

Chocolate Frogs: "They're not really frogs, are they?"
- Harry Potter and the Philosopher's Stone

Chocolate frogs are one of the things sold by the Trolly Witch who we see for the first time during Harry Potter and the Philosopher's Stone. Harry is horrified at the prospect of eating a real frog when Ron reassures him that it is "just a spell" and that they usually only have one good jump in them. Harry's rotten luck yields him no frog as the frog crawls up the window and jumps out of the train, leaving him chocolate-less.
Ron indicates that the cards are what you really want and to Harry's excitement, he receives a Dumbledore card. Then to Harry's surprise, the card is soon empty. "You can't expect him to stick around all day" says Ron as he continues to shove his face full of food. While the cards are fun, chocolate frogs are delicious. I have made mine with a bit of a twist, but it is a good one.
What will you need for your chocolate frogs?
First and foremost, you will need a mold for the frogs. I got mine from here.
Next:
- 1.5 cups of chocolate- I used milk chocolate it is your call.
- Chunky peanut butter! Enough to fill the centers of your molds.
** Initially, I thought I would need butter for my melted chocolate, and I didn't. So while it is pictured below, you don't need it.

How do you make your chocolate frogs?
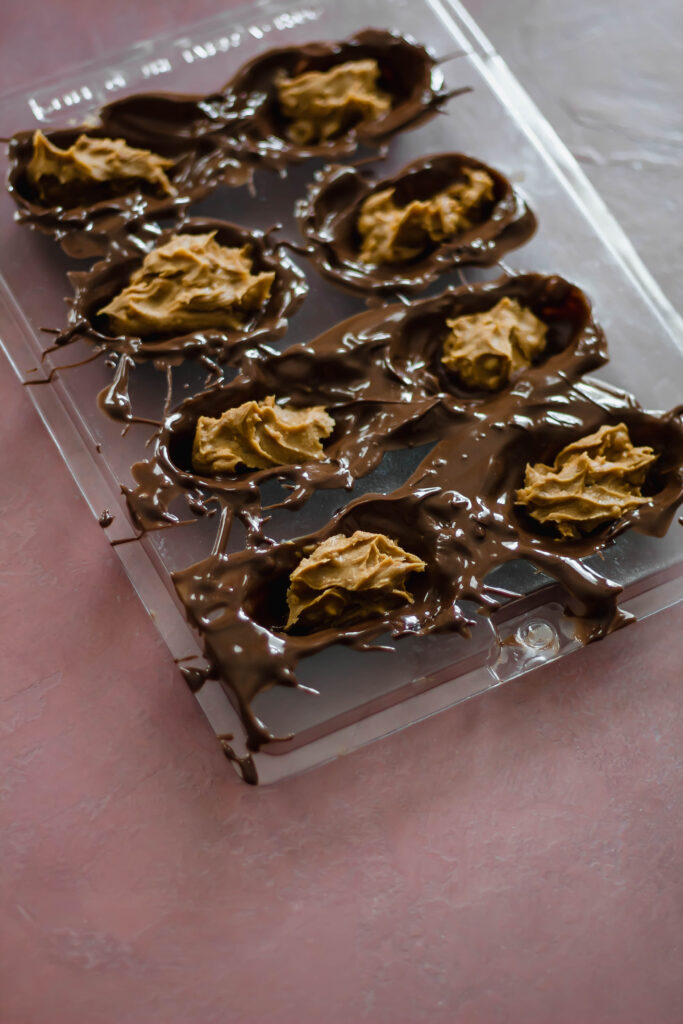
- First, you need to have your mold ready.
- Melt your chocolate in the microwave in 30 second increments. Stir after each round until it is completely smooth.
- Cover the insides of the mold with chocolate and then turn upside. You want it to be a thin layer.
- Take your peanut butter and begin to fill the centers of the molds with peanut butter.
- Cover the tops with chocolate and then place in the freezer.
- Freeze for a couple of hours.
- When they are frozen completely, remove from the freezer and turn the mold over, the frogs should come out pretty easily.
- Take a bite and dig in or wait till they warm up a bit. Either way it is your call. They are delicious in every which way.


Why should you make these?
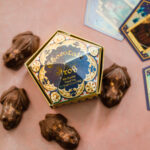
They are super fun and they are a good entryway into the Potterverse of food. The chocolate frogs you buy from Universal studios come with the cards, which I will say are very fun to get and read (and I will boast here that I got the leader of my house on my first box, oh Rowena, you witty minx). The chocolate frogs are expensive and they are just solid chocolate. This is fun in that you can make your own and do your own fillings- caramel and or tahini would be other great options. Whenever you make these, drop me a line, tell me how much you love them and how they are delicious.
Looking for other Harry Potter Recipes? I've got you covered.
Black Lake Brownies click here
Butterbeer click here
Treacle Tart click here
Polyjuice Potion click here
Pumpkin Juice click here
Chocolate Frogs
- Total Time: 3 hours 5 minutes
- Yield: 8
Description
Chocolate Frogs made famous in the Harry Potter series come to life. A fun take on the originals, this recipe is easy, quick, and gluten free.
Ingredients
- 1.5 cups of chocolate- I used milk chocolate it is your call.
- Chunky peanut butter! Enough to fill the centers of your molds.
Instructions
- First, you need to have your mold ready.
- Melt your chocolate in the microwave in 30 second increments. Stir after each round until it is completely smooth.
- Cover the insides of the mold with chocolate and then turn upside. You want it to be a thin layer.
- Take your peanut butter and begin to fill the centers of the molds with peanut butter.
- Cover the tops with chocolate and then place in the freezer.
- Freeze for a couple of hours.
- When they are frozen completely, remove from the freezer and turn the mold over, the frogs should come out pretty easily.
- Take a bite and dig in or wait till they warm up a bit. Either way it is your call. They are delicious in every which way.
- Prep Time: 5 minutes
- Cook Time: 24 minute
- Category: Dessert
- Cuisine: All chocolate loving ones
Nutrition
- Calories: 359
- Sugar: 20
- Sodium: 144
- Fat: 28
- Saturated Fat: 10
- Carbohydrates: 27
- Fiber: 3
- Protein: 9
Dianna Wilson says
How can you go wrong with chocolate and peanut butter?!
siftrva says
You simply cannot.