• Skip to primary navigation
  • Skip to main content
  • Skip to primary sidebar
  • Recipe Index
  • About
  • Contact

Garnished With Joy logo

menu icon
go to homepage
  • Recipe Index
  • About
  • Contact
search icon
Homepage link
  • Recipe Index
  • About
  • Contact
×
Sift

Blog

Brownie Fruit Pizza

July 9, 2025

Gluten-Free Brownie Fruit Pizza

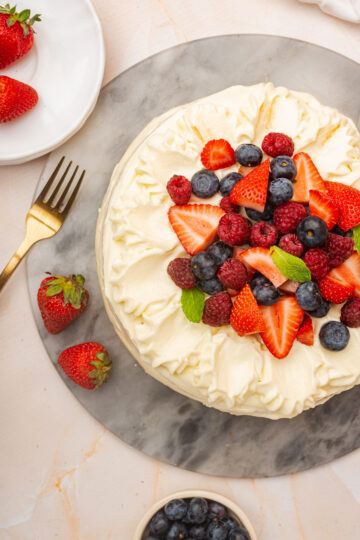
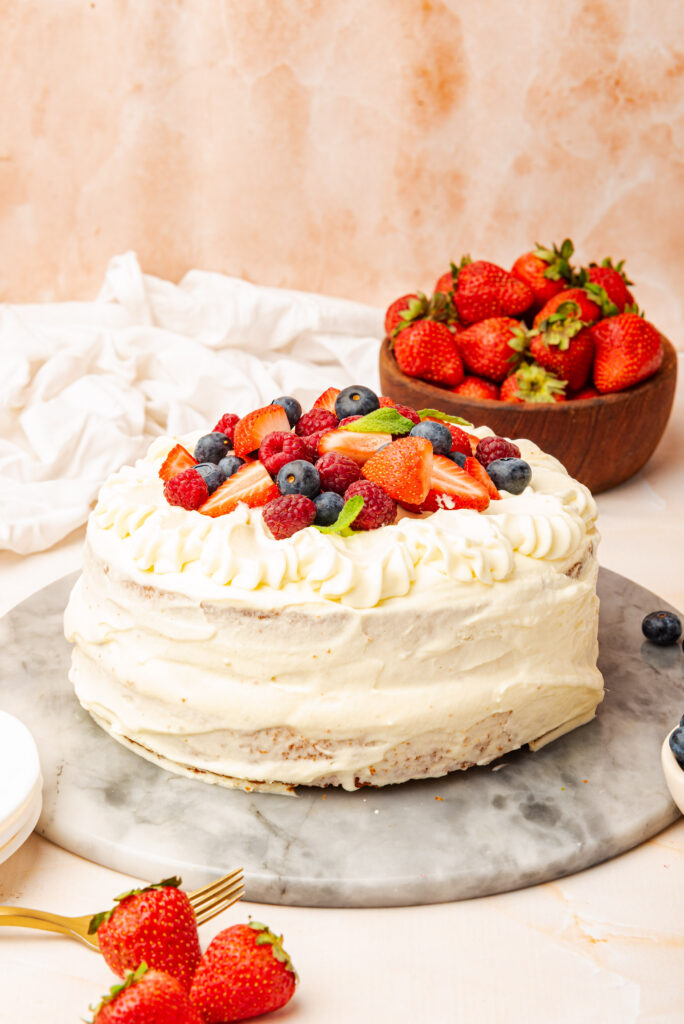
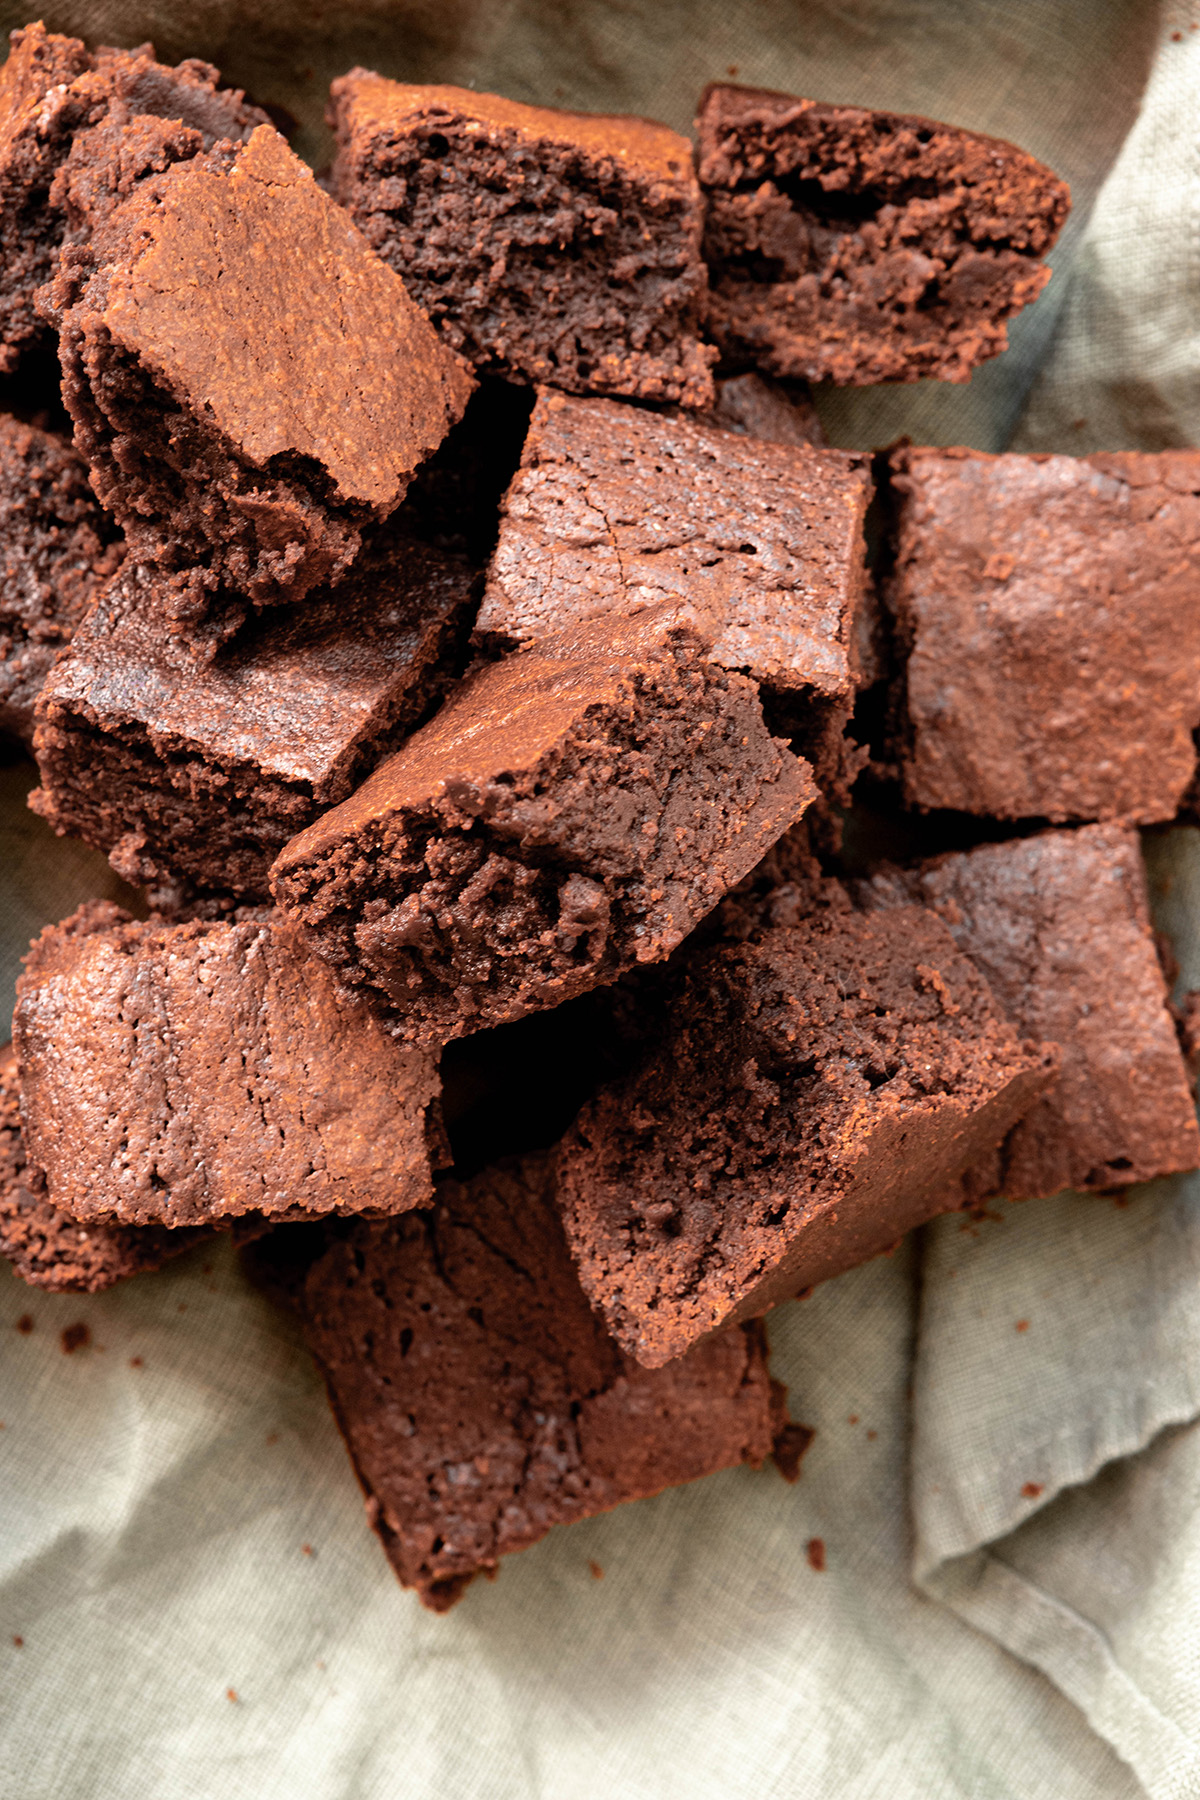
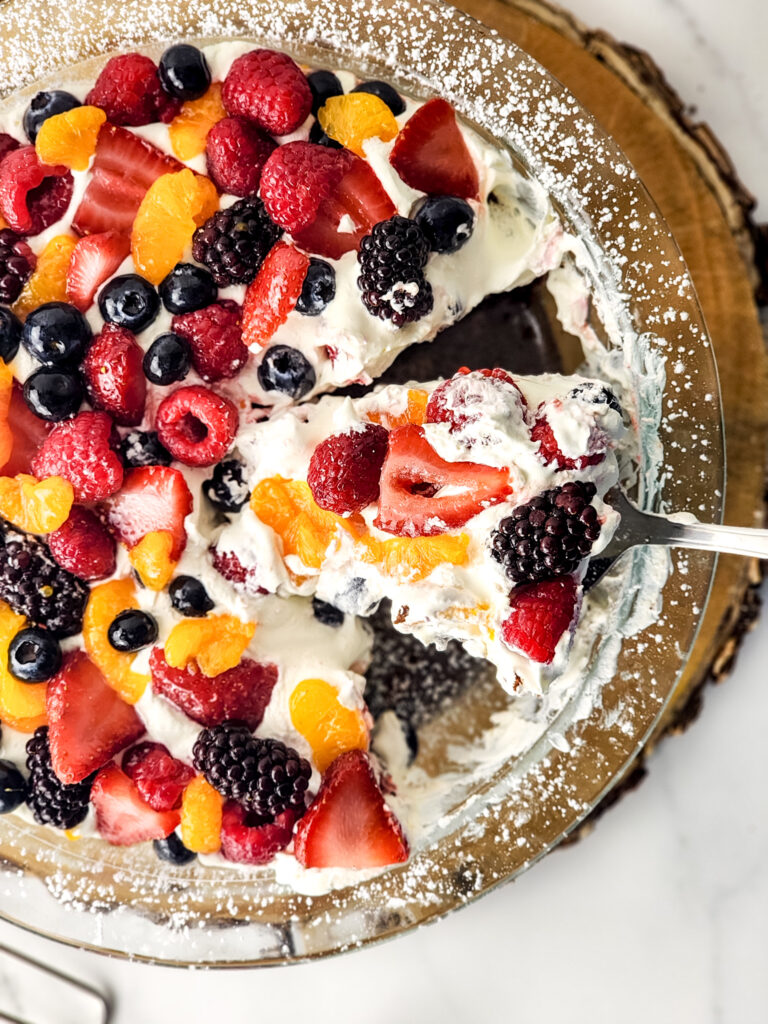
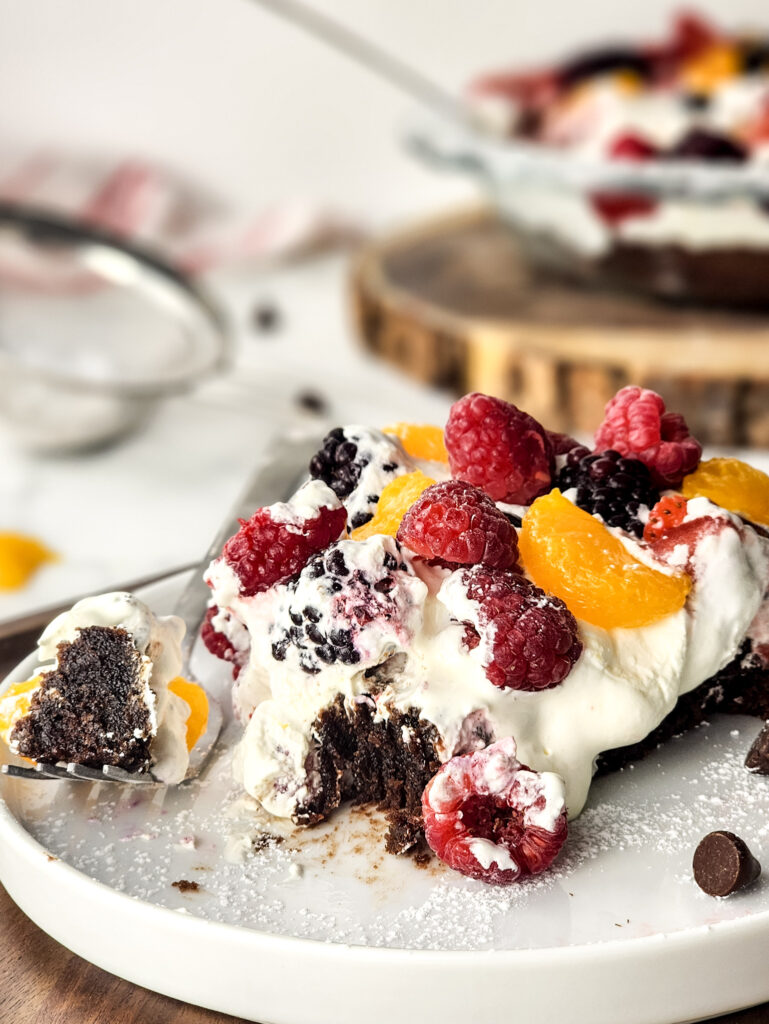
If you’re looking for a show-stopping dessert that’s as easy to make as it is delicious, you’re going to fall in love with this Brownie Fruit Pizza! Imagine a rich, fudgy brownie base topped with a cloud of creamy Cool Whip, then piled high with a colorful medley of fresh fruit.

This recipe starts with a gluten-free brownie mix, making it perfect for sharing with friends and family who have dietary restrictions—without sacrificing any of the flavor. Juicy mandarin oranges, sweet strawberries, plump blueberries, and tangy raspberries come together for a gorgeous, crowd-pleasing treat that’s perfect for summer parties, potlucks, or just a fun night in. Let’s get baking!

Gluten-Free Brownie Fruit Pizza

Recipe Details

Yield: 9 inch pizza

Equipment:

  • 9 inch baking dish

Prep Time: 20 minutes

Bake Time: 35 minutes
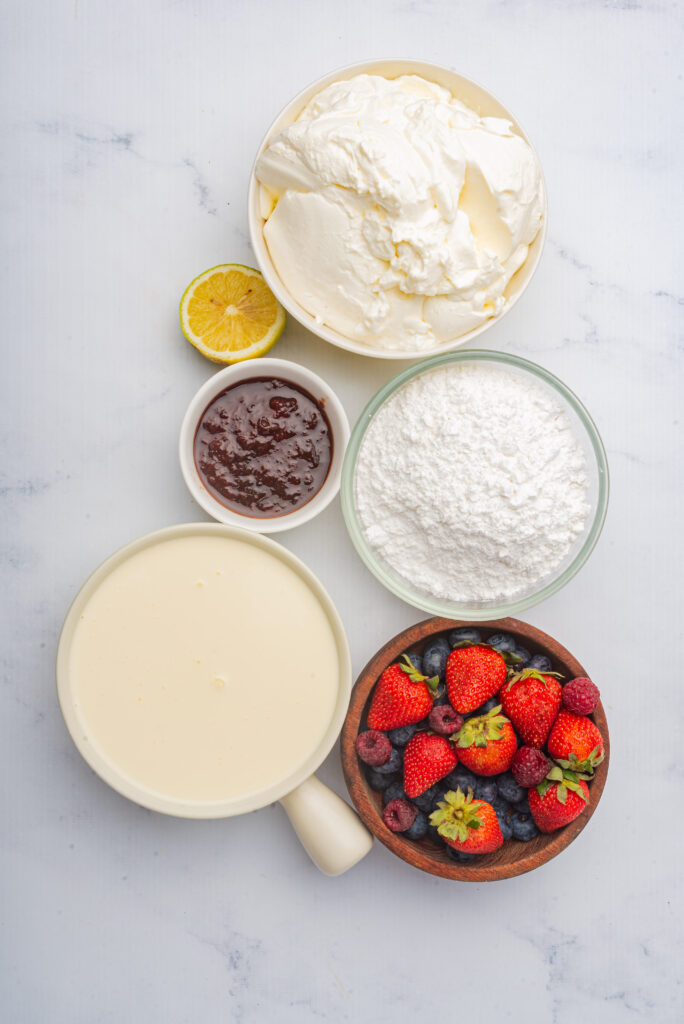
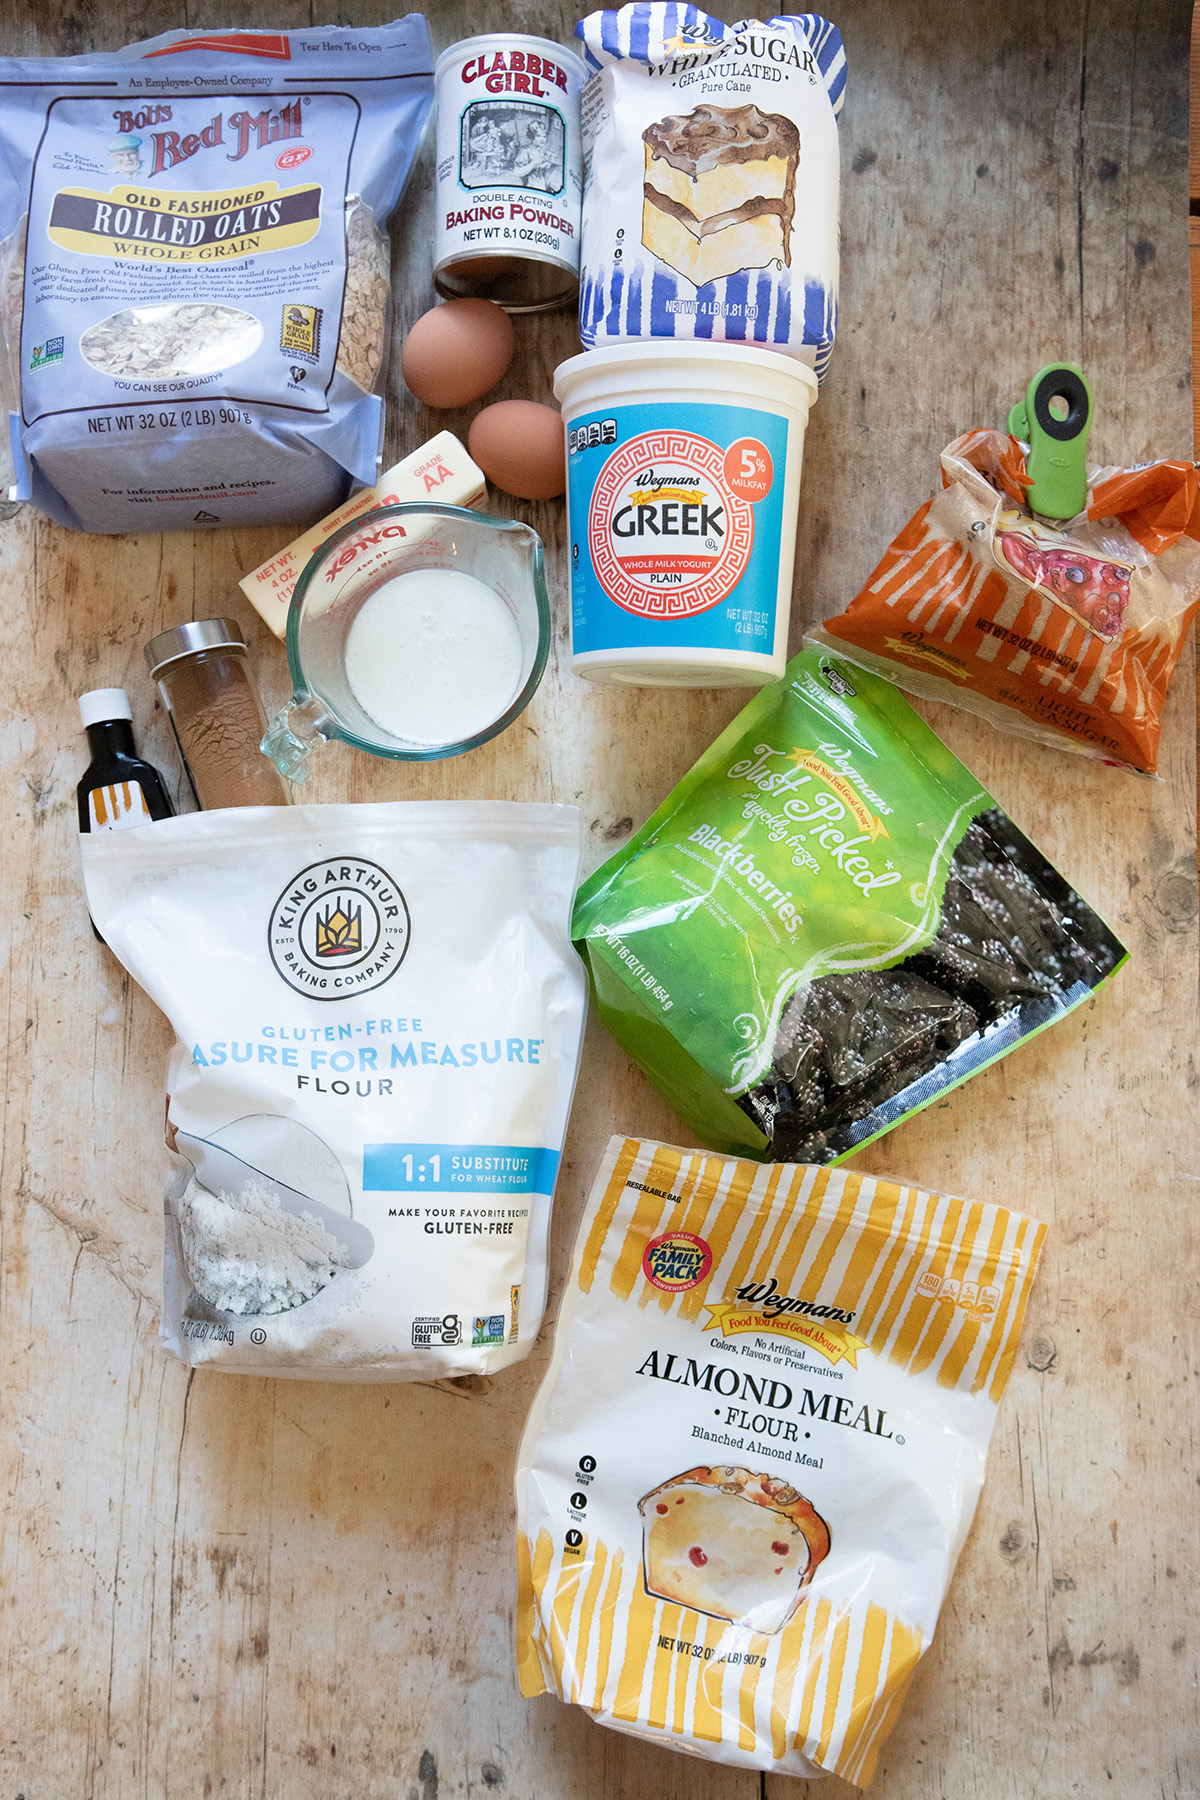
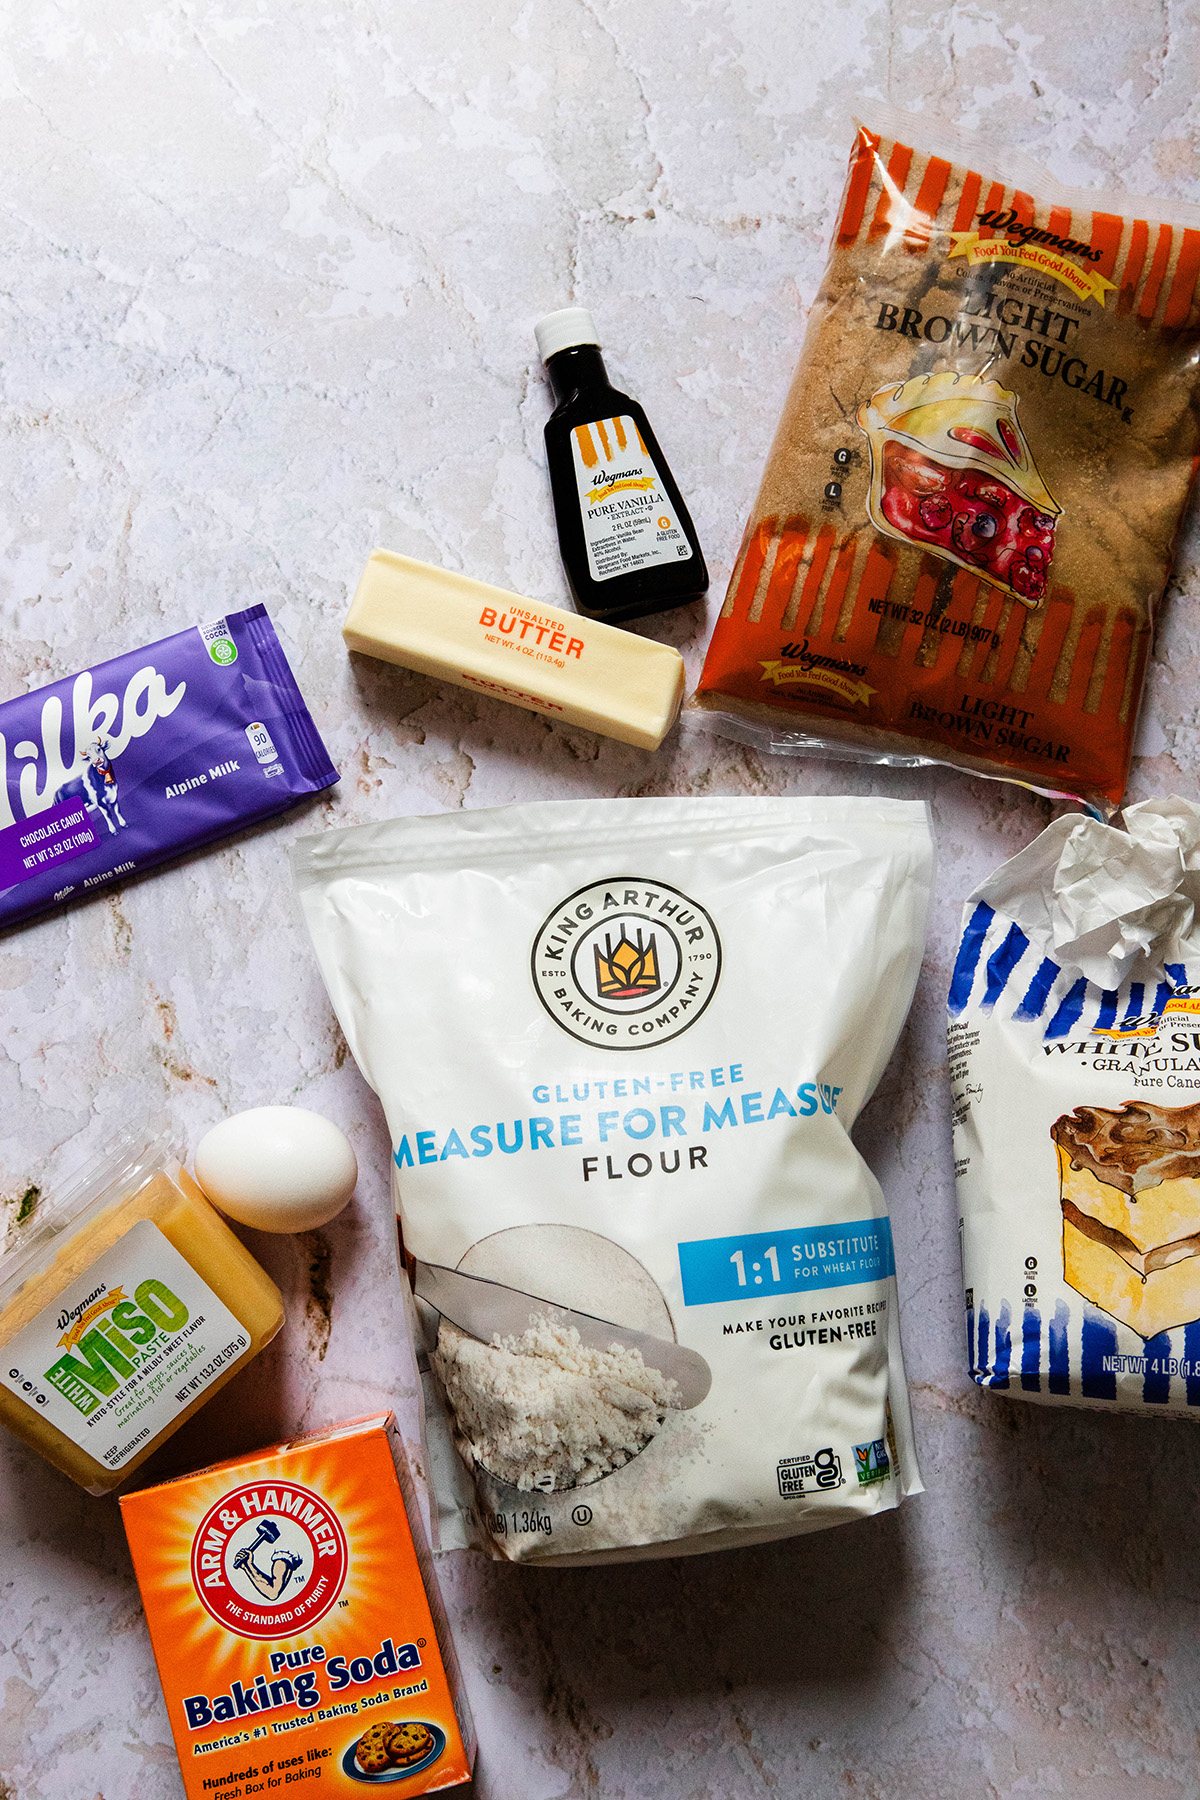
Ingredients

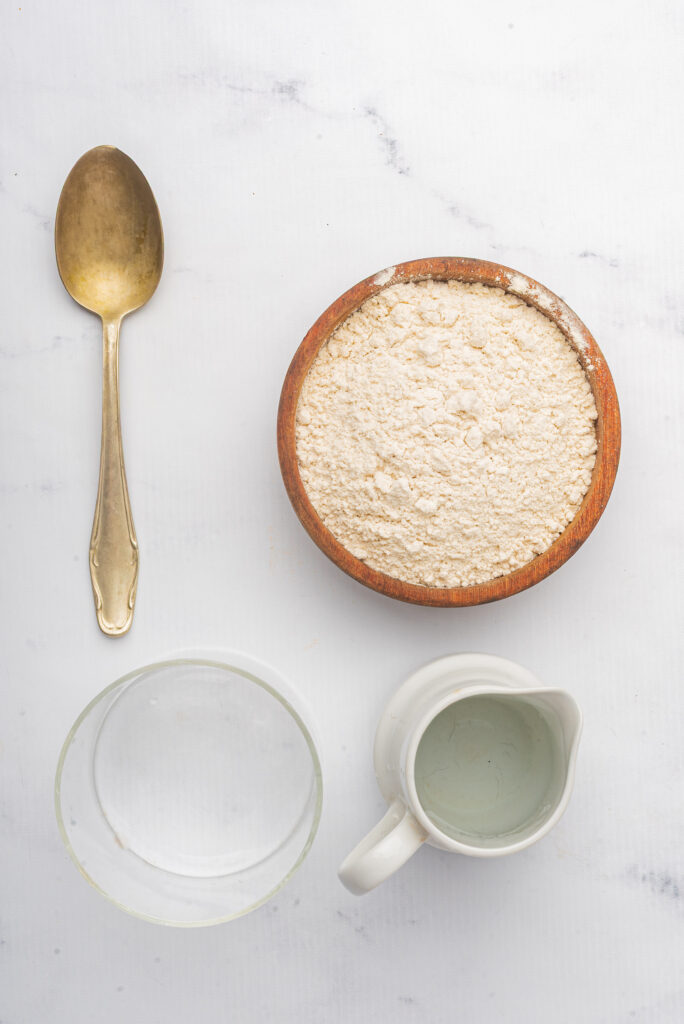
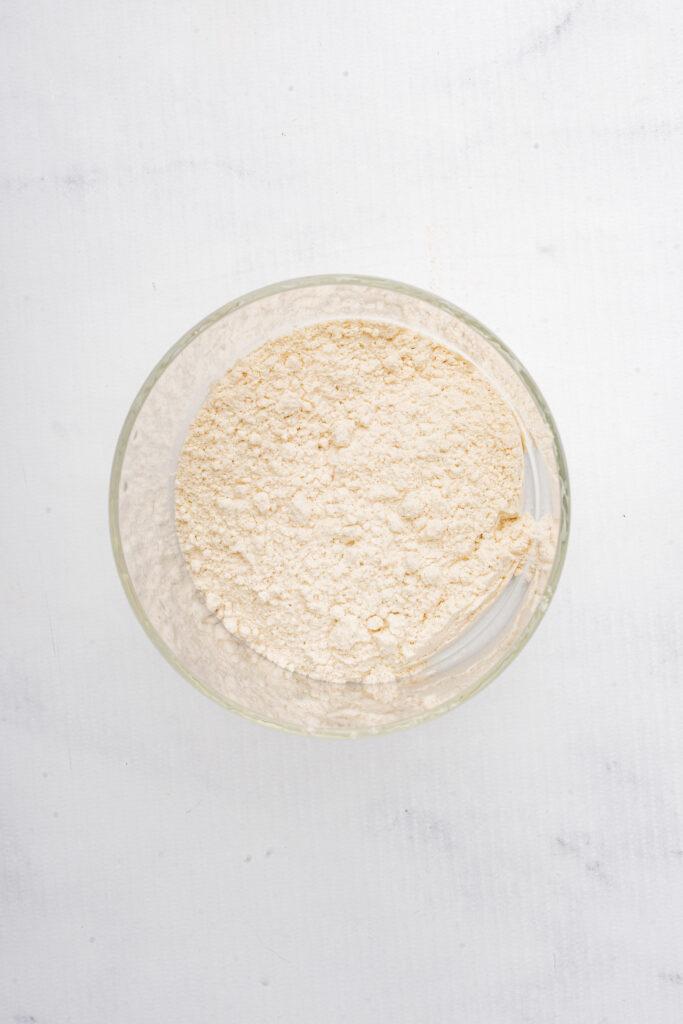
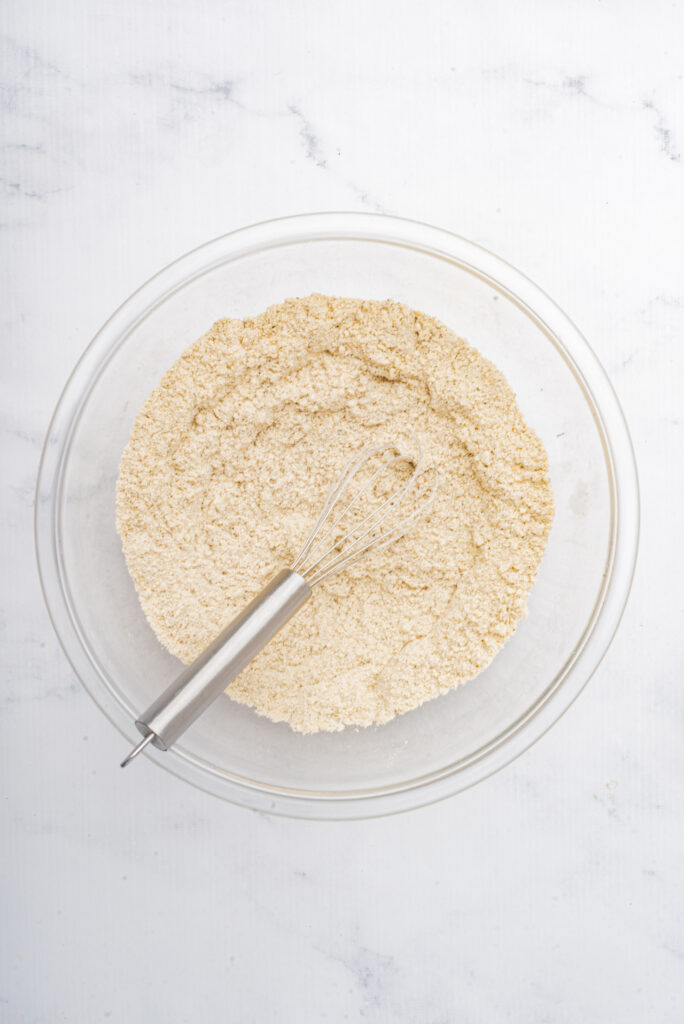
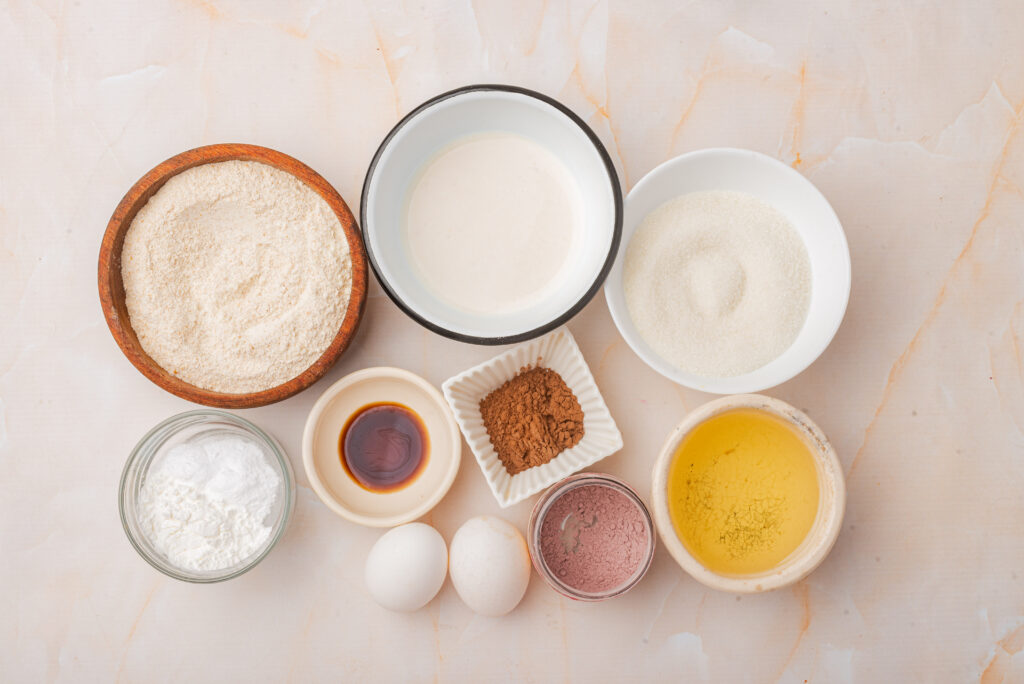
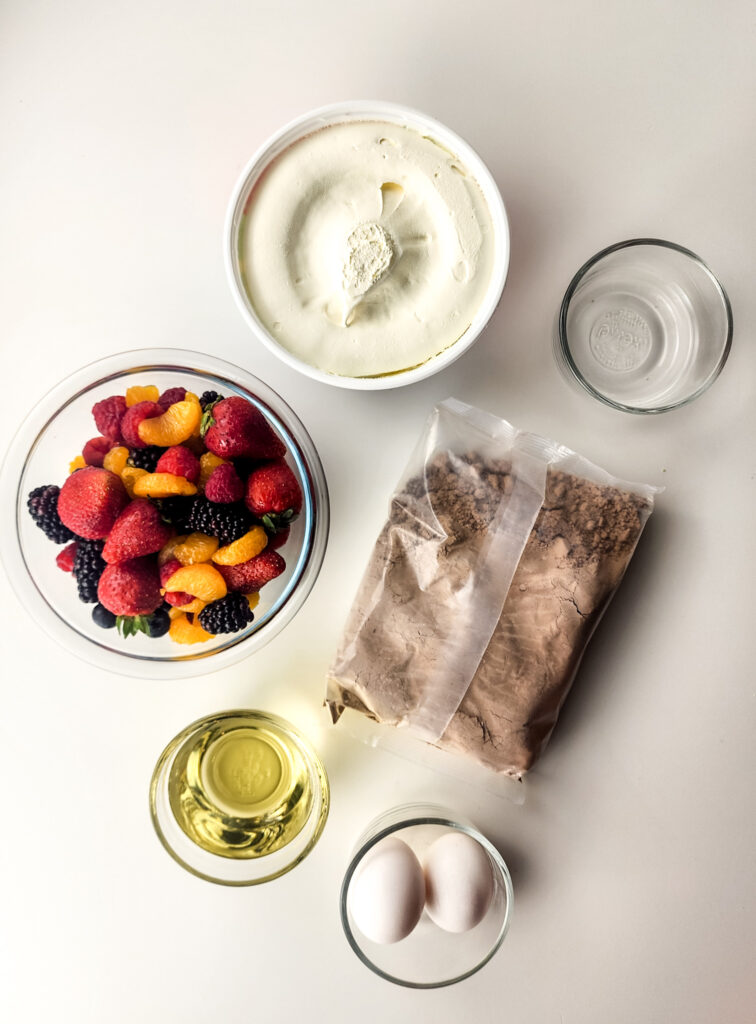
  • Gluten-Free Brownie Box + ingredients
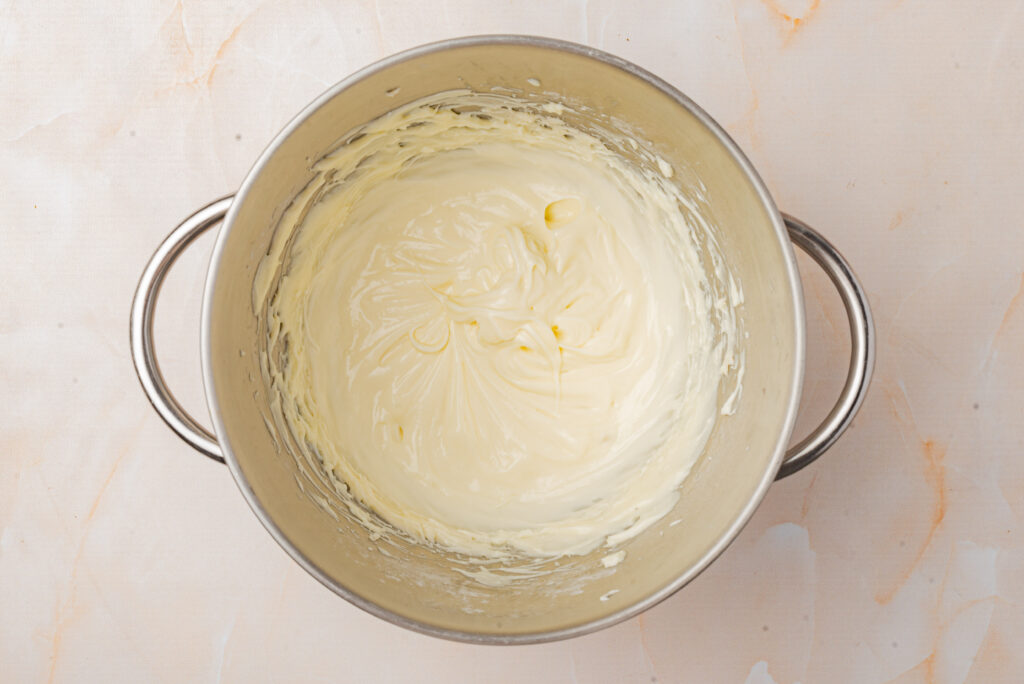
  • 8 ounces Cool Whip
  • Mandarin Oranges
  • Strawberries
  • Blueberries
  • Raspberries
Gluten-Free Brownie Fruit Pizza

Directions

  1. Preheat the oven to 350 degrees fahrenheit.
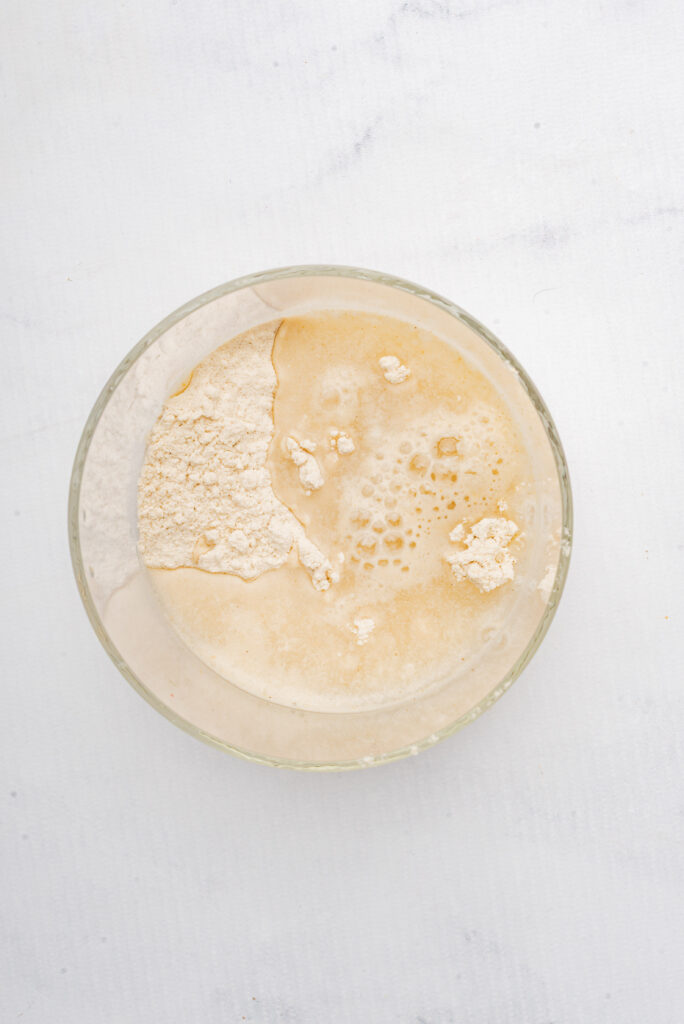
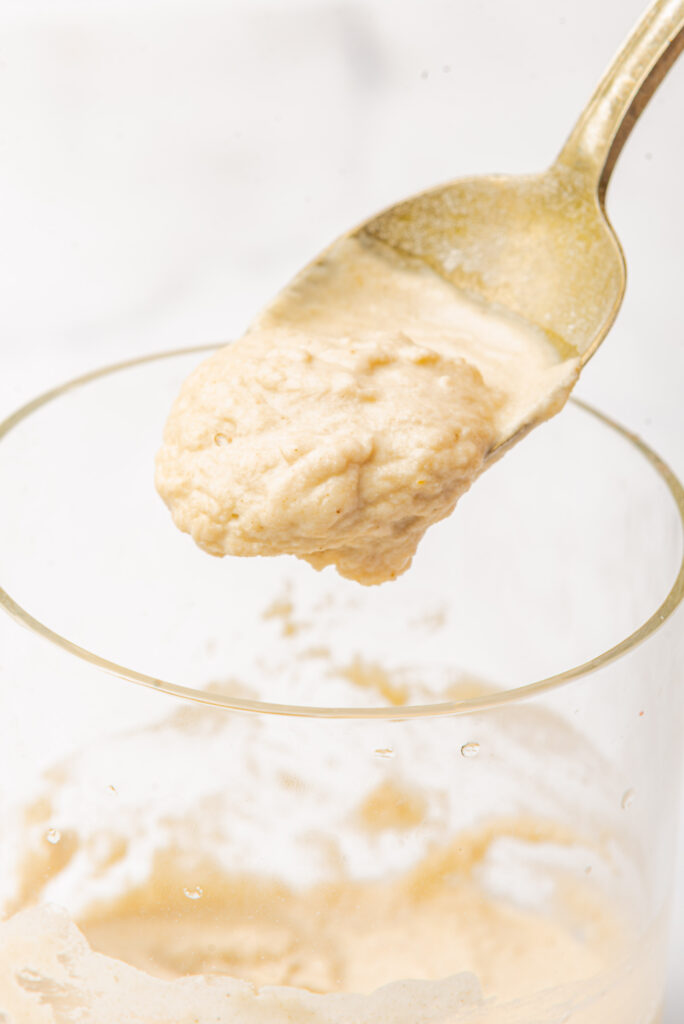
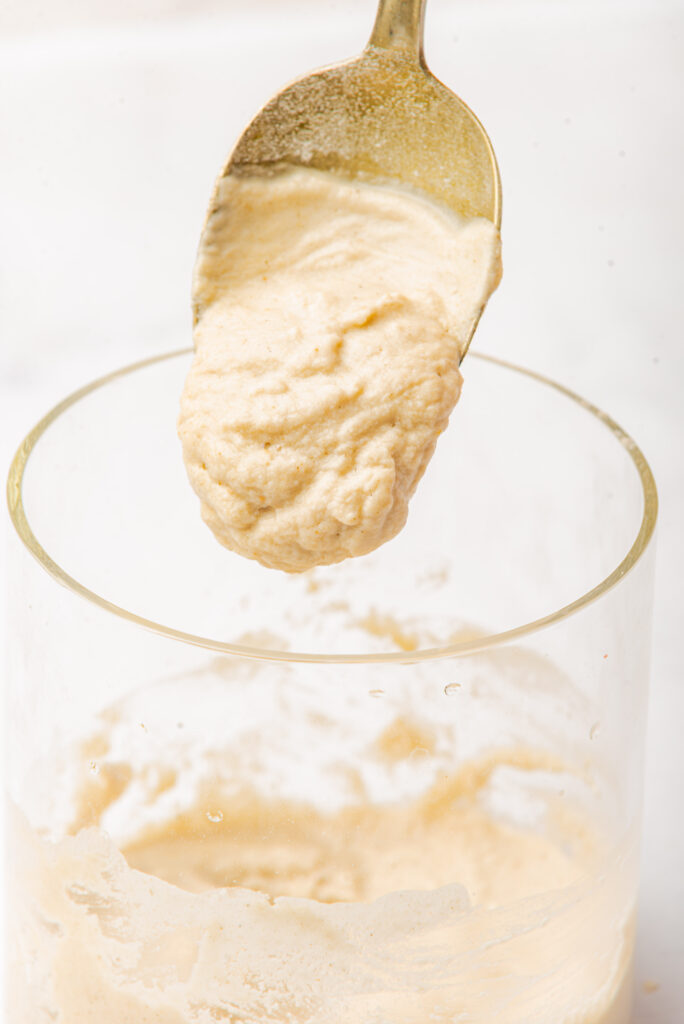
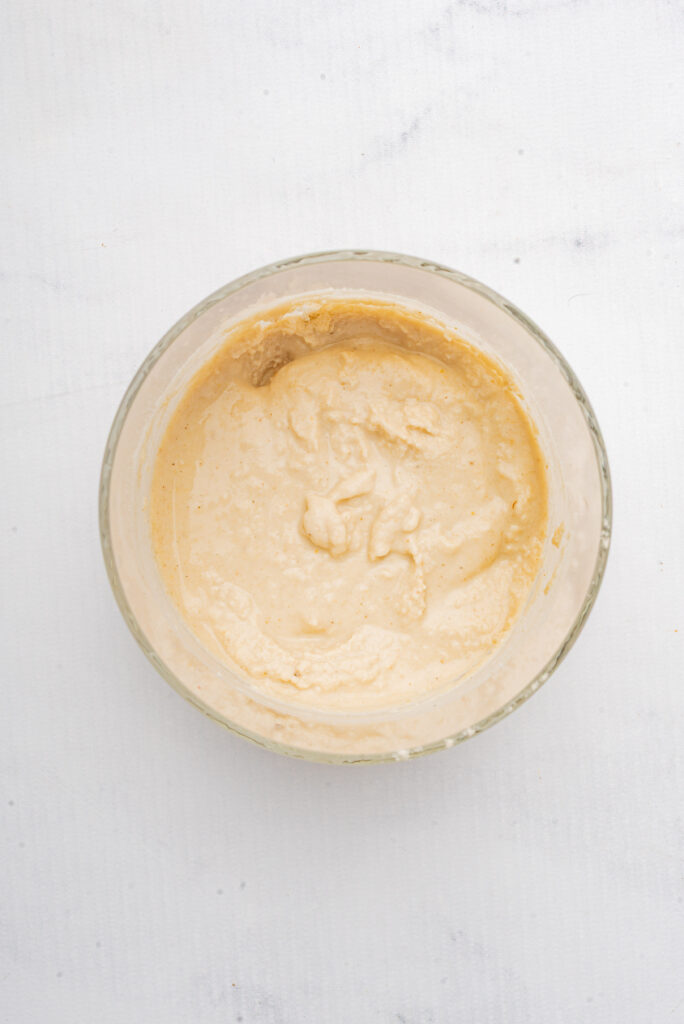
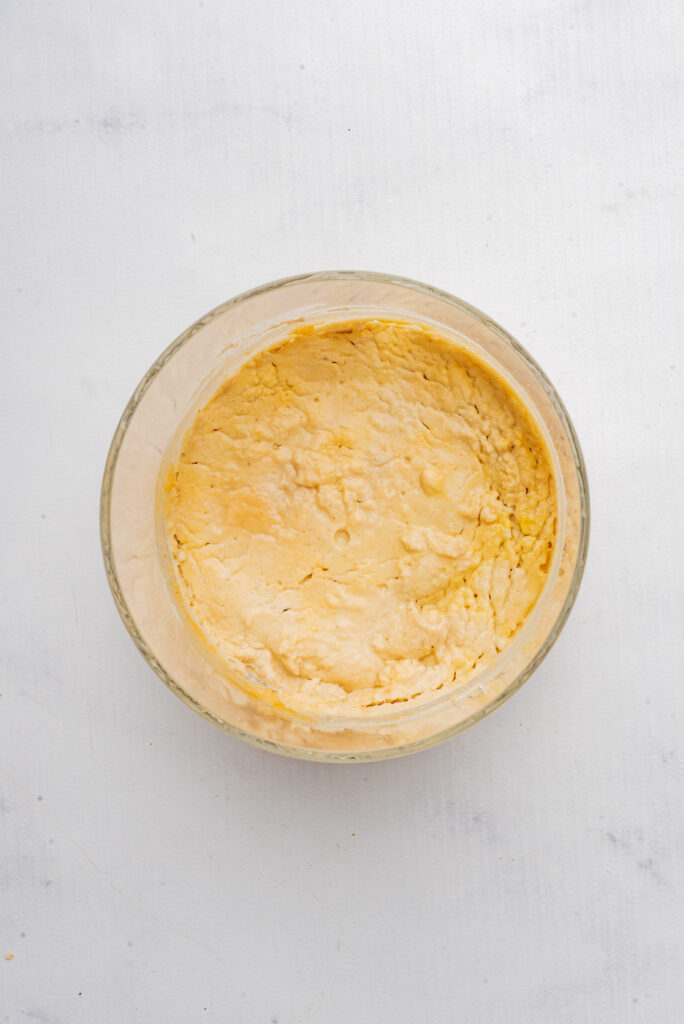
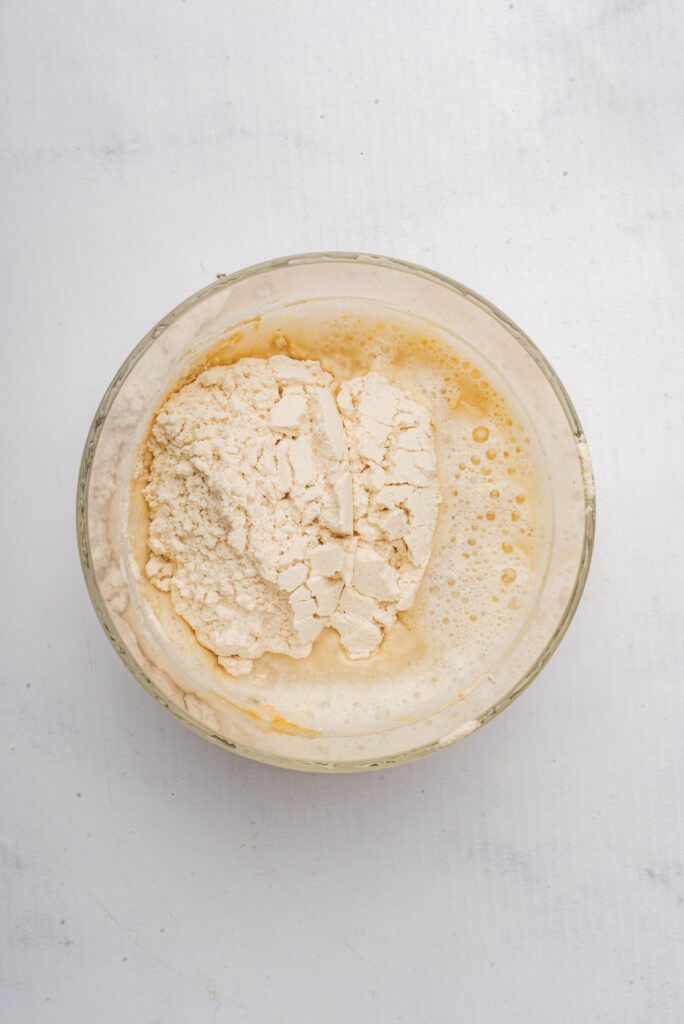
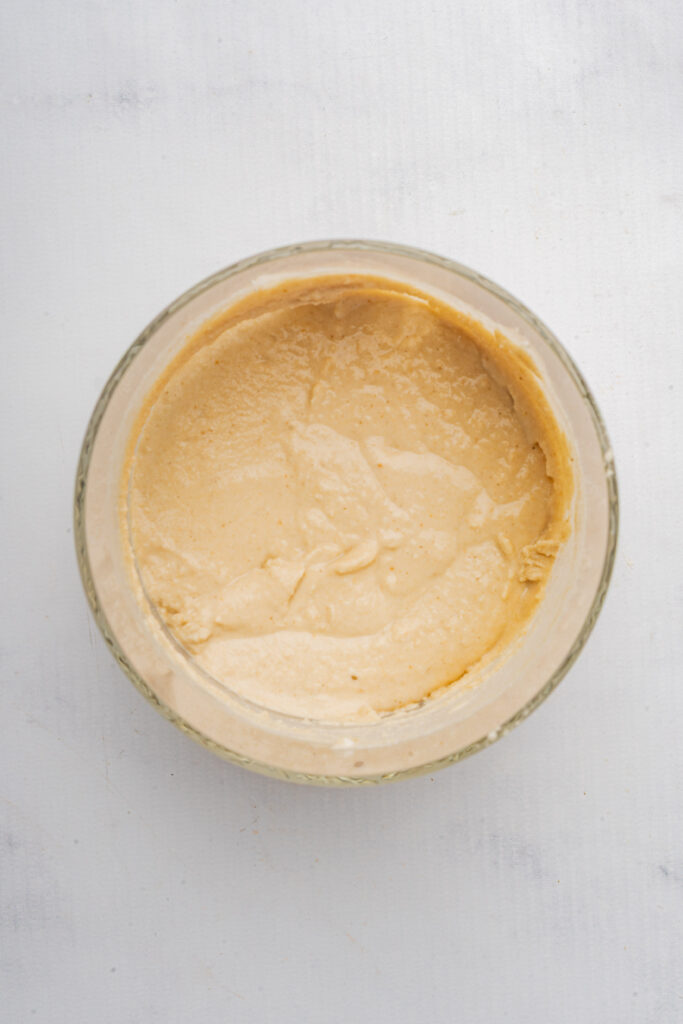
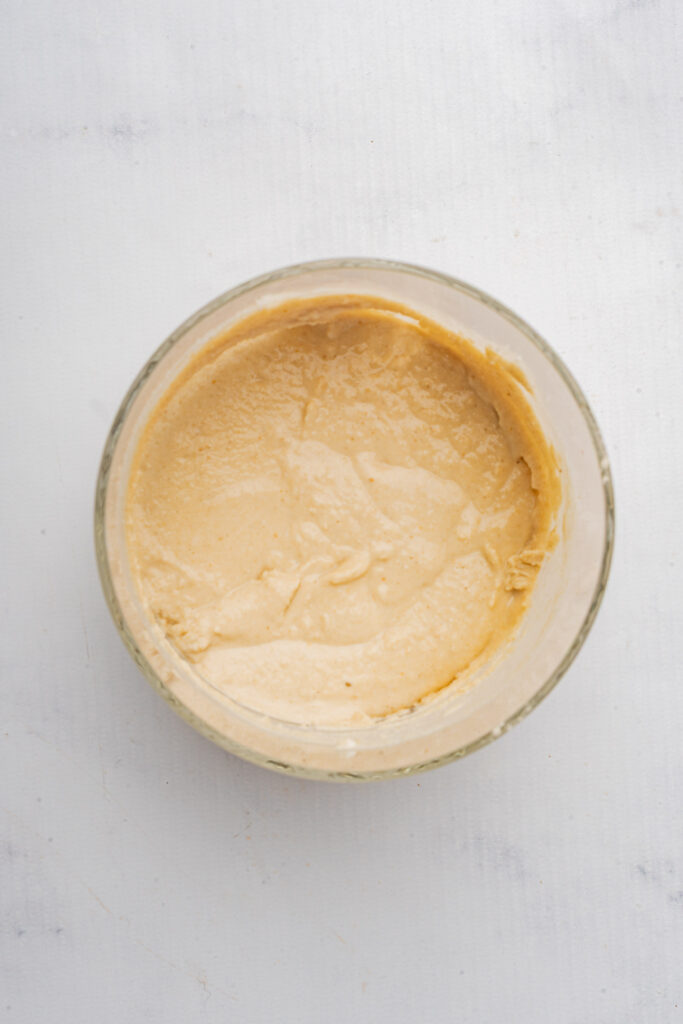
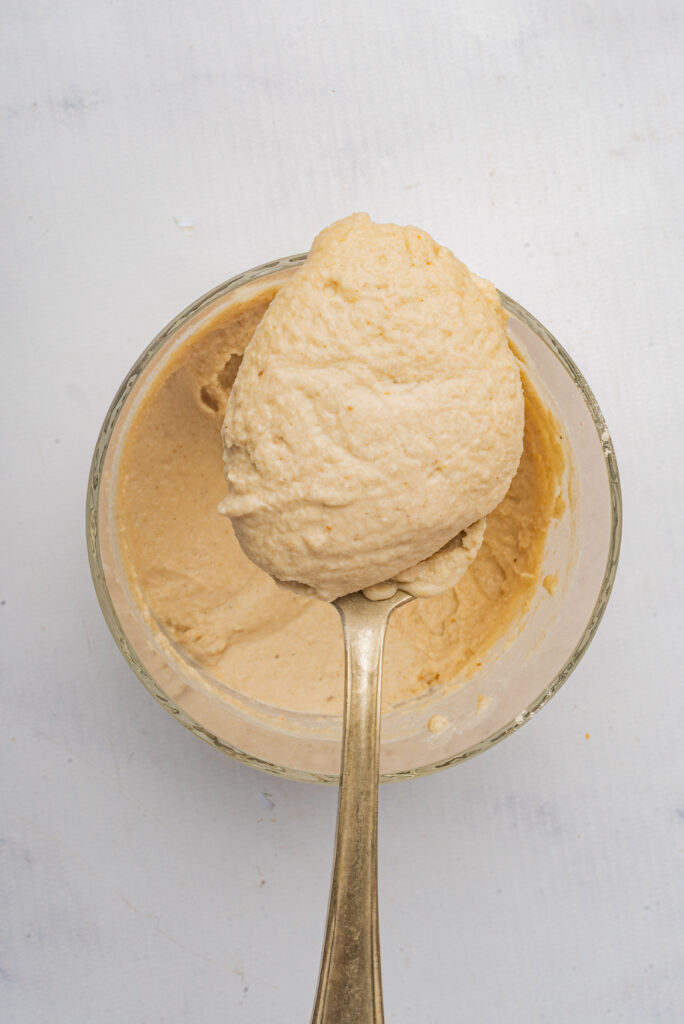
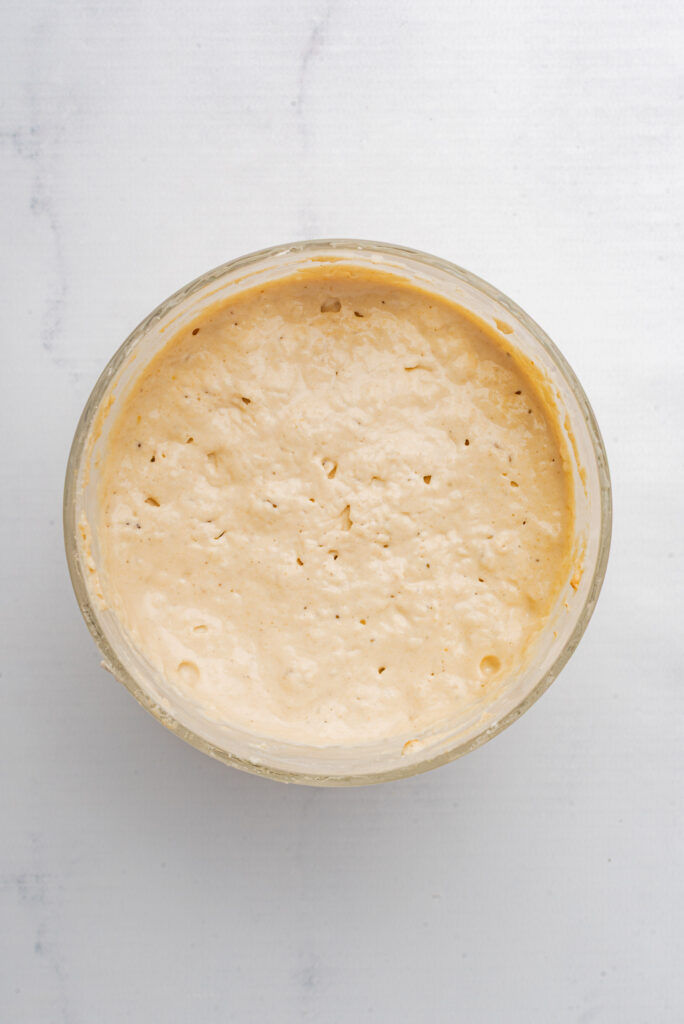
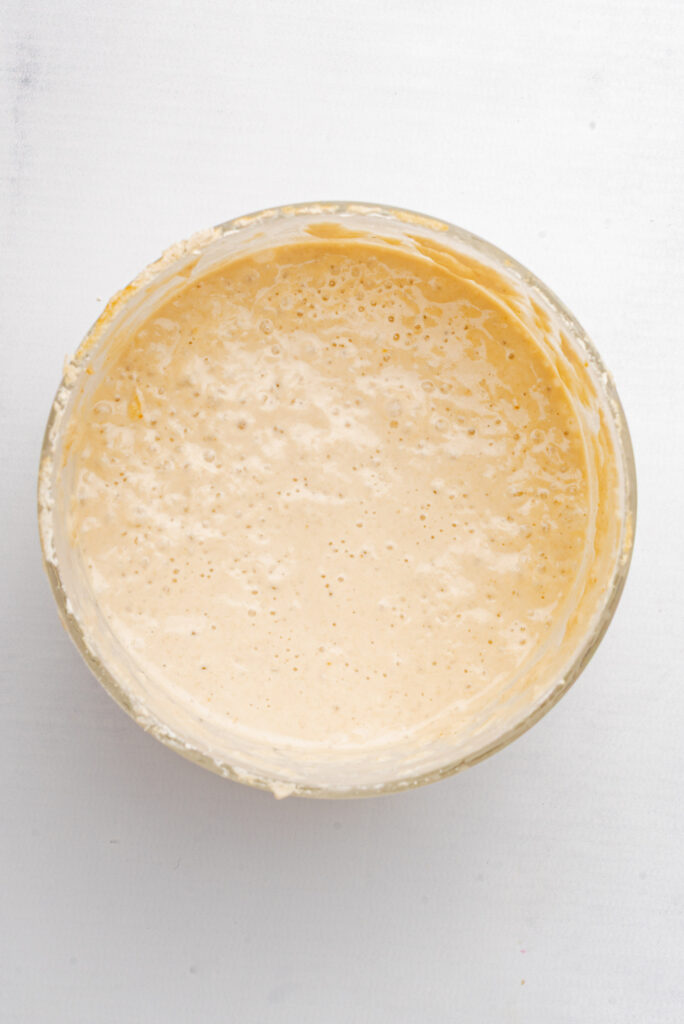
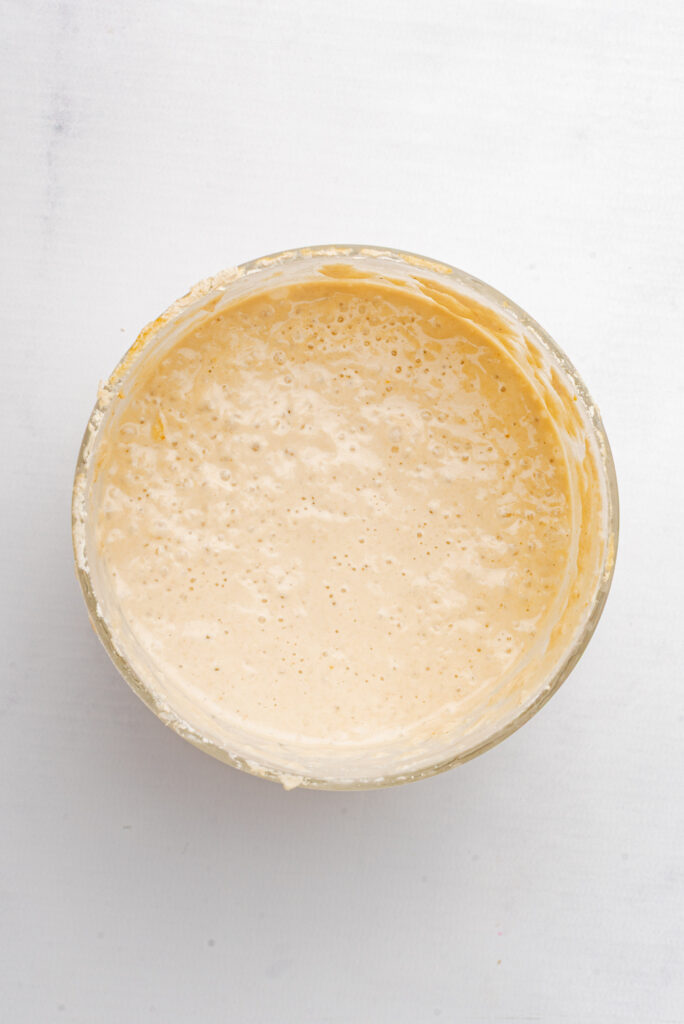
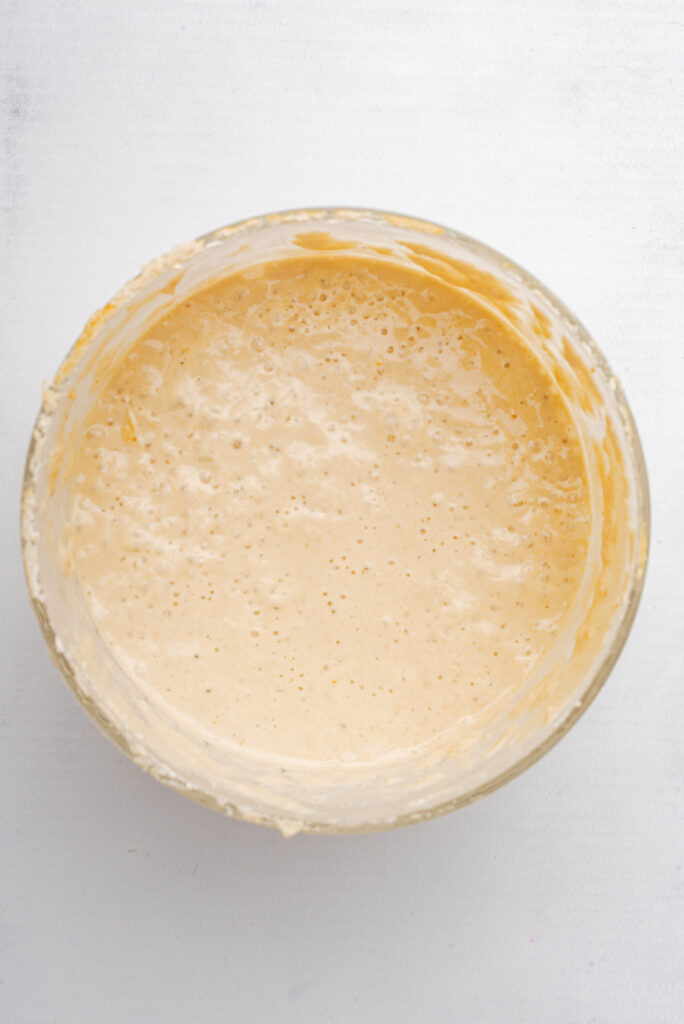
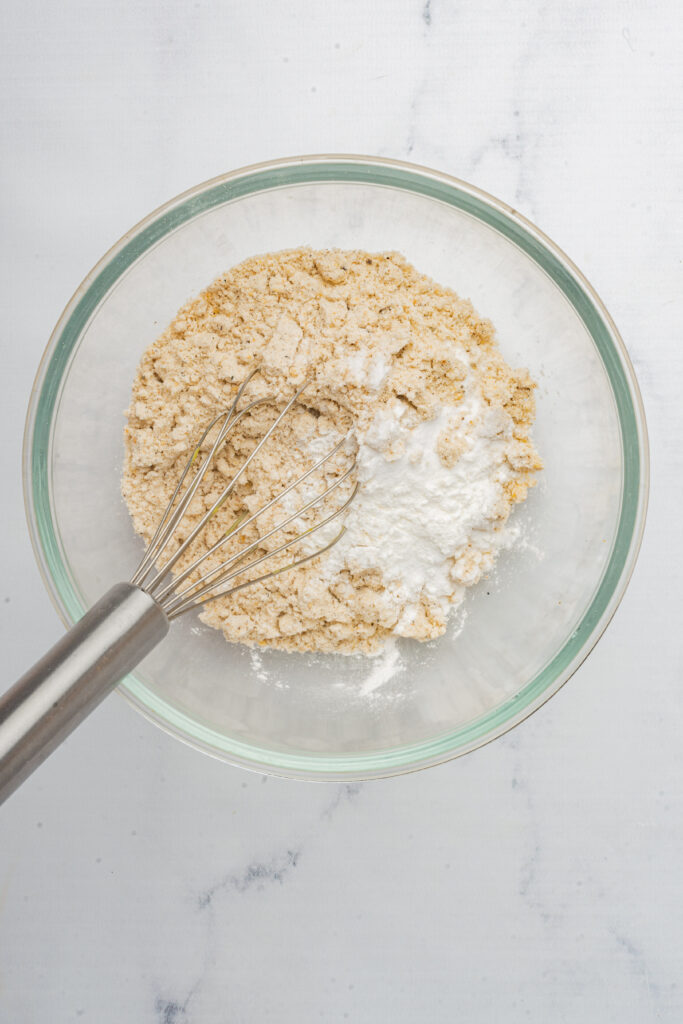
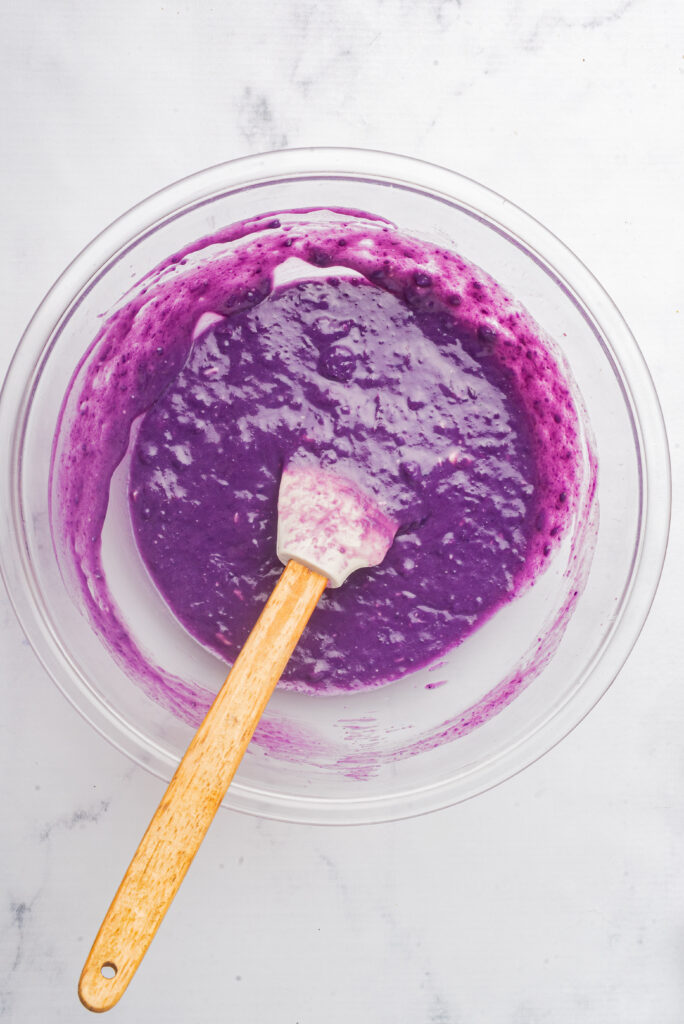
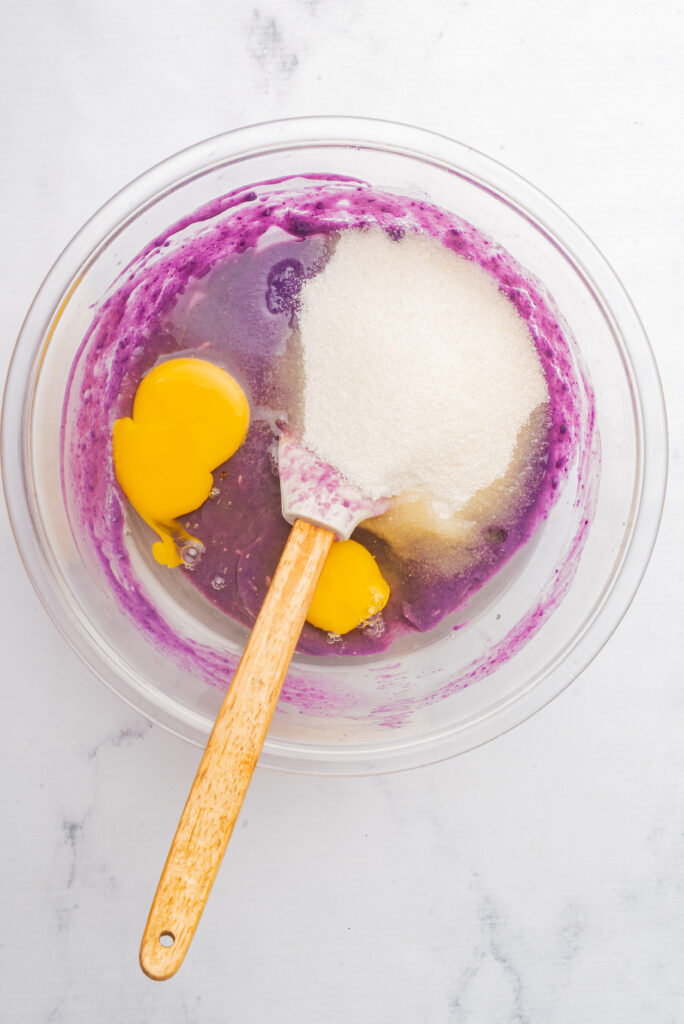
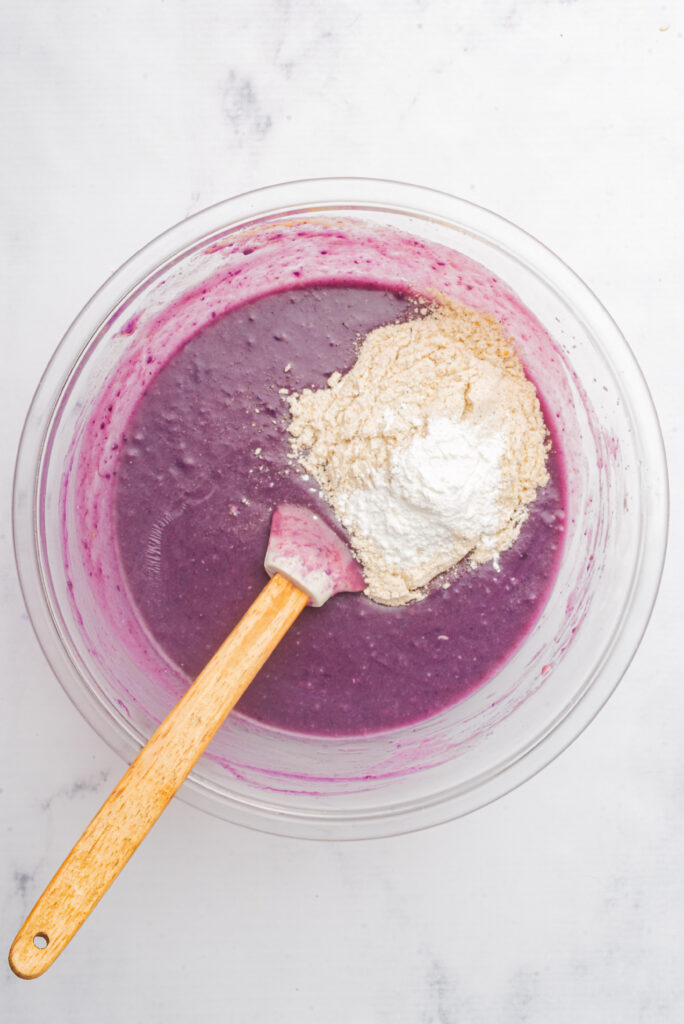
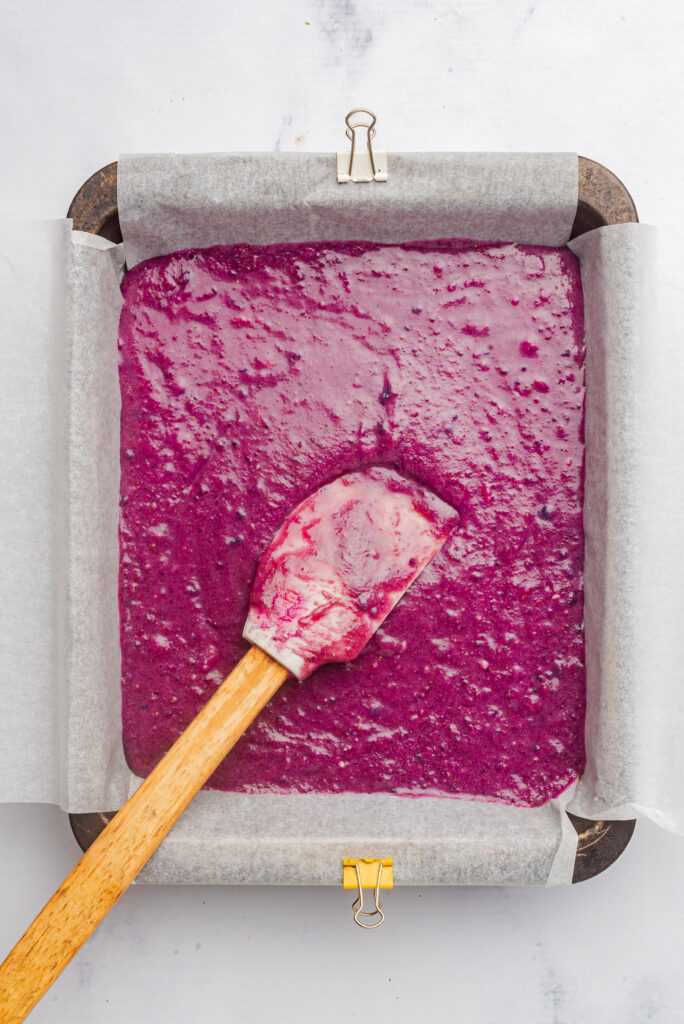
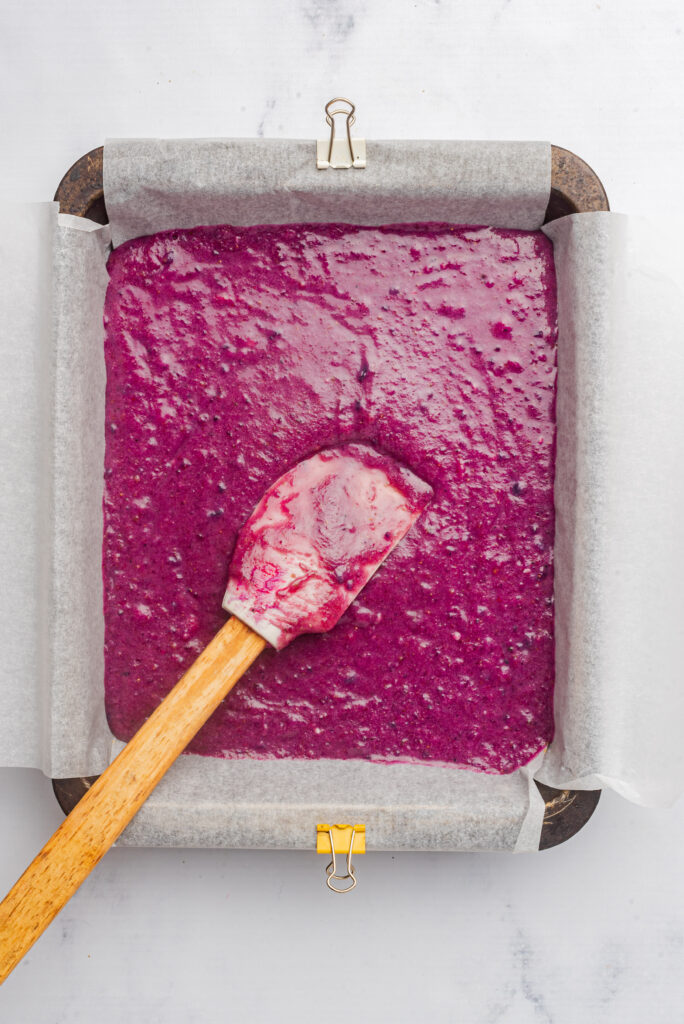
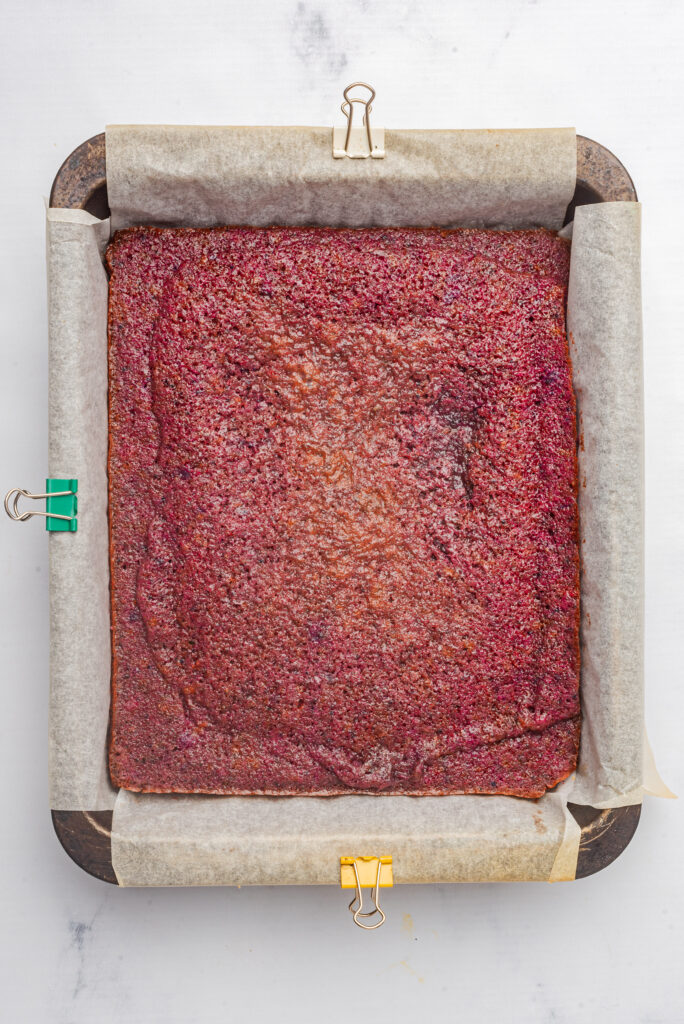
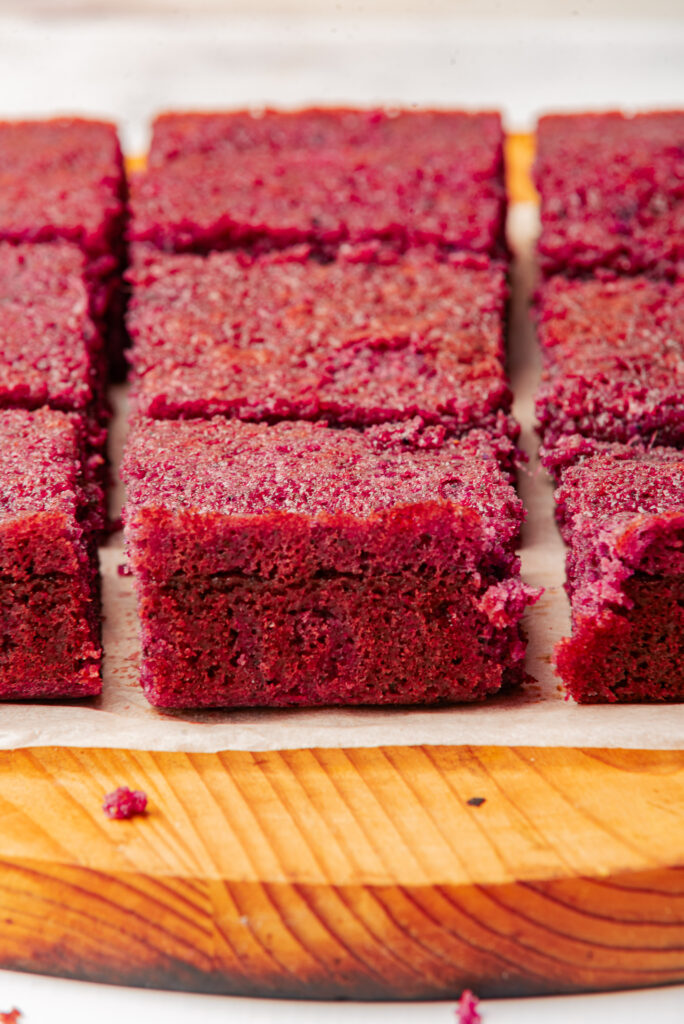
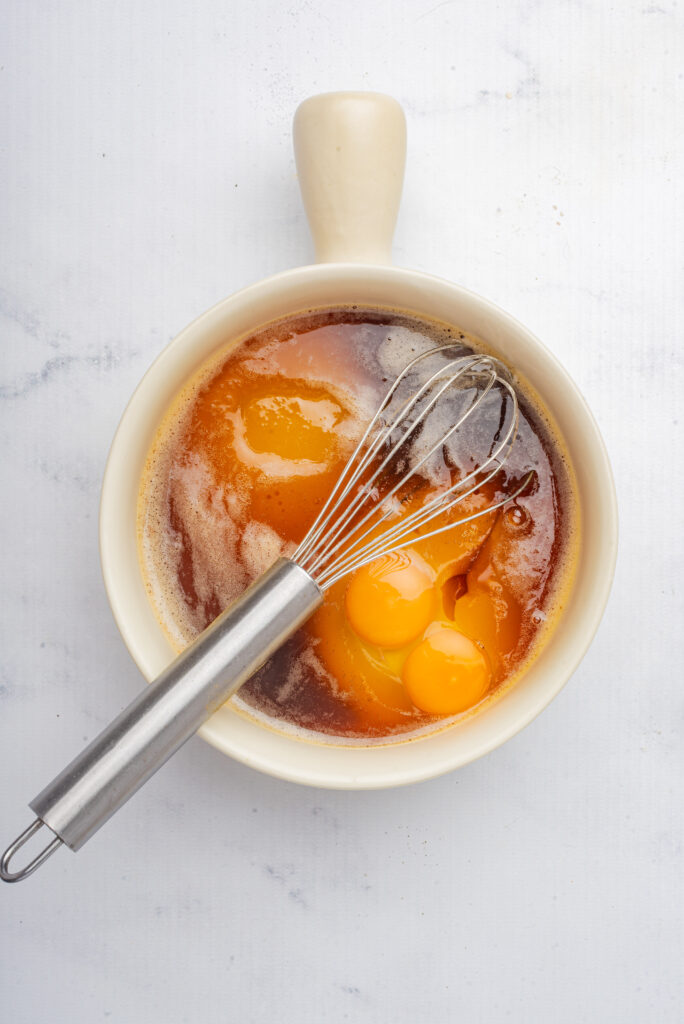
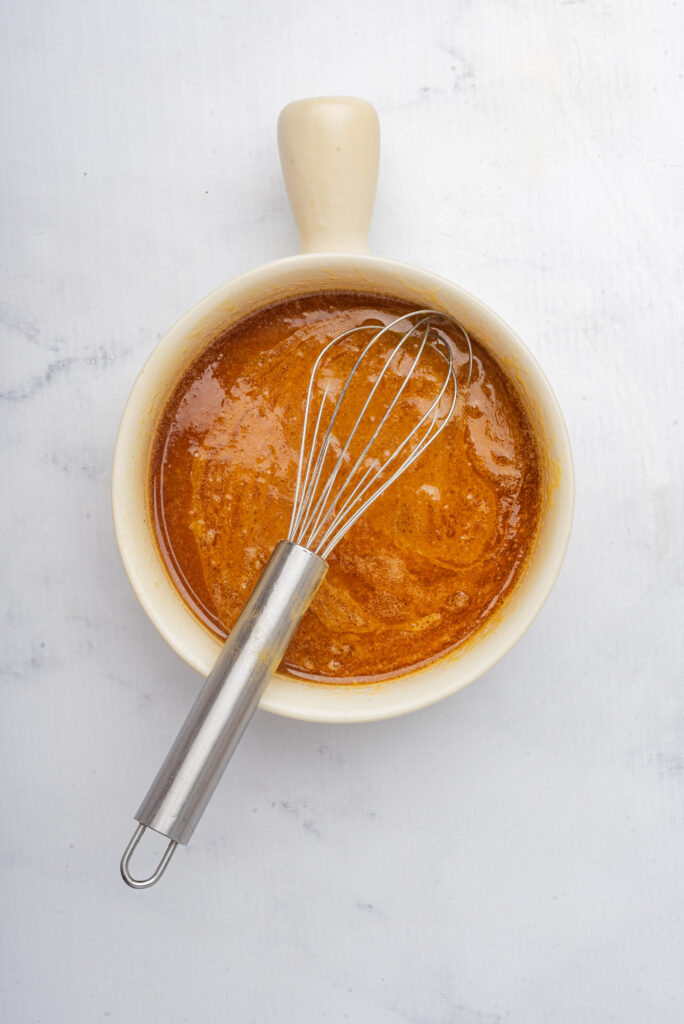
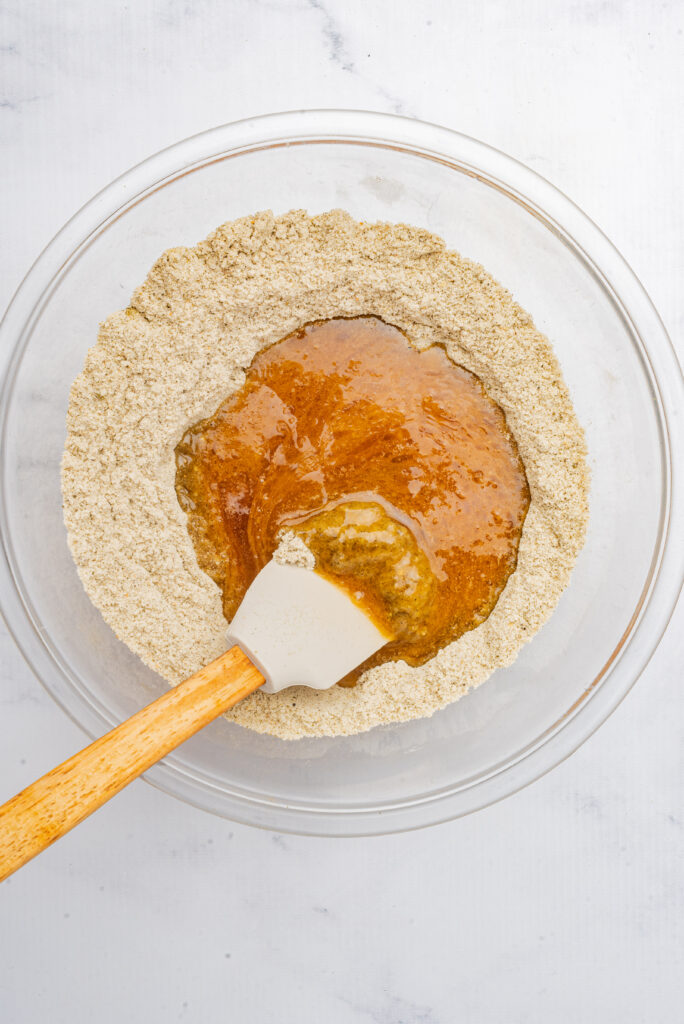
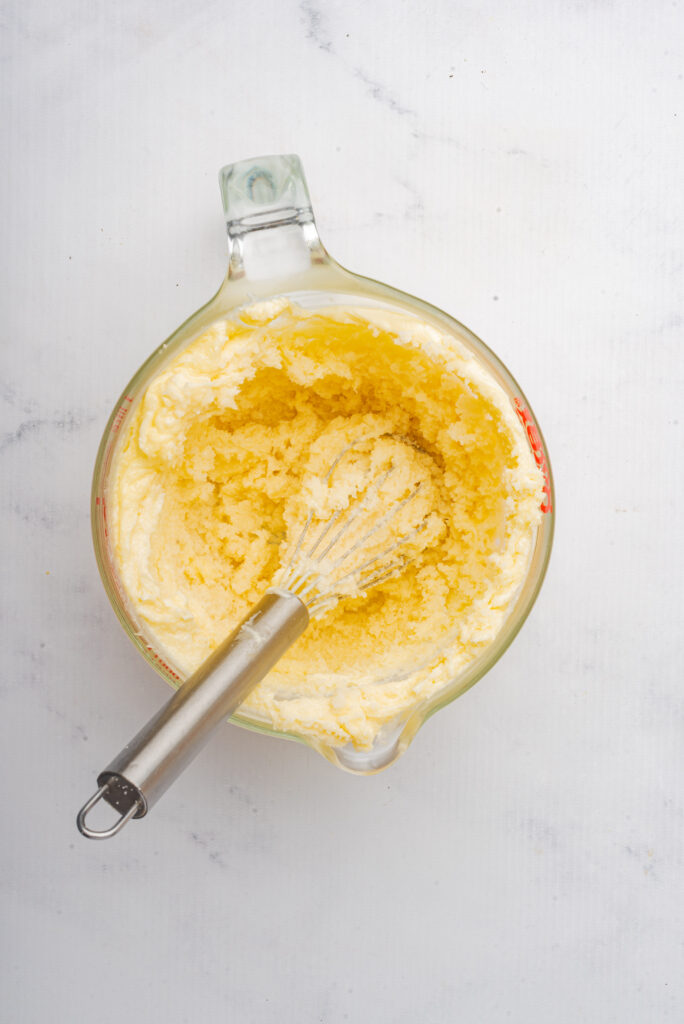
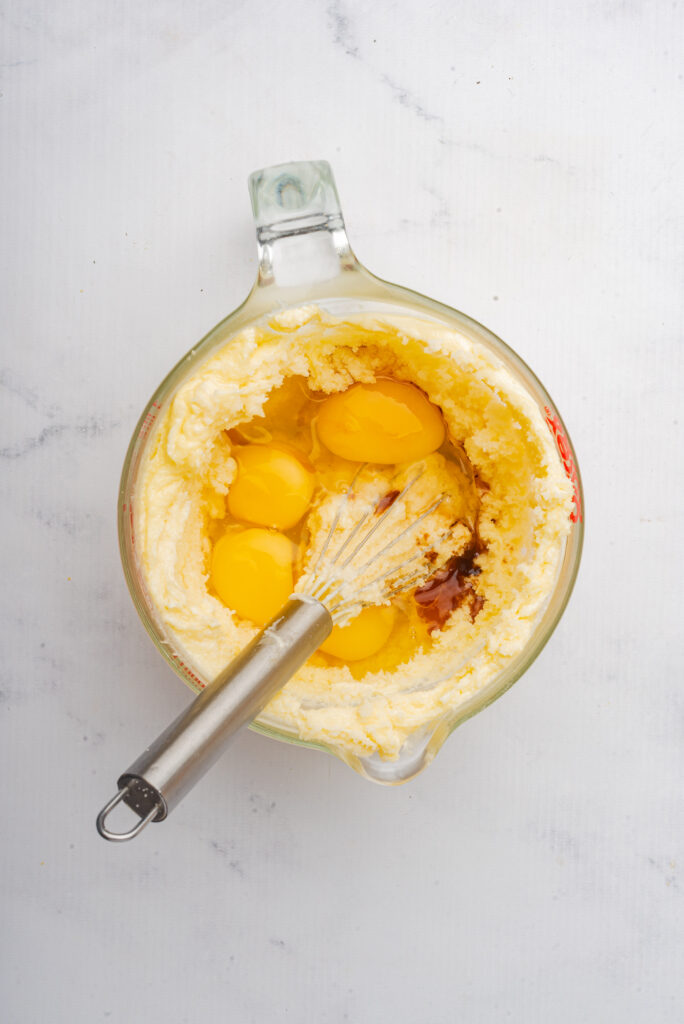
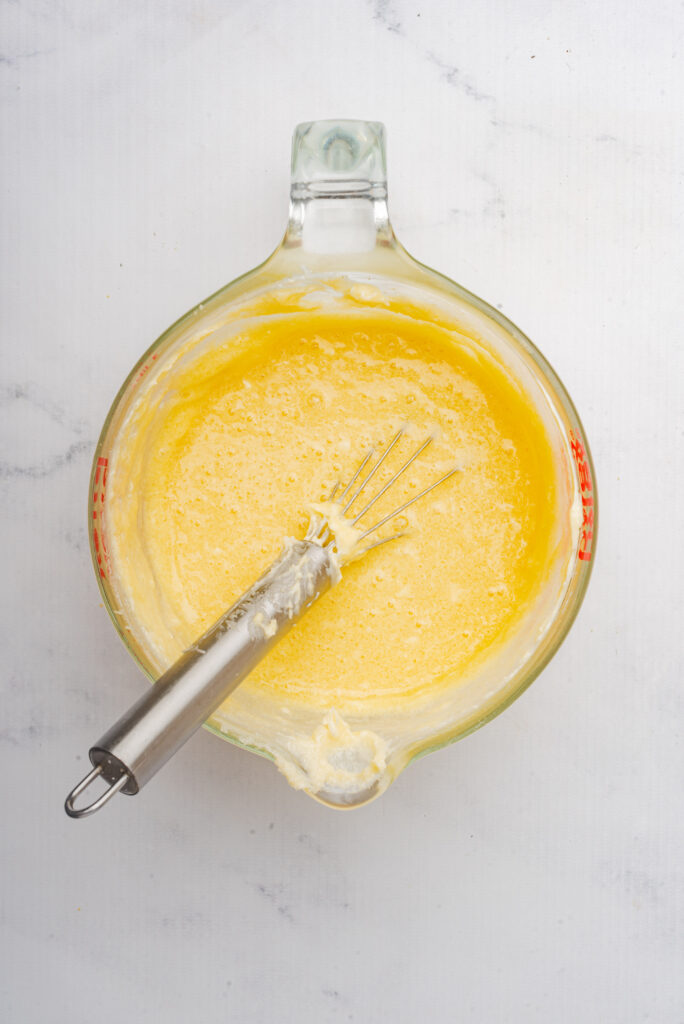
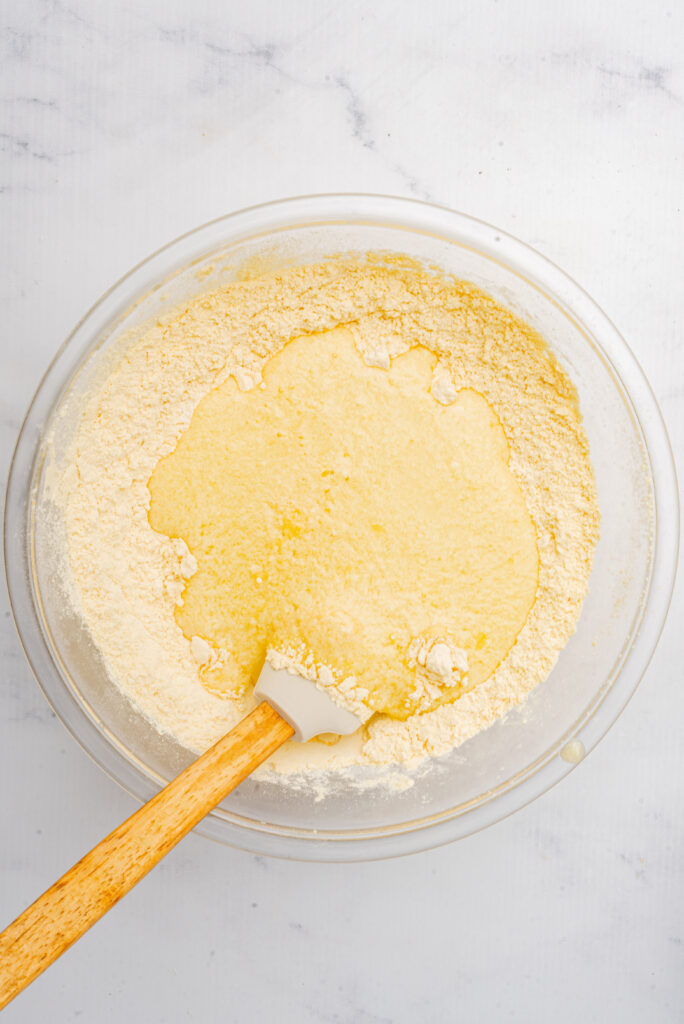
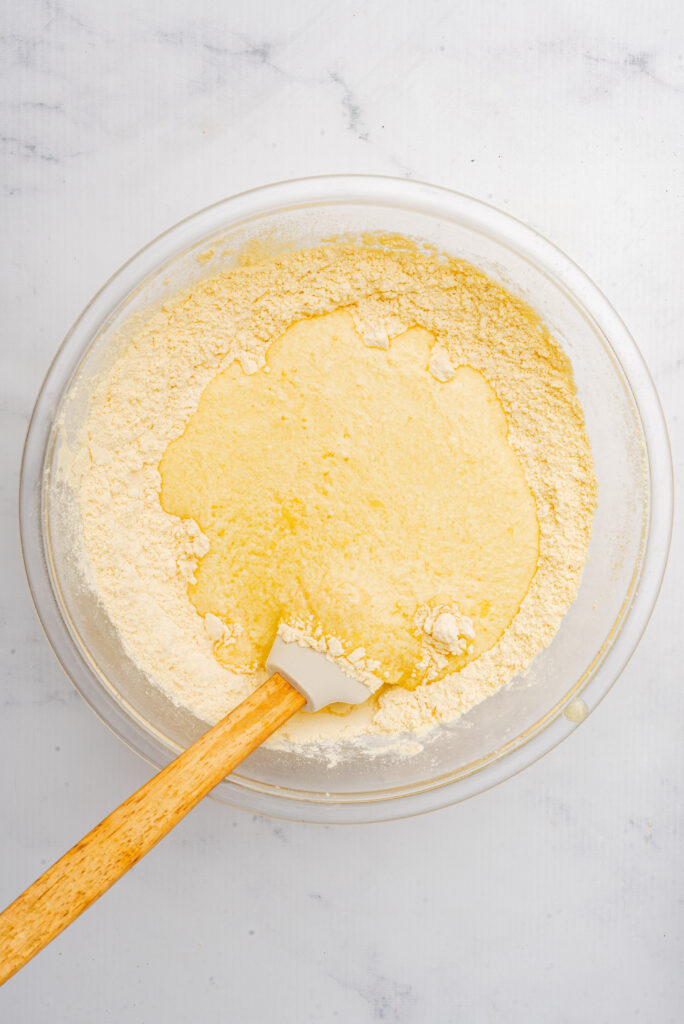
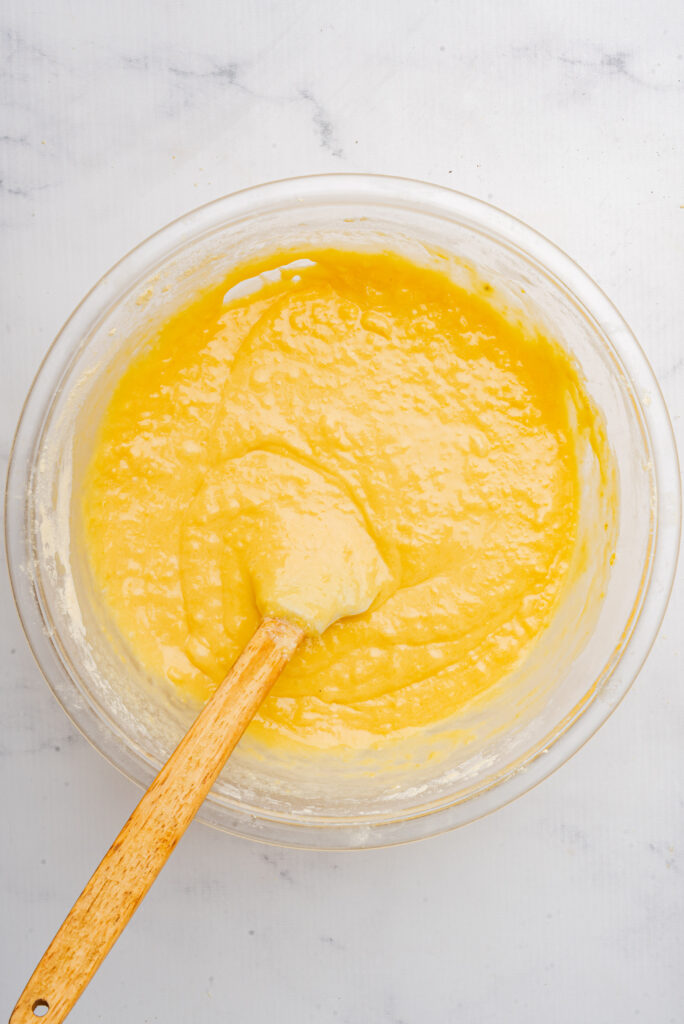
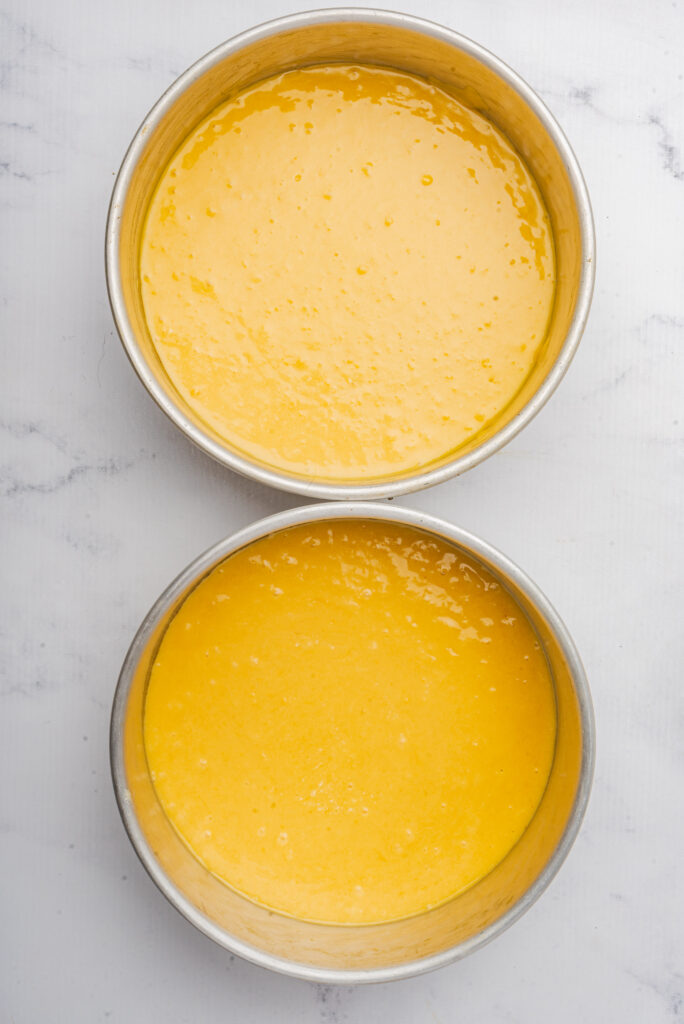
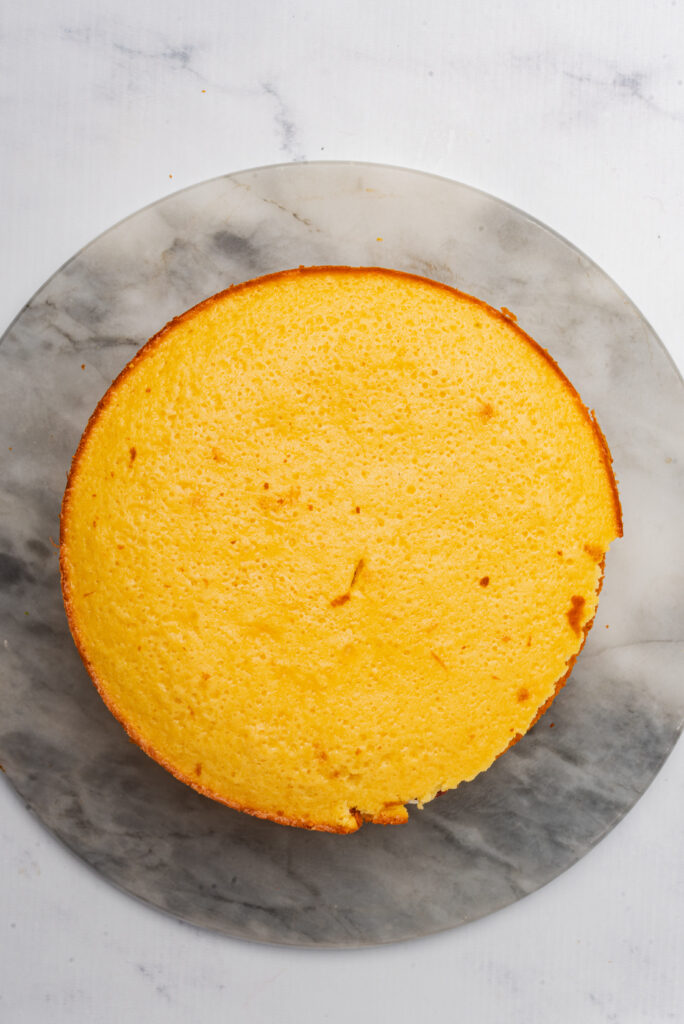
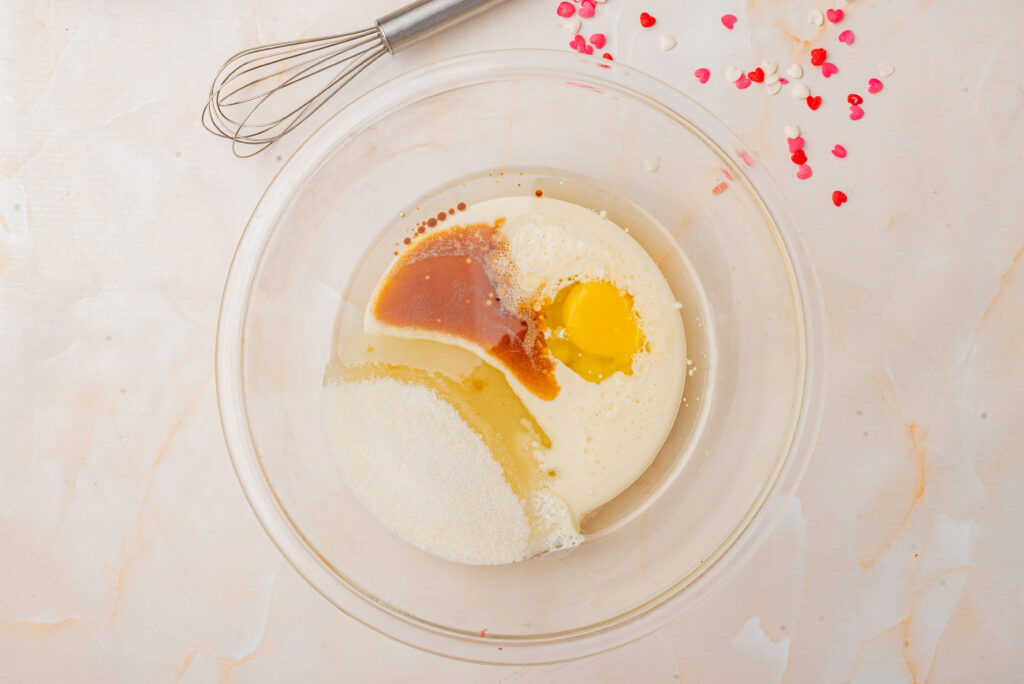
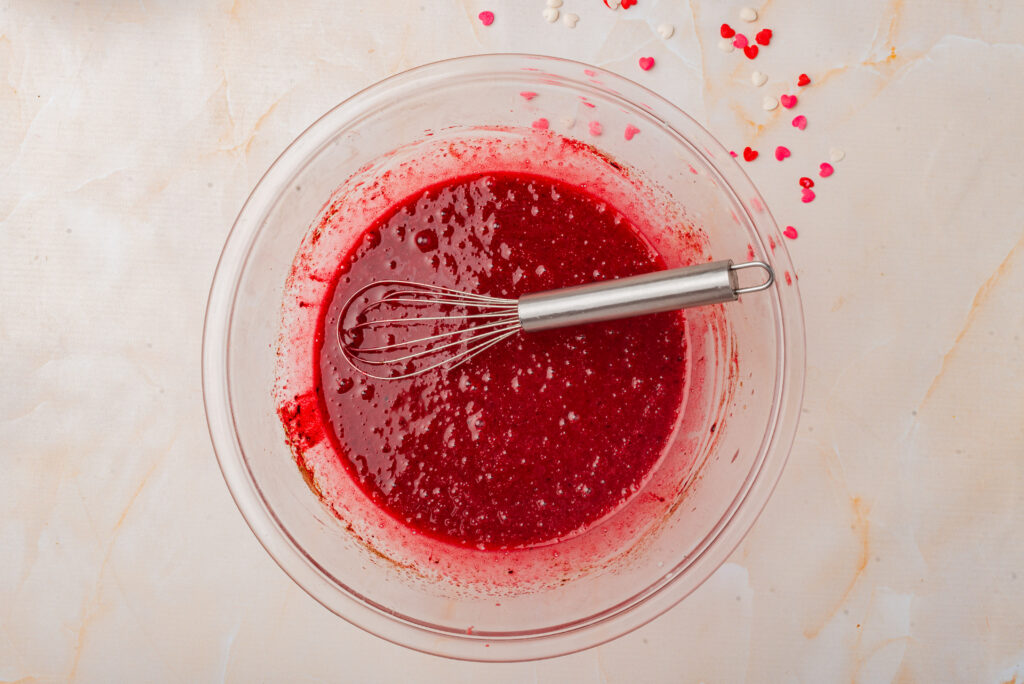
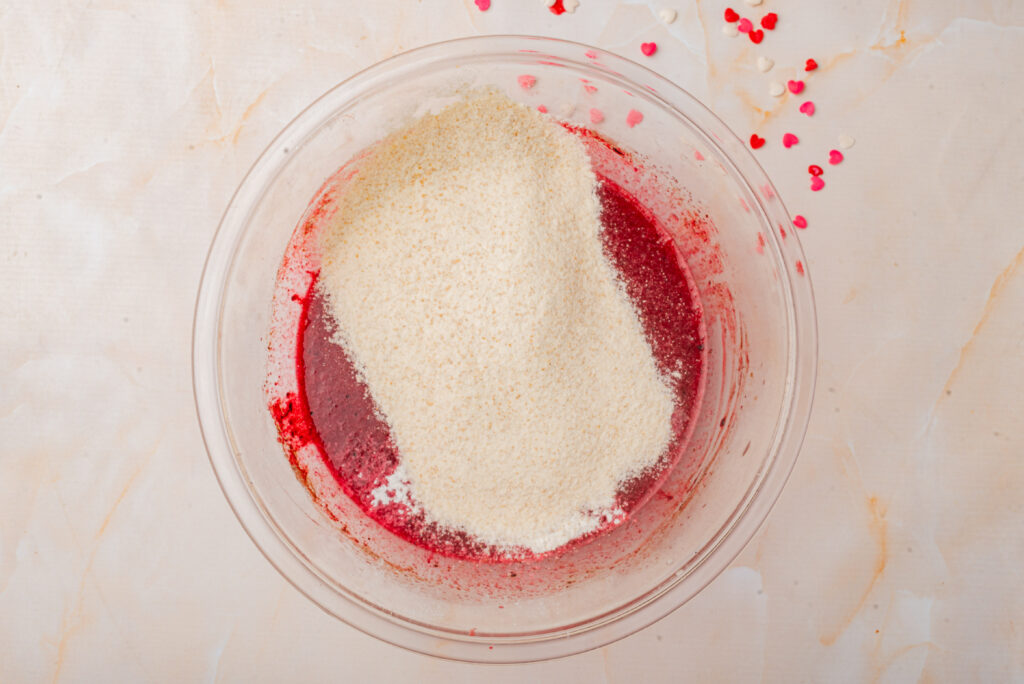
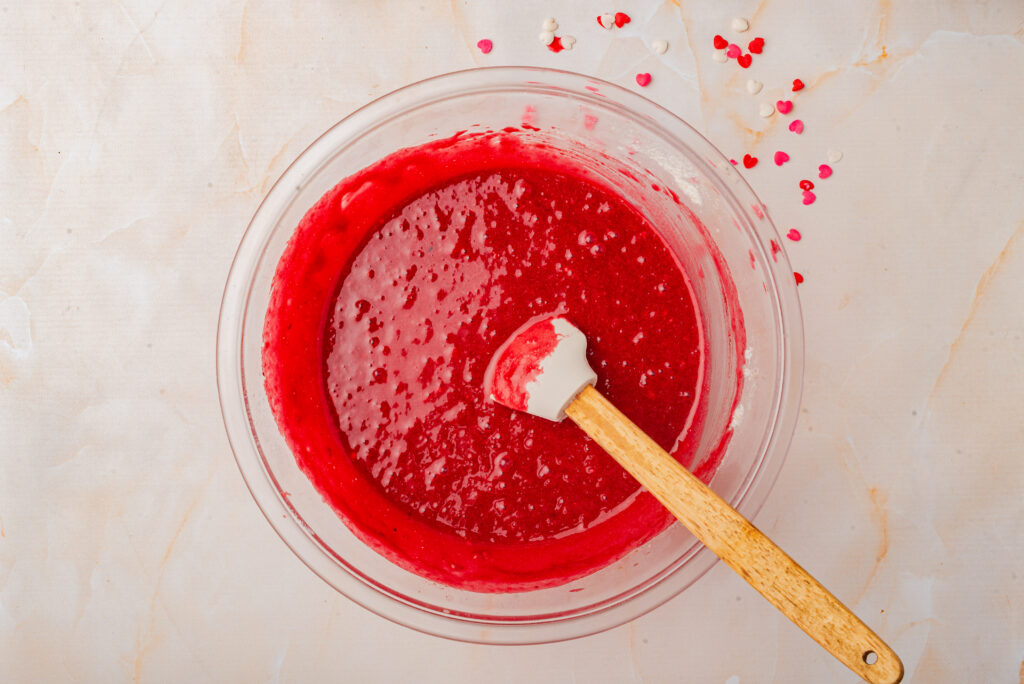
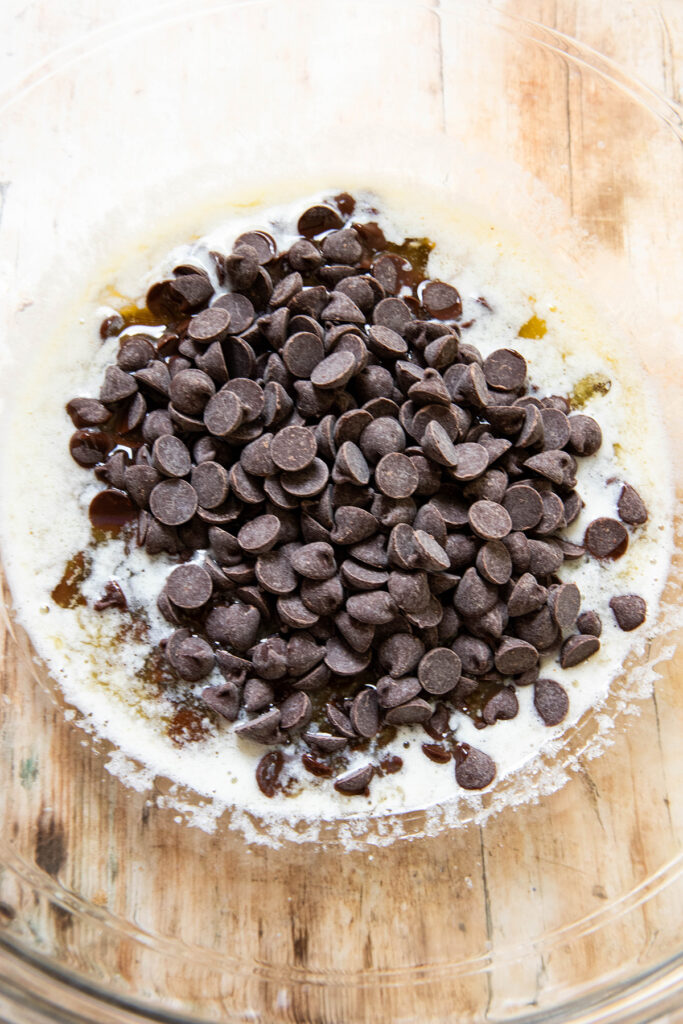
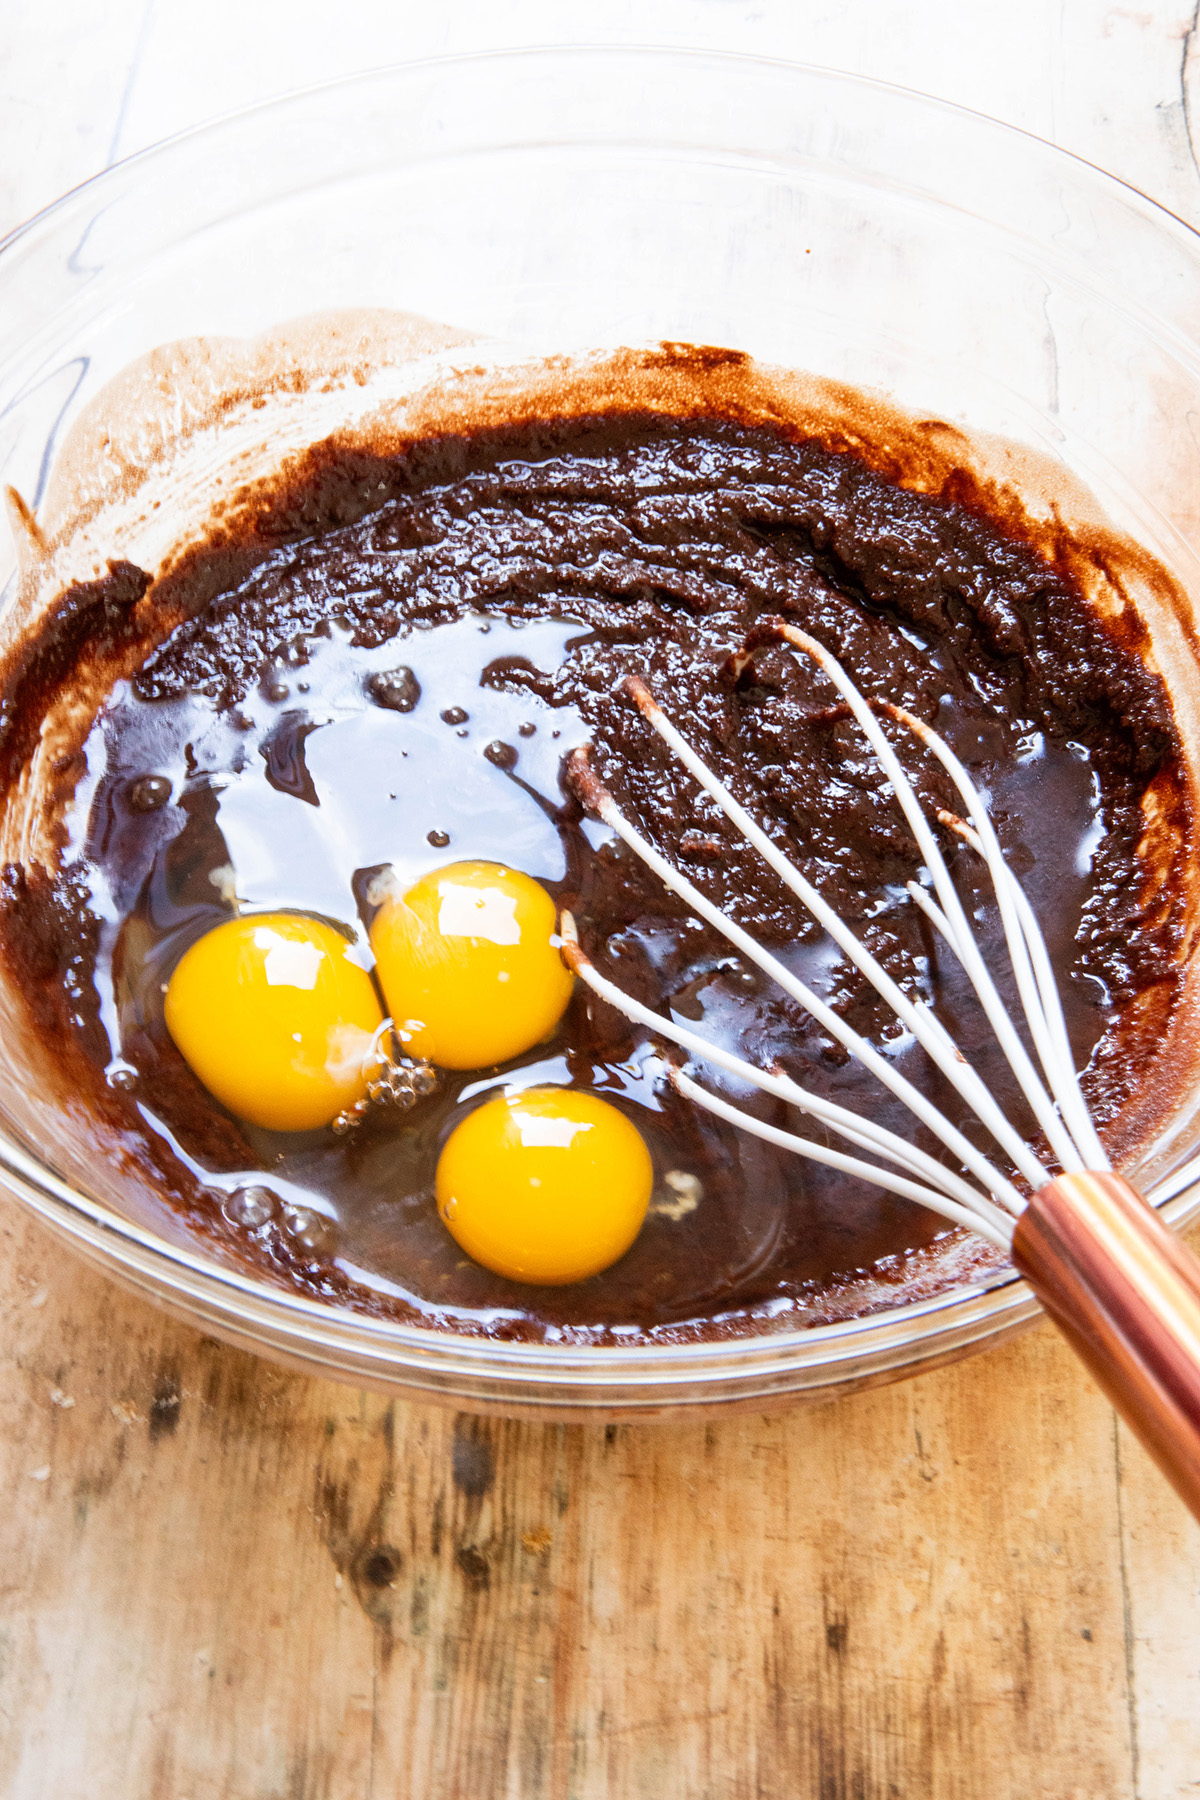
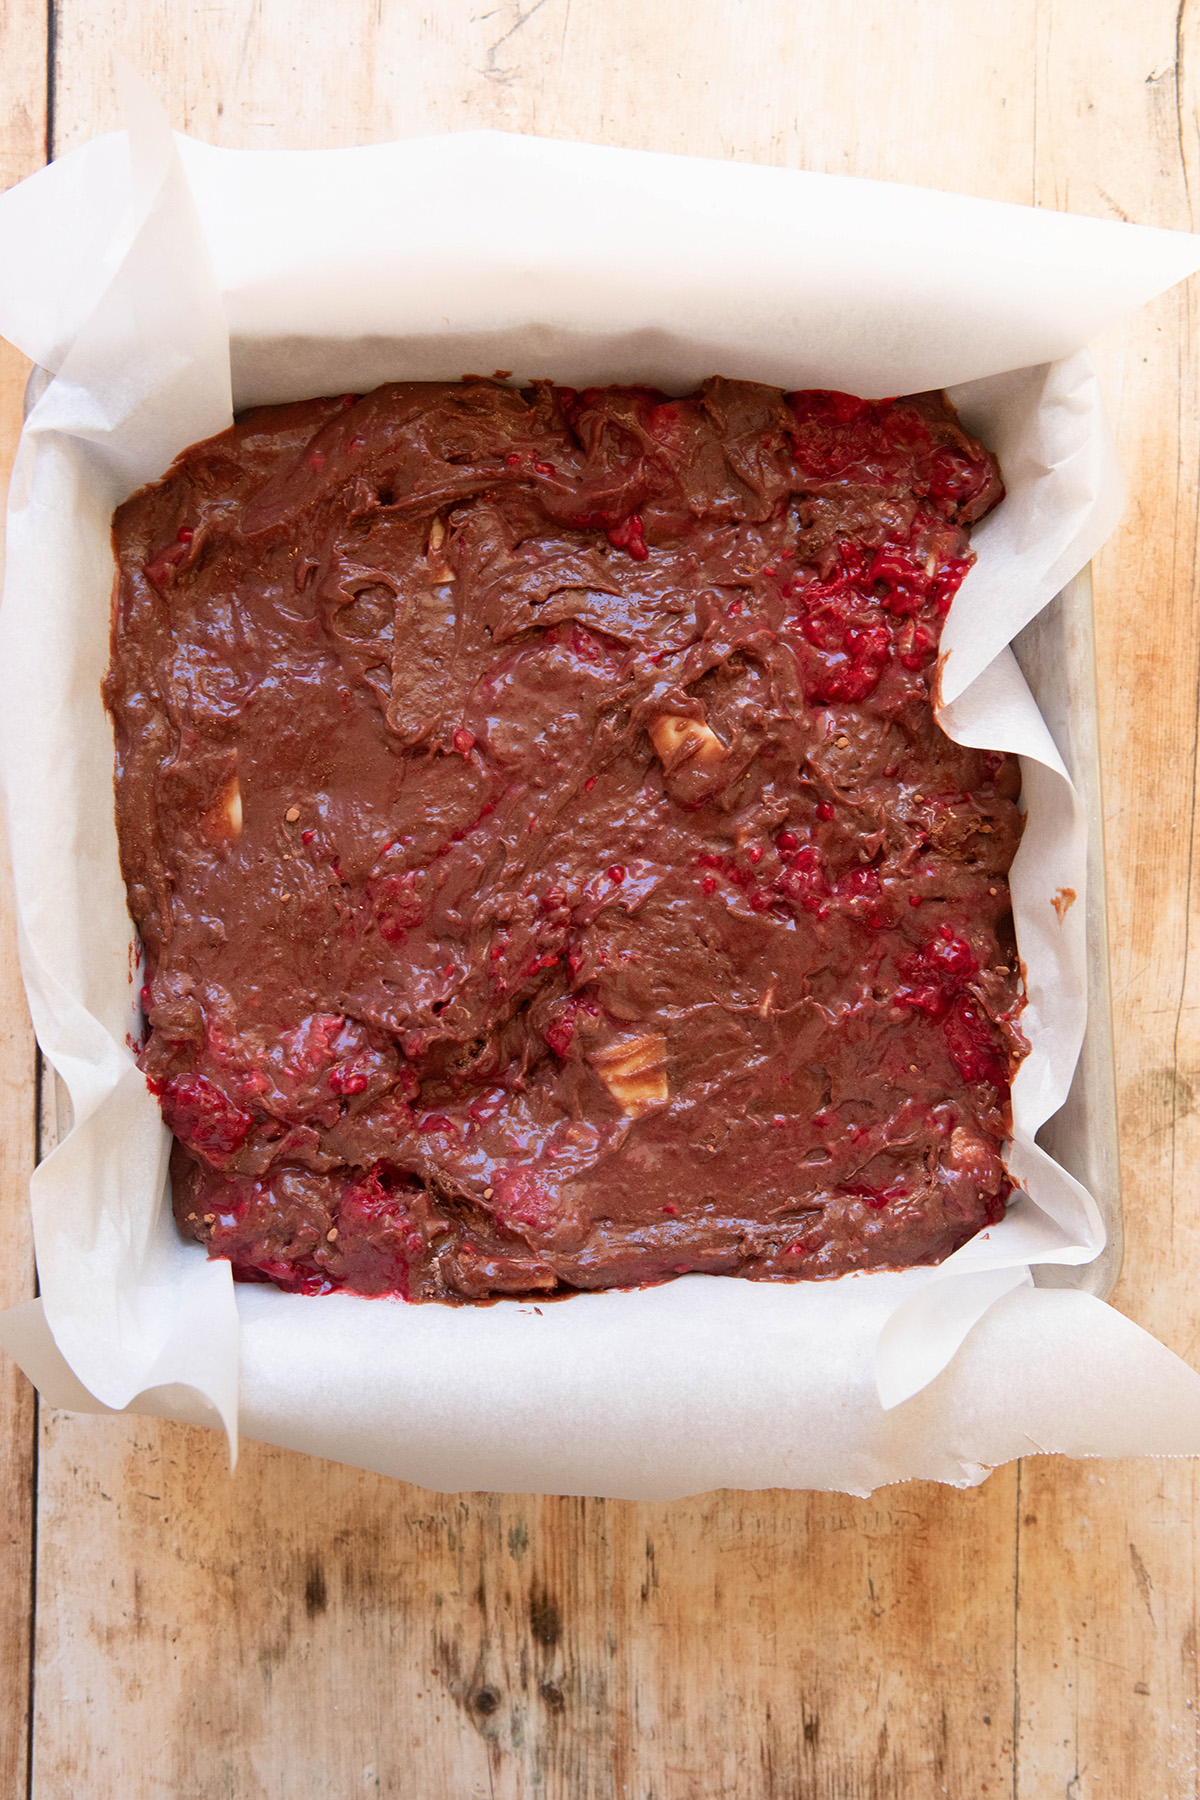
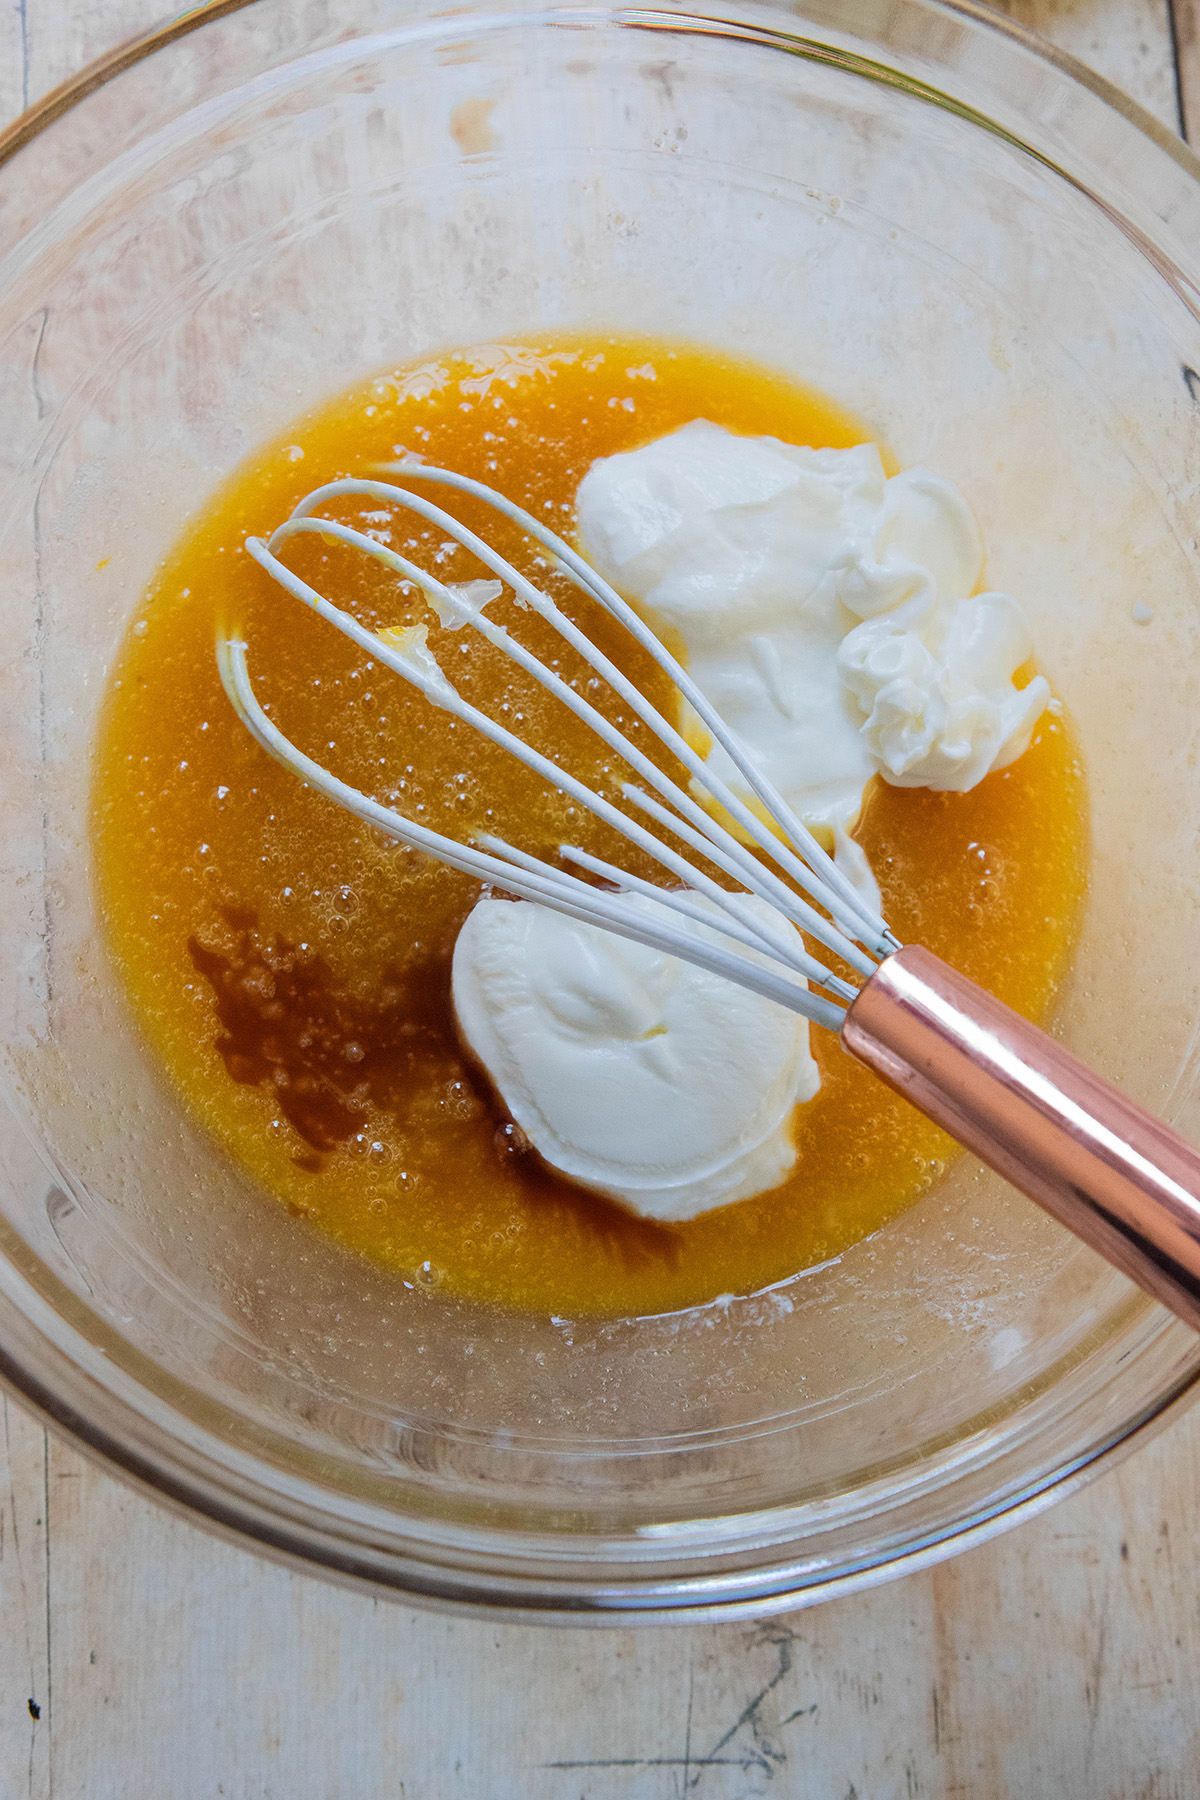
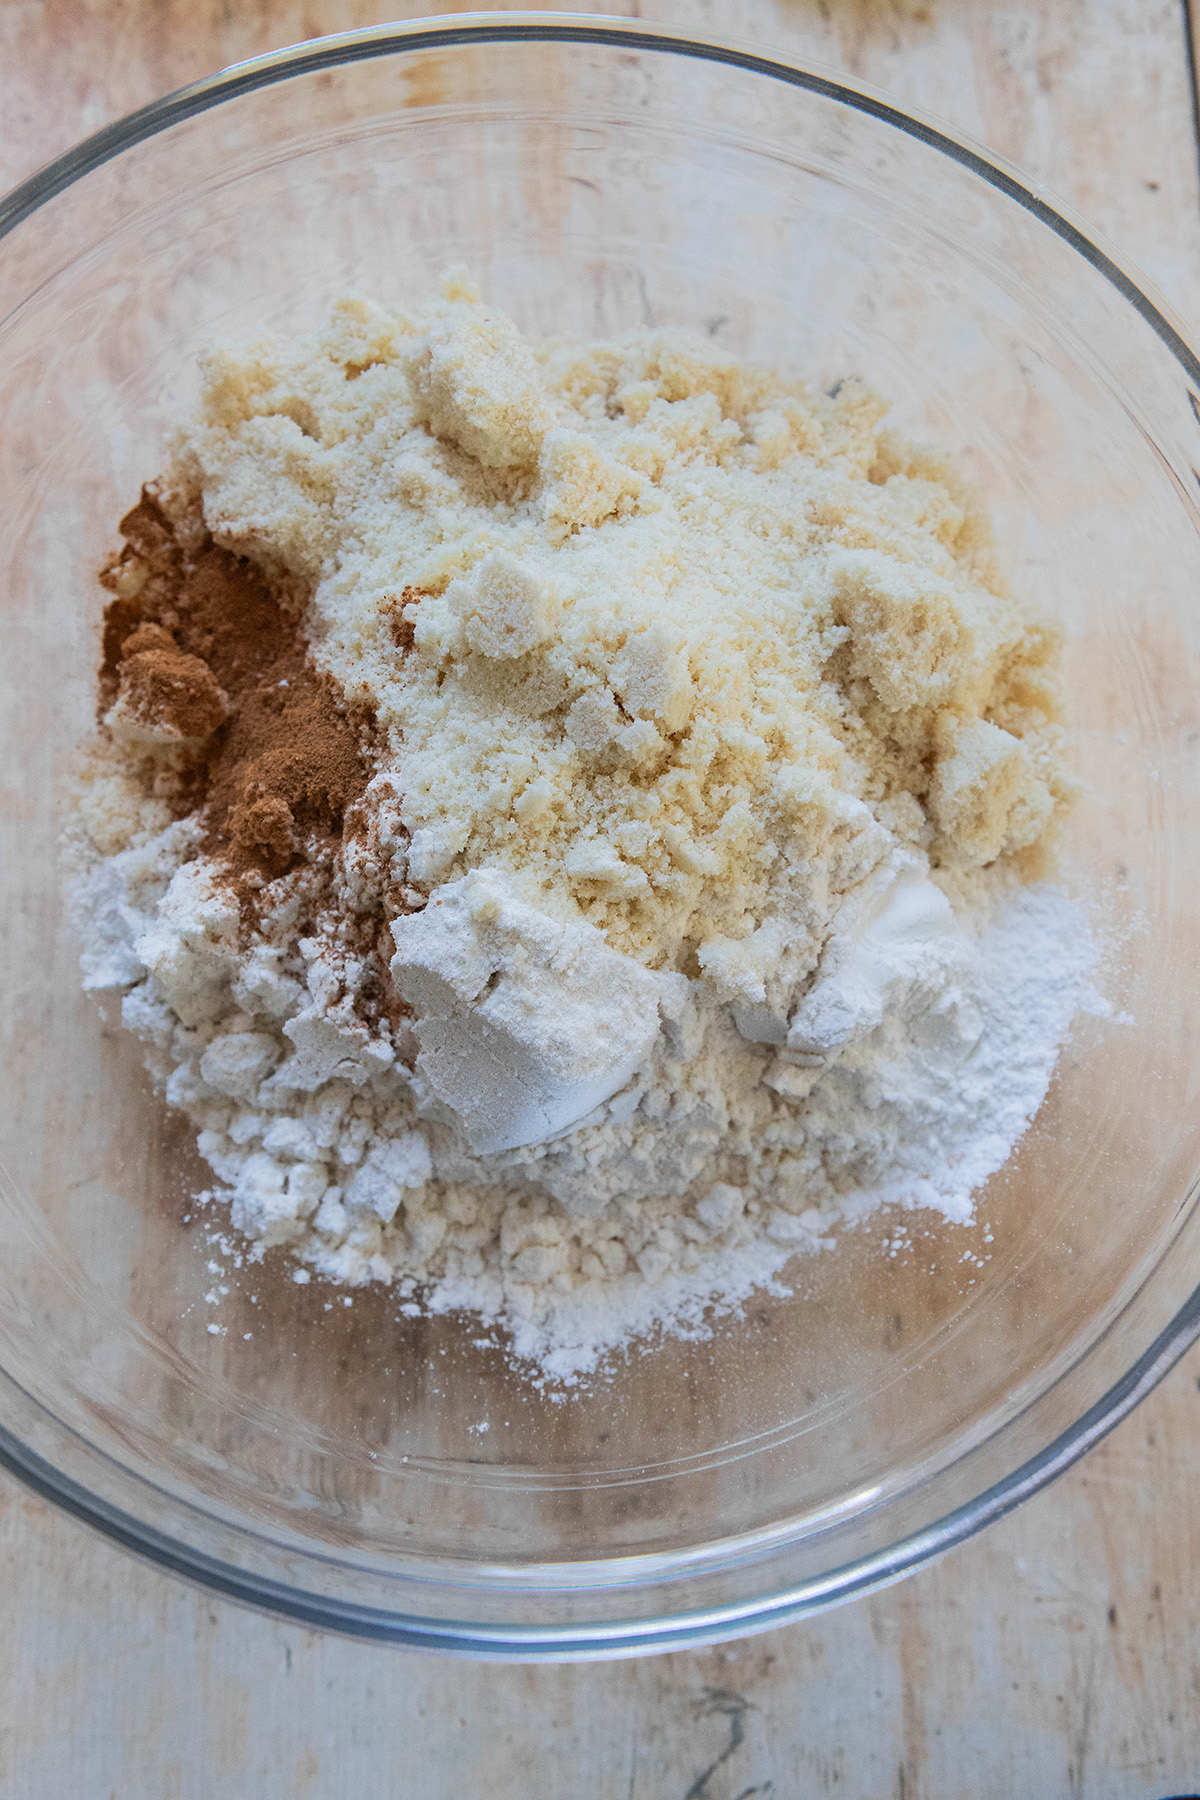
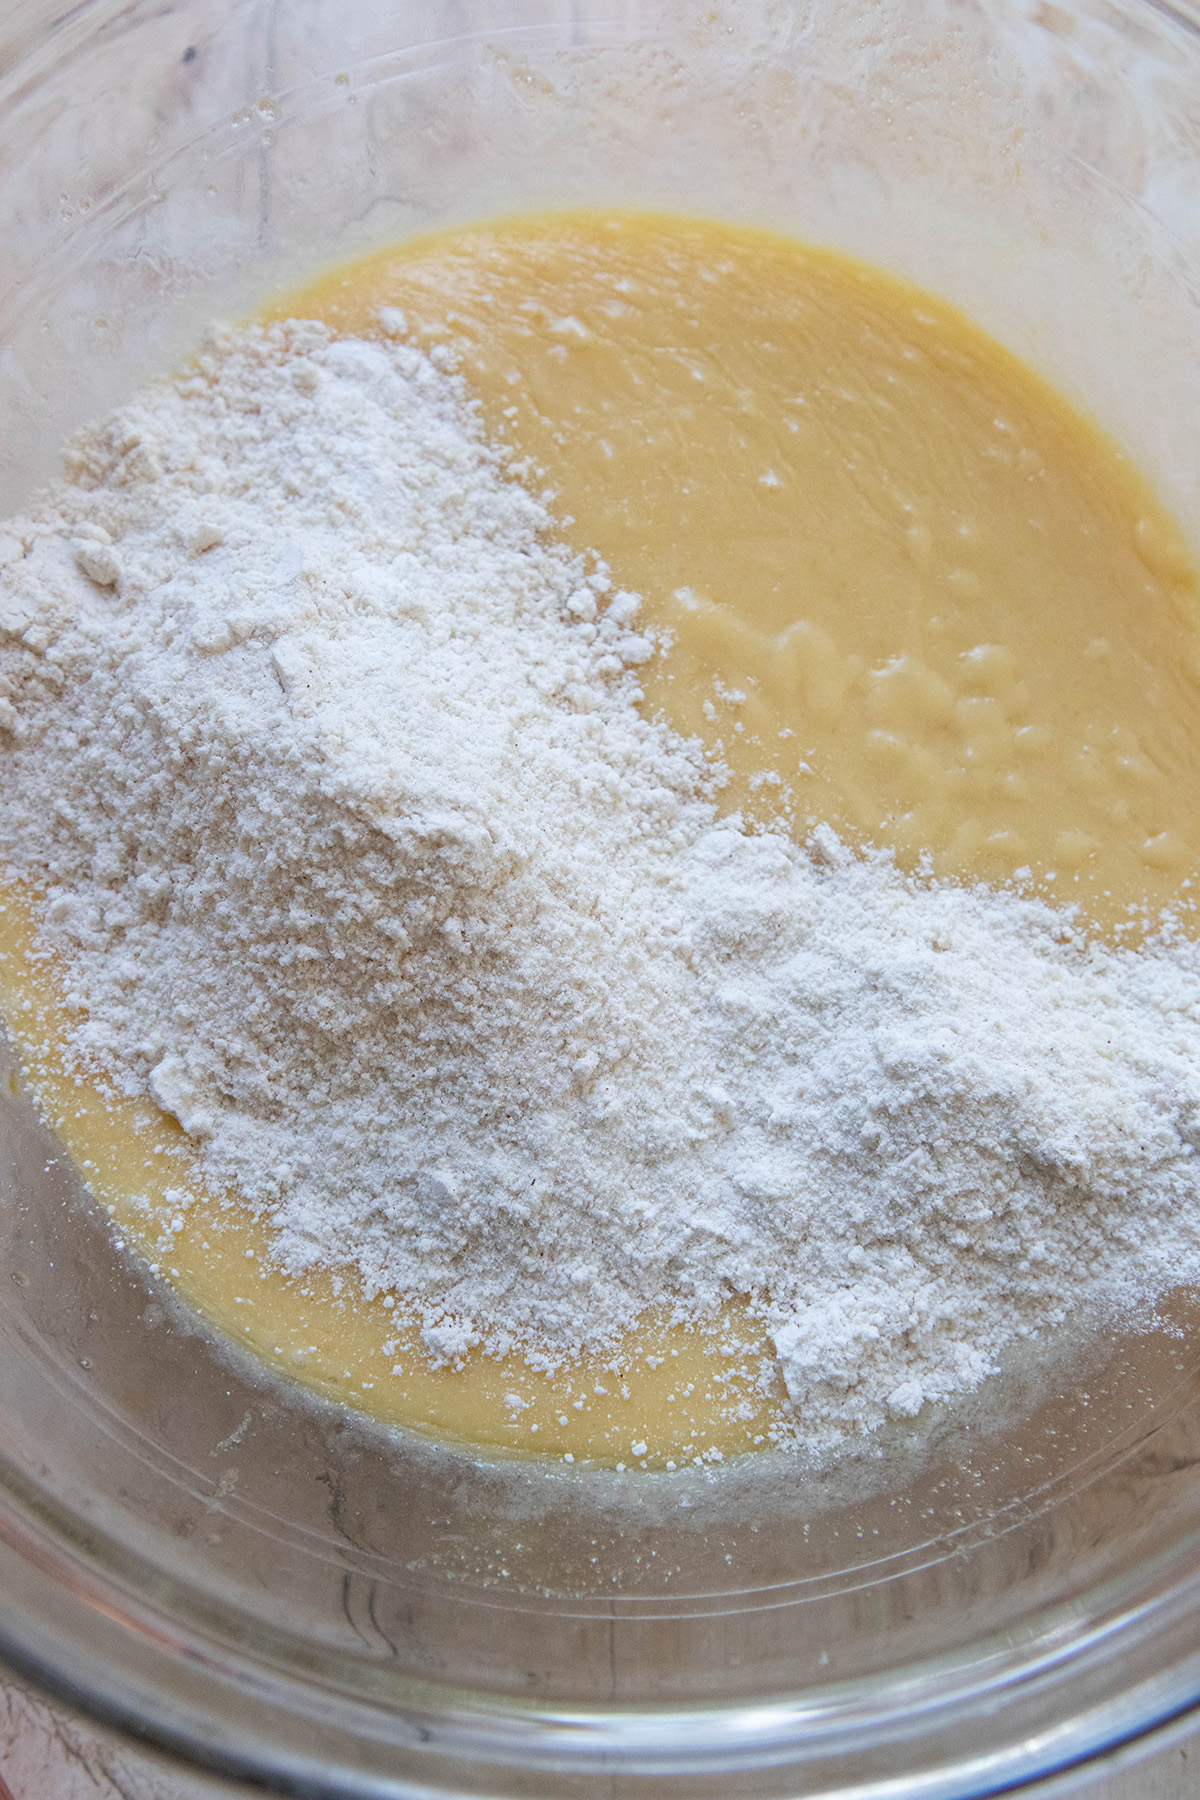
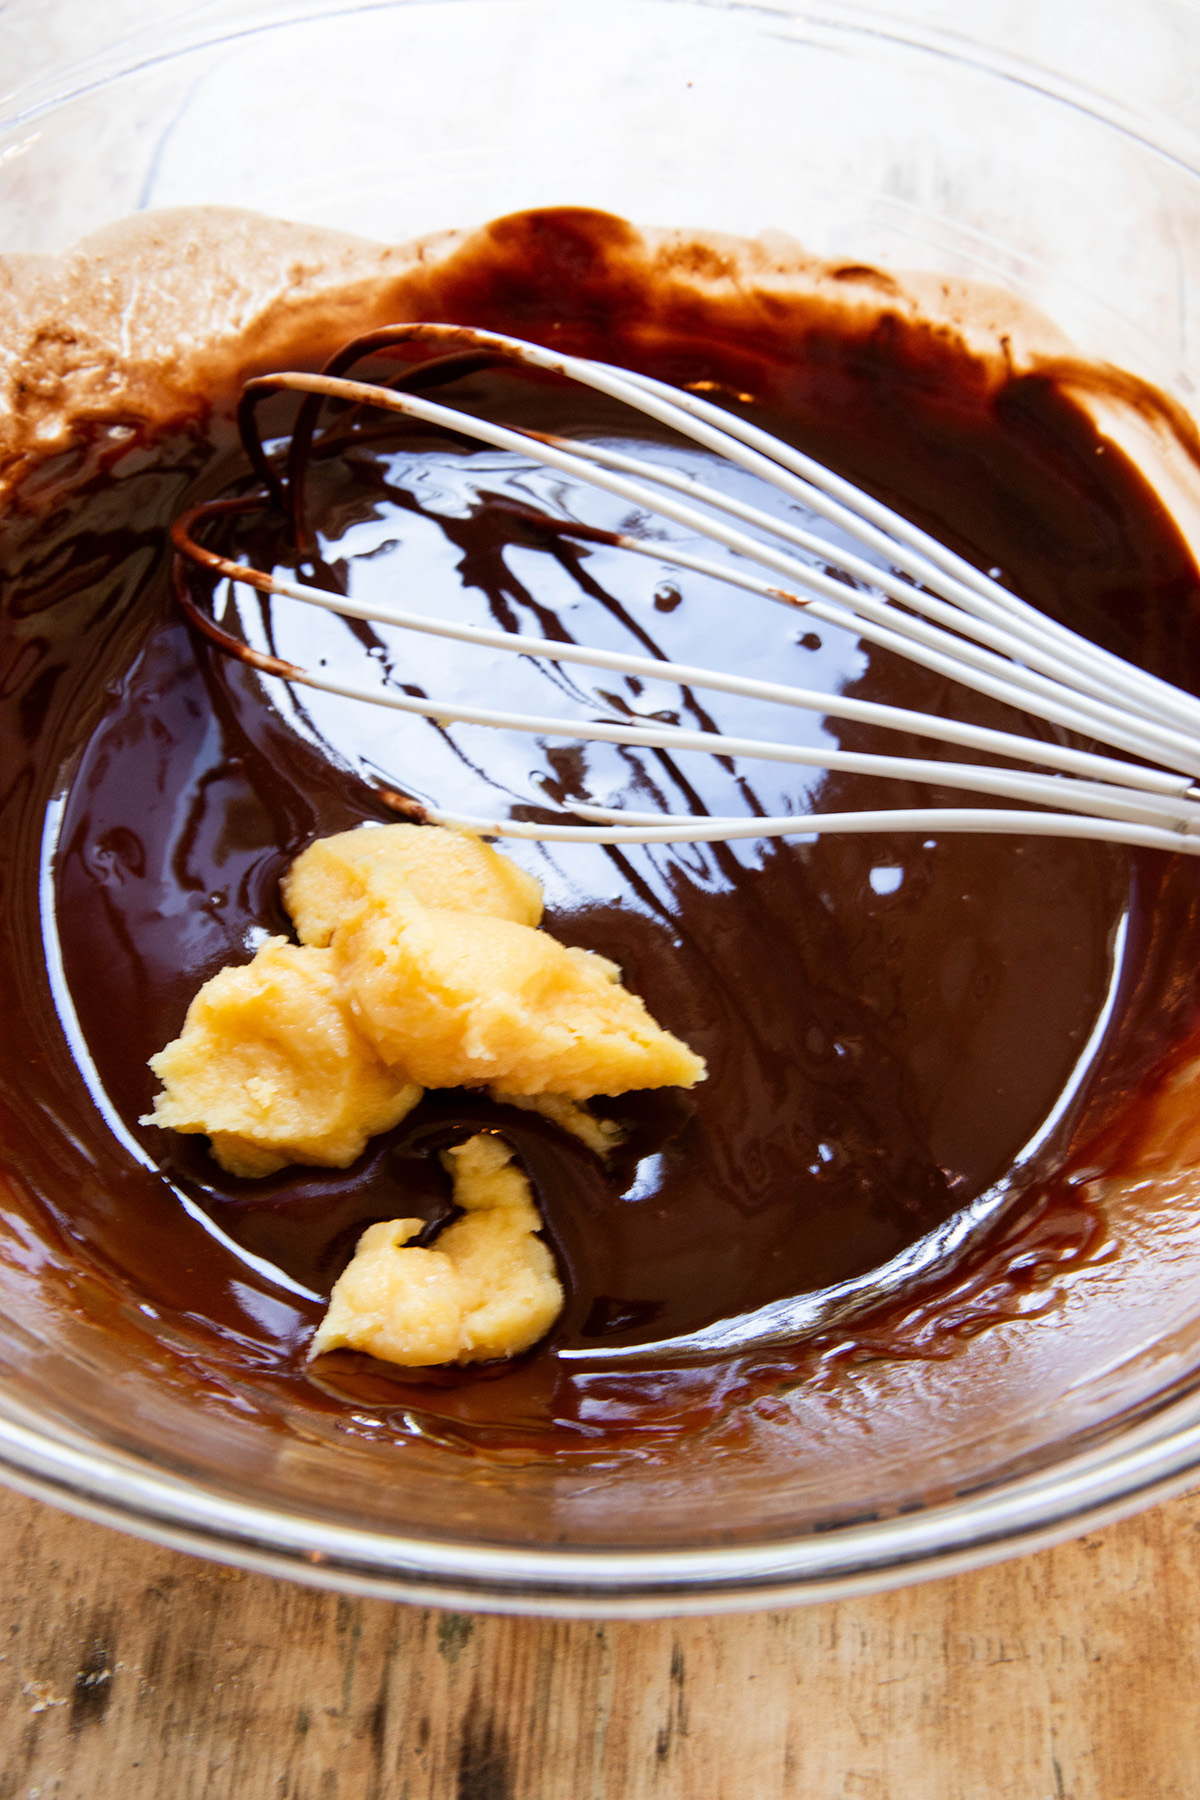
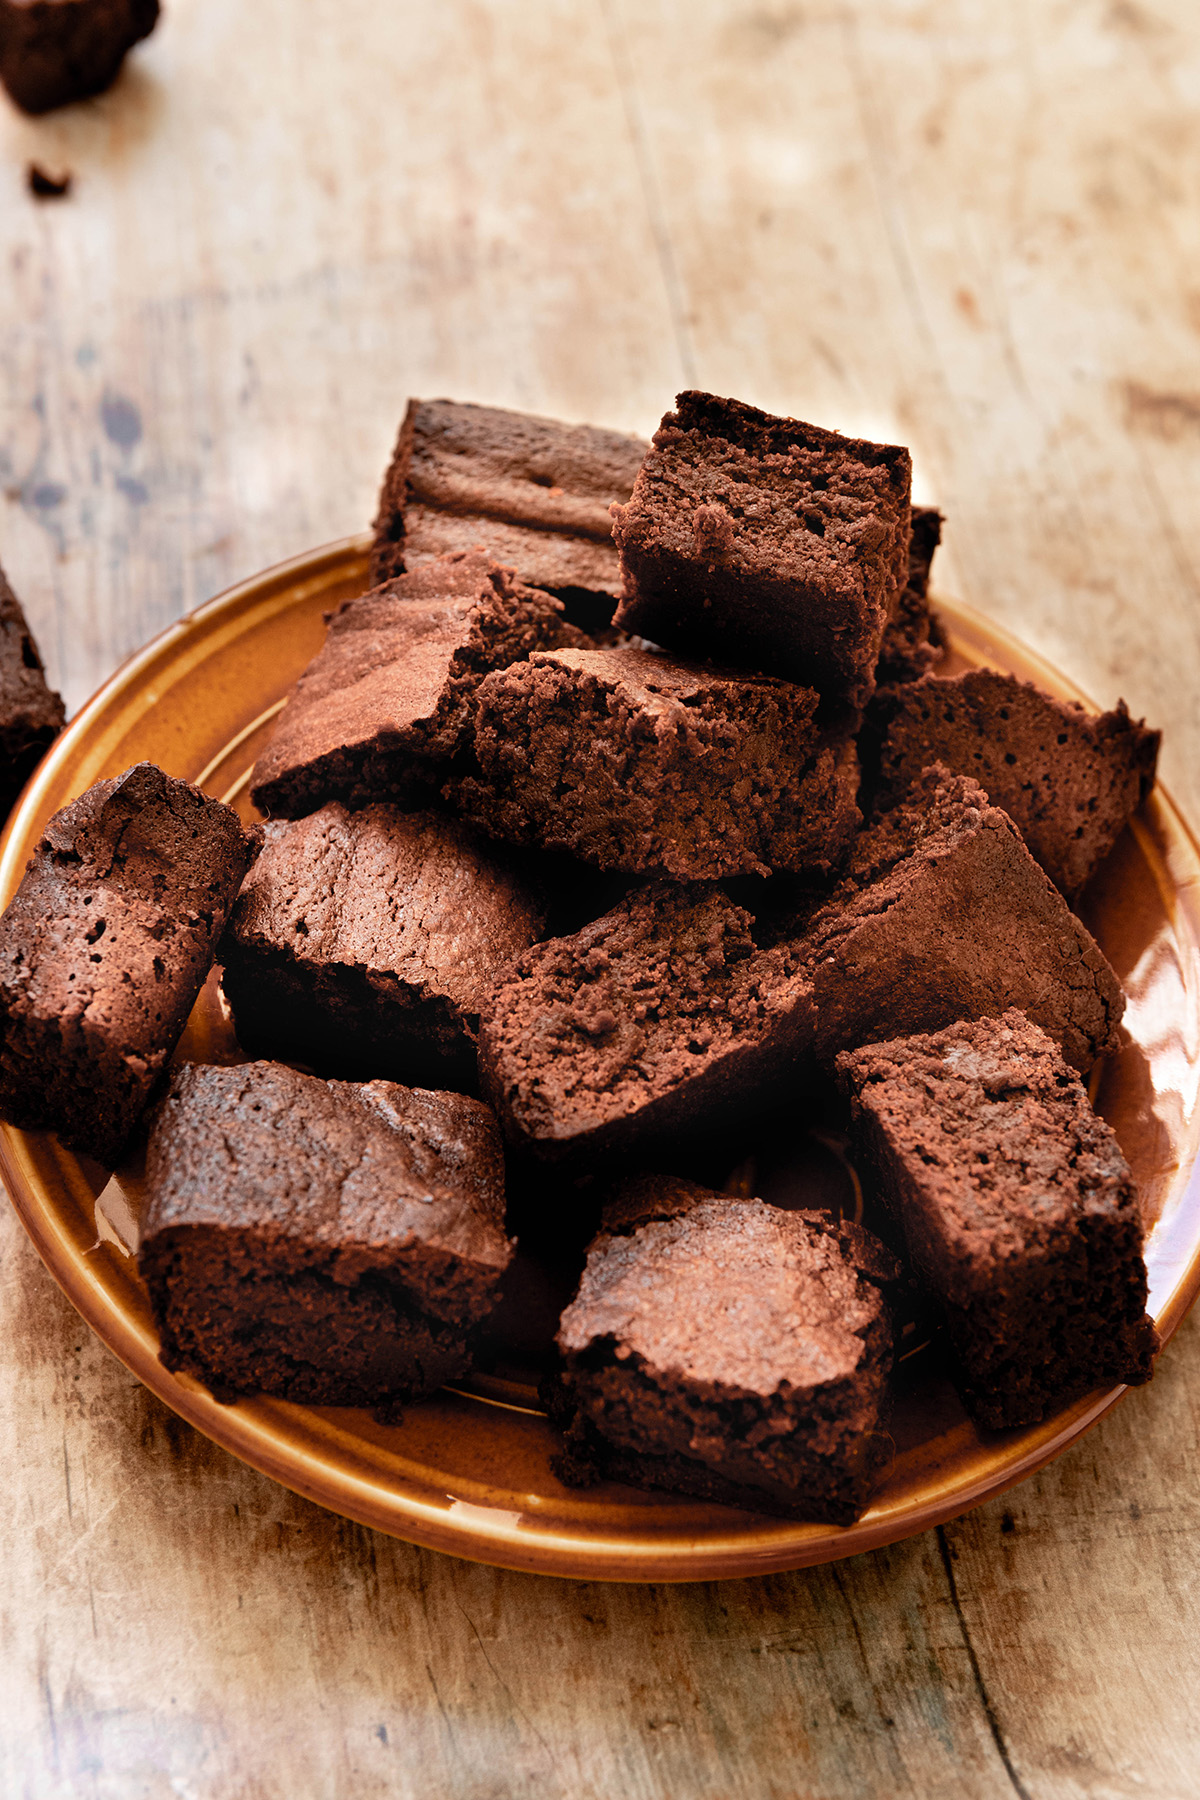
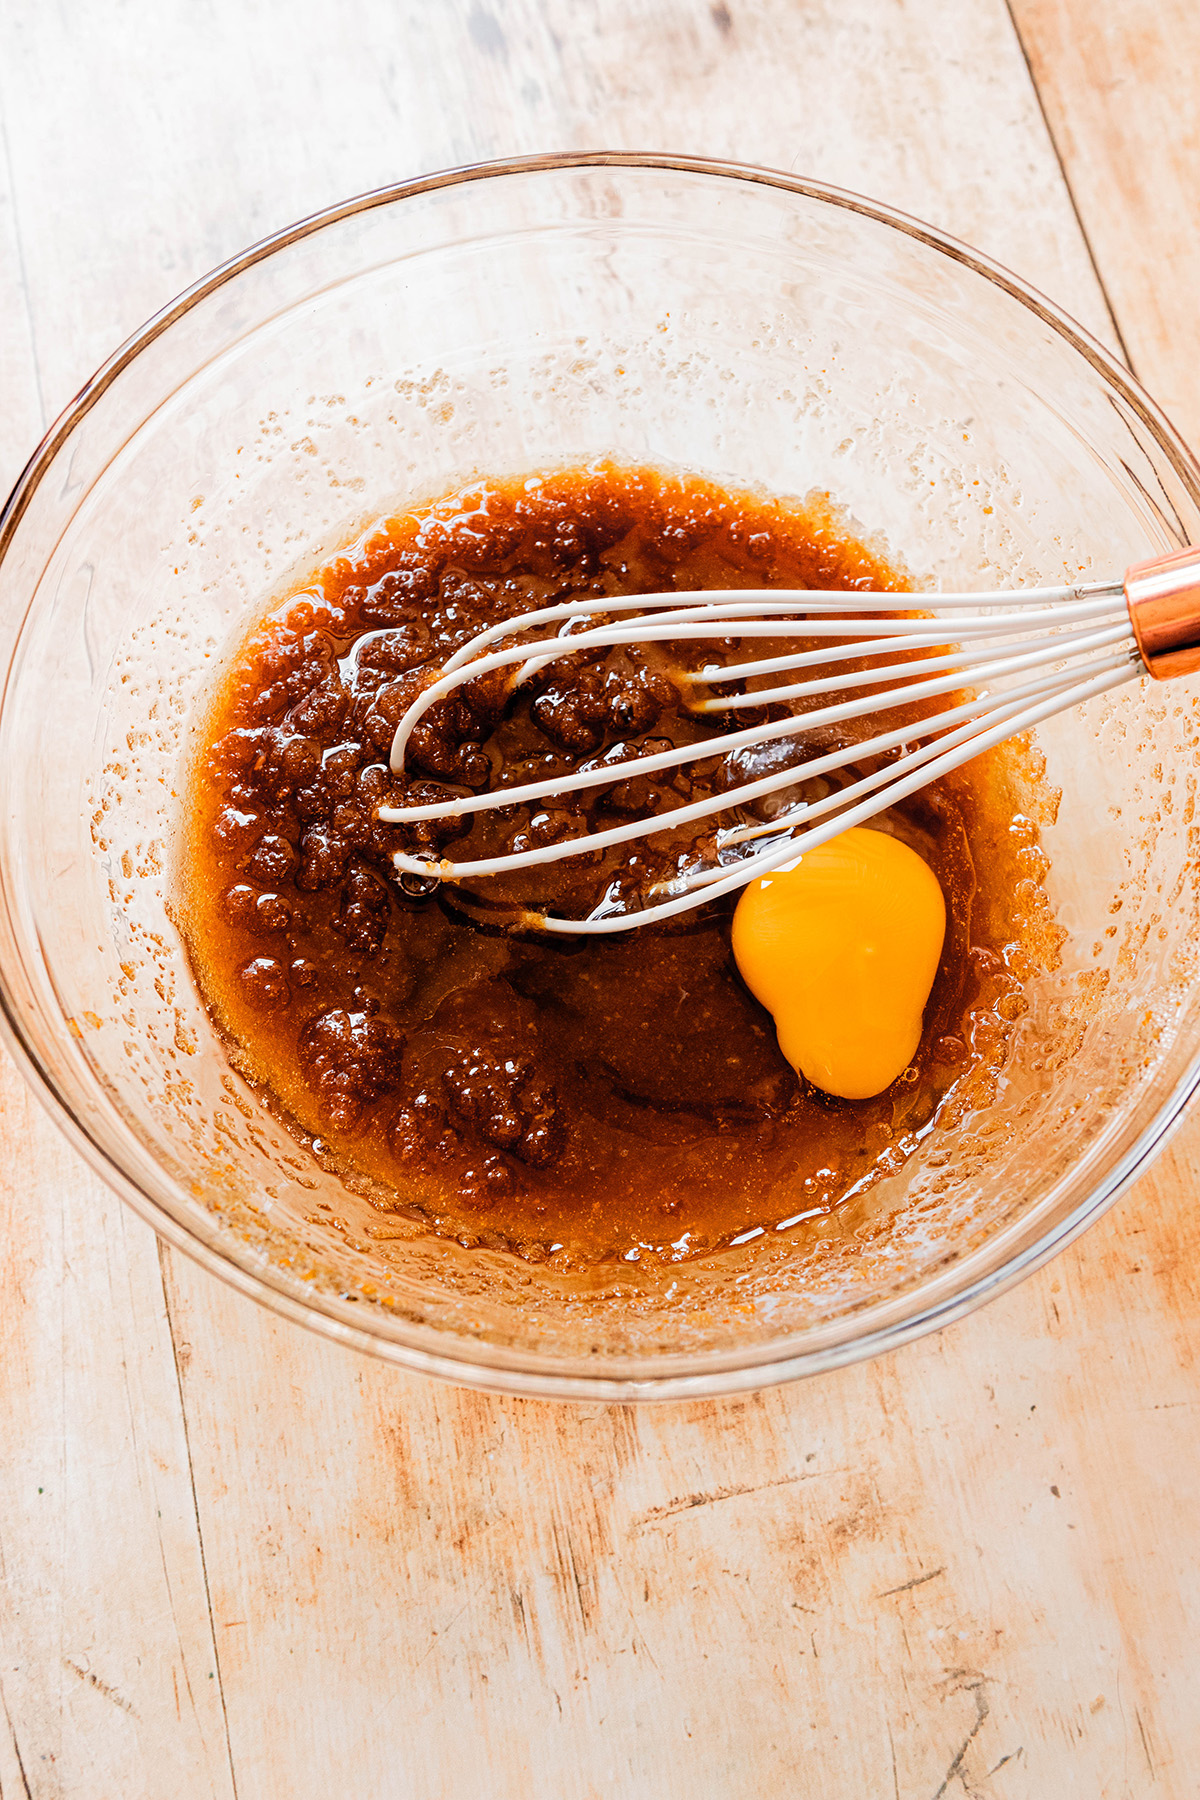
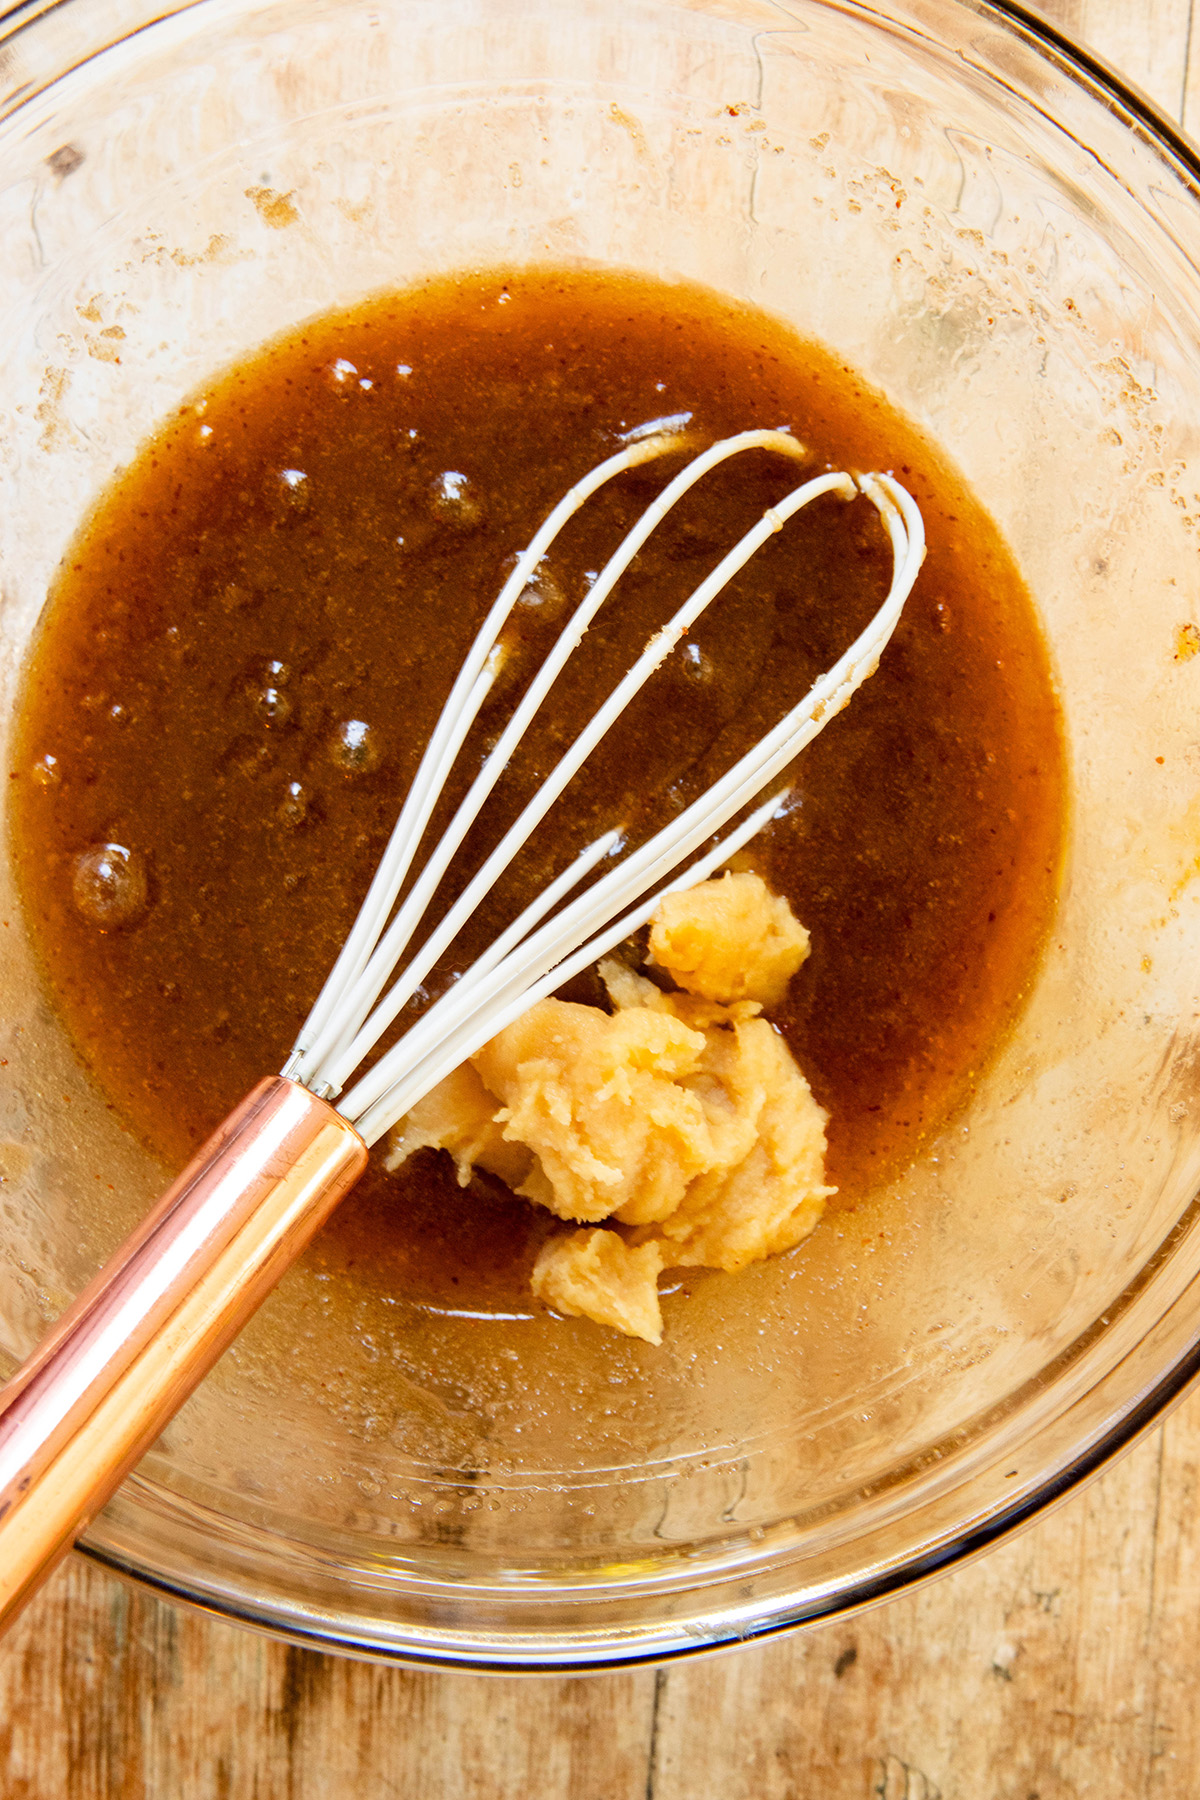
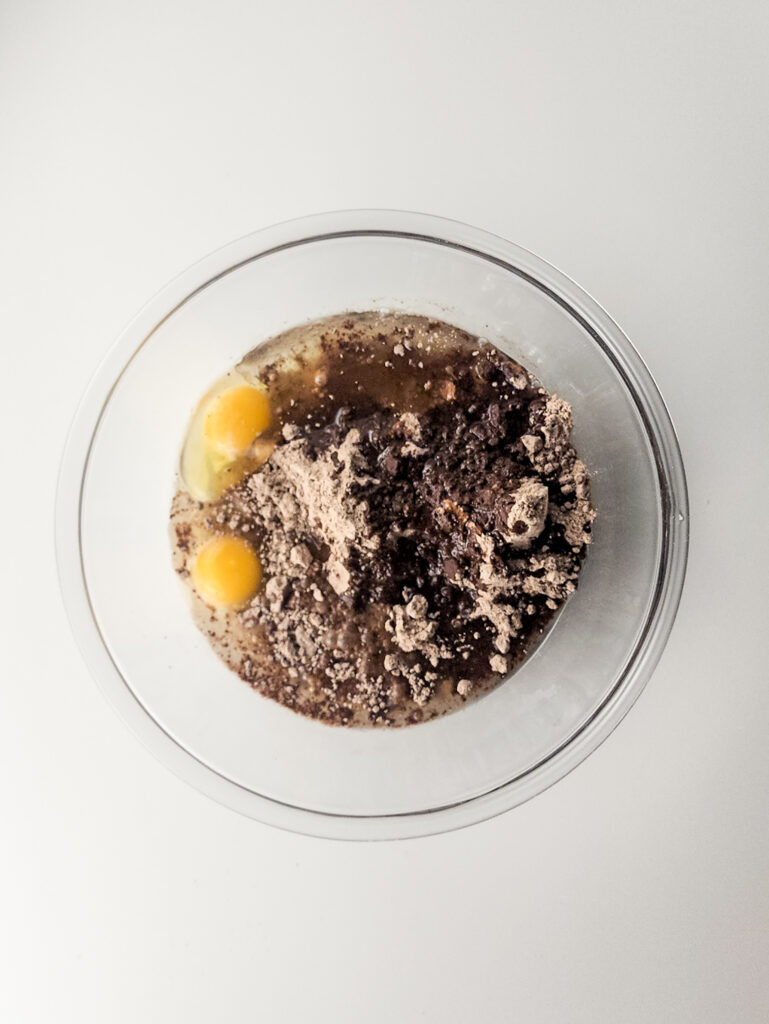
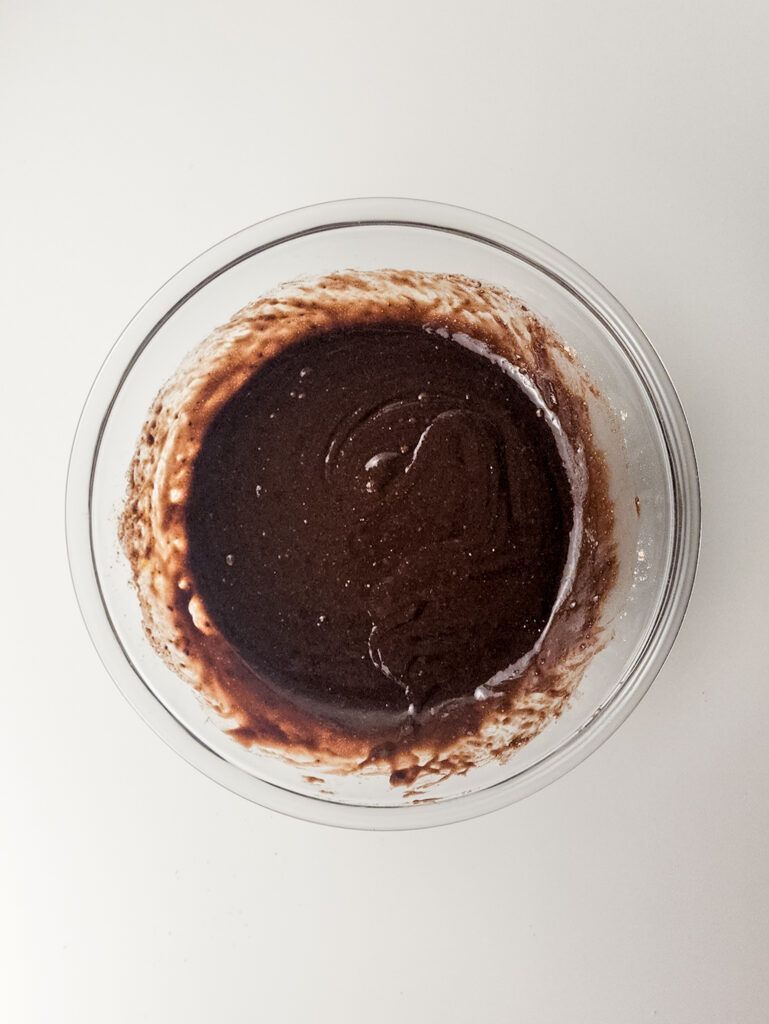
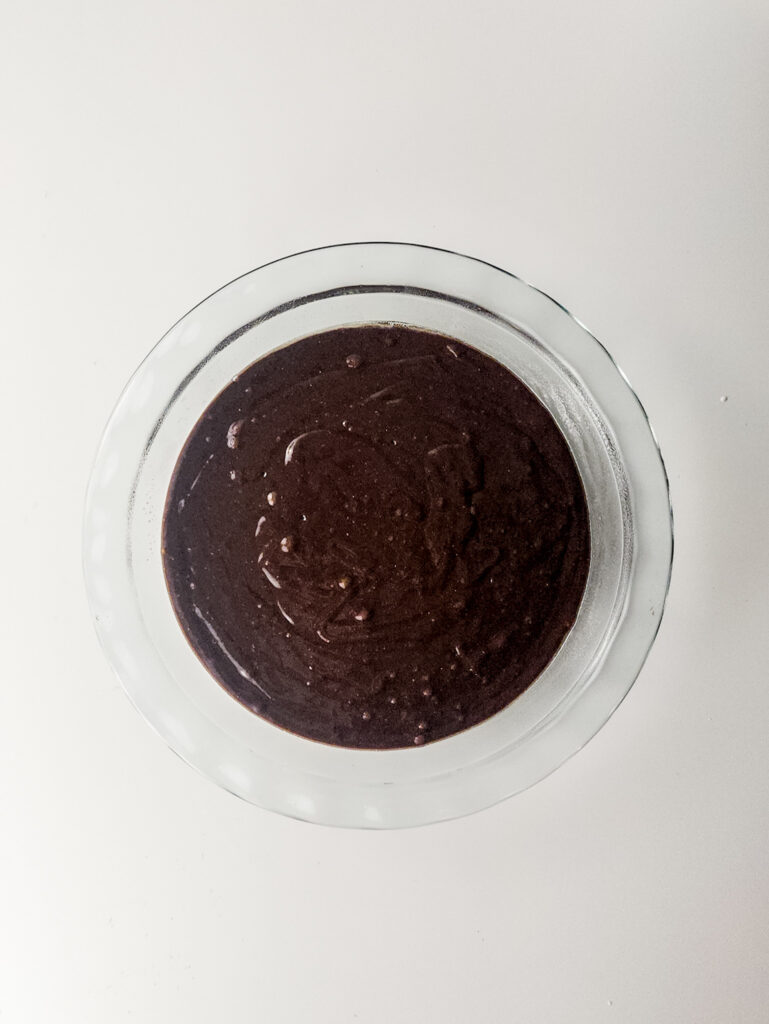
  2. Take the brownie mix and pour in a bowl. Add all the brownie box ingredients at once and mix together until combined. Transfer into a baking sprayed baking dish and bake in the oven for 30-35 minutes or until a toothpick inserted comes out clean.
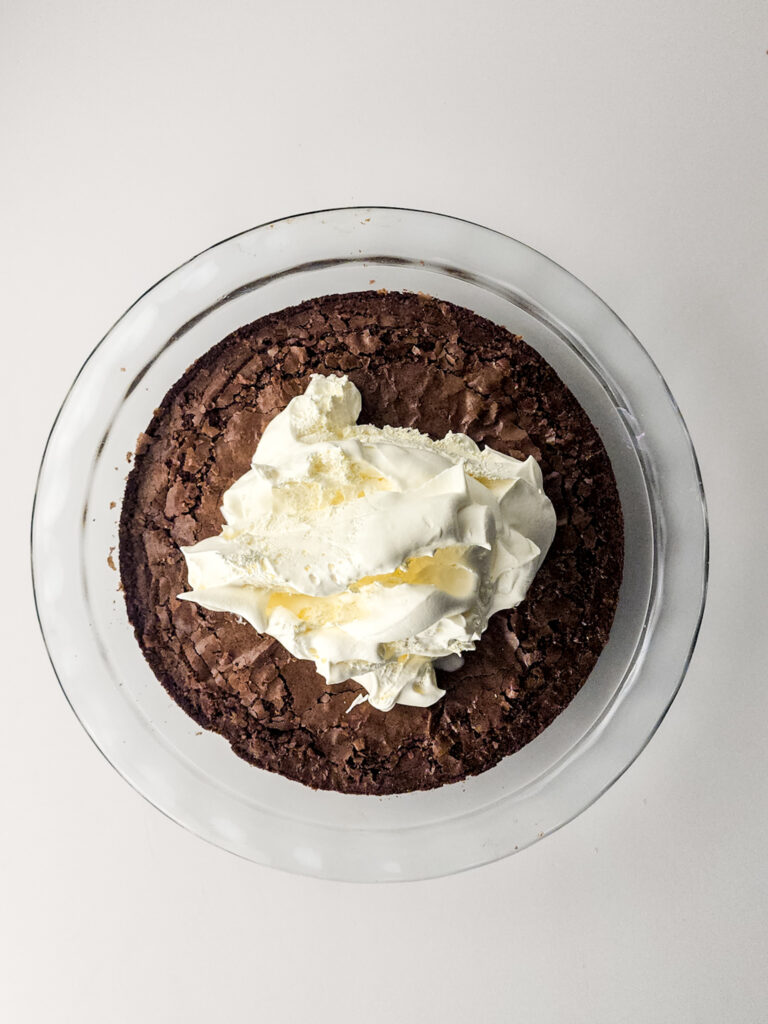
  3. Let cool completely until the brownie base isn’t warm anymore.
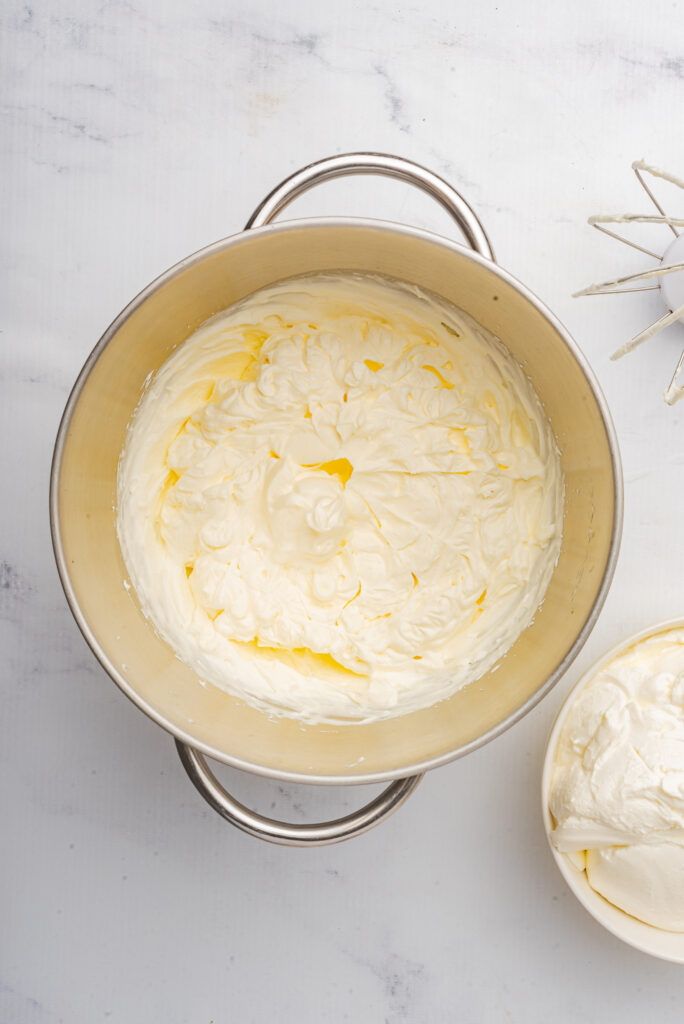
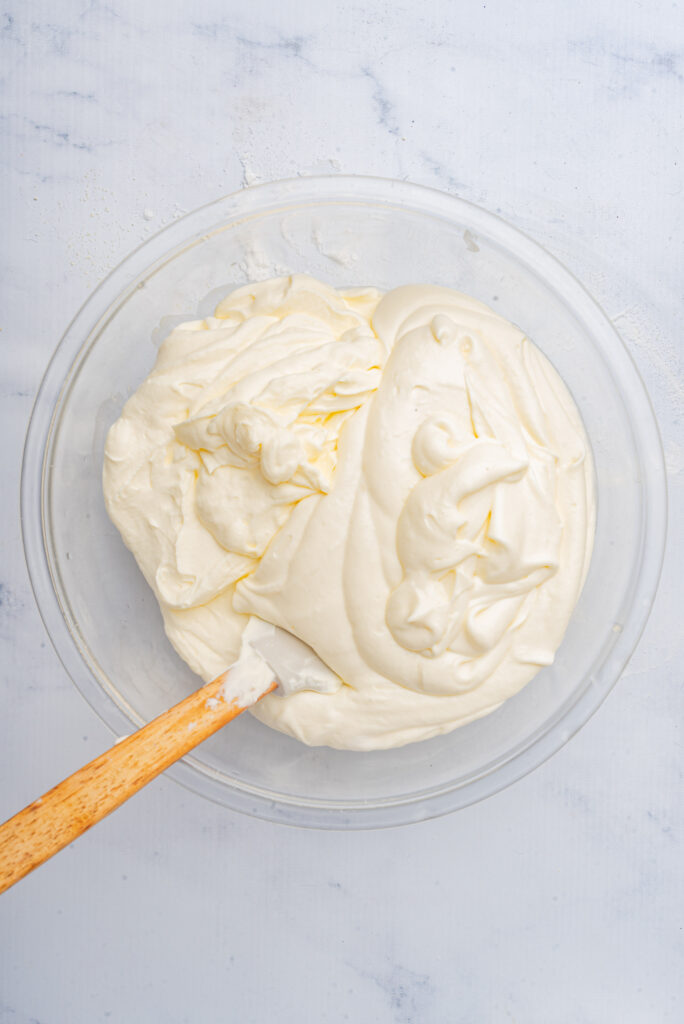
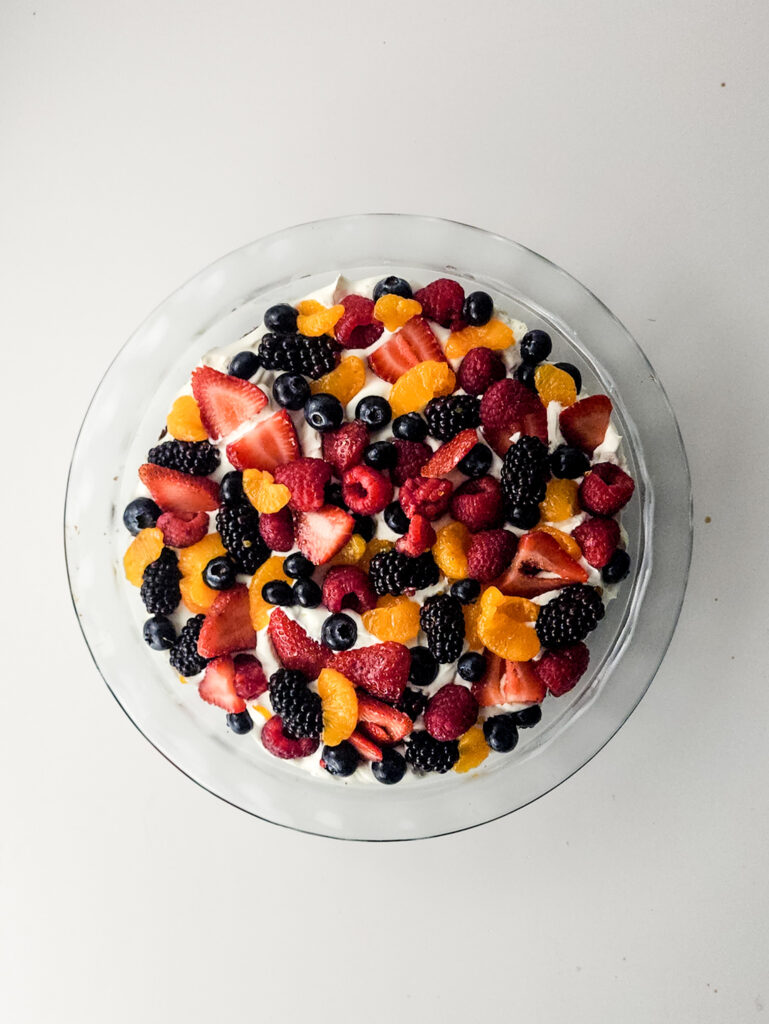
  4. In the meantime thaw your cool whip and prepare your strawberries, mandarin oranges, blueberries, raspberries, and blackberries.
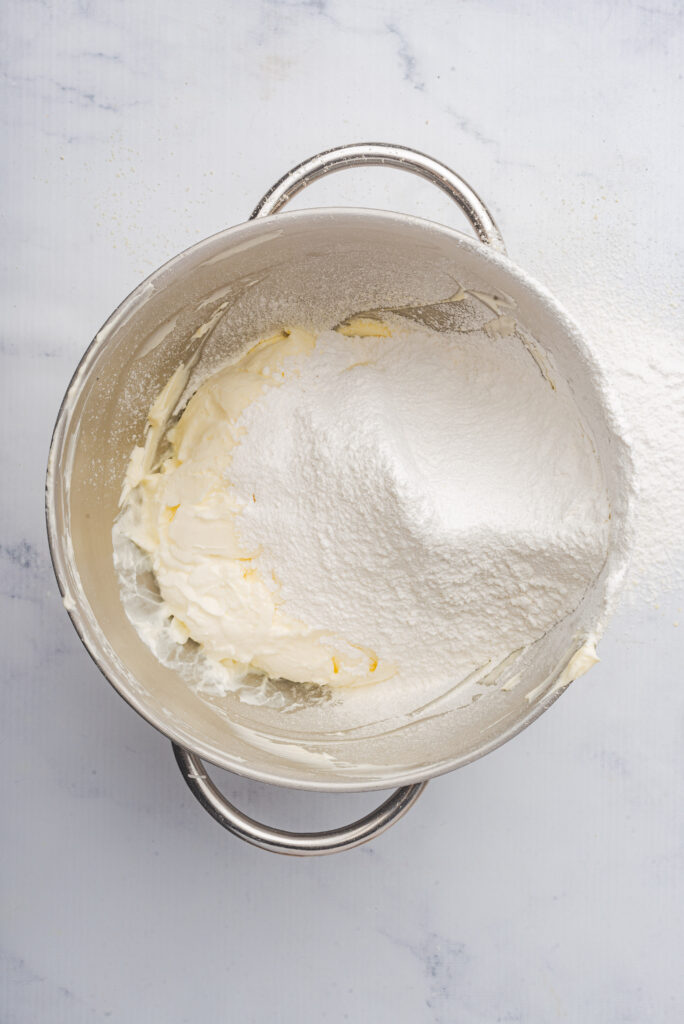
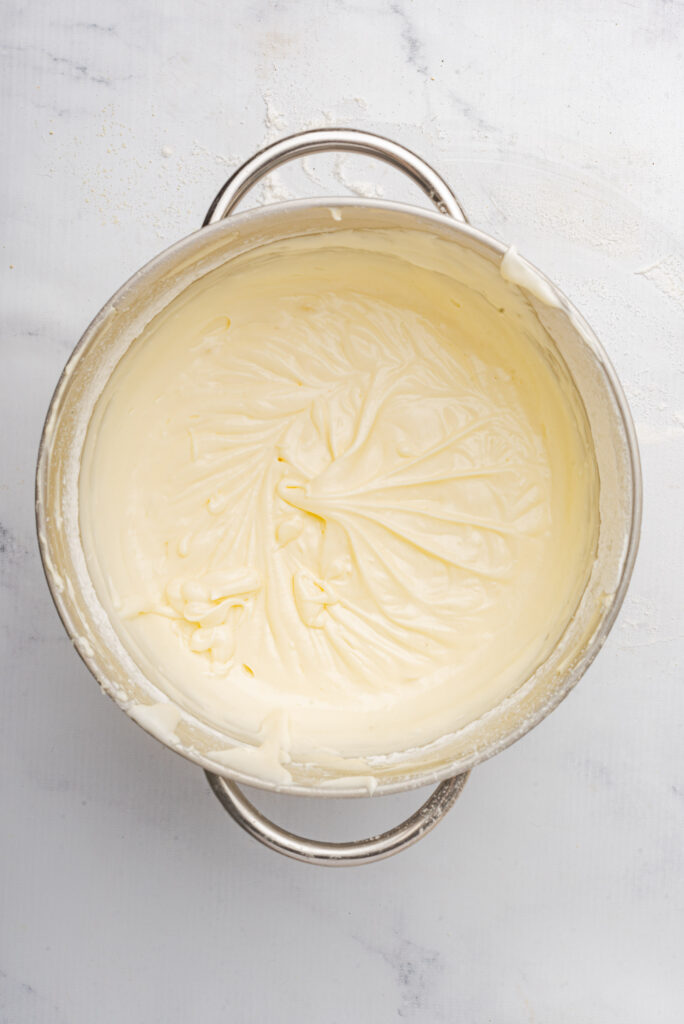
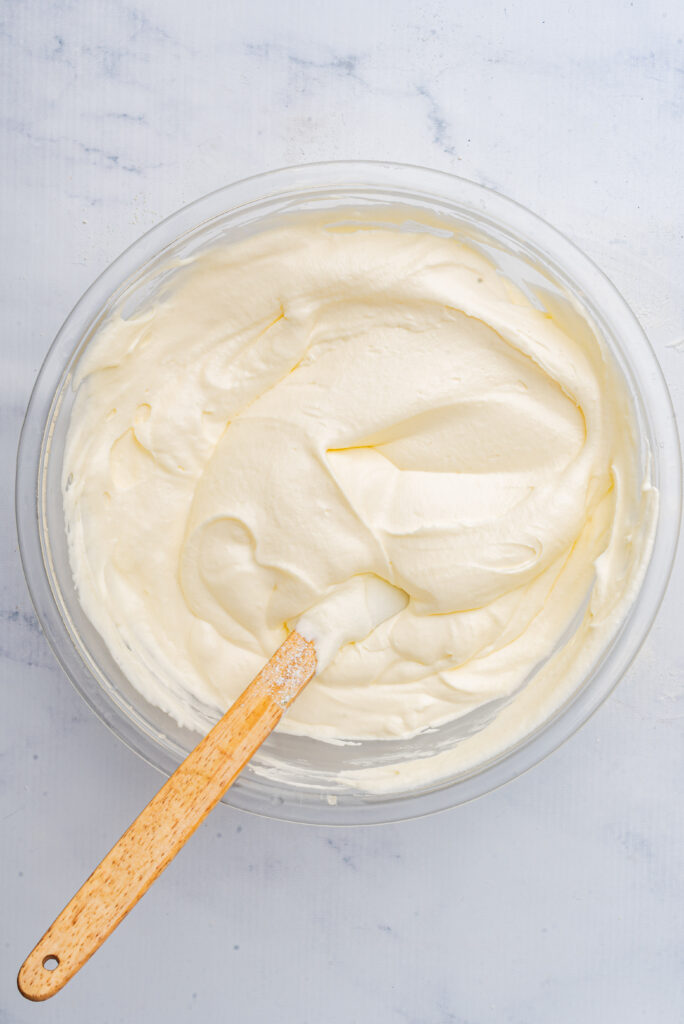
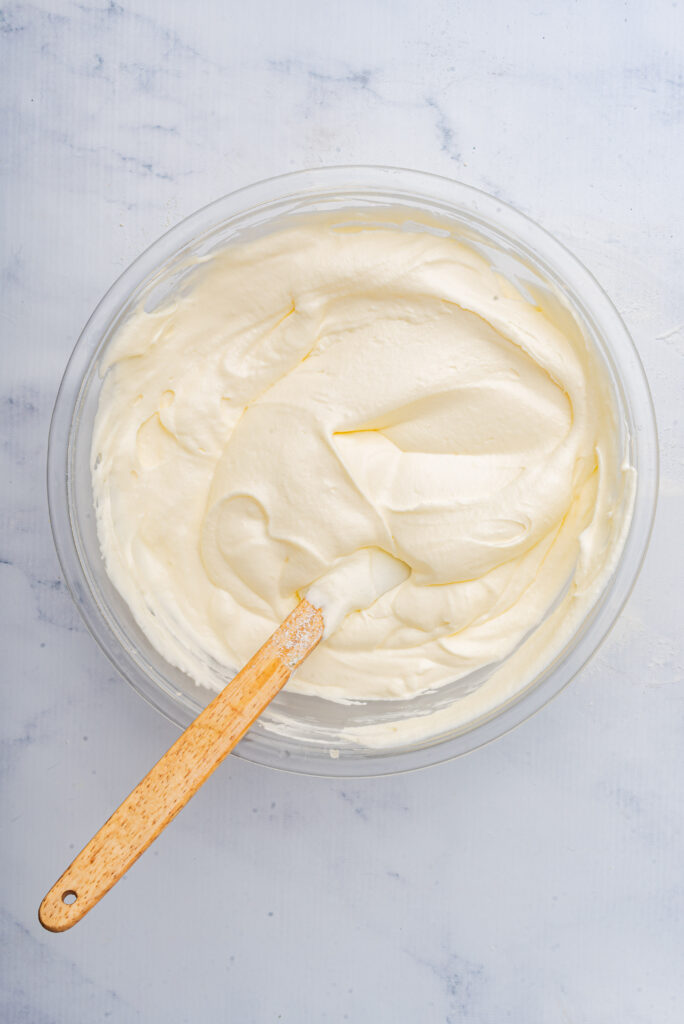
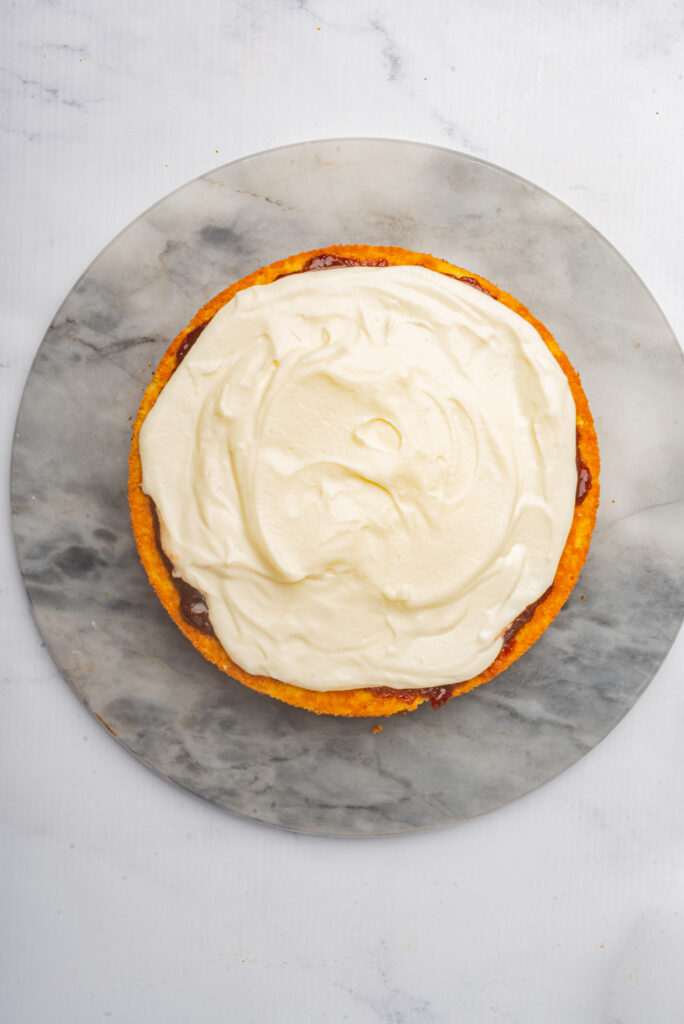
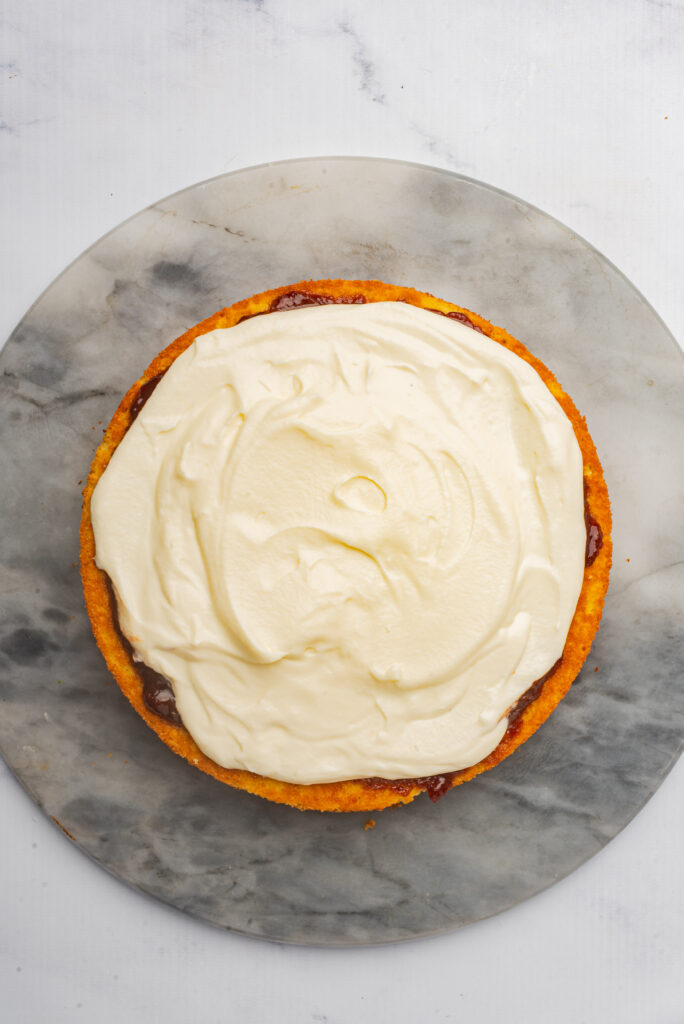
  5. Once the brownie has cooled, fill it with a generous layer of cool whip to act as the “pizza sauce”.
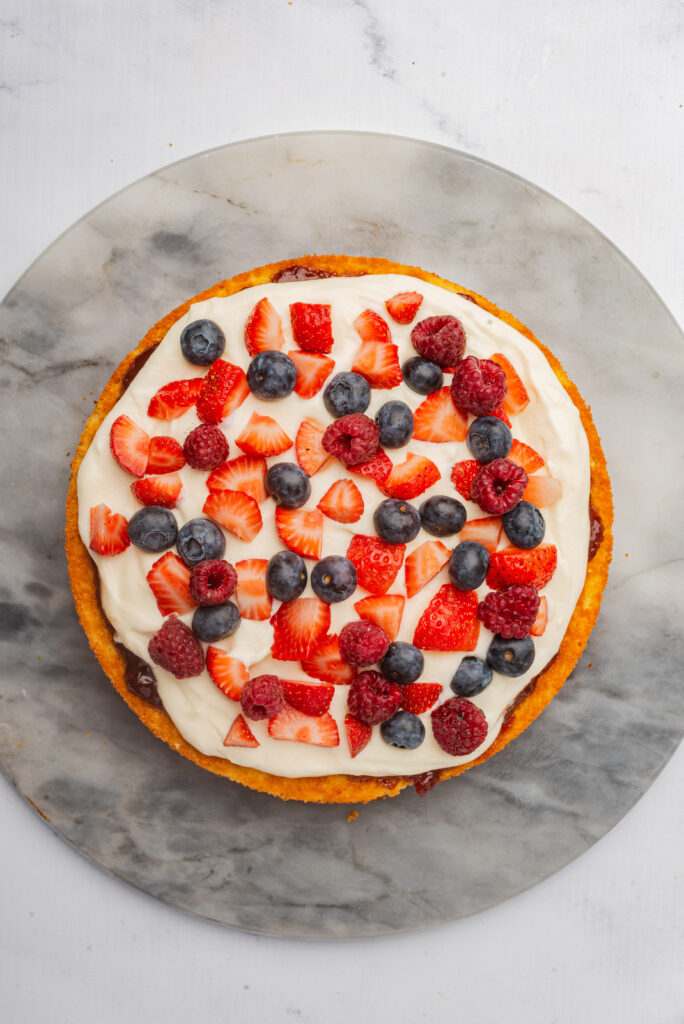
  6. Arrange the fruit in whatever fashion you desire, being strategic in spreading each fruit evenly across the pizza, so that every slice would get a bit of each fruit.
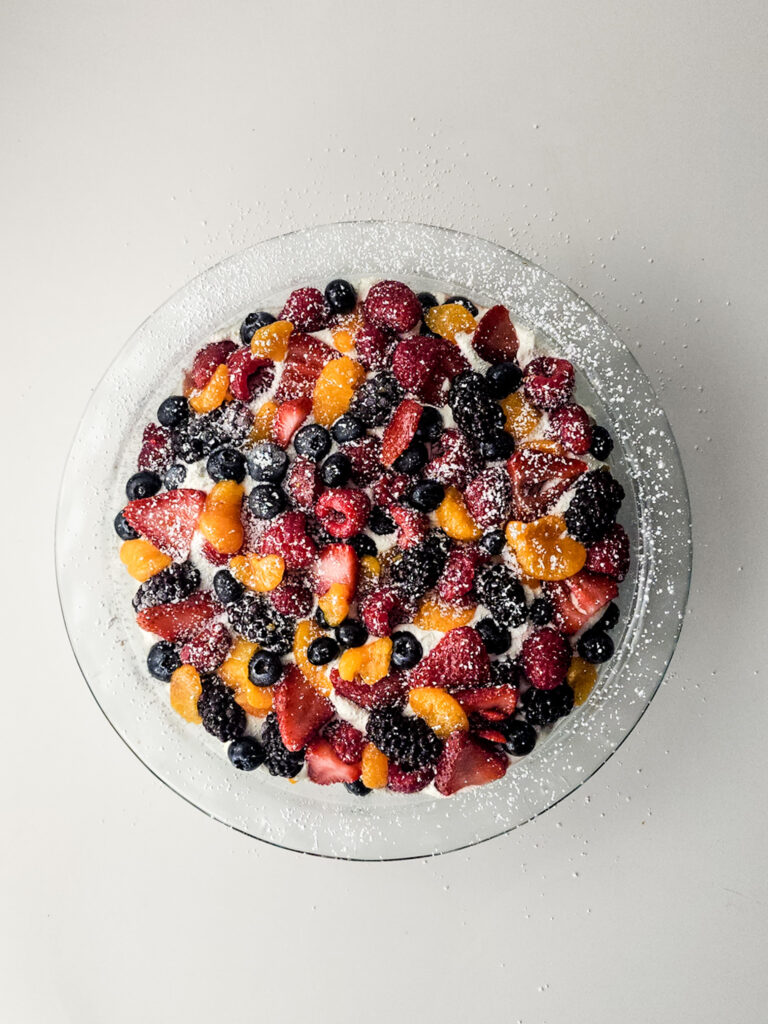
  7. Use a knife to cut the brownie pizza or cover it in plastic wrap and place it in the refrigerator for storing.
Gluten-Free Brownie Fruit Pizza

Gluten-Free Sourdough Bread

March 2, 2025

Making gluten-free sourdough bread is a bit different from traditional wheat-based bread, but with your active starter, you're ready to bake! This recipe will guide you through the process step by step.

Gluten-Free Sourdough Bread

Need to make your starter? Here's my easy sourdough starter recipe!

Gluten-Free Sourdough Bread

Ingredients (for a medium loaf)

For the bread:

  • 200 g active gluten-free sourdough starter (bubbly and ready to use).
  • 500 g gluten-free flour blend (a mix of rice flour, sorghum flour, buckwheat flour, tapioca starch, and potato starch works well).
  • 10 g salt (adjust to taste).
  • 350-400 ml warm water (depending on flour absorption).
  • 1 teaspoon psyllium husk (optional, helps with structure and elasticity).
  • 1 teaspoon apple cider vinegar (optional, enhances fermentation).

For the topping (optional):

  • Seeds (sesame, chia, flax, etc.).
  • Gluten-free oats.

Instructions

Gluten-Free Sourdough Bread

Step 1: Prepare the dough

1. In a large bowl, mix the gluten-free sourdough starter with the warm water until fully combined.

2. Add the gluten-free flour blend, salt, psyllium husk (if using), and apple cider vinegar (if using). Stir until well incorporated.

3. The dough will be stickier and less elastic than traditional wheat dough—this is normal. If it's too dry, add more water (1-2 tablespoons at a time).

Step 2: First fermentation

1. Cover the bowl with a clean cloth or plastic wrap.

2. Let the dough rest at room temperature (68-77°F / 20-25°C) for 4-6 hours. The dough should increase slightly in volume and show bubbles.

Gluten-Free Sourdough Bread

Step 3: Shape the bread

1. Lightly grease a loaf pan (rectangular or round) or line it with parchment paper.

2. With damp hands (to prevent sticking), transfer the dough to the pan and gently shape it.

3. Sprinkle seeds or gluten-free oats on top if desired.

Step 4: Second fermentation

1. Cover the pan with a clean cloth and let the dough rise for another 2-4 hours, or until it increases slightly in volume.

2. Preheat the oven to 220°C (425°F) during the last 30 minutes of fermentation.

Gluten-Free Sourdough Bread

Step 5: Bake the bread

1. Before baking, score the top of the dough with a sharp knife (this helps it expand evenly).

2. Bake for 40-50 minutes:

First 20 minutes at 220°C (425°F).

Then reduce the temperature to 200°C (390°F) and bake until golden brown and the loaf sounds hollow when tapped.

3. If the bread browns too quickly, cover it with aluminum foil.

Step 6: Cool the bread

1. Remove the bread from the oven and let it cool in the pan for 10 minutes.

2. Transfer it to a wire rack and allow it to cool completely before slicing (this takes 1-2 hours).

Gluten-Free Sourdough Bread

Additional Tips

Texture: Gluten-free bread tends to be denser than wheat bread, but psyllium husk and proper fermentation help improve structure.

Flour Variations: Experiment with different flour combinations to find your preferred taste and texture.

Storage: Store the bread in a cloth or paper bag for 1-2 days at room temperature. For longer storage, refrigerate and toast before eating.

FAQs

1. Why is my dough so sticky?

Gluten-free doughs lack elasticity and tend to be stickier. Wetting your hands when handling the dough can help.

2. Can I use a different flour blend?

Yes! Try different combinations of gluten-free flours, but keep a balance between starches and whole-grain flours for a good texture.

3. How do I know when my sourdough starter is ready?

It should be bubbly and double in volume after feeding. If it's sluggish, give it an extra feeding before baking.

4. Can I freeze this bread?

Yes! Slice it first, then freeze in an airtight container for up to 3 months. Toast before serving.

Gluten-Free Sourdough Starter

March 2, 2025

Embarking on a gluten-free sourdough journey is an exciting endeavor for those who love the tangy flavor and chewy texture of sourdough bread but cannot tolerate gluten.

Creating a gluten-free sourdough starter is the first step in this process, and it involves harnessing the power of wild yeast and bacteria to naturally leaven your bread.

Gluten-Free Sourdough Starter

While the process may seem daunting at first, with a little patience and the right ingredients, you can successfully cultivate a thriving gluten-free starter that will serve as the foundation for your delicious, homemade gluten-free sourdough breads.

In this guide, we will walk you through the steps of creating and maintaining your own gluten-free sourdough starter, ensuring that you can enjoy the benefits of this ancient baking tradition without compromising your dietary needs.

Gluten-Free Sourdough Starter

Ingredients

  • Gluten-free flour (Choose a mix of 2-3 flours for the best results – use a total of 60 g (½ cup) per feeding):
  • Brown rice flour
  • Sorghum flour
  • Millet flour
  • Buckwheat flour
  • Quinoa flour
  • Chickpea flour (use sparingly, as it has a strong flavor)
  • Avoid highly refined flours like white rice or cornstarch, as they lack nutrients for fermentation.
  • Filtered or dechlorinated water (60 ml / ¼ cup per feeding)

Step-by-Step Instructions

Gluten-Free Sourdough Starter

Day 1: Starting the Starter

1. Mix 60 g (½ cup) of gluten-free flour with 60 ml (¼ cup) of warm water (about 77–86°F / 25–30°C) in a clean glass jar.

2. Stir well until smooth and no lumps remain. The mixture should be thick but manageable.

3. Cover the jar with a clean cloth or paper towel and secure it with a rubber band.

4. Let it sit at room temperature (68–77°F / 20–25°C) for 24 hours.

Gluten-Free Sourdough Starter

Day 2: Observation

1. Check for small bubbles on the surface—this indicates fermentation has begun.

2. If no bubbles appear, don’t worry, it can take longer.

3. Discard half of the starter (about 60 g / ¼ cup). Then add:

30 g (¼ cup) of gluten-free flour

30 ml (2 tbsp) of warm water

4. Stir well, cover, and let it sit for another 24 hours.

Gluten-Free Sourdough Starter

Day 3: Feeding

1. You should see more bubbles and a slight rise in volume.

2. Discard half of the starter and add:

30 g (¼ cup) of gluten-free flour

30 ml (2 tbsp) of warm water

3. Mix well, cover, and let it rest for another 24 hours.

Gluten-Free Sourdough Starter

Day 4 and Beyond: Daily Feeding

1. Repeat the process every day:

Discard half of the starter.

Add 30 g (¼ cup) of gluten-free flour and 30 ml (2 tbsp) of warm water.

Mix well, cover, and let it ferment.

2. Over time, your starter will become more active, with consistent bubbles and a mild tangy smell.

---

Gluten-Free Sourdough Starter

When Is the Starter Ready?

Your gluten-free sourdough starter is ready when:

It doubles in size within 4–6 hours after feeding.

It has plenty of bubbles and a pleasant, slightly tangy smell.

This process takes 5–10 days, depending on temperature and flour choice.

Maintaining the Starter

Once active, store it in the refrigerator and feed it once a week.

If kept at room temperature, feed it daily.

Additional Tips

1. Be patient: Gluten-free starters often take longer to develop than wheat-based ones.

2. Keep it warm: A consistent 68–77°F (20–25°C) environment speeds up fermentation.

3. Try different flours: Experiment to find the best combination for flavor and texture.

4. Watch for bad smells: If it smells rotten or unpleasant, discard it and start over.

Ube Crinkle Cookies (Purple Yam Cookies)

February 20, 2025

Prepare to be delighted by these gluten-free ube crinkle cookies! Soft, chewy, and bursting with the unique, earthy sweetness of purple yam, these cookies are a perfect fusion of Filipino flavors and classic crinkle cookie texture.

Ube Crinkle Cookies (Purple Yam Cookies)

Rolled in powdered sugar for a beautiful crackled finish, these vibrant purple treats are sure to be a hit with everyone, whether they follow a gluten-free diet or simply love exploring new and exciting dessert options.

Ingredients:

  • 1 cup gluten-free all-purpose flour (increased from ¾ cup)
  • 1 tsp baking powder
  • ⅛ tsp salt
  • ¼ cup unsalted butter, softened
  • ¼ cup granulated sugar
  • 1 small egg (or whisk a large egg and use half)
  • ¼ cup ube jam
  • ½ tsp ube extract
  • ½ teaspoon vanilla extract 
  • Powdered sugar for rolling

Prep Time: 15 minutes

Chill Time: 1 hour (or overnight)

Cooking Time: 12-15 minutes

Total Time: ~1 hour 30 minutes

Servings: 15 cookies

Ube Crinkle Cookies (Purple Yam Cookies)

Instructions:

  1. Prepare the dough:
    • In a bowl, whisk together the gluten-free all-purpose flour and baking powder. Set aside.
    • In a separate mixing bowl, cream together softened butter and granulated sugar until light and fluffy. Add the egg and beat well until just incorporated.
    • Add ube jam, and ube extract, mixing until well incorporated.
  2. Combine:
    • Gradually add the dry ingredients into the wet mixture, stirring until a smooth dough forms.
    • Cover the dough and refrigerate for at least 1 hour (or up to overnight) to firm up.
  3. Preheat & Shape:
    • Preheat the oven to 350°F (175°C) and line a baking sheet with parchment paper.
    • Scoop about 1 tablespoon of dough per cookie and roll into balls.
  4. Coat with powdered sugar:
    • Roll each dough ball generously in powdered sugar, ensuring a thick coating.
    • Place on the prepared baking sheet, spacing them about 2 inches apart.
  5. Bake:
    • Bake for 12-15 minutes, or until the cookies have spread slightly and developed cracks.
    • Let them cool on the baking sheet for a few minutes before transferring to a wire rack.
  6. Enjoy!
    • Serve once cooled, or store in an airtight container for up to 3 days.

Notes:

Chilling is essential – This prevents the cookies from spreading too much.
Generous powdered sugar coating – Helps create a more defined crinkle effect.
For a chewier texture, slightly underbake the cookies (around 12 minutes).
For a stronger ube flavor, increase the ube extract slightly (up to ¾ tsp).
Storage: Store in an airtight container at room temperature for up to 3 days or refrigerate for up to a week.

Ube Crinkle Cookies (Purple Yam Cookies)
In a bowl, whisk together the gluten-free all-purpose flour and baking powder. Set aside.
Ube Crinkle Cookies (Purple Yam Cookies)
In a separate mixing bowl, cream together softened butter and granulated sugar until light and fluffy. Add the egg and beat well until just incorporated.
Ube Crinkle Cookies (Purple Yam Cookies)
Gradually add the dry ingredients into the wet mixture, stirring until a smooth dough forms.
Ube Crinkle Cookies (Purple Yam Cookies)
Cover the dough and refrigerate for at least 1 hour (or up to overnight) to firm up.
Ube Crinkle Cookies (Purple Yam Cookies)
Scoop about 1 tablespoon of dough per cookie and roll into balls.
Ube Crinkle Cookies (Purple Yam Cookies)
Roll each dough ball generously in powdered sugar, ensuring a thick coating.
Ube Crinkle Cookies (Purple Yam Cookies)
Place on the prepared baking sheet, spacing them about 2 inches apart.
Ube Crinkle Cookies (Purple Yam Cookies)
Bake for 12-15 minutes, or until the cookies have spread slightly and developed cracks.
Ube Crinkle Cookies (Purple Yam Cookies)
Let them cool on the baking sheet for a few minutes before transferring to a wire rack.

FAQs:

Can I use regular flour instead of gluten-free flour?

Yes! You can substitute with all-purpose flour in the same amount (1 cup).

What if I don’t have ube jam?

You can substitute ube halaya or increase the ube extract slightly (to ¾ tsp), but the cookies may be less sweet and slightly drier.

Why do my cookies not have a strong crinkle effect?

This could be due to:

  • Not rolling in enough powdered sugar (make sure it’s a thick layer).
  • Skipping the chilling step, which helps control spreading.
  • Overbaking, which reduces the contrast between cracks.

Can I freeze the dough?

Yes! Roll the dough into balls and freeze for up to 3 months. When ready to bake, let them thaw slightly, roll in powdered sugar, and bake as usual.

Can I make these dairy-free?

Yes! Substitute vegan butter for the unsalted butter to make them dairy-free.

Easy Ube Brownies

February 19, 2025

Get ready to savor a delightful twist on classic brownies with these gluten-free ube brownie delights!

Ube Brownies (Gluten-Free)

Our recipe combines the rich, earthy sweetness of purple yam (ube) with the indulgent goodness of chocolate, creating a unique and irresistible treat. Perfect for those following a gluten-free diet or anyone looking to explore new flavors, these ube brownies are sure to become a new favorite.

Prepare to be amazed by their velvety texture, vibrant color, and the delicious fusion of Filipino and Western dessert traditions in every bite!

Ingredients:

Dry Ingredients:

  • 1 cup gluten-free all-purpose flour
  • ½ tsp baking powder

Wet Ingredients:

  • ½ cup (1 stick) unsalted butter
  • ½ cup white chocolate, melted
  • ½ cup ube jam
  • ¾ cup granulated sugar
  • 2 large eggs
  • 1 tsp vanilla extract

Prep Time: 15 minutes

Bake Time: 25 minutes

Cooling Time: 1 hour

Servings: 9-12 brownies


Ube Brownies (Gluten-Free)

Instructions:

  1. Preheat & Prepare:
    • Preheat oven to 350°F (175°C).
    • Line an 8x8-inch baking pan with parchment paper and lightly grease it.
  2. Combine Wet ingredients
    • In a microwave-safe bowl, melt the butter. 
    • Add melted white chocolate, butter, and ube yam in a large bowl and mix until well combined.
    • Add sugar, eggs, and vanilla extract and keep beating until smooth.
  3. Combine Dry & Wet Ingredients:
    • Gradually fold the dry ingredients (flour and baking powder) into the wet mixture until just combined.
  4. Bake:
    • Pour the batter into the prepared baking pan. Smooth the top with a spatula.
    • Bake for 25 minutes, or until a toothpick inserted in the center comes out with a few moist crumbs (not wet batter).

Notes

  • For a fudgier texture, slightly underbake the brownies and let them set while cooling.
  • For a stronger ube flavor, add ½ teaspoon of ube extract.
  • Store in an airtight container at room temperature for 3 days or in the fridge for up to a week.
  • For extra indulgence, drizzle melted white chocolate on top once cooled.
Easy Ube Brownies
Ingredients for ube brownies
Easy Ube Brownies
Combine wet ingredients (white chocolate, butter, & ube yam)
Easy Ube Brownies
Easy Ube Brownies
Add sugar, eggs, and vanilla extract and beat until smooth
Easy Ube Brownies
Easy Ube Brownies
Gradually fold flour and baking powder into wet mixture until just combined
Easy Ube Brownies
Pour batter into prepared baking pan
Easy Ube Brownies
Smooth top with spatula
Ube Brownies (Gluten-Free)
Bake for 25 minutes at 350°F
Ube Brownies (Gluten-Free)
Enjoy!

FAQs

Can I use coconut oil instead of butter?

Yes, but it may slightly change the texture and flavor. Use the same amount (½ cup melted coconut oil).

What’s the best gluten-free flour to use?

A 1:1 gluten-free all-purpose flour blend with xanthan gum works best. If your blend doesn’t have xanthan gum, add ¼ teaspoon for structure.

Can I make these brownies dairy-free?

Yes! Substitute:

  • Butter → Vegan butter or melted coconut oil
  • White Chocolate → Dairy-free white chocolate

 Can I add mix-ins?

Absolutely! Here are some great options:

  • ½ cup white chocolate chips for extra sweetness.
  • ¼ cup chopped macadamia nuts for a crunchy texture.
  • ¼ cup shredded coconut for a tropical twist.

Why did my brownies turn out too dry?

  • Overbaking is the most common cause. Try reducing bake time by 2-3 minutes next time.
  • Make sure your ube jam is soft and not too dry—microwave for a few seconds if needed.

How do I make these extra fudgy?

  • Add 1 extra egg for a richer texture.
  • Reduce the baking powder to ¼ tsp for denser brownies.
  • Cool the brownies completely before slicing—fudgy brownies set as they cool!

Can I make these ahead of time?

Yes! These brownies taste even better the next day as the flavors develop. Store them in an airtight container at room temperature or refrigerate for a firmer texture.

Can I freeze these brownies?

Yes! Wrap individual brownies in plastic wrap and store in an airtight container. Freeze for up to 3 months. To eat, thaw at room temperature for about 30 minutes.

What can I serve these with?

  • A scoop of vanilla ice cream
  • Drizzle of condensed milk
  • Fresh fruit like mangoes or strawberries
  • A sprinkle of sea salt for contrast

How do I know when they’re done baking?

Use the toothpick test: Insert a toothpick in the center—if it comes out with a few moist crumbs, they're done! If it’s wet, bake for 2 more minutes and check again.

Matcha White Chocolate Chip Cookies With Brown Butter

February 6, 2025

Get ready to experience a delightful twist on the classic chocolate chip cookie with these Matcha White Chocolate Chip Cookies featuring nutty brown butter and a gluten-free recipe.

Matcha White Chocolate Chip Cookies With Brown Butter (Gluten-Free)

The earthy, slightly bitter notes of matcha green tea powder perfectly complement the rich, caramelized flavor of brown butter, creating a unique and irresistible taste sensation. Studded with creamy white chocolate chips, these cookies offer a delightful contrast of flavors and textures.

Matcha White Chocolate Chip Cookies With Brown Butter (Gluten-Free)

Ingredients:

Flour:1 ¾ cups gluten-free blend flour or 1 ½ cups almond flour + ¼ cup coconut flour

  • 1 tablespoon matcha powder
  • ½ teaspoon baking soda
  • ¼ teaspoon salt
  • ¼ cup maple syrup or honey 
  • 1 teaspoon vanilla extract
  • 1 large egg
  • ½ cup dairy-free white chocolate chips
  • ½ cup brown butter (cooled)

Prep Time: 15 minutes

Cooking Time: 10-12 minutes

Makes: Approximately 10 cookies

Instructions:

  1. Preheat the oven to 350°F (180°C) and line a baking sheet with parchment paper.
  2. In a mixing bowl, whisk together blend flour, matcha powder, baking soda, and salt until well combined.
  3. In a separate bowl, mix the cooled brown butter, maple syrup, vanilla extract, and egg until smooth.
  4. Gradually add the wet ingredients to the dry ingredients, stirring until a dough forms. Fold in the white chocolate chips until evenly distributed.
  5. Using a cookie scoop or spoon, portion out the dough and place it on the prepared baking sheet, leaving space between each cookie. I made 10 balls of 45 grams each.
  6. Gently flatten the cookies with the back of a spoon or your fingers. (optional)
  7. Bake in the preheated oven for 10-12 minutes, or until the edges are lightly golden.
  8. Remove from the oven and allow the cookies to cool on the baking sheet for a few minutes before transferring them to a wire rack to cool completely.
  9. Enjoy!
In a mixing bowl, whisk together blend flour, matcha powder, baking soda, and salt until well combined.
In a separate bowl, mix the cooled brown butter, maple syrup, vanilla extract, and egg until smooth.
Gradually add the wet ingredients to the dry ingredients, stirring until a dough forms.
Fold in the white chocolate chips until evenly distributed.
Using a cookie scoop or spoon, portion out the dough and place it on the prepared baking sheet, leaving space between each cookie. I made 10 balls of 45 grams each.
Matcha White Chocolate Chip Cookies With Brown Butter (Gluten-Free)
Remove from the oven and allow the cookies to cool on the baking sheet for a few minutes before transferring them to a wire rack to cool completely.

Notes:

  • Adjust the sweetness by using maple syrup or honey according to your preference.
  • Ensure the brown butter is cooled before incorporating it into the cookie dough for the best results.
  • Store the cookies in an airtight container to maintain freshness.
  • To prevent the cookies from spreading too much during baking, chill the dough in the refrigerator for 30 minutes before scooping and baking.
  • For a stronger matcha flavor, you can adjust the amount of matcha powder to suit your taste preferences.
  • Experiment with adding chopped nuts or dried fruits for extra texture and flavor.
  • Make sure to cool the cookies completely on a wire rack before storing to maintain their crispness.
  • If you prefer a chewier texture, slightly underbake the cookies and let them continue to set on the baking sheet after removing them from the oven.
  • Feel free to customize the sweetness level by adjusting the amount of maple syrup or honey used in the recipe.

How to make brown butter:

  1. Cut the Butter: Start by cutting the amount of butter needed for your recipe into smaller pieces. It's usually best to use unsalted butter for browning.
  2. Melt: Place the butter in a light-colored saucepan or skillet over medium heat. The light color will help you see the color change as the butter browns.
  3. Heat the Butter: Allow the butter to melt completely. It will start to bubble and foam as it cooks. Swirl the pan occasionally to ensure even cooking.
  4. Watch for Color and Aroma: The butter will go through several stages: foaming, then the milk solids will sink to the bottom, and finally, it will turn a golden brown color. You will also notice a nutty aroma.
  5. Remove from Heat: Once the butter reaches a golden brown color and has a nutty fragrance, remove it from the heat immediately. Be careful not to let it burn, as it can happen quickly.
  6. Transfer: Pour the brown butter into a heatproof container, leaving any dark sediment behind in the pan. Allow it to cool before using it in your recipe.
Matcha White Chocolate Chip Cookies With Brown Butter (Gluten-Free)

FAQs with Answers:

  1. How should I store the cookies to keep them fresh for longer?
    • Store the cookies in an airtight container at room temperature for up to 3-4 days. For longer storage, you can freeze the cookies in a freezer-safe container or bag for up to 2-3 months.
  1. Can I substitute the white chocolate chips with another type of chocolate?
    • Yes, you can substitute white chocolate chips with dark chocolate chips, milk chocolate chips, or even chopped chocolate bars according to your preference.
  2. Is it necessary to flatten the cookies before baking?
    • Flattening the cookies before baking is optional. It can help ensure even baking and create a slightly different texture. Feel free to experiment with both flattened and unflattened cookies.
  3. Can I freeze the cookie dough for later use?
    • Yes, you can freeze the cookie dough for later use. Shape the dough into balls, place them on a baking sheet lined with parchment paper, freeze until solid, then transfer to a freezer bag. Bake from frozen, adding a couple of extra minutes to the baking time.
  1. Can I replace the egg with a vegan egg substitute in this recipe?
    • Yes, you can use a suitable vegan egg substitute like flaxseed meal or chia seeds mixed with water as a replacement for the egg in this recipe. Follow the instructions on the package of the egg substitute for the appropriate ratio.

Chantilly Cake (Gluten-Free)

February 6, 2025

As you dive into the world of gluten-free desserts, you'll discover the delightful Chantilly cake that seamlessly combines the elegance of a classic French cake with your dietary needs.

Chantilly Cake (Gluten-Free)

This cake will tantalize your taste buds with its layers of light, airy sponge cake made with gluten-free flour alternatives, such as almond flour or rice flour.

You'll find that the cake layers are generously filled and frosted with a luscious Chantilly cream, a sweetened whipped cream flavored with vanilla that perfectly complements the delicate cake.

 Ingredients:

Vanilla cake
2 cups gluten-free all-purpose flour (I used chickpea flour)
1 ½ teaspoons baking powder
½ teaspoon baking soda
½ teaspoon salt
¾ cup unsalted butter, softened
1 ½ cups granulated sugar
4 large eggs, room temperature
2 teaspoons vanilla extract
1 cup buttermilk

Filling:
½ cup raspberry jam
2 cups strawberries
¼ cup raspberries
½ cup blueberries
Juice from half a lemon

Frosting

1 block (8 ounces) of room-temperature cream cheese.
1 cup heavy whipping cream (240mL)
1 ½ cups powdered sugar, sifted (180g)

Prep Time: 30 minutes

Cooking Time: 25 minutes

Chilling Time: At least 2 hours

Instructions:

  1. Preheat your oven to 350°F (180°C).
  2. Grease and line two 8-inch round cake pans with parchment paper.
  3. In a medium bowl, whisk together the gluten-free flour, baking powder, baking soda, and salt. Set aside.
  4. In another mixing bowl, cream the butter and sugar until light and well combined.
  5. Add the eggs and vanilla and beat well until fully incorporated. Finally, add buttermilk and stir in.
  6. Gradually add the wet ingredients to the dry ingredients, and fold in until just combined.
  7. Divide the batter evenly among the prepared cake pans.
  8. Bake in the preheated oven for 25 minutes, or until a toothpick inserted into the center of the cakes comes out clean.
  9. Allow the cakes to cool in the pans for 10 minutes before transferring them to a wire rack to cool completely.
  10. While the cakes are baking, prepare the frosting:
  11. In the bowl of a stand mixer whip the heavy whipping cream until stiff peaks form. Set aside. 
  12. In the bowl of a stand mixer, beat the room temperature cream cheese and sifted powdered sugar until smooth and creamy and mix until well combined. For about 5 minutes to medium to high speed until it reaches a firm consistency. You can add more powdered sugar to make it more firm. Or even add 100 grams of softened butter and beat for 5 minutes. 
  13. Gently fold the whipped cream cheese mixture into the whipped cream until smooth and creamy. Set aside.

Assembly:

  1. Place one of the cooled vanilla cakes on a serving plate or cake stand.
  2. Spread a layer of raspberry jam on top of the cake.
  3. Add a dollop of the prepared frosting on top of the jam.
  4. Place sliced berries on top of the frosting and squeeze the juice from half a lemon over the berries.
  5. Carefully place the second vanilla cake on top of the frosting layer.
  6. Frost the top and sides of the cake with the remaining frosting, creating a smooth and even layer.
  7. Decorate the top of the cake with additional berries and more frosting or other decorations if desired such as mint leaves.
  8. Chill the cake in the refrigerator for at least two hours before serving to allow the flavors to meld together.
Chantilly Cake (Gluten-Free)
Cake Ingredients
Chantilly Cake (Gluten-Free)
Frosting, Jam & Toppings
In a medium bowl, whisk together the gluten-free flour, baking powder, baking soda, and salt. Set aside.
In another mixing bowl, cream the butter and sugar until light and well combined.
Add the eggs and vanilla and beat well until fully incorporated.
Finally, add buttermilk and stir in.
Gradually add the wet ingredients to the dry ingredients, and fold in until just combined.
Divide the batter evenly among the prepared cake pans.
Bake in the preheated oven for 25 minutes, or until a toothpick inserted into the center of the cakes comes out clean.
In the bowl of a stand mixer whip the heavy whipping cream until stiff peaks form. Set aside. 
In the bowl of a stand mixer, beat the room temperature cream cheese and sifted powdered sugar until smooth and creamy and mix until well combined.
Gently fold the whipped cream cheese mixture into the whipped cream until smooth and creamy. Set aside.
Place one of the cooled vanilla cakes on a serving plate or cake stand.
Spread a layer of raspberry jam on top of the cake.
Add a dollop of the prepared frosting on top of the jam.
Chantilly Cake (Gluten-Free)
Place sliced berries on top of the frosting and squeeze the juice from half a lemon over the berries.
Chantilly Cake (Gluten-Free)
Carefully place the second vanilla cake on top of the frosting layer.
Chantilly Cake (Gluten-Free)
Frost the top and sides of the cake with the remaining frosting, creating a smooth and even layer.
Chantilly Cake (Gluten-Free)
Decorate the top of the cake with additional berries and more frosting or other decorations if desired such as mint leaves.

Notes:

  • Ensure the cream cheese is at room temperature for the frosting to achieve a smooth and creamy texture.
  • Ensure all ingredients are at room temperature for best results.
  • Use fresh berries for the best flavor and appearance.
  • Allow the cake to cool completely before frosting to prevent the frosting from melting.
  • When measuring the gluten-free all-purpose flour, spoon it into the measuring cup and level it off with a straight edge to avoid packing too much flour into the cup.
  • To ensure a light and fluffy cake, do not overmix the batter once the wet and dry ingredients are combined.
  • If you prefer a sweeter filling, you can add a bit of powdered sugar to the raspberry jam before spreading it on the cake.
  • For a burst of citrus flavor, consider adding some lemon zest to the cake batter or frosting.
  • To make the frosting even more luxurious, you can add a splash of vanilla extract or a hint of almond extract for additional flavor.
  • If you want to enhance the presentation, consider piping a decorative border around the top and bottom edges of the cake using a piping bag and a decorative tip.
  • Before serving, allow the cake to sit at room temperature for about 20-30 minutes to soften slightly for better texture and flavor.
  • To store any leftover cake, cover it tightly with plastic wrap or store it in an airtight container in the refrigerator. Bring it to room temperature before serving for the best taste and texture.

Tips to Make the Cake More Moist:

  1. Add Sour Cream or Yogurt: Incorporating sour cream or yogurt into the batter can add moisture to the cake. These dairy products also contribute to a tender crumb texture.
  2. Use Buttermilk: Buttermilk is acidic and helps to tenderize the gluten in the flour, resulting in a moist cake. It also reacts with baking soda to provide leavening and a soft texture.
  3. Add Fruit Puree: Adding fruit puree like applesauce, mashed bananas, or pureed berries can increase moisture content in the cake while adding natural sweetness and flavor.
  4. Include Vegetable Oil: Using vegetable oil instead of butter in the cake batter can help retain moisture since oil is a liquid fat that keeps cakes moist for longer periods.
  5. Avoid Overbaking: Be cautious not to overbake the cake, as it can result in a dry texture. Use a toothpick or cake tester to check for doneness - it should come out with a few moist crumbs attached, but not wet.
  6. Brush with Simple Syrup: After baking and cooling the cake layers, brushing them with a simple syrup made of equal parts sugar and water can add extra moisture and flavor.
  7. Cover While Cooling: To trap moisture in the cake as it cools, cover it with a clean kitchen towel or plastic wrap while it's still slightly warm.
Chantilly Cake (Gluten-Free)

FAQs:

  1. Is it possible to make this cake ahead of time and store it in the refrigerator?
    • Yes, you can make this cake ahead of time and store it in the refrigerator. It's actually recommended to chill the cake in the refrigerator for at least two hours before serving to allow the flavors to meld together.
  2. How long will the cake stay fresh if stored in the refrigerator?
    • The cake will stay fresh for about 3-4 days when stored in the refrigerator, covered to prevent drying out.
  1. Can I freeze the cake for later consumption?
    • Yes, you can freeze the cake for later consumption. Wrap it tightly in plastic wrap and store it in an airtight container before freezing. Thaw in the refrigerator before serving.
  1. Is it necessary to use buttermilk in the cake batter, or are there any suitable substitutes?
    • Buttermilk adds a nice tang and tenderness to the cake. If you don't have buttermilk, you can make a substitute by adding 1 tablespoon of white vinegar or lemon juice to 1 cup of milk and letting it sit for 5-10 minutes.
  1. How can I adjust the sweetness of the cream cheese frosting to suit my preference?
    • You can adjust the sweetness of the cream cheese frosting by adding more or less powdered sugar to suit your taste. Taste as you go and adjust accordingly.

Red Velvet Cupcakes for Valentine's Day

January 1, 2025

Celebrate love this Valentine’s Day with a delicious twist on a classic favorite—gluten-free red velvet cupcakes!

These delightful treats are not only visually stunning with their vibrant red hue and creamy frosting but also cater to those with gluten sensitivities, ensuring everyone can indulge in a sweet moment.

Whether you're baking for your special someone or hosting a romantic gathering, these moist and flavorful cupcakes are sure to impress and make the day even more memorable.

Let’s dive into this easy recipe that combines love and flavor in every bite!

Ingredients for the cupcakes

  • 2 ½ cups of rice flour or gluten-free blend (see note 1)
  • 2 tablespoons of baking soda
  • 1 ½ tablespoons of baking powder
  • 4 tablespoons of cocoa powder
  • 1 teaspoon of salt
  • 1 ½ cups of granulated sugar
  • 1 cup of vegetable oil
  • 2 eggs
  • 1 cup of buttermilk
  • 2 teaspoons of vanilla essence
  • 4 teaspoons of red food coloring

Ingredients for the cream cheese frosting

  • 100 grams of butter
  • 100 grams of powdered sugar
  • 200 grams of cream cheese
  • Pink food coloring (optional)

Decoration (optional)

  • Sprinkles

How to make gluten-free red velvet cupcakes

Prep Time: 20 minutes

Cooking Time: 18-20 minutes

For the cupcakes:

  1. Preheat the oven to 350°F (180°C) and line a cupcake pan with paper liners.
  2. In a large bowl, whisk together the wet ingredients (vegetable oil, buttermilk, eggs) and sugar until well combined.
  3. Add the cocoa powder and red food coloring to the wet mixture and beat until smooth. If you want to adjust the color, this is the time to do it because we don’t want to overmix the batter later.
  4. Sift in the remaining dry ingredients: flour, baking soda, and baking powder. Mix until smooth but make sure not to overmix.
  5. Fill cupcake liners about ⅔ full with the batter.
  6. Bake for 18  minutes or until a toothpick inserted into the center comes out clean.
  7. Allow the cupcakes to cool in the pan for a few minutes before transferring them to a wire rack to cool completely.

For the cream cheese frosting:

  1. In a bowl, beat the butter and powdered sugar together for a few minutes until smooth. Start with low speed and increase the speed until it reaches a smooth texture. About 3 minutes.
  2. Add the cold cream cheese and continue beating until smooth and fluffy. For about 4 minutes on medium speed.
  3. Optionally, add pink food coloring to a portion of the frosting for a two-tone effect. Refrigerate the frosting until ready to use.

Assembly:

  • Once the cupcakes are completely cooled, decorate with the prepared cream cheese frosting and decorate with sprinkles if using.

Notes:

  • Using almond flour or a blend may result in a darker color, while rice flour tends to yield a more vibrant red color.
  • Ensure all ingredients are at room temperature for best results except for the cream cheese.
  • Store cupcakes in an airtight container in the refrigerator for up to 3 days.
  • If you don't have buttermilk, you can make a substitute by adding 1 tablespoon of vinegar or lemon juice to a cup of milk and letting it sit for a few minutes until it curdles.
  • Ensure the cream cheese is cold when adding it to the frosting for the best consistency.
  • Double-check all ingredients to ensure they are free from gluten and other allergens that you or your guests may need to avoid.

FAQs:

Can I use almond flour instead of rice flour?

Almond flour can be used, but note that it may affect the color of the cupcakes.

Can I freeze these cupcakes?

Yes, you can freeze the cupcakes without frosting for up to 1 month. Thaw in the refrigerator before serving.

 How can I adjust the sweetness of the cream cheese frosting?

If you prefer a less sweet frosting, you can reduce the amount of powdered sugar in the cream cheese frosting to suit your taste. Add the sugar gradually, tasting as you go.

Can I freeze the cream cheese frosting?

Cream cheese frosting can be frozen for up to three months. Thaw it in the refrigerator overnight and then bring it to room temperature before using. Remember to give it a good stir to restore its creamy texture.

Cupcake Ingredients. Preheat oven to 350 degrees F.
Mix wet ingredients and sugar until well combined.
Add the cocoa powder and red food coloring and beat until smooth.
If you want to adjust the color, now is the time to do so.
Sift in the remaining dry ingredients.
Dry ingredients: flour, baking soda, and baking powder.
Mix until smooth but do not overmix.
Fill the cupcake liners about ⅔ full with the batter. Bake for 18 minutes.
Baked red velvet cupcakes.
Cream Cheese Frosting Ingredients
In a bowl, beat the butter and powdered sugar together until smooth.
Mixing should take a few minutes. Start with low speed and increase speed until smooth.
Add the cold cream cheese and continue beating until smooth and fluffy. This should take 4 minutes on medium speed.
Optionally, add pink food coloring to a portion of the frosting for a two-tone effect.
Refrigerate until ready to use.
Frost and decorate your cupcakes.
Enjoy!

Moist Gluten Free Lemon Poppy Seed Muffins Recipe!

February 26, 2024

This recipe for gluten free lemon poppy seed muffins is quick, easy, and so simple. Filled with lemon flavor and filled with poppy seeds, this recipe is simple and delicious.

Moist Gluten Free Lemon Poppy Seed Muffins Recipe!

I love how quick and easy muffins are. Some of my favorites are my blueberry muffins, gluten-free blackberry muffins, savory gluten free muffins, rice flour muffins, and my cranberry and orange muffins. Muffins were hard to figure out when I first started gluten-free baking because I did not know how to balance a gluten-free flour blend with enough moisture. These muffins are soft, moist, and tender muffins. These are a delicious breakfast for a weekday morning if you are headed out the door, or, a breakfast treat if you add some chocolate to them!. We do not need a lot in terms of equipment for this recipe so let us get to making the our tasty gluten free muffin recipe!

[feast_advanced_jump_to]

⭐️ TIPS, TRICKS, AND ALTERATIONS:

Fresh lemon juice vs store bought lemon juice: If you wish to use fresh lemons (and who can blame you, it is hard to beat that fresh lemon flavor) for our gluten-free lemon poppy seed muffins then you definitely can. However, I do not like to create extra work for myself and therefore use store bought lemon juice. Do not use lemon extract in place of lemon juice. 

Gluten-Free Flour Blends: are not all created equal. My go-to for muffins is King Arthur's Measure for Measure gluten free flour. I know that by using this that I will end up with a moist muffin. If that is not available near you, you can try Bob's Red Mill Gluten-Free 1:1 Flour. I have not tried it with this flour but I know a lot of gluten free bakers who have success with their gluten free baking flour. Whatever flour blend you use, make sure your blend has xanthan gum in it.

I use 2% milk in this recipe but if you wanted to you could use whole milk.

I use Greek yogurt in this recipe, I have not tried it with sour cream but it would work well as a substitute. 

If you want to add a little bit of fresh lemon zest to add even more lemon flavor, you absolutely can!

If you want to make this almost more into a dessert muffin, you could add a simple lemon glaze on top of the muffins. 

The best way to ensure the best results is always to follow the recipe card.

❤️ Why you will love these gluten free lemon poppy seed muffins:

 They are great for a brunch table or for quick and easy breakfast. It is hard to beat homemade muffins, especially ones that are delicious, gluten free muffins, and safe for you to eat!

📃 Ingredients for gluten free lemon poppy seed muffins:

Ingredients for Moist Gluten Free Lemon Poppy Seed Muffins Recipe!

All Purpose Flour: See my note above on gluten free flours
Large Eggs: They help serve as a binding agent in our recipe
Buttermilk: Buttermilk helps with the moisture in these muffins
Baking Powder: One of the agents to help the muffins rise
Almond Flour: Almond flour(also known as almond meal) is a secret ingredient in these muffins as it makes them super soft
Poppy Seeds: They give delicious sweetness to the muffins
Lemon Juice + lemon zest: The essence of our lemon poppy seed muffins!
Sugars: There is a bit of both white sugar and brown sugar in this recipe to give it a bit of sweetness
Butter: For our batter and for the crumb top. I use unsalted butter.
Vanilla Extract: To help give flavor to our muffins
Plain Greek Yogurt: Adds to the softness and fluffiness of the muffins

All of these simple ingredients should be available at your local grocery store. If you cannot find the gluten free flour you want, you can definitely find it online!

📖 How do I make these muffins?

Preheat your oven to 350°F:  Meanwhile, melt your butter in a large bowl and then mix it with the sugars. You will then add the two eggs to the same bowl and mix them together. Add the vanilla and the greek yogurt, and continue to whisk together.
In a separate bowl: whisk together the dry ingredients (gluten free all purpose flour, almond flour, baking powder). Add half of the flour mixture into the wet ingredients and mix together, then add the buttermilk, and whisk. Once the juice is mixed in, add the remaining dry ingredients and mix together.
Fold in the poppy seeds: with a rubber spatula and set aside. Line a muffin tin with liners, and fill them ⅔ of the way up with the batter. 
Place in the oven:Proceed to place the muffin pan the oven. Baking time is 30 minutes. Remove from the oven and allow to cool on the counter for 10 minutes in the tin. Then enjoy!

sugar and melted butter
Mix the melted butter and sugars together
eggs, sugar, and butter
Whisk in the eggs
muffin mixture
Add the Greek yogurt
flour and muffin mixture
Fold the dry ingredients into the wet ingredients
Moist Gluten Free Lemon Poppy Seed Muffins Recipe batter
Add the buttermilk, lemon juice, lemon zest, and poppy seeds
Moist Gluten Free Lemon Poppy Seed Muffins Recipe batter
Fold the ingredients together
Moist Gluten Free Lemon Poppy Seed Muffins Recipe!
Place the batter into the muffin liners and in the muffin tin
Moist Gluten Free Lemon Poppy Seed Muffins Recipe!
Bake and enjoy

⍰ How to store these gluten free lemon poppy seed muffins?

You can store them in an airtight container and keep them at room temperature for a few days. 

If you wish to freeze the muffins, you can do so by placing the muffins into either a freezer-safe container or a freezer bag. They will last for 3 months so be sure to mark them with the date on them so you know when to eat them by!

🌟 LEAVE A RATING AND REVIEW! 🌟

⭐️⭐️⭐️⭐️⭐️
Did you love this recipe? If you did, let me know! And let others know too by leaving a comment and star rating. Reviews are incredibly useful in helping other people find my site and make my recipes.
Thank you so much!
Laura 

🔎 Looking for other easy recipes?

  • Moist Gluten Free Lemon Poppy Seed Muffins Recipe!
  • Savory Gluten Free Muffins: Cheddar Breakfast Muffins
  • Gluten-Free Blackberry Muffins: Quick & Easy Muffins
  • Gluten Free Cranberry Orange Muffins on a wooden slab
    Gluten Free Cranberry Orange Muffins

One Bowl Gluten Free Peanut Butter Brownies Recipe!

February 2, 2024

One Bowl Gluten Free Peanut Butter Brownies Recipe!

This recipe for gluten free peanut butter brownies is the perfect fudgy brownie recipe. Packed full of peanut butter flavor, and you only need one bowl? It is hard to beat!

One Bowl Gluten Free Peanut Butter Brownies Recipe!

I love brownies. They are my favorite snack or dessert to keep in the freezer and pop one out whenever I am craving something chocolatey or sweet. These are my new favorite brownies. It was previously a tie between my raspberry white chocolate brownies, and my miso brownies. However, my husband lives for peanut butter so I decided to make these gluten-free brownies with creamy peanut butter. These brownies are perfect as a snack or for special occasions. I mean, who doesn't want chewy brownies?

[feast_advanced_jump_to]

⭐️ Tips, Tricks, and Alterations:

Peanut butter: First things first, you cannot use natural peanut butter for this recipe. The oil from natural peanut butter does not bake the way you want it to. It needs to be "normal" peanut butter. I like to use creamy peanut butter, I have not tried it with crunchy. 

Can I add peanut butter cups? Yes, you definitely can. If you want a peanut butter cups recipe check out my peanut butter chocolate cookies. 

Can I use substitutes for peanut butter? I have not made this recipe with anything other than peanut butter. Cashew Butter and Almond Butter might be too similar to organic peanbut butter. So it is possible it may not bake properly. 

Sweeteners: I use regular (caster) sugar in this recipe. I have not subbed in anything else like coconut sugar or maple syrup.

Flour: Not all gluten free flours are created equal. I understand that not all flours are available everywhere but my go to for brownies are King Arthur Gluten Free Measure for Measure flour (with xanthan gum). It is important to use a 1:1 flour mixture and not just an almond flour or an oat flour. 

Coffee can enrich flavor so if you want to add coffee powder to this recipe, be sure to use an instant coffee or instant espresso powder

You do not need to use an electric mixer for this recipe, I like to mix everything by hand. 

For best results, always follow the recipe card. 

I use milk chocolate chips mixed with melted butter as the base for my recipe. However, if you want a darker brownie, then you can use dark chocolate instead.

For clean slices, wipe your knife after each slice. 

Remember, gluten free baking can seem overwhelming when you first start. However, it gets easier the more you do it! Check out more recipes here to get your feet wet.

❤️ Why you will love these gluten free peanut butter brownies

It is hard not to eat the whole pan of these homemade brownies when they come out of the oven! It is a really easy recipe, it is all done in one bowl, and then you just pour the batter into a baking dish! They have the best texture. They are chew brownies that are packed with chocolatey flavor and peanut butter. They are perfect for any peanut butter lover and will no doubt become one of your favorite dessert recipes due to their fudgy centers and their simplicity.

📃 Ingredients for gluten free peanut butter brownies:


Butter: I use unsalted butter in my recipe but you can use salted if you would like to have some extra saltiness
Peanut Butter: ​See my notes on this in the tips and tricks section
Eggs: Eggs are one of the binding agents in this recipe
Chocolate Chips: I like to use dark chocolate in brownies. I like the flavor that it gives.
Cocoa Powder: I like to use both cocoa powder and dark chocolate in my brownies. The chocolate mixture helps with the fudgy aspect of the recipe. 
Vanilla Extract: Despite the fact that it is a chocolate based recipe, vanilla helps enhance those flavors.
White Sugar: Our sweetener for our recipe
Flour: I use a gluten free all purpose flour (specifically King Arthur Measure for Measure) but you can use whatever flour you like so long as it is all purpose. If it is gluten free, make sure it has xanthan gum in it. 

📖 How to make this fudgy gluten free brownie recipe:

Combining the Butter and Chocolate: In a large bowl (use a heatproof bowl) melt the butter in a microwave. Once the butter is completely melted, add the chocolate chips to the bowl and whisk together. They should all melt to form a beautiful chocolatey mix. 
Adding the Sugar, Vanilla, and Eggs: Whisk in the sugar. Then add the eggs one at a time and whisk until the batter thickens. Finally add the vanilla and whisk once more.
Mixing in the dry ingredients: Add the flour and cocoa powder to the brownie batter. Switch out the whisk for a spatula now and fold in the ingredients.
Baking: Set the oven to 350°F. Create a prepared pan by lining a baking dish (a square tin) with parchment paper (it is easier if you grease the bottom first with cooking spray). Place mixture into the baking dish and smooth the top with a rubber spatula or palette knife.
Add the Peanut Butter: Dollop the peanut butter on top of the batter and swirl with a knife. Place the baking dish onto the middle shelf of the oven. If you are using a 9×13, bake for 28 minutes. If you are using an 8×8 bake for 30-35 minutes. Check for doneness when removing from the oven with a toothpick. If you want them to cook up a bit more, place back in for 3 minutes at a time. Once they are done baking, let them cool on the counter completely (or place in the fridge) before cutting into them.

Note: If you want some extra saltiness to your brownies, use sea salt flakes on top or kosher salt before you put the lined tin into the oven. These would pair great with ice cream (a sweet cream or vanilla would be best).

Add chocolate chips to the melted butter and whisk
This is how it should look when done
Add the sugar and whisk it in
Whisk in the eggs, along with the vanilla extract
Line the baking tin with parchment paper. Pour the batter into the tin
One Bowl Gluten Free Peanut Butter Brownies Recipe batter with peanut butter on top
Dollop the peanut butter on top of the batter
One Bowl Gluten Free Peanut Butter Brownies Recipe!
Swirl the peanut butter with a knife and bake
One Bowl Gluten Free Peanut Butter Brownies Recipe!
Bake for 30-35 minutea

If you want another great raspberry recipe, check out my blondie recipes! 
When you are done with this sweet treat, try some of my Chocolate Raspberry Tart.

⍰ How to store these gluten free peanut butter brownies:

I cut up the brownie so that it is more brownie bites but you can cut them how you like. you can either store them in an airtight container on the counter for 3-5 days. I personally suggest storing them on the counter as the fridge can dry out baked goods. (same with the fridge) or, you can store them in a freezer safe bag. In you choose to freeze them (they do great if you freeze them) you can store them for up to 3 months. Just mark on the bag when you froze them. When you want to eat them, take out of the freezer, leave on the counter until desired temperature. I like to freeze them as individual brownies, so, I would advise cutting them before freezing. 

🌟 LEAVE A RATING AND REVIEW! 🌟

⭐️⭐️⭐️⭐️⭐️
Did you love this recipe? If you did, let me know! And let others know too by leaving a comment and star rating. Reviews are incredibly useful in helping other people find my site and make my recipes. Thank you so much!
Laura 

​

🔎  ​Looking for other brownie recipes?

  • Brownie Fruit Pizza
  • Easy Ube Brownies
  • One Bowl Gluten Free Peanut Butter Brownies Recipe!
    One Bowl Gluten Free Peanut Butter Brownies Recipe!
  • Best Raspberry White Chocolate Brownies Recipe!

Miso Butter Onions: Yotam Ottolenghi's Flavor Onions!

January 30, 2024

This recipe for miso butter onions is the perfect appetizer. They are packed full of flavor and are beyond simple to make. 

Miso Butter Onions: Yotam Ottolenghi's Flavor Onions!

Yotam Ottolenghi is one of my favorite chefs and cookbook authors. I own practically all of his cookbooks and when I came across this miso butter onions recipe (in the cookbook Ottolenghi Flavor), I wanted to put it on my site as an homage to him. He has introduced me to so many new flavor profiles. It is no secret that I love miso on my website. I have recipes for miso cookies, miso carrots, miso caramel, and now, we will add miso butter onions to the mix.

⭐️ Tips, Tricks, and Alterations:

Onions: Yotam uses small onions in his recipe and I use shallots. I like using large shallots, I just love the flavor that they give but if you do not want to use shallots, you can use onion halves in this recipe

Miso: It is important to use white miso paste in this recipe. We are going to make a buttery miso sauce to pour over these shallots and if you were to use any other type of miso it throws off the balance of the dish. Red miso paste for example would be better if you were to make something like miso salmon. Do not use savory miso paste, stick to the sweet because it only enriches the sweetness of caramelized onions. 

Miso Butter Onions: Yotam Ottolenghi's Flavor Onions!

❤️ Why you will love these miso butter onions:

​The buttery golden gravy has a luxurious richness that is so delicious. There is enough saltiness from the miso to pair beautifully with the fall-apart tender onions. There is a savory depth to the sauce because it has so much umami flavor. The onions are soft throughout, you could not have a better side dish! I love to serve this with fish but I think it would also pair beautifully a roast chicken.

📃 Ingredients for miso butter onions

Miso Butter Onions: Yotam Ottolenghi's Flavor Onions!

Unsalted Butter: I like to use unsalted butter in this recipe. The butter is not where we get the saltiness from in this dish, it is the miso.
White Miso Paste: Miso paste comes from fermented soybeans (it can be made of other sources as well so be sure if you are gluten free to look for a gluten free miso paste!)
Water: The base of our gravy is miso water and we can't have that without water
Shallots: ​As I said above this was traditionally an onion dish in that Yotam uses small onions (I have also seen variations where people use large onions or larger onions) but I think that shallots are a worthy vegetable and they have such delicious sweetness that they are my favorite to use in this recipe!

📖 How to make this recipe

Set oven to 500°F
Cut your shallots: Slice the shallots in half and peel the papery skin off. Place in a baking dish (I use my 9x13 casserole dish), place the shallots in the baking dish in a single layer. 
Warm water: Warm the water, and melt the butter in the microwave. In a medium bowl, mix the water and the melted butter together and add the miso paste to the water. Make sure everything is broken down in the water and then pour the water over the shallots. Cover the baking dish with aluminum foil.
Bake: Place in the oven and bake for 30 minutes, At the 30 minute mark, remove the aluminum foil. Place back into the oven and bake for another 45-50 minutes. Every 10-15 minutes, baste the shallots (meaning scoop up some of the liquid and drizzle it over the shallots.) If by the end of the time you feel that there is still too much liquid, bake for another 10 minutes. You want a gravy consistency by the end and if you do not have that, keep baking. 

shallots in a baking dish
Slice shallots in half and place in a 9x13 baking dish
miso butter broth in a measuring cup
Melt the butter and mix with warm water. Dissolve the miso in the water mixture
shallots in a miso butter broth in a baking dish
Pour the water mixture over the shallots
aluminum foil covering a baking dish
Cover with aluminum foil for the first 30 minutes. Then uncover and baste every 10-15 minutes for 45-50 minutes
Miso Butter Onions: Yotam Ottolenghi's Flavor Onions!
Serve immediately

⍰ How to store these miso butter onions:

​I sometimes make these ahead and I bake them almost all the way. I then pop them back into the oven for 20 minutes.

To store them, I store them in an airtight container in the fridge for 2-3 days.

These are best when they are right out of the oven due to the gravy but they are still delicious on a reheat.

🌟 LEAVE A RATING AND REVIEW! 🌟

⭐️⭐️⭐️⭐️⭐️
Did you love this recipe? If you did, let me know! And let others know too by leaving a comment and star rating. Reviews are incredibly useful in helping other people find my site and make my recipes.
Thank you so much!
Laura 

🔎 Looking for other miso recipes?

  • Miso Butter Onions: Yotam Ottolenghi's Flavor Onions!
  • Is Miso Gluten Free?
    Is miso gluten free? Gluten-free Recipes / What to Know
  • Roasted Miso Carrots Recipe with Brown Butter Glaze
  • Fudgy and Gooey Chocolate Miso Brownies Recipe!

​

Easy Gluten-Free Sausage Rolls: Best Vegetarian Rolls

January 25, 2024

The perfect party food, mini sausage rolls are one of the best snack foods. For those on a gluten free diet, this recipe is for you! This gluten-free sausage rolls recipe is packed full of flavor, is delicious, and no one will know it is gluten free.

Easy Gluten-Free Sausage Rolls: Best Vegetarian Rolls

I love sausage rolls. So much so that this is not the first recipe for it on my site. I grew up eating sausage rolls but I married a pescatarian which meant the days of eating meaty sausage rolls were over. Also having celiac disease meant that having traditional sausage rolls had not been an option for sometime. I decided a couple of years ago to make vegetarian sausage rolls using hot Italian sausage with Beyond Meat's sausages. They are so good! 

This year while watching the 2023 class of Great British Bake Off, we watched them make sausage rolls! Some had a traditional sausage roll mixture, while others made a more modern sausage roll. Matty made one that we thought sounded so delicious that we decided to take his idea and modify it into a gluten-free sausage rolls recipe. Made once again with Beyond Meat's sausages (this time a mild sausage - their sausages tend to be gluten-free sausage meat but always be sure to read the label where you live), caramelized onions, apples, sage, and some spices, it is SO good! Let's make our gf sausage rolls!

Easy Gluten-Free Sausage Rolls: Best Vegetarian Rolls

⭐️ Tips, Tricks, and Alterations

For best results, always follow the recipe card! 

For my flaky pastry, I always use the Cup4Cup gluten free flour blend. I believe it is the best for making gluten free pie dough. I use my gluten free pastry dough recipe. You can also use a gluten-free puff pastry if you have a recipe for it. 

If you want to use real sausage you can, just sub in the same amount. 

I do not use gluten-free bread crumbs or bread crumbs of any kind in this recipe. Egg is my only binding agent. I do not want to dry the meaty filling out. 

You can add more fresh herbs if you want to your sausage filling. I use red pepper flakes and sage for my spices and herbs but you can play around with it. 

You can make small sausage rolls, in the photos, I made these as a main course, so, they are larger! They would have a shorter bake time. 

❤️ Why you'll love this gluten-free sausage rolls recipe:

It really is the best food for parties or just your evening meal. Finger foods can be great but you can make large sausage rolls and make them more hearty and substantial as I did in this recipe. I love making easy gluten free quick foods. This one is relatively quick, the things that take the longest are caramelizing the onions (which you don't do much work there), and then the bake on the rolls (which you also can do whatever you want during this time!). 

📃 Ingredients for gluten-free sausage rolls:

ingredients for Easy Gluten-Free Sausage Rolls: Best Vegetarian Rolls

Pastry Dough: I use my gluten-free pastry dough recipe, but, you can use whatever recipe you are comfortable with
Egg: Egg is used in the meat mixture as well as for an egg wash
Onion: Caramelized onions add so much flavor to this recipe and it is for that reason they are a key part of the sausage rolls
Apple: Apples and caramelized onions are one of my favorite pairings. The sweetness goes so well with the sausage
Sausage:  I use the beyond meat Sweet Italian sausage for these. You do not want a spicy Italian, it will not pair nicely with the apple.
Spices: I like to use fresh sage and red pepper flakes in this recipe

📖 How to make this gluten free sausage roll recipe:

Make the pastry dough: If you are making my recipe, place all of the ingredients into the bowl of a food processor and mix together. If you do not want to use my recipe that is fine, just use a pie dough or puff pastry that you like. You can use my recipe at room temperature (you do not need to put the dough into the fridge when it is done).
Caramelize the Onions: Place the oil (or butter if you choose to use butter) in a pan. Slice your onions length ways so that they are long strings, and let them cook down for 30-40 minutes on a medium heat.
Set oven to 400°F
Make the filling: In a large bowl place one of the eggs, the shredded apples, uncooked sausage, and spices to a bowl. Mix it together by hand until it all comes together into a weird looking mush.
Put it all together: On a flour dusted work surface (or on top of parchment paper) roll out the pie dough. Now, this part is going to be a bit up to you. If you want smaller sausage rolls, be sure to roll it out for that. I wanted chunkier ones, so you can see how I did this in the pictures. Once it is rolled out, place the sausage mixture on the pie dough. Fold the dough over so that you an close it and it almost looks like a baguette. In a bowl, whisk an egg, and set it aside. With a sharp knife, slice the massive roll into smaller pieces and place on a baking sheet that is lined with parchment paper or a baking mat. Take the beaten egg mixture, and brush it with a pastry brush on the top of each sausage roll. 
Bake: Place into the oven and bake for 20-25 minutes or until golden brown (remember that baking time will depend on the size of your sausage rolls). Serve immediately! I like to serve mine with honey mustard but they don't need anything!

ingredients in a bowl for Easy Gluten-Free Sausage Rolls: Best Vegetarian Rolls
Place ingredients in a bowl and mix by hand
ingredients Easy Gluten-Free Sausage Rolls: Best Vegetarian Rolls in a bowl
It will look like this
pastry with caramelized onions
Place the caramelized onions on your pastry dough
sausage roll filling
Top the onions with the sausage mixture
Easy Gluten-Free Sausage Rolls: Best Vegetarian Rolls
Fold over
Easy Gluten-Free Sausage Rolls: Best Vegetarian Rolls
Slice the sausage roll with a sharp knife, cover with egg wash, and place on a baking sheet. Then bake

⍰ How to store these sausage rolls?

​I store them in an airtight container in the fridge up to 3 days. You can also freeze them for three months. If you do freeze them, when you go to reheat them, brush them with an egg wash again and bake them for 15-20 minutes.

🌟 LEAVE A RATING AND REVIEW! 🌟

⭐️⭐️⭐️⭐️⭐️
Did you love this recipe? If you did, let me know! And let others know too by leaving a comment and star rating. Reviews are incredibly useful in helping other people find my site and make my recipes.
Thank you so much!
Laura 

🔎 Looking for other gluten free recipes?

  • Gluten-Free Sourdough Bread
  • Gluten-Free Sourdough Starter
  • Ube Crinkle Cookies (Purple Yam Cookies)
  • Matcha White Chocolate Chip Cookies With Brown Butter

Best & Easy Gluten Free Breakfast Casserole Recipe!

January 23, 2024

This delicious gluten free breakfast casserole does not just have to be saved for Christmas morning but any morning. Packed full of veggie sausage, hash browns, and a delicious egg mixture, it is simple to make and beyond tasty.

Best & Easy Gluten Free Breakfast Casserole Recipe!

I love casseroles. Usually I just make dinner casseroles like my New England Seafood Casserole and my Vegetable tater tot casserole, and I thought, why not make meal prep easy for myself for breakfast and go ahead and make a breakfast casserole? I made this recipe for us Christmas morning and I have since made it as a non holiday breakfast as well because it is so simple, takes very little effort from me, and yet tastes delicious. 

[feast_advanced_jump_to]

⭐️ Tips, Tricks, and Alterations:

Peppers: I like to use roasted red peppers in this recipe because I love the flavor that they give but if you want you can use green bell pepper in replace of it or in addition to it. Peppers are a great addition to breakfast bakes for their flavor and it is honestly one of my favorite ways to eat them. You can also just use red pepper.

Hash Browns: I like to use the hash brown potatoes that are diced. I think they are the best for this recipe.

Spices: I like to season the potatoes with black pepper, salt, oregano, harissa, and smoked paprika. However you can add spices like onion powder or garlic powder if you want to.

Sausages: I use Beyond Meat vegetarian hot Italian sausage because my family does not eat meat. However, if you wanted to sub it out for pork sausage or turkey sausage, you can. Just make sure you get an Italian spiced sausage.

Cheese:  I like to use a Mexican cheese mix for the top of the casserole however you can use whatever gooey cheese you want (monterey jack is a great potion, sharp cheddar cheese, gruyere, swiss). Just make sure it is a cheese you like! But most cheeses are a great option.

❤️ Why you will love this gluten free breakfast casserole:

This is a complete recipe. You get eggs. sausage, potatoes, veggies, it is a filling breakfast that you can make the night before (or a few days before) and is perfect for a busy morning. The best part is that it is so low effort, will no doubt become one of your favorite gluten-free breakfast recipes, and is perfect for the whole family.

📃 Ingredients for this easy breakfast casserole:

Best & Easy Gluten Free Breakfast Casserole Recipe!

Eggs: Eggs are our binding agent for this recipe!
Milk: Mixing in milk makes the casserole light and fluffy
Cheese: The cheese gives extra flavor and is a delicious topping 
Spices: I like to use a mix of spices in this but it is primarily salt, black pepper, harissa, oregano, and smoked paprika
Onion: The flavor of onion adds so much to the casserole!
Sausage: See my notes on this in the tips and tricks section
Peppers: See my notes on this in the tips and tricks section
Hash browns: See my notes on this in the tips and tricks section
Olive Oil: To cook our veggies in!

📖 How to make this easy recipe:

​Heat oven to 400°F: in a large baking dish (9x13) place the butter. Place the dish into the oven while it prebakes as that way it will grease the bottom of the dish. Once the oven is at 400, remove the greased casserole dish from the oven.
Spice the hash browns: Place the hash browns into the dish and cover the potatoes with the spices. Bake for 30 minutes. When they are done, lower the oven temperature to 375°F.
Get a large skillet out: While the potatoes are baking, you are going to cook the onion, pepper, and the sausage. In order to cook sausage properly be sure to check the instructions for whatever type of sausage you are using. Cook until the onions are soft and golden. The peppers should also be soft, and the sausage should be cooked through.
In a large bowl: When the food is done in the skillet, set it aside. In a large bowl, whisk the eggs, milk, and cayenne pepper. Set aside
Put it all together: When the hash browns are done, remove from the oven. Cover the potatoes with the sausage mixture. Be sure to really mix everything together, you want to get the flavors from the sausage mixture into those potatoes. Once it is all mixed together, cover the filling with cheese. Now, if you are looking to do a make-ahead breakfast casserole, you would pour the egg mixture on top of this, cover it with plastic wrap, and keep it in the fridge overnight (the next morning you would let it sit on the counter for 10-15 minutes while your oven heats up and then follow the rest of the instructions below). If you want to make it right away, cover it with the egg mixture, place in the oven for 40-45 minutes.
Check for doneness: ​at the 40-45 minute mark. The top should be cheesy and baked but you need to insert a toothpick or knife into the middle of the bake to make sure it is cooked. If it is a little bit jiggly when it comes out of the oven, that is okay, but you absolutely do not want liquid. If it is still liquid, place bake in the oven for 5 minute increments at a time. Once it is fully baked, let it sit on the counter for 5-10 minutes before cutting into it.

hash browns and spices in a casserole dish
Preheat the oven to 400 and melt the butter in the dish as it heats up. Then add the hash browns and spices and bake
sausage, red pepper, and onions in a frying pan
While they cook, in a pan fry your sausage, onion, and red pepper
hash browns and spices
When the hash browns have finished baking, remove from the oven and mix so they all get coated
egg mixture for Best & Easy Gluten Free Breakfast Casserole Recipe!
Make the egg mixture and set it aside
sausage mixture forr Best & Easy Gluten Free Breakfast Casserole Recipe!
Top the potatoes with the sausage mixture. Mix together well so the hash browns get the flavors from the sausage mix
Best & Easy Gluten Free Breakfast Casserole Recipe!
Top with cheese
Best & Easy Gluten Free Breakfast Casserole Recipe!
Poor the egg mixture on top and bake
Best & Easy Gluten Free Breakfast Casserole Recipe!
Bake until cooked in the center

⍰ How to store this gluten free breakfast casserole:

​Storing this delicious breakfast casserole is super easy! All you need to do is either cover it with aluminum foil, plastic wrap, or a lid! Store in the fridge for 3-4 days. 

🌟 LEAVE A RATING AND REVIEW! 🌟

⭐️⭐️⭐️⭐️⭐️
Did you love this recipe? If you did, let me know! And let others know too by leaving a comment and star rating. Reviews are incredibly useful in helping other people find my site and make my recipes.
Thank you so much!
Laura 

🔎 Looking for other gluten free recipes?

  • Chantilly Cake (Gluten-Free)
  • Red Velvet Cupcakes for Valentine's Day
  • Easy Gluten-Free Sausage Rolls: Best Vegetarian Rolls
  • Best & Easy Gluten Free Breakfast Casserole Recipe!

Savory Gluten Free Muffins: Cheddar Breakfast Muffins

January 18, 2024

This recipe for savory gluten free muffins is quick, easy, and so simple. Made with aged cheddar and delicious thyme, these muffins are the perfect treat. 

Savory Gluten Free Muffins: Cheddar Breakfast Muffins

I love how quick and easy muffins are. Some of my favorites are my blueberry muffins, gluten-free blackberry muffins, and my cranberry and orange muffins. Muffins were hard to figure out when I first started gluten-free baking because I did not know how to balance a gluten-free flour blend with enough moisture. Even though I love sweet muffins, I enjoy gluten free savory muffins just as much! These are a delicious breakfast for a weekday morning if you are headed out the door, or, a breakfast treat if you add some chocolate to them!. We do not need a lot in terms of equipment for this recipe so let us get to making the our tasty gluten free muffin recipe!

[feast_advanced_jump_to]

⭐️ TIPS, TRICKS, AND ALTERATIONS:

Cheese muffins: these muffins are savory cheddar muffins mixed in with delicious herbs. I like to use an aged cheddar as it is ag reat way to get more flavor. However, you can use regular cheddar or an aged cheddar cheese.

Other things that would taste good with these muffins are green onion (which you could finely chop and add to the batter) or sun-dried tomatoes - I have not tried this but if you do be mindful of how wet the batter becomes. It will effect baking time. 

Vegan savoury muffins: I have not attempted to make these as I myself do not adhere to a vegan diet. But you would have to sub in dairy-free milk, cheese, dairy-free butter, and dairy free yogurt. Also an egg replacement. Not to say it cannot be done, but, I think it would be difficult to convert this gluten free cheddar muffins recipe.

Gluten-Free Flour Blends: are not all created equal. My go-to for muffins is King Arthur's Measure for Measure gluten free flour. I know that by using this that I will end up with a moist muffin. If that is not available near you, you can try Bob's Red Mill Gluten Free 1:1 Flour. I have not tried it with this flour but I know a lot of gluten free bakers who have success with their gluten free baking flour. Whatever flour blend you use, make sure your blend has xanthan gum in it.

I use 2% milk in this recipe but if you wanted to you could use whole milk.

I use Greek yogurt in this recipe, I have not tried it with sour cream but it would work well as a substitute. 

​I use dry herbs in this recipe but they would taste amazing with fresh herbs. It is hard to beat fresh thyme! 

A great way to serve these is to warm them up for a quick breakfast. You can warm them up in a toaster oven or a microwave!

For best results, always follow the recipe card!

Savory Gluten Free Muffins: Cheddar Breakfast Muffins

❤️ Why you will love these savory gluten free muffins:

This muffin recipe is made soft by the inclusion of almond meal (aka almond flour) along with the greek yogurt. I love an easy gluten free breakfast (breakfast recipes are some of my faves), and one that the whole family can eat is a win in my book. They are an easy way to start the day and the best part is, you can make them the night before and have them ready to go for breakfast. Savory breakfast muffins? Yes please!

📃 Ingredients for savory gluten free muffins:

ingredients

All Purpose Flour: See my note above on gluten free flours
Large Eggs: They help serve as a binding agent in our recipe
Buttermilk: Buttermilk helps with the moisture in these muffins
Baking Powder: One of the agents to help the muffins rise
Almond Flour: Almond flour is a secret ingredient in these muffins as it makes them super soft
Sugars: There is a bit of both white sugar and brown sugar in this recipe to give it a bit of sweetness
Butter: For our batter and for the crumb top. I use unsalted butter.
Greek Yogurt: This is what gives the muffins a super soft moist texture

All of these simple ingredients should be available at your local grocery store. If you cannot find the gluten free flour you want, you can definitely find it online!

📖 How do I make these muffins?

Preheat your oven to 350°F:  Meanwhile, in a large mixing bowl melt your butter in a large bowl and then mix it with the sugars. You will then add the two eggs to the same bowl and mix them together. Add the greek yogurt, and continue to whisk together.
In a separate medium mixing bowl: whisk together the dry ingredients (gluten free all purpose flour, almond flour, baking powder). Add half of the flour mixture into the wet ingredients and mix together, then add the buttermilk, and whisk. Once the juice is mixed in, add the remaining dry ingredients and mix together.
Fold in the cheese and spices: with a rubber spatula and set aside. Line a muffin tin with muffin liners, and fill them ⅔ of the way up with the muffin batter. Set to the side.
Bake: Place in the oven and bake for 30 minutes. When they are nice and gold on top, remove from the oven, take them out of the muffin tin and let them cool on a wire rack. 

sugars and melted butter
Mix the melted butter and sugars together
eggs and wet ingredients mixed in a bowl
Whisk in the eggs. Add the greek yogurt and mix in as well.
Dry and wet ingredients
In a separate bowl mix the dry ingredients. ⅓ at a time add the dry ingredients to the wet ingredients and mix
muffin batter in a glass bowl with milk
Add the buttermilk and whisk
Cheese and muffin batter
Add in the cheese and fold the batter
savory muffin batter in a glass bowl
Until it looks like this and is fully incorporated
Fill the muffin tin liners
Savory Gluten Free Muffins: Cheddar Breakfast Muffins
Bake until golden brown on top

⍰ How to store these savory gluten free muffins?

You can store them in an airtight container and keep them at room temperature for a few days. 

If you wish to freeze this muffin recipe you can do so by placing the muffins into either a freezer-safe container or a freezer bag. They will last for 3 months so be sure to mark them with the date on them so you know when to eat them by!

🌟 LEAVE A RATING AND REVIEW! 🌟

⭐️⭐️⭐️⭐️⭐️
Did you love this recipe? If you did, let me know! And let others know too by leaving a comment and star rating. Reviews are incredibly useful in helping other people find my site and make my recipes.
Thank you so much!
Laura 

🔎 Looking for other easy gluten free recipes?

  • gluten free blueberry muffins recipe
    Blueberry Muffins
  • Gluten Free Salvadorian Breakfast Cakes
    Rice Flour Muffins: An Easy Gluten Free Recipe!

Best Raspberry White Chocolate Brownies Recipe!

January 16, 2024

This recipe for raspberry white chocolate brownies is the perfect recipe for gooey chocolate brownies. Packed full of fresh raspberries and white chocolate, it is the easiest way to get your chocolate raspberry fix and will become on of your favorite dessert recipes in no time.

Best Raspberry White Chocolate Brownies Recipe!

These are my new favorite brownies. It was previously a tie between my espresso brownies and smores brownies, and my miso brownies. However, I am in a raspberry mood and these have taken first place! You do not need a separate bowl to make them, this is a one bowl recipe. The brownies themselves so fudgy and delicious. This is so much better than a boxed brownie mix and will be one of your favorite brownie recipes in no time. They do not take a long time to prepare and 

[feast_advanced_jump_to]

⭐️ Tips, Tricks, and Alterations:

I like to use white chocolate bar that I break up into pieces for this white chocolate brownie recipe. However, you can also use white chocolate chips!  It is always a good idea to use a good quality chocolate.

Can I use frozen raspberries? Yes! They are fresh when they are frozen so you are good to go. 

Can I use raspberry jam instead? I have not tried it instead of the fresh berries but I don't see why it would not work.

I use fresh juicy raspberries in this recipe which does give it a longer bake time because the raspberries release so much liquid into the batter (the top of your fudgy brownies will almost look like it has raspberry jam in the recipe). I support you using fresh raspberries but if you want to use freeze dried raspberries instead, you can. The bake time would be 30-35 minutes instead. 

Coffee can enrich flavor so if you want to add coffee powder to this recipe, be sure to use an instant coffee or instant espresso powder

You do not need to use an electric mixer for this recipe, I like to mix everything by hand. 

For best results, always follow the recipe card. 

I use milk chocolate chips mixed with melted butter as the base for my recipe. However, if you want a darker brownie, then you can use dark chocolate instead.

For clean slices, wipe your knife after each slice. 

​

Best Raspberry White Chocolate Brownies Recipe!

❤️ Why you will love these raspberry white chocolate brownies:

It is hard not to eat the whole pan of these homemade brownies when they come out of the oven! It is a really easy recipe, it is all done in one bowl, and then you just pour the batter into a baking dish! They have the best texture, it is a super fudgy texture that is packed full of raspberries, and delicious sweet white chocolate chunks! These delicious brownies are definitely a crowd pleaser. The sharp raspberries plus the sweetness of the chocolate come together to make a really good brownie.

📃 Ingredients for raspberry white chocolate brownies:

ingredients for Best Raspberry White Chocolate Brownies Recipe!

Butter: I use unsalted butter in my recipe but you can use salted if you would like to have some extra saltiness
Raspberries: See what I have to say about raspberries in tips and tricks section. 
Eggs: Eggs are one of the binding agents in this recipe
Chocolate Chips: I like to use dark chocolate in brownies. I like the flavor that it gives.
White Chocolate: See what I have to say about white chocolate in the tips and tricks section.
Cocoa Powder: I like to use both cocoa powder and dark chocolate in my brownies. The chocolate mixture helps with the fudgy aspect of the recipe. 
Vanilla Extract: Despite the fact that it is a chocolate based recipe, vanilla helps enhance those flavors.
White Sugar: Our sweetener for our recipe
Flour: I use a gluten free all purpose flour (specifically King Arthur Measure for Measure) but you can use whatever flour you like so long as it is all purpose. If it is gluten free, make sure it has xanthan gum in it. 

📖 How to make this recipe:

Combining the Butter and Chocolate: In a large bowl (use a heatproof bowl) melt the butter in a microwave. Once the butter is completely melted, add the chocolate chips to the bowl and whisk together. They should all melt to form a beautiful chocolatey mix. 
Adding the Sugar, Vanilla, and Eggs: Whisk in the sugar. Then add the eggs one at a time and whisk until the batter thickens. Finally add the vanilla and whisk once more.
Mixing in the dry ingredients: Add the flour and cocoa powder to the brownie batter. Switch out the whisk for a spatula now and fold in the ingredients. Once they are practically all mixed in, add in the raspberries and white chocolate. 
Baking: Set the oven to 350°F. Create a prepared pan by lining a baking dish (a square tin) with parchment paper (it is easier if you grease the bottom first with cooking spray). Place mixture into the baking dish and smooth the top with a rubber spatula or palette knife. Place the baking dish onto the middle shelf of the oven. If you are using a 9×13, bake for 28 minutes. If you are using an 8×8 bake for 40-45 minutes. Check for doneness when removing from the oven with a toothpick. If you want them to cook up a bit more, place back in for 3 minutes at a time. Once they are done baking, place them into the fridge for an hour before slicing. 

Note: If you want some extra saltiness to your brownies, use sea salt flakes on top or kosher salt before you put the lined tin into the oven. These would pair great with ice cream (a sweet cream or vanilla would be best).

Add chocolate chips to the melted butter and whisk
This is how it should look when done
Add the sugar and whisk it in
Whisk in the eggs, along with the vanilla extract
Add the raspberries and white chocolate. Fold in with a spatula
Place in the baking tin and bake

If you want another great raspberry recipe, check out my blondie recipes! 
When you are done with this sweet treat, try some of my Chocolate Raspberry Tart.

⍰ How to store these raspberry white chocolate brownies:

I cut up the brownie so that it is more brownie bites but you can cut them how you like. you can either store them in an airtight container on the counter for 3-5 days (same with the fridge) or, you can store them in a freezer safe bag. In you choose to freeze them (they do great if you freeze them) you can store them for up to 3 months. Just mark on the bag when you froze them. When you want to eat them, take out of the freezer, leave on the counter until desired temperature. I like to freeze them as individual brownies, so, I would advise cutting them before freezing. 

🌟 LEAVE A RATING AND REVIEW! 🌟

⭐️⭐️⭐️⭐️⭐️
Did you love this recipe? If you did, let me know! And let others know too by leaving a comment and star rating. Reviews are incredibly useful in helping other people find my site and make my recipes. Thank you so much!
Laura 

🔎  Looking for other recipes?

  • Espresso Brownies
  • Peanut Butter Blondies Recipe
  • Gluten Free Raspberry Blondies sitting in a bowl
    Raspberry Blondies
  • Gluten Free S'mores Brownie Recipe (A 1:1 Recipe)
    S'mores Brownie Recipe

Gluten-Free Blackberry Muffins: Quick & Easy Muffins

January 11, 2024

This recipe for gluten-free blackberry muffins is quick, easy, and so simple. Made with either fresh berries or frozen berries, the whole recipe is ready in no time!

Gluten-Free Blackberry Muffins: Quick & Easy Muffins

I love how quick and easy muffins are. Some of my favorites are my blueberry muffins and my cranberry and orange muffins. Muffins were hard to figure out when I first started gluten-free baking because I did not know how to balance a gluten-free flour blend with enough moisture. These muffins are soft, moist, and tender muffins. The perfect breakfast for a weekday morning if you are headed out the door, or, working from home. We do not need a lot in terms of equipment for this recipe so let us get to making the best gluten free muffin recipe!

[feast_advanced_jump_to]

⭐️ TIPS, TRICKS, AND ALTERATIONS:

​You may be wondering which is better, frozen blackberries or fresh blackberries. I made my muffin batter with frozen muffins that I had let defrost a bit. As I am making my gluten-free muffins not during blackberry season, I opted for frozen, but, you can use fresh. They will both release liquid during the baking process which is great for gluten free baking as it helps our homemade muffins stay soft and give a fluffy texture. If it is during blackberry season, you can use fresh juicy blackberries or wild blackberries. Either would be absolutely delicious!

Vegan blackberry muffins: I have not attempted to make these as I myself do not adhere to a vegan diet. 

Gluten Free Flour Blends: are not all created equal. My go-to for muffins is King Arthur's Measure for Measure gluten free flour. I know that by using this that I will end up with moist muffins. If that is not available near you, you can try Bob's Red Mill Gluten-Free 1:1 Flour. I have not tried it with this flour but I know a lot of gluten free bakers who have success with their gluten free baking flour. 

I use 2% milk in this recipe but if you wanted to you could use whole milk.

I use Greek yogurt in this recipe, I have not tried it with sour cream but it would work well as a substitute. 

If you wanted to add a bit of lemon zest to the recipe, go ahead!

For best results, always follow the recipe card!

Gluten-Free Blackberry Muffins: Quick & Easy Muffins

❤️ Why you will love these gluten-free blackberry muffins:

​I have a toddler, and as any parent knows, getting kids to eat food can sometimes be a massive pain. She loves these, as does my mom, my husband, and myself. They are great for the whole family. It is one of my favorite muffin recipes. It is so quick to make, and really is so delicious as it is the perfect level of sweet.

📃 Ingredients for gluten-free blackberry muffins:

ingredients for Gluten-Free Blackberry Muffins: Quick & Easy Muffins

All Purpose Flour: ​See my note above on gluten free flours
Large Eggs: ​They help serve as a binding agent in our recipe
Buttermilk: Buttermilk helps with the moisture in these muffins
Baking Powder: One of the agents to help the muffins rise
Almond Flour: Almond flour is a secret ingredient in these muffins as it makes them super soft
Blackberries: See my note about blackberries above in tips and tricks
Sugars: There is a bit of both white and brown sugar in this recipe to give it a bit of sweetness
Cinnamon: Cinnamon is our only spice in this recipe and it is such a warming flavor. 
Oats: I love to coat these muffins in a crumb top and gluten free oats are the best option to do so
Butter: For our batter and for the crumb top. I use unsalted butter.
Vanilla: To help give flavor to our muffins
Greek Yogurt: Adds to the softness and fluffiness of the muffins

📖 How do I make these muffins?

Preheat your oven to 350°F:  Meanwhile, melt your butter in a large bowl and then mix it with the sugars. You will then add the two eggs to the same bowl and mix them together. Add the vanilla and the greek yogurt, and continue to whisk together.
In a separate bowl: whisk together the dry ingredients (gluten free all purpose flour, almond flour, baking powder, and cinnamon). Add half of the flour mixture into the wet ingredients and mix together, then add the buttermilk, and whisk. Once the juice is mixed in, add the remaining dry ingredients and mix together.
Fold in the blackberries: with a rubber spatula and set aside. Line a muffin tin with liners, and fill them ⅔ of the way up with the batter. Set to the side.
Make the crumb top: In a bowl mix the oats, remainder of the brown sugar, and butter. Crush together with your fingers until the butter is the size of peas. When it looks similar to the photo I have of it below, place it on top of each muffin. Proceed to place the muffin pan the oven and bake for 30 minutes. Remove from the oven and allow to cool on the counter for 10 minutes in the tin. Then enjoy!

Melted butter and sugar
Mix the melted butter and sugars together
eggs, butter, sugar
Whisk in the eggs
eggs, butter, sugar, yogurt, vanilla
Add the vanilla and Greek yogurt
dry ingredients
In a separate bowl, mix the dry ingredients
batter for Gluten-Free Blackberry Muffins: Quick & Easy Muffins
Fold the dry ingredients into the wet ingredients
batter for Gluten-Free Blackberry Muffins: Quick & Easy Muffins
Add the buttermilk and mix
Gluten-Free Blackberry Muffins: Quick & Easy Muffins batter
Add the blackberries and fold the batter together. Line your muffin tin and fill the muffin liners with the batter
butter, oats, and brown sugar
Make the crumb top
crumb top for Gluten-Free Blackberry Muffins: Quick & Easy Muffins
The butter should be pea sized like in this picture
Gluten-Free Blackberry Muffins: Quick & Easy Muffins
Top each muffin with the crumb top
Gluten-Free Blackberry Muffins: Quick & Easy Muffins
Bake for 30 minutes at 350°F

⍰ How to store these gluten-free blackberry muffins?

​You can store them in an airtight container and keep them at room temperature for a few days. 

If you wish to freeze this gluten-free blackberry muffin recipe you can do so by placing the muffins into either a freezer-safe container or a freezer bag. They will last for 3 months so be sure to mark them with the date on them so you know when to eat them by!

🌟 LEAVE A RATING AND REVIEW! 🌟

⭐️⭐️⭐️⭐️⭐️
Did you love this recipe? If you did, let me know! And let others know too by leaving a comment and star rating. Reviews are incredibly useful in helping other people find my site and make my recipes.
Thank you so much!
Laura 

🔎 LOOKING FOR SIMILAR RECIPES AND DELICIOUS RECIPES?

The Best Strawberry White Chocolate Cookies Recipe

January 9, 2024

This recipe for strawberry white chocolate cookies is the easiest cookie that is perfect for Valentine's Day or any day! 

The Best Strawberry White Chocolate Cookies Recipe

If you have been to my site before, you know I love a cookie recipe. I love my miso chocolate chip cookies, my double chocolate chip cookies, and my white chocolate miso cookies! However, if you are looking for the best white chocolate strawberry cookies, these are hard to beat. The white chocolate chunks, chewy texture, and freeze-dried fruit come together to make the best cookies.

[feast_advanced_jump_to]

⭐️ Tips, Tricks, and alterations:

If you do not have white chocolate chunks that is okay. You can make strawberry white chocolate chip cookies instead by using white chocolate chips rather than chunks. 

I have not tried making these cookies with fresh strawberries. If you did use fresh berries, it would make for a much wetter batter.

Baking with fresh strawberries can be difficult when it comes to cookies. It can be done, don't get me wrong, but, I prefer to use freeze-dried strawberries. By using freeze dried strawberries, you don't have to rely on strawberry season. You can make these whenever you want.  If you do try it with the fresh berry, let me know in the comments how it goes. 

The Best Strawberry White Chocolate Cookies Recipe

I do not use an electric mixer or hand mixer for this recipe. I like to use a rubber spatula and a large mixing bowl. This way I can ensure that the dough does not get over mixed. 

If you do not have white chocolate you can sub in dark chocolate chips or milk chocolate chips. 

For best results, always follow the recipe card.

❤️ Why you'll love these cookies

They are so quick and easy to whip up. They have great strawberry flavor and basically taste like a cheesecake in cookie format. What else would you need from a cookie?

📃 Ingredients for these Strawberry White Chocolate Cookies

ingredients for The Best Strawberry White Chocolate Cookies Recipe

Gluten Free All Purpose Flour: I use King Arthur gluten free Measure for Measure flour (it has xanthan gum in it). However this is a 1:1 recipe so regular flour works just fine.
Light Brown Sugar: Brown sugar helps add to the richness of the cookie, almost a caramel flavor
White Sugar: The balance of sugars in the cookie makes it perfectly sweet.  It is also used to dip the cookies into.
Unsalted Butter: The richness of any cookie dough. Using unsalted means you can control the amount of salt flavor going into your cookies. 
Egg: One large egg is in the binding agent in the cookie dough
Vanilla: Vanilla extract helps enhance the flavor of the cookie
Baking Soda: This helps with the structure of the cookie 
White Chocolate Chips or White Chocolate Chunks: this is our chocolatey goodness!
Freeze Dried Strawberries: Where all of the strawberry flavor comes from in this recipe 
Milk: I like to add a little bit of milk to the dough to make sure that it isn't dry and give it extra moisture.

📖 How to make these strawberry white chocolate cookies?

Mix together your dry ingredients: in a large bowl add the flour, and baking soda and set aside. 
Brown the butter: Browned butter enhancing the flavor of any cookie dough and it is super simple to make. If you want the butter to melt faster, use room temperature butter but honestly, cold butter is fine. Place the butter into a pan (or small saucepan) and put it on medium heat. The butter will begin to break down and you will see little brown bits form on the bottom, Swirl it around and remove it from the heat. Pour the butter into the small bowl (or) medium sized bowl.
Add the sugars: and whisk. After the sugars and butter have been creamed together, add the egg and whisk together. Add the vanilla and whisk until it has all come together.
Fold the wet ingredients: into the dry ingredients ⅓ at a time. At the ⅔ point, add the chocolate and strawberries to the bowl and make sure everything is incorporated. One of the key things to this batter is to make sure to not overwork it. Once you have folded it a few times, add the chocolate chunks and strawberries. Do make sure though to scrap down the sides of the bowl to make sure you get everything in the mixing bowl incorporated. Add the milk and fold everything together once more. 
Roll the dough: into balls and place onto a baking sheet that is lined with parchment paper or a baking mat. The dough may feel greasy, but that is entirely normal. You can use a cookie scoop for this or an ice cream scoop but I just do it by hand. 
Set the oven to 350°: The bake time on the cookies is 12 minutes but I like to bake them for 6 minutes,  then turn the cookie sheets. Then bake for another 6 minutes. The cookies will be golden brown when done.
Remove the trays from the oven: and let them sit for a few minutes on the sheets. If you want crispy edges but a gooey center, then you can eat them right away, otherwise, let them sit for a little bit. You can leave them on the cookie sheet or place them on a wire rack or cooling wrack to cool completely. 

Brown the butter
sugars mixed with butter and eggs
Mix the butter with the sugar, vanilla, and egg
wet and dry ingredients for cookies
Fold the wet and dry ingredients together
cookie dough
Add the freeze dried strawberries and white chocolate chunks
The Best Strawberry White Chocolate Cookies dough on baking sheet
Roll the dough into balls and place them into the oven and bake

Note: if you make really big cookies, they made need an extra minute or two to bake. You want the texture of the cookies to be chewy but you want your cookies to be baked! You do not wanted unbaked cookie dough balls (well, maybe you do, I bet those could be good too!)

After you have made this recipe, try making my linzer cookies.

⍰ HOW TO STORE THESE MISO WHITE CHOCOLATE COOKIES?

Store in an airtight container on the counter for a few day or place in a freezer safe bag and into the freezer for up to three months. 

🌟 LEAVE A RATING AND REVIEW! 🌟

⭐️⭐️⭐️⭐️⭐️
Did you love this recipe? If you did, let me know! And let others know too by leaving a comment and star rating. Reviews are incredibly useful in helping other people find my site and make my recipes.
 Thank you so much!
Laura 

Looking for other cookie recipes?

  • The Best Strawberry White Chocolate Cookies Recipe
  • Reeses Peanut Butter Cup Cookies Recipe: Best Cookies
  • Miso White Chocolate Cookies with Brown Butter!
    Miso White Chocolate Cookies with Brown Butter!
  • Easy Miso Brown Butter Cookies with Chocolate and Heath

Reeses Peanut Butter Cup Cookies Recipe: Best Cookies

January 4, 2024

Indulge in the ultimate sweet delight with this reeses peanut butter cup cookies recipe! These delectable treats offer the perfect harmony of rich peanut butter flavor and the satisfying crunch of a cookie cup, creating a dessert that's both irresistible and a breeze to whip up.

Reeses Peanut Butter Cup Cookies Recipe: Best Cookies

I love cookies! I have a ton of cookie recipes on my site. Lately, I have been going between my miso chocolate chip cookies and these! But, I also have an unwavering affection for peanut butter, chocolate chips, and anything reminiscent of Fall. Enter my reese's peanut butter cup cookies!—a twist on the classic peanut butter cookie. Inspired by my love for unconventional treats like peanut butter miso cookies and peanut butter blondies, this recipe combines the rich flavors of brown sugar, and the beloved mini Reese's Peanut Butter Cups. The result is a heavenly fusion that captures the essence of autumn in every delectable bite. Embrace the cookie that pays homage to the perfect marriage of peanut butter and chocolate.

[feast_advanced_jump_to]

⭐️ Tips, Tricks, and alterations:

Even though reeses peanut butter cup is in the name, I actually don't use the reese's cups for this recipe! I use the non name-brand ones from Aldi (I think they are better!). 

I like to mix this batter by hand. I know. that for most cookies you'd put all of the ingredients into the bowl of a stand mixer but for me, I put everything into a large bowl and do it myself. That way I can ensure that the batter does not get overworked. So, do not use an electric hand mixer, or an electric mixer. Use a spatula or a wooden spoon to fold everything together. 

I use light brown sugar in this recipe, not dark brown sugar. I have not tried subbing it. 

If you wanted to add some extra peanut butter flavor you could try adding some reese's pieces or peanut butter chips but do not add creamy peanut butter. The peanut butter will cause the cookies to spread and they will not bake correctly. 

Reeses Peanut Butter Cup Cookies Recipe: Best Cookies

❤️ Why you will love this recipe:

This is a great cookie recipe. If you like classic chocolate chip cookies and also are a member of the peanut butter lovers group then this is going to be a win for you! These are the best cookies to make when you have a craving for a sweet treat. Plus who wouldn't love a miniature reese's peanut butter cup cut up into cookies? So for chocolate lovers and peanut butter lovers, this is the cookie for you. 

📃 Ingredients for reeses peanut butter cup cookies recipe:

Ingredients for Reeses Peanut Butter Cup Cookies Recipe: Best Cookies
  • Brown Butter: For a richer flavor. I always use unsalted butter.
  • Eggs: Essential for binding our concoction together.
  • Gluten-Free Flour: I recommend King Arthur Gluten-Free Measure for Measure for the cookies
  • Vanilla Extract: Elevate the flavor profile with a dash of vanilla extract.
  • White Sugar: Adds a balance to our brown sugar.
  • Mini Peanut Butter Cups: A delightful addition for an extra layer of sweetness.
  • Brown Sugar: Incorporate this to enhance the overall richness of the fusion.
  • Milk: ​I like to add a tablespoon or two of milk if the batter feels a bit dry. It helps keep the cookies moist and soft. 

📖 How do you make this reeses peanut butter cup cookies recipe:

Set the oven to 350°
Mix together your dry ingredients: in a large bowl add the flour, and baking soda and set aside. 
Brown the butter: Browned butter enhancing the flavor of any cookie dough and it is super simple to make. If you want the butter to melt faster, use room temperature butter but honestly, cold butter is fine. Place the butter into a pan and put it on medium heat. The butter will begin to break down and you will see little brown bits form on the bottom, Swirl it around and remove it from the heat. Pour the butter into the small (or) medium sized bowl.
Add the sugars: to the bowl with the brown butter and whisk. After the sugars and butter have been creamed together, add the egg and whisk together. 
Add the vanilla: and whisk until everything is smooth.
Fold the wet ingredients: into the dry ingredients ⅓ at a time. At the ⅔ point, add the peanut butter cups to the bowl and make sure everything is incorporated. One of the key things to this batter is to make sure to not overwork it. It is why I do not use my mixmaster for this recipe. Do make sure though to scrap down the sides of the bowl to make sure you get everything in the mixing bowl incorporated.
Roll the dough: into balls and place onto the cookie sheet. Place in the fridge for at least 30 minutes. The dough may feel greasy, but that is entirely normal. You can use a cookie scoop for this or an ice cream scoop but I just do it by hand. 
Bake the cookies: for 12 minutes. At the 6 minute mark, turn the tray. Then bake for another 6 minutes. You want the cookies to turn golden brown. 
Remove the trays from the oven: and let them sit for a few minutes on the sheets. If you want crispy edges but a gooey center, then you can eat them right away, otherwise, let them sit for a few minutes on the tray. 

browned butter in a pan
Brown the butter
sugar and butter
Mix with the sugars
egg and sugar in a bowl
Add the egg and vanilla
Reeses Peanut Butter Cup Cookies Recipe: Best Cookies
Mix with the dry ingredients
cookie dough for Reeses Peanut Butter Cup Cookies Recipe: Best Cookies
Fold in the peanut butter cups
Cookie dough balls on a sheet pan
Place dough on a lined baking sheet and bake

When you are done with this recipe, give my linzer cookies a try!

⍰ How can I store these reeses peanut butter cup cookies?

You can either store them in ziploc bag or in an airtight container. They will keep for a few days on the counter. However, you can freeze them. Baked cookies will keep in the freezer for up to three months. You can also store them as unbaked balls of dough. They will also keep for up to 3 months. 

🌟 LEAVE A RATING AND REVIEW! 🌟

⭐️⭐️⭐️⭐️⭐️
Did you love this recipe? If you did, let me know! And let others know too by leaving a comment and star rating. Reviews are incredibly useful in helping other people find my site and make my recipes.
Thank you so much!
Laura 

Looking for more Cookies Recipes?

  • Miso Cookies With Brown Butter, Chocolate, & Strawberry
  • Peanut Butter Miso Cookies Recipe: Delicious Cookies
    Peanut Butter Miso Cookies Recipe: Delicious Cookies
  • Easy Miso Chocolate Chip Cookies Recipe with Brown Butter!
    Easy Miso Chocolate Chip Cookies Recipe with Brown Butter!
  • Gluten Free Halloween Recipes: Gluten-free Fun Treats!
    Gluten-Free Halloween Recipes

Are Corn Tortillas Gluten Free? Homemade Gluten-Free Recipe

January 2, 2024

If you are new to a gluten free diet you may be wondering are corn tortillas gluten free? In this post we answer if they are and I give you a recipe for gluten-free corn tortillas.

Are Corn Tortillas Gluten Free? Homemade Gluten-Free Recipe

Navigating a gluten-free diet involves steering clear of gluten, a protein found in wheat, barley, and rye. The gluten-free journey often entails exploring alternative grains like rice, quinoa, and oats, carefully sourced to avoid cross-contamination. When it comes to flour choices, gluten-free options such as almond flour, coconut flour, and rice flour become staples.

[feast_advanced_jump_to]

Beyond grains, an array of naturally gluten-free foods exists, offering diverse and delicious alternatives. Corn tortillas and corn products, for example, are excellent substitutes for their gluten-containing counterparts. Embracing a gluten-free lifestyle doesn't mean sacrificing flavor or variety; it's about discovering a world of culinary possibilities that cater to specific dietary needs. So, whether you're exploring gluten-free out of necessity or choice, rest assured that a vibrant and satisfying menu awaits your gluten-free palate.

⭐️ So are corn tortillas gluten free?

Yes! Corn is a not a gluten containing protein. They are a great alternative to wheat tortillas. However, just because they are good for those of us with celiac disease or a gluten sensitivity, does not mean that the store-bought varieties are any good. The best corn tortillas are the ones that you make at home. Learning to make this at home gluten-free option means that you will always have soft corn tortillas that don't break and taste like traditional corn tortillas whenever you want. 

Ready-made corn tortillas can easily be bought at the grocery store, but after learning to make my own fresh corn tortillas, I will never use store-bought tortillas again.

📃 ​Ingredients for corn tortillas

ingredients for Are Corn Tortillas Gluten Free? Homemade Gluten-Free Recipe

You only need three ingredients 

Corn flour

water

salt

🥣 Special Equipment:

To make homemade tortillas you will need a tortilla press and I like to use parchment paper rather than a piece of plastic.

You will also need a cast iron pan. I do not use a non-stick skillet. You want the heat from the flat surface of the cast-iron skillet. 

What if I don't have a tortilla press?

https://garnishedwithjoy.com//www.youtube.com/shorts/9YKA0oQ98vc
Watch the video to see how to make them with a rolling pin.

📖 How to make this corn tortilla recipe:

In a large mixing bowl: add the corn flour, water, and salt. Mix by hand.
Open the tortilla press: and place one piece of parchment paper (cut into a square) on the base. 
Roll the dough: into a dough ball and place it onto the parchment paper. Then top with the second piece of parchment paper. Press down on the tortilla press. It will form a tortilla. 
Heat the skillet on: medium-high heat. Once you have a hot skillet (you can test this by throwing some warm water or cold water onto it. If it sizzles, it is ready) place the tortilla in the middle of the hot skillet. Cook for 2-3 minutes per side. Set aside on a plate until ready to use and cover with a towel to help them retain their heat. 

***

Corn tortillas are a staple in Mexican cuisine. There is no gluten content in corn and therefore if you have an autoimmune disease or gluten sensitivities, if you make this recipe from home there is no risk of cross-contamination, you have your own certified gluten-free tortilla, and you will have made authentic corn tortillas! I prefer the taste of corn tortillas to wheat tortillas and the taste of a warmed corn tortilla in my opinion is tough to beat!

corn flour in a bowl
Place ingredients in a bowl
tortilla dough in a bowl
Mix by hand
corn dough ball
Roll dough into ball
corn dough
Place the dough ball on the tortilla press between parchment paper
tortilla press
Press down
Are Corn Tortillas Gluten Free? Homemade Gluten-Free Recipe
It should look like this
Are Corn Tortillas Gluten Free? Homemade Gluten-Free Recipe
Place on a heated cast iron pan
Are Corn Tortillas Gluten Free? Homemade Gluten-Free Recipe
Cook for 90 seconds on each side
Are Corn Tortillas Gluten Free? Homemade Gluten-Free Recipe
While you cook the others, place your cooked ones on a plate
Are Corn Tortillas Gluten Free? Homemade Gluten-Free Recipe
Cover with a cloth to keep warm
Are Corn Tortillas Gluten Free? Homemade Gluten-Free Recipe
Use them for your favorite taco recipes

⍰ Can I store these?

These are best eaten right away

🌟 LEAVE A RATING AND REVIEW! 🌟

⭐️⭐️⭐️⭐️⭐️
Did you love this post? If you did, let me know! And let others know too by leaving a comment and star rating. Reviews are incredibly useful in helping other people find my site and make my recipes.
Thank you so much!
Laura 

LOOKING FOR OTHER RECIPES?

  • Are Corn Tortillas Gluten Free? Homemade Gluten-Free Recipe
  • RED CURRY SALMON: EASY THAI RED CURRY SALMON RECIPE!
    Best and Easy Gluten and Dairy Free Dinner Recipes
  • APPLE FRANGIPANE TART RECIPE: CLASSIC FRENCH RECIPES
    French tart recipes: Beautiful and Classic Tarts
  • Easy Pumpkin Empanadas Recipe: Baked Empanadas!

Best and Easy Gluten and Dairy Free Dinner Recipes

December 28, 2023

RED CURRY SALMON: EASY THAI RED CURRY SALMON RECIPE!

Anyone who is contending with food allergies or intolerances knows it can be a pain to find a delicious dinner for the whole family. Let's look at some gluten and dairy free dinner recipes that the entire family will enjoy!

Best and Easy Gluten and Dairy Free Dinner Recipes

It can be difficult when accommodating gluten free dinners and dairy free meals for the entire family. A great way to make sure that everyone is happy is if you can just make one dairy free and gluten-free dinner with simple ingredients that everyone can enjoy.

My family likes to cook vegan recipes, dairy free, and so on. Some of our family favorite meals are gluten free and dairy free. Best thing is they are all easy to make. . Let's look at a few things before we dive into our yummy recipes.

⭐️ Tips and Tricks for gluten and dairy free dinner recipes

Good news is that your local grocery stores will carry all of the ingredients in these meals.
It can be easy to modify recipes a lot of the time. So, even though you eat gluten and dairy free that you can still have a comforting meal or a satisfying meal. For example, if a recipe calls for heavy cream, you can often sub in coconut cream or coconut milk. This is great for us or if we want to make some vegan meals for our vegan friends. 

Things to remember when cooking gluten and dairy free are that a lot of foods in their natural forms (such as brown rice, sweet potatoes (all potatoes) ground beef, black beans, fresh tomatoes, fresh veggies, lean proteins etc) are safe. It is only when we start adding things to the foods that we run the risk of them no longer being gluten free or dairy free. 

📖 Let's make some delicious gluten-free dairy-free recipes 

All of these recipes could be made as easy weeknight dinners. Remember, everything on my website is 100% gluten free. I have a lot of gluten free recipes, vegan recipes, dairy free, nut free, and more. Recipes for all dietary needs. Now, let's make some delicious recipes!

red curry salmon
If you love salmon and are looking to spice up your weekly dinners, this red curry salmon is perfect. Ready in 30 minutes, and absolutely delicious, it will become a meal in your weekly rotation.
Red Curry Salmon: Easy Thai Red Curry Salmon Recipe!
coconut curry salmon recipe
It can be easy to recreate delicious Thai flavors at home. This coconut curry salmon recipe does jus that. The creamy coconut curry sauce along with the delicious salmon filets makes it the perfect dinner. Ready in 30 minutes, it will quickly become one of your favorite meals.
RED CURRY SALMON: EASY THAI RED CURRY SALMON RECIPE!
sweet potato black bean tacos
This taco recipe does not need to be reserved just for taco Tuesday. These sweet potato black bean tacos are the perfect addition to your repertoire of vegetarian recipes! Follow the video for step by step instructions as to how to make this fun new recipe!
Sweet Potato Black Bean Tacos filling in tortillas
Vegan Ragu
This Vegan Polenta Recipe is a delicious take on the classic ragu. Packed with vegetables and delicious flavors, this recipe is vegan and gluten free but your guests will never know it.
Easy and Delicious Vegan Polenta Recipe
spinach soup
This spinach soup recipe is packed full of flavor, and is the perfect meal to warm you up on a chilly day.
Vegan Spinach Soup Recipe
Moroccan Salmon
This recipe for Moroccan Salmon and Roasted Acorn Squash is the perfect blending of flavors and textures. Ready in under 45 minutes, it is the perfect dinner.
Quick and Easy Moroccan Salmon
Stuffed Swordfish - Little Mermaid Les Poissons
A fun take on the recipe from the Little Mermaid, this stuffed swordfish recipe is delicious!
Little Mermaid's Les Poissons
Pad See Ew
This gluten free Pad See Ew Recipe is a 1:1 recipe, ready in 30 minutes, and will no doubt please all who try it.
Gluten Free Pad See Ew Recipe
Ahi Tuna
This recipe and marinade for Ahi Tuna is so simple in its ingredients that you will be kicking yourself for not having made it sooner!
Sliced Ahi Tuna on a plate
Fish Soup
This Fish Soup Recipe is packed full of flavor, gluten free, dairy & nut free, and ready in 45 minutes! Make it today!
Easy One Pot Fish Stew
Chilean Sea Bass Recipe
Delicious, Decadent, and Easy
Chilean Sea Bass ingredients
Cajun Catfish
Cajun Catfish is flavorful and beyond easy to make!
Cajun Catfish Recipe on a plate
Ratatouille
Have you ever wanted to make Ratatouille just like Remy from Disney’s Ratatouille? Were you unsure as to how to bring this recipe to life? Look no further. This quick, easy, gluten free and vegan ratatouille is simple and beyond delicious. Make it today!
RED CURRY SALMON: EASY THAI RED CURRY SALMON RECIPE!
Vegetarian Mushroom Bourguignon
Inspired by Julia Child, this mushroom and vegetarian version (with a vegan option!) is the perfect dinner.
Julia Child inspired vegetarian bourguignon
Shakshuka
This quick and easy shakshuka recipe is simple in its ingredients, packed full of flavor, and is ready in under 30 minutes. Make it today
Quick and Easy Shakshuka Recipe

🌟 LEAVE A RATING AND REVIEW! 🌟

⭐️⭐️⭐️⭐️⭐️
Did you love this post? If you did, let me know! And let others know too by leaving a comment and star rating. Reviews are incredibly useful in helping other people find my site and make my recipes.
Thank you so much!
Laura 

Looking for other recipes?

  • RED CURRY SALMON: EASY THAI RED CURRY SALMON RECIPE!
    Coconut Curry Salmon: Easy Thai Inspired Recipe
  • Red Curry Salmon: Easy Thai Red Curry Salmon Recipe!
    Red Curry Salmon: Easy Thai Red Curry Salmon Recipe!
  • Sweet Potato Black Bean Tacos filling in tortillas
    Sweet Potato Black Bean Tacos
  • Soft amaretti cookies in a white container on a brown cloth
    Soft Amaretti Cookies

French tart recipes: Beautiful and Classic Tarts

December 26, 2023

APPLE FRANGIPANE TART RECIPE: CLASSIC FRENCH RECIPES

When you think of classic pastry, desserts that are just beautiful, you cannot beat delicious french tarts! These French tart recipes are pretty to look at, easy to make, and will please you and all of your guests.

French tart recipes: Beautiful and Classic Tarts

I love a tart recipe! Growing up in Montreal aka French Canada, I was always tempted every time I walked by a bakery (and they are everywhere)! It inspired me to make my version of a tarte aux pommes which is my take on a French apple tart or a "tarte normande" as it is otherwise called. Tarts are often beautiful, easy to make, and in this post we are going to take about the equipment you need for some easy and delicious tart recipes, as well as look at some recipes.

🥣 Tools you need for tart recipes:

tart pan also known as a tart tin: You are going to need either one large tart pan or mini tart shell pans. All of them should come with a removable bottom. 

rolling pin: This is to roll out your pastry for your pastry case (aka the pie crust)

plastic wrap: Often in my recipes, I do not place my pie dough in the fridge to cool down. However, if you want to make the pastry dough ahead of time and wait on using it, you would cover it in plastic wrap and place it in the fridge until you are ready to use it.

pie weights: It is important to pre-bake your crust so that your tart does not have a soggy bottom. Classic tarts have delicate but sturdy crusts. 

parchment paper: Parchment paper is what you will top the crust with when you pre-bake it. You will then top the parchment paper with the pie weights.

food processor: I like to make my pastry dough in a food processor as I am gluten free and find it simpler. 

pastry brush: Almost every classic French tart will be topped with apricot preserves or apricot jam. A tart glaze brings the whole look together. 

French tart recipes: Beautiful and Classic Tarts

📃 Ingredients or fillings you often see for or need:

Fresh fruit: this can be anything from apple slices, strawberries (if one were to make a strawberry tart or a strawberry galette), kiwi slices, really any fresh and juicy fruits. 

Almond flour: A lot of my tart recipes use frangipane. Frangipane is an almond custard filling. It pairs beautifully with fruit.

Custard: If you are making a classic French fruit tart, you would likely use a vanilla pastry cream or a creamy vanilla custard as the filling. 

Crème pâtissière: This is a pastry cream that often serves as a filling like custard.

Heavy Cream: You are going to want heavy cream for any custard base.

Apples: Apple pie may not be a classic French tart but apple frangipane tarts are, along with tarte normande are. In addition to recipes like tarte tatin. 

Pastry: To make pastry you are obviously going to need flour and butter. It really depends what you want to do for your tart crust if you are making sweet or savory but you can make sweet pastry crust by adding sugar. The thing is that all tart crusts have in common is that they are a flaky crust. Some examples of tart crusts are a sweet shortcrust pastry, buttery shortbread crust, buttery crust, or puff pastry. As I am gluten free, I use a gluten free crust for all of my recipes.

📖 Gluten Free French Tart Recipes

raspberry frangipane tartlets
This recipe for raspberry frangipane tartlets is the ideal dessert. Easy to make, packed with flavor, and super delicious, it is the perfect individual treat.
apple frangipane tart
Apple and almond are two of the best flavors. It therefore makes perfect sense to marry them in this French inspired apple frangipane tart. This apple tart is made with a delicious tart crust, rich almond frangipane, and is covered in beautiful apples.
APPLE FRANGIPANE TART RECIPE: CLASSIC FRENCH RECIPES
custard apple tart
This recipe for custard apple tart is the perfect treat for fall. With the flavors of an apple pie and the lusciousness of a tart, it is the perfect blend. The apple slices make it the most beautiful desert, and while it looks detailed and difficult, this tart is incredibly simple to make.
Custard Apple Tart: A French NormandeTarte Recipe
Peach Frangipane Tart
The perfect balance of almond and peach.
Gluten Free Peach Frangipane Tart on a plate
Provencal Tomato Tart
This recipe for a French tomato tart is the ideal summer dish.
Quick and Easy Recipe for Tomato Tart
Pear and Frangipane Tart
Pear and Frangipane Tart is an elegant and delicious dessert.
Gluten Free Pear and Frangipane Tart
Caramelised Onion and Goats Cheese Tart
Caramelised Onion and Goats Cheese Tart is the perfect dinner. Sweet and savory all in one.

🌟 LEAVE A RATING AND REVIEW! 🌟

⭐️⭐️⭐️⭐️⭐️
Did you love this post? If you did, let me know! And let others know too by leaving a comment and star rating. Reviews are incredibly useful in helping other people find my site and make my recipes.
Thank you so much!
Laura 

Looking for other recipes?

  • Caramelised Onion and Goats Cheese Tart with Thyme
  • Raspberry Frangipane Tartlets Recipe: Almond Tarts
  • Chocolate Empanadas Recipe: How to Make this Easy Dessert
  • Quick and Easy Dark Chocolate Raspberry Tart

Easy Pumpkin Empanadas Recipe: Baked Empanadas!

December 21, 2023

If you are looking for a delicious dinner, snack, or treat, then these pumpkin empanadas are perfect. They are ready in no time and are such a delicious flavor that you will no doubt be going back for seconds.

Easy Pumpkin Empanadas Recipe: Baked Empanadas!

I think that when people think of a pumpkin empanada that maybe they think of sweet empanadas (which I do love- check out my apple empanadas, chocolate empanadas) but for a sweet version I have my pumpkin pasties recipe. No, this pumpkin empanada recipe does not have pumpkin pie spice or pumpkin pie filling. They are savory empanadas! These pumpkin hand pies are made with an easy pastry dough, pumpkin puree, caramelized onion, melty cheese, and spices. The pumpkin mixture is delicious and super easy to make. Let's make these delicious half-moon shape treats!

[feast_advanced_jump_to]

⭐️ Tips, Tricks, and Alterations:

I use gruyere cheese in this recipe but if you can't find that then Swiss cheese will also work well. it is a good melting cheese and has good flavor. 

If you want to make your own homemade pumpkin puree you can by using fresh pumpkin but it really is easier to just buy some from the store (aka canned pumpkin)!

❤️ Why you'll love this pumpkin empanadas recipe:

I love pumpkin recipes that are savory dishes . I get a little tired of all of the sweet pumpkin filling. Don't get me wrong, I love a mini pumpkin pie or a full size pumpkin pie, if someone offered it to me, I'd eat it. but, delicious treats can be savory too and these definitely fit the bill. They are one of my favorite things about the Fall and Winter time. 

📃 Ingredients for pumpkin empanadas:

The list of ingredients for this recipe is not long!

ingredients Easy Pumpkin Empanadas Recipe: Baked Empanadas!

Empanada dough: I use my gluten free pastry dough recipe. It is made from Cup4Cup gluten free flour, egg, butter, and water. But, you can use your own dough should you prefer!

Pumpkin Puree: This is central to our dish. See my notes above about which types of puree to use.

Gruyere cheese: I love the flavor of aged gruyere. I think it is delicious with the pumpkin. 

Onions: The sweetness in this dish really comes from the caramelized onions in this recipe. 

Ras el-hanout: This is such a great spice mix that adds so much depth to the pumpkin. It is Morrocan in origin, so not at all Latin American (empanadas hail from Latin America originally) but it really is the best spice to pair with pumpkin. 

Egg: To brush the pastry with so that it turns a beautiful golden brown and crisps up on the outside 

📖 How to make these easy pumpkin empanadas:

Set oven to 350°F
First make your pie dough: if you are making homemade empanada dough and want to use my recipe, use my gluten free pastry dough recipe. Put the ingredients in the bowl of a food processor and pulse until it comes together. Set it aside.
Make the pumpkin empanada filling: slice up your onions and place them either in a pot or a large frying pan along with some oil. Cook them down on a medium heat for 30ish minutes. They will be a nice golden brown color when ready. Meanwhile, place the pumpkin puree into a large bowl, add the spices, and mix together. Set aside.
Bring them together: in a tortilla press (or between two pieces of parchment paper) place a ball of the empanada dough. If using a tortilla press, place between the pieces of parchment, and then into the press. Push down and get it to the thickness you desire. If using a rolling pin, roll it out to the thickness you like. Place some of the onion along the center of each of the  empanada discs, followed by a scoop of the filling, and then top with cheese. Fold it over and use a fork to press the edges together to seal edges. Place them on a cookie sheet that is lined with a baking mat or parchment paper.
Cover in egg wash: In a bowl, crack an egg and whisk. Using a pastry brush, brush egg wash on the empanadas. Place into the oven and bake for 25-30 minutes. Check to see how golden they are at 25 minutes. Baking time is up to 30 minutes.  

food processor with dough ingredients inside
Make dough
tortilla press
Place on tortilla press
tortilla press
Press down
onions in a pot
Caramelize the onions
pumpkin filling
Make the pumpkin filling
Easy Pumpkin Empanadas Recipe: Baked Empanadas!
Put the empanadas together
Easy Pumpkin Empanadas Recipe: Baked Empanadas!
Brush with egg wash
Easy Pumpkin Empanadas Recipe: Baked Empanadas!
Bake

⍰ How to store these pumpkin empanadas?

Store in an airtight container in the fridge for 2-3 days. If you want to reheat them, you can brush them with egg wash again or not, bake them at 350°F for about 10 - 15 minutes.

🌟 LEAVE A RATING AND REVIEW! 🌟

⭐️⭐️⭐️⭐️⭐️
Did you love this recipe? If you did, let me know! And let others know too by leaving a comment and star rating. Reviews are incredibly useful in helping other people find my site and make my recipes.
Thank you so much!
Laura 

🔎 Looking for similar recipes and delicious recipes?

Gluten Free Potato Recipes: Easy Gluten-Free Food

December 19, 2023

image

Potatoes are the perfect side dish if ever there was one. Let's dive into some easy and delicious gluten free potato recipes!

Gluten Free Potato Recipes: Easy Gluten-Free Food

If you are curious I have a post that answers if potatoes are gluten free and goes into greater detail. In this post though, we are going to talk about types of potatoes and delicious gluten free potato recipes! There are so many types of potatoes: sweet potatoes, russet potatoes, red potatoes, yellow potatoes, yukon gold potatoes, and you can make a main dish out of potatoes or the best side dishes. Potatoes are always a key part of our holiday dinner and different potato recipes usually are part of our holiday table. 

[feast_advanced_jump_to]

You can make pasta from potatoes, potato salad, potato skins, au gratin potatoes, and never get bored. They are always a crowd pleaser, and the best thing is that you don't only have to serve that at special occasions. Potatoes usually require minimal prep and the less meal prep there is, the better! 

🥣 Equipment to have on hand for gluten free potato recipes:

Good news, you do not need much! 

Large Mixing Bowl: If you like to mix your potatoes by hand this is the way to go along with using a masher

Food Processor or Electric Mixer: If you want to make lump free mashed potatoes that are silky smooth, I always suggest using one or the other

Aluminum foil: If you are going to bake your potatoes or reheat them for a holiday meal, it can be handy to have aluminum foil to cover them

Casserole Dish or baking dish: if you are making something like gluten free scalloped potatoes

Air fryer: If you want to make something like homemade french fries or potato wedges without frying them, then this is a good option

Airtight container: For storing our potatoes after they are cooked!

📃 Good ingredients to have on hand for gluten free potato recipes:

Delicious potatoes: Butter potatoes are my favorite but really, any kind of potato will do

Heavy Cream: you can use heavy whipping cream or milk (or a dairy free alternative) but if you are looking to make creamy mashed potatoes or creamy potatoes in general, then it is good to have this- you can also sub in sour cream

Butter: melted butter (or vegan butter) is a staple in most potato recipes 

Cheese: If you want to make a cheesy potato then sharp cheddar cheese is good, along with gruyere cheese

Herbs and spices: Garlic powder, garlic cloves, green onions, chives, 

📖 Let's look at some of my personal favorite potato recipes

Remember everything on my site is always 100% gluten free. I do my best to use the best foods and bring you the best gluten free recipes!

Sweet Potato Black Bean Tacos
This taco recipe does not need to be reserved just for taco Tuesday. These sweet potato black bean tacos are the perfect addition to your repertoire of vegetarian recipes! Follow the video for step by step instructions as to how to make this fun new recipe!
Sweet Potato Black Bean Tacos filling in tortillas
Creamy Mashed Potatoes
This recipe for creamy mashed potatoes is quick and easy. The ideal side dish to any meal, they are ready in a snap and super delicious
Creamy Mashed Potatoes
Polish Potatoes or Herb Potatoes
If you are looking for the perfect side dish or holiday recipe, look no further! This recipe for Polish Potatoes is quick, easy, and beyond delicious. Ready in under 30 minutes, it is the perfect accompaniment to any meal. Make them today.
Roasted Potatoes
These roasted potatoes are quick, easy, and packed full of flavor. Ready in 30 minutes, they are the perfect side dish!
Roasted Potatoes Recipe on a plate
Cheese and Onion Pasty
Based off of the original Cornish Pasty, this recipe for a cheese and onion pasty is quick, delicious, and the perfect blend of flavors. These homemade cheese and onion pasties are a delicious combination of mature cheddar, mashed potato, onion, and spices.
CHEESE AND ONION PASTY RECIPE: VEGETARIAN PASTIES
vegetarian pasty recipe
This vegetarian pasty recipe is based on the traditional Cornish pasty but instead of using meat focuses on root vegetables is packed full of great flavour.
VEGETARIAN PASTY RECIPE: CORNISH PASTIES RECIPE
gluten free pasty
Learn how to make your favorite Cornish staple at home and gluten free. Introducing the gluten free pasty. This savory hand pie is delicious, hearty, and the perfect meal to eat with your hands.
Gluten Free Pasty Recipe: Traditional Cornish Pasties
Irish pasties
This recipe for Irish pasties is perfect for any day (or St Patrick’s day). Similar to Cornish pasties, but with their own spin, this delicious pastie supper will become a staple in your kitchen in no time
IRISH PASTIES RECIPE: DELICIOUS IRISH PASTY RECIPES

🌟 LEAVE A RATING AND REVIEW! 🌟

⭐️⭐️⭐️⭐️⭐️
Did you love this post? If you did, let me know! And let others know too by leaving a comment and star rating. Reviews are incredibly useful in helping other people find my site and make my recipes.
Thank you so much!
Laura 

Looking for other recipes?

  • image
    Gluten Free Potato Recipes: Easy Gluten-Free Food
  • Gluten Free Fish Recipes: Easy Gluten-Free Meals
  • Maple Miso Salmon Recipe: Make Easy Glazed Salmon
  • Crusted Cod Recipe: Delicious & Easy Baked Fish Recipe

Caramelised Onion and Goats Cheese Tart with Thyme

December 14, 2023

This recipe for caramelised onion and goats cheese tart  is packed full of flavor. The sweetness of the onions and the tangy flavor of the goat's cheese is just the perfect match of flavors.

I love a good tart recipe. Savory tarts like my French Tomato Tart, savory galette, or this caramelised onion and goats cheese tart hit the spot. This tart in particular with the caramelized onions and the goat cheese give the perfect balance of sweet and savory. Despite this being a tart and perhaps being thought of as difficult, it still falls under the category of easy meals. The only real prep for this recipe is the crust, and the caramelised onions.  If that is the hardest part, then this onion tart with creamy goat cheese should be on your dinner menu in no time.

[feast_advanced_jump_to]

⭐️ Tips, Tricks, and Alterations

For this recipe it is important to only use sweet onions. A sweet onion is going to give you the right sweetness when you cook them down. You want a simple caramelized onion, and red onions will not give you this. 

I use a soft goats cheese. I have not used feta cheese in this recipe. You could try it if you want to but I cannot guarantee that if you do not use a similar goat cheese that the taste will not be effected. Tangy goat cheese shines in this recipe and you would lose some of that if you used a hard feta for example. 

I use my gluten free tart crust for this recipe. However if you are not gluten free then you can use whatever crust you wish. I would stick to a regular pie dough crust however rather than a puff pastry dough (this would work better if you were doing bite sized and individual pieces where you would cut the sheet of puff pastry.) Either way, be sure to use a buttery pastry crust as it brings the recipe together and is our pastry case.
If you want to make caramelized onions without butter and use balsamic vinegar instead, learn how to make my vegan caramelized onions.

Caramelised Onion and Goats Cheese Tart with Thyme

❤️ Why you will love this recipe

This tart is perfect for main meals, brunch menu ideas, holiday lunches, you name it. The filling mixture is so simple to make and so delicious. For any goat cheese fan, this is the recipe for them.

📃 Ingredients for this caramelised onion and goats cheese tart:

Goat cheese: I use soft goats cheese. I think it adds the best flavor and I like the texture.
Half & Half: You could use cream if you wanted to but this is a rich tart by its nature. Cream would amplify that.
Onions: A key part of our tart
Pie Crust: I use my gluten free tart crust for this recipe which is made from cup4cup flour (gluten free), butter, egg, and cold water
Cayenne Pepper: I like to add a pinch of cayenne to give some further depth of flavor to the tart
Thyme: I love fresh thyme in this, and in general. It adds such a gorgeous flavor. 
Eggs: Eggs help bind the filling together when it bakes in the oven
Salt & Pepper: To season the filling

📖 How to make this caramelised onion and goats cheese tart

First thing to do is set the oven to 375°F
Make the tart crust: If you are making my crust, in the bowl of a food processor place the butter, egg, flour, and water. Pulse until it comes together to form the dough. 
Put the dough into the tart pan: I like to use a tart tin with a removable bottom but you don't have to, just makes it easier for when you want to slice it. You can either roll out the dough between two pieces of parchment paper and lay it over the tarty tin and mold it in. Or, dump the dough into the tin and press it to fit with your fingers.
Par bake the crust: Cover it with parchment paper and place pie weights over the crust. Bake for 15 minutes. Remove from the oven and set aside.
Make the filling: In a large frying pan, place the butter and cook down the onions. Caramelized onions are a deep golden brown when done. While the onions are cooking down, place in half & half into a medium sized bowl. Add the eggs, cayenne, and thyme leaves. Whisk together. 
Put it together: Place the tart in on a baking tray. Line the bottom of the tart with the onions and crumble up the cheese. Scatter it around. Pour the mixture in. Place in the oven and bake for 30 minutes. You want the filling to be firm and the tart to be golden brown.
Let it sit: For 5 minutes and then serve immediately. Top with more thyme if desired.

Caramelised onion and goats cheese tart
Make the crust
Caramelised onion and goats cheese tart
Form the crust into the mold of the tin
Caramelised onion and goats cheese tart
Place the parchment paper under the pie weights and bake
onions in a pot
Caramelize the onions
half and half and eggs in a bowl
Put the half&half and eggs in a bowl and whisk
custard filling for Caramelised onion and goats cheese tart
Add the cayenne and whisk
custard filling  for Caramelised onion and goats cheese tart
Add the thyme, salt, and pepper and whisk
tart shell lined with caramelized onions
Line the bottom of the tart with the caramelized onion
Caramelised onion and goats cheese tart
Place the cheese on top of the onions
Caramelised onion and goats cheese tart
Pour the filling in and bake
Caramelised onion and goats cheese tart
Let it sit for a few minutes when it is out of the oven


🍽 How to store this Caramelised onion and goats cheese tart?

If you are storing it in the tart pan then simply cover it with tin foil. If not, store in an airtight container. When you want to reheat it, heat the oven to 350°F and bake for 10-15 minutes on a lined baking sheet.

🥘 What to pair with this goat cheese tart

This would go really nicely with a sparkling cider or white wine if you are looking for a drink to match it with.

If you wanted to make this a bit sweeter, you could add fig jam.

🌟 LEAVE A RATING AND REVIEW! 🌟

⭐️⭐️⭐️⭐️⭐️
Did you love this recipe? If you did, let me know! And let others know too by leaving a comment and star rating. Reviews are incredibly useful in helping other people find my site and make my recipes.
Thank you so much!
Laura 

Looking for more tart recipes?

Gluten Free Fish Recipes: Easy Gluten-Free Meals

December 12, 2023

When on a gluten free diet, it is important to know what you can eat. In this post I'll show you delicious and easy gluten free fish recipes.

Gluten Free Fish Recipes: Easy Gluten-Free Meals

I always have frozen fish fillets in my freezer. More often than not it is flounder, salmon, and cod. I love a good seafood casserole or a gluten free fried fish, but, when you are new to a gluten free lifestyle and diet, it can be hard to know what you can have that is safe for you (and is also delicious). I'm going to go over some tips and tricks in this post as well as share some of my favorite gluten free fish recipes and gluten free seafood recipes!

🐠 What fishes are safe?

All fish in its natural form is gluten-free fish. Gluten is a protein found in things such as barley, wheat, rye, and malt. For the average home cook, you are going to want to go with a flaky white fish (such as cod or halibut) or salmon (sockeye salmon being my personal favorite). This doesn't mean that you can't splurge every now and then and get something like chilean sea bass or rockfish. But, whatever you favorite fish is, in its natural form, it is gluten free!

⭐️Tips and Tricks for making gluten free fish recipes:

I always have a gluten free all purpose flour on hand in my house if I want to give my fish recipes a little crisp. The flour that I love to use for this is King Arthur Gluten Free Measure for Measure flour.  

If you are going to fry fish it is important to remember the following about oils:

Cooking oils and frying oils all have different heating points. This means that some oils are going to burn faster than others. 

If you are wanting to sear a fish in a frying pan for a recipe, then it is safe to use something like olive oil or avocado oil. However, if you are wanting deep-fried fish (a la fish and chips along with mushy peas) then you would use either vegetable oil or canola oil as your cooking oil. These types of oils are meant for deep frying. It would be the same type of oil if you were to make homemade fries or homemade chips.  

Some people also like to make their fish in an air fryer, even though I must say that I have never done this.

Gluten Free Fish Recipes: Easy Gluten-Free Meals

🥣 Kitchen Tools you may want:

I like to always have a large skillet, preferably one that is cast iron so that it can be used for the stove top as well as the oven.

Another great option is a solid and sturdy baking sheet. That way you can use it to just bake the fish itself or you can do a pan meal where you throw everything on there and ensure that it cooks evenly. 

⍰ Do I need to use "fresh fish" for gluten free fish?

The idea of fresh fish being fish that is not frozen from the grocery store is incorrect. All fish is frozen. Meaning that the fish was caught then frozen immediately. The "fresh" fish you get from the store is fish that has already been thawed. I therefore always suggest that people keep frozen fillets in their freezer. It is a great way to guarantee that you will always have fresh fish when you want it and you can then decide when to thaw it and not be on the clock. 

📃Key Ingredients to have on hand for fish:

I am always pro spice in my house. I always have black pepper, salt, garlic powder, harissa, zaatar, oregano, and a slurry of other spices ready to go at a moments notice. Spice is the key with fish, along with whatever sauce or glaze you will top it with. But, it all starts with spice. Old bay seasoning is a big one in Maryland where I live. I also like to have garlic cloves, lemon juice, white wine, and sherry.  Another big staple is tartar sauce.3

Frozen Fish filets: 

As I said above, I love cooking with cod filets (I have several family friendly cod recipes listed below) as well as salmon. For cod you get can different variations like Alaskan cod fillets, regular cod, or black cod. In addition to salmon you can also find fish like mahi mahi.

📖 Gluten Free Fish Recipes:

Remember that every recipe on my site is safe for someone who is gluten free. I have celiac disease and never ever take the risk. These meals can be great for a date night, or for the whole family. For best results, remember to always stick to the recipe card (at least for the first time you make it). 

Mediterranean Cod
If you are looking for an easy and delicious meal that can feed your whole family and falls under the Mediterranean diet, then this Mediterranean cod recipe is perfect for you! This meal is ready to go in under thirty minutes. Make this Mediterranean dish today.
Maple Miso Salmon
This recipe for Maple Miso Salmon is the easiest weekday dinner. Ready in under 30 minutes, the maple miso glaze is savory, sweet, and delicious.
Coconut Curry Salmon
It can be easy to recreate delicious Thai flavors at home. This coconut curry salmon recipe does jus that. The creamy coconut curry sauce along with the delicious salmon filets makes it the perfect dinner. Ready in 30 minutes, it will quickly become one of your favorite meals.
RED CURRY SALMON: EASY THAI RED CURRY SALMON RECIPE!
Cod Au Gratin
If you are looking for an au gratin recipe but want to try something a bit different, then this gluten free cod au gratin is the right recipe for you. With very little prep time, and a punch of flavor, this dish is elevated and sophisticated all the while remaining simple. One of the traditional Newfoundland recipes, this dish is so delicious and simple to make.
Best Cod Au Gratin Recipe: Classic Traditional Recipes
Christmas Salmon
If you are looking for something other than meat to be the center piece of your Christmas dinner, look no further than this Christmas salmon. This salmon dish is perfect for special occasions and will be a perfect center to your table on Christmas day.
Ingredients Baked Christmas Salmon Recipe: The Best Holiday Dinner
Zaatar Salmon
If you love Mediterranean inspired dishes and love salmon, then you will love this zaatar salmon. This dish is ready in under 30 minutes and packed full of flavor.
Red Curry Salmon
If you love salmon and are looking to spice up your weekly dinners, this red curry salmon is perfect. Ready in 30 minutes, and absolutely delicious, it will become a meal in your weekly rotation.
Red Curry Salmon: Easy Thai Red Curry Salmon Recipe!
Gluten Free Fried Fish
Being gluten free doesn’t mean you have to go without some of your favorite things. This gluten free fried fish recipe is so quick and easy that it will become part of your weekly rotation.
Gluten Free Fried Fish: A Pan-Fried & Gluten-Free Recipe
New England Seafood Casserole Recipe
If you love a hearty meal and are a fan of seafood, then you will love this New England Seafood Casserole Recipe! It is stuffed full of delicious ingredients that seafood lovers will be unable to stop themselves for going for seconds.
Chilean Sea Bass
This recipe for Chilean Sea Bass is decadent, delicious, and beyond easy.
Chilean Sea Bass ingredients
Baked Rockfish
This recipe for baked rockfish fillets is quick, delicious, and an easy recipe. With a cook time of under 30 minutes, you will be wondering why you haven’t been making this recipe forever.
baked rockfish with chives on top on a white plate with a silver serving utensil next to it
Slow Roasted Salmon
This recipe for slow roasted salmon is quick, easy, and absolutely delicious. Make it today.
Slow Roasted Salmon with Herb Butter
The Little Mermaids "Les Poissons"
Stuffed swordfish!
"Then I stuff you with bread, It don’t hurt, ’cause you’re deadAnd you’re certainly lucky, you are, ‘Cause it’s gonna be hotIn my big silver pot, Tout à l’heure, mon poisson!Au revoir!"– Little Mermaid Les Poissons
Little Mermaid's Les Poissons
Moroccan Salmon with Acorn Squash
This recipe for Moroccan Salmon and Roasted Acorn Squash is the perfect blending of flavors and textures. Ready in under 45 minutes, it is the perfect dinner.
Quick and Easy Moroccan Salmon
Fish Soup
This Fish Stew Recipe is packed full of flavor, gluten free, dairy & nut free, and ready in 45 minutes! Make it today!
Easy One Pot Fish Stew
Ahi Tuna
This recipe and marinade for Ahi Tuna is so simple in its ingredients that you will be kicking yourself for not having made it sooner!
Sliced Ahi Tuna on a plate
Cajun Catfish
This recipe for cajun catfish is packed full of flavor and beyond simple to make. The perfect weeknight dinner.
Cajun Catfish Recipe on a plate
Crusted Cod
If you are looking for an easy yet delicious dinner, this crusted cod recipe is going o be perfect for you. Less than 5 ingredients, and ready in under 30 minutes, it is the ideal dinner.
Thai Salmon Fish Cakes
If you love a crab cake or a fish cake in general, then these Thai salmon fish cakes are the perfect recipe for you. Quick and easy to make, they are a crowd pleaser and absolutely delicious. This recipe is a great appetizer or perfect as a main dish.

🌟 LEAVE A RATING AND REVIEW! 🌟

⭐️⭐️⭐️⭐️⭐️
Did you love this post? If you did, let me know! And let others know too by leaving a comment and star rating. Reviews are incredibly useful in helping other people find my site and make my recipes.
Thank you so much!
Laura 

Looking for other recipes?

  • Gluten Free Salmon Recipes: The Best Gluten-Free Recipes
  • image
    Are Potatoes Gluten Free? Gluten Free Potato Recipes
  • Easy Mediterranean Cod: Baked Fish Recipe with Lemon
  • Gluten-Free Tart Crust Recipe

Maple Miso Salmon Recipe: Make Easy Glazed Salmon

December 7, 2023

This recipe for Maple Miso Salmon is the easiest weekday dinner. Ready in under 30 minutes, the maple miso glaze is savory, sweet, and delicious. 

Maple Miso Salmon Recipe: Make Easy Glazed Salmon

I love salmon for busy weeknights. I am a fan of fish, that is no surprise here. It is hard to beat a flaky salmon and lately my go to's have been my zaatar salmon, Christmas salmon (with the holiday approaching), and now this maple miso salmon. The sweet maple syrup paired with the umami flavor of the miso paste makes the miso maple glaze the ideal sauce for our salmon. The cooking time for everything in this recipe is under 30 minutes, Let's make this miso maple salmon.

[feast_advanced_jump_to]

⭐️ Tips, Tricks, and Alterations

Miso is a fermented soybean paste but it can occasionally be made from other sources (such as barley). Be sure if you are on a gluten free diet that you find a gluten free based miso paste. 

In this recipe I use a red miso paste (often used in miso soup), which tends to be used for savory dishes in addition to marinades. White miso paste is used for sweeter dishes. If you cannot find red, you can use white, but, the flavor of the dish will be quite different. 

Bake the salmon on parchment paper and not aluminum foil. I tend to use skin-on salmon fillets and it sticks to the foil. This is avoidable if using parchment paper. 

Miso is available in most grocery stores. If you cannot find it, try to get to an Asian market or look on Amazon. 

If you wanted to add some texture to the dish, you could top the salmon in addition to the glaze with sesame seeds or green onions. 

If you want a head start and want to make this earlier in the day, you can make the marinade / glaze and let the salmon sit in it in the fridge for several hours. Pour the sauce from the bag or container you use to hold it along with the fish onto the sheet pan (make sure the salmon is covered in the sauce) and bake it.

For best results, always stick to the recipe card.

❤️ Why you will love this recipe:

Easy recipes are the best for weeknight dinners. The flavor-packed marinade of the maple miso sauce is so delicious. This dish requires minimal effort, and is one of my favorite salmon recipes. This recipe is just the latest addition of my easy salmon recipes but it has quickly worked its way up my list and I hope it will be at the top of yours!

📃 Ingredients for Maple miso salmon

Ingredients for maple miso salmon

Salmon: I like to use sockeye salmon but you can use regular salmon if you wish

Red Miso Paste: See my notes above in the tips and tricks section

Garlic Cloves: Every good savory recipe has garlic! The flavor blends beautifully with the glaze.

Butter: This is the base of our glaze

Maple Syrup: The sweetness from our glaze comes from the maple syrup

📖 How to make this miso maple salmon:

Heat the oven to 425°F
Pat down the salmon: with paper towels. You want to make sure that the salmon is not going to leek water when it bakes
Make the glaze: Add the butter, miso, maple syrup, and minced garlic to a pot. Melt everything down until it becomes a thick glaze.
Place salmon: ​On a baking sheet and season with salt and pepper.
Pour the glaze: On top of the salmon. Make sure that the glaze covers the 
Place the salmon: ​On a baking sheet that is lined with parchment paper. Place the salmon into the oven and bake for 12 minutes. Remove from the oven and check that the internal temperature is 145°F. If the fish is not cooked yet, place the fish back into the middle of the oven and bake for 2 more minutes. 

Maple Miso Salmon Recipe: Make Easy Glazed Salmon
Make the glaze
Maple Miso Salmon Recipe: Make Easy Glazed Salmon
Cover the salmon with the glaze
Maple Miso Salmon Recipe: Make Easy Glazed Salmon
Bake and serve immediately

Next time you are in a rush, make sure to look at my other pescatarian recipes. 

🍽 How to store this?

An easy way to store it is in an airtight container. It should be eaten within 1-2 days. 

🥘 What to pair with maple miso salmon?

This easy weeknight meal can be paired with a wide variety of dishes. My favorite ways are to serve it with my harissa carrots, in addition to my creamy mashed potatoes or Polish potatoes. 

🌟 LEAVE A RATING AND REVIEW! 🌟

⭐️⭐️⭐️⭐️⭐️
Did you love this recipe? If you did, let me know! And let others know too by leaving a comment and star rating. Reviews are incredibly useful in helping other people find my site and make my recipes.
Thank you so much!
Laura 

🔎 Looking for other salmon recipes?

  • Thai-style Salmon Fishcakes
  • Ingredients Baked Christmas Salmon Recipe: The Best Holiday Dinner
    Baked Christmas Salmon Recipe: The Best Holiday Dinner
  • Mediterranean Baked Za'atar Crusted Salmon
  • Slow Roasted Salmon with Herb Butter
    Slow Roasted Salmon

Crusted Cod Recipe: Delicious & Easy Baked Fish Recipe

December 5, 2023

If you are looking for an easy yet delicious dinner, this crusted cod recipe is going o be perfect for you. Less than 5 ingredients, and ready in under 30 minutes, it is the ideal dinner.

Crusted Cod Recipe: Delicious & Easy Baked Fish Recipe

I love fish recipes because they usually are a quick dinner. I always have cod fillets in my freezer. Lately, my favorites have been my mediterranean cod recipe (because I am just digging Mediterranean cuisine) or my cod au gratin but this one is a favorite because it is a meal I can make for the whole family in no time and is super delicious. This is a delicious meal and a great option for dinner that I love to serve with my harissa carrots or my polish potatoes. Best part? The flakiness of the cod. Let's make this recipe.

⭐️ Tips and tricks for this crusted cod recipe:

You do not need to use "fresh cod" from the grocery store. It is important to remember that all fish when caught is then frozen. "Fresh" fish at your local grocery store is fish that has been frozen and already thawed. I love keeping frozen fish fillets in my freezer instead. That way, I can control when I want to make them. I simply put the fillets in the fridge the night before to let them thaw or place them on the counter that morning until they are completely thawed.

I love using cod for this because it is a meaty fish and a blank slate. If you cannot find cod fish however you could use flounder.

The best way to guarantee the best outcome is to always follow the recipe card!

❤️ Why you will love this recipe:

The flaky fish is so delicious and this will be one of your go to easy recipes in no time. This recipe uses easy and simple ingredients. Cod is a mild white fish so it does not have a distinctive fishy flavor that some people do not like. The crunchy texture on the outside of the fish pairs so nicely with how soft the fish is when it comes out of the oven. It is a simple dish but a delicious recipe. It is a flavorful fish when the recipe is complete.

📃Ingredients for crusted cod:

ingredients for Crusted Cod Recipe: Delicious & Easy Baked Fish Recipe

Mayonnaise: I use a light mayo but you can use regular if you wish. It serves as our "binding" agent in this recipe so that our crust will stick to the fish. 
Pistachios: I do not use panko crumbs in my recipe. While a crunchy panko is delicious, the pistachios give a great flavor, texture, and are so pretty. 
Cod Filets: This is my fish of choice for this recipe because it is a meatier white fish.
Salt and Pepper: to flavor the fish

📖 How do I make this crusted cod?

Set the oven to 425° degrees F
Take paper towels: and pat down the fish. You do not want the fish to have too much water in it. Otherwise, it will seep out when you back it and it ruins the crunch of the crust.
Line a baking sheet pan: with parchment paper. Place the fish fillets on the pan. Season each fillet with salt and pepper. 
Place the mayo: on top of the fish. I like to use a pastry brush to coat the fish with the mayo and make sure it is covered on all sides.
Make the pistachio fine: I like to use a mortar and pestle to grind down the nuts. If you put them in a food processor, you run the risk of them turning into a nut butter which is not something you want for this recipe. Once you have ground them down into a chunky but finer powder, coat the fish with it. 
Place the fish: into a hot oven and bake for 15 minutes. Remove from the oven and check to see that the internal temperature is 145°F. Once it hits 145, it is cooked and ready to serve.

cod filet
Season cod filets
cod filet with mayo on top
Cover in mayo
pistachios in a mortar and pestle
Grind up the pistachios
Crusted Cod Recipe: Delicious & Easy Baked Fish Recipe
Coat the fish with the pistachios
Crusted Cod Recipe: Delicious & Easy Baked Fish Recipe
Bake and serve

Note: The recipe is fine as is but if you wanted to serve it with some chopped fresh parsley or some lemon zest you could. But a great way to serve it is as is! 

When you are done with this recipe, give my gluten free fried fish a go!

⍰ How to store the leftovers?

In an airtight container that you place in the fridge. Eat within 1-2 days.

🌟 LEAVE A RATING AND REVIEW! 🌟

⭐️⭐️⭐️⭐️⭐️
Did you love this recipe? If you did, let me know! And let others know too by leaving a comment and star rating. Reviews are incredibly useful in helping other people find my site and make my recipes.
Thank you so much!
Laura 

Looking for other pescatarian recipes?

  • Best Cod Au Gratin Recipe: Classic Traditional Recipes
    Best Cod Au Gratin Recipe: Classic Traditional Recipe
  • Gluten Free Fried Fish: A Pan-Fried & Gluten-Free Recipe
    Gluten-Free Pan Fried Fish
  • New England Seafood Casserole Recipe: The Best Recipe!
  • baked rockfish with chives on top on a white plate with a silver serving utensil next to it
    Quick and Easy Oven Baked Rockfish Fillets Recipe

Gluten Free Salmon Recipes: The Best Gluten-Free Recipes

December 1, 2023

Salmon is one of my favorite ingredients. It is so versatile and easy to cook with. Let's jump into some of my favorite gluten free salmon recipes. 

Gluten Free Salmon Recipes: The Best Gluten-Free Recipes

When you have celiac disease or a gluten intolerance (or simply adhere to a gluten free diet) it is great to have some delicious and flaky salmon recipes in your repertoire. Perfect for busy weeknights or weekends, I have easy dinners and quick meal prep recipes!

The best part is that every recipe is ready in under 30 minutes. These are easy salmon recipes and each recipe I hope will become a family favorite. Nothing is better than an easy meal that has a short cooking time and has the seal of approval from the whole family. Some of these recipes (like my Christmas salmon) are also perfect for special occasions. For best results for each of these recipes, try to stick to the recipe card. 

Why you'll love these gluten free salmon recipes:

I love that you can easily pair these meals with quick sides like sushi rice, brown rice, creamy mashed potatoes, harissa carrots, or brown sugar honey glazed carrots. It is one of my all-time favorite fish. 

Ingredients Baked Christmas Salmon Recipe: The Best Holiday Dinner

Tips and Tricks For Gluten Free Salmon Recipes:

The perfect meal is always based on the quality of its ingredients. Therefore using a good quality salmon as the main ingredient is key. If you want a delicious gluten-free dinner make sure that you use good quality salmon. This does not mean that you only purchase the best quality salmon or  fresh salmon fillets, I actually recommend that you buy frozen. 

*All fish is frozen after it is caught. Frozen fish is fish that has been frozen and not yet thawed. "Fresh" fish is fish that was frozen when it was caught, and then was thawed at the grocery store to be sold at the counter. The fillets often aren't good the next day, so if you do not intend to have the entire family eat them that night, I suggest buying frozen. Place frozen fillets in the fridge the night before to take the edge off, and then place salmon on the counter to fully thaw before cooking. 

Gluten Free Salmon Recipes: The Best Gluten-Free Recipes

Depending on the recipe you are making, ingredients can help elevate a dish. Sesame seeds can give nice texture and a nutty flavor (same with sesame oil). Coconut aminos tastes just like soy sauce but is gluten free (or you can look for a gluten-free soy sauce if you want to make a teriyaki salmon). Fresh garlic, sriracha sauce, lemon zest, etc. Salmon is a great canvas to try different flavors on and get your taste buds moving. The first time you make the recipe, try to stick to the recipe card, and the next time, you can take it to the next level because you will know what exactly it is that you love or what you wan to pair it with. 

Gluten Free Salmon Recipes

Most of these recipes are made from simple ingredients, and each recipe is an easy weeknight dinner. 

Coconut Curry Salmon
t can be easy to recreate delicious Thai flavors at home. This coconut curry salmon recipe does jus that. The creamy coconut curry sauce along with the delicious salmon filets makes it the perfect dinner. Ready in 30 minutes, it will quickly become one of your favorite meals.
RED CURRY SALMON: EASY THAI RED CURRY SALMON RECIPE!
Thai Salmon Fish Cakes
If you love a crab cake or a fish cake in general, then these Thai salmon fish cakes are the perfect recipe for you. Quick and easy to make, they are a crowd pleaser and absolutely delicious. This recipe is a great appetizer or perfect as a main dish.
Christmas Salmon Recipe
If you are looking for something other than meat to be the center piece of your Christmas dinner, look no further than this Christmas salmon. This salmon dish is perfect for special occasions and will be a perfect center to your table on Christmas day.
Ingredients Baked Christmas Salmon Recipe: The Best Holiday Dinner
Zaatar Salmon
If you love Mediterranean inspired dishes and love salmon, then you will love this zaatar salmon. This dish is ready in under 30 minutes and packed full of flavor.
Slow Roasted Salmon
This recipe for slow roasted salmon is quick, easy, and absolutely delicious. Make it today.
Slow Roasted Salmon with Herb Butter
Moroccan Salmon (Salmon with Acorn Squash)
This recipe for Moroccan Salmon and Roasted Acorn Squash is the perfect blending of flavors and textures. Ready in under 45 minutes, it is the perfect dinner.
Quick and Easy Moroccan Salmon
Red Curry Salmon
If you love salmon and are looking to spice up your weekly dinners, this red curry salmon is perfect. Ready in 30 minutes, and absolutely delicious, it will become a meal in your weekly rotation.
Red Curry Salmon: Easy Thai Red Curry Salmon Recipe!

🌟 LEAVE A RATING AND REVIEW! 🌟

⭐️⭐️⭐️⭐️⭐️
Did you love this post? If you did, let me know! And let others know too by leaving a comment and star rating. Reviews are incredibly useful in helping other people find my site and make my recipes. Thank you so much!
Laura 

LOOKING FOR NEW RECIPES?

  • Brown Sugar Honey Glazed Carrots Recipe: Easy & Sweet
  • Baked Apple Empanadas: Easy Empanada (Hand Pies) Recipe
  • CHERRY BAKEWELL TART RECIPE: MINI FRANGIPANE TARTS
    Cherry Bakewell Tart Recipe: Mini Frangipane Tarts
  • IRISH PASTIES RECIPE: DELICIOUS IRISH PASTY RECIPES
    Delicious Irish Pasty

Raspberry Frangipane Tartlets Recipe: Almond Tarts

November 27, 2023

This recipe for raspberry frangipane tartlets is the ideal dessert. Easy to make, packed with flavor, and super delicious, it is the perfect individual treat. 

I love a good tart recipe! However when I am having people over for dinner or for a holiday meal, I like to sometimes make tarts for everyone rather than just a slice. In the past I have made my apple frangipane tarts or my cherry Bakewell tart. However, these raspberry frangipane tartlets have climbed up the list. You do not need fresh raspberries for this recipe, just raspberry jam. You do not even need a tart pan, just a muffin tin. The frangipane filling is made from almond meal (which is also known as almond flour - which is really finely ground almonds), along with a splash of almond extract. It is just such a simple dessert but so delicious. Great for a dinner or an afternoon tea! Plus, it is topped with slivered almonds and is so pretty to look at. Let's make our individualized raspberry almond tart. 

📜Tips and Tricks for this raspberry frangipane tartlets recipe:

  • You do not hav e to par bake your crust, which means you do not need pie weights or parchment paper. 
  • You do not need a tart tin or a a tart pan with a removable bottom. All you need is a muffin tin. If you did want to make more classic tart shells, you can, if you do that your tart crust would need a removable bottom pan.
  • I do not refrigerate the tart dough before baking it. Therefore you do not need to wrap the pie crust in plastic wrap. You can put it in the fridge if you do not want to make them right away but, I do not for this recipe.
  • For best results, always follow the recipe card!

❤️ Why you will love these Raspberry Frangipane Tartlets

The almond filling in the tarts is soft and spongey and so delicious. The almond flavors from the extract and the flour pair so beautifully with the jam. Plus, they look so cute!

📜 Ingredients Needed For Raspberry Frangipane Tartlets:

Almond Flour: almond flour is the core of our almond frangipane sponge layer. While it’s not a “cake” when baked, it is super moist and delicious. I do not recommend using store bought almond paste but rather making your own. 
Almond Extract: Even though we have almond flour in the recipe, you still want a strong almond flavor and that will come from the almond extract.
Pastry Dough: You need a pastry case for our raspberry frangipane tartlets recipe. I use my gluten free pastry dough recipe but you can use your own recipe, mine, or store bought.
Butter: Butter goes into our frangipane filling (as well as pie crust)
Eggs: the whole egg (not just the egg yolk) is the binding agent in the frangipane
Raspberry Jam: Cherry jam is used in this recipe rather than the traditional raspberry jam. 
Caster Sugar: We have sugar to sweeten the frangipane
Slivered Almonds: I like to top the tarts with slivered almonds and make them look nice.

📜 STEP BY STEP INSTRUCTIONS: HOW DO YOU MAKE THIS CHERRY BAKEWELL RECIPE?

– Set the oven temperature to 350°F
– Make the pastry base: If you are using your own pie crust or pastry dough recipe, then follow the instructions for that. If you are wanting my recipe, make the dough, place between two pieces of parchment paper and roll it out with a rolling pin until thin. Cut with cookie cutters or pastry cutters.
– Line the muffin tin: with the pastry that you used the cookie cutters to cut. Make sure they sit well in the muffin tin. Poke the base of the pastry with a fork.
– Place the raspberry jam: with a spoon, line the bottom of the pastry dough with jam. 
Make the frangipane: To make the frangipane, in the large bowl of an electric mixer (or a large mixing bowl) add room temperature butter, almond meal (same as almond flour), egg, sugar, and almond extract. Mix on a medium speed. The frangipane will come together and be sticky and soft.
Fill the pastry cups: with the frangipane filling. You can do this with a spoon and then smooth it out with your hands if you wish.
Top the tarts: with the slivered almonds. Place the slivered almonds on top of the frangipane. I like to do a flower pattern. 
Place into a preheated oven: bake for 25-30 minutes. They should be golden brown when they are finished. Remove from the oven when they are done baking and place on a wire rack. Allow them to cool.

Raspberry Frangipane Tartlets Recipe: Almond Tarts
Make the pie dough and. then set aside
Raspberry Frangipane Tartlets Recipe: Almond Tarts
As it is pulsing, put the ingredients in the bowl for the frangipane
raspberry frangipane tartlets dough
Between two pieces of parchment paper, roll out the dough
cut pastry
Cut it with cookie cutters or pastry cutters
pastry cups
Line the muffin tin with the pastry dough and pierce the bottom with a fork
pastry filled with raspberry jam
Line with raspberry jam
raspberry frangipane tartlets in a muffin tin
Fill with the frangipane and top with the almonds
raspberry frangipane tartlets
Bake 25-30 minutes, until golden brown on top

🥧 How to store these raspberry frangipane tartlets:

Store in an airtight container and eat within 3-5 days. You can store them in the fridge or on the counter.

🌟 LEAVE A RATING AND REVIEW! 🌟

⭐️⭐️⭐️⭐️⭐️
Did you love this recipe? If you did, let me know! And let others know too by leaving a comment and star rating. Reviews are incredibly useful in helping other people find my site and make my recipes.
Thank you so much!

Looking for more Tart Recipes?

  • VEGETARIAN PASTY RECIPE: CORNISH PASTIES RECIPE
    Vegetarian Cornish Pasties
  • CHEESE AND ONION PASTY RECIPE: VEGETARIAN PASTIES
    Cheese and Onion Pasty Recipe: Vegetarian Pasties
  • APPLE FRANGIPANE TART RECIPE: CLASSIC FRENCH RECIPES
    Apple Frangipane Tart Recipe: Classic French Recipes
  • Custard Apple Tart: A French NormandeTarte Recipe
    Custard Apple Tart: A French Normande Tarte Recipe

Are Potatoes Gluten Free? Gluten Free Potato Recipes

November 23, 2023

image

When dealing with Celiac Disease or a gluten-free diet, it can be overwhelming at first to determine which foods are gluten-free foods. In this post we will ask the question, are potatoes gluten free and get into some delicious recipes that are safe for anyone with celiac or a gluten intolerance.

Are Potatoes Gluten Free?

If you are new to a gluten free diet and are wondering about gluten-containing ingredients, fear not! In this post, we are going to look at potato products! 

[feast_advanced_jump_to]

Are potatoes gluten free?

Yes, potatoes are naturally gluten-free. Gluten is a protein found in wheat, barley, rye, and their derivatives, but it is not present in potatoes. Therefore, potatoes and products made from them, such as mashed potatoes, baked potatoes, and french fries (when prepared without added gluten-containing ingredients), are generally safe for those who need to follow a gluten-free diet. However, it's always important to check ingredient labels and preparation methods, especially when consuming processed or pre-packaged potato products, as some additives or seasonings may contain gluten.

Are Potatoes Gluten Free?

Types of potatoes:

There many different types  of potatoes, each with its own unique characteristics in terms of flavor, texture, and best culinary uses. Here are some common types of potatoes:

  1. Russet Potatoes (Idaho Potatoes): These are large, starchy potatoes with a thick skin and a fluffy texture when cooked. They are often used for baking, mashing, and frying.
  2. Red Potatoes: These have thin, red skins and a waxy texture. They hold their shape well when cooked, making them suitable for dishes like potato salads, roasting, and boiling.
  3. Yukon Gold Potatoes: These have a golden-yellow flesh and a buttery flavor. They fall between starchy and waxy varieties, making them versatile for various cooking methods, including boiling, baking, and mashing.
  4. Fingerling Potatoes: These are small, narrow potatoes that come in various colors (including red, yellow, and purple). They have a waxy texture and are often roasted, boiled, or used in salads.
  5. Purple Potatoes (Blue Potatoes): These potatoes have vibrant purple or blue skin and flesh. They contain antioxidants and are often used for roasting, boiling, or making colorful mashed potatoes.
  6. Baby Potatoes: These are small, immature potatoes and can come in various varieties. They are often boiled or roasted whole and are popular for their bite-sized appeal.
  7. White Potatoes: These are medium-sized potatoes with white flesh and a balanced starch content. They are versatile and can be used in a variety of dishes, including mashed potatoes and soups.
  8. Adirondack Potatoes: These have a striking appearance with dark purple skin and pink or red flesh. They are typically used in the same way as other potatoes, such as roasting or mashing.
  9. Yellow Finn Potatoes: These potatoes have yellow flesh and a waxy texture. They work well in salads, boiling, or roasting.
  10. All Blue Potatoes: As the name suggests, these potatoes have deep blue or purple skin and flesh. They are often used for novelty purposes, but they can be roasted, mashed, or used in salads.

These are just a few examples, and there are many more potato varieties, each with its own unique qualities. The choice of potato depends on the intended dish and cooking method.

What are a few gluten-containing grains?

Several grains contain gluten, a protein that can cause adverse reactions in individuals with gluten-related disorders such as celiac disease or non-celiac gluten sensitivity. Here are a few gluten-containing grains:

  1. Wheat: Wheat is a major source of gluten and is found in various forms, including whole wheat, white wheat, wheat bran, and wheat germ. Common wheat-based products include bread, pasta, cereals, and baked goods.
  2. Barley: Barley contains gluten and is often used in various food products, such as barley malt, malt extract, and malt vinegar. Barley is commonly found in certain types of beer.
  3. Rye: Rye is another grain that contains gluten. It is used in some types of bread, crackers, and cereals. Rye flour and pumpernickel bread often contain gluten.
  4. Triticale: Triticale is a hybrid grain derived from wheat and rye. It naturally contains gluten and is used in some food products.
  5. Spelt: Spelt is an ancient grain related to wheat, and it contains gluten. Some people with wheat sensitivity may tolerate spelt, but it is not suitable for those with celiac disease.
Are Potatoes Gluten Free?

It's important for individuals who need to follow a gluten-free diet to carefully read food labels, as gluten can hide in various processed foods under different names and forms. Additionally, individuals with gluten-related disorders should avoid cross-contamination in food preparation to prevent inadvertent gluten exposure.

Are Potatoes Gluten Free? Things to remember:

It is important to remember that potatoes are gluten-free in their natural form however things like hash browns could possibly have wheat flour on them. It is always important to look at ingredients list and nutrition label while at a grocery store to make sure that the potato product you want is made in a safe environment (meaning no possible cross contamination or similar equipment being used) and that there are no gluten ingredients to help with its shelf stability.
If you want to be sure that your potatoes are free of all gluten then it is a good idea to use fresh potatoes. It is the best way to be sure that they are safe. 
Also remember that potato flour is a gluten-free flour but this does not mean that potato bread is gluten free. 

Let's make some gluten free potato recipes:

I am of Polish decent and the humble potato is not so humble for me. I love the natural state of potatoes because they can serve as a blank canvas and you can make them so many different ways. I have recipes with sweet potatoes, potato flour and potato starch even, and one of my favorite snacks are potato chips. Potato dishes are simple to make and making potatoes gluten-free is about the easiest thing in the world.

Remember that every recipe on my website is suitable for those with a gluten free lifestyle (be it from an autoimmune condition, coeliac disease (otherwise known as celiac) or simply due to a lifestyle choice). The only immune response you will get from the recipes is happiness.

Sweet Potato Black Bean Tacos
This taco recipe does not need to be reserved just for taco Tuesday. These sweet potato black bean tacos are the perfect addition to your repertoire of vegetarian recipes! Follow the video for step by step instructions as to how to make this fun new recipe!
Sweet Potato Black Bean Tacos filling in tortillas
Creamy Mashed Potatoes
This recipe for creamy mashed potatoes is quick and easy. The ideal side dish to any meal, they are ready in a snap and super delicious
Creamy Mashed Potatoes
Polish Potatoes or Herb Potatoes
If you are looking for the perfect side dish or holiday recipe, look no further! This recipe for Polish Potatoes is quick, easy, and beyond delicious. Ready in under 30 minutes, it is the perfect accompaniment to any meal. Make them today.
Roasted Potatoes
These roasted potatoes are quick, easy, and packed full of flavor. Ready in 30 minutes, they are the perfect side dish!
Roasted Potatoes Recipe on a plate
Cheese and Onion Pasty
Based off of the original Cornish Pasty, this recipe for a cheese and onion pasty is quick, delicious, and the perfect blend of flavors. These homemade cheese and onion pasties are a delicious combination of mature cheddar, mashed potato, onion, and spices.
CHEESE AND ONION PASTY RECIPE: VEGETARIAN PASTIES
vegetarian pasty recipe
This vegetarian pasty recipe is based on the traditional Cornish pasty but instead of using meat focuses on root vegetables is packed full of great flavour.
VEGETARIAN PASTY RECIPE: CORNISH PASTIES RECIPE
gluten free pasty
Learn how to make your favorite Cornish staple at home and gluten free. Introducing the gluten free pasty. This savory hand pie is delicious, hearty, and the perfect meal to eat with your hands.
Gluten Free Pasty Recipe: Traditional Cornish Pasties
Irish pasties
This recipe for Irish pasties is perfect for any day (or St Patrick’s day). Similar to Cornish pasties, but with their own spin, this delicious pastie supper will become a staple in your kitchen in no time
IRISH PASTIES RECIPE: DELICIOUS IRISH PASTY RECIPES

🌟 LEAVE A RATING AND REVIEW! 🌟

⭐️⭐️⭐️⭐️⭐️
Did you love this post? If you did, let me know! And let others know too by leaving a comment and star rating. Reviews are incredibly useful in helping other people find my site and make my recipes. Thank you so much!
Laura 

Find New Recipes Here

  • Easy Miso Caramel Sauce Recipe: How to Make Miso Caramel
    Easy Miso Caramel Sauce
  • Gluten Free Yorkshire Pudding Recipe: Gluten-free Puddings
    Gluten-Free Yorkshire Pudding
  • Harrisa Carrots : Roasted Carrot Recipe with Harissa
  • Garlic Yogurt Recipe: An Easy Homemade Dip & Sauce
    Garlic Yogurt

Is miso gluten free? Gluten-free Recipes / What to Know

November 21, 2023

Is Miso Gluten Free?

Navigating Japanese restaurants can be difficult when one has Celiac disease or when one requires a gluten free lifestyle. Traditional staples in Japanese food and Japanese dishes (like soy sauce) are not safe. In this post we will ask the question is miso gluten free and we'll go over some great miso recipes. If you want a sneak peak, check out my miso caramel or miso chocolate chip cookies!

Is Miso gluten free? Miso paste on spoons and bowls of miso soup
[feast_advanced_jump_to]

Those who live a gluten-free lifestyle know how hard it can be to find gluten-free options when out for dinner at a restaurant. The normally great way of determining if a food is safe (reading food labels) is not often an option. Food allergies can make. going out to dinner quite difficult and when one is looking at Japanese cuisine, it can be difficult for those with a gluten sensitivity. 

Miso paste is a paste made fermented ingredients that is often found in the traditional soup, miso soup. Made with miso paste and from a dashi stock it is a delicious recipe! In order for this to be considered safe, one would need to ascertain as to whether or not the restaurant uses gluten-free miso paste. The fermented paste can have a different base, and it is fundamentally important to find one that uses soy beans as its base. 

What is miso made from? What is the fermentation process?


Miso is a traditional Japanese seasoning produced by fermenting soybeans with salt and koji (a type of fungus), along with other ingredients such as rice or barley. The fermentation process results in a thick, salty paste with a complex flavor profile that can range from sweet and mild to salty and robust, depending on the type of miso and the duration of fermentation.

Here's a basic overview of the ingredients and fermentation process for making miso:

Is Miso Gluten Free? Ingredients for miso paste:

  1. Soybeans: The primary ingredient is soybeans, which are usually soaked and cooked before being mixed with the other components.
  2. Koji (Aspergillus oryzae): Koji is a mold that plays a crucial role in the fermentation process. It is added to the soybeans to break down starches into sugars, facilitating the subsequent fermentation.
  3. Salt: Salt is an essential component that not only contributes to the flavor but also helps control the fermentation process and prevent the growth of undesirable microorganisms.
  4. Additional Ingredients (Optional): Depending on the type of miso being made, additional ingredients like rice, barley, or other grains may be added to the mixture.

Fermentation Process:

  1. Steeping and Cooking: Soybeans are soaked and cooked until they become soft. The cooked soybeans are then mashed or crushed.
  2. Koji Inoculation: The koji mold is introduced to the mashed soybeans. This step initiates the breakdown of starches in the soybeans into sugars.
  3. Salt Addition: Salt is added to the mixture, and the ingredients are thoroughly mixed. The salt concentration plays a crucial role in controlling the fermentation process and preserving the miso.
  4. Fermentation: The mixture is left to ferment for a specified period, which can range from a few weeks to several months or even years, depending on the desired type of miso. During fermentation, the microorganisms present, including bacteria and yeast, continue to break down the sugars and proteins, resulting in the development of complex flavors.
  5. Aging (Optional): Some miso varieties are aged for an extended period to enhance their flavors and textures.
  6. Packaging: After the fermentation process is complete, the miso is typically ground into a smooth paste or left chunky, depending on the type, and then packaged for consumption.

The specific steps and duration of the fermentation process can vary depending on the type of miso being produced and regional variations in traditional methods. The result is a versatile and flavorful condiment that is widely used in Japanese cuisine for soups, marinades, sauces, and various dishes.

Is Miso Gluten Free? Type of Miso paste?

There are several types of miso, each with its unique flavor, color, and texture. The variation in miso types is influenced by factors such as ingredients, fermentation time, and regional traditions. Here are some common types of miso:

  1. Shiro miso (White Miso Paste):
    • Color: Light beige to pale yellow.
    • Ingredients: Predominantly made from soybeans, with a lower percentage of rice or barley.
    • Flavor: Sweet and mild, with a subtle umami. Short fermentation time.
    • Common Uses: Suitable for light soups, dressings, and marinades. Often used in modern and Western-influenced dishes.
  2. Akamiso (Red Miso Paste):
    • Color: Dark reddish-brown.
    • Ingredients: Primarily soybeans, with a higher percentage of barley or other grains.
    • Flavor: Strong, robust, and salty. Longer fermentation time.
    • Common Uses: Ideal for heartier dishes, such as stews, rich soups, and braises. Adds depth of flavor to sauces.
  3. Awase Miso (Mixed Miso):
    • Color: Varies depending on the blend.
    • Ingredients: A combination of white and red miso.
    • Flavor: Offers a balance of sweetness and umami, with a nuanced flavor profile.
    • Common Uses: Versatile and can be used in a wide range of dishes, including soups, marinades, and glazes.
  4. Hatcho Miso (Dark miso Paste):
    • Color: Very dark brown, almost black.
    • Ingredients: Primarily soybeans, with a minimal amount of grains.
    • Flavor: Intensely rich and savory. Fermented for an extended period, often over two years.
    • Common Uses: Traditionally used in hearty dishes and soups. Its bold flavor makes it a stand-out condiment.
  5. Saikyo Miso (Kyoto-Style Miso):
    • Color: Pale yellow to light beige.
    • Ingredients: Mainly made from soybeans, with a higher percentage of rice.
    • Flavor: Mild, sweet, and creamy. Short fermentation time.
    • Common Uses: Frequently used in Kyoto cuisine for delicate and sweet dishes. Excellent for marinating fish or grilling.
  6. Mugi Miso (Barley Miso):
    • Color: Brown.
    • Ingredients: Soybeans and barley.
    • Flavor: Balanced flavor with a touch of sweetness from the barley. Fermented for a moderate duration.
    • Common Uses: Suitable for various dishes, including soups, marinades, and dressings.
    • This type of miso is not safe for those on a gluten free diet. If you have a gluten intolerance or Celiac disease, this has gluten-containing ingredients (barley) therefore it must be avoided and is not a great option. 

These are general descriptions, and specific variations and nuances exist within each type of miso, depending on the producer and regional influences. Experimenting with different types of miso can add depth and complexity to your cooking.

Things to Remember

The good news is that miso can be purchased at almost any grocery store and if not, can be ordered from Amazon. Companies will now advertise if their varieties of miso are gluten free and safe. 

Be sure to always check the ingredient label to make sure that the main ingredient is safe and that you are purchasing a miso that is safe for anyone with gluten-free disorders. 

While this fermented food is one of the bases of the traditional Japanese soup, I love it in baked goods. The umami flavor paired with the sweetness of baked goods makes the final product the ideal dessert. Let's look at some miso recipes

Is Miso Gluten Free? Gluten Free Miso Recipes

All of these recipes are safe for anyone on a gluten-free diet and do not have any gluten-containing grains. Everything on my site is always 100% gluten free.

Miso Carrots
Roasted miso carrots are an easy and delicious way to serve this delicious side. The miso glaze make these carrots an easy side dish, and a perfect carrot recipe.
Miso Brownies
This one bowl miso brownies recipe is the perfect brownie recipe. A blend of dark chocolate chips and white miso paste, the umami flavor pairs with the chocolate to create delicious fudgy miso brownies.
Miso White Chocolate Cookies
This recipe for miso white chocolate cookies is quick, easy, and packed full of flavor. The miso flavor is only enhanced by the white chocolate chunks. Make these delicious cookies today.
Miso White Chocolate Cookies with Brown Butter!
Miso Brown Butter Cookies
These miso brown butter cookies with chocolate chunks and heath bits is the perfect treat. With the deliciousness of brown butter cookies and the delicious umami flavor of miso paste, they are the ideal cookie.
Peanut Butter Miso Cookies
This recipe for peanut butter miso cookies is quick, easy, and absolutely delicious. A perfect blend of sweet and savory flavors, it is the cookie you never knew you needed.
Miso Cookies
This recipe for miso cookies is simple to make and super delicious. Ready in under 25 minutes, these cookies are going to take your baked goods to the next level.
Miso Chocolate Chip Cookies
Looking to up your cookie game? This recipe for miso chocolate chip cookies is quick, easy, and is so delicious. With the sweet flavors of chocolate chip cookies and the umami flavor from the white miso paste, these cookies are the perfect balance of flavor.
Easy Miso Chocolate Chip Cookies Recipe with Brown Butter!
Miso Caramel
If you love miso, miso caramel is the perfect recipe for you. Miso caramel sauce is ready in mere minutes and is so rich and delicious. The perfect topping for vanilla ice cream.
Easy Miso Caramel Sauce Recipe: How to Make Miso Caramel

🌟 LEAVE A RATING AND REVIEW! 🌟

⭐️⭐️⭐️⭐️⭐️
Did you love this post? If you did, let me know! And let others know too by leaving a comment and star rating. Reviews are incredibly useful in helping other people find my site and make my recipes. Thank you so much!
Laura 

Looking for new recipes?

  • Blueberry Pie with Frozen Blueberries: Easy Homemade Pie
    Blueberry Pie with Frozen Blueberries
  • Are Gluten Free Oreos Dairy Free or Vegan? Gluten-Free Oreos
    Are Gluten Free Oreos Dairy Free or Vegan? Gluten-Free Oreos
  • How To Cook Frozen Pasties: Cooking Pasty Instructions
    How To Cook Frozen Pasties: Cooking Pasty Instructions
  • Gluten Free Pasty Recipe: Traditional Cornish Pasties
    Gluten-Free Traditional Cornish Pasties

Roasted Miso Carrots Recipe with Brown Butter Glaze

November 16, 2023

Roasted miso carrots are an easy and delicious way to serve this delicious side. The miso glaze make these carrots an easy side dish, and a perfect carrot recipe.

Roasted Miso Carrots Recipe with Brown Butter Glaze

I love carrots! It's been a tough call recently between my harissa carrots and my brown sugar honey glazed carrots. At the holidays we also make a carrot sauce that my grandmother used to make. Carrots are a regular and delicious side dish to many of my meals. Miso is often known for being associated with miso soup (which is delicious), but, it goes beautifully with so many things. Miso roasted carrots are few in their ingredients, but delicious in their flavor. Miso is traditionally thought to be better for savory flavors, however, as carrots are sweet, you'd be surprised how well they go together! I actually have an entire miso category on my site where I mostly use the paste in desserts! Let's make this tasty side dish.

[feast_advanced_jump_to]

❓ WHAT IS MISO?

Miso paste is a fermented soybean paste that's commonly used in Japanese cuisine. It's made by fermenting cooked soybeans with salt and koji (a type of fungus), which gives it its characteristic umami flavor. There are a few different types of miso paste, including:

  • White miso: mild, sweet, and light in color, often made with rice and soybeans.
  • Red miso: bold, full-bodied, and pungent, often made with more fermented soybeans.
  • Yellow miso: medium-bodied, nutty, and slightly sweet, often made with rice, soybeans, and barley.
  • Barley miso: nutty and robust, often made with barley and soybeans.

Miso paste can add a ton of flavor to soups, sauces, marinades, and dressings!

📜Tips for recipe success and alterations:

I brown the butter for this recipe because it adds a delicious nutty flavor. If you do not wish to spend the extra few minutes browning it, then you can just melt the butter.

You can use whole carrots (or cut them up) and you can use rainbow carrots if you wish. 

I use white miso paste in this recipe. I have not tried other types of miso paste (such as red miso paste) as it pairs nicely with sweet dishes. It therefore pairs beautifully with the natural sweetness of the carrots. You can use organic carrots or not, it is up to you what kind of carrot you use!

If you wanted to add some sweetness to the glaze you could make a miso honey glaze by adding a few tablespoons of honey to the recipe or maple syrup. 

If you wanted to add a little bit of heat you could add some red pepper flakes.

I like to top mine with sesame seeds! I do not use sesame oil because it will compete with the flavor of the miso but the seeds are a nice taste and textural difference.

📜Ingredients for miso carrots:

ingredients for Roasted Miso Carrots Recipe with Brown Butter Glaze

Carrots: See above on the different types of carrots you can use but I use regular carrots

Miso Paste: This is going to add the umami flavor to the dish

Butter: Miso butter is a thing and in this dish we sort of have a miso butter by the fact that we have melted butter and miso together. However it is not a compound butter. 

Salt and Pepper: To season our carrots

Sesame Seeds: I like to top my carrots with sesame seeds to give them a pop of flavor and texture

📜 How to make miso carrots:

There is no boiling in this process! Simply set your oven to 425°F

Begin by making your glaze: first you will brown your butter. Browned butter should be a golden brown with little flecks in it. Once the butter is ready, add the white miso paste to the pan and mix together. Set aside.

Peel the carrots: and place them on a rimmed baking sheet (you could also use a baking dish ). Pour the miso sauce over the carrots and make sure that the carrots are covered in it. Once they are, season with salt and pepper.

Roast the carrots: the roasting process is simple. Place the carrots into the oven and bake for 15 minutes. At the 15 minute mark, open the oven, and turn the carrots over. Place the baking tray back into the oven and bake again for another 15 minutes. 

browned butter in a pot with miso
Brown the butter
browned butter in a pot with miso
Add the miso into the pan and mix
carrots with miso glaze on them
Place the carrots onto a baking sheet and cover with the glaze
Roasted Miso Carrots Recipe with Brown Butter Glaze
Bake until tender
Roasted Miso Carrots Recipe with Brown Butter Glaze
Cover with herbs and sesame seeds

When you are done with this recipe, try my harissa carrots

❤️ Why you'll love these miso carrots:

They are the perfect accompaniment to any main dish and are one of the best side dishes. This is one of my favorite carrots recipe because it is so simple to make. Carrots always brighten up a dinner table. Carrots really are the ultimate side dish. They are a treat for the taste buds, and this recipe in particular is made using simple ingredients. 

⍰ HOW TO STORE THESE MISO CARROTS:

Cool Completely: Allow the roasted carrots to cool completely at room temperature before storing. This helps prevent condensation and moisture buildup in the storage container.
Refrigeration: Place the roasted carrots in an airtight container or a resealable plastic bag. Seal the container tightly to prevent air from getting in, which can cause the carrots to dry out.
Refrigerate: Store the container of roasted carrots in the refrigerator. They can typically be stored for up to 3-5 days without significant loss of quality.
Avoid Freezing: Roasted carrots have a higher water content than raw carrots, and freezing can lead to changes in texture when they thaw. It’s best to enjoy them within the recommended refrigeration timeframe.
Reheating: To reheat the roasted carrots, place them in an oven preheated to about 350°F (175°C) for a few minutes until they are warmed through. You can also reheat them in a microwave, but be careful not to overheat them and make them mushy.

🌟 LEAVE A RATING AND REVIEW! 🌟

⭐️⭐️⭐️⭐️⭐️
Did you love this recipe? If you did, let me know! And let others know too by leaving a comment and star rating. Reviews are incredibly useful in helping other people find my site and make my recipes.
Thank you so much!
Laura 

🔎 FIND OTHER MISO RECIPES

Fudgy and Gooey Chocolate Miso Brownies Recipe!

November 13, 2023

This one bowl miso brownies recipe is the perfect brownie recipe. A blend of dark chocolate chips and white miso paste, the umami flavor pairs with the chocolate to create delicious fudgy miso brownies.

Fudgy and Gooey Chocolate Miso Brownies Recipe!

These are my new favorite brownies. It was previously a tie between my espresso brownies and smores brownies but these miso brownies take the cake. You do not need a separate bowl to make them, this is a one bowl recipe. The brownies themselves so fudgy and delicious. This is so much better than a boxed brownie mix and will be one of your favorite brownie recipes in no time. They do not take a long time to prepare and 

📜 Recipe Tips for Success + Alterations:

If you want to add different types of chocolate to the recipe such as white chocolate or milk chocolate you can do so. you can do this after you have mixed the wet ingredients and the dry ingredients. Fold in the chocolate chunks or chips. 

Coffee can enrich flavor so if you want to add coffee powder to this recipe, be sure to use an instant coffee or instant espresso powder

Sometimes browning butter can add a nutty richness to a dish. However, in this recipe it does not due to the deep flavors of the chocolate and miso.

You do not need to use an electric mixer for this recipe, I like to mix everything by hand. 

📜 What ingredients do you need for these miso brownies?

Ingredients for Fudgy and Gooey Chocolate Miso Brownies Recipe!


Butter: I use unsalted butter in my recipe but you can use salted if you would like to have some extra saltiness
Miso: while traditionally used in savory recipes, miso is excellent in sweet dishes and desserts to balance the flavor. I have a miso caramel recipe as well as several miso cookie recipes. Only use white miso- red miso is used for recipes like soups and sauces.
Eggs: Eggs are one of the binding agents in this recipe
Dark Chocolate Chips: I like to use dark chocolate in brownies. I like the flavor that it gives.
Cocoa Powder: I like to use both cocoa powder and dark chocolate in my brownies. The chocolate mixture helps with the fudgy aspect of the recipe. 
Vanilla Extract: Despite the fact that it is a chocolate based recipe, vanilla helps enhance those flavors.
White Sugar: Our sweetener for our recipe
Flour: I use a gluten free all purpose flour (specifically King Arthur Measure for Measure) but you can use whatever flour you like so long as it is all purpose. If it is gluten free, make sure it has xanthan gum in it. 

📜 How do you make miso brownies?

Combining the Butter and Chocolate: In a large mixing bowl (use heat-proof bowl) melt the butter in a microwavable safe bowl. Once the butter is completely melted, add the chocolate chips to the bowl and whisk together. They should all melt to form a beautiful chocolatey mix. 
Adding the Sugar, Vanilla, Miso, and Eggs: Add the miso first and whisk. Whisk in the sugar. Then add the eggs one at a time and whisk until the batter thickens. Finally add the vanilla and whisk once more.
Mixing in the dry ingredients: Add the flour and cocoa powder to the brownie batter. Switch out the whisk for a spatula now and fold in the ingredients. Once they are practically all mixed in. 
Baking: Set the oven to 350°F. Create a prepared pan by lining a baking dish (I used 9×13 but you can use 8×8) with parchment paper (it is easier if you grease the bottom first). Place mixture into the baking dish and smooth the top with a rubber spatula or palette knife. Place the baking dish onto the middle shelf of the oven. If you are using a 9×13, bake for 28 minutes. If you are using an 8×8 bake for 40-45 minutes. Check for doneness when removing from the oven with a toothpick. If you want them to cook up a bit more, place back in for 3 minutes at a time. Allow them to cool before you cut into them. The color will be a dark brown with a few cracks on the top.

melted chocolate and butter in a bowl
Add chocolate chips to the melted butter and whisk
melted chocolate and butter in a bowl
This is how it should look when done
miso and melted chocolate in a bowl
Add the miso and whisk in
melted chocolate with sugar
Add the sugar and whisk
melted chocolate with eggs in a bowl
Whisk in the eggs, along with the vanilla extract
Fudgy and Gooey Chocolate Miso Brownies Recipe batter
Place the batter into a prepared baking tin and bake

Note: If you want some extra saltiness to your brownies, use sea salt flakes on top or kosher salt before you put the lined tin into the oven. 
These brownies would go amazingly with ice cream, a salted caramel, or my miso caramel. 

When you are done with this sweet treat, try some of my Chocolate Raspberry Tart.

🍱 How to store these miso brownie bites:

​I cut up the brownie so that it is more brownie bites but you can cut them how you like. you can either store them in an airtight container on the counter for 3-5 days (same with the fridge) or, you can store them in a freezer safe bag. In you choose to freeze them (they do great if you freeze them) you can store them for up to 3 months. Just mark on the bag when you froze them. When you want to eat them, take out of the freezer, leave on the counter until desired temperature. I like to freeze them as individual brownies, so, I would advise cutting them before freezing. 

Fudgy and Gooey Chocolate Miso Brownies Recipe!

🌟 LEAVE A RATING AND REVIEW! 🌟

⭐️⭐️⭐️⭐️⭐️
Did you love this recipe? If you did, let me know! And let others know too by leaving a comment and star rating. Reviews are incredibly useful in helping other people find my site and make my recipes. Thank you so much!
Laura 

Find Other Miso Recipes

Miso White Chocolate Cookies with Brown Butter!

November 9, 2023

Miso White Chocolate Cookies with Brown Butter!


This recipe for miso white chocolate cookies is quick, easy, and packed full of flavor. The miso flavor is only enhanced by the white chocolate chunks. Make these delicious cookies today.

Miso White Chocolate Cookies with Brown Butter!

Miso is a flavor that I love. It's origins are savory but it is a special ingredient as it can transition to sweet dishes as well. I have loved playing around with miso and cookies and so far have come up with delicious miso cookies, miso chocolate chip cookies, miso brown butter cookies, and peanut butter miso cookies.

❓What is miso?

Miso paste has a long and fascinating history. Here's a quick breakdown:

  • Origins: Miso is thought to have originated in China over 2,500 years ago, and was introduced to Japan around the 7th century. It is now a staple in Japanese cooking.
  • Types: There are several types of miso, including:
  • White miso: mild, sweet, and light in color, made with rice and soybeans.
  • Red miso: bold, full-bodied, and pungent, made with more fermented soybeans.
  • Yellow miso: medium-bodied, nutty, and slightly sweet, made with rice, soybeans, and barley.
  • Barley miso: nutty and robust, made with barley and soybeans.
  • Rice miso: delicate, slightly sweet, and light in color, made with rice.

It is important if you are gluten free to make sure that you always check ingredients and find a gluten free miso.

Miso is readily available at most grocery stores but if you cannot find it, it is available on Amazon.

❤️ Why you'll love these miso white chocolate cookies?

These cookies are the perfect balance of flavors. The white chocolate is a sweet flavor but the umami from the miso is just the best pairing. The dough comes together in under 10 minutes, and they bake for only 12 minutes! The perfect treat.

Miso White Chocolate Cookies with Brown Butter!

🏆 Tips for recipe success:

Sugars: You can sub out dark brown sugar instead of light brown sugar if you want. 
Chocolates: I use chocolate chunks in this recipe but if you want you can use chocolate melts, chocolate bar pieces, white chocolate chips, or dark chocolate chips if you want to alter the recipe. This is really up to you.
Butter: Be sure not to skip browning the butter. Brown butter takes your cookies to the next level and adds a delicious depth of flavor that is seriously lacking without it. 
Miso Type: Be sure to use a light miso (aka white miso) for these cookies. The flavor of the other types of miso would not mesh well with our cookies. 
Vegan: I myself am not vegan and have not tried to make this vegan. You would need to use vegan sugars, vegan butter, and an egg substitute. If you do make them vegan, let me know in the comments.
Electric Mixer: Do not make this cookies with a hand mixer or bowl of a stand mixer for your mixer. You want to mix this dough by hand. 
Salt: If you want to make these cookies a bit saltier by added flaky sea salt on top or by using salted butter. I use unsalted butter in this recipe but it is up to you.
Best Results: For best success, always follow the recipe card.

📜 WHAT INGREDIENTS DO YOU NEED FOR MISO COOKIES?

Ingredients for Miso White Chocolate Cookies with Brown Butter!

Gluten Free All Purpose Flour: I use King Arthur gluten free Measure for Measure flour (it has xanthan gum in it). However this is a 1:1 recipe so regular flour works just fine.
Light Brown Sugar: Brown sugar helps add to the richness of the cookie, almost a caramel flavor
White Sugar: The balance of sugars in the cookie makes it perfectly sweet.  It is also used to dip the cookies into.
White Miso Paste: This is where the umami flavor is going to come from in the cookie. 
Unsalted Butter: The richness of any cookie dough. Using unsalted means you can control the amount of salt flavor going into your cookies. 
Egg: One large egg is in the binding agent in the cookie dough
Vanilla: Vanilla extract helps enhance the flavor of the cookie
Baking Soda: This helps with the structure of the cookie 
White Chocolate Chips or White Chocolate Chunks: this is our chocolatey goodness!

📜 HOW DO YOU MAKE THESE MISO WHITE CHOCOLATE COOKIES?

Mix together your dry ingredients: in a large bowl add the flour, and baking soda and set aside. 
Brown the butter: Browned butter enhancing the flavor of any cookie dough and it is super simple to make. If you want the butter to melt faster, use room temperature butter but honestly, cold butter is fine. Place the butter into a pan (or small saucepan) and put it on medium heat. The butter will begin to break down and you will see little brown bits form on the bottom, Swirl it around and remove it from the heat. Pour the butter into the small bowl (or) medium sized bowl.
Add the sugars: and whisk. After the sugars and butter have been creamed together, add the egg and whisk together. 
Add the vanilla: and miso paste and whisk until it has all come together.
Fold the wet ingredients: into the dry ingredients ⅓ at a time. At the ⅔ point, add the chocolate to the bowl and make sure everything is incorporated. One of the key things to this batter is to make sure to not overwork it. Once you have folded it a few times, add the chocolate chunks and heath bits. Do make sure though to scrap down the sides of the bowl to make sure you get everything in the mixing bowl incorporated.
Roll the dough: into balls and place onto the baking sheet. Place in the fridge for at least 30 minutes. The dough may feel greasy, but that is entirely normal. You can use a cookie scoop for this or an ice cream scoop but I just do it by hand. 
Set the oven to 350°: and bake the cookies after they have had enough time to sit and bake for 13-15 minutes. You want the cookies to turn golden brown. 
Remove the trays from the oven: and let them sit for a few minutes on the sheets. If you want crispy edges but a gooey center, then you can eat them right away, otherwise, let them sit for a little bit.

sugars and browned butter in a glass bowl
Brown the butter. Add the sugars to the browned butter
wet ingredients with an egg in a glass bowl
Whisk and add the egg
wet ingredients with miso in a glass bowl
Whisk together
flour sitting on top of wet ingredients
Add the wet ingredients to the dry ingredients
flour with white chocolaye
Fold the dough together
cookie dough in a glass bowl
The final product should look like this
Miso White Chocolate Cookies with Brown Butter cookie dough
Roll the dough into balls and place in the fridge
Miso White Chocolate Cookies with Brown Butter!
Then bake

When you are done with this recipe, make my Miso Cookies with Chocolate and Strawberry.

🍱 HOW TO STORE THESE MISO WHITE CHOCOLATE COOKIES?

Store in an airtight container on the counter for a few day or place in a freezer safe bag and into the freezer for up to three months. 

🌟 LEAVE A RATING AND REVIEW! 🌟

⭐️⭐️⭐️⭐️⭐️
Did you love this recipe? If you did, let me know! And let others know too by leaving a comment and star rating. Reviews are incredibly useful in helping other people find my site and make my recipes.
 Thank you so much!
Laura 

🔎 Find More Miso Recipes Here

Easy Miso Brown Butter Cookies with Chocolate and Heath

November 6, 2023

These miso brown butter cookies with chocolate chunks and heath bits is the perfect treat. With the deliciousness of brown butter cookies and the delicious umami flavor of miso paste, they are the ideal cookie.

Easy Miso Brown Butter Cookies with Chocolate and Heath

Despite miso having savory origins, I absolutely love it in cookies. On this blog, I have miso chocolate chip cookies, miso peanut butter cookies, straight up miso cookies (that have chocolate and strawberry in them), and I love to add miso to caramel and make a miso caramel. White miso is savory in its origin however it pairs beautifully with sweet foods and in baked goods. 

[feast_advanced_jump_to]

❓What is miso?

Miso paste has a long and fascinating history. Here's a quick breakdown:

  • Origins: Miso is thought to have originated in China over 2,500 years ago, and was introduced to Japan around the 7th century. It is now a staple in Japanese cooking.
  • Types: There are several types of miso, including:
  • White miso: mild, sweet, and light in color, made with rice and soybeans.
  • Red miso: bold, full-bodied, and pungent, made with more fermented soybeans.
  • Yellow miso: medium-bodied, nutty, and slightly sweet, made with rice, soybeans, and barley.
  • Barley miso: nutty and robust, made with barley and soybeans.
  • Rice miso: delicate, slightly sweet, and light in color, made with rice.

It is important if you are gluten free to make sure that you always check ingredients and find a gluten free miso.

Miso is readily available at most grocery stores but if you cannot find it, it is available on Amazon.

❤️ Why you'll love these miso brown butter cookies?

The browned butter in these cookies is just so good. It gives off of a nutty flavor and pairs great with the miso flavor. They have crispy edges but a chewy center. It isn't a gooey center, but, it is chewy, melts in your mouth, and is just delicious. 

Easy Miso Brown Butter Cookies with Chocolate and Heath

🏆 Tips for recipe success:

Sugars: You can sub out dark brown sugar instead of light brown sugar if you want. 
Chocolates: I use chocolate chunks in this recipe but if you want you can use chocolate melts, chocolate bar pieces, white chocolate chips (even though these will be really sweet), or dark chocolate chips. This is really up to you.
Butter: Be sure not to skip browning the butter. Brown butter takes your cookies to the next level and adds a delicious depth of flavor that is seriously lacking without it. 
Miso Type: Be sure to use a light miso (aka white miso) for these cookies. The flavor of the other types of miso would not mesh well with our cookies. 
Vegan: I myself am not vegan and have not tried to make this vegan. You would need to use vegan sugars, vegan butter, and an egg substitute. If you do make them vegan, let me know in the comments.
Electric Mixer: Do not make this cookies with a hand mixer or bowl of a stand mixer for your mixer. You want to mix this dough by hand. 
Salt: If you want to make these cookies a bit saltier by added flaky sea salt on top or by using salted butter. I use unsalted butter in this recipe but it is up to you.
Best Results: For best success, always follow the recipe card.

📜 WHAT INGREDIENTS DO YOU NEED FOR BROWN BUTTER MISO COOKIES?

ingredients for Easy Miso Brown Butter Cookies with Chocolate and Heath

Gluten Free All Purpose Flour: I use King Arthur gluten free Measure for Measure flour (it has xanthan gum in it). However this is a 1:1 recipe so regular flour works just fine.
Light Brown Sugar: Brown sugar helps add to the richness of the cookie, almost a caramel flavor
White Sugar: The balance of sugars in the cookie makes it perfectly sweet.  It is also used to dip the cookies into.
White Miso Paste: This is where the umami flavor is going to come from in the cookie. 
Unsalted Butter: The richness of any cookie dough. Using unsalted means you can control the amount of salt flavor going into your cookies. 
Egg: Egg is in the binding agent in the cookie dough
Vanilla: Vanilla extract helps enhance the flavor of the cookie
Baking Soda: This helps with the structure of the cookie 
Chocolate Chips or Chocolate Chunks: this is our chocolatey goodness!
Heath Bits: This is going to give a toffee flavor to the cookie and some extra sweetness

📜 HOW DO YOU MAKE THESE MISO COOKIES?

Mix together your dry ingredients: in a large bowl add the flour, and baking soda and set aside. 
Brown the butter: Browned butter enhancing the flavor of any cookie dough and it is super simple to make. If you want the butter to melt faster, use room temperature butter but honestly, cold butter is fine. Place the butter into a pan (or small saucepan) and put it on medium heat. The butter will begin to break down and you will see little brown bits form on the bottom, Swirl it around and remove it from the heat. Pour the butter into the small bowl (or) medium sized bowl.
Add the sugars: and whisk. After the sugars and butter have been creamed together, add the egg and whisk together. 
Add the vanilla: and miso paste and whisk until it has all come together.
Fold the wet ingredients: into the dry ingredients ⅓ at a time. At the ⅔ point, add the chocolate to the bowl and make sure everything is incorporated. One of the key things to this batter is to make sure to not overwork it. Once you have folded it a few times, add the chocolate chunks and heath bits. Do make sure though to scrap down the sides of the bowl to make sure you get everything in the mixing bowl incorporated.
Roll the dough: into balls and place onto the baking sheet. Place in the fridge for at least 30 minutes. The dough may feel greasy, but that is entirely normal. You can use a cookie scoop for this or an ice cream scoop but I just do it by hand. 
Set the oven to 350°: and bake the cookies after they have had enough time to sit and bake for 13-15 minutes. You want the cookies to turn golden brown. 
Remove the trays from the oven: and let them sit for a few minutes on the sheets. If you want crispy edges but a gooey center, then you can eat them right away, otherwise, let them sit for a little bit.

brown butter sugar in a glass bowl
Add the sugars to the browned butter
brown butter sugar and egg
Add the egg, vanilla, and miso
mix of miso sugar and egg
Whisk
cookie dough with chocolate chunks with heath bits
Add it to the dry ingredients and fold in the heath and chocolate chunks
cookie dough
Roll the dough into balls, place in the fridge, then bake

When you are done with this recipe, check out my double chocolate chip cookies

🍱 HOW TO STORE THESE MISO BROWN BUTTER COOKIES?

Store in an airtight container on the counter for a few day or place in a freezer safe bag and into the freezer for up to three months. 

🌟 LEAVE A RATING AND REVIEW! 🌟

⭐️⭐️⭐️⭐️⭐️
Did you love this recipe? If you did, let me know! And let others know too by leaving a comment and star rating. Reviews are incredibly useful in helping other people find my site and make my recipes.
Thank you so much!
Laura 

🔎 Find More Cookie Recipes Here

  • Best Gluten Free Chocolate Chip Cookies on a table
    Best Gluten Free Chocolate Chip Cookies
  • Gluten Free Oatmeal Cookies Recipe on a beige cloth
    Gluten Free Oatmeal Cookies Recipe
  • Orange Macarons
  • biscotti on a beige cloth
    Gluten Free Biscotti Recipe

Miso Cookies With Brown Butter, Chocolate, & Strawberry

November 2, 2023

This recipe for miso cookies is simple to make and super delicious. Ready in under 25 minutes, these cookies are going to take your baked goods to the next level.

Miso Cookies With Brown Butter, Chocolate, & Strawberry

Miso cookies (and miso in general) is one of my favorite things. I have a recipe for miso chocolate chip cookies, peanut butter miso cookies, and miso caramel. Even though miso is typically a savory staple in Japanese cooking, white miso goes beautifully into brown butter cookies. The misos umami flavor is subtle but it helps balance the sweetness of the chocolate chips (or chocolate chunks) along with the strawberry in this recipe. 

[feast_advanced_jump_to]

❓What is miso?

Miso is a paste that is made from fermented soybeans, barley, or rice that has been mixed with salt and a mold called koji. It's a staple ingredient in Japanese cuisine, known for its savory umami flavor and is often used as a seasoning or base for soups, sauces, and dressings. Miso has a rich, salty, and slightly sweet flavor, with a range of varieties that vary in color and strength.

🍽 Types of miso:

There are several types of miso, each with its own unique flavor and characteristics:

  • White miso: mild, sweet, and light in color
  • Yellow miso: medium-bodied, nutty, and slightly sweet
  • Red miso: bold, full-bodied, and pungent, with a deep, earthy flavor

    It is important to make sure if you are gluten free that you always get a gluten free miso.
Miso Cookies With Brown Butter, Chocolate, & Strawberry

❤️ Why you'll love these miso cookies?

The texture of these cookies is soft. Miso is wasted when it is used in only savory dishes. These cookies have the best flavor for anyone who likes miso flavor, chocolate, or strawberry. If you are looking for the best chocolate chip cookie recipe, this is definitely a contender. 

🥣 WHAT DO YOU NEED TO MAKE MISO COOKIES?

Large Bowl
Parchment Paper (or a reusable baking mat)
Baking tray
Rubber Spatula
Medium bowl

Miso Cookies With Brown Butter, Chocolate, & Strawberry

📜 Tips, tricks, and alterations:

You can sub out dark brown sugar instead of light brown sugar if you want. 

Be sure to use a light miso (aka white miso) for these cookies. The flavor of the other types of miso would not mesh well with our cookies. 

I myself am not vegan and have not tried to make this vegan. You would need to use vegan sugars, vegan butter, and an egg substitute. If you do make them vegan, let me know in the comments.

Do not make this cookies with a hand mixer or bowl of a stand mixer for your mixer. You want to mix this dough by hand. 

📜 WHAT INGREDIENTS DO YOU NEED FOR MISO COOKIES?

Ingredients for Miso Cookies With Brown Butter, Chocolate, & Strawberry

Gluten Free All Purpose Flour: I use King Arthur gluten free Measure for Measure flour (it has xanthan gum in it). However this is a 1:1 recipe so regular flour works just fine.
Light Brown Sugar: Brown sugar helps add to the richness of the cookie, almost a caramel flavor
White Sugar: The balance of sugars in the cookie makes it perfectly sweet.  It is also used to dip the cookies into.
White Miso Paste: This is where the umami flavor is going to come from in the cookie. 
Unsalted Butter: The richness of any cookie dough. Using unsalted means you can control the amount of salt flavor going into your cookies. 
Egg: Egg is in the binding agent in the cookie dough
Vanilla: Vanilla extract helps enhance the flavor of the cookie
Baking Soda: This helps with the structure of the cookie 
Chocolate Chips or Chocolate Chunks: this is our chocolatey goodness!
Freeze Dried Strawberries: ​Freeze dried strawberries provide excellent flavor. They are more flavorful than fresh strawberries so I suggest using these. 

​

📜 HOW DO YOU MAKE THESE MISO COOKIES?

Mix together your dry ingredients: in a large bowl add the flour, and baking soda and set aside. 
Brown the butter: Browned butter enhancing the flavor of any cookie dough and it is super simple to make. If you want the butter to melt faster, use room temperature butter but honestly, cold butter is fine. Place the butter into a pan (or small saucepan) and put it on medium heat. The butter will begin to break down and you will see little brown bits form on the bottom, Swirl it around and remove it from the heat. Pour the butter into the small bowl (or) medium sized bowl.
Add the sugars: and whisk. After the sugars and butter have been creamed together, add the egg and whisk together. 
Add the vanilla: and miso paste and whisk until it has all come together.
Fold the wet ingredients: into the dry ingredients ⅓ at a time. At the ⅔ point, add the chocolate to the bowl and make sure everything is incorporated. One of the key things to this batter is to make sure to not overwork it. Once you have folded it a few times, add the chocolate chunks and strawberries. Do make sure though to scrap down the sides of the bowl to make sure you get everything in the mixing bowl incorporated.
Roll the dough: into balls and place onto the baking sheet. Place in the fridge for at least 30 minutes. The dough may feel greasy, but that is entirely normal. You can use a cookie scoop for this or an ice cream scoop but I just do it by hand. 
Set the oven to 350°: and bake the cookies after they have had enough time to sit and bake for 13-15 minutes. You want the cookies to turn golden brown. 
Remove the trays from the oven: and let them sit for a few minutes on the sheets. If you want crispy edges but a gooey center, then you can eat them right away, otherwise, let them sit for a little bit.

sugars mixed with browned butter
Brown the butter and add it to the sugars and whisk
added egg to sugar and butter
Add the egg and vanilla and whisk
miso mixture
Add the miso and whisk
freeze dried strawberries with chocolate and flour
Pour the wet ingredients into the dry ingredients and fold a few times. Then add the strawberries and chocolate chunks
cookie dough
Finished batter should look like this
cookie dough on a baking sheet
Make the dough into balls and place on a prepared baking sheet. Cool in the fridge and then bake

🍱 HOW TO STORE THESE COOKIES?

Store in an airtight container on the counter for a few day or place in a freezer safe bag and into the freezer for up to three months. 

🌟 LEAVE A RATING AND REVIEW! 🌟

⭐️⭐️⭐️⭐️⭐️
Did you love this recipe? If you did, let me know! And let others know too by leaving a comment and star rating. Reviews are incredibly useful in helping other people find my site and make my recipes. Thank you so much!
Laura 

🔎 Find More Cookie Recipes Here

  • Gluten Free Puff Pastry
    Palmiers
  • Candy Cane Cookies Recipe
  • Tiramisu Sandwich Cookies
  • Tahini Chocolate Chip Cookies

Peanut Butter Miso Cookies Recipe: Delicious Cookies

October 30, 2023

Peanut Butter Miso Cookies Recipe: Delicious Cookies

This recipe for peanut butter miso cookies is quick, easy, and absolutely delicious. A perfect blend of sweet and savory flavors, it is the cookie you never knew you needed.

Peanut Butter Miso Cookies Recipe: Delicious Cookies

I'm not sure if it was the New York Times that set off the miso cookies trend but it was a good one. When most people think of miso, they tend to think of savory dishes. However, I love to use it in sweet dishes such as miso chocolate chip cookies and miso caramel. And now, here in these miso peanut butter cookies. The texture of the cookies is super soft but you get a slight crunch for the sugar coating it. Making is the perfect cookie. I love a chewy peanut butter cookie, so, the combination of peanut butter and miso in this recipe makes them one of the best cookies.

❓ What is miso?

Miso is a paste that is made from fermented soybeans, barley, or rice that has been mixed with salt and a mold called koji. It's a staple ingredient in Japanese cuisine, known for its savory umami flavor and is often used as a seasoning or base for soups, sauces, and dressings. Miso has a rich, salty, and slightly sweet flavor, with a range of varieties that vary in color and strength.

It is important to make sure if you are gluten free that you always get a gluten free miso.

🍽 Types of miso:

There are several types of miso, each with its own unique flavor and characteristics:

  • White miso: mild, sweet, and light in color
  • Yellow miso: medium-bodied, nutty, and slightly sweet
  • Red miso: bold, full-bodied, and pungent, with a deep, earthy flavor
Peanut Butter Miso Cookies Recipe: Delicious Cookies

❤️ Why you'll love these peanut butter miso cookies?

They have such a good chewy texture. One of the best things is that they are super easy to make. They are a great snack, and a perfect treat.

📜 Tips, tricks, and alterations:

Be sure that you are not using natural peanut butter. All natural peanut butter will not work because of the oil content that is in it. You want to just use a regular store bought peanut butter (no organic, no all natural). I have not tried this with crunchy peanut butter but I do not see why you couldn't. It would give a subtle crunch to the cookie. 

You can sub out dark brown sugar instead of light brown sugar if you want. 

Be sure to use a light miso (aka white miso) for these cookies. The flavor of the other types of miso would not mesh well with our cookies. 

I myself am not vegan and have not tried to make this vegan. You would need to use vegan sugars, vegan butter, and an egg substitute. If you do make them vegan, let me know in the comments.

🥣 Equipment needed

Large Bowl
Parchment Paper (or a reusable baking mat)
Baking tray
Rubber Spatula
Small bowl (or a medium bowl, doesn't really matter)

📜 WHAT DO YOU NEED TO MAKE peanut butter miso COOKIES?

Ingredients for Peanut Butter Miso Cookies Recipe: Delicious Cookies

Gluten Free All Purpose Flour: I use King Arthur gluten free Measure for Measure flour (it has xanthan gum in it). However this is a 1:1 recipe so regular flour works just fine.
Light Brown Sugar: Brown sugar helps add to the richness of the cookie, almost a caramel flavor
White Sugar: The balance of sugars in the cookie makes it perfectly sweet.  It is also used to dip the cookies into.
White Miso Paste: This is where the umami flavor is going to come from in the cookie. 
Peanut Butter: The source of our peanut butter flavor!
Unsalted Butter: The richness of any cookie dough. Using unsalted means you can control the amount of salt flavor going into your cookies. 
Egg: Egg is in the binding agent in the cookie dough
Vanilla: Vanilla extract helps enhance the flavor of the cookie
Baking Soda: This helps with the structure of the cookie 

📜 HOW DO YOU MAKE THIS peanut butter miso COOKIE RECIPE?

Mix together your dry ingredients: in a large bowl add the flour, and baking soda and set aside. 
Brown the butter: Browned butter enhancing the flavor of any cookie dough and it is super simple to make. If you want the butter to melt faster, use room temperature butter but honestly, cold butter is fine. Place the butter into a pan and put it on medium heat. The butter will begin to break down and you will see little brown bits form on the bottom, Swirl it around and remove it from the heat. Pour the butter into the small (or) medium sized bowl.
Add the sugars: and whisk. After the sugars and butter have been creamed together, add the egg and whisk together. 
Add the vanilla: the peanut butter, and miso paste and whisk until it has all come together.
Fold the wet ingredients: into the dry ingredients ⅓ at a time. At the ⅔ point, add the chocolate to the bowl and make sure everything is incorporated. One of the key things to this batter is to make sure to not overwork it. It is why I do not use my mixmaster for this recipe. Do make sure though to scrap down the sides of the bowl to make sure you get everything in the mixing bowl incorporated.
Roll the dough: into balls and place onto the baking sheet. Place in the fridge for at least 30 minutes. The dough may feel greasy, but that is entirely normal. You can use a cookie scoop for this or an ice cream scoop but I just do it by hand. 
Set the oven to 350°: and bake the cookies after they have had enough time to sit and bake for 13-15 minutes. You want the cookies to turn golden brown. 
Remove the trays from the oven: and let them sit for a few minutes on the sheets. If you want crispy edges but a gooey center, then you can eat them right away, otherwise, let them sit for a little bit.

sugars and browned butter in a bowl
Brown the butter and add it to the sugars and whisk
sugar, butter, and an egg in a bowl
Add the egg and vanilla and whisk
wet ingredients in a glass bowl with peanut butter
Add the miso and peanut butter and whisk
whisked wet ingredients
It should look like this when properly whisked
wet and dry ingredients in a glass bowl
Fold in the dry ingredients
Peanut Butter Miso Cookies dough
This is how the batter should look when done
Peanut Butter Miso Cookies dough balls on a baking sheet
Roll the dough into balls and roll in sugar.
Peanut Butter Miso Cookies Recipe: Delicious Cookies
Bake and let cool slightly then dig in

🍱 HOW TO STORE THESE COOKIES?

Store in an airtight container on the counter for a few day or place in a freezer safe bag and into the freezer for up to three months. 

🌟 LEAVE A RATING AND REVIEW! 🌟

Did you love this recipe? If you did, let me know! And let others know too by leaving a comment and star rating. Reviews are incredibly useful in helping other people find my site and make my recipes. Thank you so much!
Laura 

Looking for more delicious cookie recipes?

  • Hagrid Rock Caked aka chocolate rice krispie treats with peanut butter on parchment paper
    Hagrid's Rock Cakes
  • Polyjuice potion in a clear glass.
    Polyjuice Potion
  • Peppermint Mocha Cookies
  • Double Chocolate Chip Cookies

Coconut Curry Salmon: Easy Thai Inspired Recipe

October 25, 2023

RED CURRY SALMON: EASY THAI RED CURRY SALMON RECIPE!

It can be easy to recreate delicious Thai flavors at home. This coconut curry salmon recipe does jus that. The creamy coconut curry sauce along with the delicious salmon filets makes it the perfect dinner. Ready in 30 minutes, it will quickly become one of your favorite meals.

Coconut Curry Salmon: Easy Thai Inspired Recipe

I love salmon. Red curry salmon, Zaatar Salmon, you name it. Salmon makes for a delicious meal. This coconut curry salmon recipe is made with simple ingredients and all you really need is a large skillet. This is a great recipe that is ready in under 30 minutes and is a fantastic choice for weeknight dinners. 

A note on coconut milk vs coconut cream

while full fat coconut milk is rich and creamy and used in a variety of culinary applications, coconut cream is even thicker and richer, primarily used to add intense creaminess and coconut flavor to desserts and indulgent savory dishes. The choice between the two depends on your recipe's requirements and the desired level of richness and creaminess.

Coconut Curry Salmon: Easy Thai Inspired Recipe

tips, tricks, and substitutions 

Thai-inspired coconut curry salmon is delicious. If you want the best result then always follow the recipe card.

If you want to brighten up the flavor you can always add some lime zest. 

If you don't have white sugar then you can use brown sugar. 

Be sure to flavor and taste your food as you go. Salt and black pepper are foundational in cooking for a reason! 

A brief note on curry paste:

The history of curry paste in Thai food is deeply intertwined with the culinary and cultural development of Thailand. Thai cuisine is known for its intricate balance of flavors, vibrant colors, and aromatic herbs and spices. Curry pastes are essential components of many Thai dishes, providing the foundation for the rich and complex flavors that Thai food is famous for.

While the exact origins of curry paste in Thai cuisine might not be definitively documented, it’s believed that curry paste recipes were influenced by a combination of local ingredients and influences from neighboring countries, as well as historical trade routes and migration patterns.

What ingredients do you need?

ingredients for Coconut Curry Salmon: Easy Thai Inspired Recipe

Fish sauce: a staple in Thai cooking. Fish sauce is a very unique taste and can add a ton to a dish. We don’t use soy sauce in this recipe, only fish sauce.
Lime juice: lime juice adds a great acidity to the dish.
Red Bell Pepper: I like to use a roasted red pepper but you can use a regular bell pepper
Thai Red Curry Paste: This adds so much flavor and really is the essence of the dish. It also gives our sauce its color. In Thai cooking, you use curry paste and no so much curry powder as you would in Indian cooking. I use a store-bought curry paste.
Salmon fillets: This is our protein for this dish. I use sockeye salmon but you can use wild salmon, fresh salmon, or frozen (be sure to thaw is overnight in the fridge first if you plan to use frozen)
Fresh Cilantro: This is a garnish you will use at the end of the dish
Sugar: To add a bit of sweetness to the dish
Chili Pepper: To add some spice
Chili Powder: For flavor in our dish
Garlic: Everything tastes better with garlic. If you do not have fresh garlic, then you can use garlic powder. 
Ginger: I use ginger powder in this recipe as I never have enough of an excuse to use enough fresh ginger to warrant having it in my fridge but we use it to help bring out the flavor in the dish.
Coconut Cream: Coconut cream is the liquid in our dish, the base of our sauce. Coconut cream allows the dish to be dairy free but does not compromise on creaminess. Coconut milk is great but it does not have the same level of creaminess that coconut cream can afford.
Small Onion: You can also use small shallots but a small onion works just fine in this recipe
Salt and Pepper: To taste
Oil: I like using a clear oil like canola or vegetable but you can use olive oil.
Spinach: I like to have spinach in the curry to have some leafy greens!

Another optional topping is Thai basil (or fresh basil aka regular basil)

How do you make coconut curry salmon?

Make sure your: salmon filets aren’t too wet. Press paper towel onto them to remove the moisture. You do not want too much water releasing while you are cooking them. 
Fill your baking dish with oil: place it on a medium heat. Take the salmon filets and place with the skin side up – this means place the non-skin side face down in the pan. Cook the salmon fillets for 2 minutes and then remove from the pan and set aside.
Put oil into the pan: and add your chopped onions along with the ginger. You want these to caramelize and brown. If you find that the onions are sticking to the bottom of your pan, you can add a bit of water to deglaze your pan. Cook these for about 7 minutes on a medium heat.
Once the onions are cooked: add the sugar and minced garlic to the pan and allow it to cook for one minute. Add the red Thai curry paste and let it cook for one minute.
Proceed to then add: the chili spice, fish sauce, and your coconut cream. You want to make a creamy curry sauce, therefore coconut cream is your best option (not full-fat coconut milk). Use the entire can and break it down with a wooden spoon.
Add the juice: from half of a lime and some lime slices into the sauce. Then place the salmon filets into the pan and cook for 10-15 minutes on a medium heat. The internal temperature of salmon when cooked is 145°F. Check the salmon steaks while you are cooking them (you can check every 2-3 minutes) to make sure that they reach the desired internal temperature.
Remove from the stove: top with green onion, fresh cilantro, and serve immediately. You can serve this over rice, mashed potatoes, or with some sort of flat bread.

Put the salmon filets skin side up and cook for 2 minutes
Add more oil, onion, red pepper, and ginger to the pan
Once caramelized, add the minced garlic and sugar. Add the chili powder and red curry paste, cook for a minute
Pour the coconut cream in and break down
Have the sauce come together and then add the spinach
Add the salmon filets back to the coconut curry sauce 
Coconut Curry Salmon: Easy Thai Inspired Recipe
Cook until the internal temperature is 145°F. Garnish and serve immediately

How do you store this coconut curry salmon?

In an airtight container in the fridge for 2-3 days. When you heat it up the next day, some of the oil may separate from the sauce, but, that is fine. Just warm it up in the microwave and serve over whatever you'd like!

What can you serve with this coconut curry salmon?

I love to serve it with mashed potatoes but of course it goes well with white rice or a jasmine rice 

LEAVE A RATING AND REVIEW!

Did you love this recipe? If you did, let me know! And let others know too by leaving a comment and star rating. Reviews are incredibly useful in helping other people find my site and make my recipes. Thank you so much!
Laura 

Check out more salmon recipes 

  • Quick and Easy Moroccan Salmon
    Moroccan Salmon

Easy Mediterranean Cod: Baked Fish Recipe with Lemon

October 23, 2023

If you are looking for an easy and delicious meal that can feed your whole family, then this Mediterranean cod recipe is perfect for you! This meal is ready to go in under thirty minutes. Make this Mediterranean dish today.

Easy Mediterranean Cod: Baked Fish Recipe with Lemon

We love fish in my household. Some of our recent favorites have been zaatar salmon, gluten free fried fish, and Christmas salmon (which you could make and should make all year round). We also love zaatar and harissa, key Mediterranean flavors. They are the perfect spices for this fish dinner. This mediterranean baked cod recipe is ready in under thirty minutes, and that isn't the only good reason to make it. This flaky cod is an easy recipe and a great dinner for the whole family.

❓what are zaatar and harissa?

Two staples of Mediterranean cuisine! Here's the lowdown:

Za'atar: a Middle Eastern spice blend usually made of sumac, thyme, sesame seeds, and salt. It has a slightly tangy, earthy, and nutty flavor and is commonly used as a seasoning for meats, veggies, breads, and dips.
Harissa: a spicy North African chili paste made from roasted red peppers, garlic, olive oil, and a blend of spices like cumin, caraway, and coriander. It has a fiery kick and is often used as a condiment, marinade, or ingredient in stews and tagines. It's basically the ketchup of the Mediterranean.

Easy Mediterranean Cod: Baked Fish Recipe with Lemon

🥔 What to serve with this mediterranean cod recipe?

I love to keep on brand and serve this with my harissa potatoes. You could also serve it with cauliflower rice, or use my garlic yogurt to top this. It pairs really nicely with the lemon sauce. 

🥣 WHAT EQUIPMENT DO YOU NEED:

Medium bowl
Cast iron pan
Thermometer (if you want to make sure your fish is fully cooked)

📜 Ingredients for this Mediterranean Cod Recipe

Easy Mediterranean Cod: Baked Fish Recipe with Lemon ingredients

Olive oil: is the oil you will fry the fish in, and it goes in the sauce.
Cod Filets: Cod fish is a meaty white fish and is perfect for this dish. You can use fresh cod or frozen. If using frozen, make sure your fish fillet is thawed prior to cooking.
Gluten Free Flour: I like to use King Arthur Measure for Measure gluten free flour. If you want to try to emulate regular flour (wheat flour) or all purpose flour, it is best you avoid single flours (i.e. white rice flour) and go for a gluten-free flour mix. 
Spices: Harissa and Zaatar are the best spices and give such great flavor. 
Lemon Juice: To help lift up the flavor of the dish
Butter: To give some richness to the sauce 
Garlic: For your sauce
Lemon: Lemon slices are a beautiful topper for this dish
Parsley: I love to top this dish with a pop of color and the parsley is perfect for that

📜 HOW TO MAKE THIS easy baked cod RECIPE:

Set your oven: to 425 degrees F. Even though we panfry this recipe, it gets baked as well for extra flavor.
Dry the fish: Take paper towels and pat down the fish filets. You want to make sure that they are dry for your fish dry. If the pieces of fish are too wet, it will not coat properly and it will not give you a crispy coating, but a soggy one.
Take a large skillet: specifically cast iron and place the oil in the pan. Have it on a medium-high heat. By allowing the oil to heat up, it will help crisp up the coating on the fish when it is put into the pan.
Melt your butter: and mix it together with the lemon juice and olive oil (do not add the garlic or spices yet). Pour ¼ of the sauce into a bowl that you can then dip the fillets into. 
Mix your dry ingredients: You do not need a large bowl for this but rather a medium or small bowl and a plate. Mix the dry ingredients together, and pour onto a plate so that you can dip the fish into it. 
Dip the fish: first into the sauce mixture and then place fish into the flour mixture. Once they are covered, place in your skillet in the hot oil. Fry them for 2-4 minutes per side (until they are golden brown) on a medium heat. 
Bake: Once you have panfried the fish, put the garlic into your sauce, along with the remaining zaatar and harissa. Place it into your pan. Do not pour it over your fish as you want the top to stay crispy. Bake for 10 minutes.
Remove from the oven: and serve immediately.

oil in a cast iron pan
Place oil in a cast iron or ovenproof pan
butter, oil, and lemon juice in a bowl
Melt the butter in a bowl with the lemon juice, and olive oil
flour mixture on a plate
Mix the dry ingredients
cod filet dunked in butter mixture and flour
Dip both sides of the fish into the sauce and then into the flour mixture
glass bowl with lemon sauce mixture
Add the garlic and spices to the sauce once you have dipped all of the filets
lemon sauce mixture with whisk
Mix together and set aside
fried fish in a cast iron pan
Place the filets in the heated oil and cook for 2-3 minutes per side
Easy Mediterranean Cod: Baked Fish Recipe with Lemon slices
Pour the sauce around the filets, not over and place lemon slices on top. Bake
Easy Mediterranean Cod: Baked Fish Recipe with Lemon
Remove from the oven and serve immediately

Fish is cooked when the internal temperature is 145°F. If you'd like to serve this with wine to liven up your dinner, a dry white wine pairs best with fish like cod and tilapia.

When you are done with this recipe, make my cod au gratin recipe.

🍱 HOW TO STORE THIS mediterranean cod?

This is of course best served right after it is made as it has the crisp on top but should you wish to store it (it does reheat well), store it in an airtight container and keep it in the fridge. Eat within 2-3 days. 


❓What are key ingredients of the Mediterranean Diet?

Foods of the Mediterranean diet include:

  • Fruits and veggies, lemon (lemon zest), cherry tomatoes, red onion, especially leafy greens, tomatoes, bell peppers, eggplant, zucchini, and garlic
  • Legumes like green beans, lentils, and chickpeas
  • Whole grains like whole wheat bread, brown rice, and oatmeal
  • Seafood such as fish (salmon, tuna, sardines, white fish (like cod fillets), shrimp, and squid
  • Nuts and seeds like almonds, walnuts, hazelnuts, and pumpkin seeds
  • Olives; kalamata olives, green olives, black olives, extra virgin olive oil as the main source of added fat
  • Moderate amounts of dairy like yogurt, feta cheese, and milk
  • Poultry in moderation
  • Herbs: fresh herbs like fresh parsley, fresh basil

🌟 LEAVE A RATING AND REVIEW! 🌟

Did you love this recipe? If you did, let me know! And let others know too by leaving a comment and star rating. Reviews are incredibly useful in helping other people find my site and make my recipes. Thank you so much!
Laura 

🔎 Looking for more Fish Recipes? 


  • Easy and Delicious Seafood Nachos
    Homemade Easy Nachos Recipe
  • Little Mermaid's Les Poissons
    Les Poissons
  • Easy One Pot Fish Stew
    Fish Soup
  • Sliced Ahi Tuna on a plate
    Easy Ahi Tuna Marinade Recipe: Seared Marinated Tuna

Chocolate Empanadas Recipe: How to Make this Easy Dessert

October 19, 2023

Dessert empanadas are the ideal treat for anyone with a sweet tooth. Chocolate empanadas are filled with melted chocolate (aka nutella), are baked until golden brown and topped with powdered sugar. Let's make this delicious recipe.

Chocolate Empanadas Recipe: How to make this easy dessert

I love hand pies, empanadas, and pasties. Beef empanadas are not the only kind! They can be sweet (check out my apple empanadas) or savory and in this case, these chocolate empanadas are sweet with their Nutella filling. These delicious treats are ready in under an hour. Let’s make our chocolate empanadas. The perfect sweet treat!

WHAT ARE SWEET EMPANADAS?

Sweet empanadas, also known as “empanadas dulces” in Spanish, are a delightful and popular variation of the traditional savory empanadas. Empanadas are a type of pastry or turnover that originated in Spain and have been embraced by Latin America, South America, and Hispanic cultures. While savory empanadas are typically filled with ingredients like meat, vegetables, or cheese, sweet empanadas are filled with sweet fillings, making them a delicious dessert option.

There are numerous types of sweet empanadas, each with its own unique flavor and ingredients. Here are some popular types of sweet empanadas from various Latin American and Spanish-speaking regions:

  1. Dulce de Leche Empanadas: These empanadas are filled with dulce de leche, a sweet caramel-like sauce made from sweetened condensed milk. They are rich, creamy, and sweet.
  2. Fruit Empanadas: These empanadas are filled with various fruits, either fresh, cooked, or in the form of jams and preserves. Common fruit fillings include apple, peach, guava, pineapple, and strawberry.
  3. Chocolate Empanadas: These empanadas are filled with chocolate in various forms, such as chocolate chips, chocolate ganache, or even Nutella. They are a chocolate lover's delight.
  4. Sweet Potato Empanadas: Sweet potato is a popular filling for sweet empanadas. The sweet and earthy flavor of mashed or candied sweet potatoes works wonderfully inside a flaky pastry.
  5. Cream Cheese Empanadas: Cream cheese, often sweetened with sugar, can be used as a filling for a creamy and slightly tangy flavor.
  6. Nut Empanadas: Nuts like chopped almonds, pecans, or walnuts can be combined with sweet ingredients like honey or caramel to create nut-filled empanadas.
  7. Cinnamon Sugar Empanadas: These empanadas are simple but delicious. They are filled with a mixture of cinnamon and sugar, which creates a sweet and spiced flavor.
  8. Ricotta and Honey Empanadas: A creamy ricotta cheese filling combined with a drizzle of honey creates a delightful sweet and savory contrast.
  9. Cheese and Guava Empanadas: A combination of sweet guava paste and cream cheese is a classic filling that offers a balance of sweet and tangy flavors.
  10. Pumpkin Empanadas: Pumpkin puree, often sweetened and spiced with cinnamon and nutmeg, can be used as a filling for a fall-inspired treat.
  11. Coconut Empanadas: These empanadas feature shredded coconut mixed with sugar for a tropical and sweet flavor.
  12. Lemon or Lime Empanadas: Citrus curd or lemon/lime filling can be used to create a tart and sweet empanada.

These are just a few examples, and the possibilities for sweet empanada fillings are limited only by your imagination and regional traditions. Whether baked or fried, sweet empanadas are a delightful treat enjoyed by people in many parts of the world.

Chocolate Empanadas Recipe: How to make this easy dessert

EQUIPMENT NEEDED FOR THIS RECIPE

Baking Tray (or cookie sheet)
Rolling pin (or a tortilla press)
parchment paper (or wax paper)
Food processor- I do not use an electric mixer just a food processor
Pastry Brush

FRYING VS BAKING:

You can deep fry these if you want but be sure to use a clear oil like vegetable oil or canola oil. Do this in a heavy bottom pot, and fry until golden brown. 

INGREDIENTS FOR chocolate EMPANADAS:

ingredients for Chocolate Empanadas Recipe: How to make this easy dessert

Pie Dough: You can use a store bought pie dough or make your own. I use my gluten free pastry dough recipe. It is a flaky dough and is my go-to for these types of recipes.

Nutella: In this recipe, I use nutella for the filling rather than actual chocolate. It is quick and easy to use and yields a great flavor.

Powdered Sugar (icing sugar): Powdered sugar is our sweet topping for our finished empanadas

Egg: Egg is used for an egg wash to coat the pie crust

HOW DO YOU MAKE THESE chocolate EMPANADAS?

Set oven to 350°F
First make your dough: if you are making homemade empanada dough and want to use my recipe, use my gluten free pastry dough recipe. Put the ingredients in the bowl of a food processor and pulse until it comes together. Set it aside.
Bring them together: in a tortilla press (or between two pieces of parchment paper) divide dough, place a ball of dough. If using a tortilla press, place between the pieces of parchment, and then into the press. Push down and get it to the thickness you desire. If using a rolling pin, roll it out to the thickness you like.Place the Nutella (along the center) onto the empanada discs. Fold it over and use a fork to press the edges together to seal it.  Place each empanada on a prepared baking sheet (large baking sheets if you want to get all onto the same sheet). They should look like a half moon when they are folded over.
Cover in egg wash: In a bowl, crack an egg and whisk. Using a pastry brush, brush the empanadas with it and. then place turbinado sugar on top of each empanada. Place into the oven and bake for 20-25 minutes. Check to see how golden they are. Baking time is up to 30 minutes. However use your discretion if you feel they are done at 20 minutes, take them out of the oven.  
Remove from the oven: and cover in powdered sugar. Serve and enjoy.

dough in a food processor
Make the dough
empanada dough between parchment paper
Make the empanadas
tortilla press
Press down
empanada discs
Place the empanada dough discs onto a prepared baking sheet. Place the nutella on them.
Chocolate Empanadas Recipe: How to make this easy dessert
Fold over the dough and crimp
Chocolate Empanadas Recipe: How to make this easy dessert
Brush with egg wash and top with sugar and bake
Chocolate Empanadas Recipe: How to make this easy dessert
Cover with powdered sugar and serve

HOW DO YOU STORE THESE Chocolate EMPANADAS:

​In an airtight container on the counter for 3-5 days. Icing you can also store on the counter or in the fridge.

Notes about this recipe:

Despite this being a recipe for chocolate empanadas, there is no cocoa powder in this recipe or chocolate dough. This is one of my favorite easy recipes and holds a special place in my heart because of how easy it is to make. 

You can make the dough ahead of time. If you are using my original recipe, you can cover the dough in plastic wrap (or an eco-friendly alternative) and place in the fridge for a few days until you would like to use it. Allow it to come to room temperature when you want to use it. 

Alterations or Additions:


If you wanted to add fresh berries with the chocolate filling you could to brighten up the flavor a bit. If you love peanut butter and chocolate, you could add peanut butter as well. If you want to amp up the chocolate as well you could cover these delicious empanadas with a chocolate drizzle instead of the powdered sugar. For the inside, you could also add coarse crumbs of heath bits! There are so many fun options of what you can add into this to make it the best snack.

LEAVE A RATING AND REVIEW!

Did you love this recipe? If you did, let me know! And let others know too by leaving a comment and star rating. Reviews are incredibly useful in helping other people find my site and make my recipes. Thank you so much!
Laura 

FIND MORE OF MY FAVORITE TART RECIPES BELOW

Gluten-Free Tart Crust Recipe

October 16, 2023

If you have ever wondered how to make your favorite tarts gluten-free, look no further! This gluten-free tart crust recipe is quick, simple, and delicious.

Gluten Free Tart Crust Recipe: Easy Gluten-Free Pastry

I love a tart recipe! For Fall I love my custard apple tart , apple frangipane tart, and my pear frangipane tart. For Spring and Summer my rhubarb tart and peach frangipane tart. There are so many things you can put into a tart. It is a party pleaser and really just the best. You can put your favorite filling, a lemon curd (or orange curd), fill it with pastry cream, or whatever your heart desires. Let's get to making this gluten free tart crust recipe.

Why you will love this gluten free tart crust recipe?

It is super simple to make and is only a few ingredients. Plus, if you want to make savory pies or savory tarts with this crust you can! Just omit the sugar. 

It can also be used to make a flaky gluten-free pie crust. It really is a universal easy gluten-free pie crust / tart crust recipe. 

Tips and Tricks for this recipe:

Blind baking is usually necessary however depending on the recipe you are making, see if the instructions called for blind baking or not. 

For best results, always follow the recipe card.

Gluten Free Tart Crust Recipe: Easy Gluten-Free Pastry

Equipment that you need for this gluten free tart crust recipe:


Tart pan - make sure you have a tart pan with a removable bottom (you can have a full size one or mini tart pans)

​Food processor - I use a food processor for my recipe, it is just easier

Pie Weights- I use pie weights when I par bake my crust 

Rolling Pin, optional, you can roll out your tart dough or you can press it by hand into the tart pan

Parchment paper, optional​

A note on gluten free flours:

Tart crusts can be made of several different flours and materials. I have made a gluten free oreo crust for my chocolate raspberry tart, you can use a graham cracker crust (like I do in my cheesecake bars) however it is important to talk about gluten free flour. If you are wanting to make a traditional tart crust but gluten free, you are not going to want to use something like almond flour or oat flour. You are going to want to use a good 1:1 flour that has xanthan gum. The flour that I have found to yield the best success is Cup4Cup gluten-free flour blend. The thing to note for this flour blend is that it does contain milk powder so if you need to be dairy free then this is not going to be the best choice for you. It is important to find a good gluten free all purpose flour (other options are Bob's Red Mill and King Arthur Measure for Measure Gluten Free Flour)

Ingredients for gluten free tart crust recipe

Missing water

gluten free flour: See above with my notes on flours 

egg: I use a whole egg in my tart recipe (not just the egg yolk). It helps with the color and bring the pie dough (tart dough) together

cold water: This is what gives moisture to the dough

butter: ​all good pastry dough needs some fat in it- in this recipe, it comes from butter

sugar: ​sugar in this recipe is optional. If you are making a sweet filled tart, you can add some sugar to the dough, but you can also omit it and there is no consequence. 

How do you make this gluten free tart crust recipe?

In the bowl of a food processor: ​place the dry ingredients in 
Cube the cold butter: ​make sure the butter is cold, cut it up and put it in the bowl of the food processor
Add the egg: ​and the water and pulse until the crust come together.
You can use this crust right away: ​if you do not want to use it immediately, you can wrap it in plastic wrap or a non-plastic wrap and place it in the fridge until you are ready to use it. If you want to use the crust, set your oven to 350°F. 
You can put the crust together in 2 ways: ​if you want to use a rolling pin, place the dough between two pieces of parchment paper, roll it out. Place it over the tart pan and press it into the crevices so that it is shaped to the pan. The other option is to pour the dough into the tart pan and press it in with your fingers. Either method works fine. 
Cover the tart: with parchment paper and then place the pie weights on top. Bake the tart crust for 15 minutes. When it has finished baking, remove from the oven, fill the tart with the tart filling of your choice, and bake according to that recipes instructions. Your tart shell will be a nice color (not quite golden brown but a lighter gold). You do not want it to get too brown because it could then burn when you bake it again with the filling.

ingredients for tart crust in a food processor
Place ingredients into the food processor
Gluten Free Tart Crust dough in a tart pan
Pour the dough into the tart pan
Gluten Free Tart Crust in a tart pan
Press dough with your fingers until it is an even thickness in the tart pan
Gluten Free Tart Crust with baking beads and parchment paper
Cover the tart with parchment paper and pie weights and blind bake the crust
Gluten Free Tart Crust Recipe: Easy Gluten-Free Pastry
Remove from the oven, fill with your preferred filling and follow the instructions for that recipe.

This recipe can be used as a gluten-free pie crust recipe as well as a tart crust recipe, it is versatile and great. If you want a double-crust pie,  all you need to do is double the recipe. This recipe is as close as I have gotten to replicating a crust made with wheat flour. It is made from simple ingredients but yields the best gluten free pies or gluten free tarts!

Alterations to the recipe:

I am not a vegan baker and therefore have not tried to make this pie crust vegan or dairy free. If you do try to make it dairy free you would need to substitute the butter with something like earth balance or a good dairy free butter. You can also try an egg replacement. If you do try this vegan or dairy free, please let me know how it turns out in the comments below. 

LEAVE A RATING AND REVIEW!

Did you like this recipe? If you did, let me know! And let others know too by leaving a comment and star rating. Reviews are incredibly useful in helping other people find my site and make my recipes. Thank you so much!
Laura 

CHECK OUT OTHER RECIPES

Easy Miso Chocolate Chip Cookies Recipe with Brown Butter!

October 12, 2023

Easy Miso Chocolate Chip Cookies Recipe with Brown Butter!

Looking to up your cookie game? This recipe for miso chocolate chip cookies is quick, easy, and is so delicious. With the sweet flavors of chocolate chip cookies and the umami flavor from the white miso paste, these cookies are the perfect balance of flavor.

Easy Miso Chocolate Chip Cookies Recipe with Brown Butter!

I really love miso in a sweet dish (check out my miso caramel). Miso flavor in cookies is a subtle flavor but it still adds a lot of depth. People often don't think of miso for sweeter dishes because of its umami flavor being categorized as savory but miso can be used in a variety of ways and it goes great in cookies!

What do you need to make miso chocolate chip cookies?

Large Bowl
Parchment Paper (or a reusable baking mat)
Baking tray
Rubber Spatula
Medium bowl

What ingredients do you need for miso chocolate chip cookies?

Easy Miso Chocolate Chip Cookies Recipe with Brown Butter!

Gluten Free All Purpose Flour: I use King Arthur gluten free Measure for Measure flour (it has xanthan gum in it). However this is a 1:1 recipe so regular flour works just fine.
Dark Brown Sugar: Brown sugar helps add to the richness of the cookie, almost a caramel flavor
White Sugar: The balance of sugars in the cookie makes it perfectly sweet
White Miso Paste: This is where the umami flavor is going to come from in the cookie. The saltiness pairs beautifully with the chocolate, but, you need to be sure to use a white miso so as to not overpower the flavor of the cookie
Unsalted Butter: The richness of any cookie dough. Using unsalted means you can control the amount of salt flavor going into your cookies. 
Chocolate Chunks: I like to use milk chocolate chunks however you can use dark if you like
Egg: Egg is in the binding agent in the cookie dough
Vanilla: Vanilla extract helps enhance the flavor of the cookie
Baking Soda: This helps with the structure of the cookie 

How do you make this chocolate chip cookie recipe?

Mix together your dry ingredients​: in a large bowl add the flour, and baking soda and set aside. 
Brown the butter: ​Browned butter enhancing the flavor of any cookie dough and it is super simple to make. If you want the butter to melt faster, use room temperature butter but honestly, cold butter is fine. Place the butter into a pan and put it on medium heat. The butter will begin to break down and you will see little brown bits form on the bottom, Swirl it around and remove it from the heat. Pour the butter into the medium sized bowl.
Add the sugars: ​and whisk. After the sugars and butter have been creamed together, add the egg and whisk together. 
Add the vanilla: ​and miso paste and whisk until it has all come together.
Fold the wet ingredients: ​into the dry ingredients ⅓ at a time. At the ⅔ point, add the chocolate to the bowl and make sure everything is incorporated. One of the key things to this batter is to make sure to not overwork it. It is why I do not use my mixmaster for this recipe.
Roll the dough: ​into balls and place onto the baking sheet. Place in the fridge for at least 30 minutes. The dough may feel greasy, but that is entirely normal. 
Set the oven to 350°:​ and bake the cookies after they have had enough time to sit and bake for 13-15 minutes. You want the cookies to turn golden brown. 
Remove the trays from the oven:​ and let them sit for a few minutes on the sheets. If you want crispy edges but a gooey center, then you can eat them right away, otherwise, let them sit for a little bit.

browned butter in a pan
Brown the butter
dry ingredients in a glass bowl
Mix dry ingredients in a bowl
browned butter and sugar in a bowl
Add the sugars to the browned butter
sugar with an egg in a bowl
Whisk and add the egg
wet ingredients with miso paste
Add the miso paste
wet ingredients for cookie dough
Whisk together
wet and dry ingredients in a bowl
Add the wet ingredients to the dry ingredients
flour with chocolate in a bowl
Fold the dough together
Easy Miso Chocolate Chip Cookies Recipe with Brown Butter cookie dough
The final product should look like this
Easy Miso Chocolate Chip Cookies Recipe with Brown Butter cookie dough
Roll the dough into balls and place in the fridge
Easy Miso Chocolate Chip Cookies Recipe with Brown Butter!
Then bake

How to store these cookies?

​Store in an airtight container on the counter for a few day or place in an freezer safe bag and into the freezer for up to three months. 

Why should you make these miso chocolate chip cookies?

Miso is such a fun and great ingredient to work with in your recipes and is available at most grocery stores. It can be such a great addition to baked goods, and I love to bake cookies with it. This recipe in my opinion is one of the best chocolate chip cookie recipes and I would never have initially thought miso cookies would top the list, but, they are that good! The soft centers of the cookie are so gooey and delicious and the chocolate bar bits in the cookie are only part of what makes these the best cookies. The depth of flavor from the browned butter and miso paste is the absolute best.

Tips and Tricks for this recipe:

Always follow the recipe card for the best results however, that doesn't mean that you cannot make a few changes if you'd like.

You can use chocolate melts or dark chocolate chips if you'd like rather than chocolate chunks. 

If you would like o use a sprinkle of flaky sea salt on top go ahead. I personally don't add more salt because of the subtle saltiness from the miso but you can add more if you'd like.

LEAVE A RATING AND REVIEW!

Did you like this recipe? If you did, let me know! And let others know too by leaving a comment and star rating. Reviews are incredibly useful in helping other people find my site and make my recipes. Thank you so much!

Laura 

CHECK OUT OTHER RECIPES

  • Mexican Hot Chocolate Cookies
  • Easy Gluten Free Chocolate Crinkle Cookies laying flat on a cookie tray on brown parchment paper
    Easy Gluten Free Chocolate Crinkle Cookies
  • Pomegranate mini pavlovas on a white tray covered in whipped cream and pomegranate syrup and seeds.
    Pomegranate Pavlova
  • Geode Macarons
Next Page »

Primary Sidebar

Custard Apple Tart: A French NormandeTarte Recipe

Let's Get Cooking!

  • 100% gluten-free sweet & indulgent recipes that I've tested in my own kitchen that I hope you'll try and love!
  • Step-by-step instructions (including some videos) on how to perfect your gluten-free cooking and baking game.
  • All of my favorite cooking, baking, and photography equipment that I deem essential in the kitchen!

More about Garnished With Joy →

As Featured In

Footer

↑ back to top

About

Recipes

Contact

Privacy Policy

Disclaimer

Terms & Conditions

© 2025 Garnished With Joy