• Skip to primary navigation
  • Skip to main content
  • Skip to primary sidebar
  • Recipe Index
  • About
  • Contact

Garnished With Joy logo

menu icon
go to homepage
  • Recipe Index
  • About
  • Contact
search icon
Homepage link
  • Recipe Index
  • About
  • Contact
×
Sift

Blog

Best Cod Au Gratin Recipe: Classic Traditional Recipe

October 9, 2023

Best Cod Au Gratin Recipe: Classic Traditional Recipes

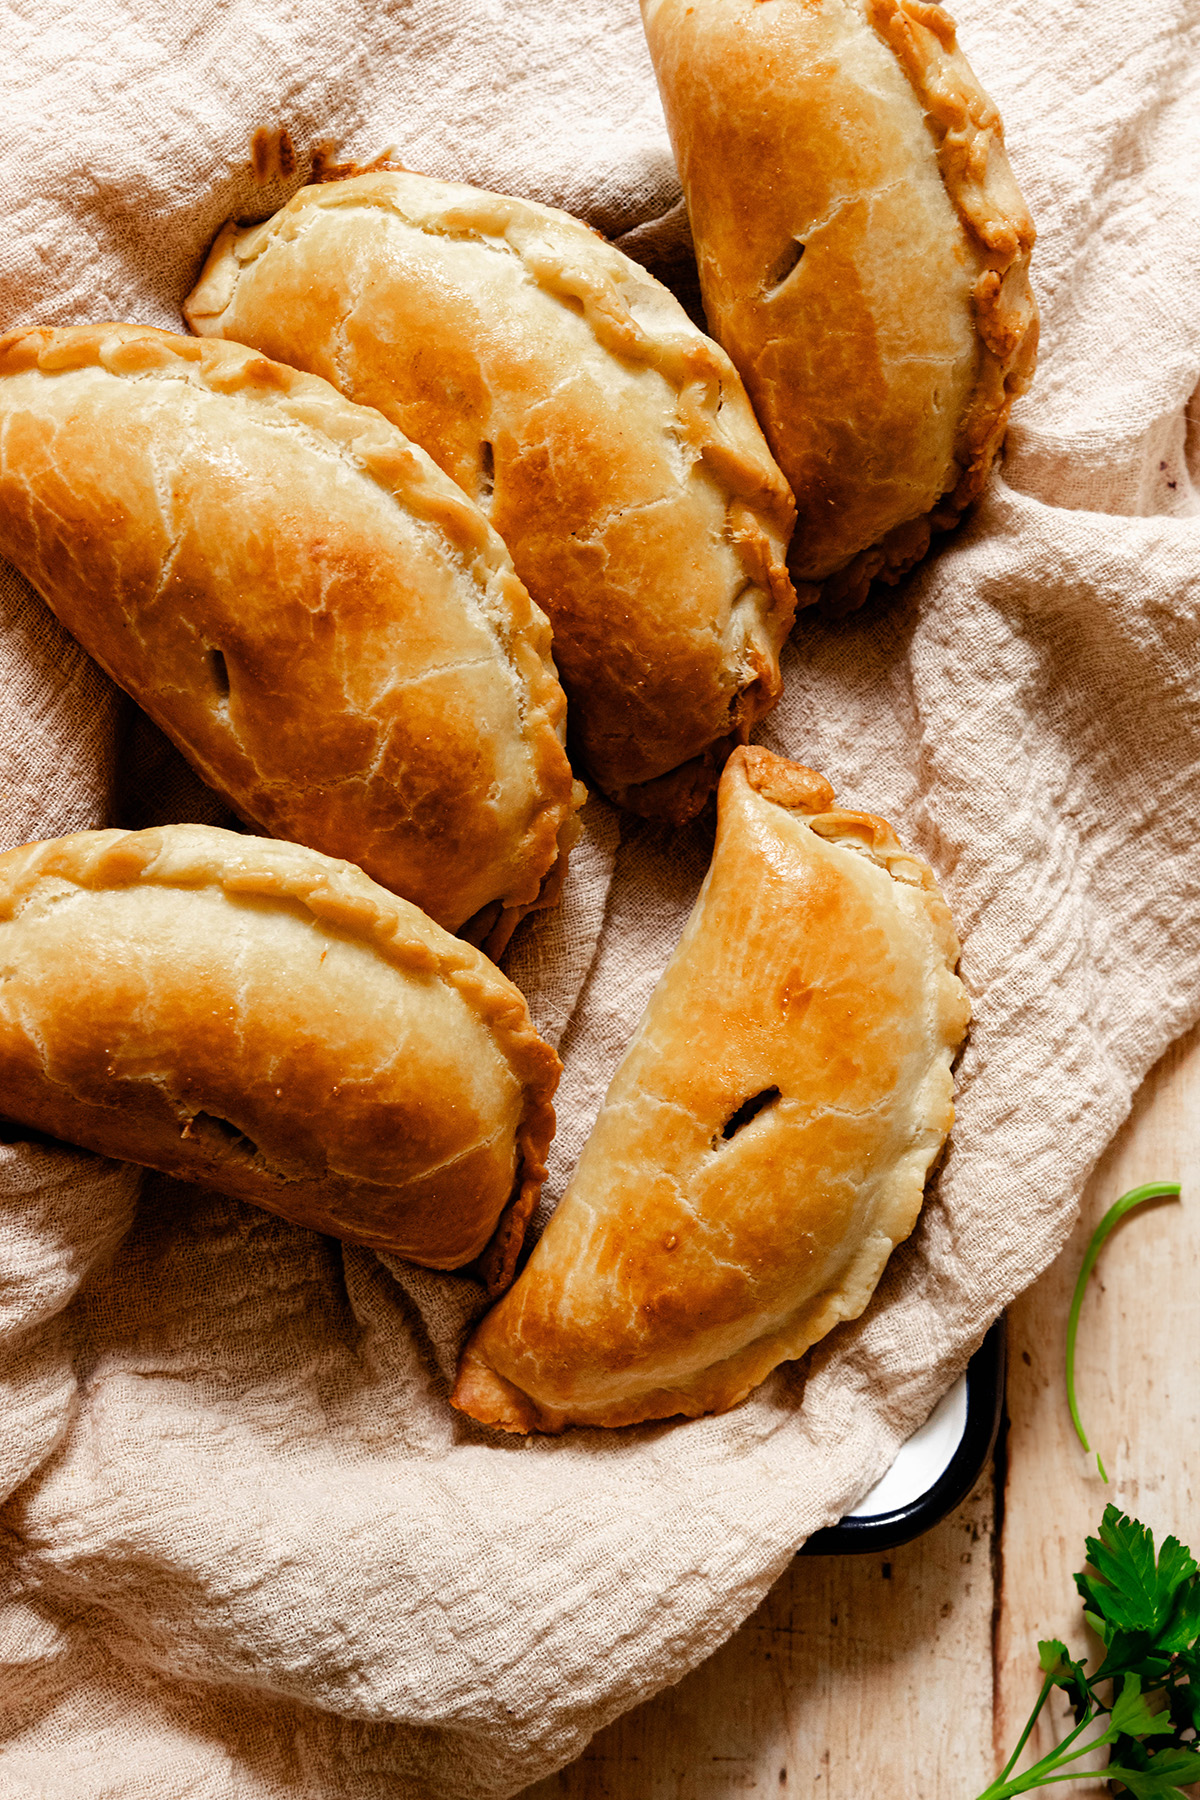
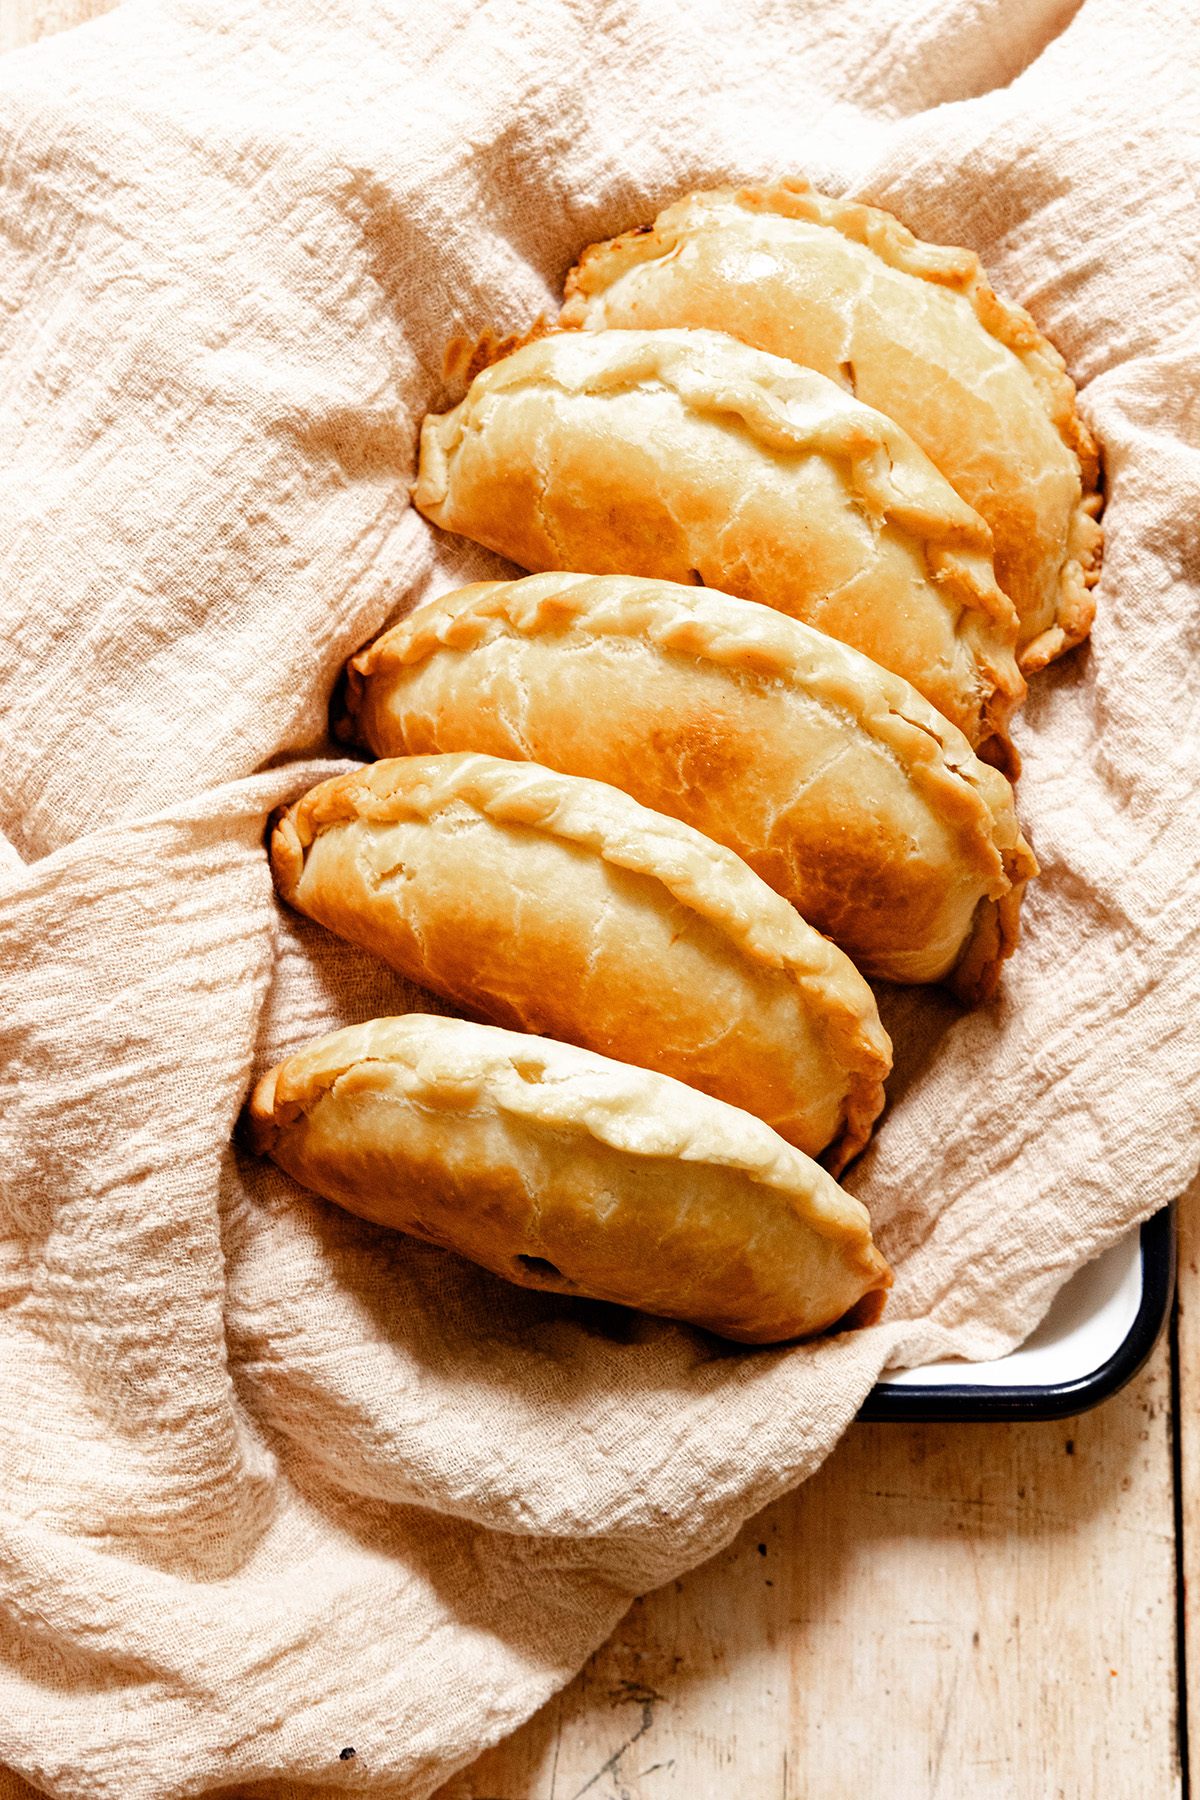
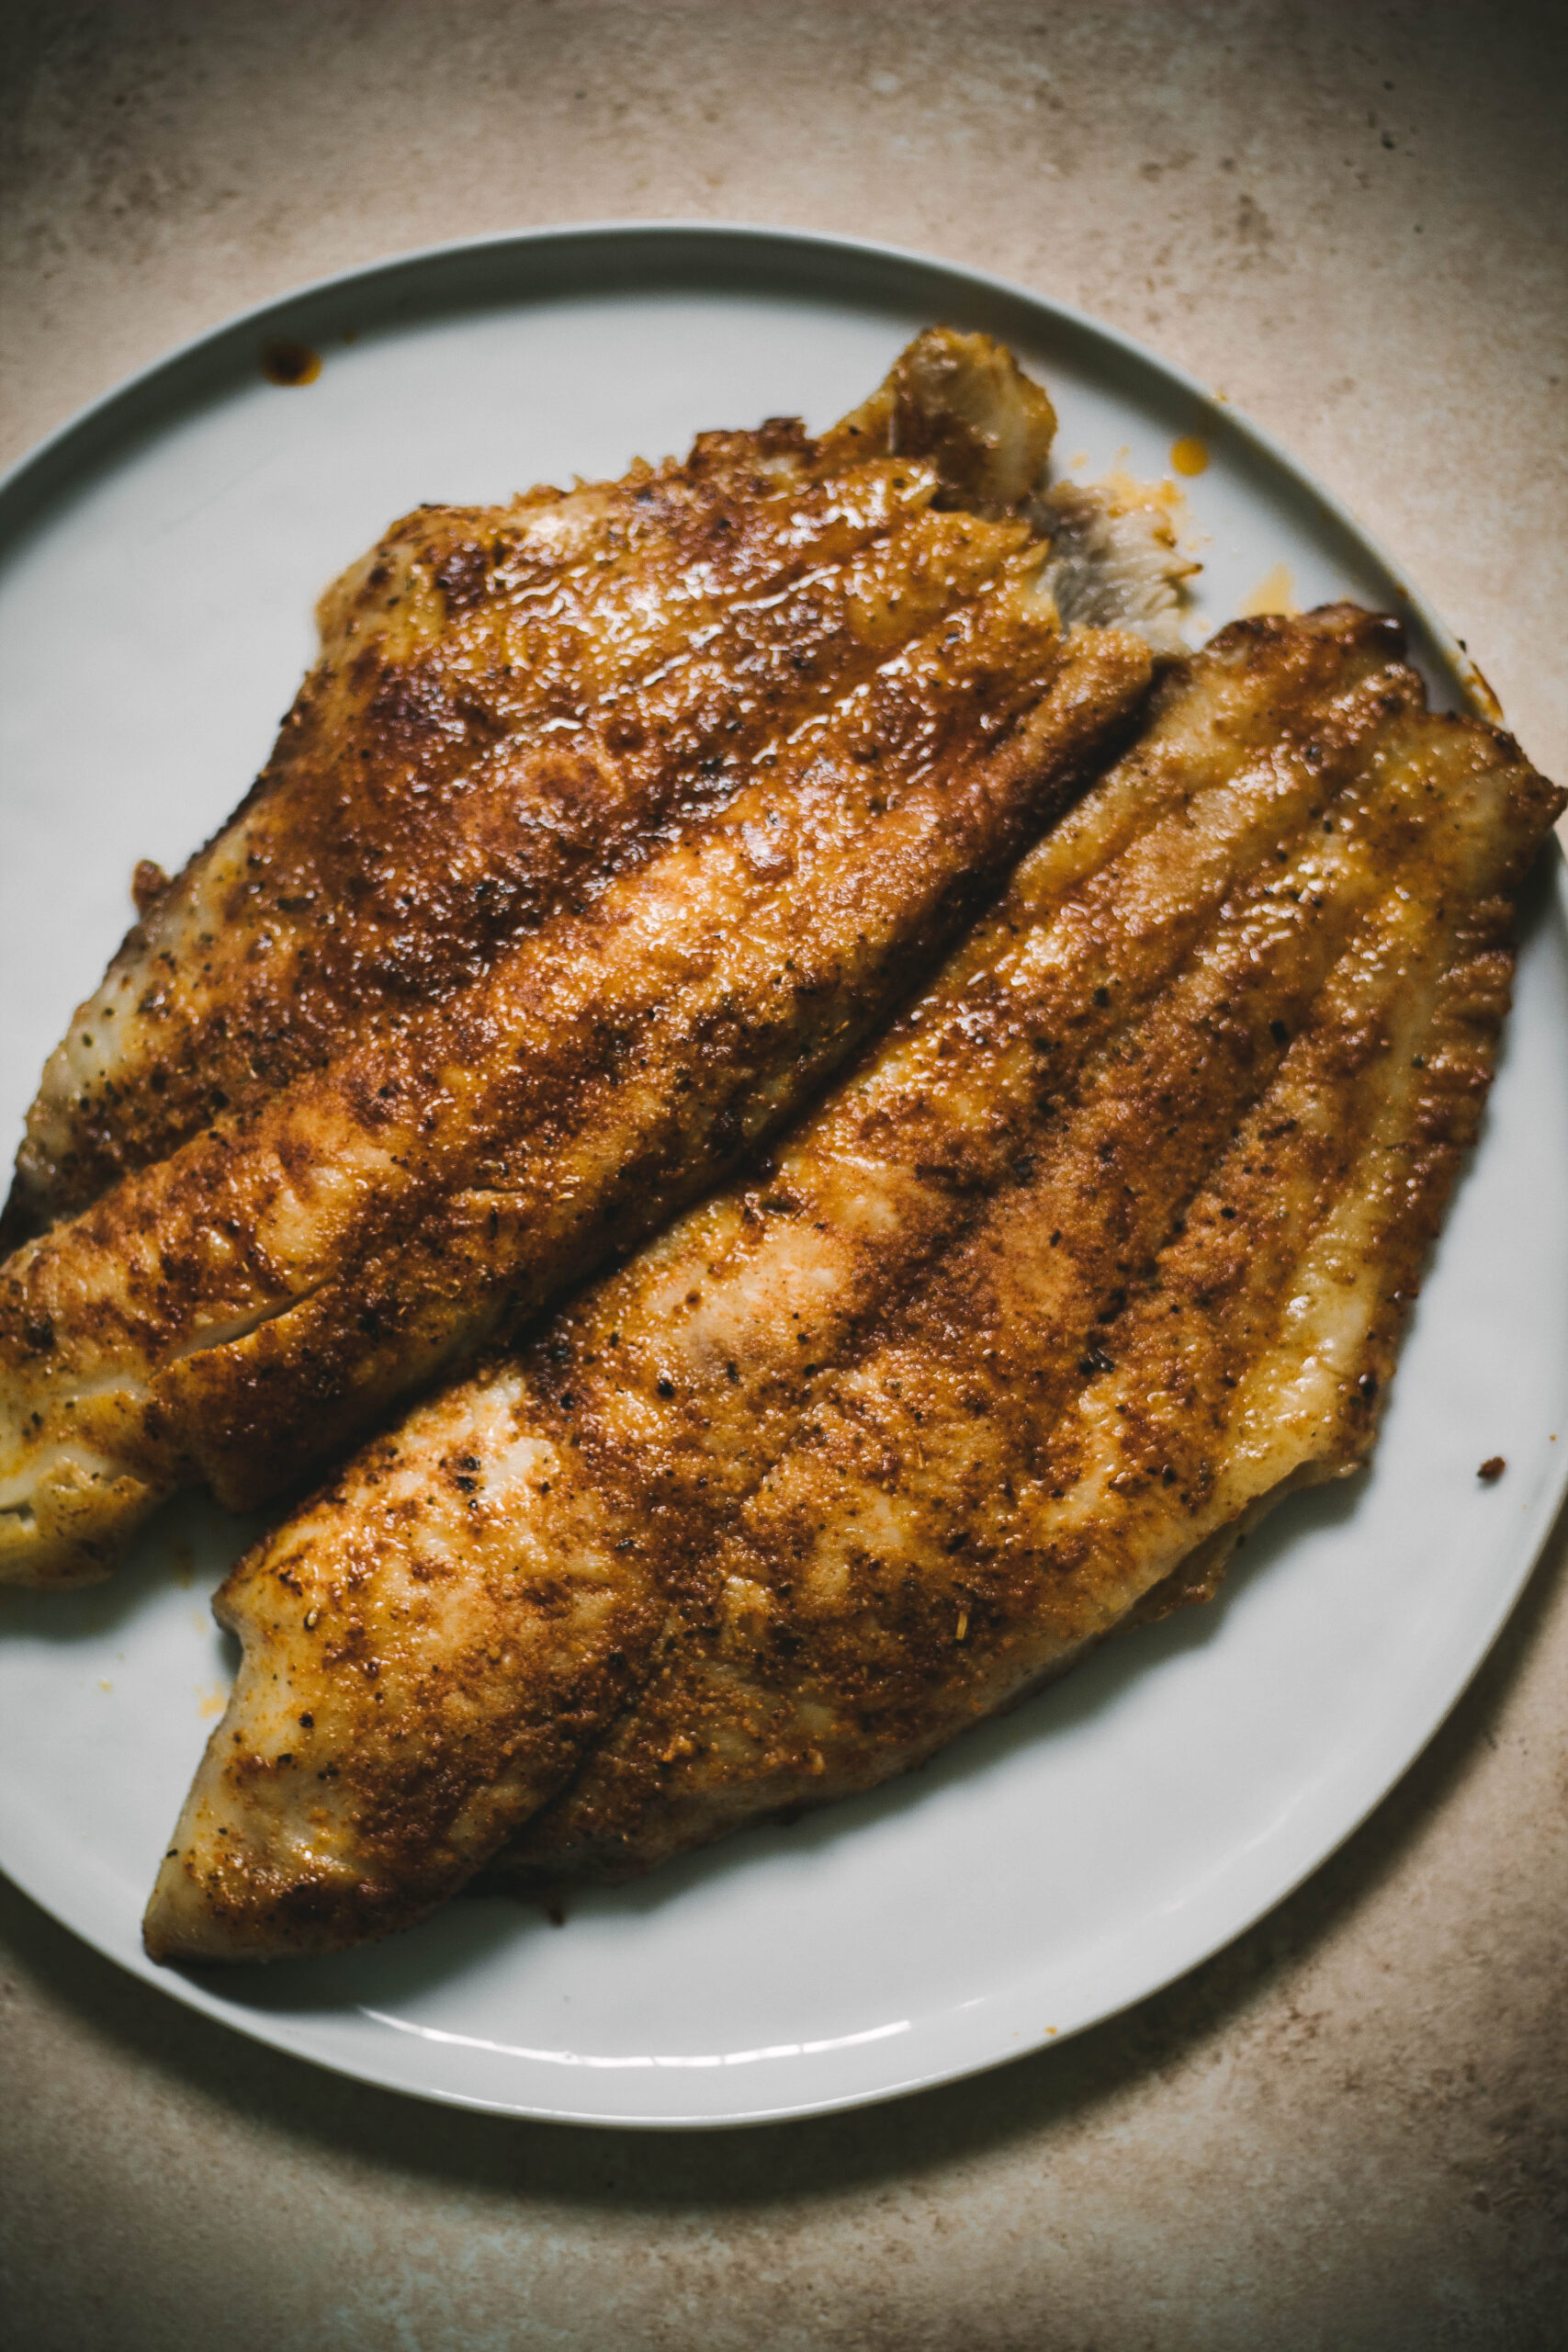
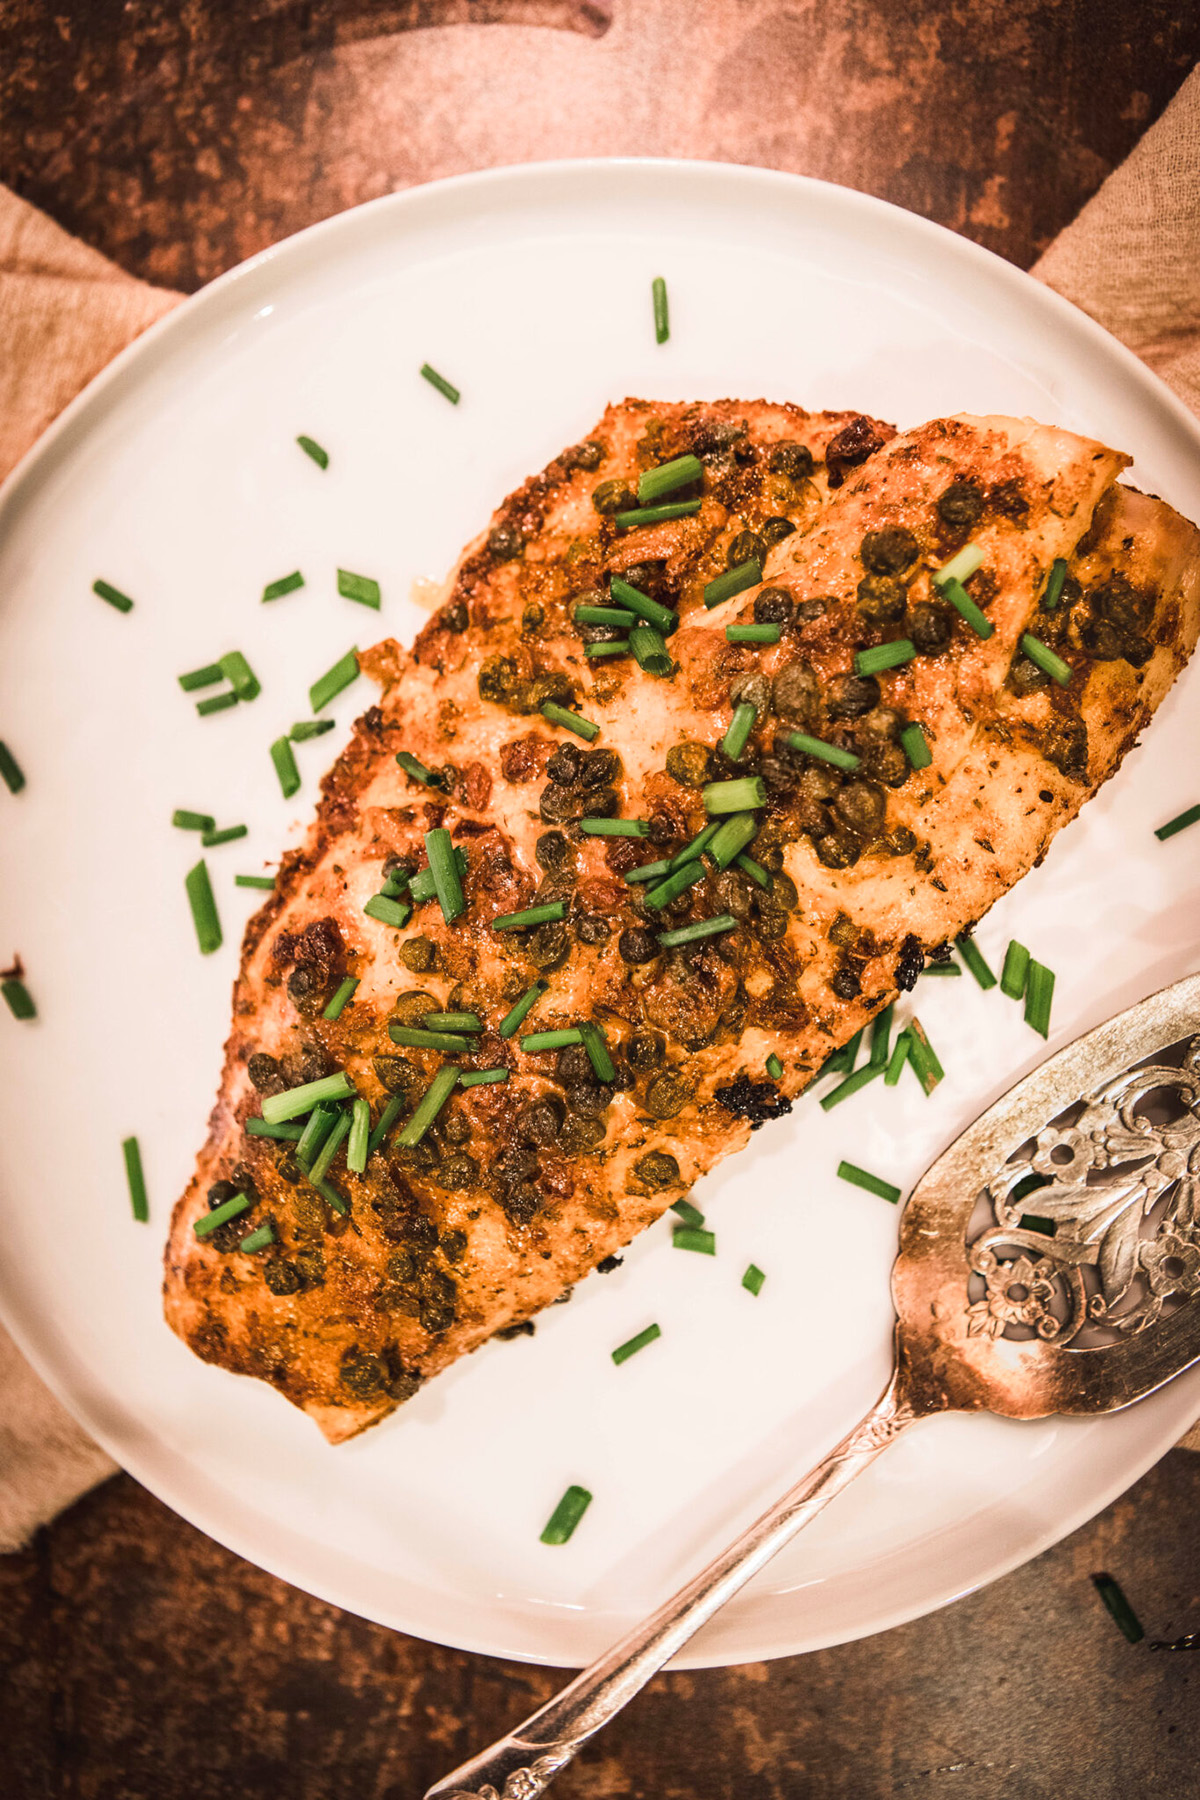
If you are looking for an au gratin recipe but want to try something a bit different, then this gluten-free cod au gratin is the right recipe for you. With very little prep time and a punch of flavor, this dish is elevated and sophisticated, all while remaining simple. One of the traditional Newfoundland recipes, this dish is so delicious and simple to make. 

Best Cod Au Gratin Recipe: Classic Traditional Recipes

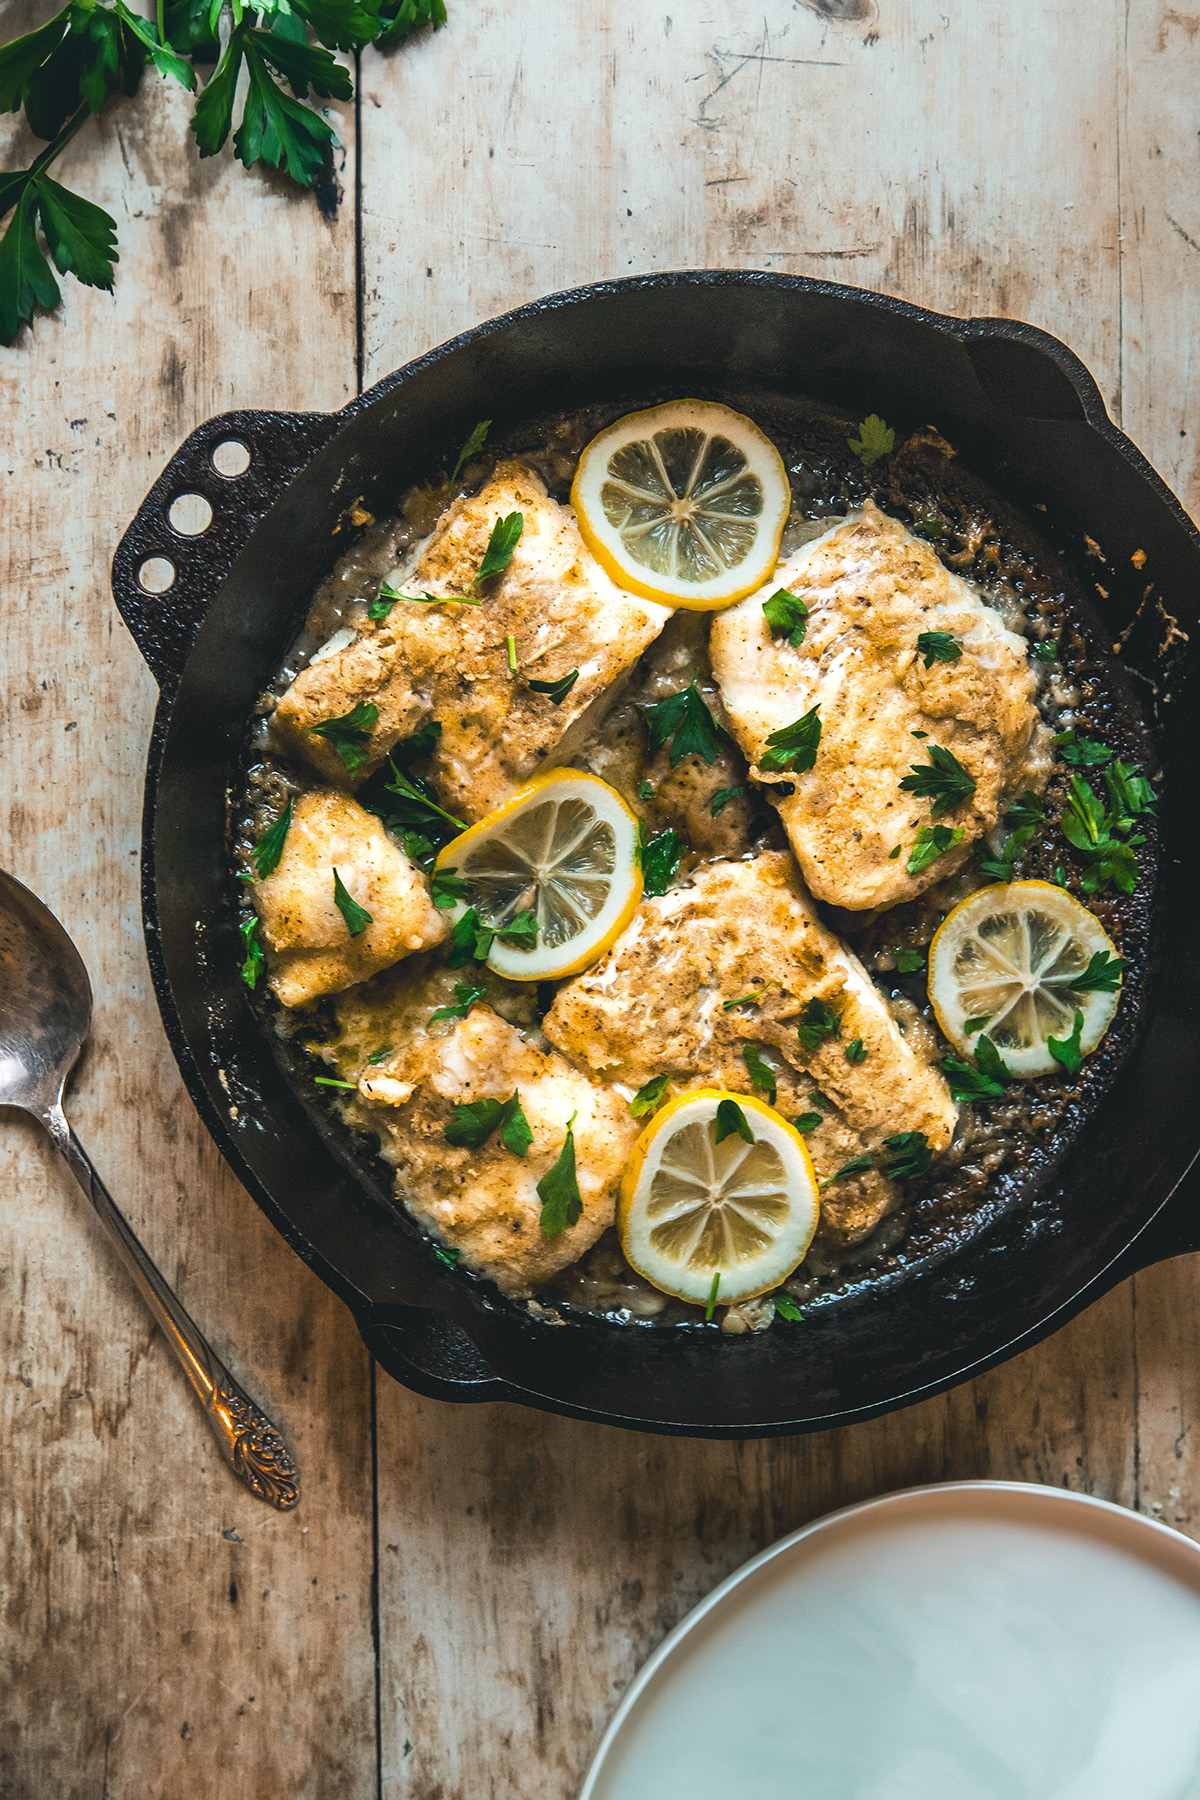
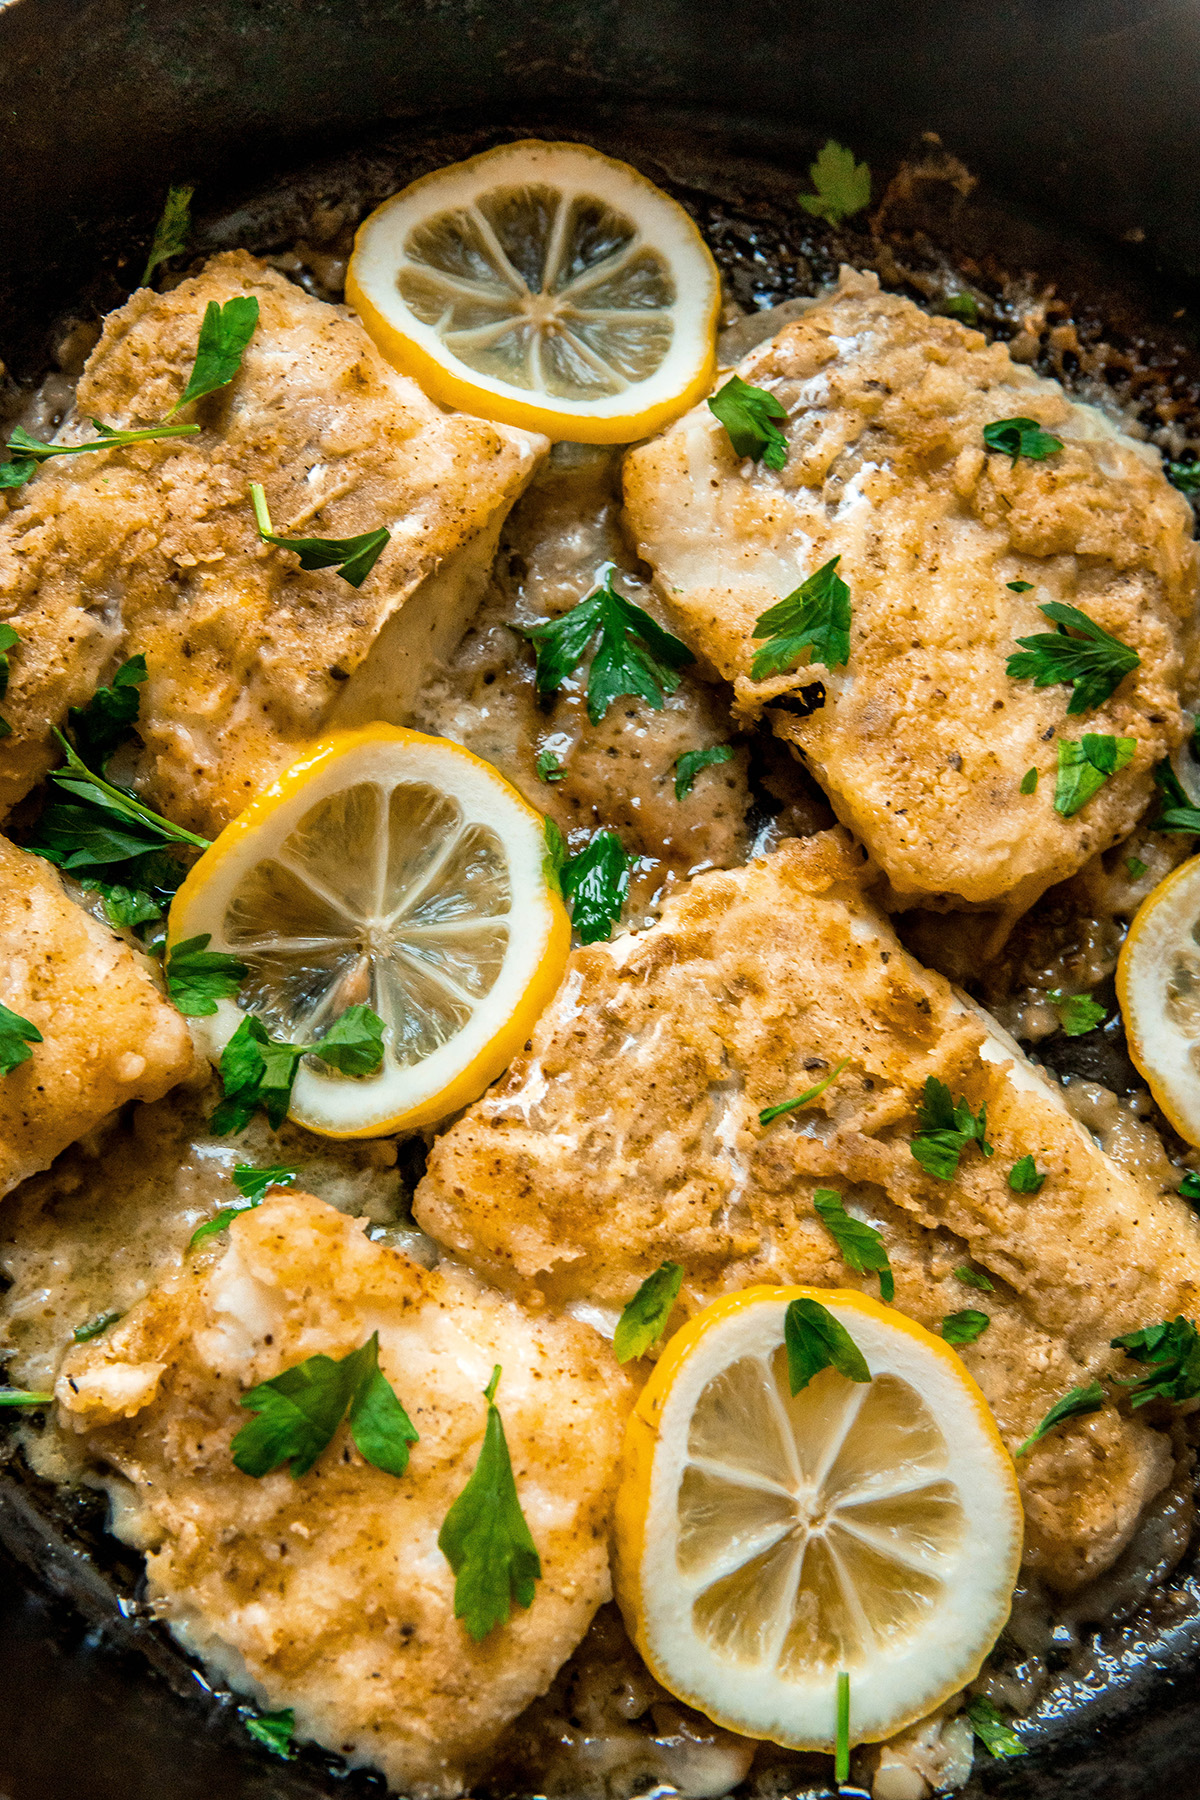
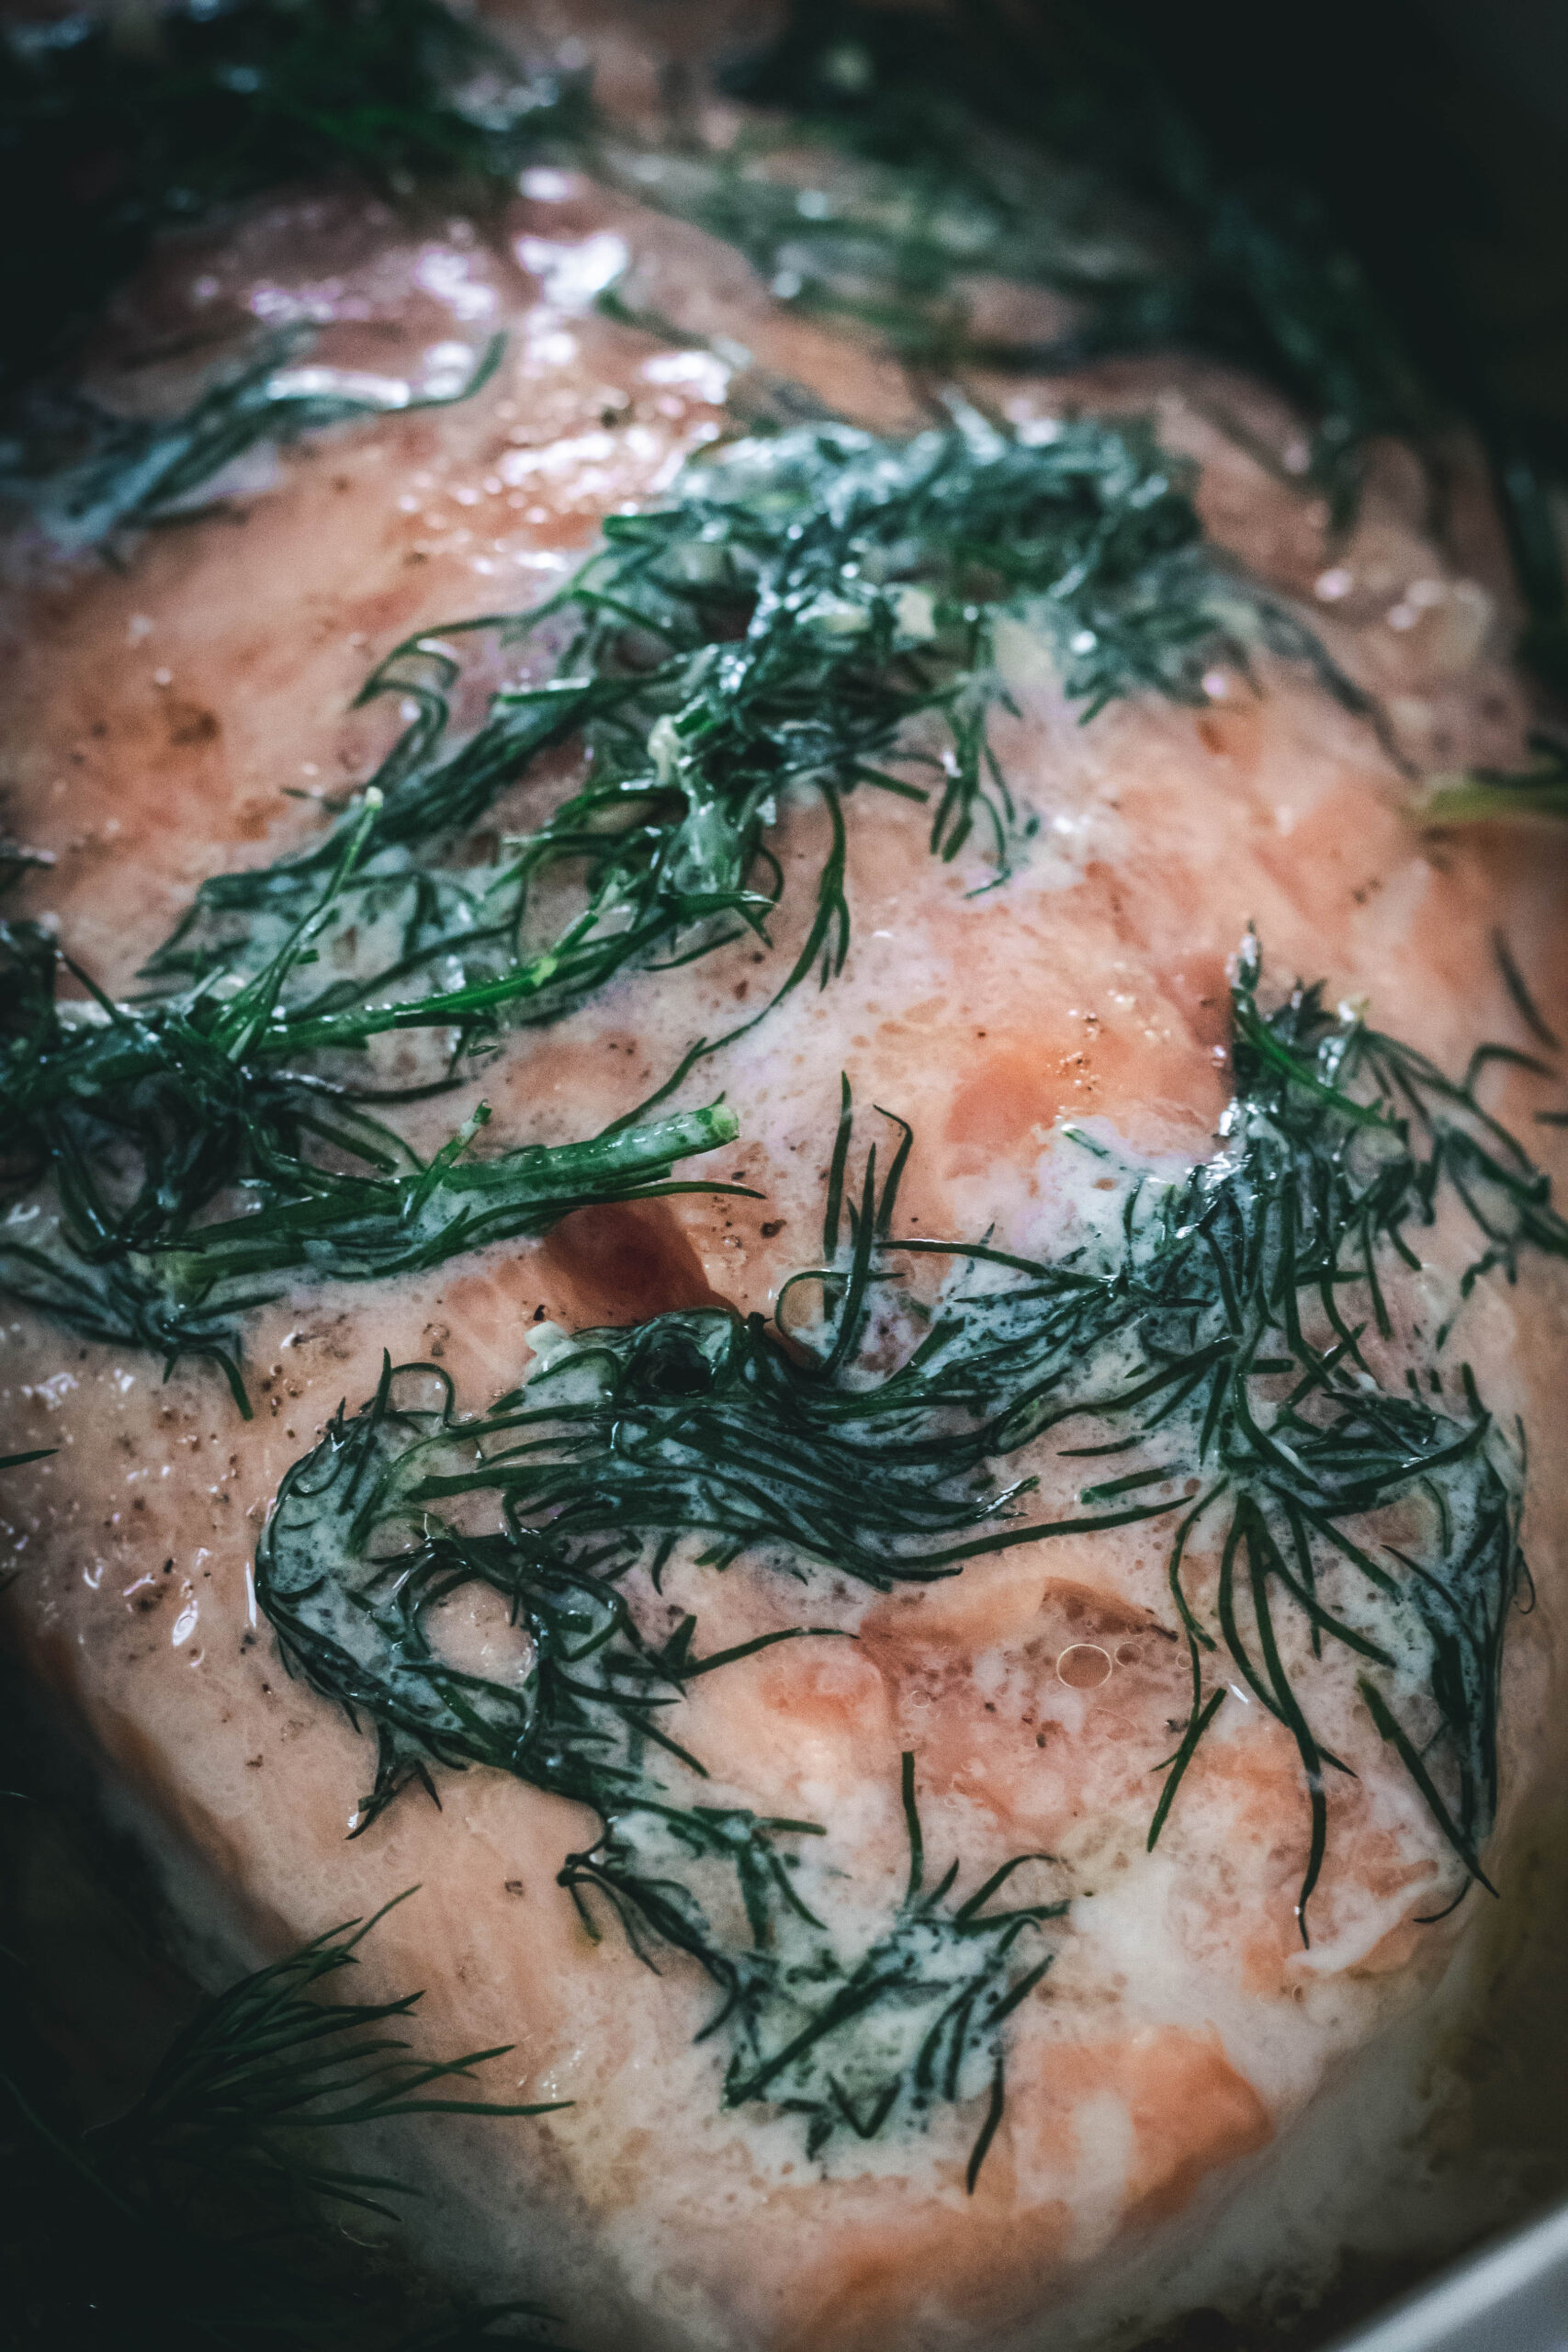
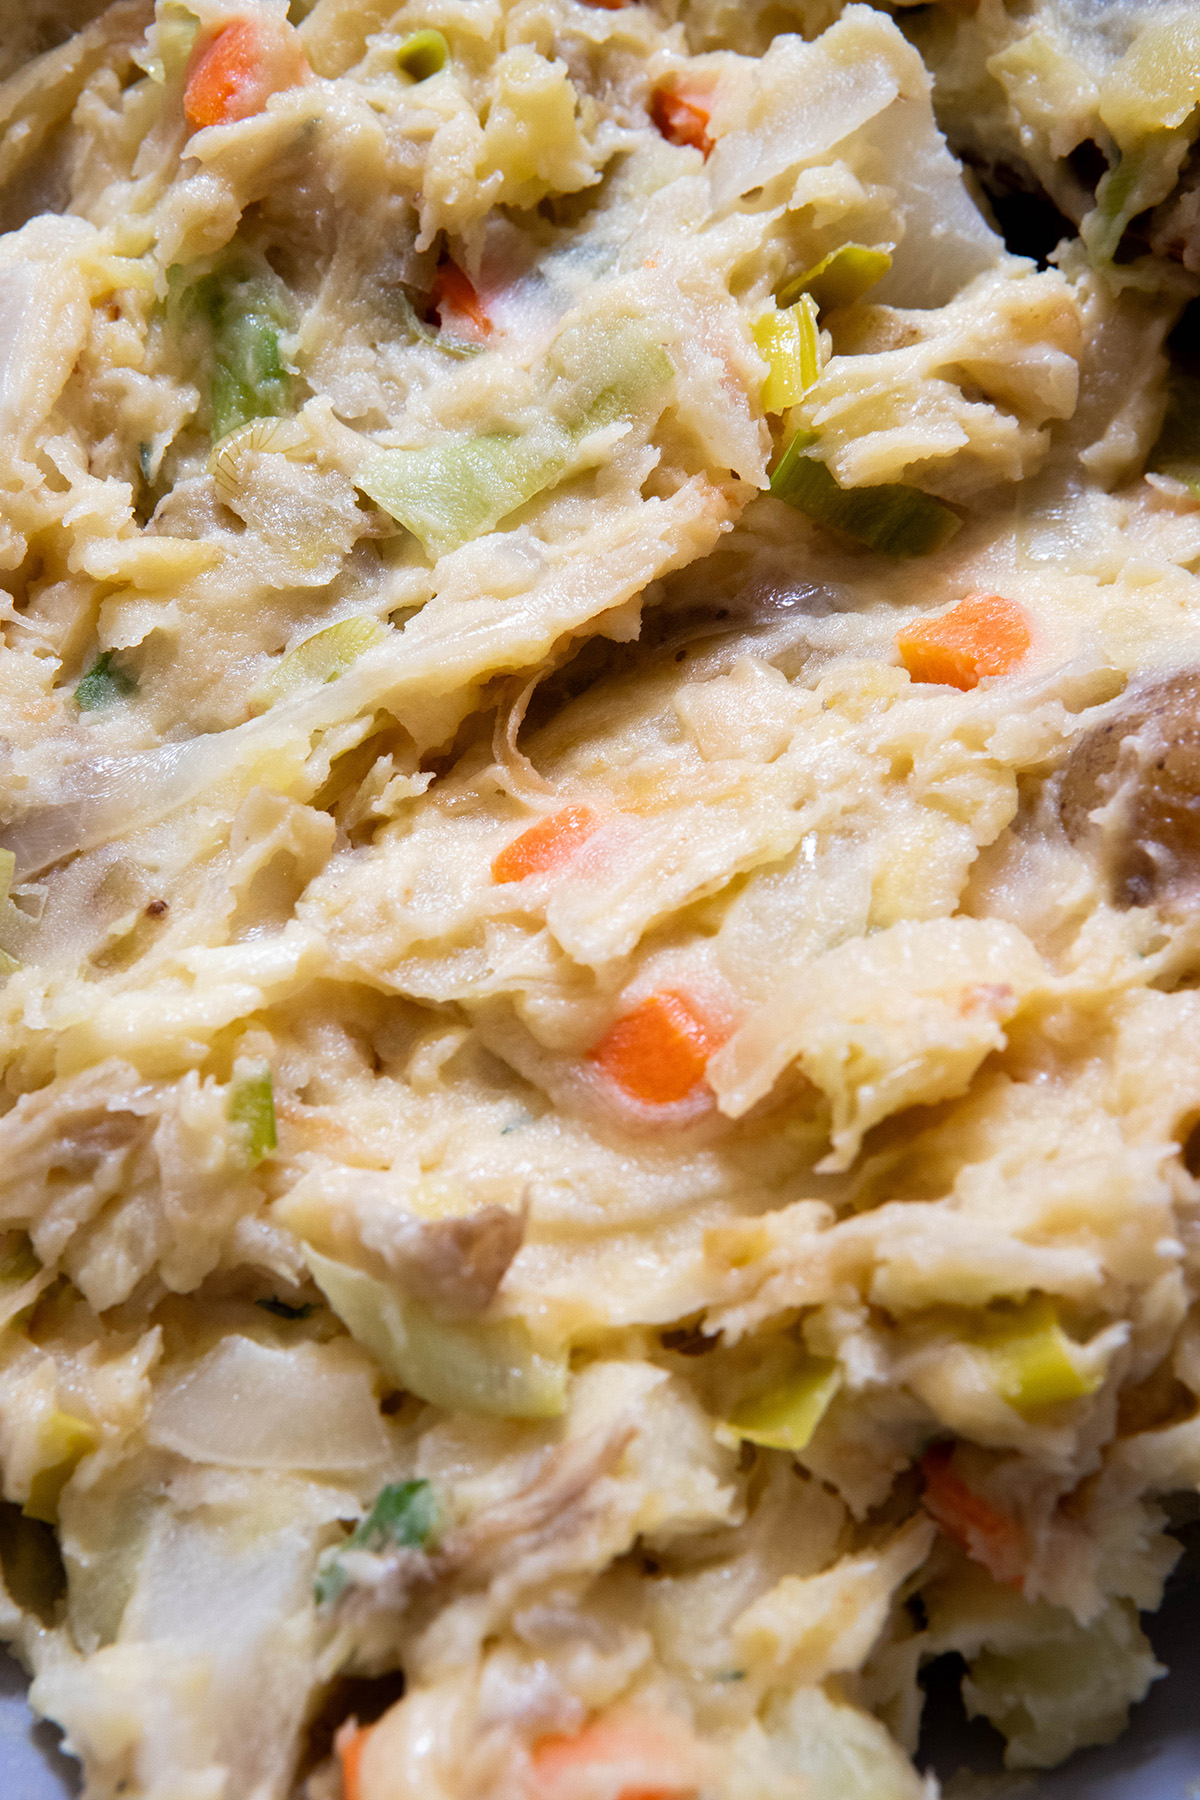
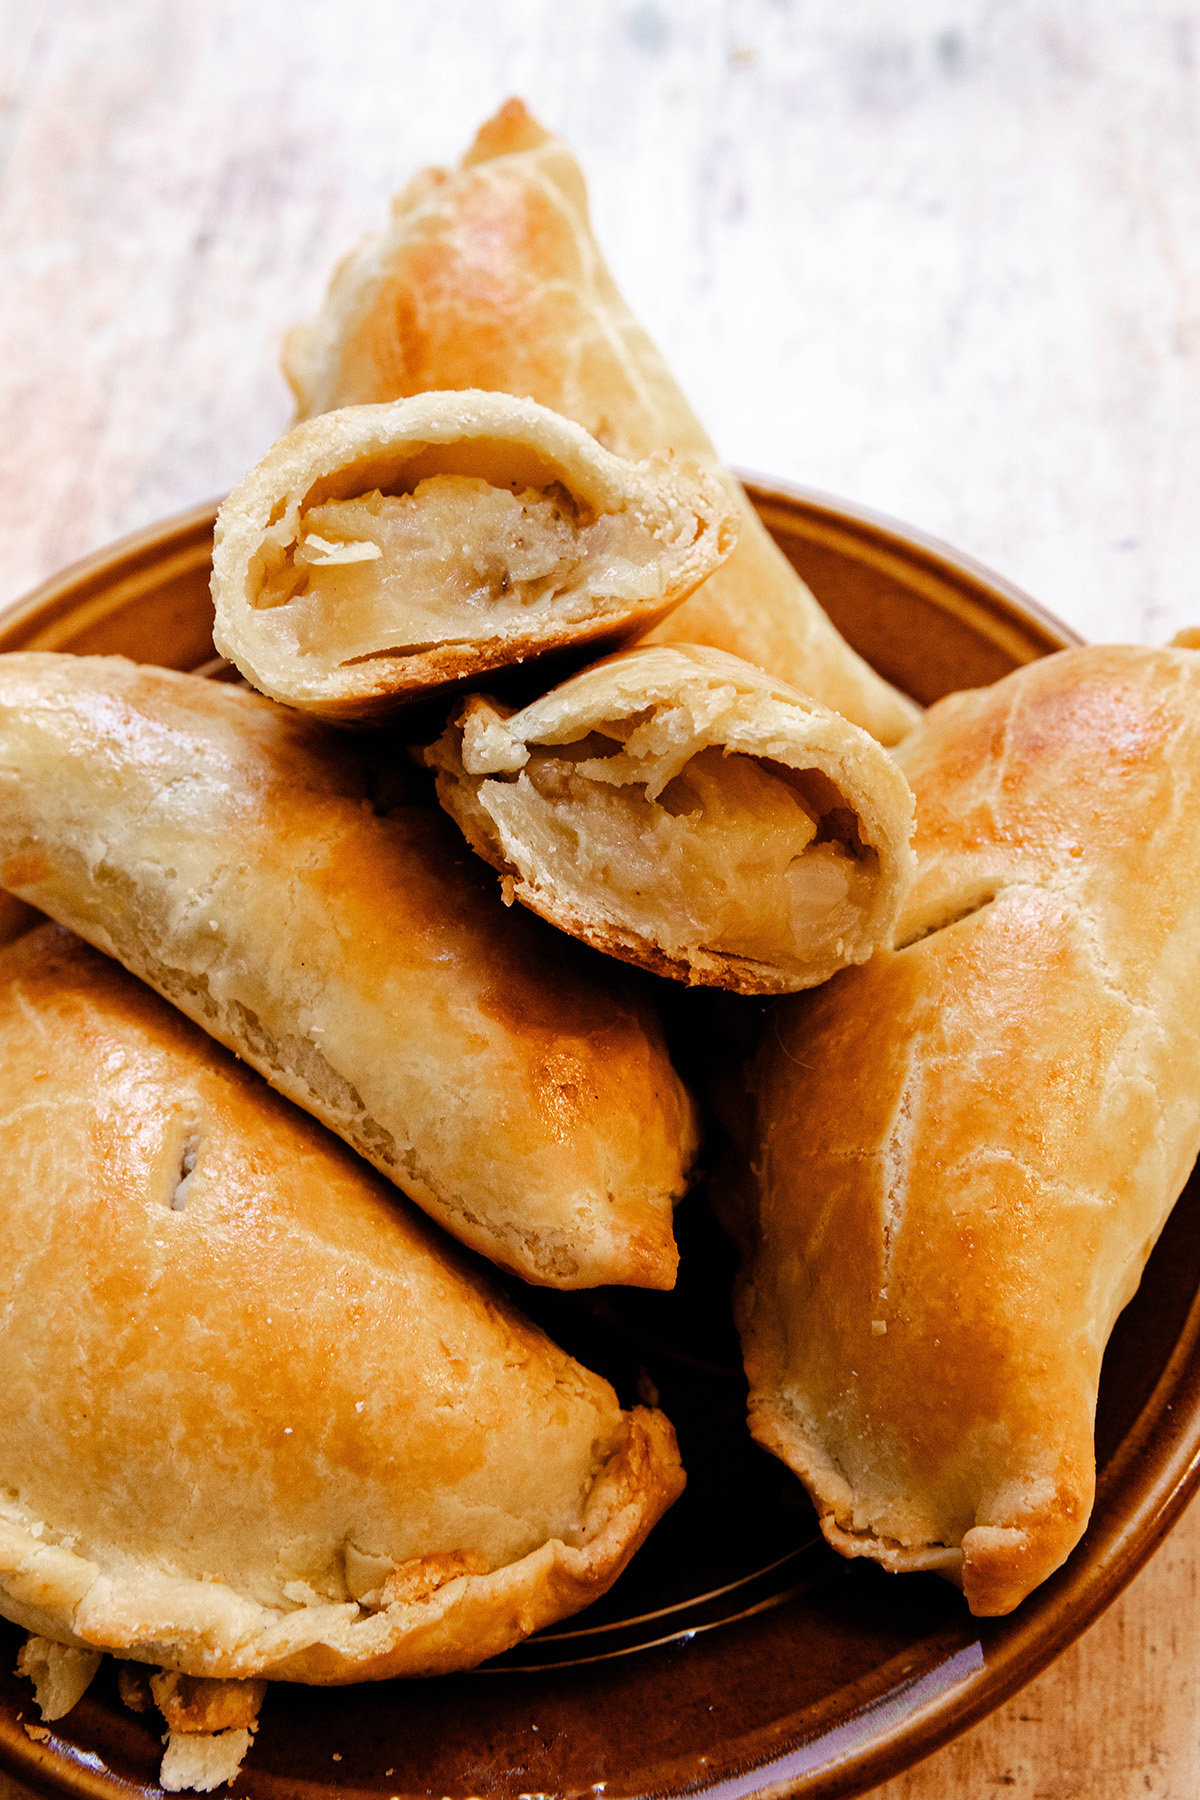
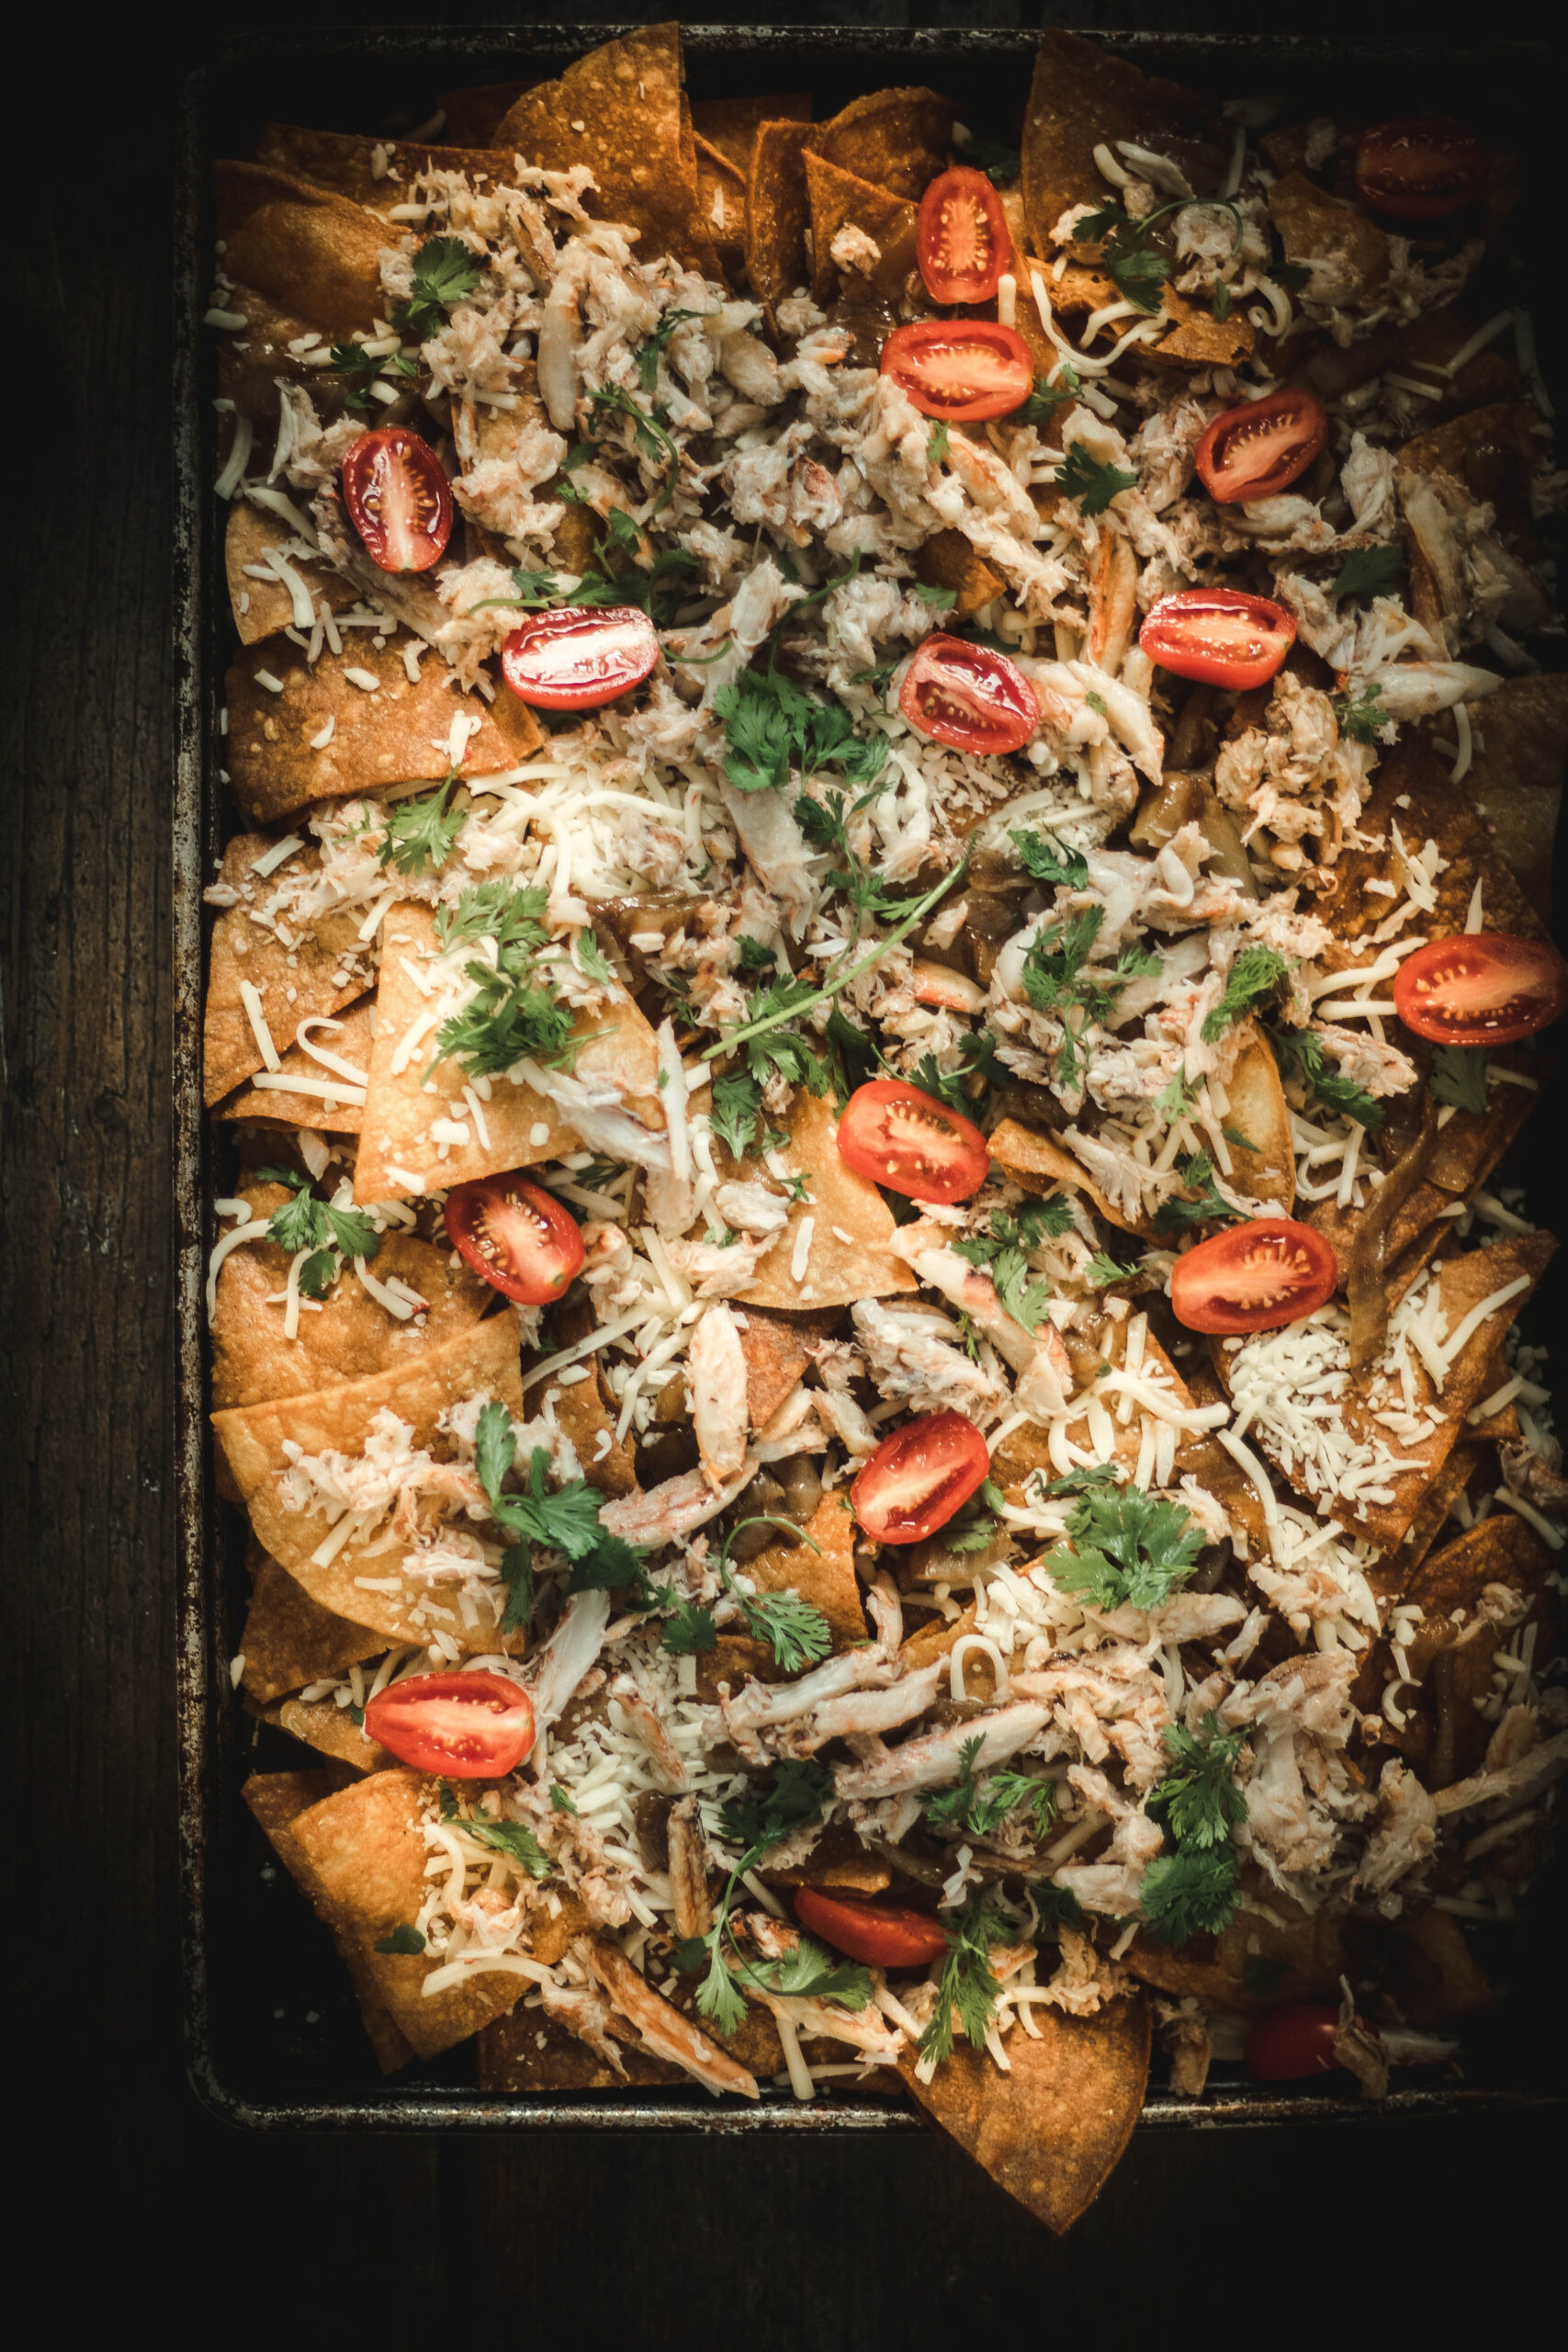
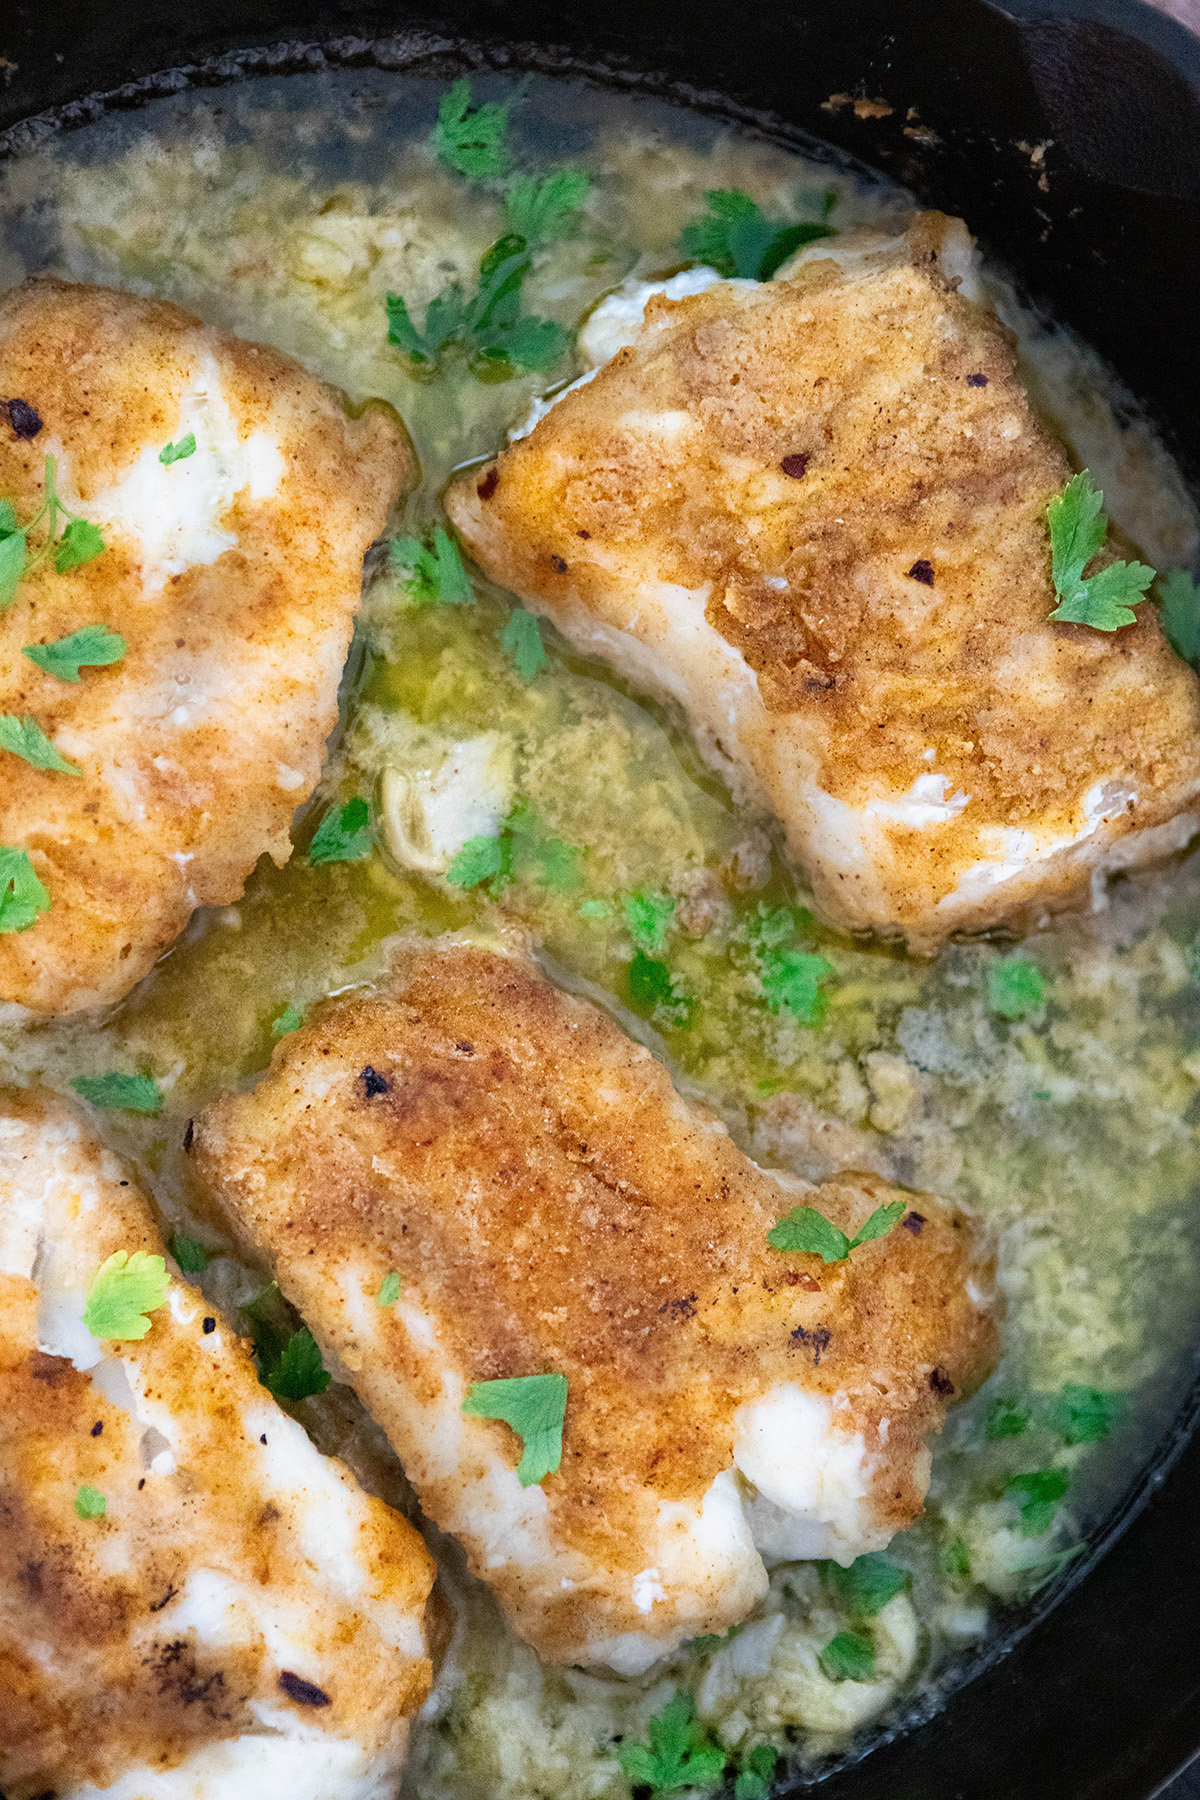
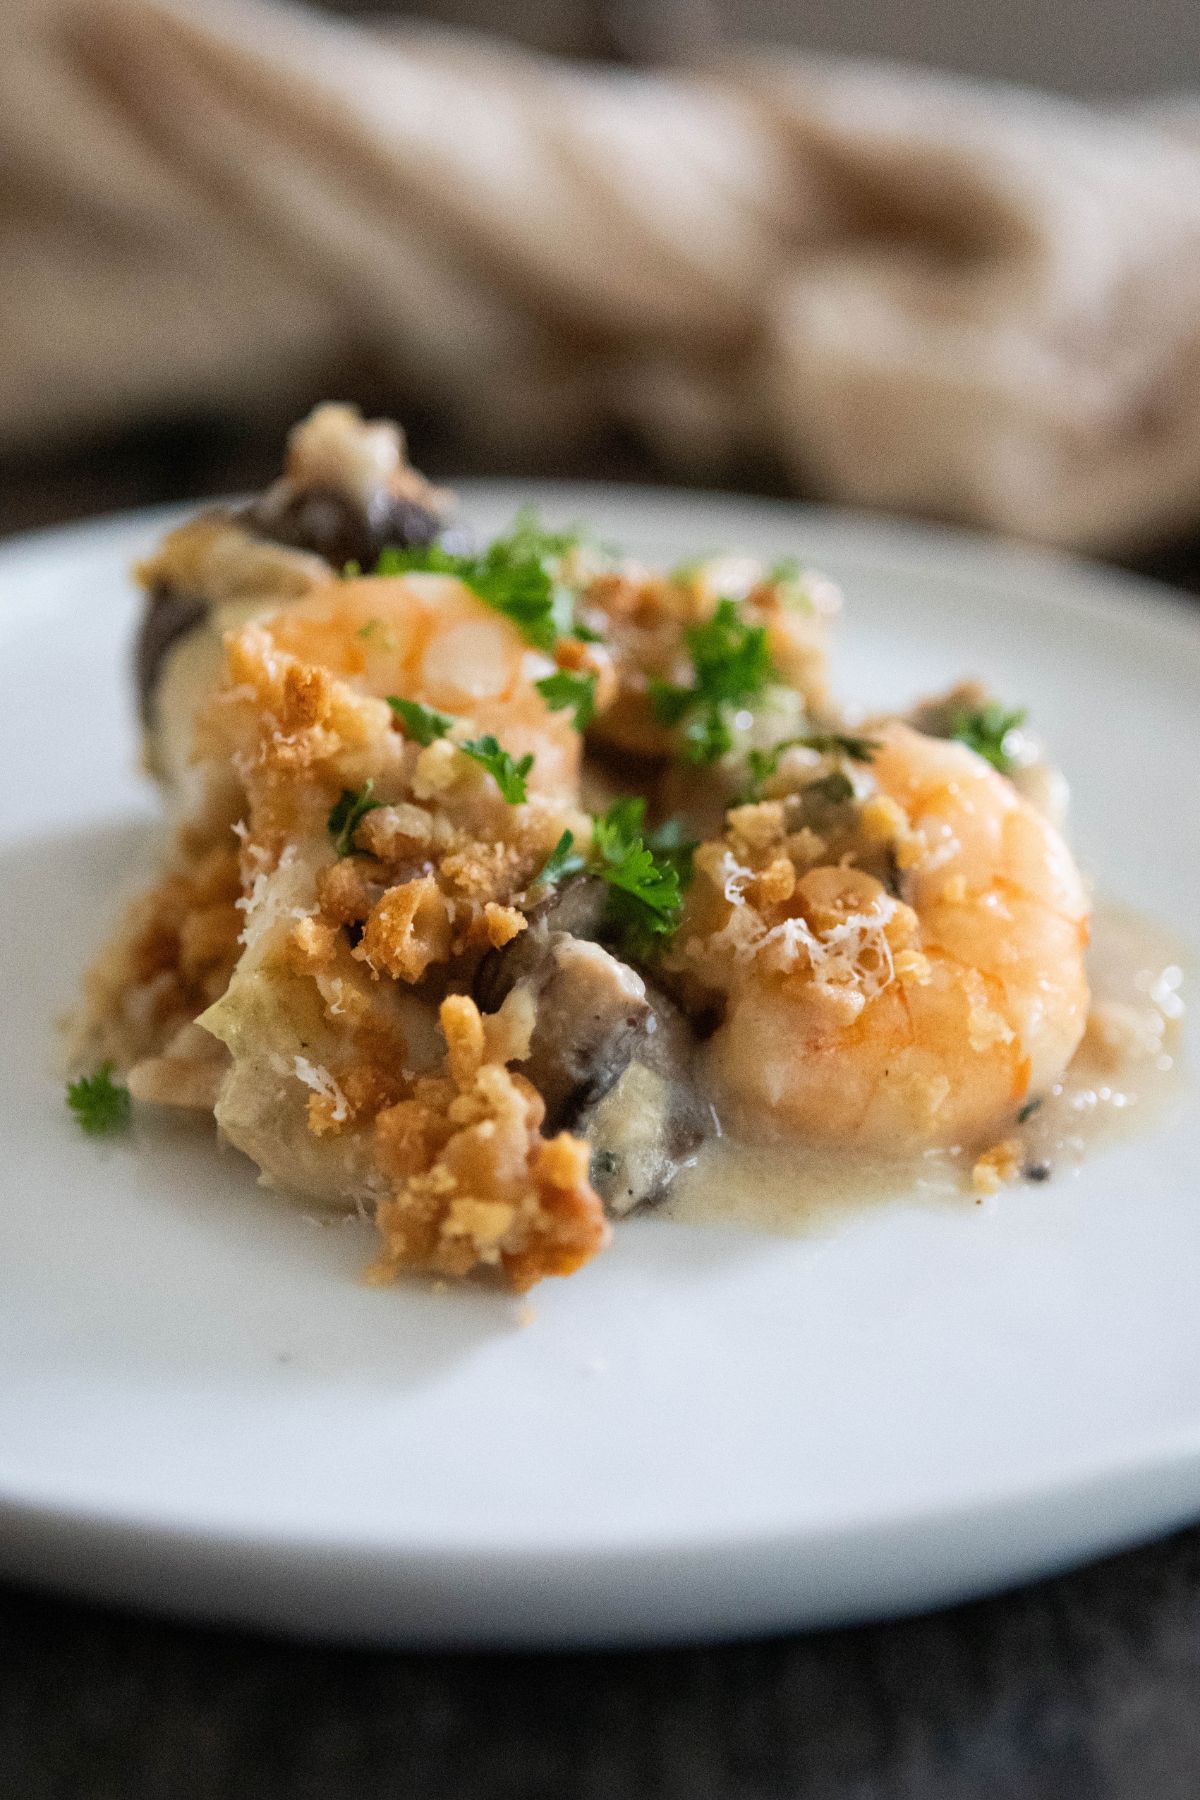
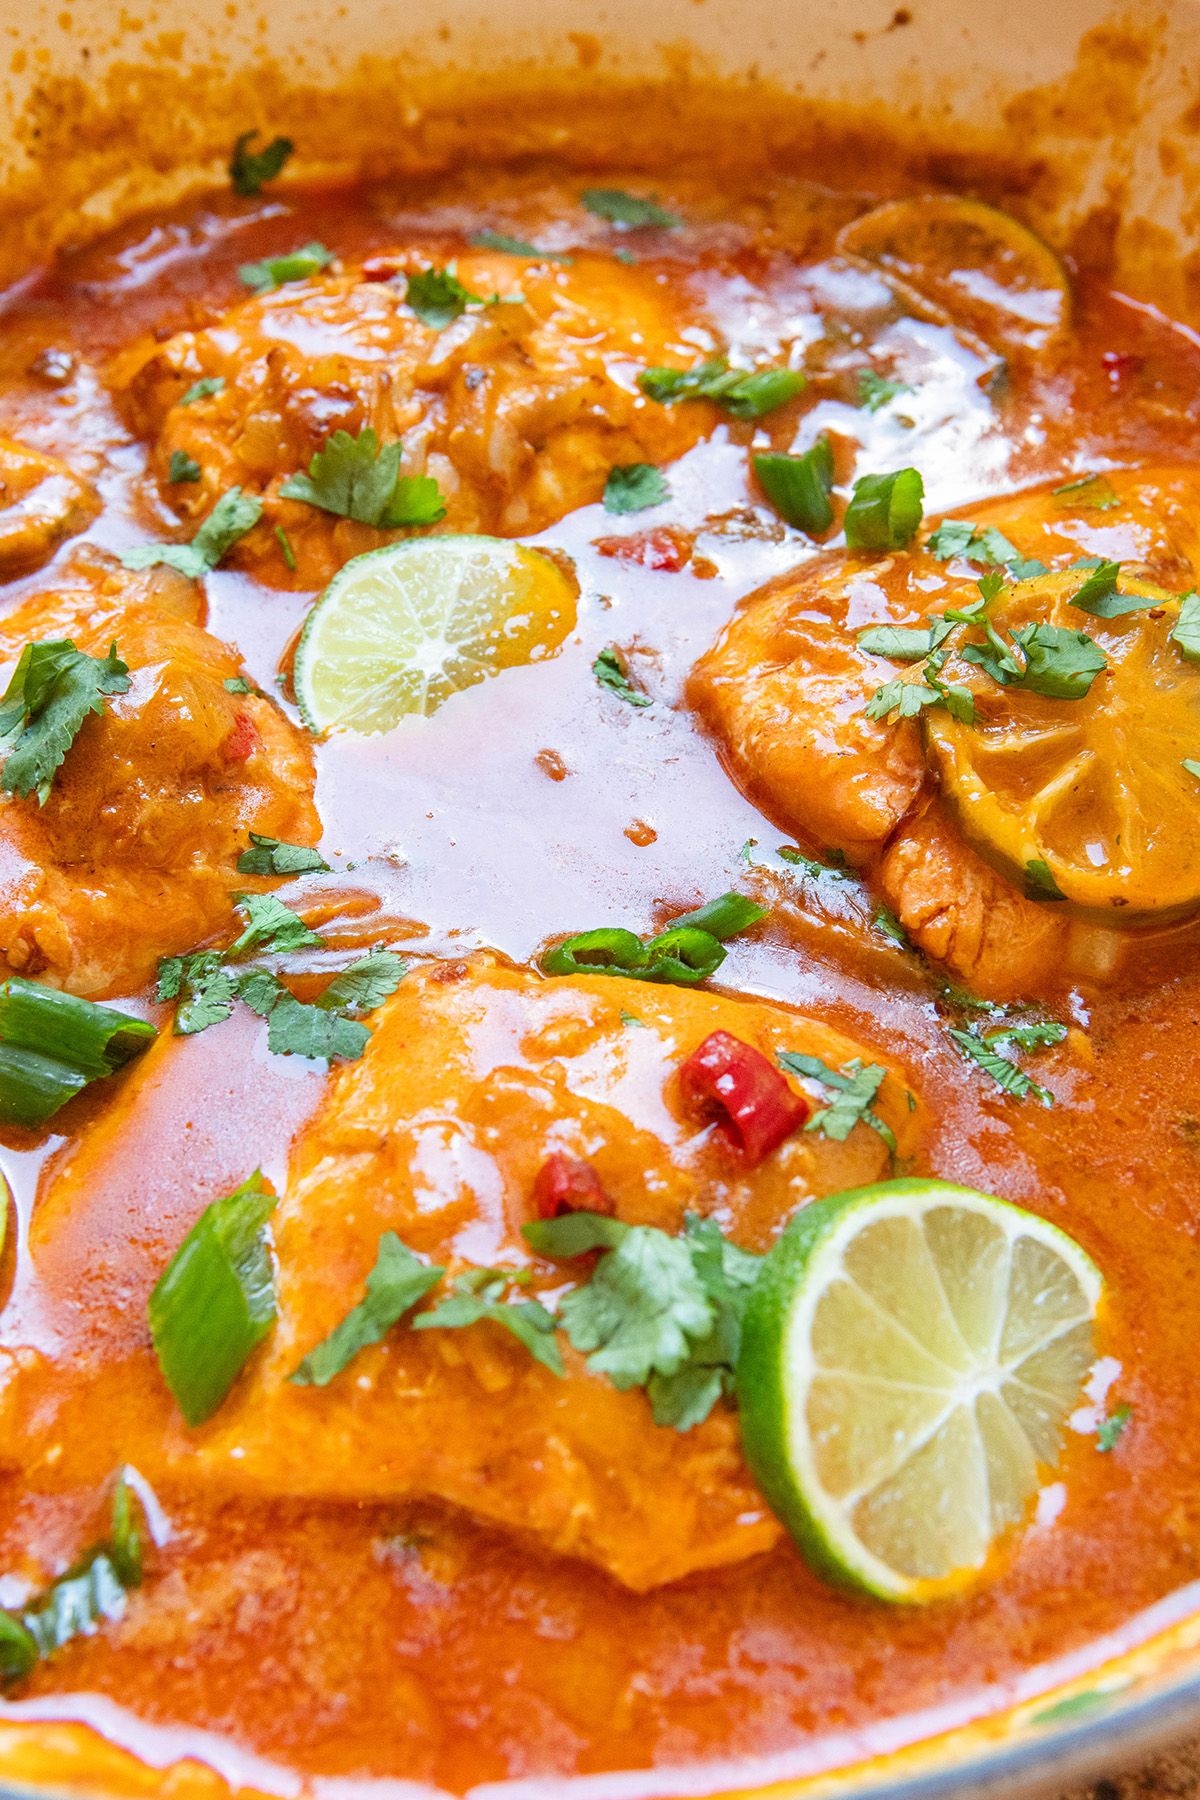
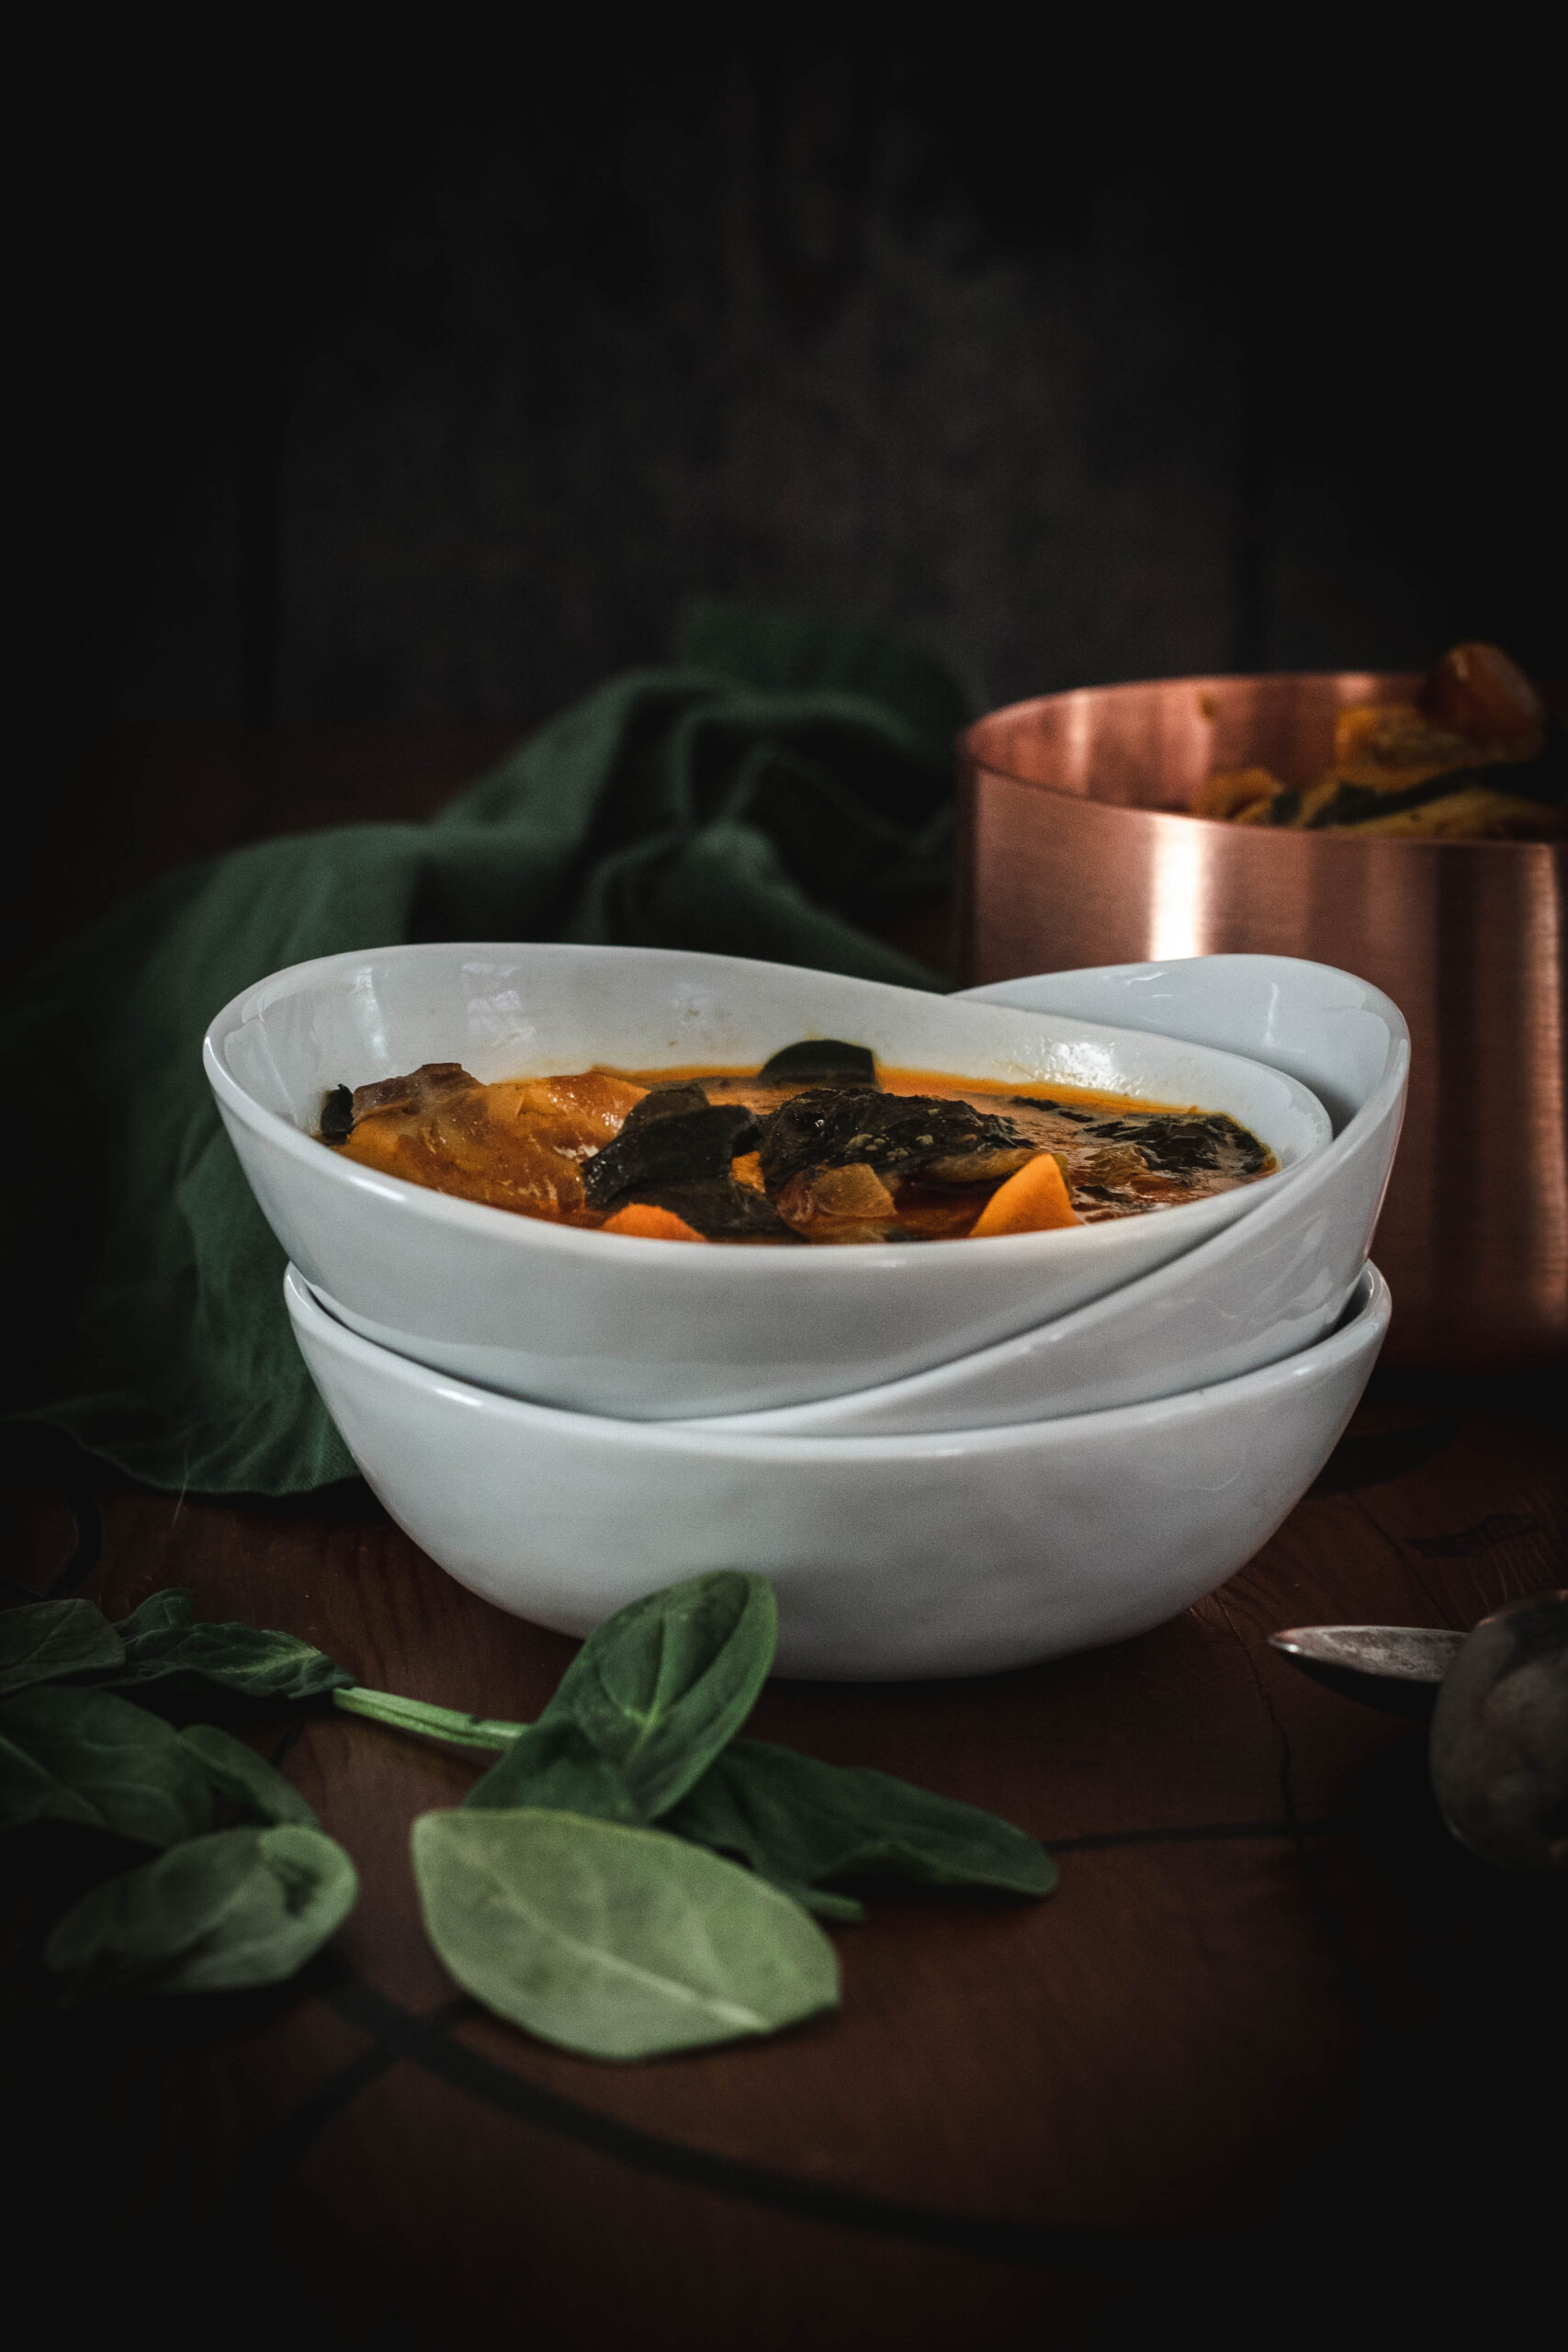
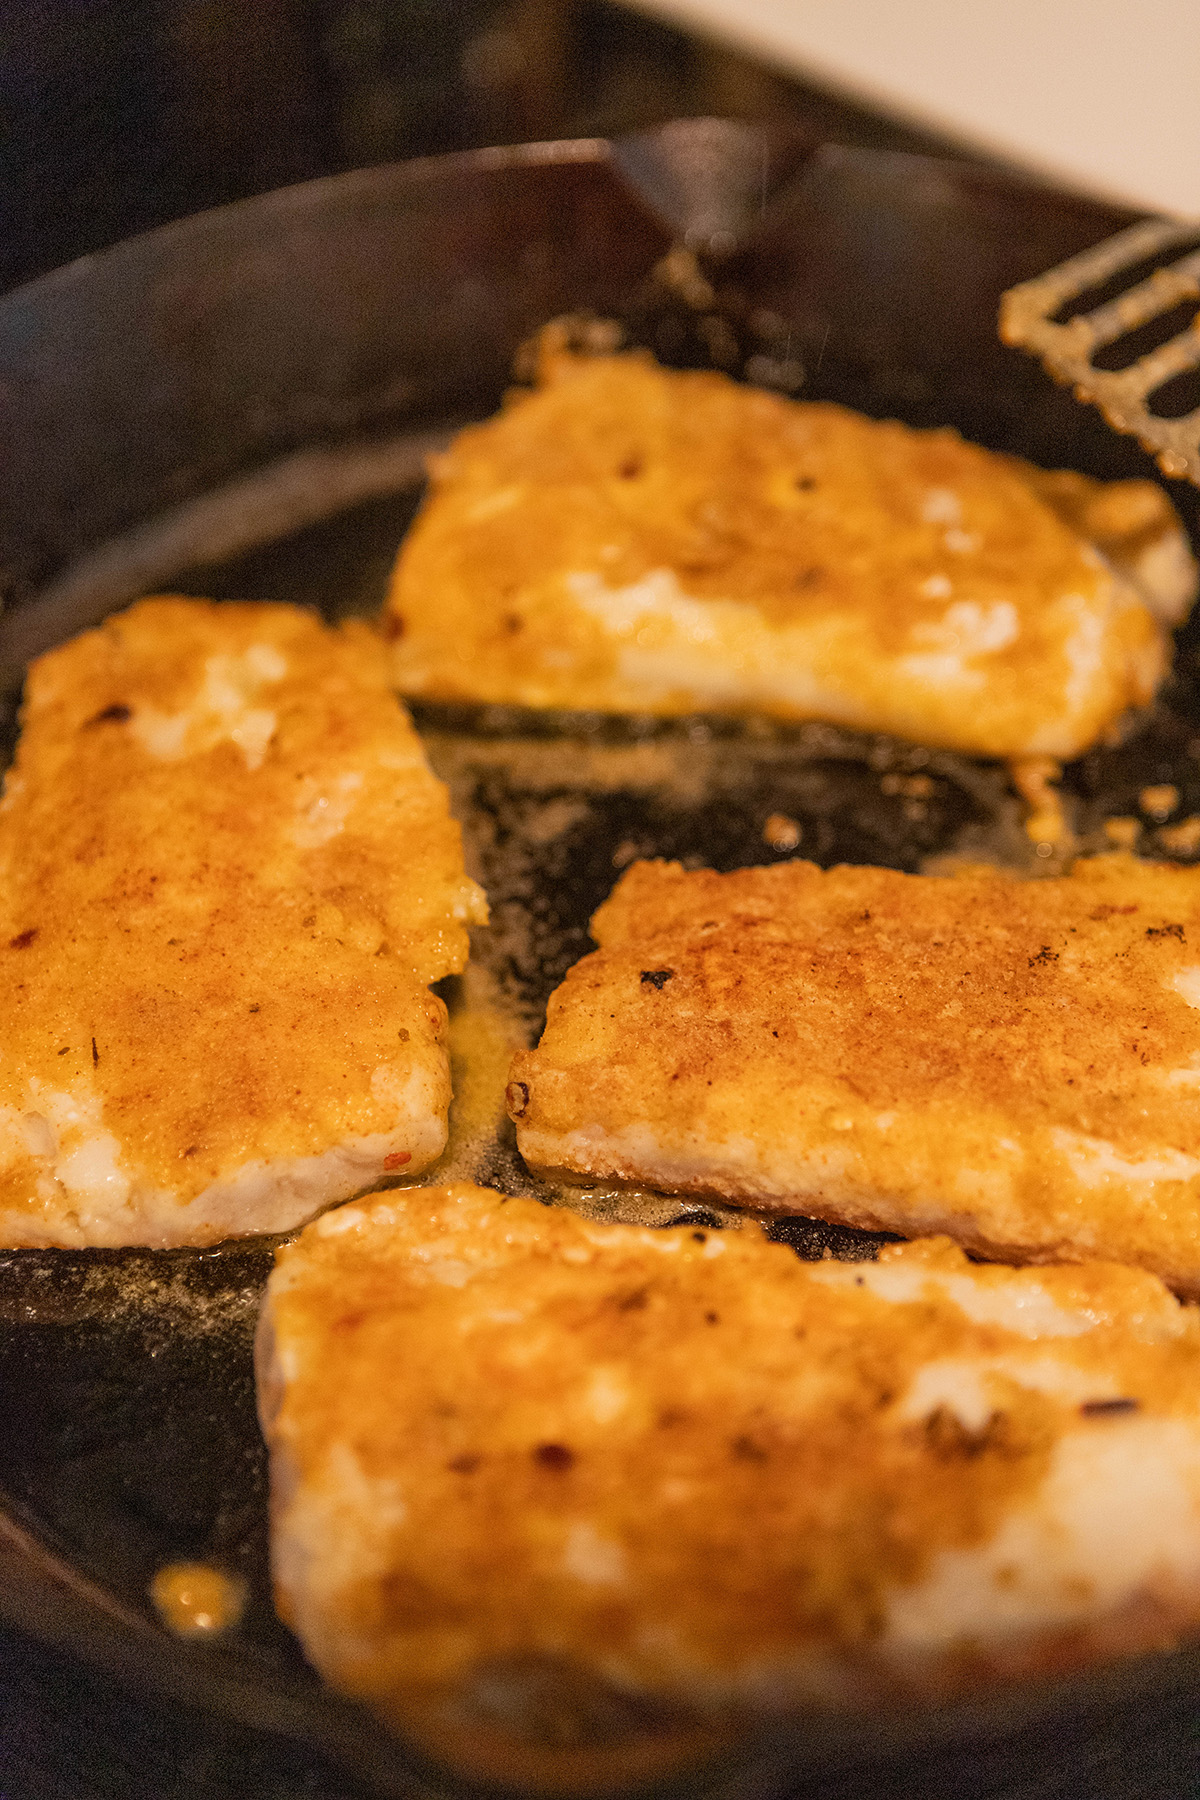
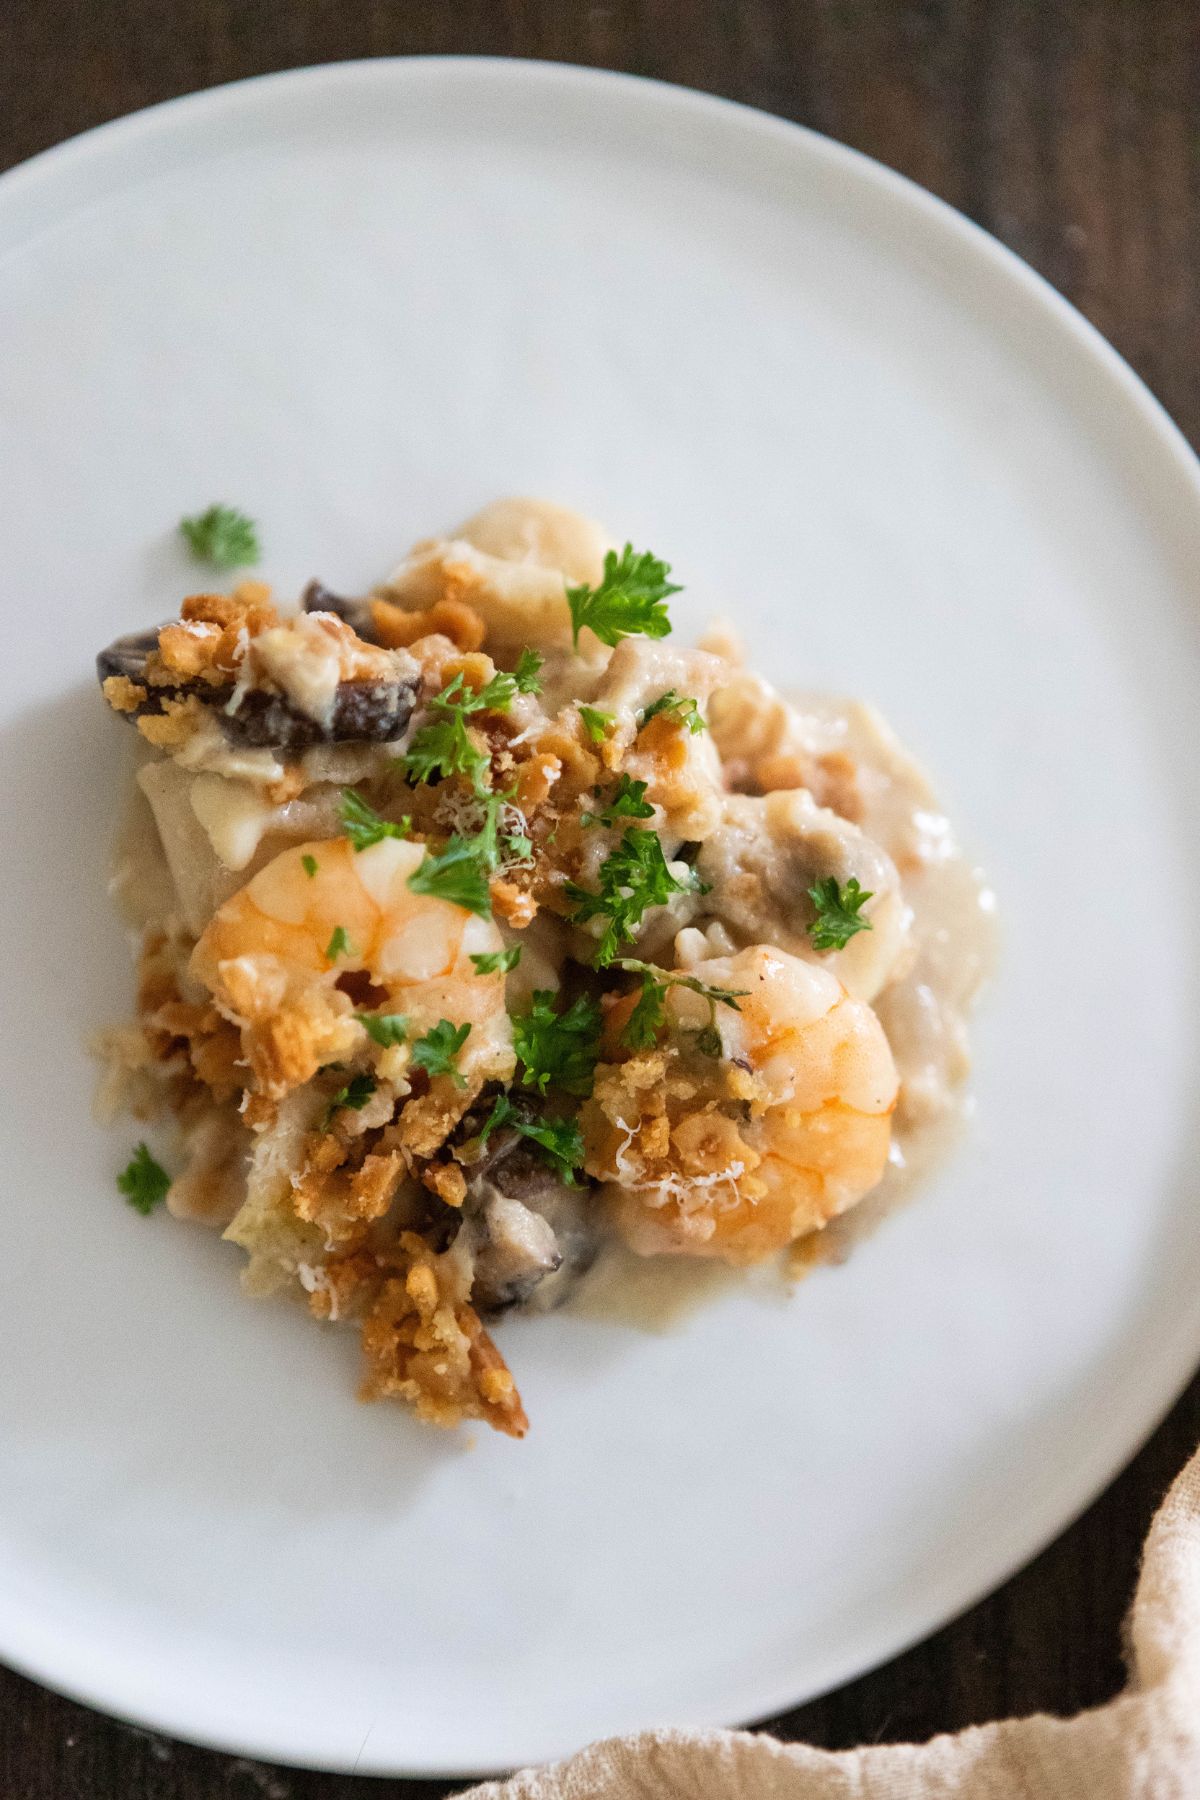
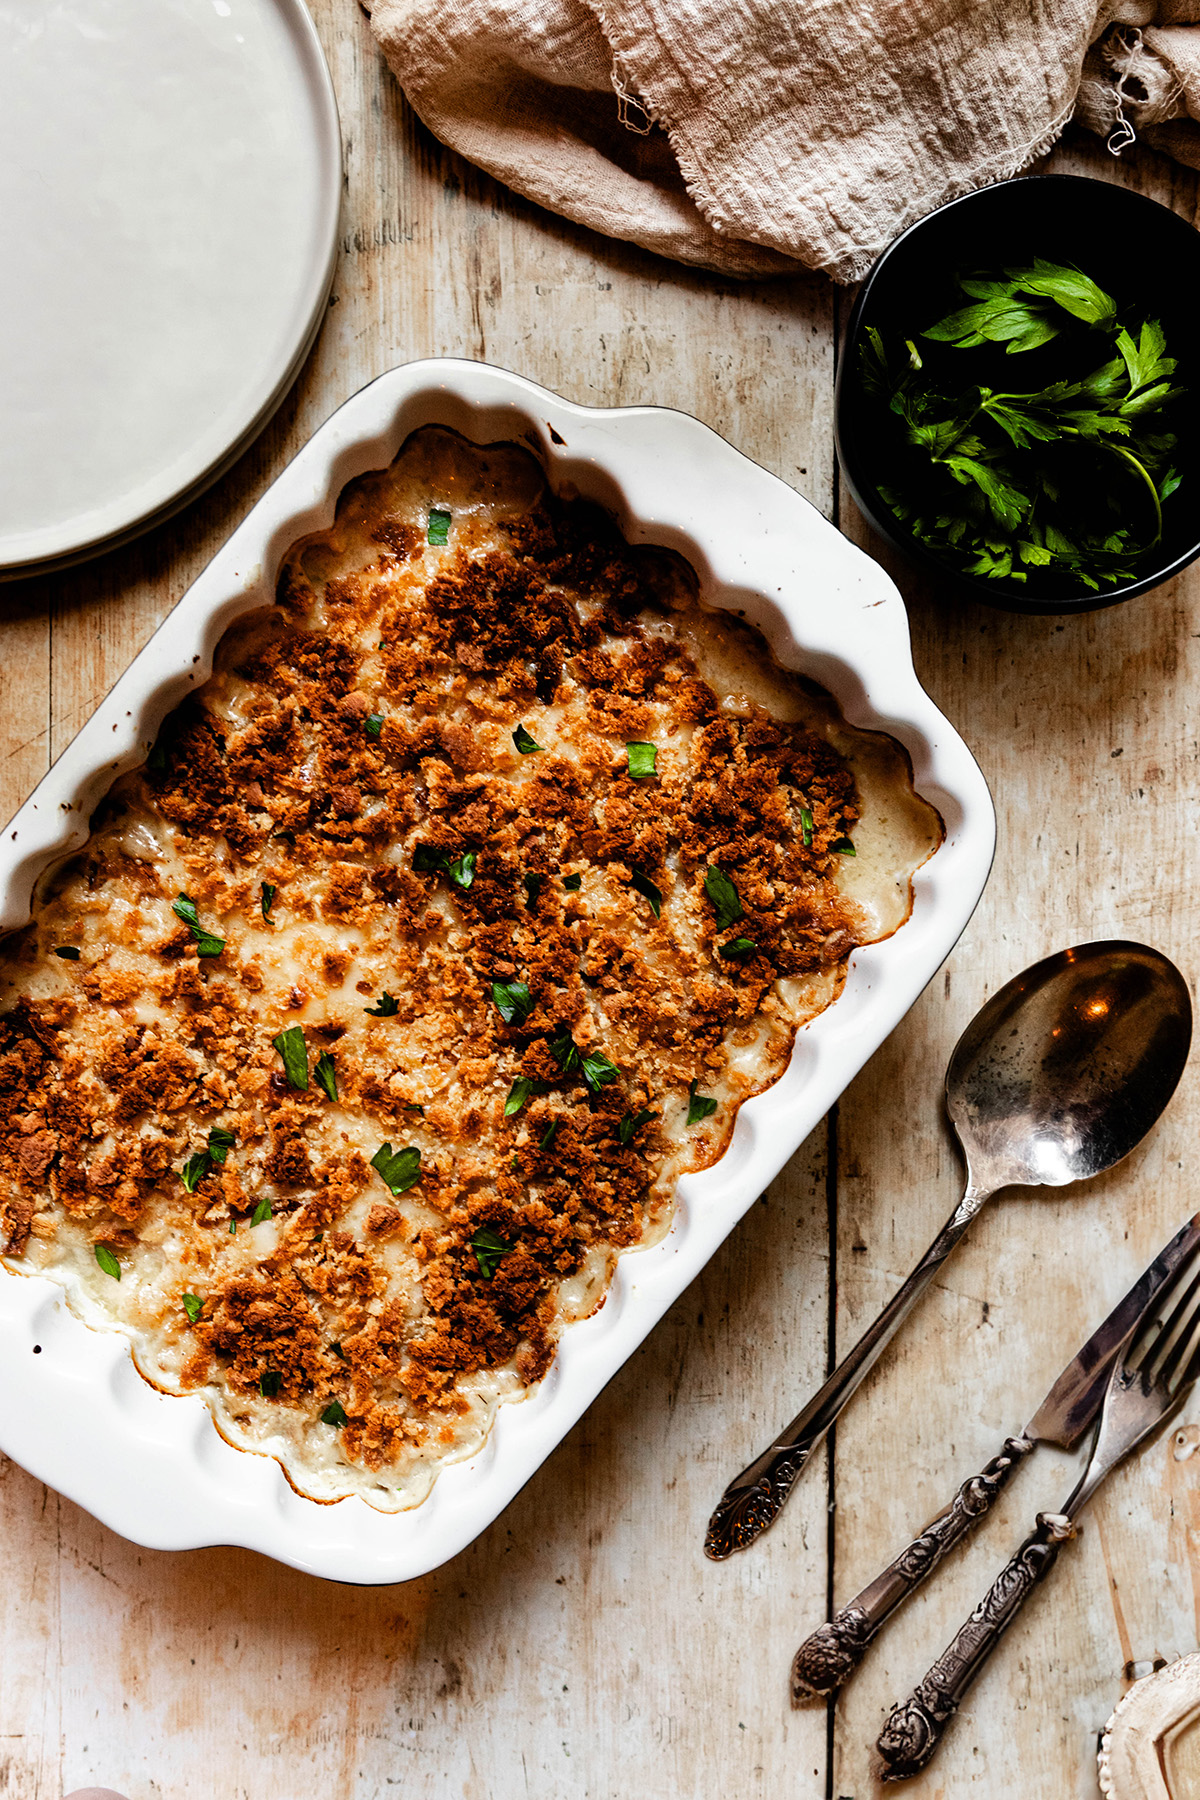
I love cod (you can see my gluten free fried fish recipe). It is such a great white fish. It is meaty, and hearty and makes the best fish to smother in a béchamel sauce and make a gratin. Cod au gratin is as it sounds, it is fresh cod fillets that are covered in a white sauce with sautéed onions, parmesan cheese, lemon zest, and covered with cheese and bread crumbs that are baked until golden brown. It does not take much time to prepare the cod fish dish but it is the perfect comfort food. 

[feast_advanced_jump_to]

What equipment or tools do you need?

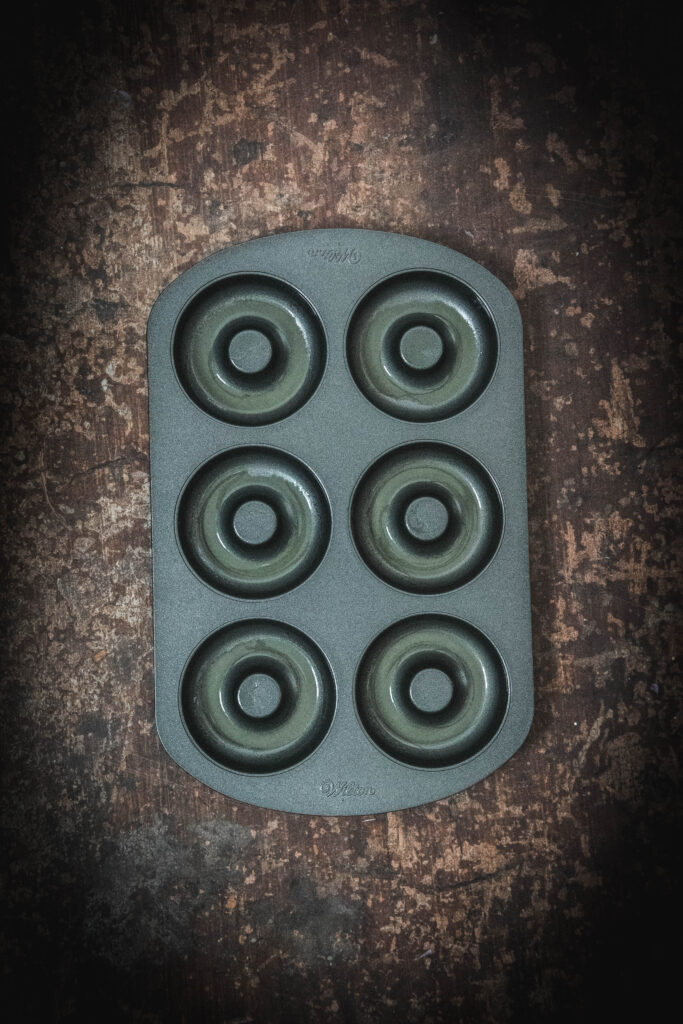
Baking dish (singular or individual)
Medium saucepan or frying pan
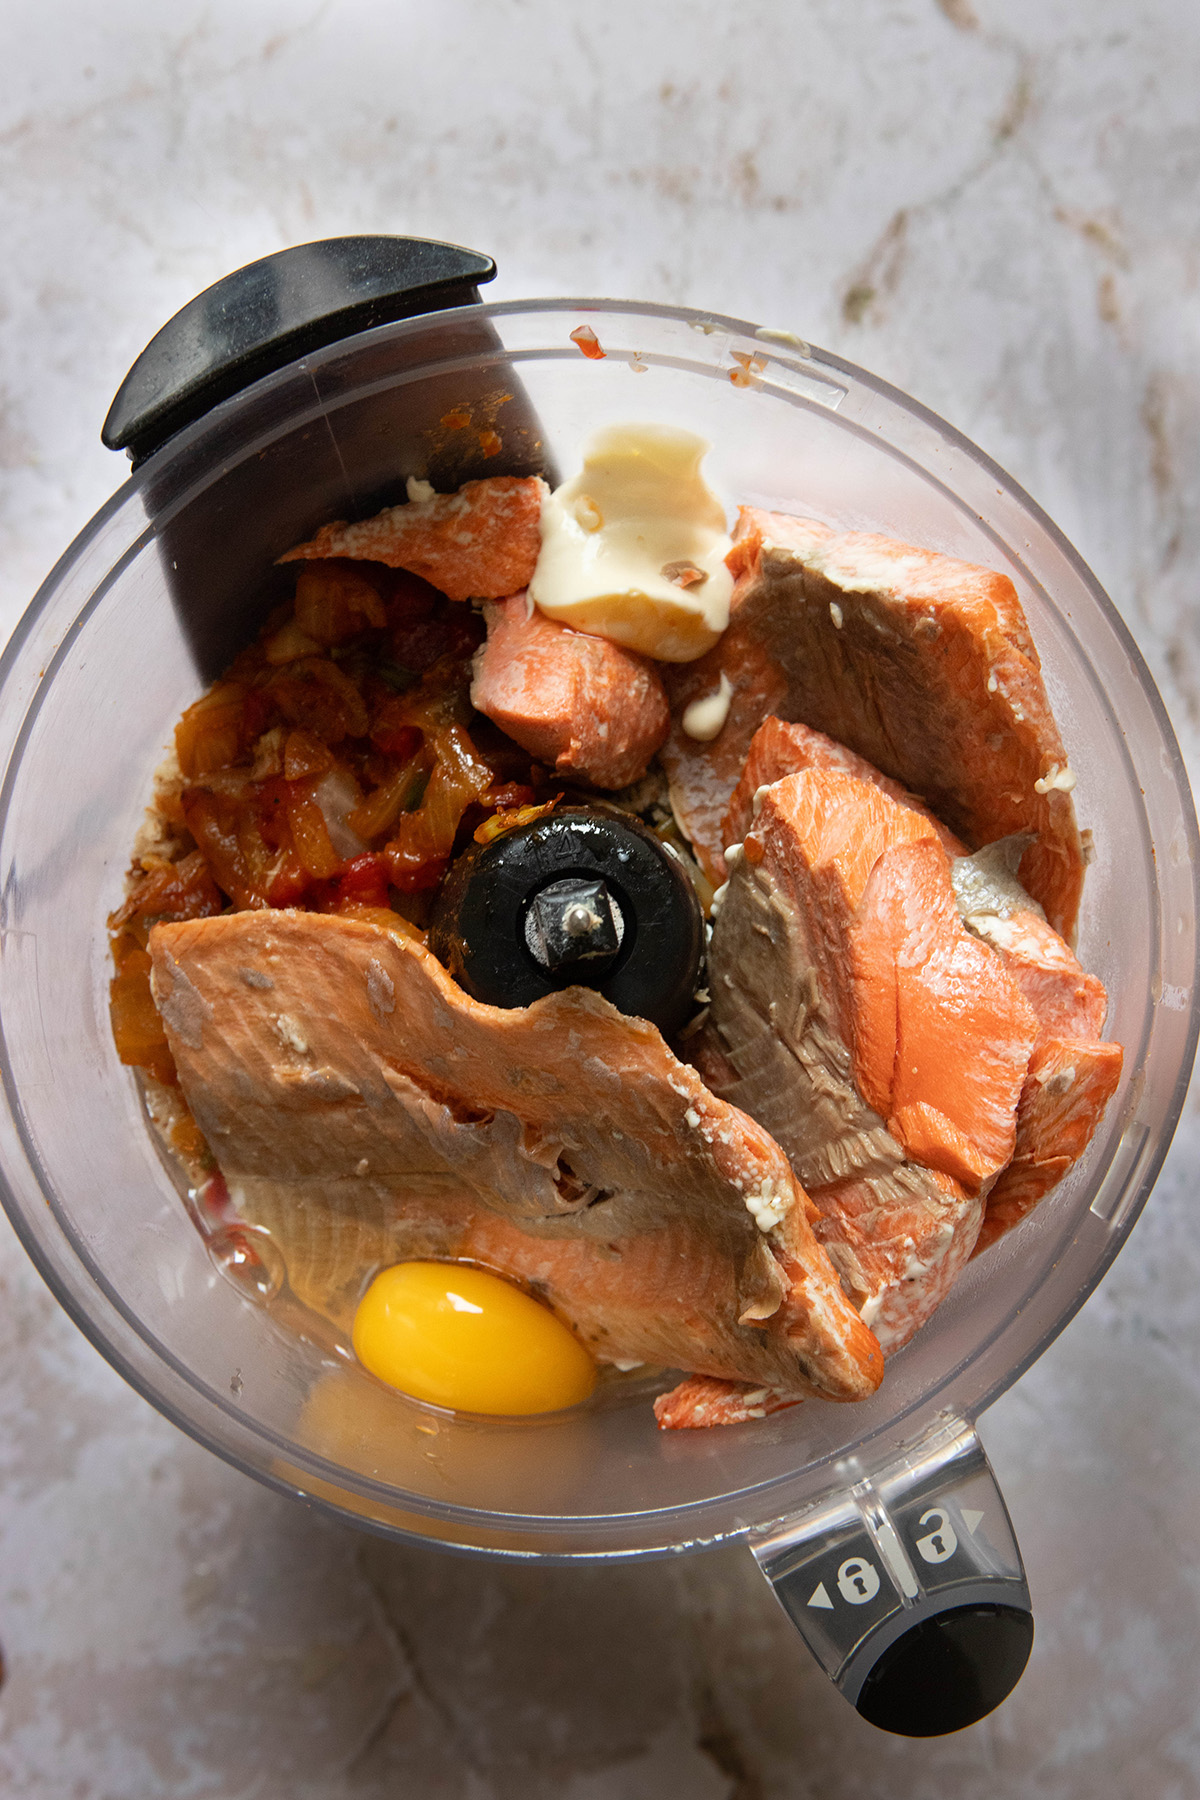
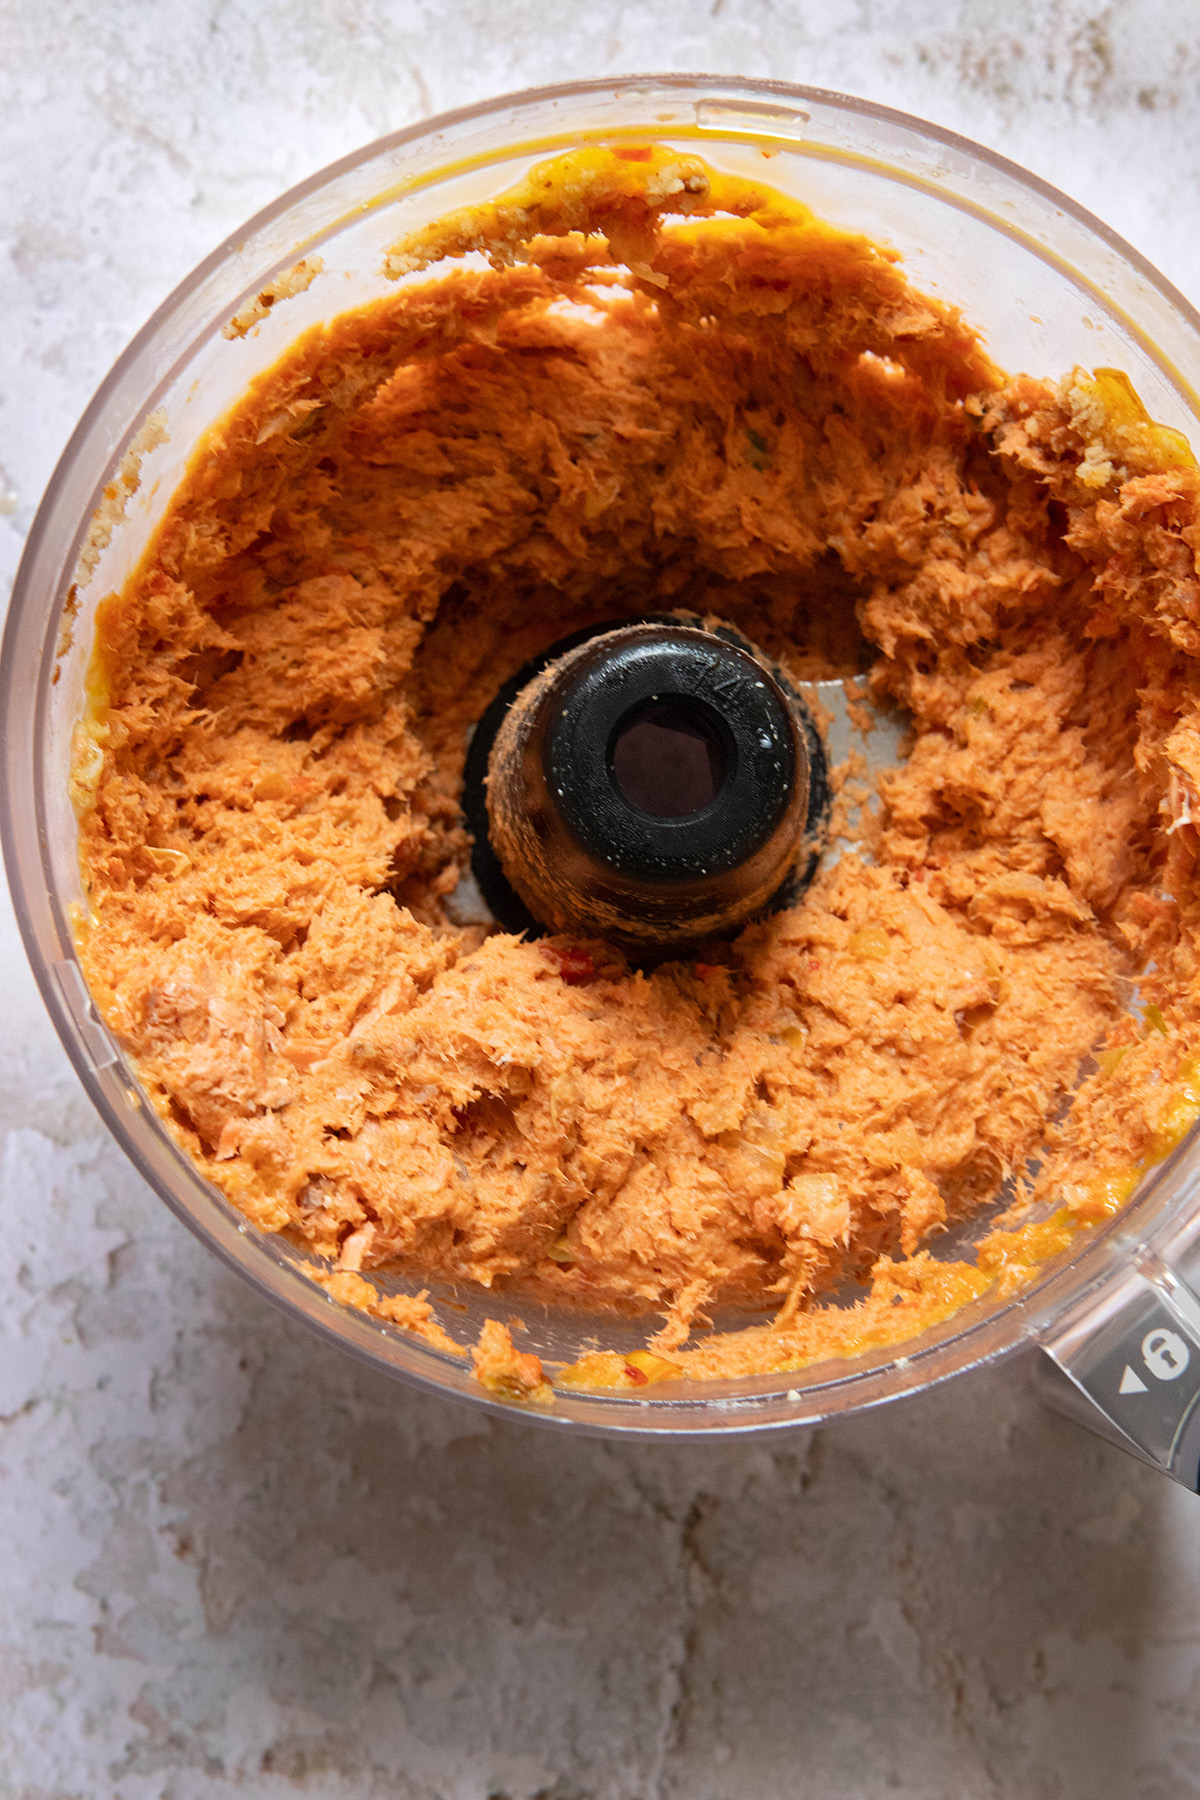
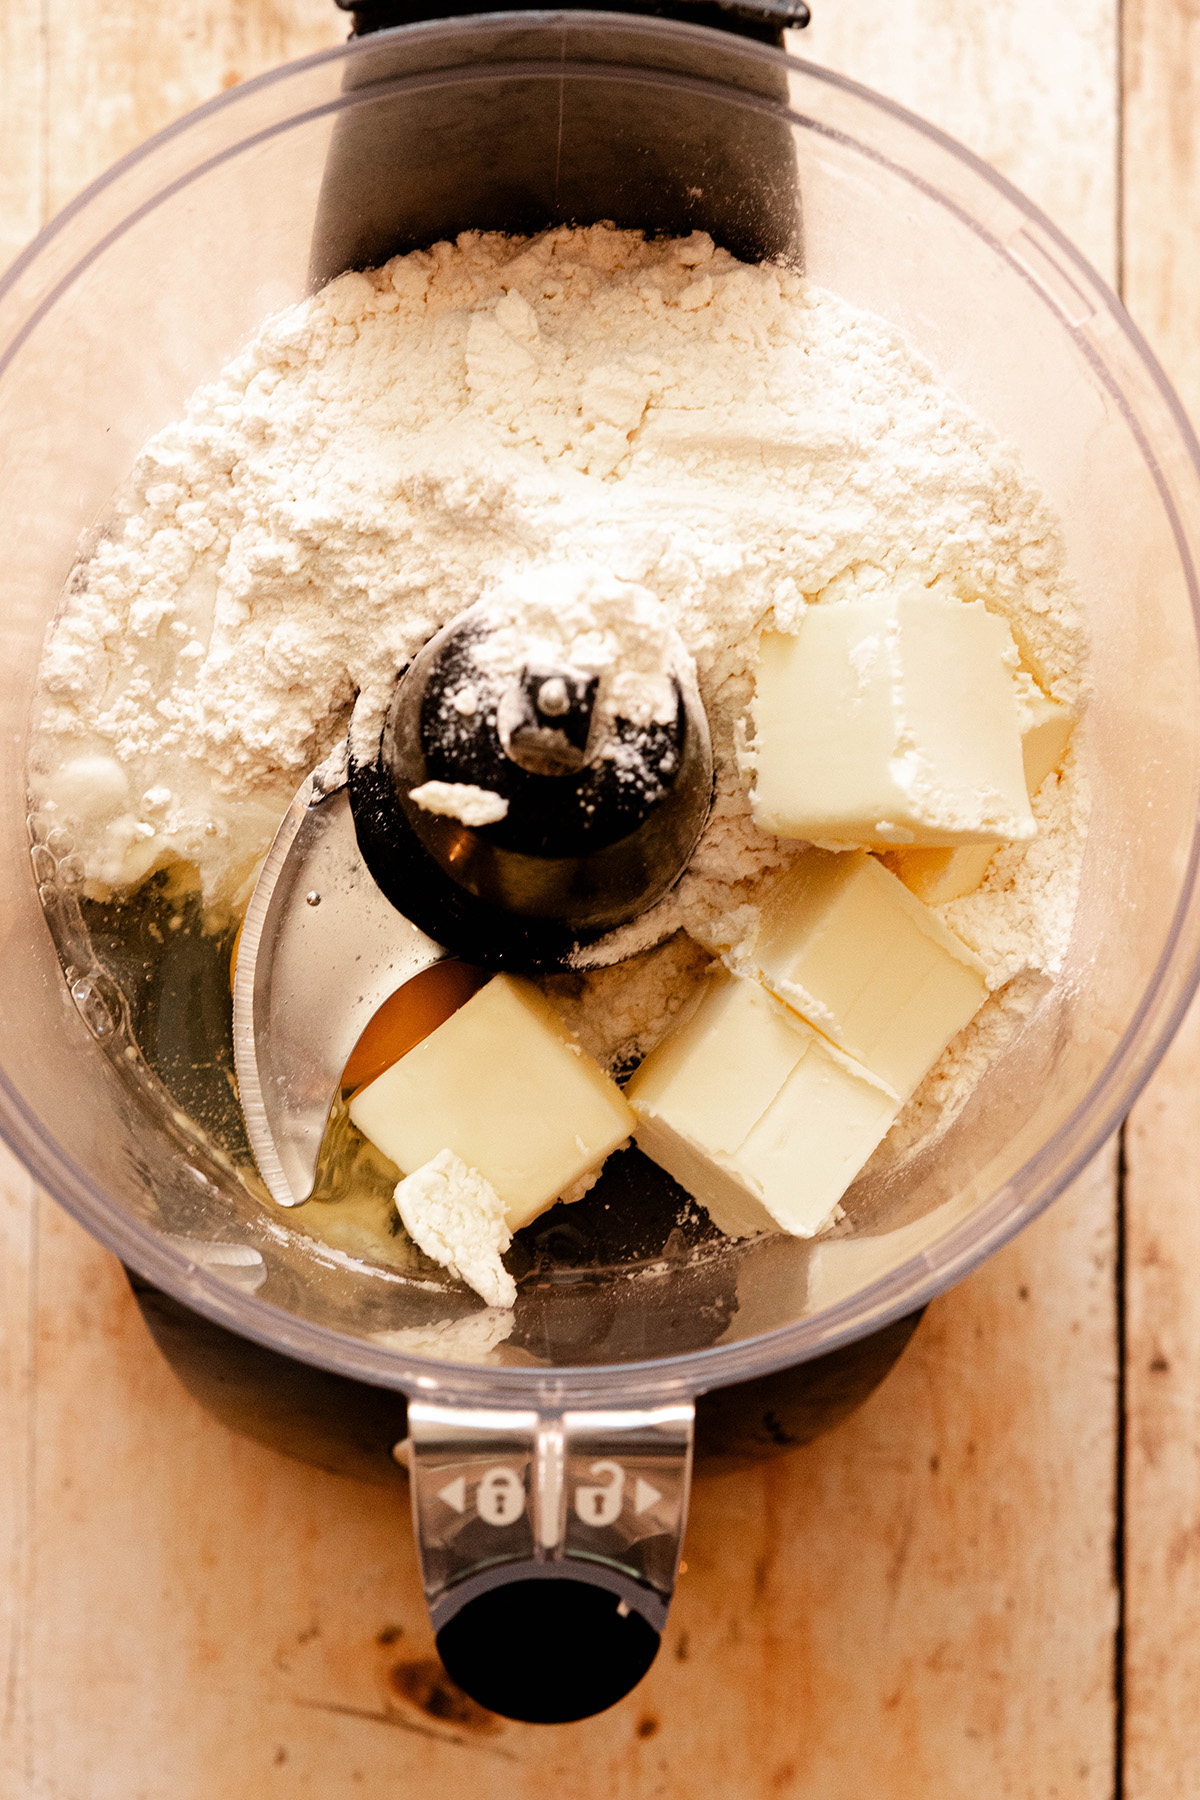
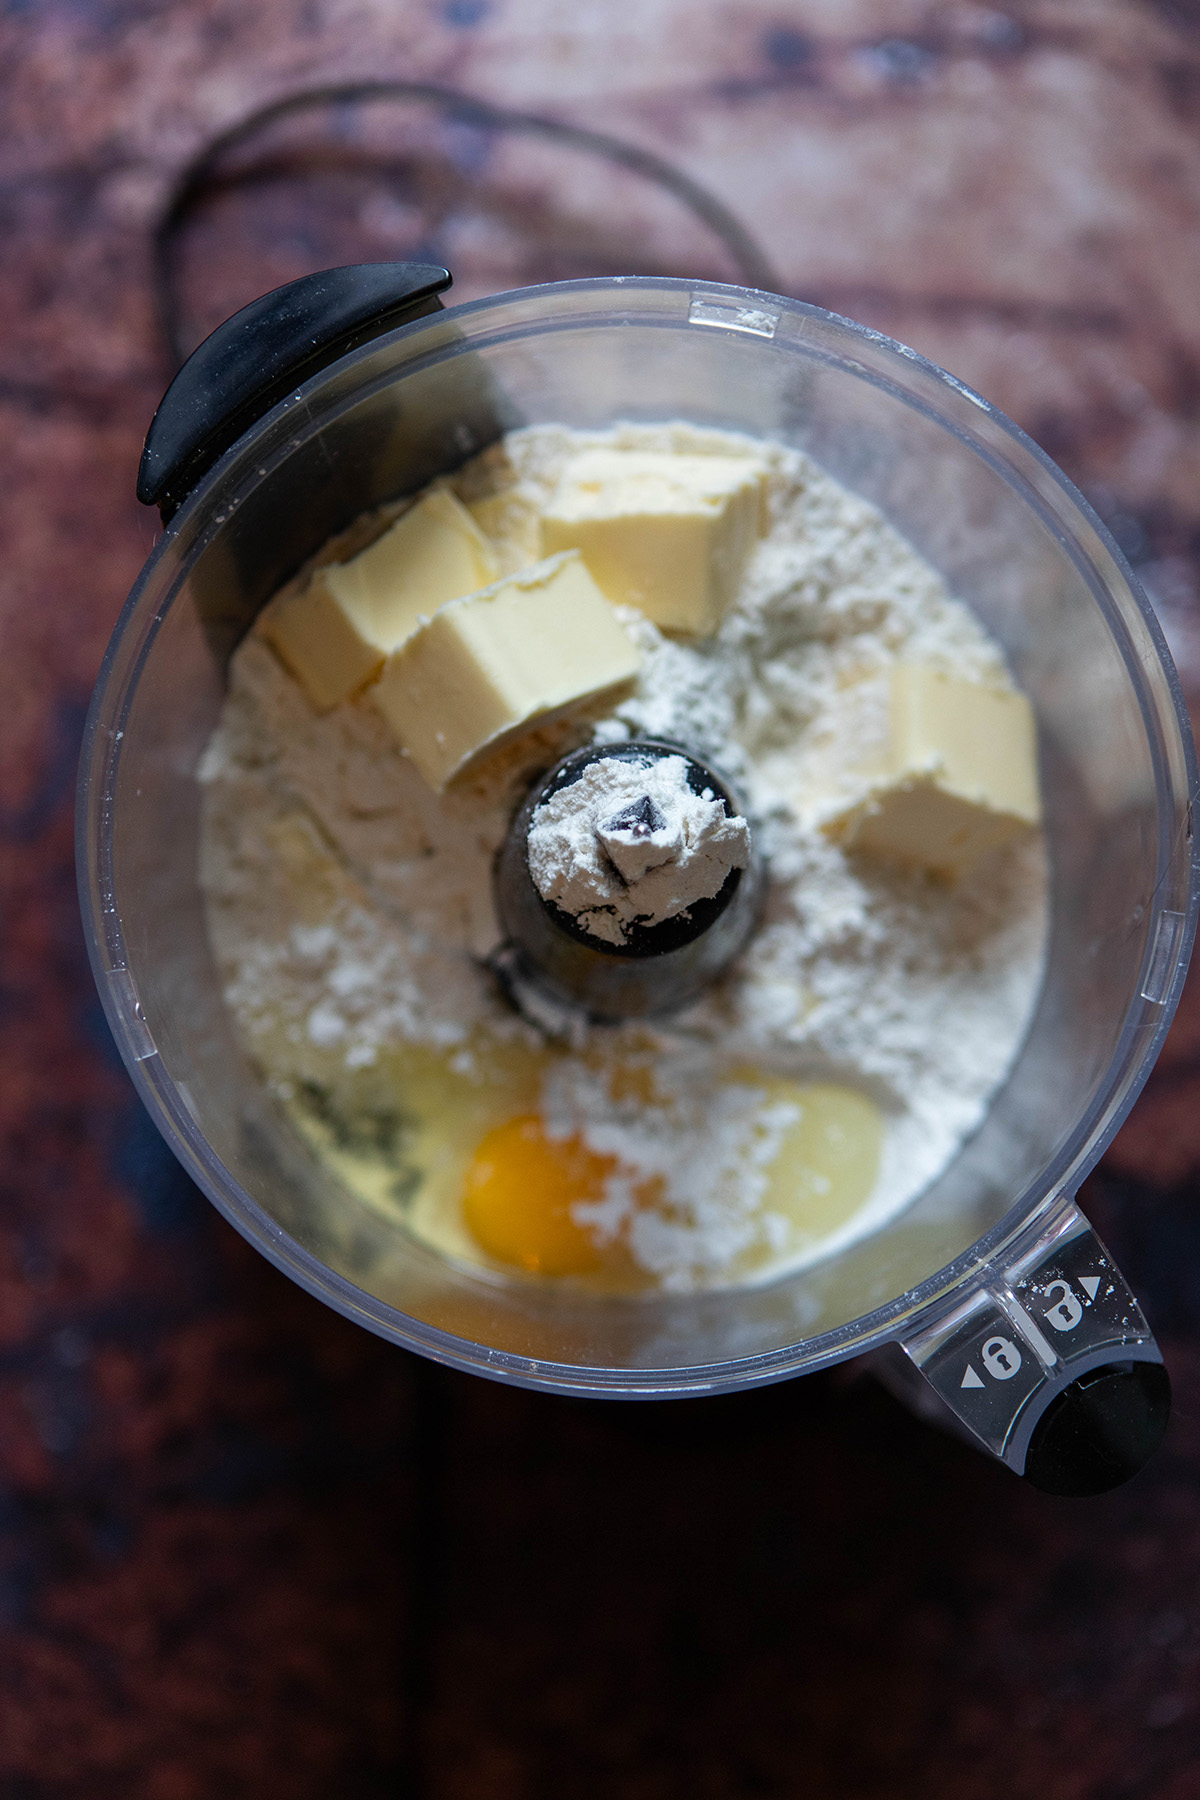
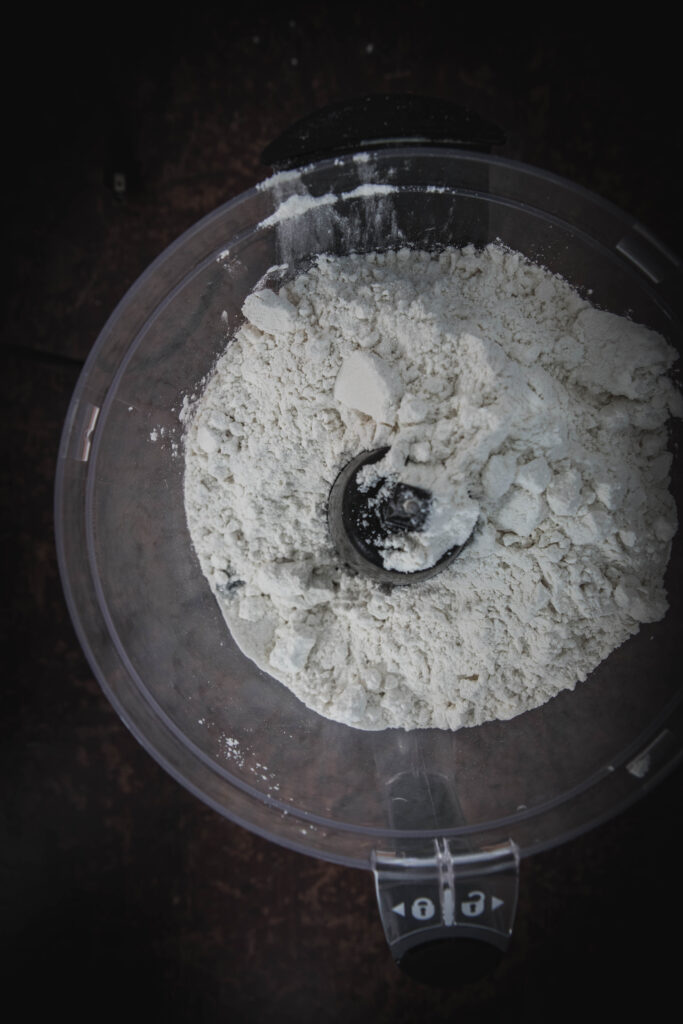
Small food processor (only needed if you are making homemade breadcrumbs)

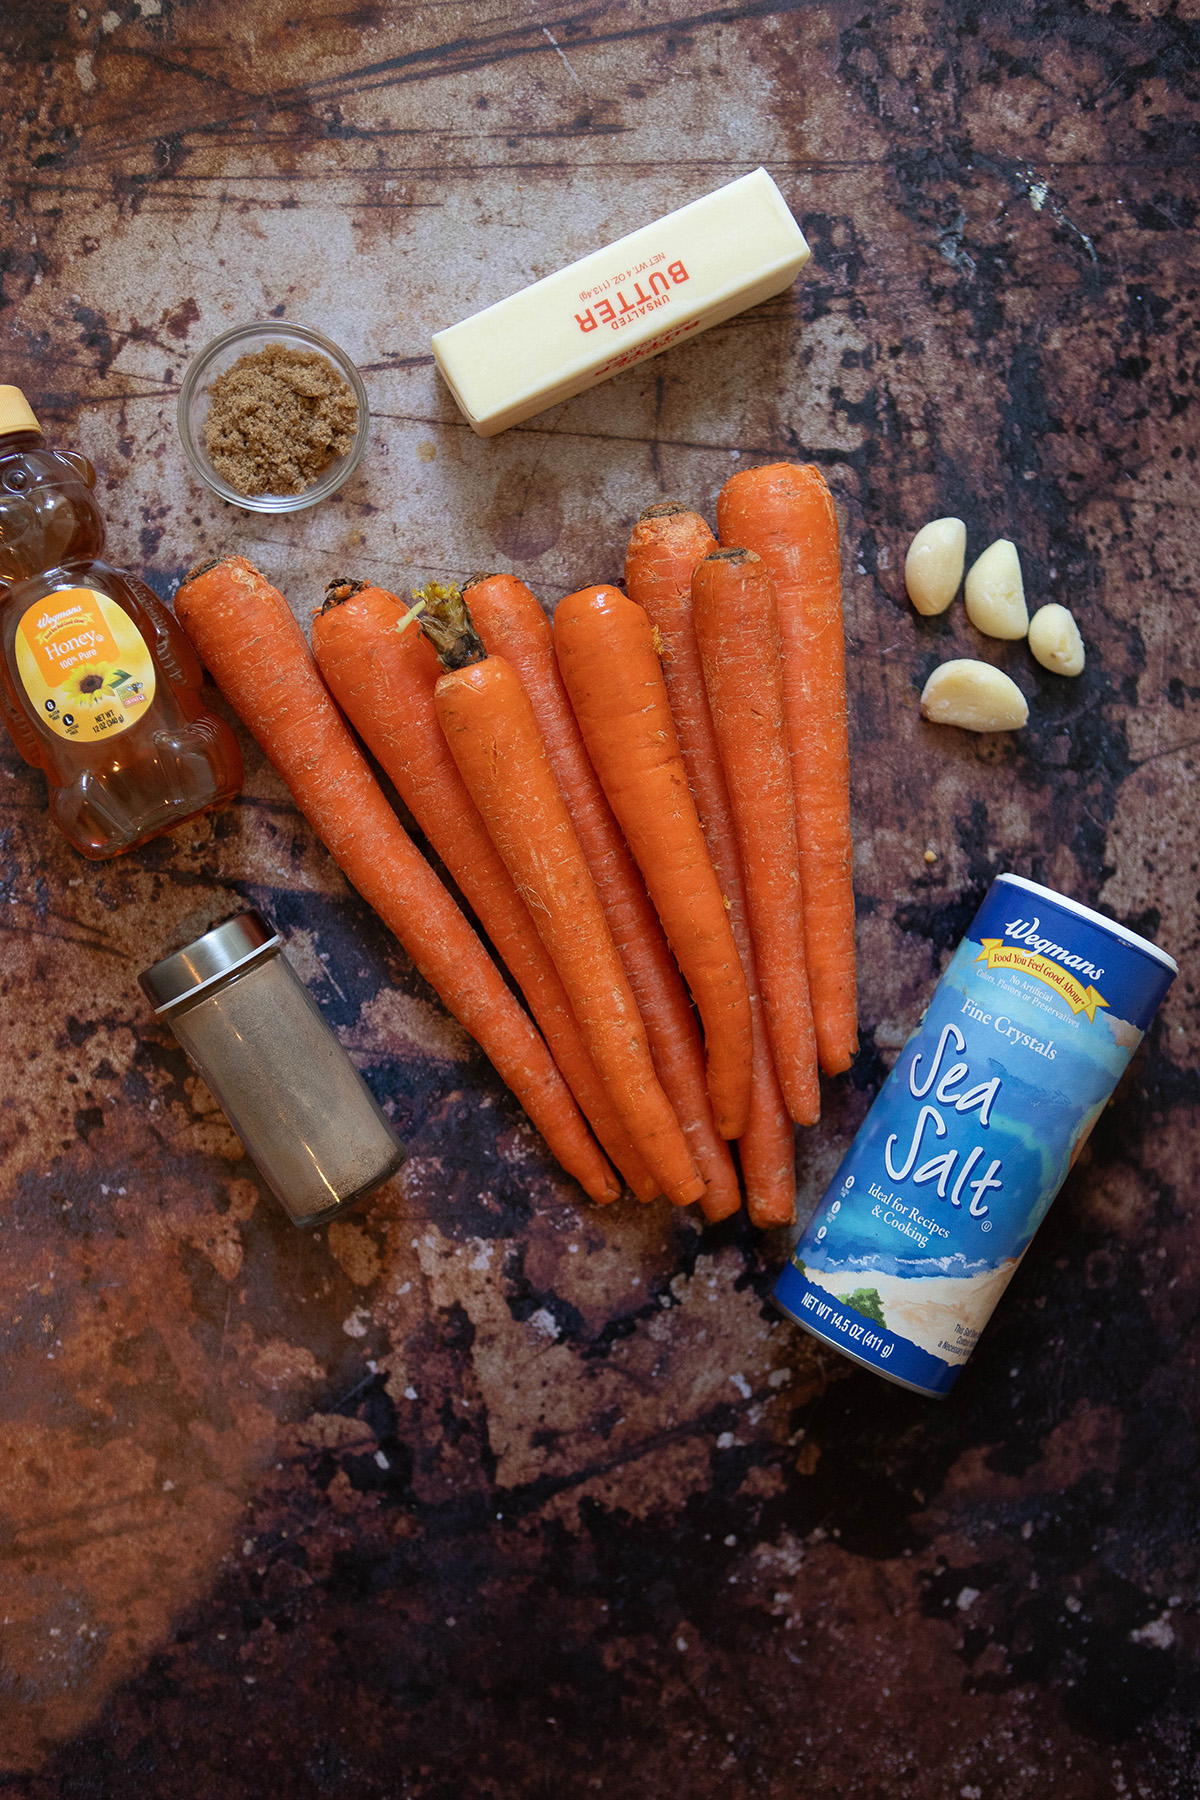
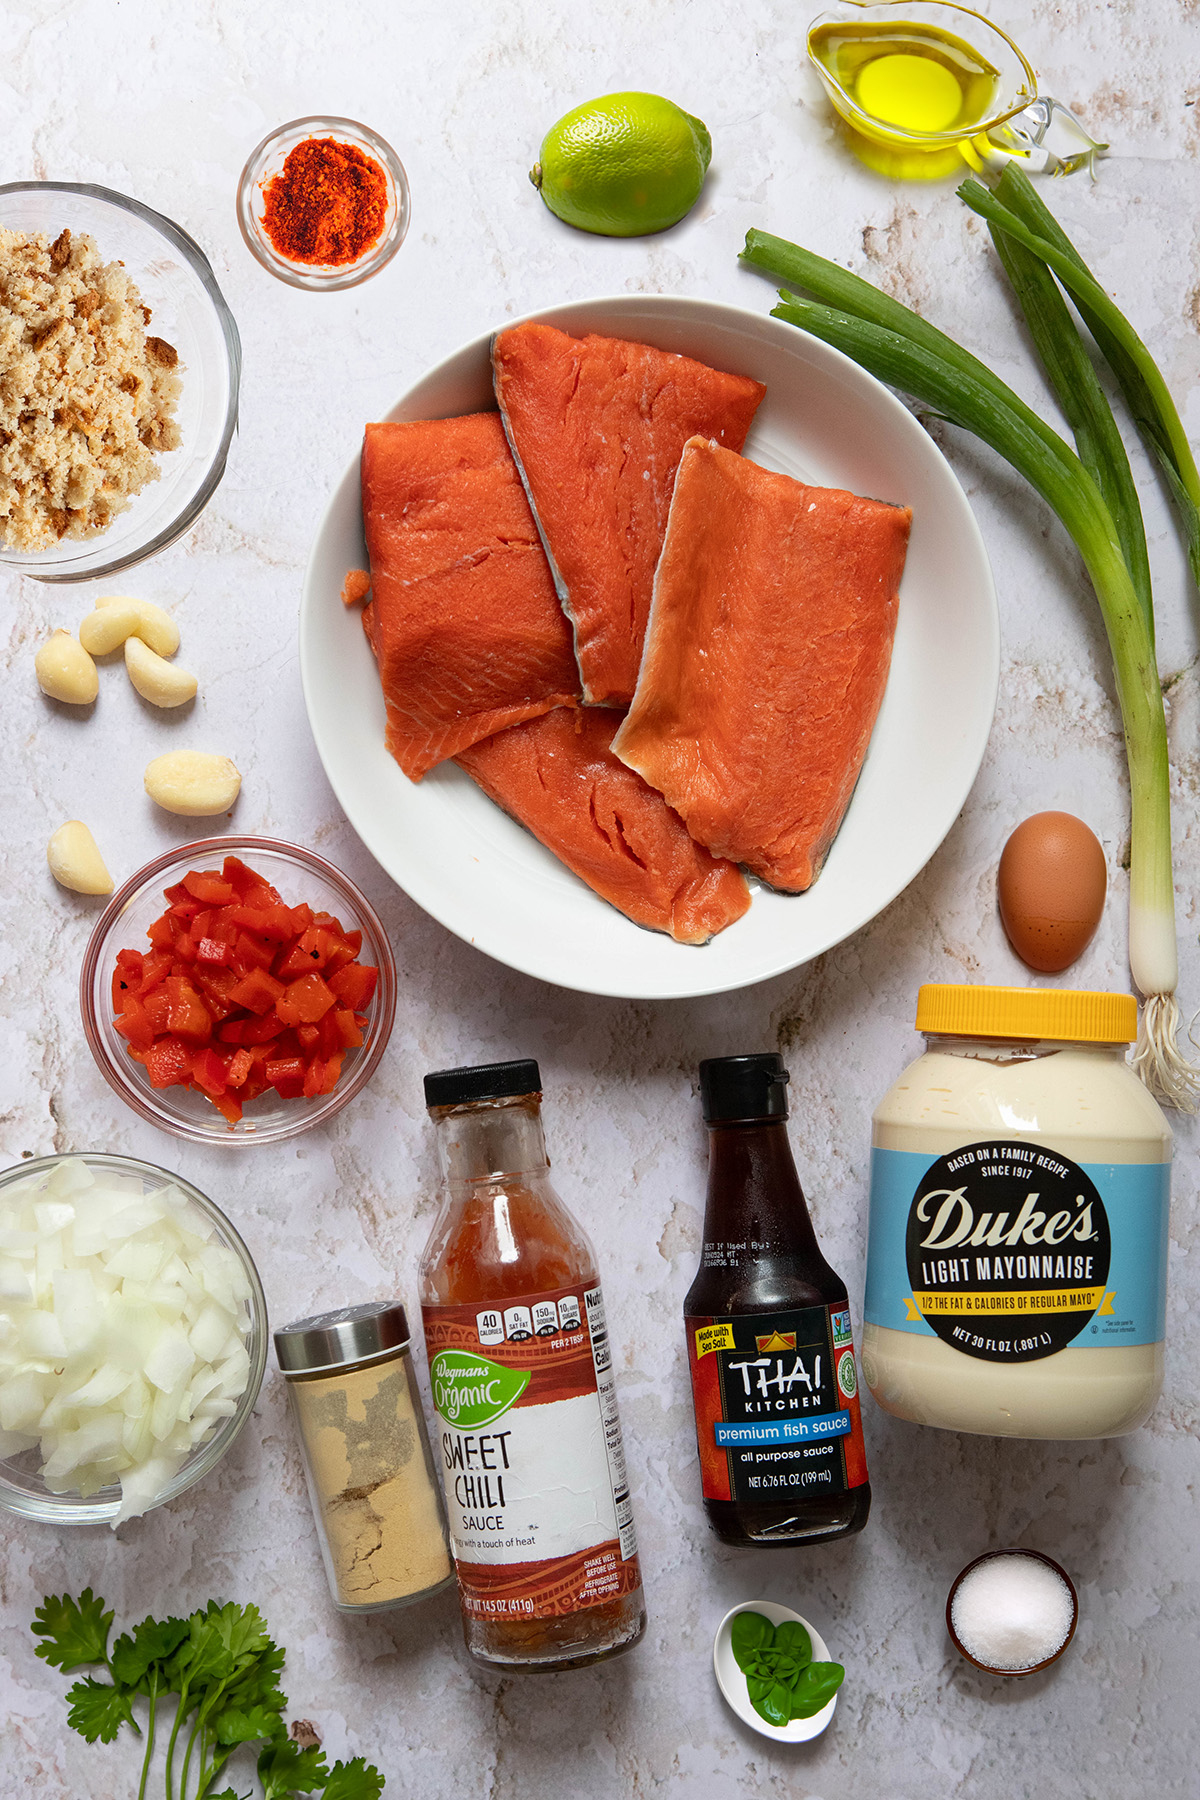
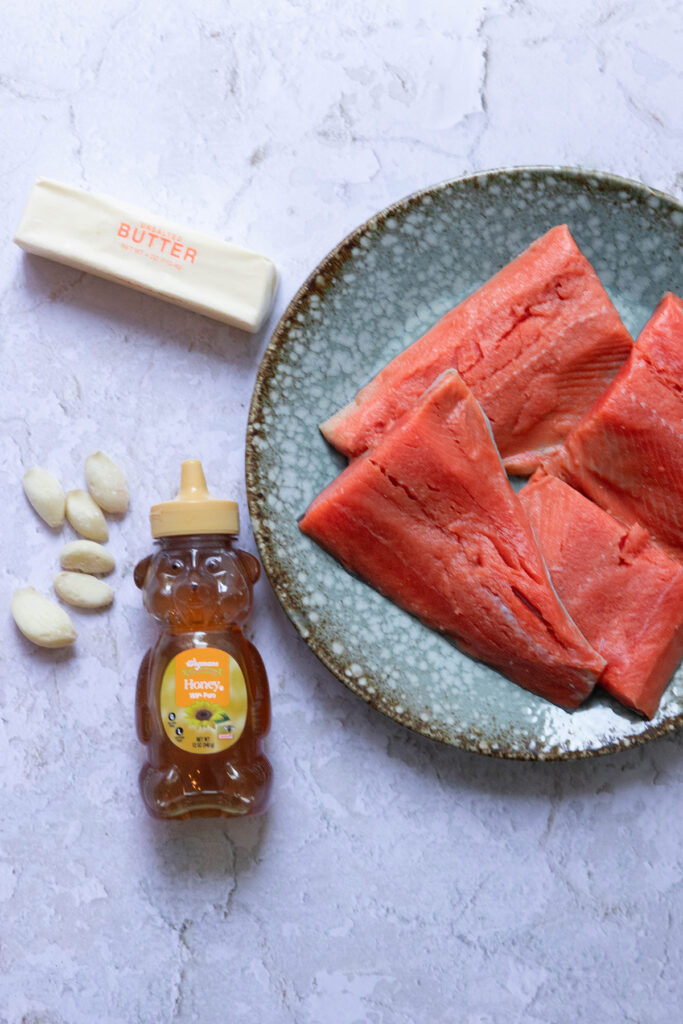
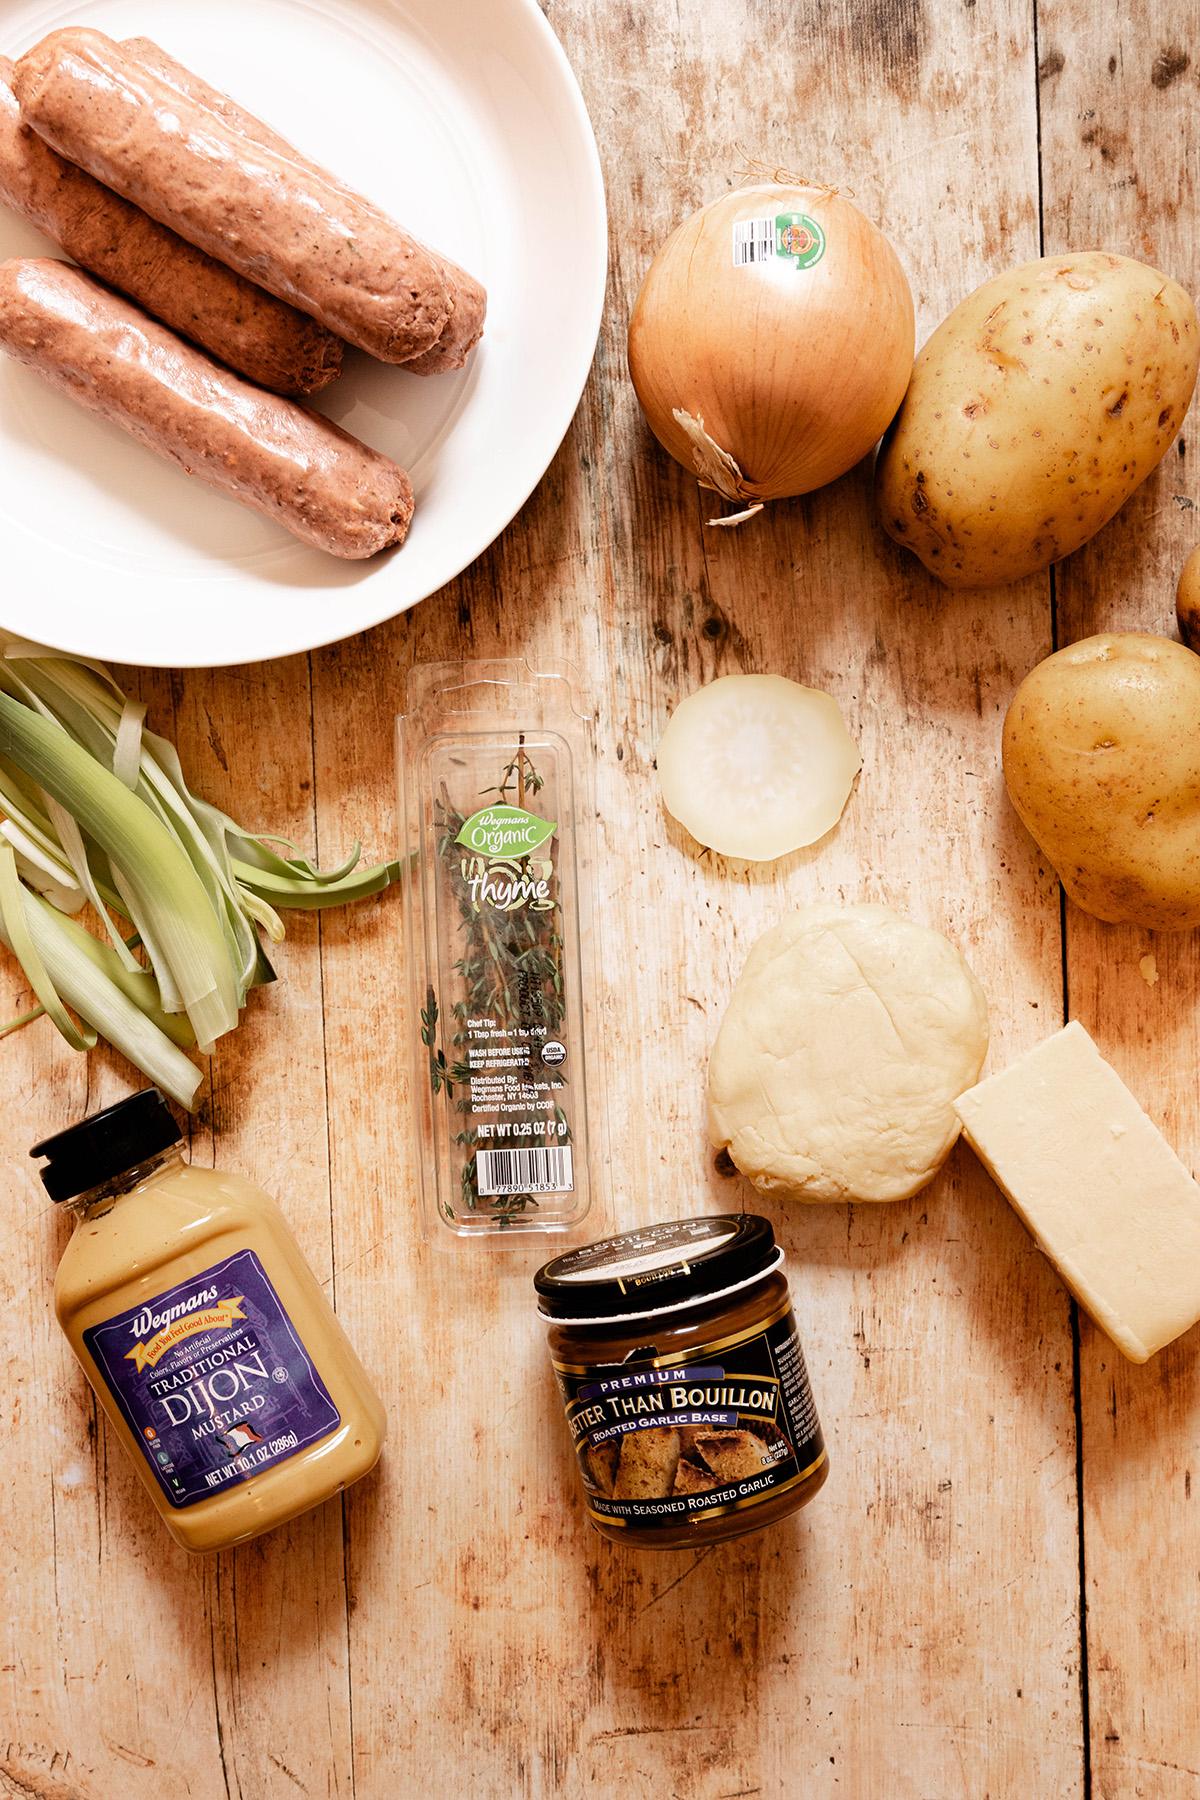
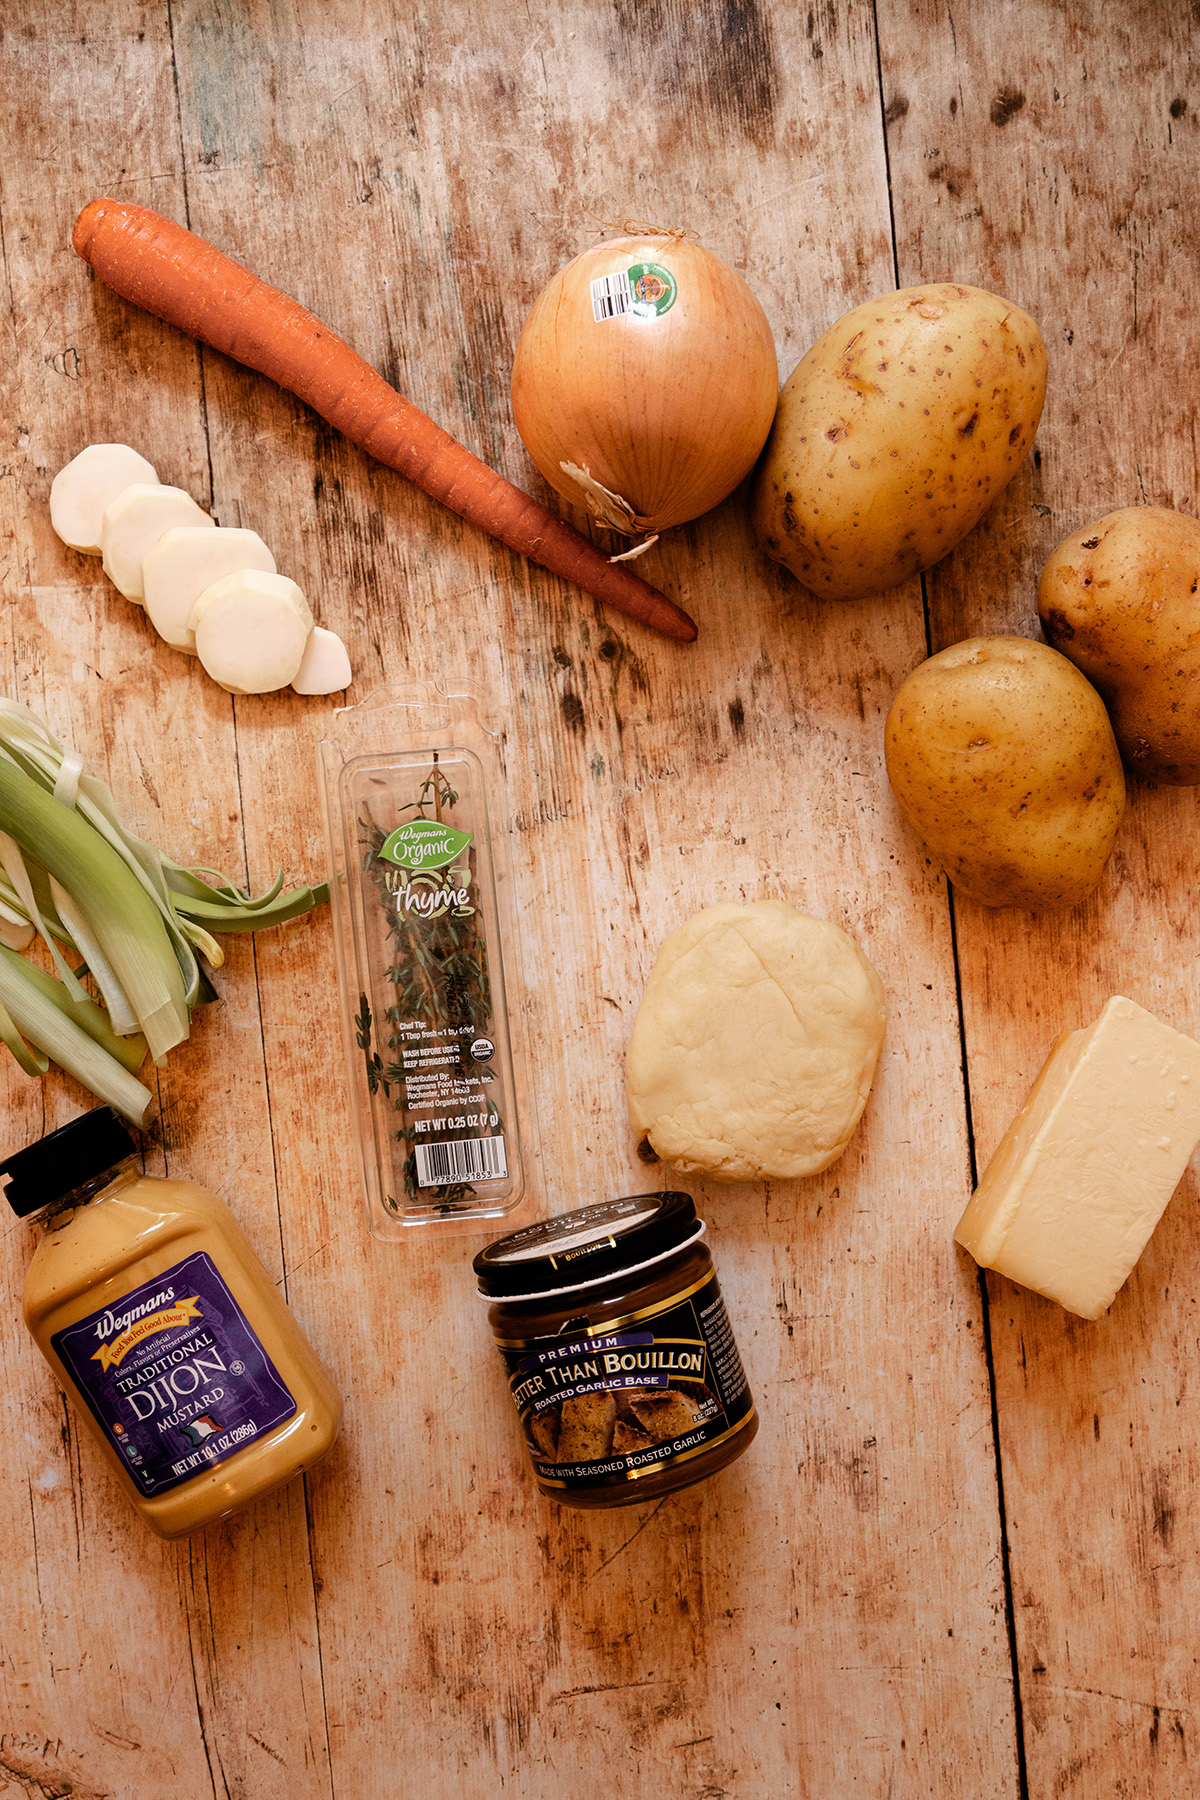
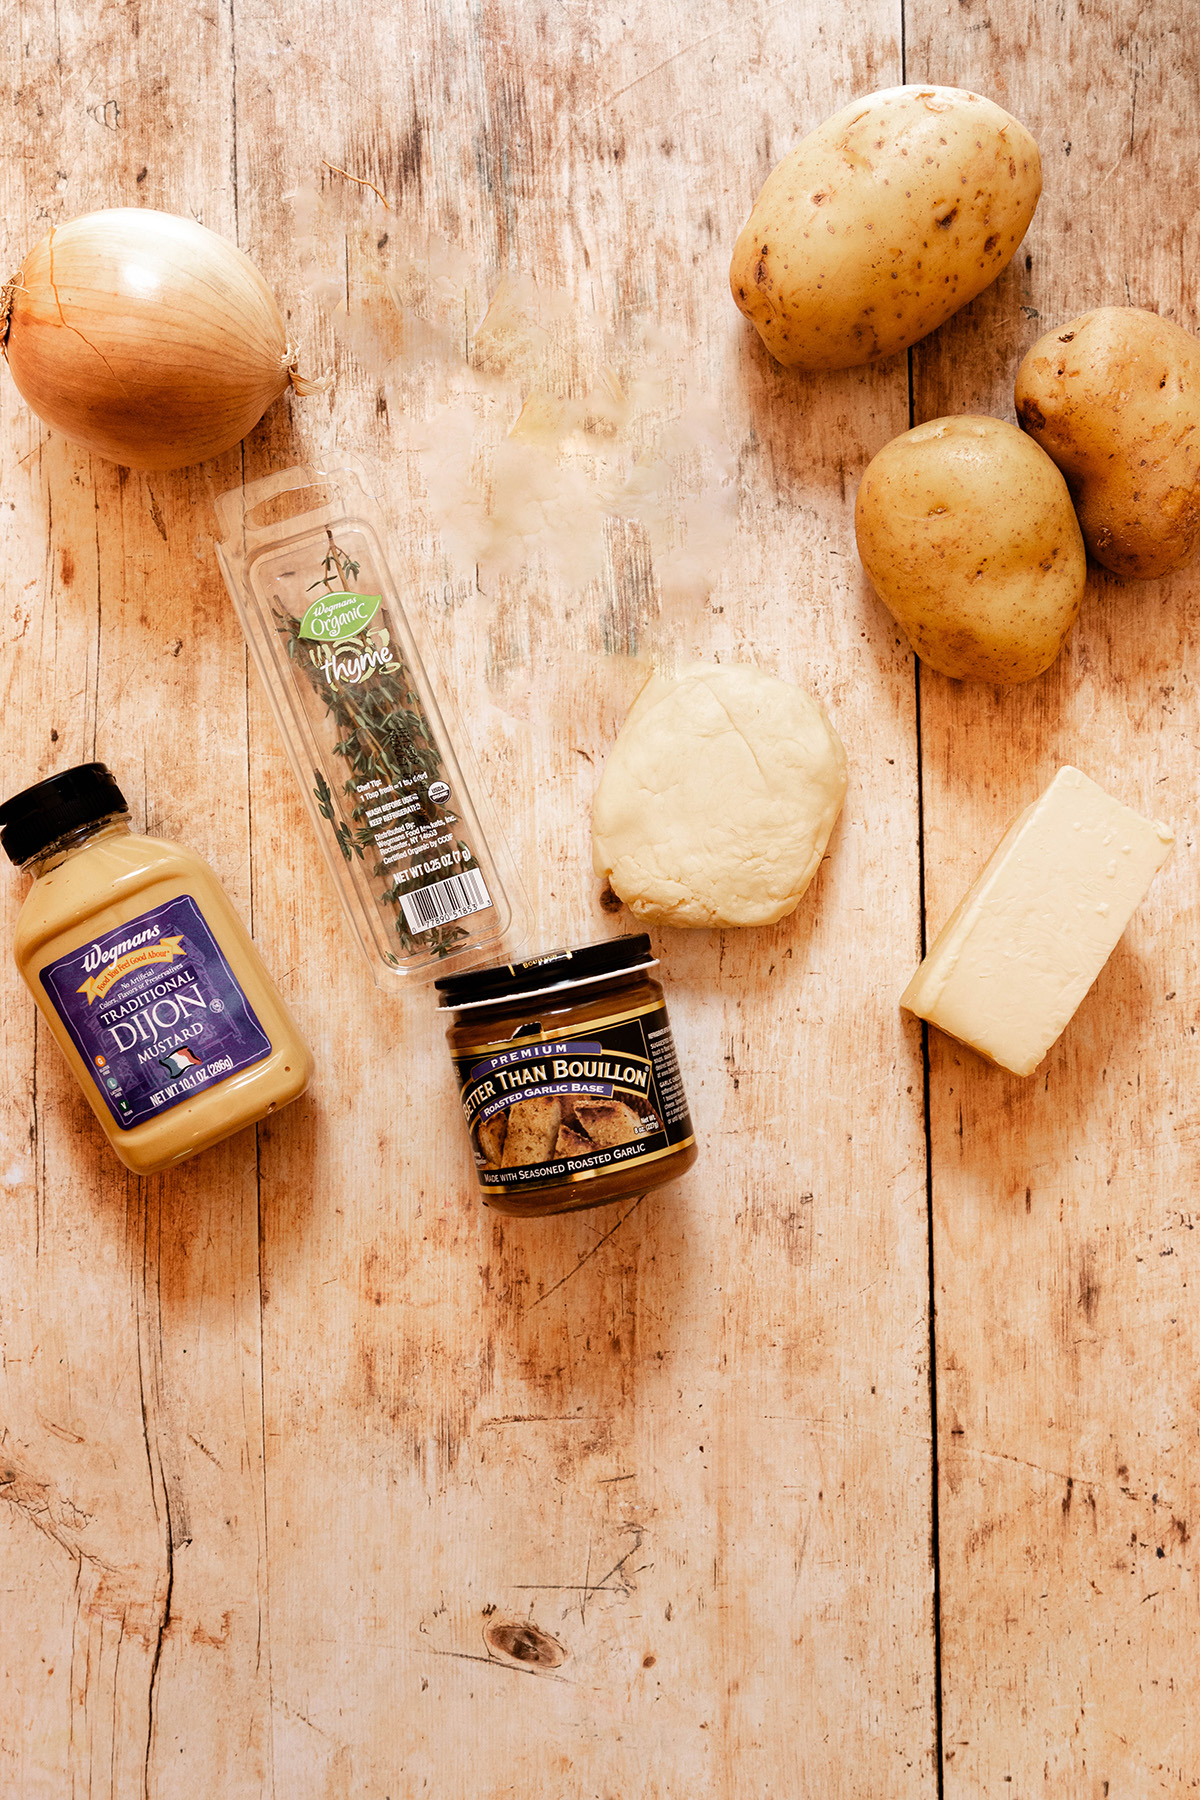
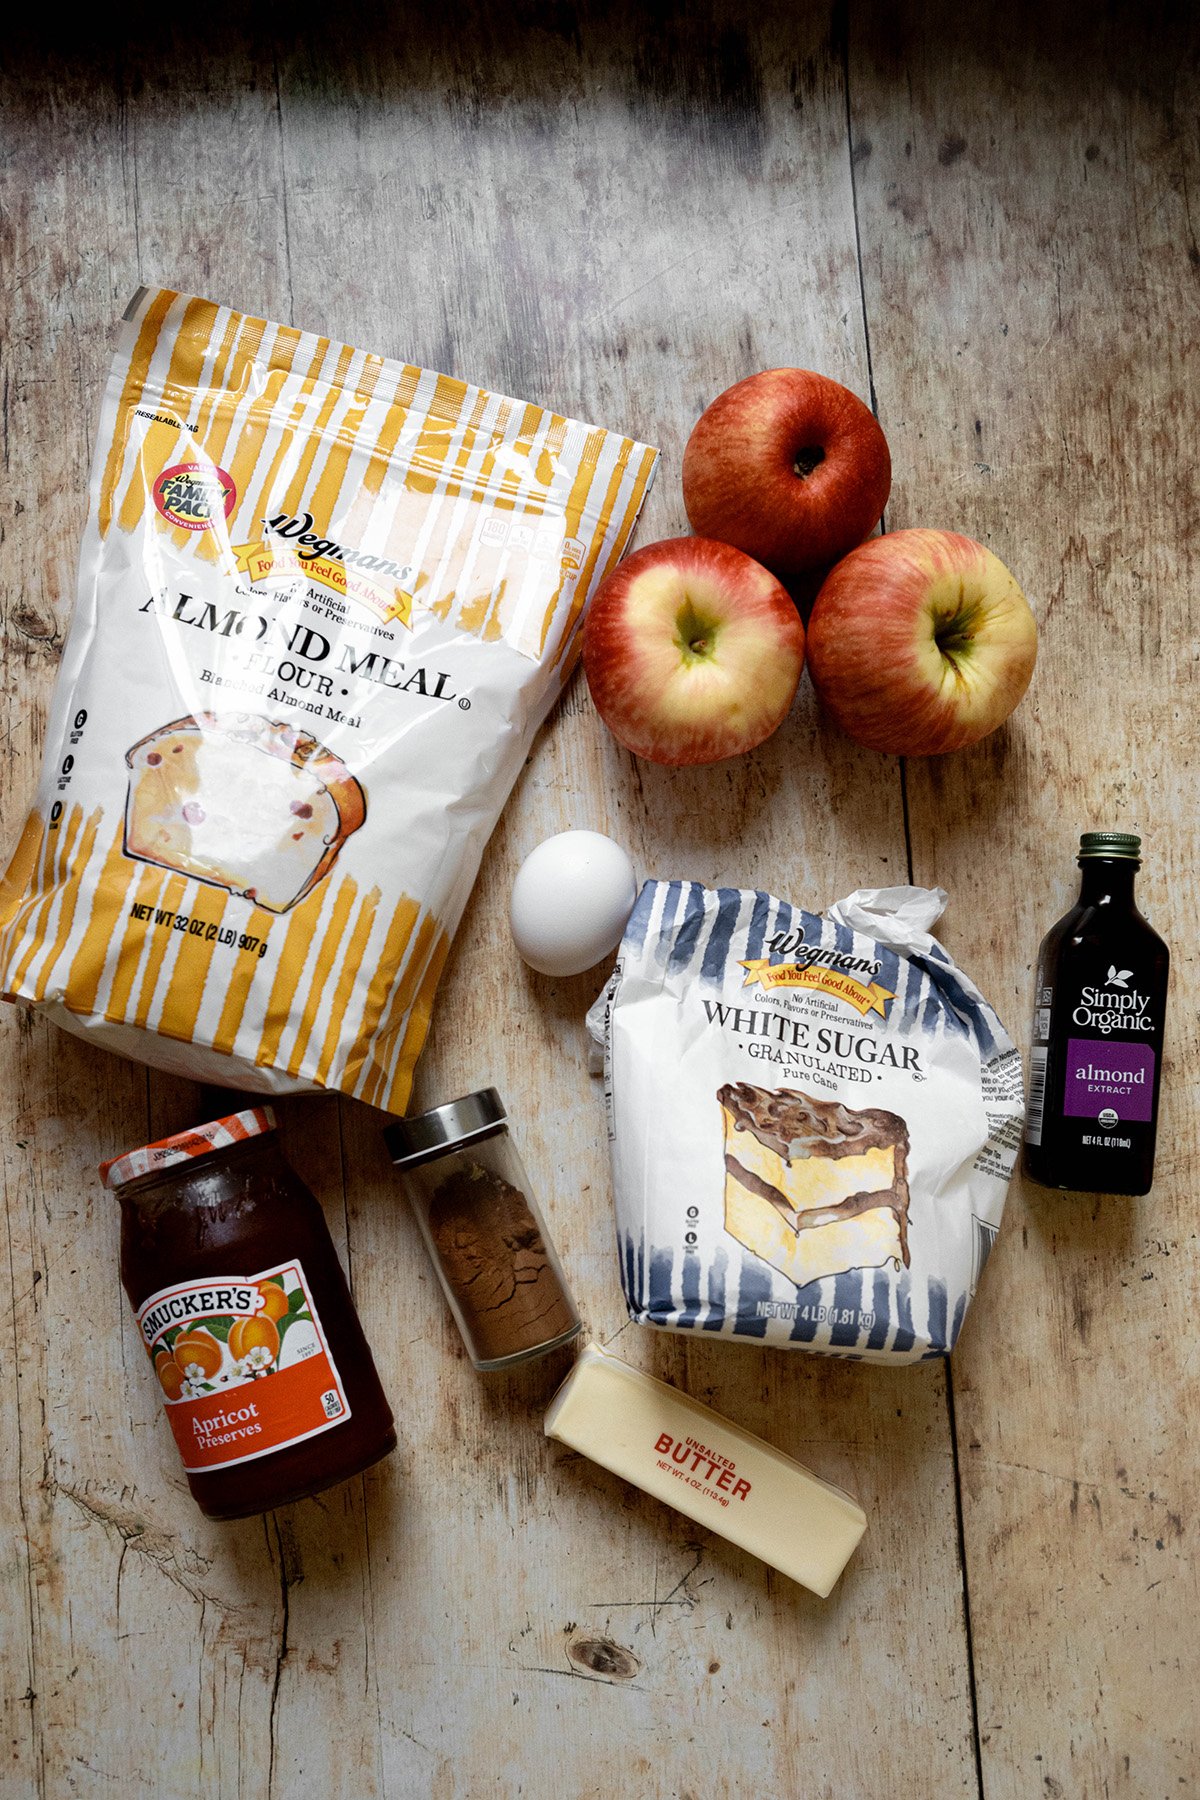
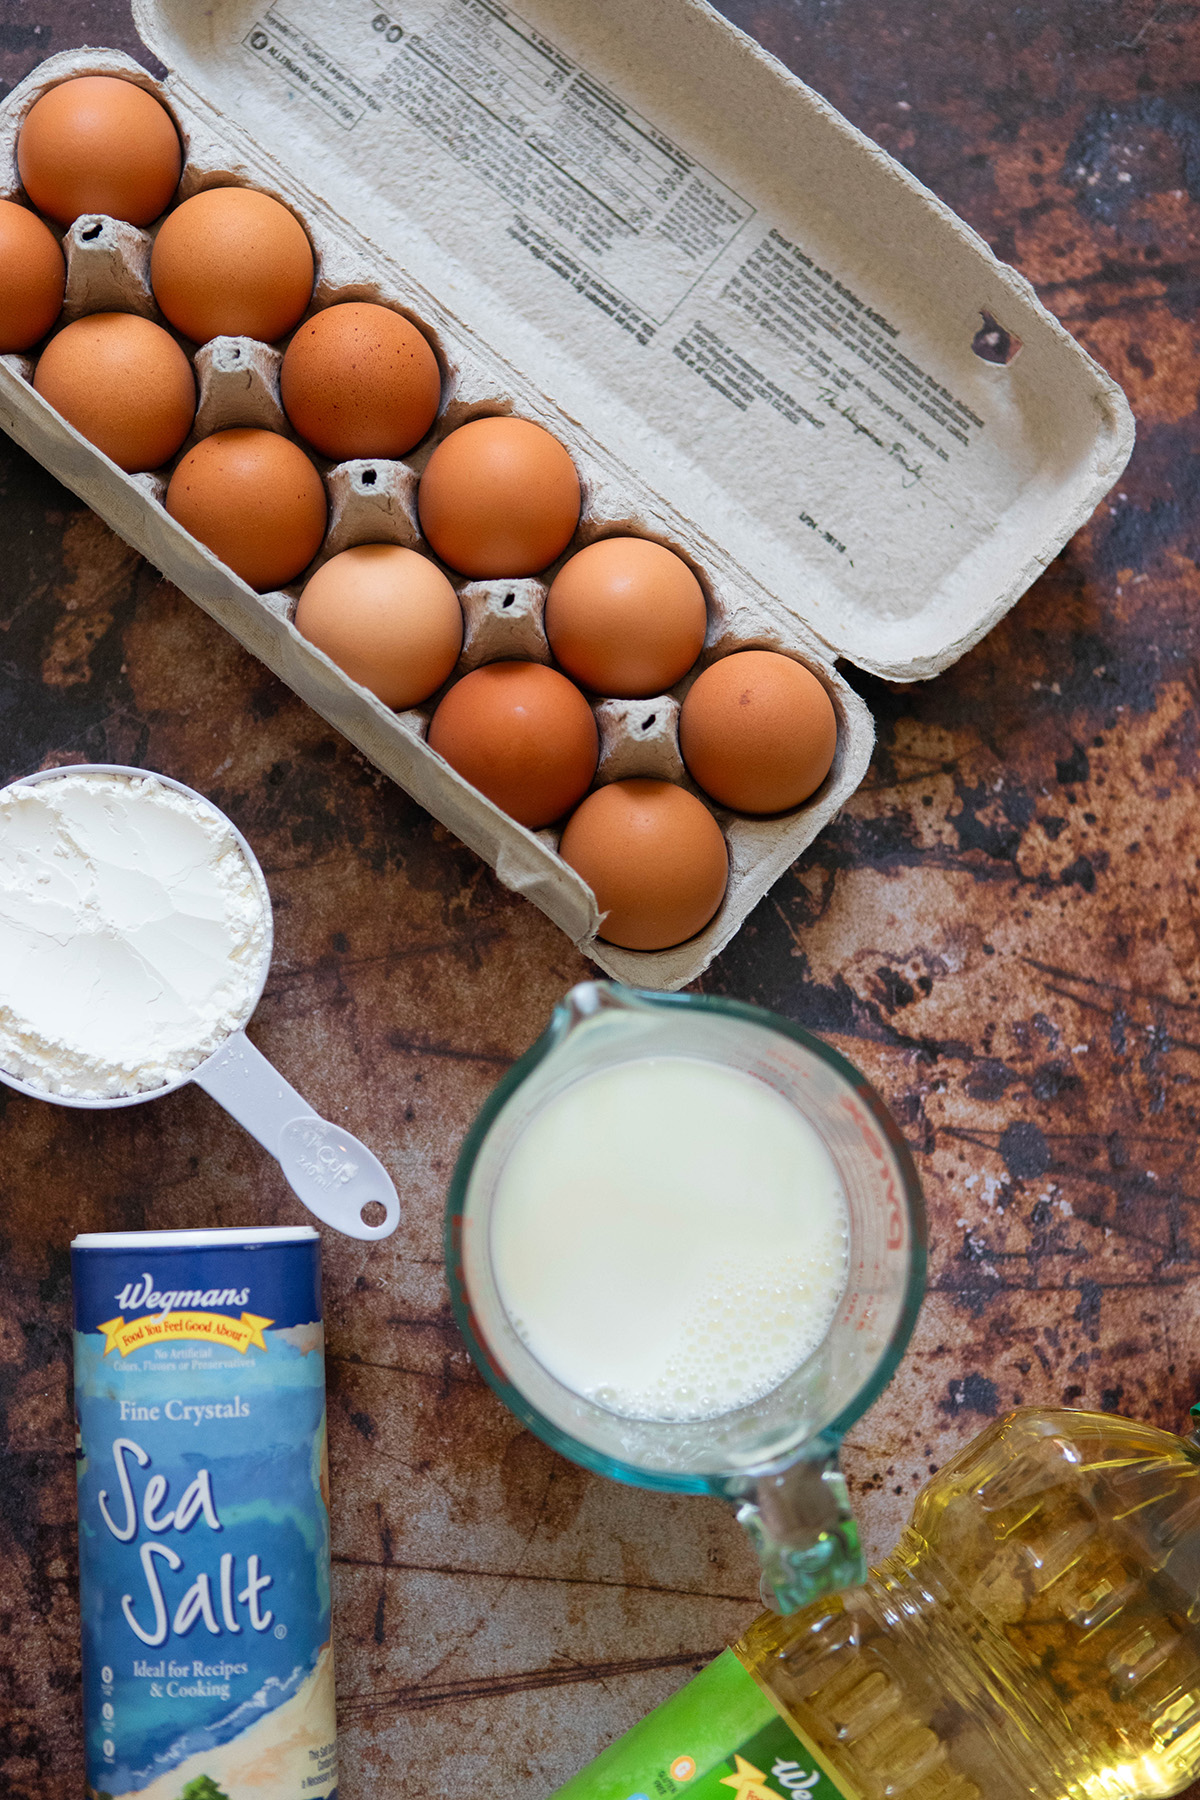
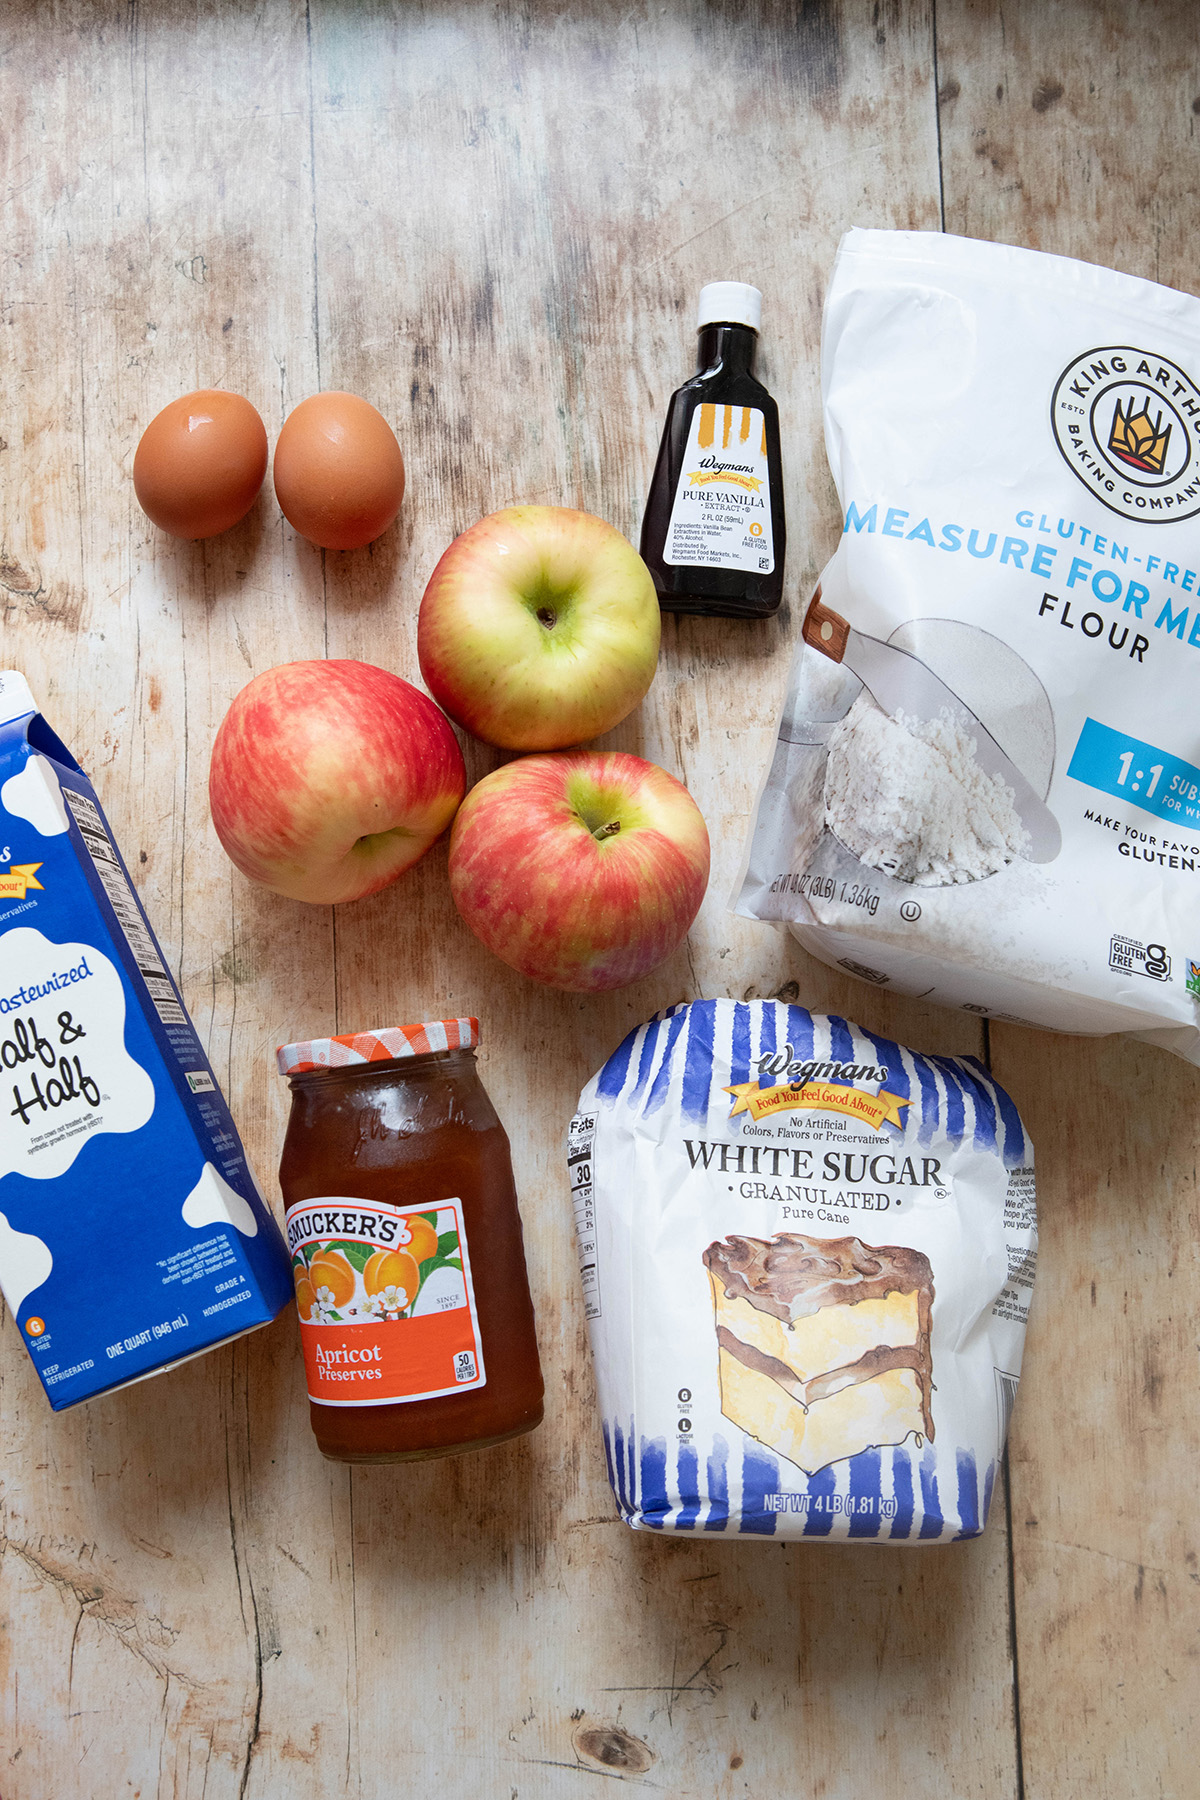
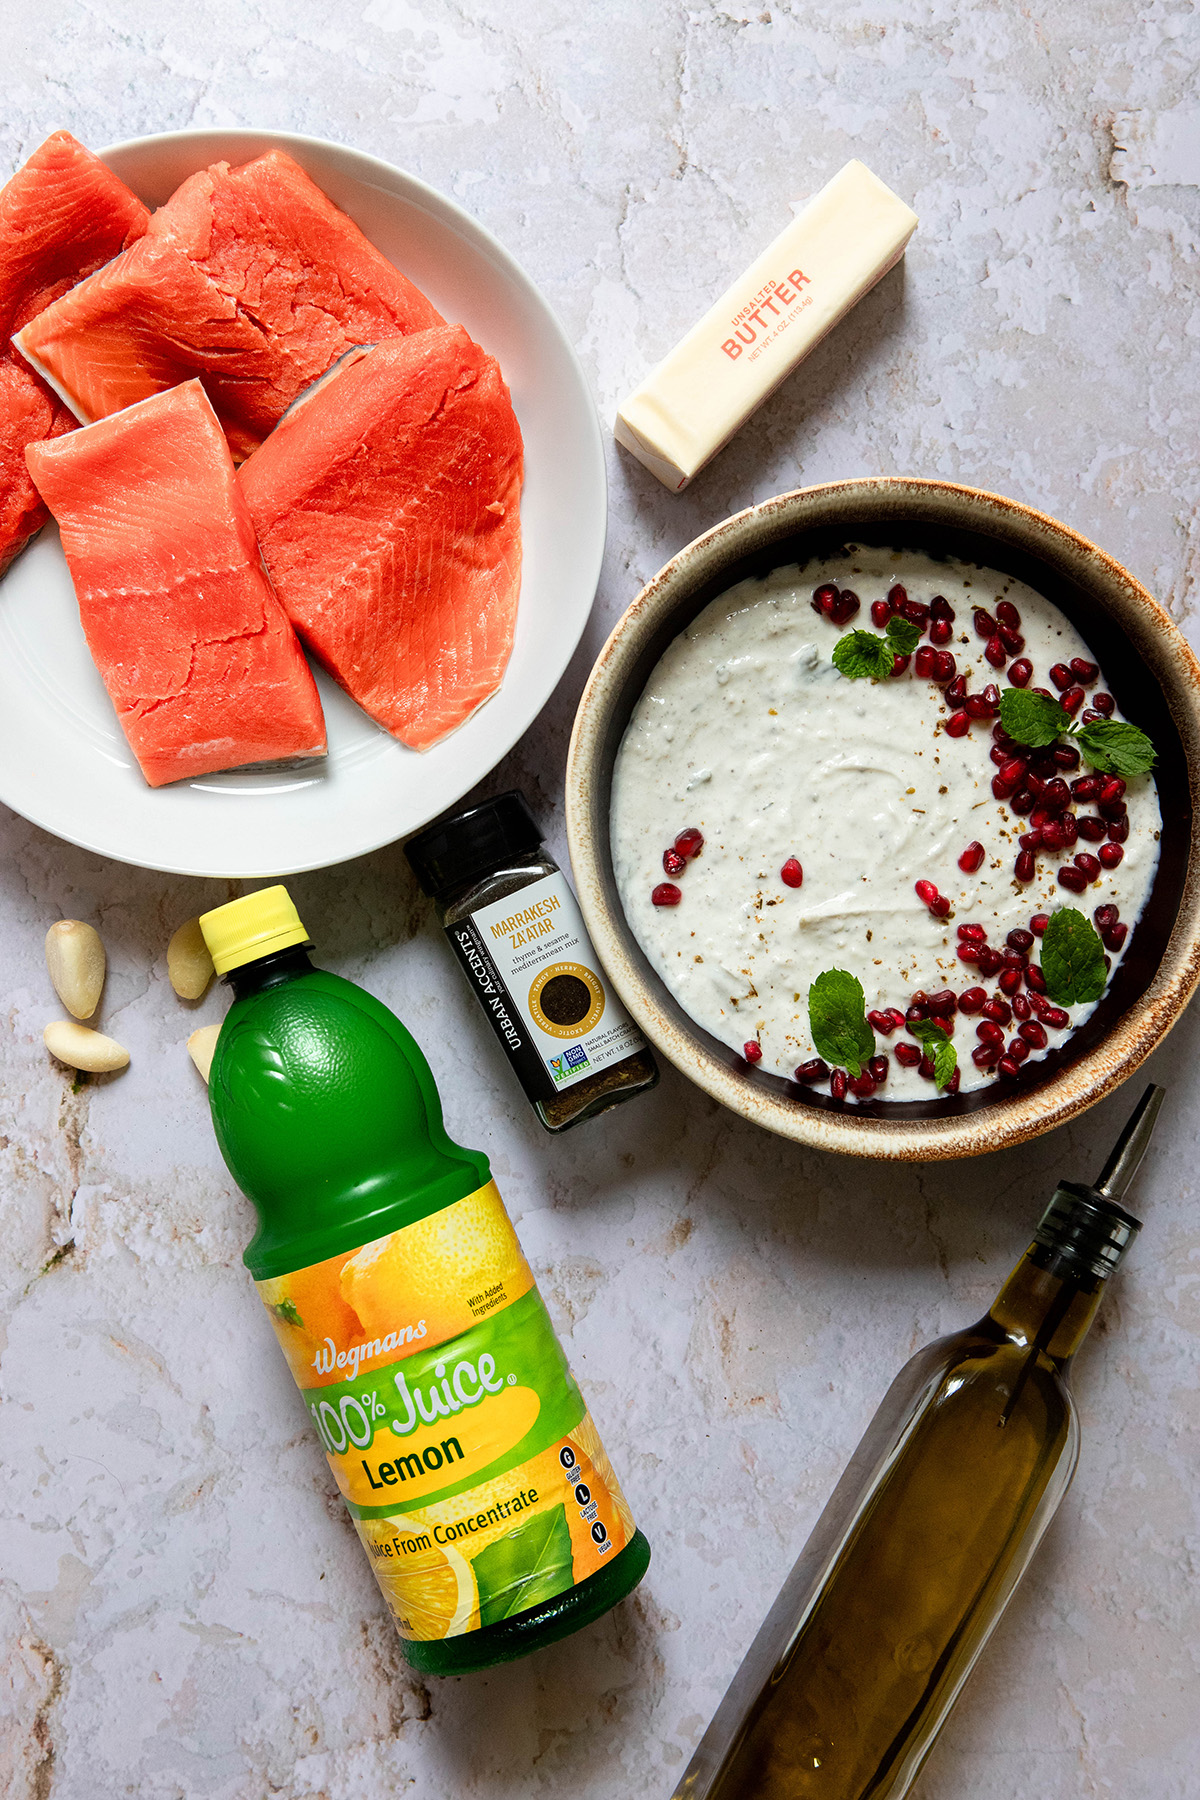
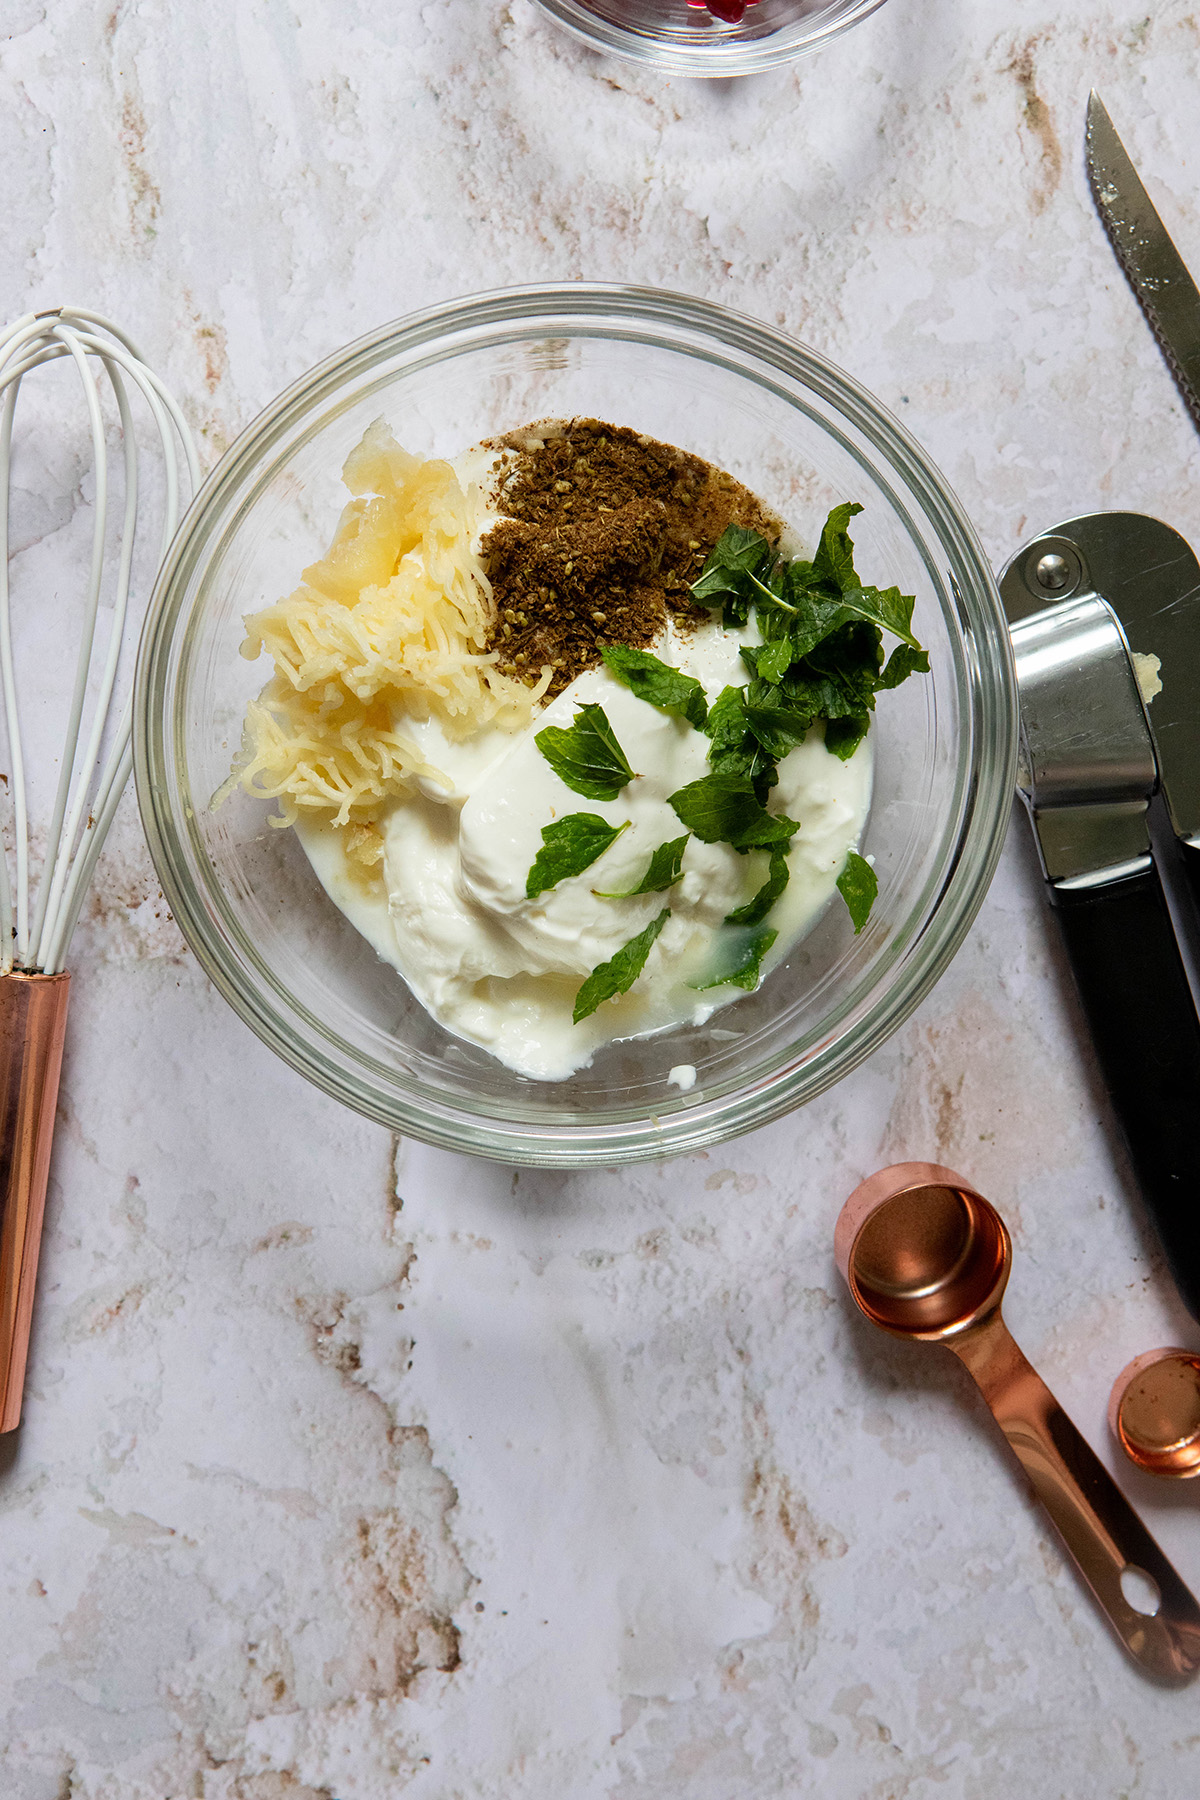
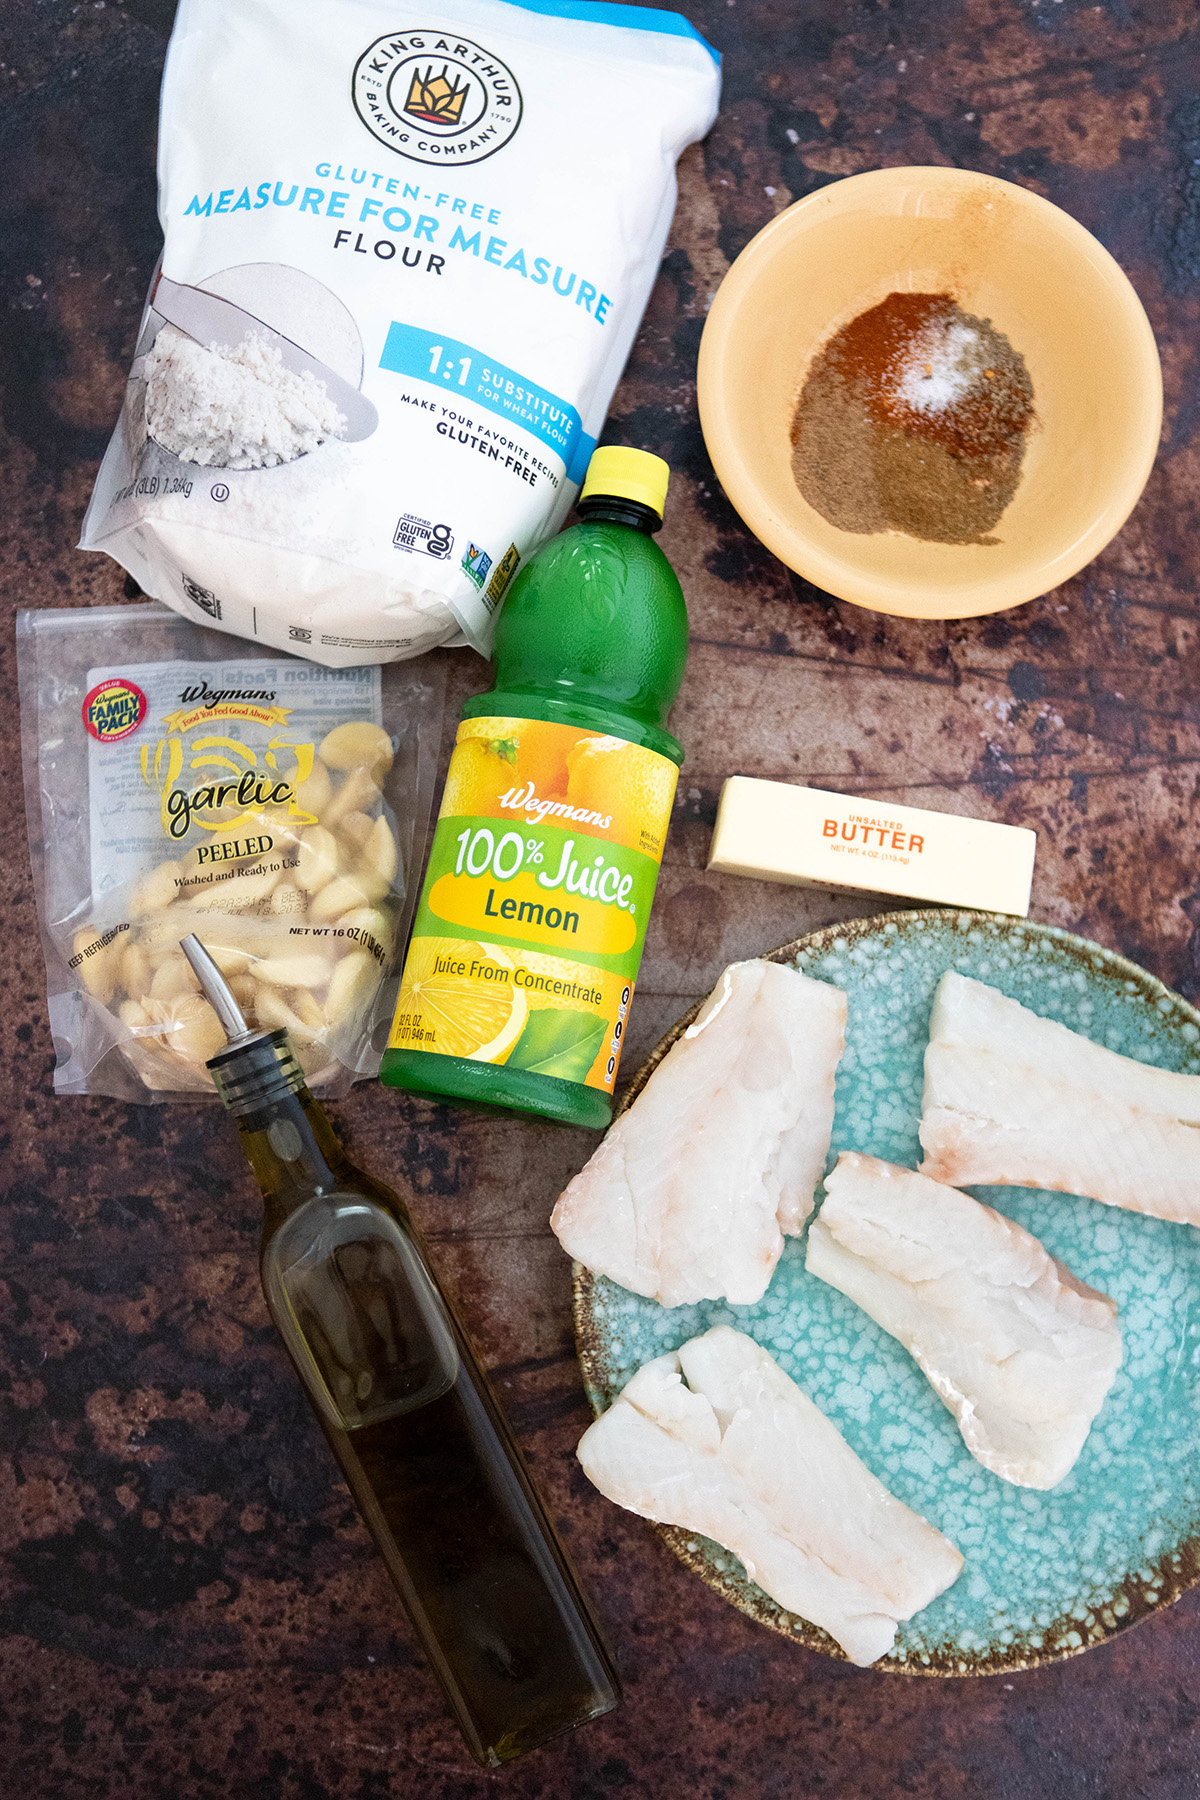
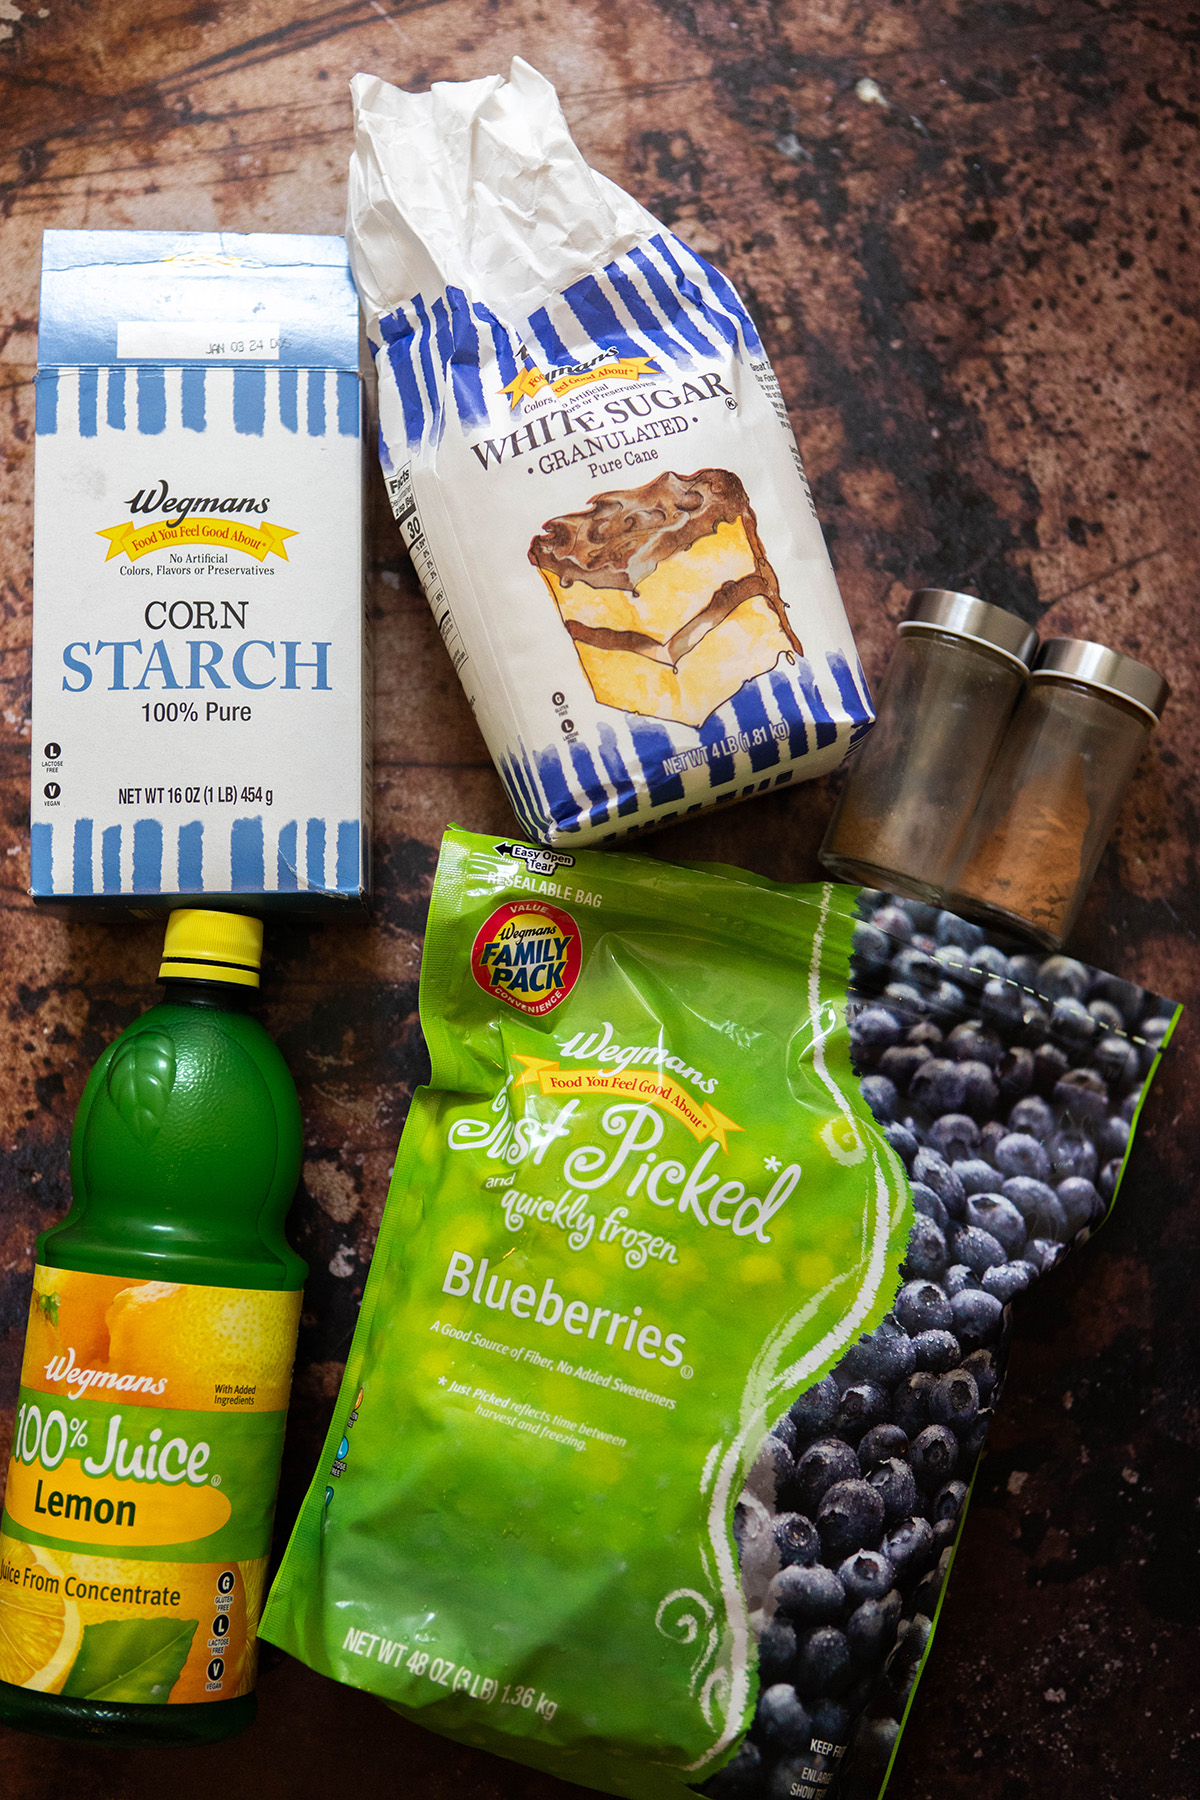
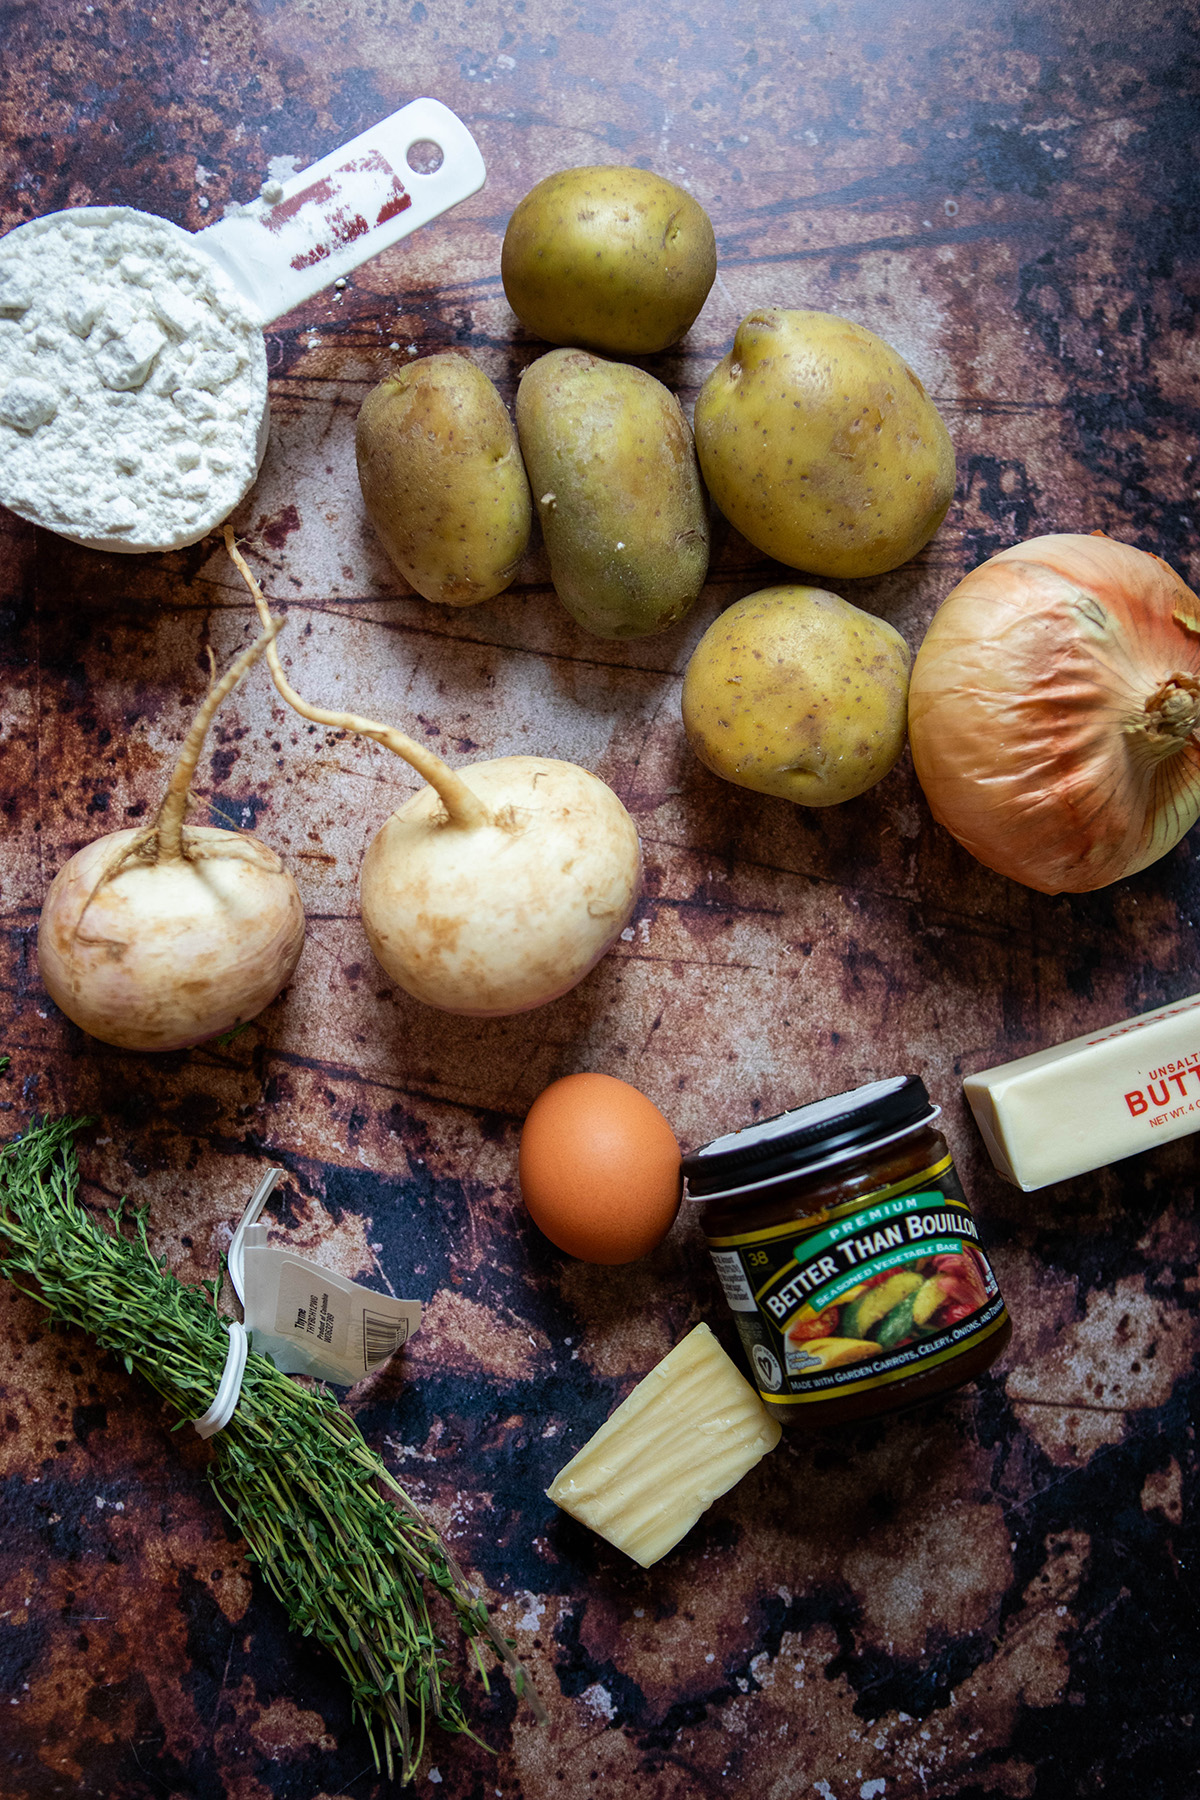
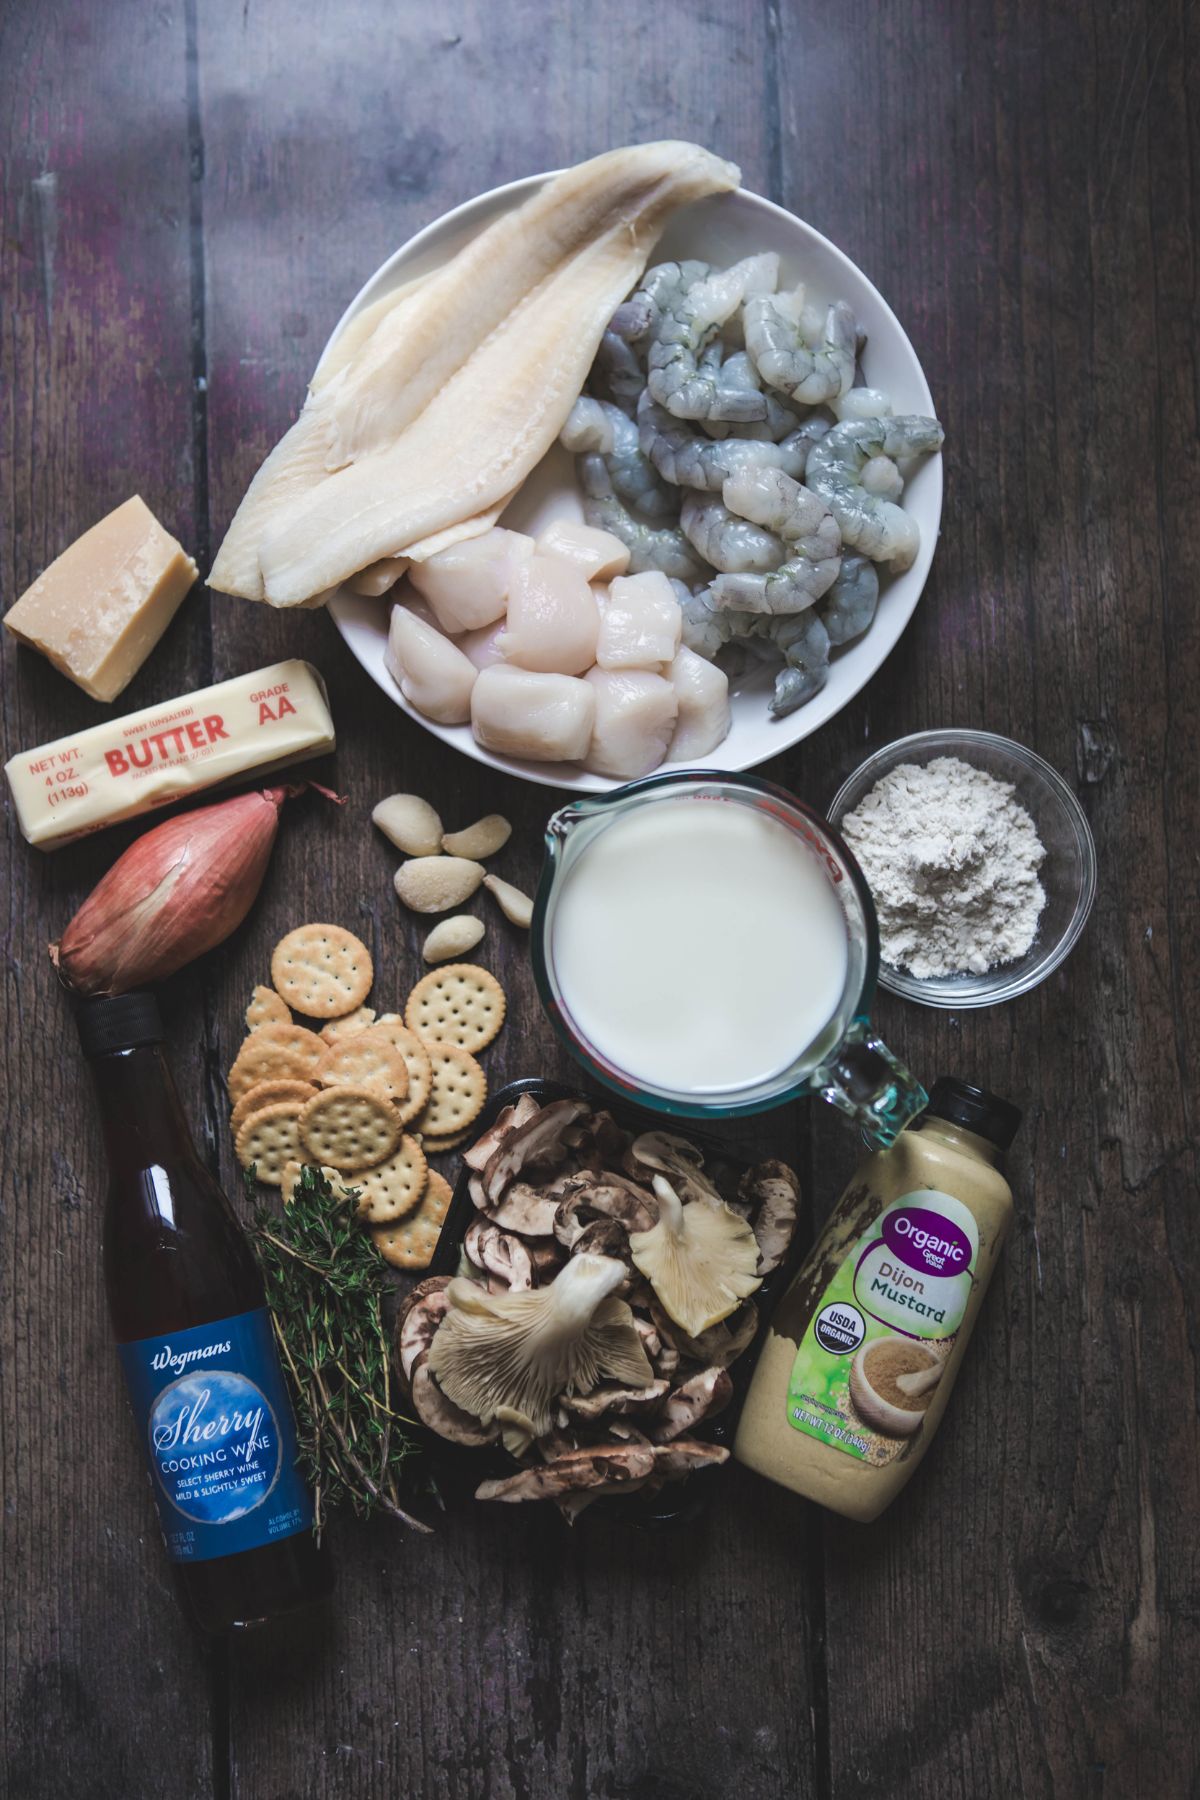
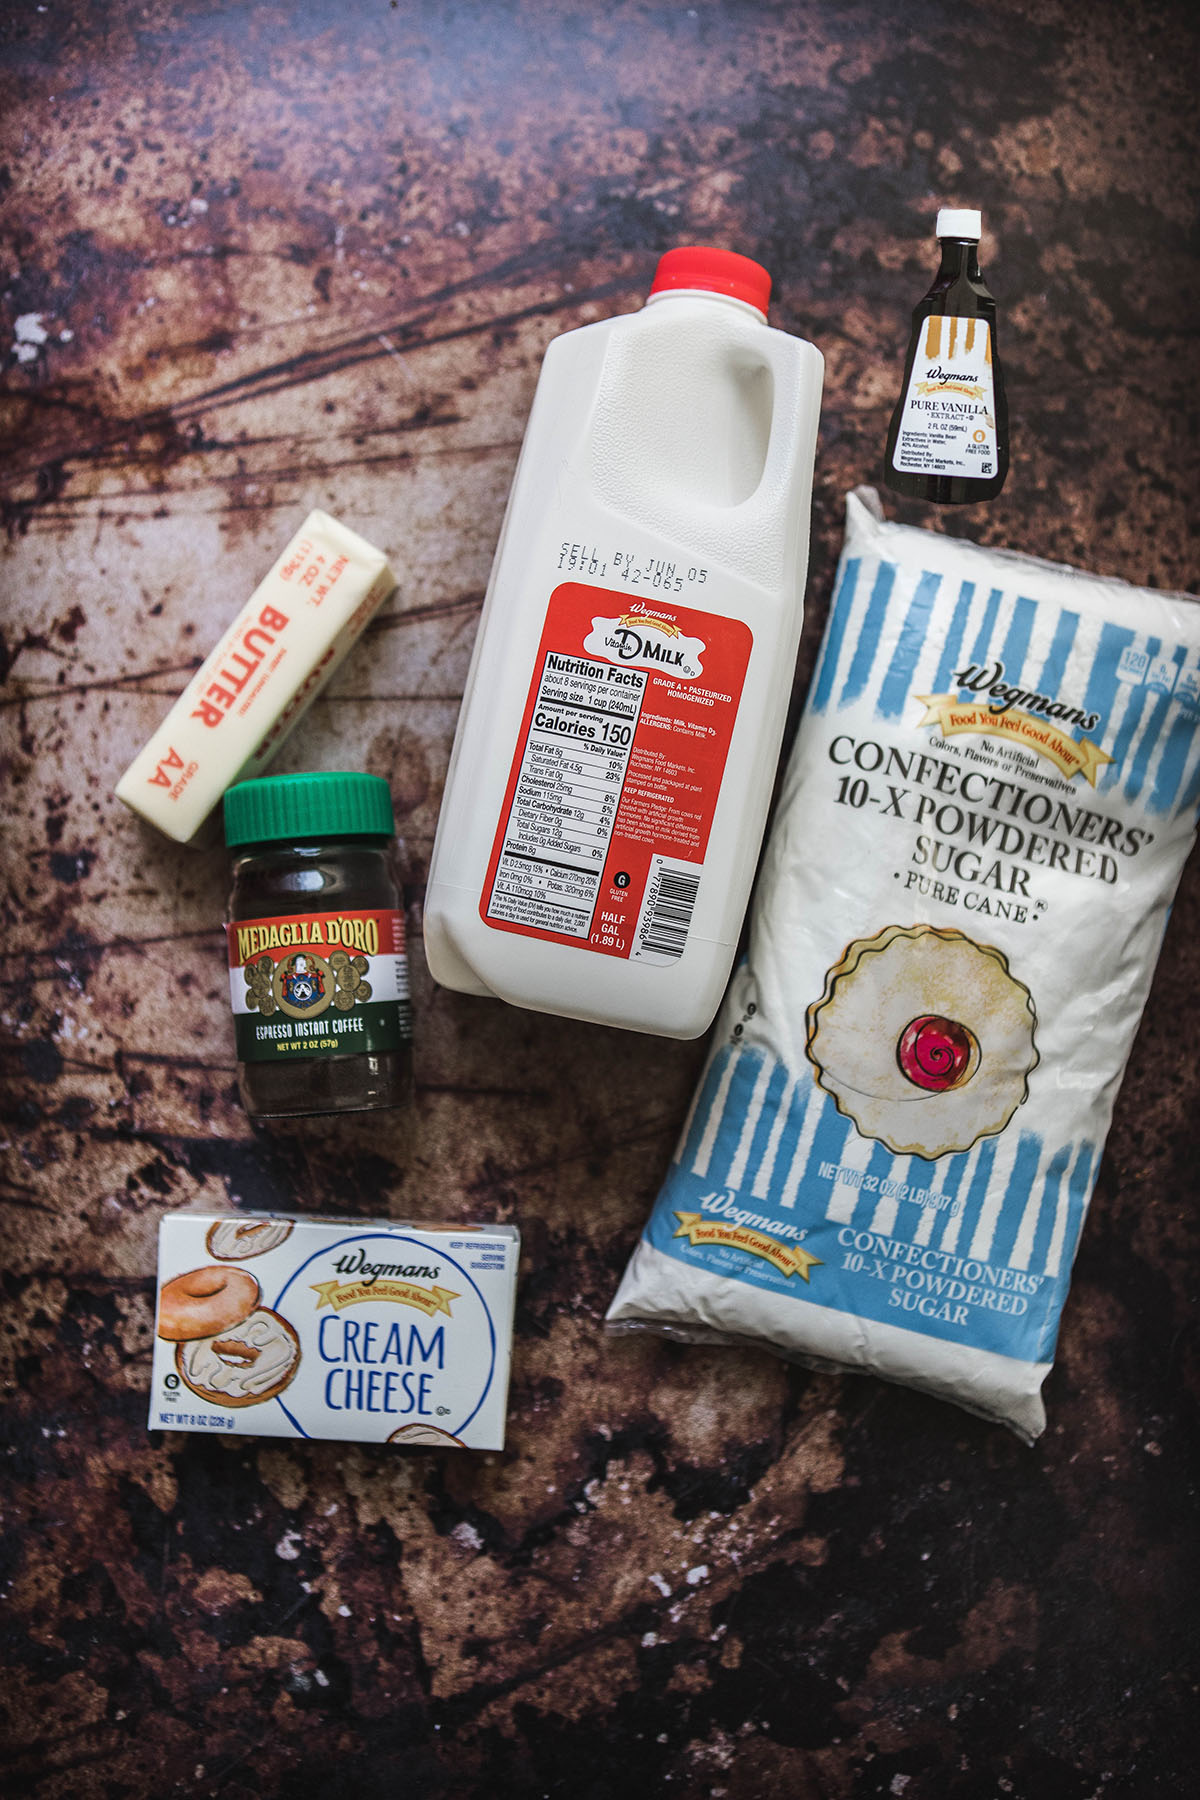
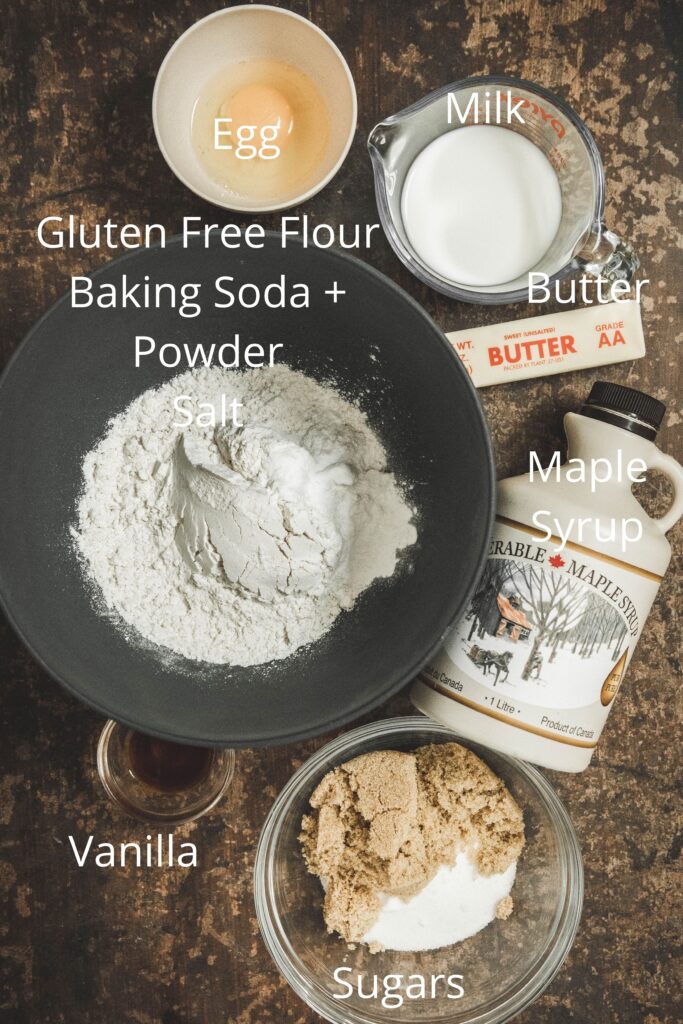
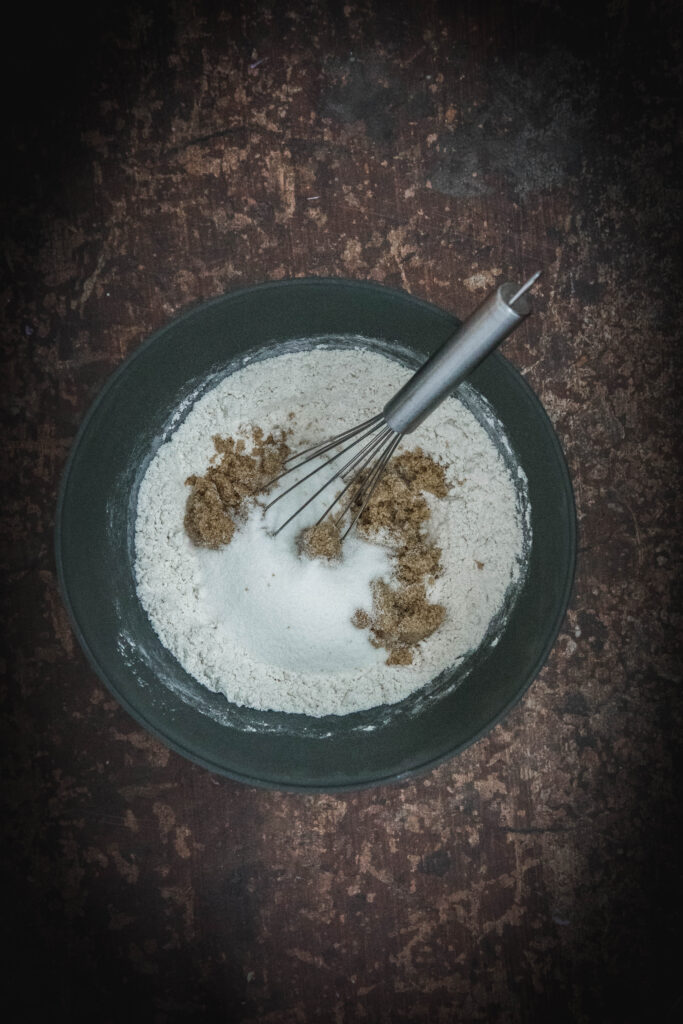
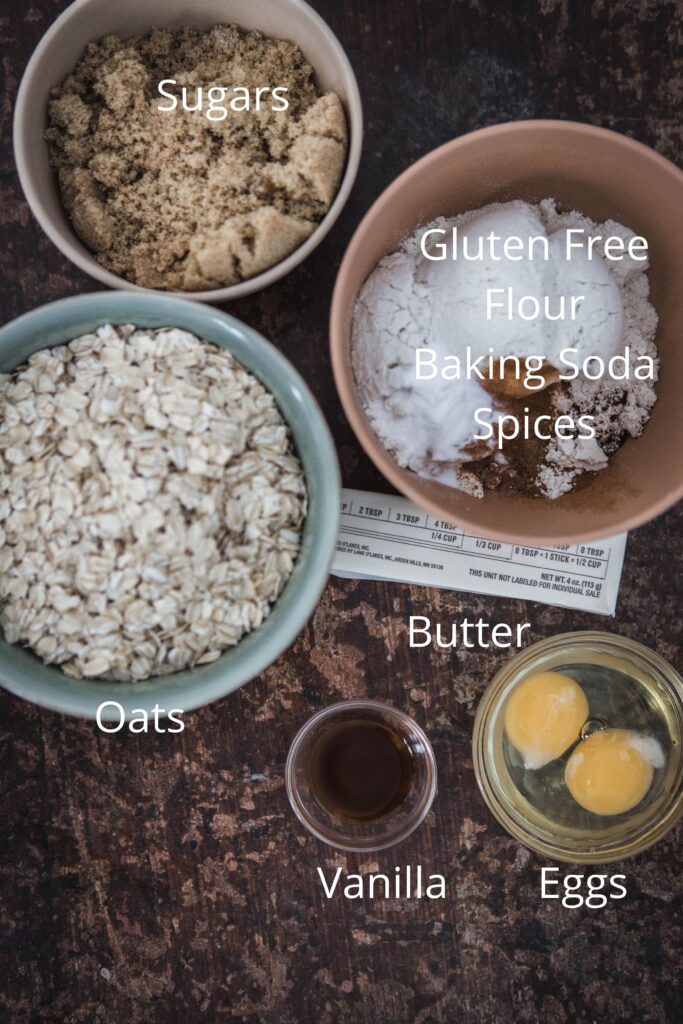
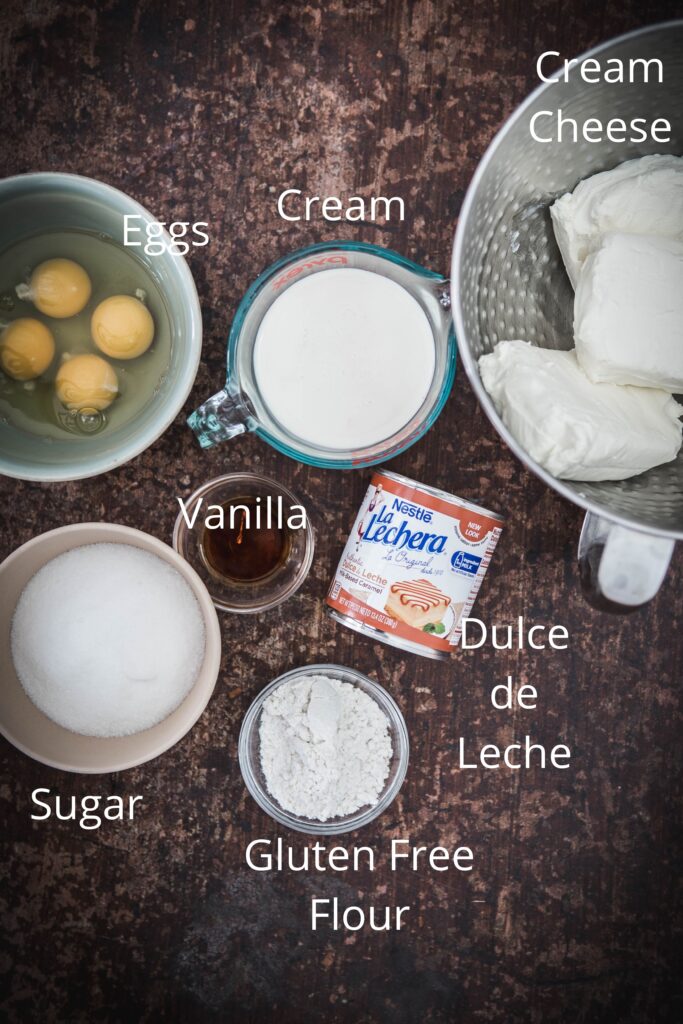
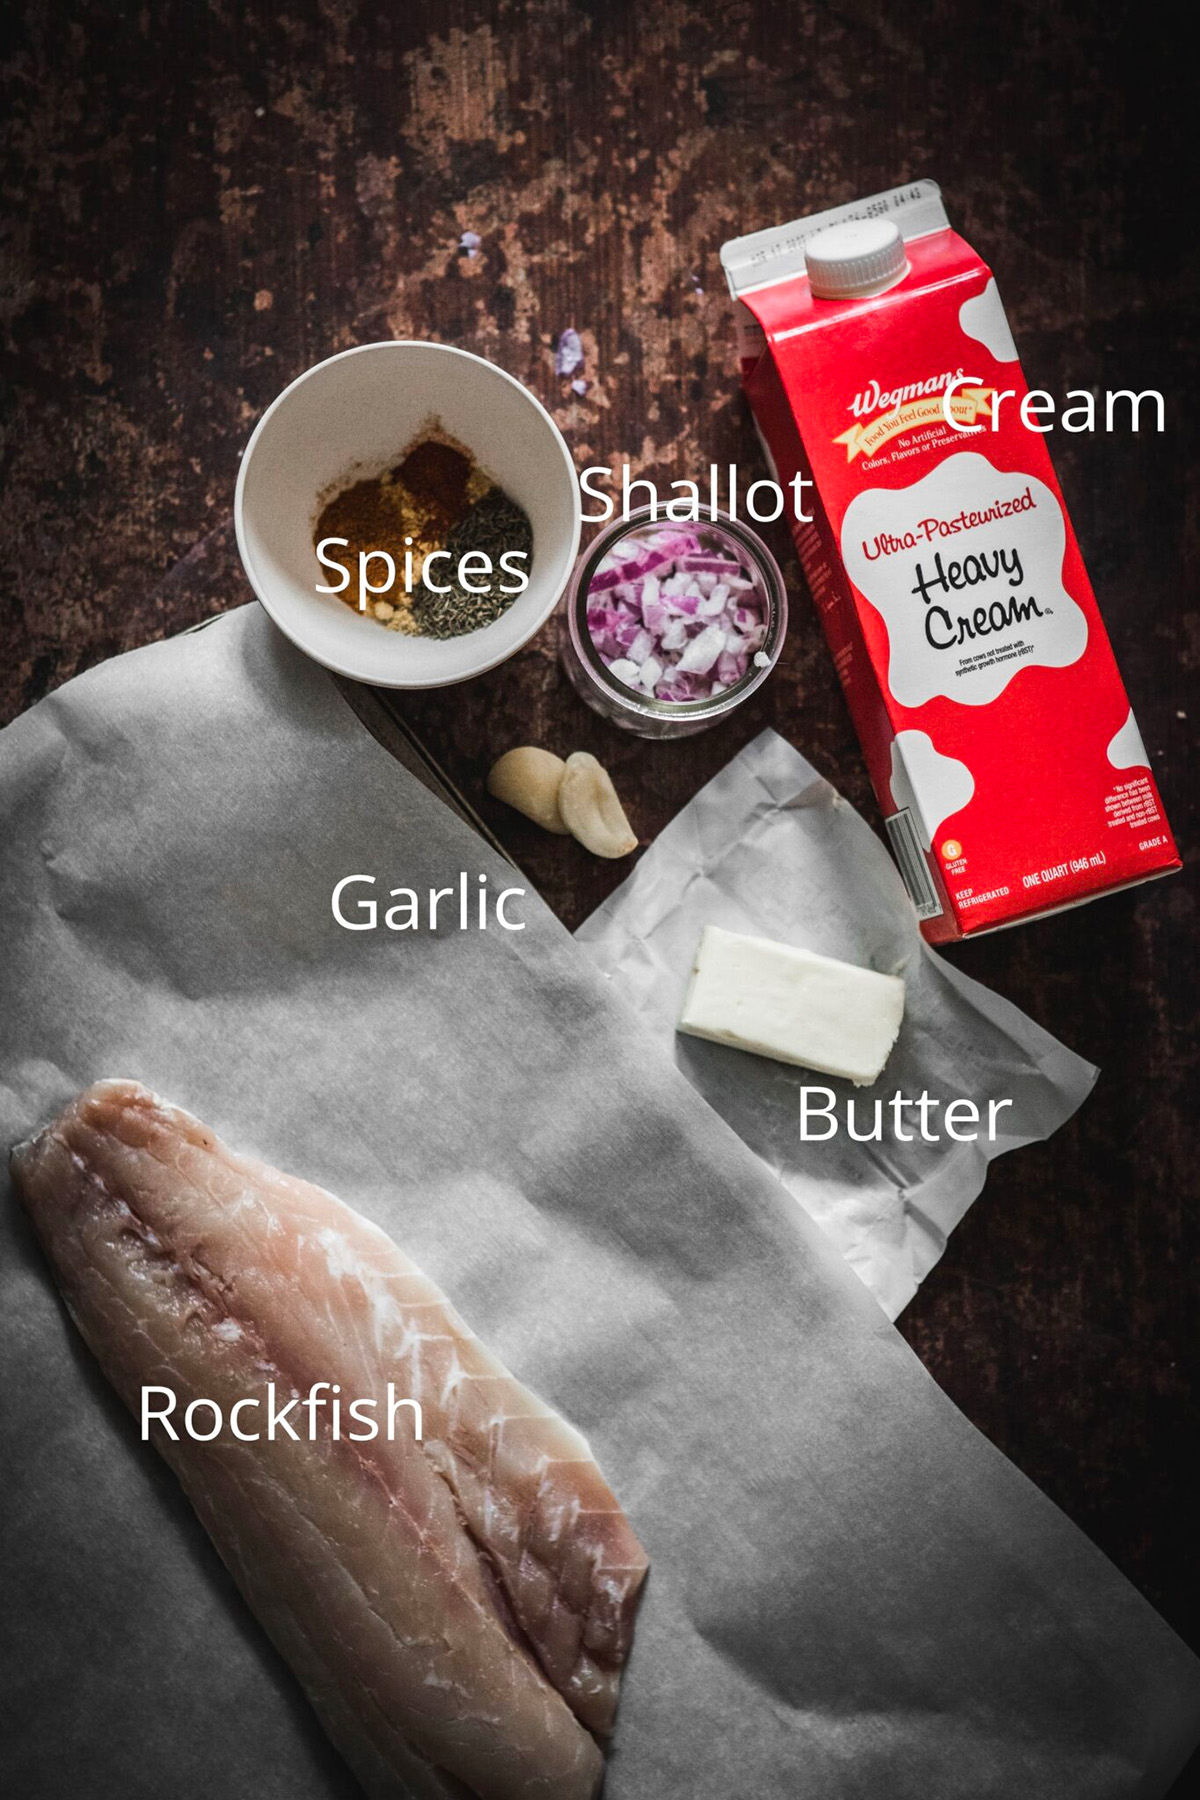
What ingredients do you need for cod au gratin?

Best Cod Au Gratin Recipe: Classic Traditional Recipes

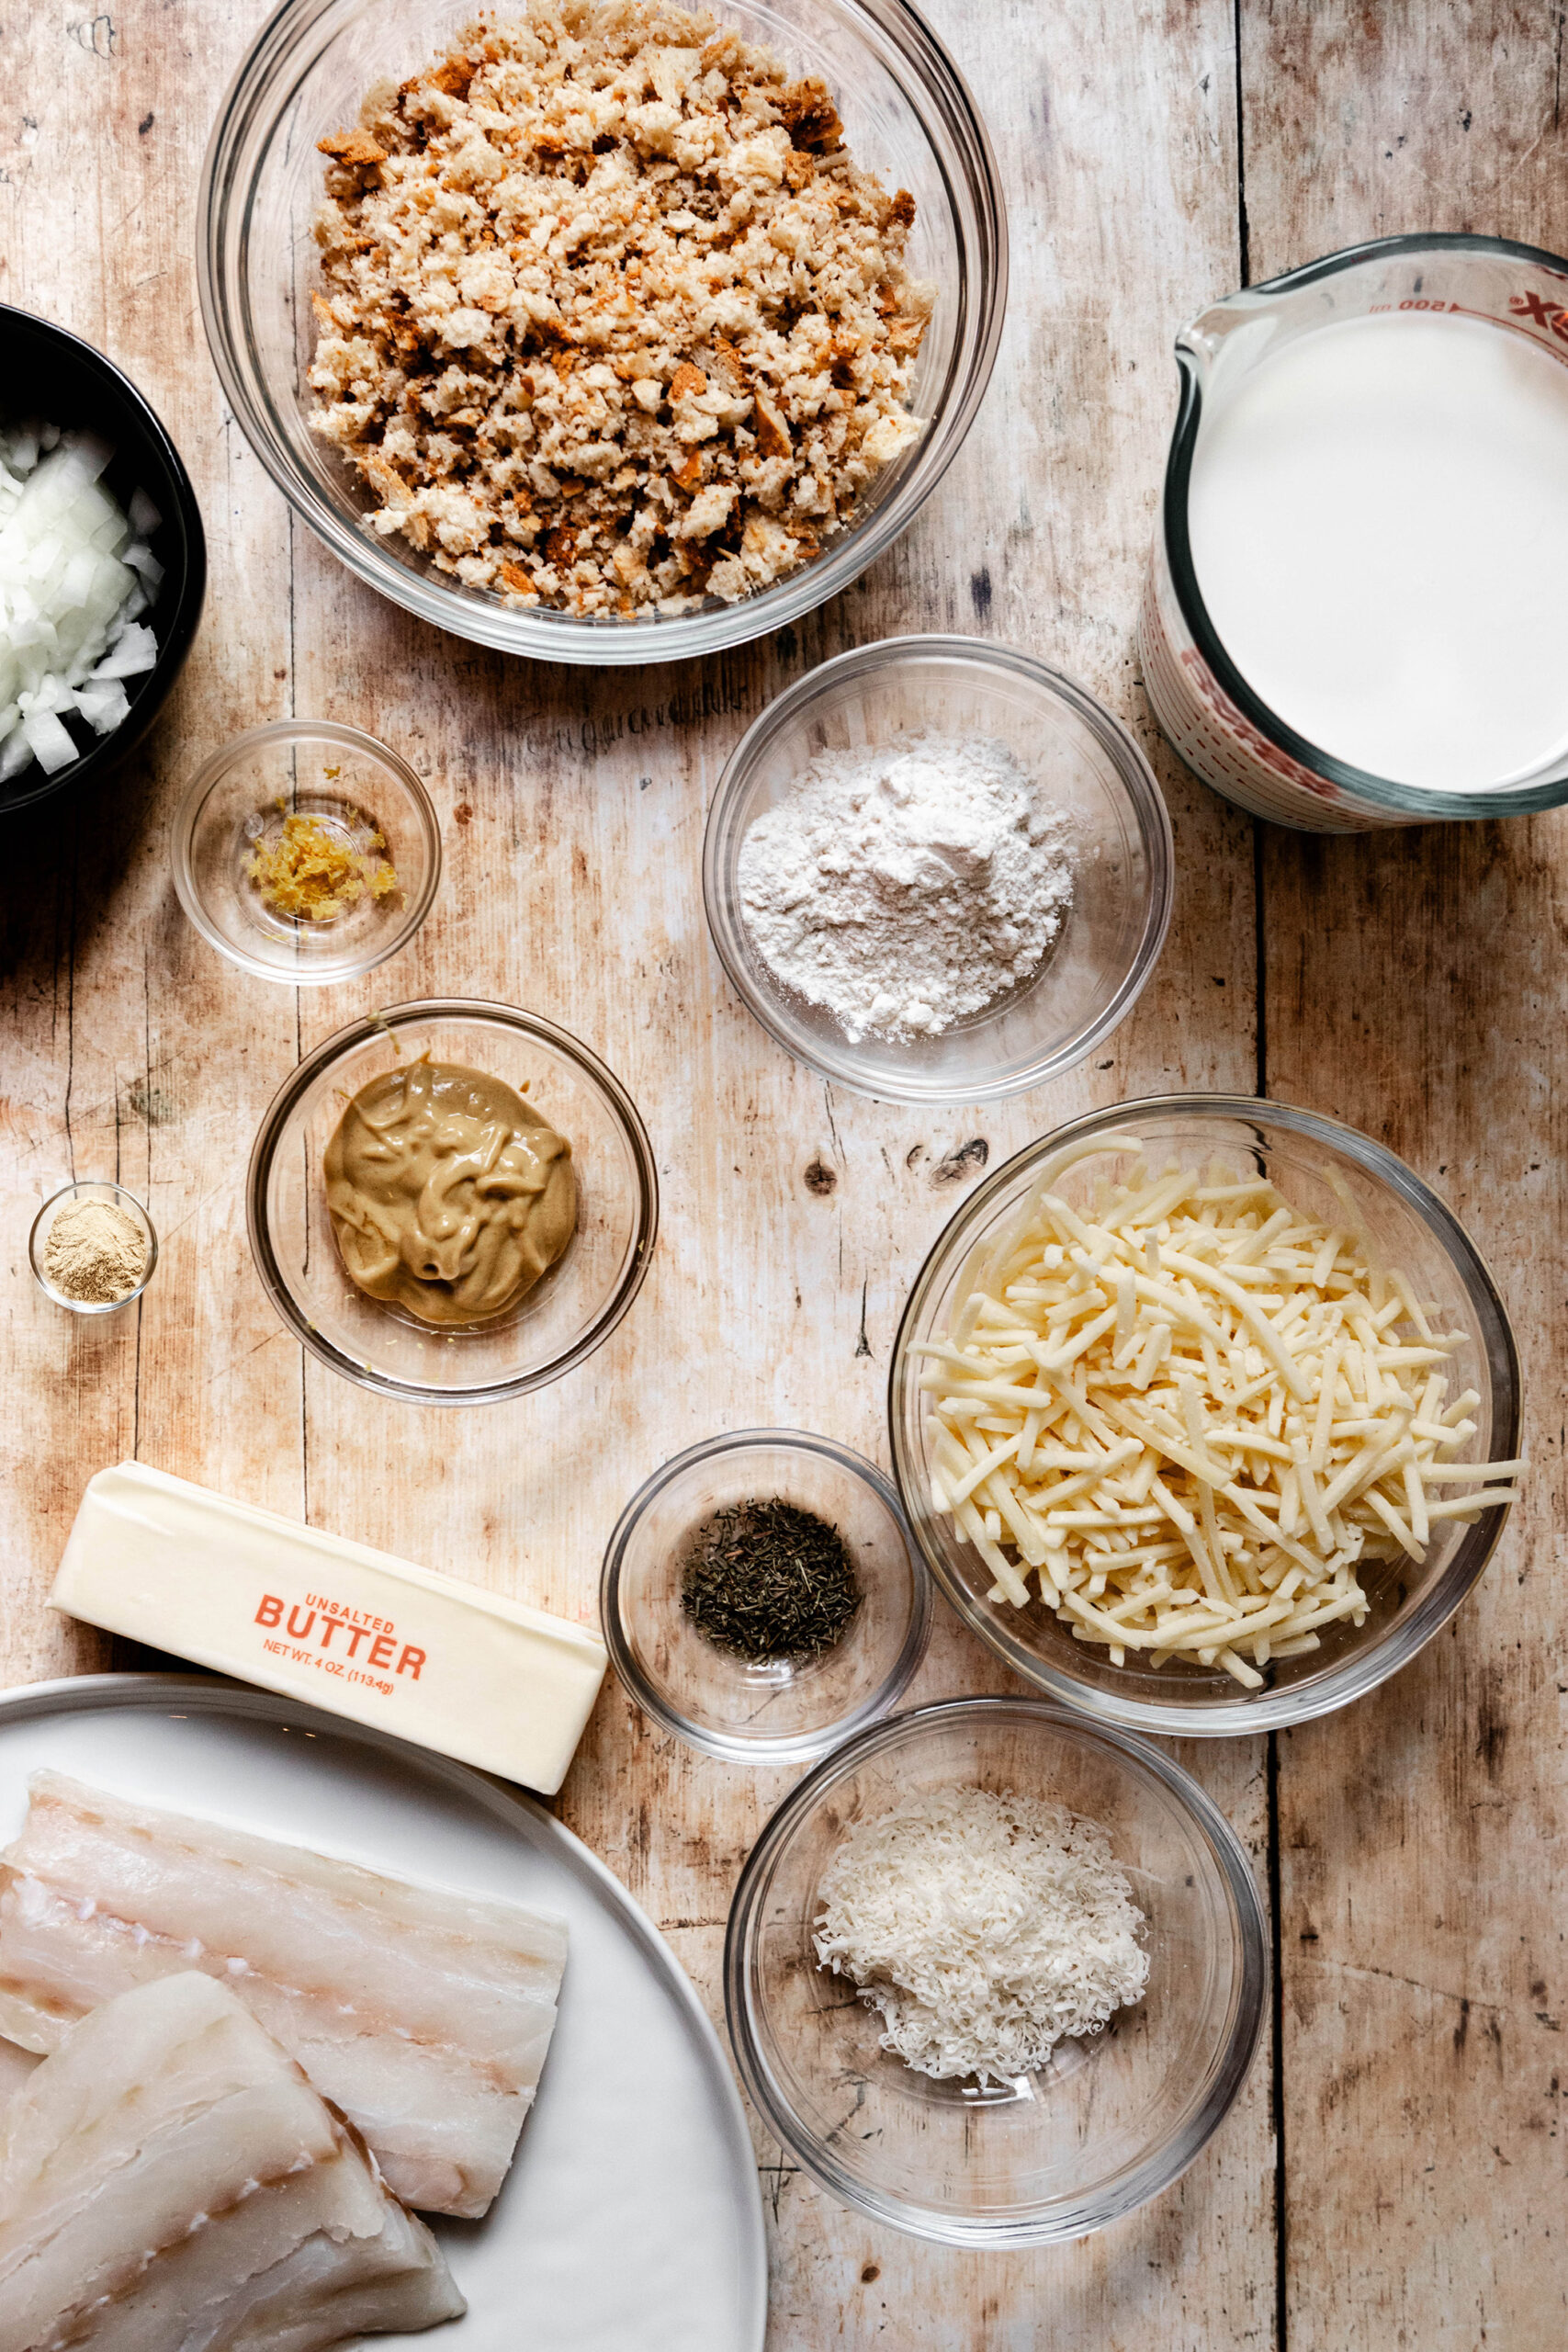
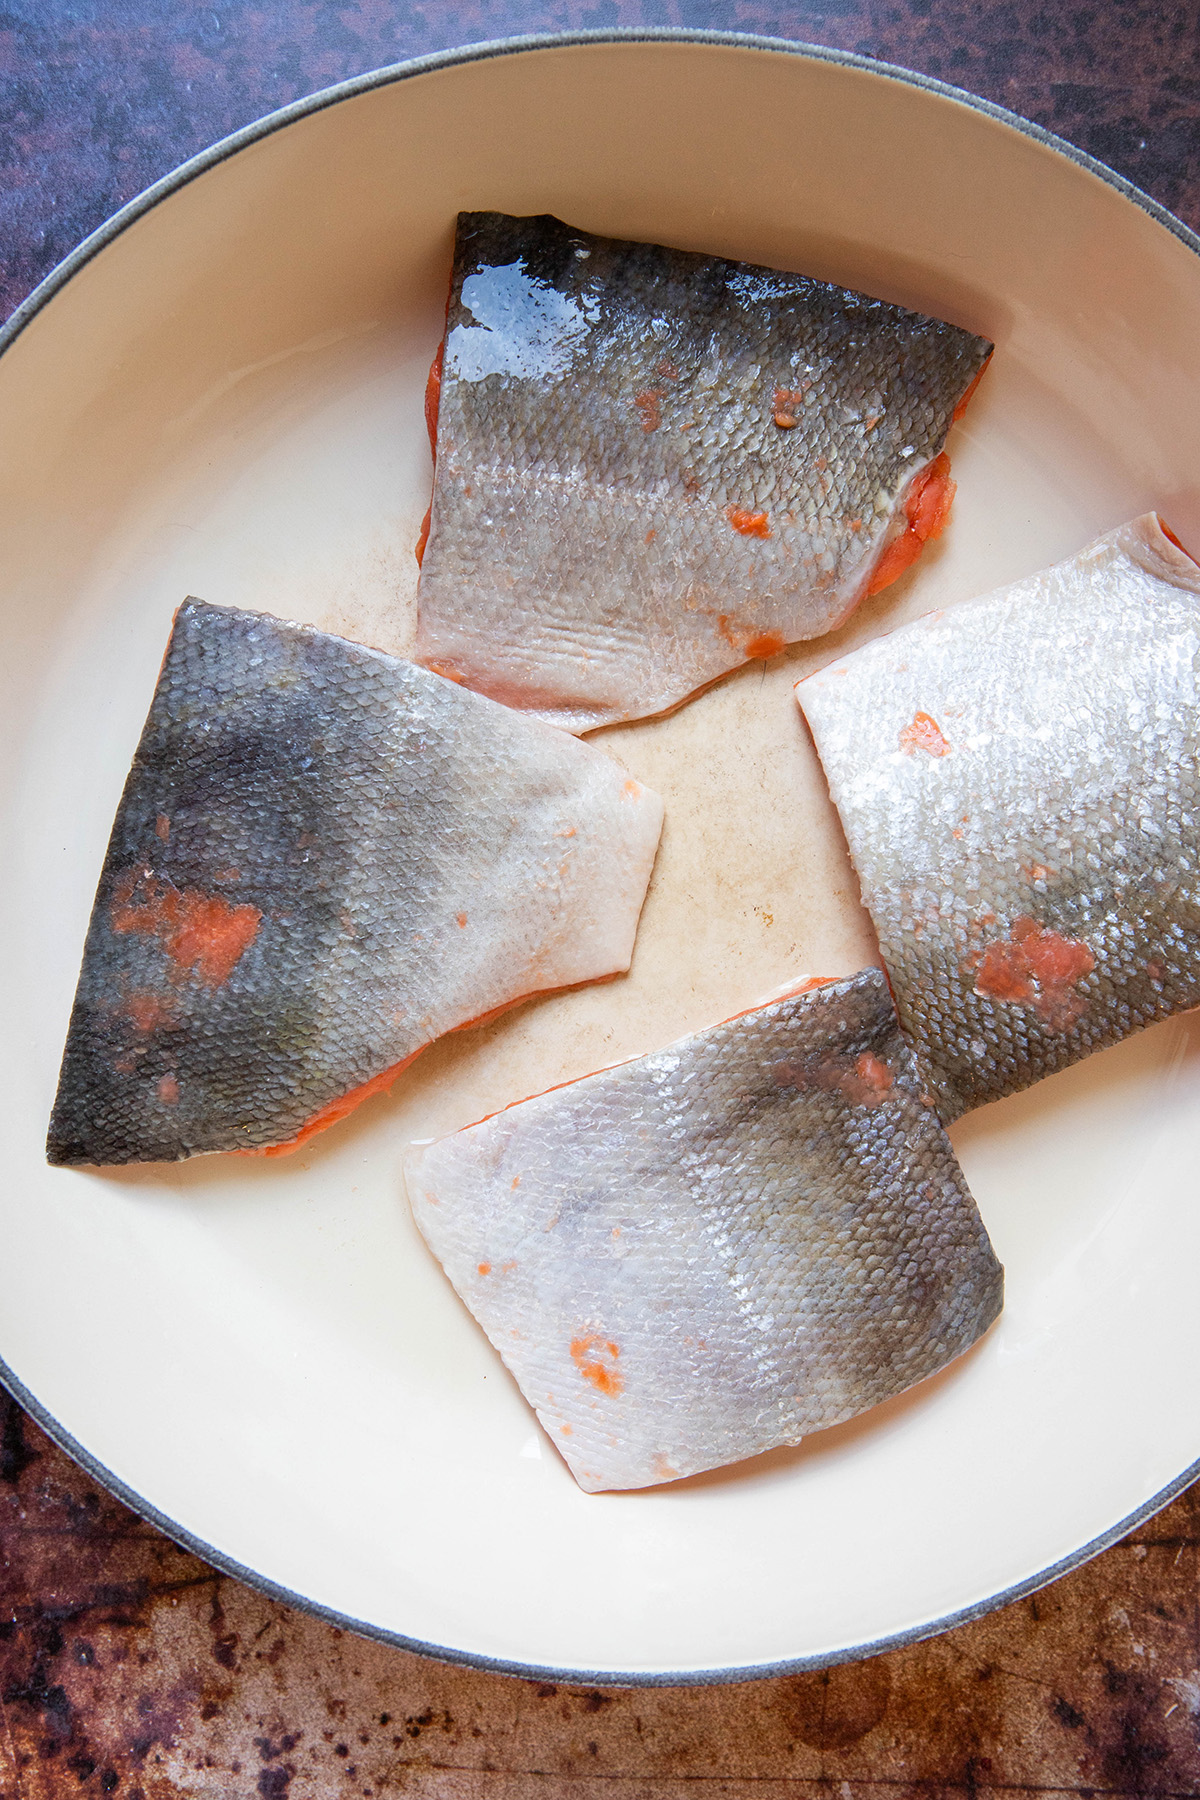
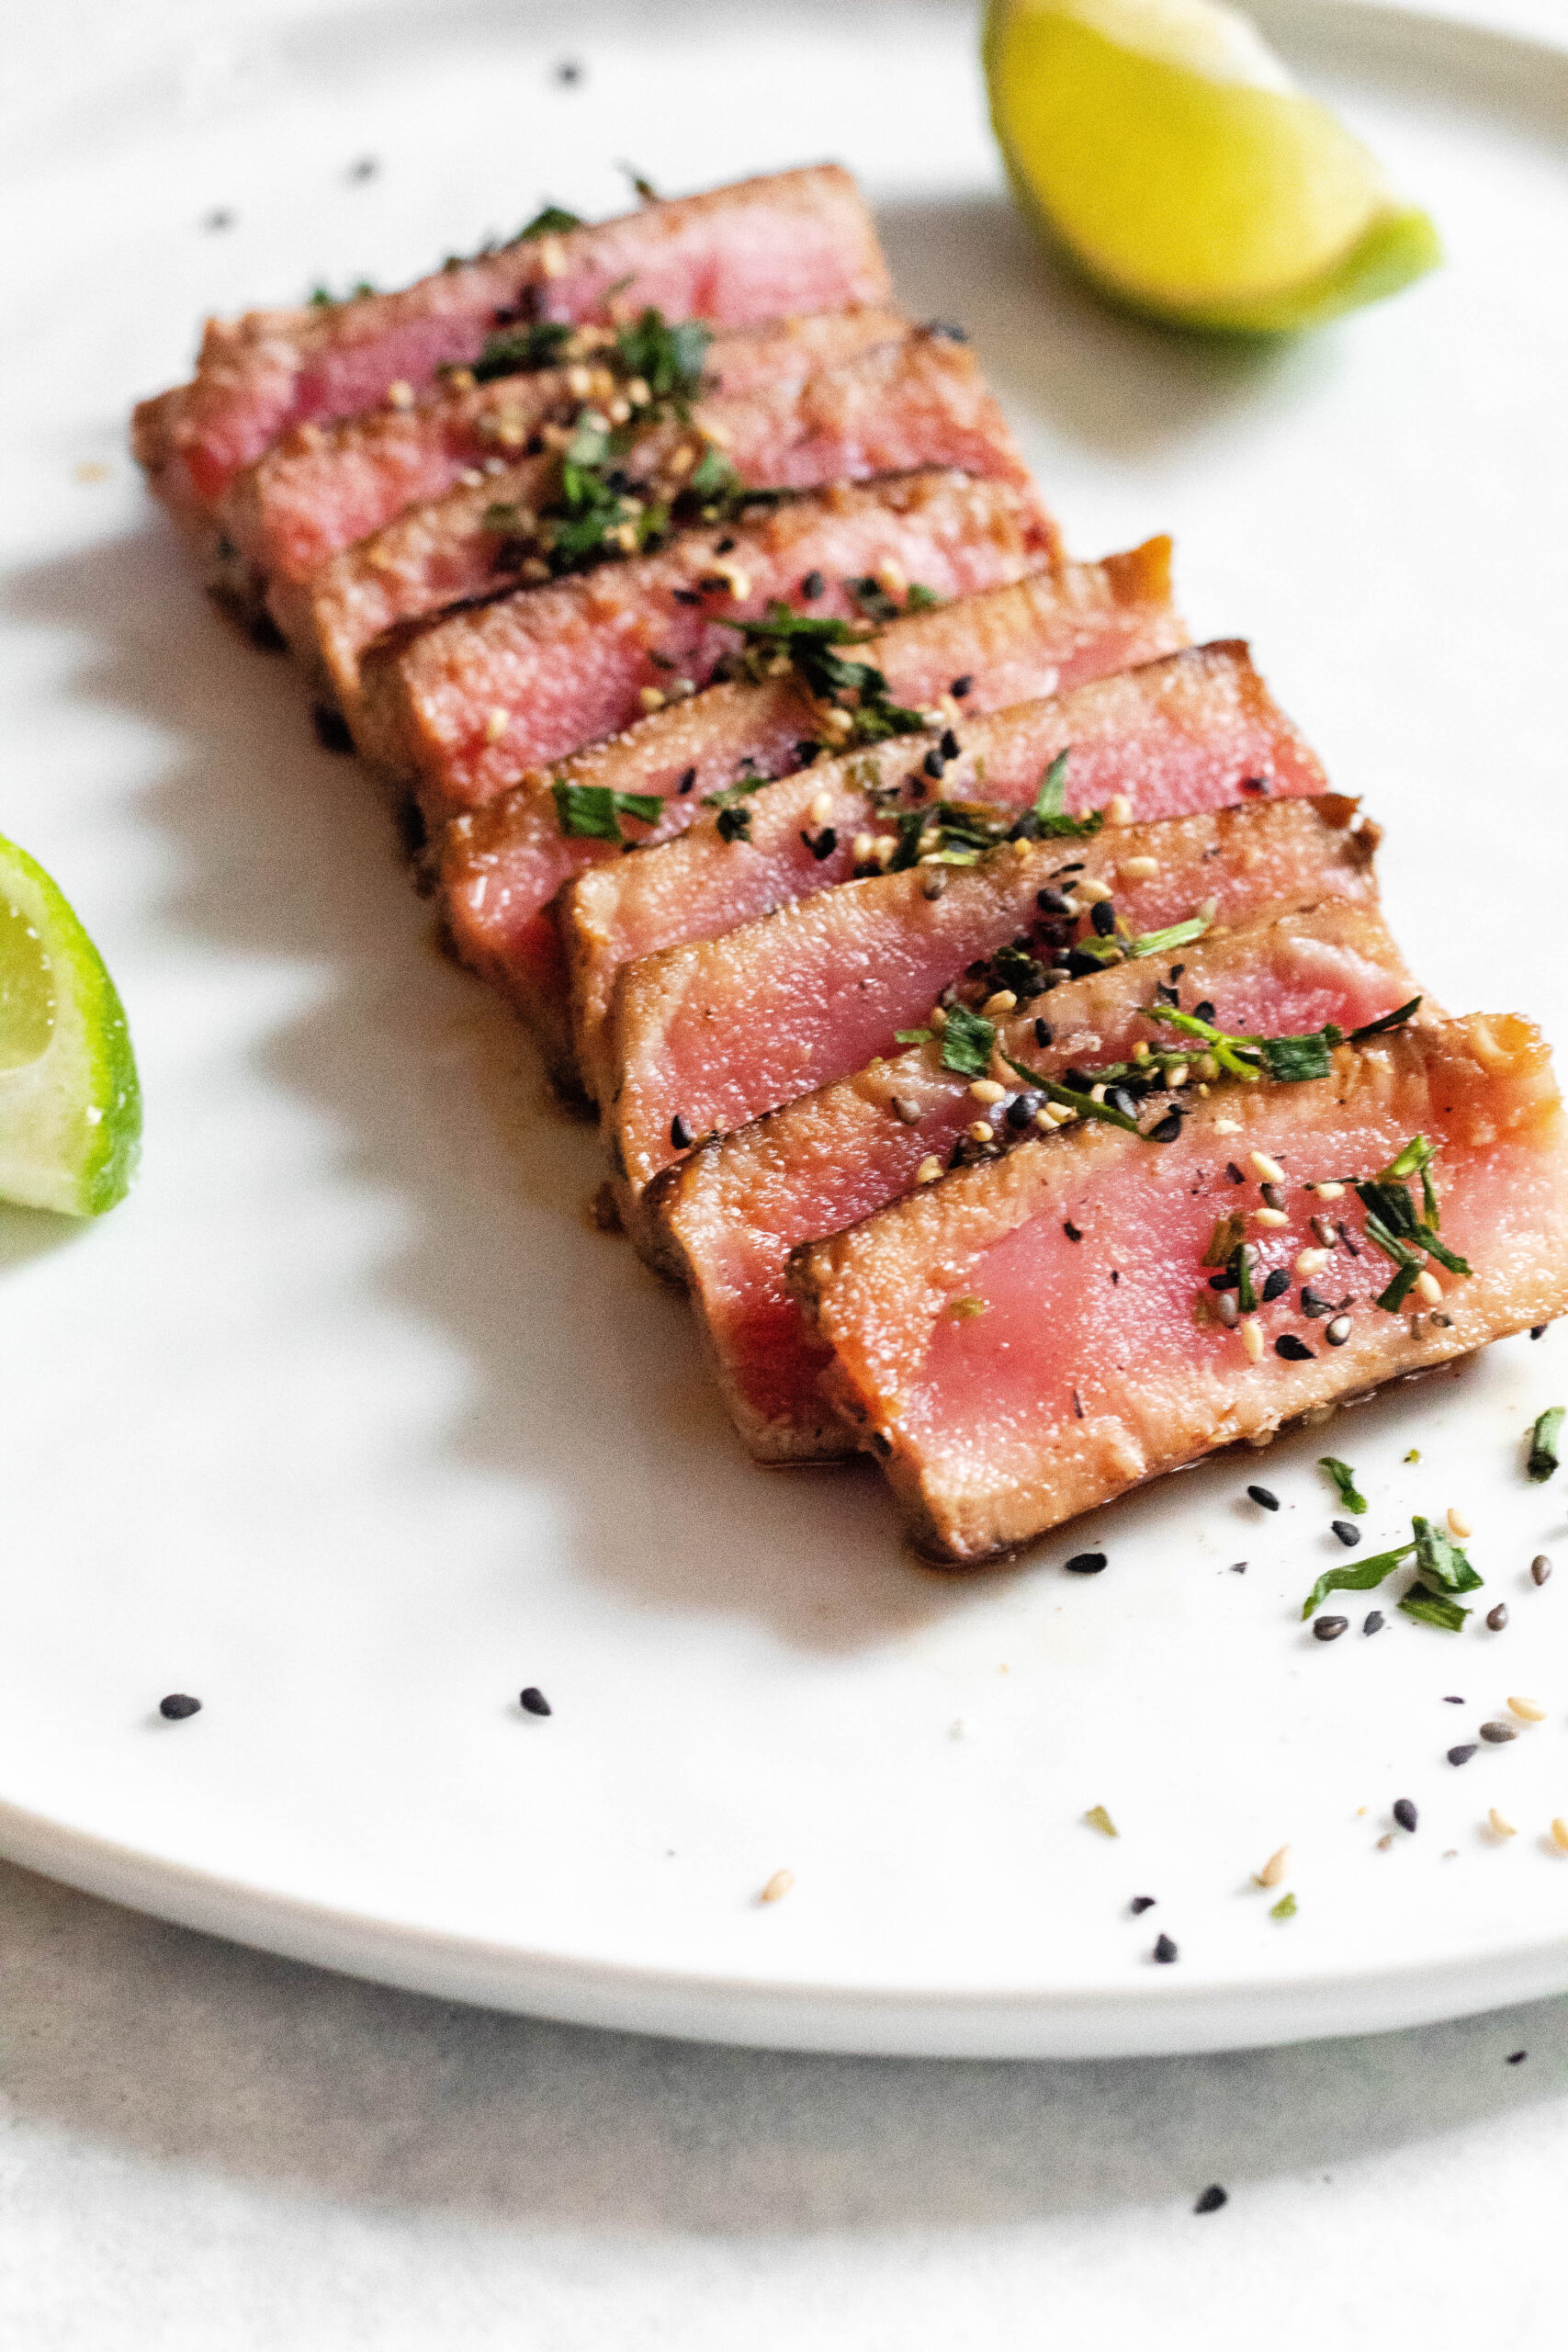
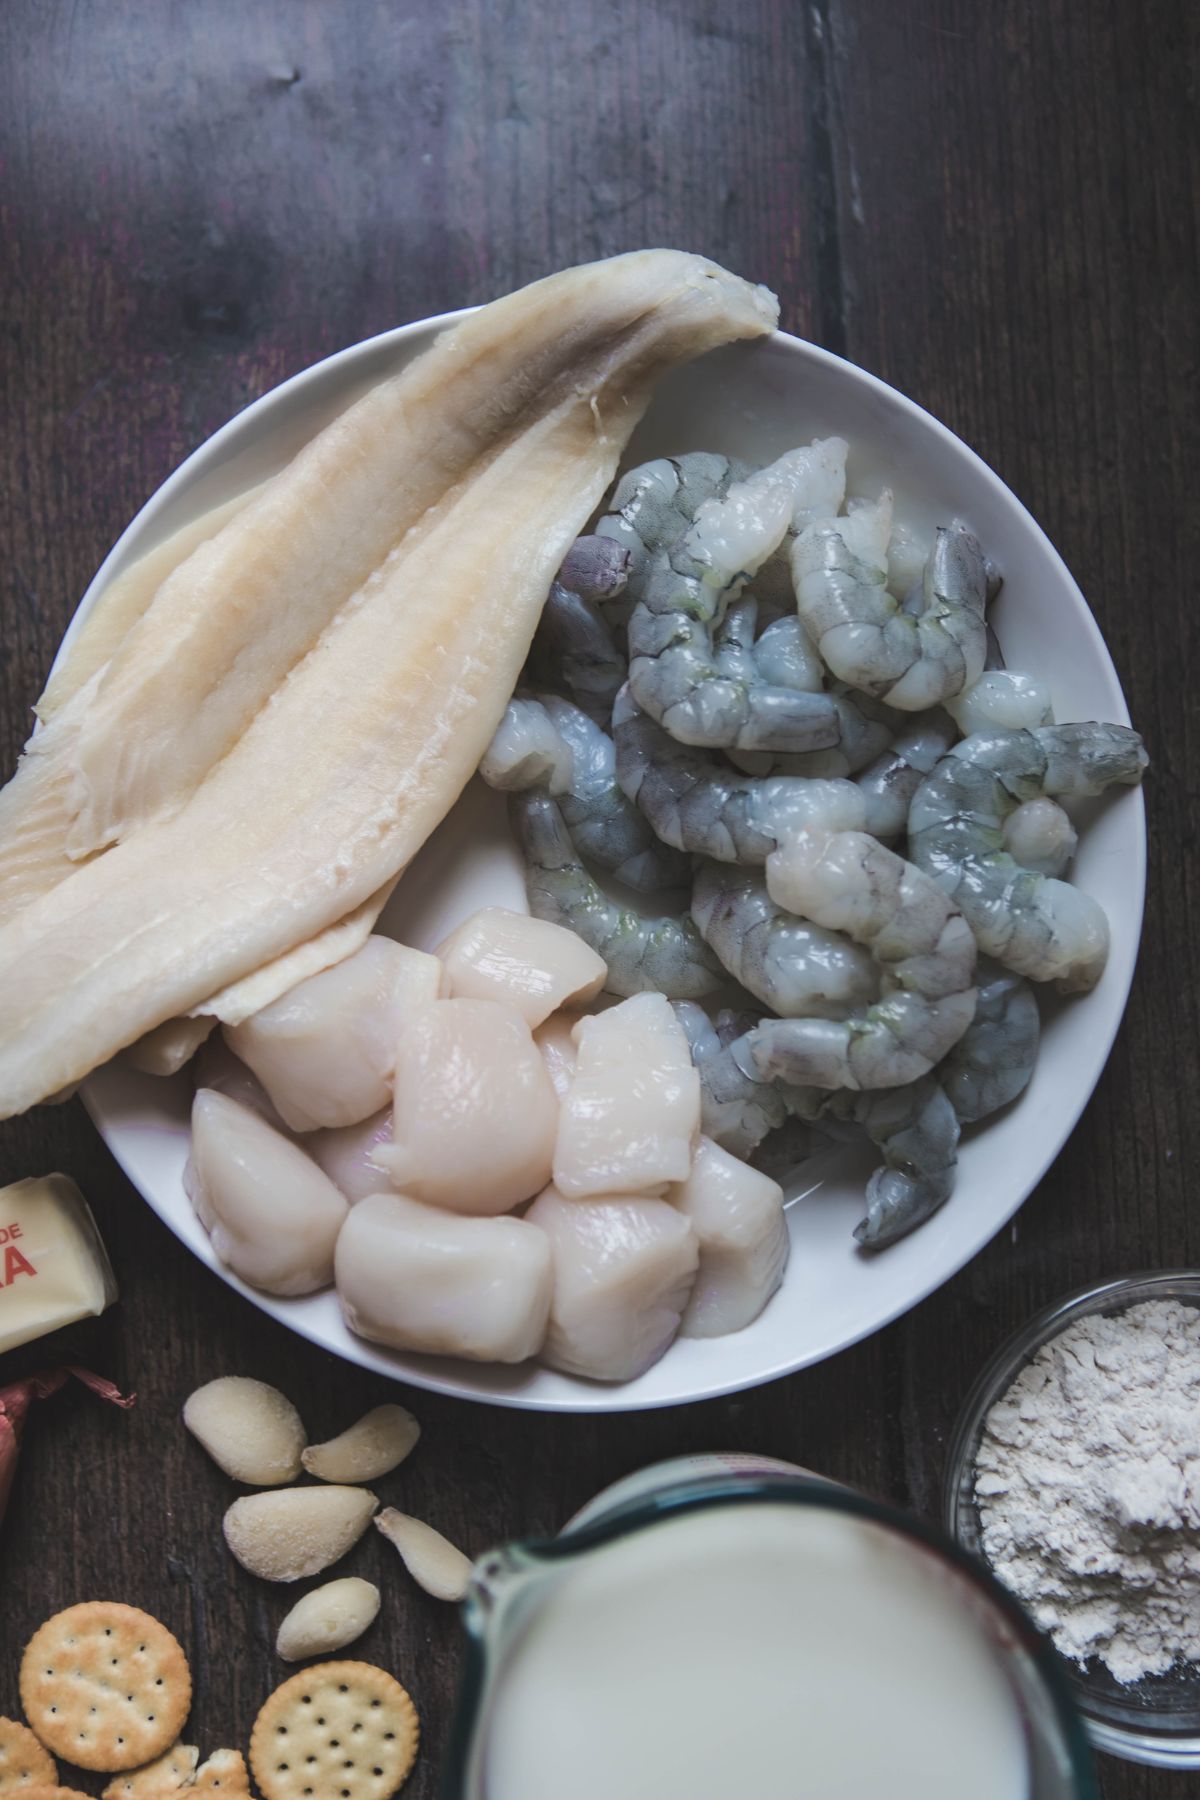
Cod fillets: cod fillets are the perfect fish fillets for this hearty meal
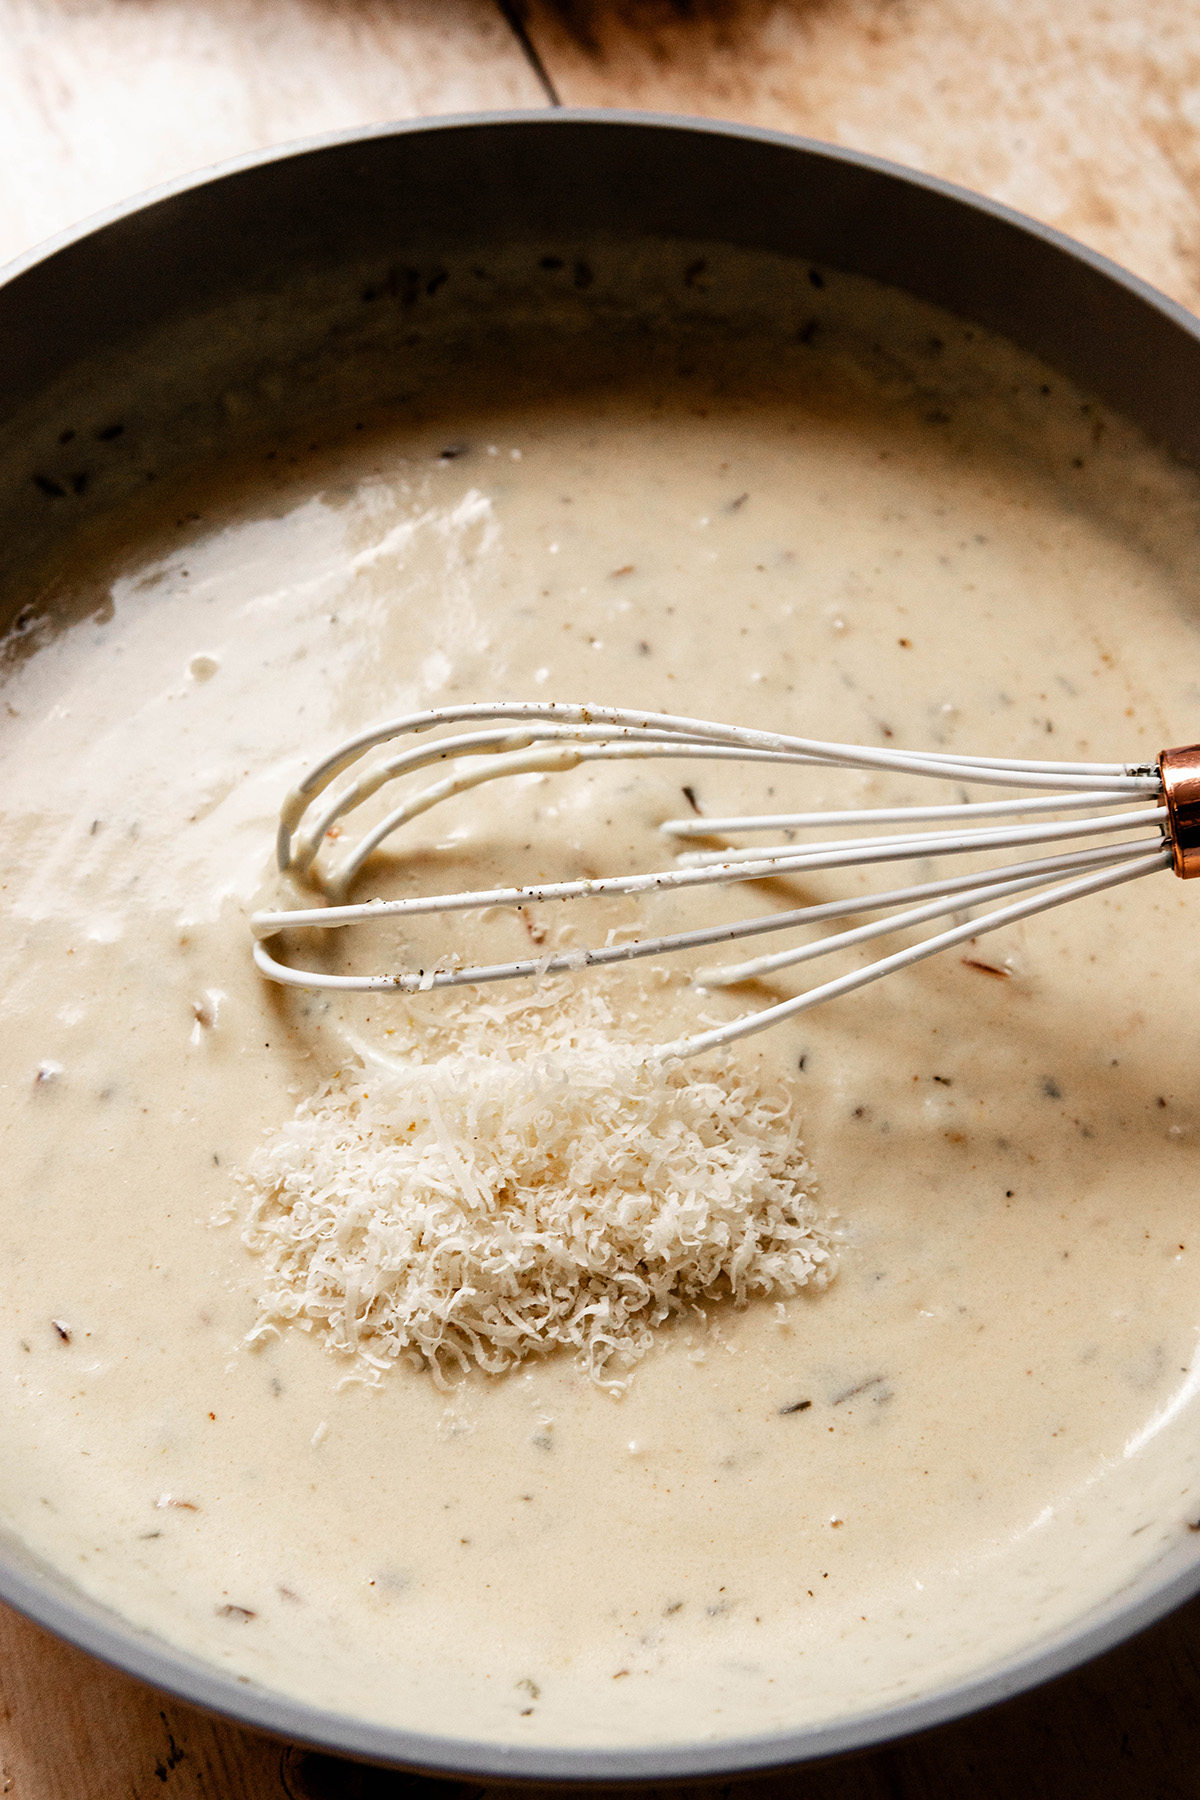
Parmesan cheese: Parmesan adds such a good umami flavor to the dish
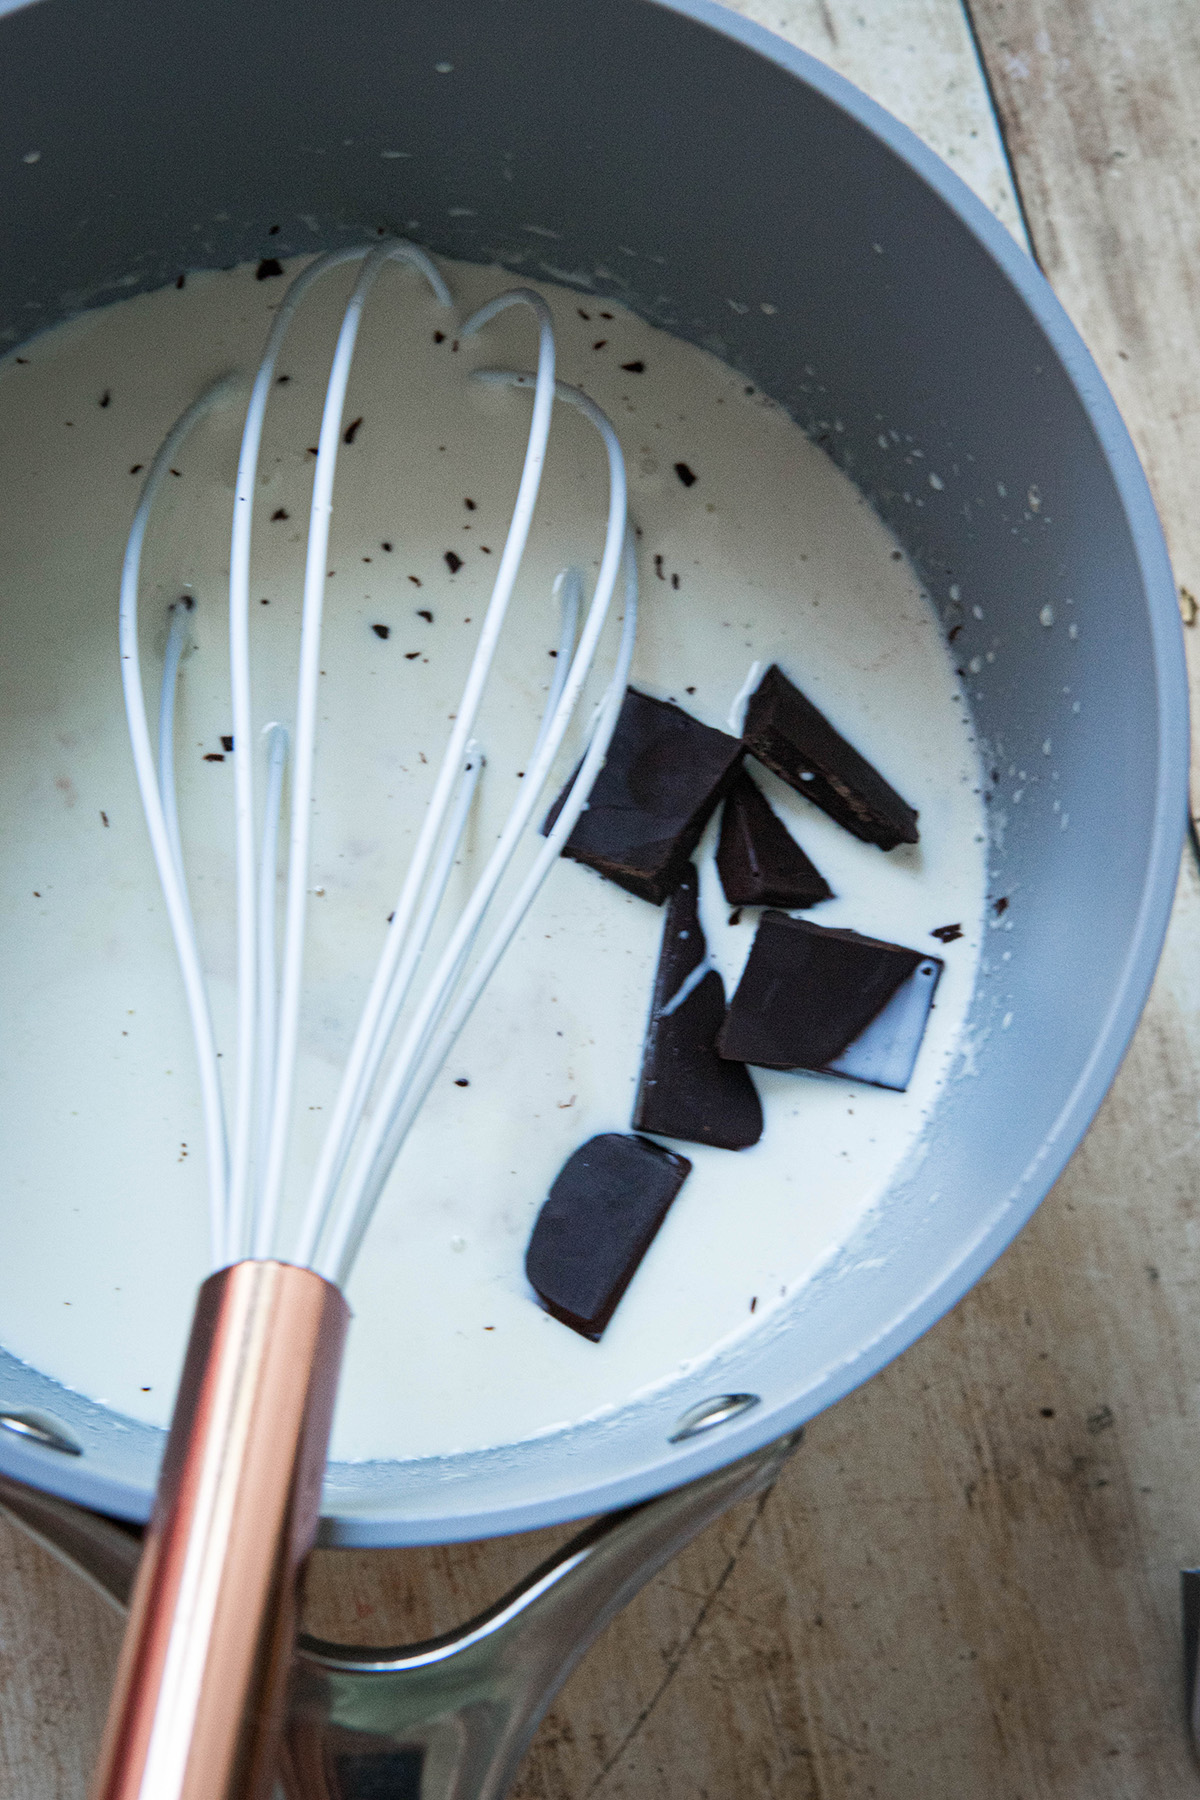
Cheese: the traditional recipe from the maritime provinces uses cheddar cheese, I like to use gruyere 
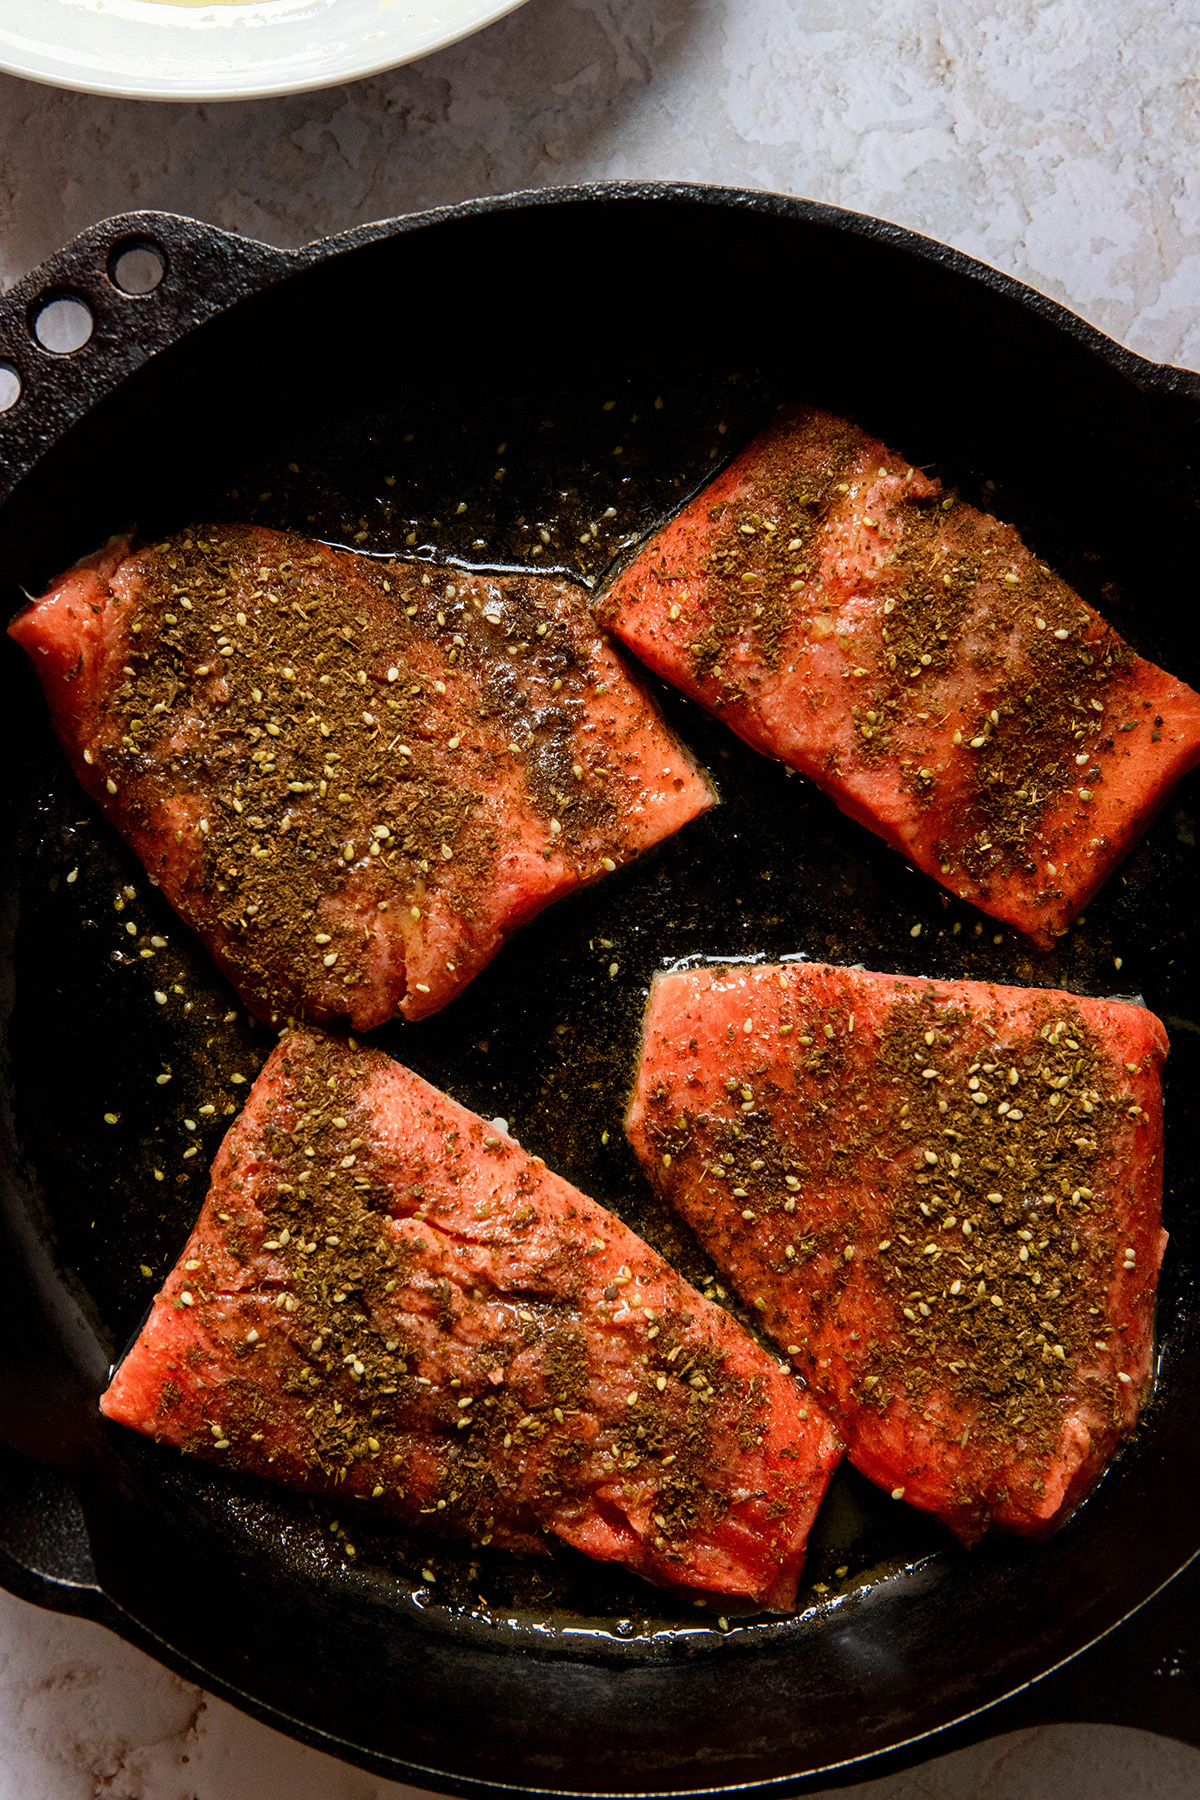
Spices: salt, black pepper, garlic powder, thyme, these all help to flavor our sauce and dish
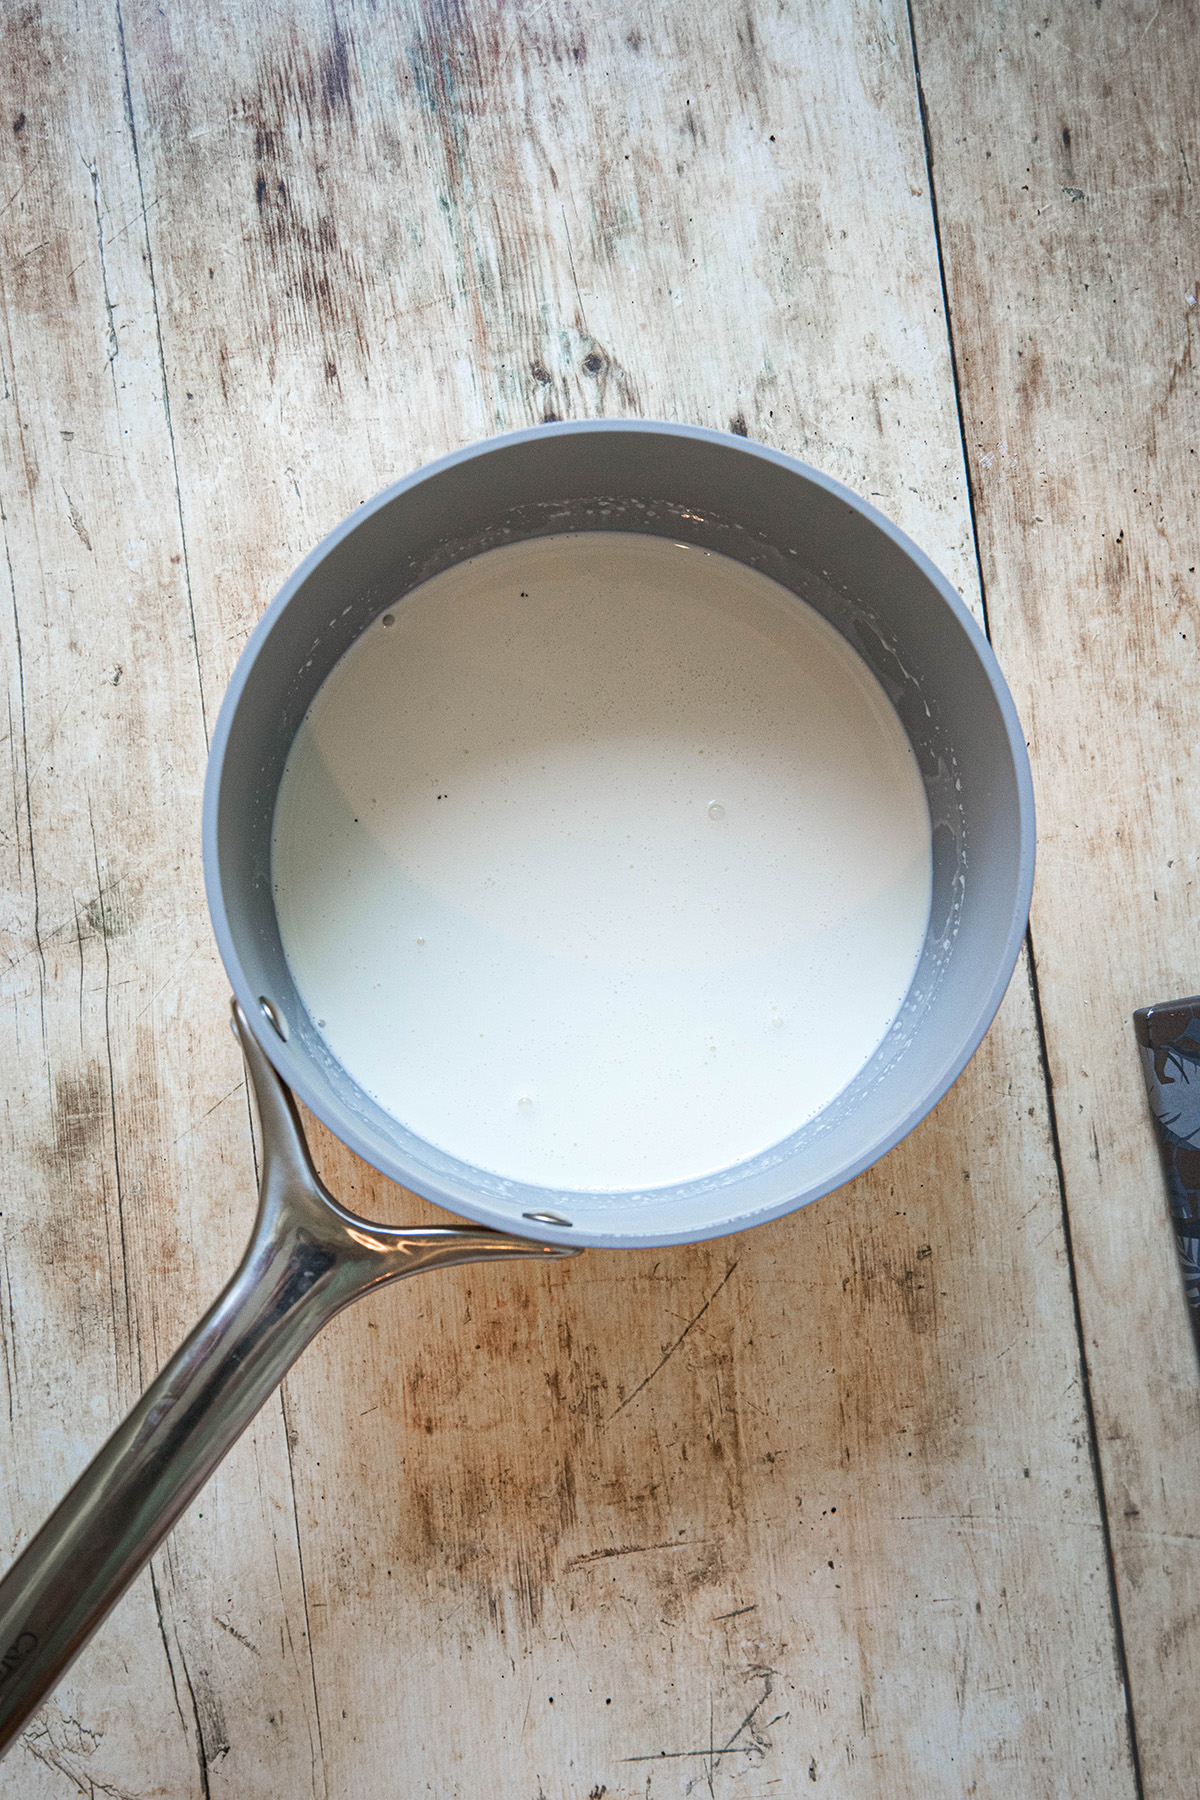
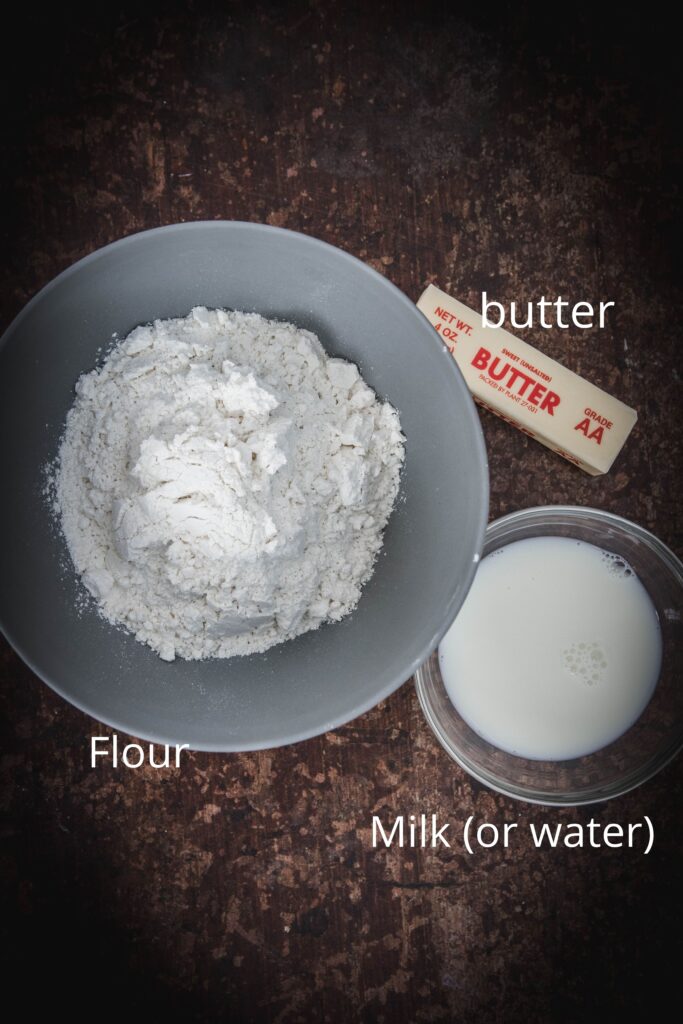
Milk: Milk is the base of our cream sauce. I use only 2% but it is still very rich and creamy. 
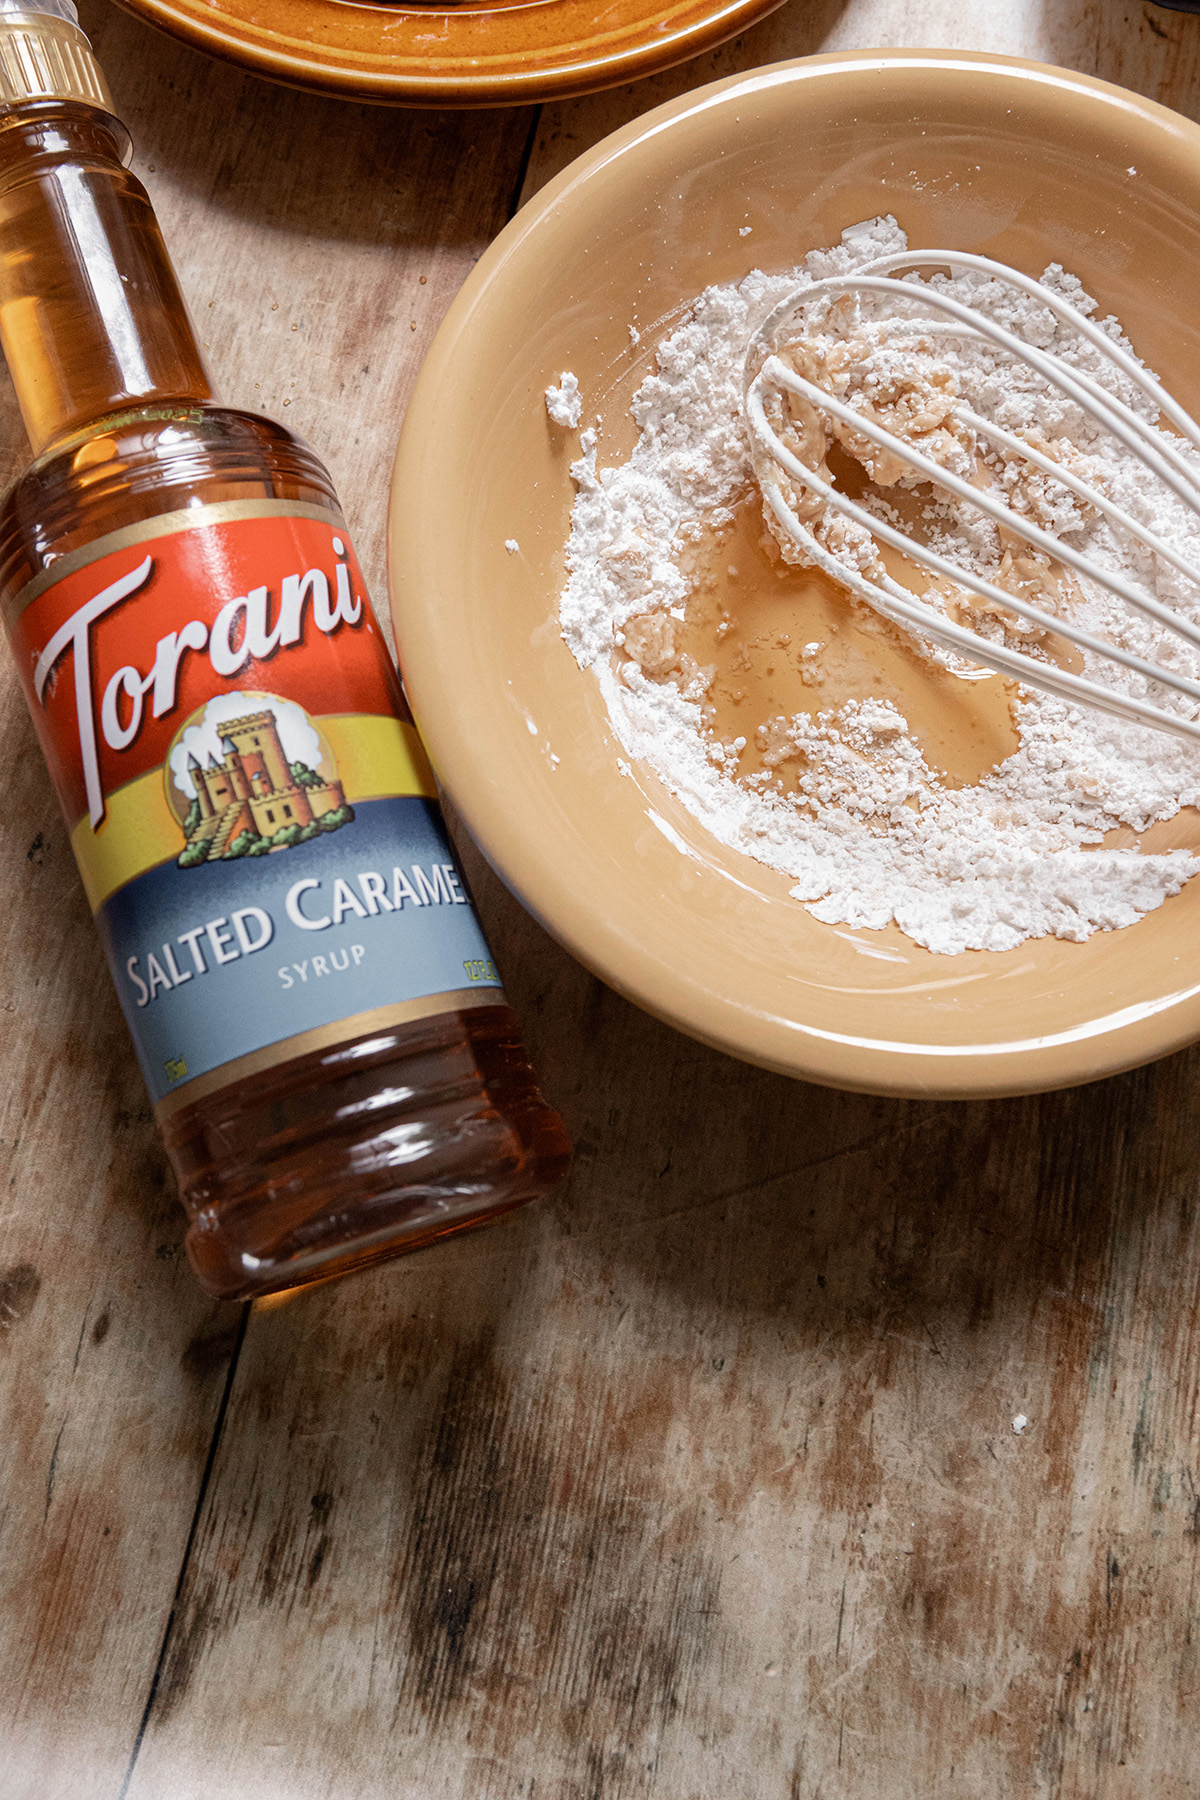
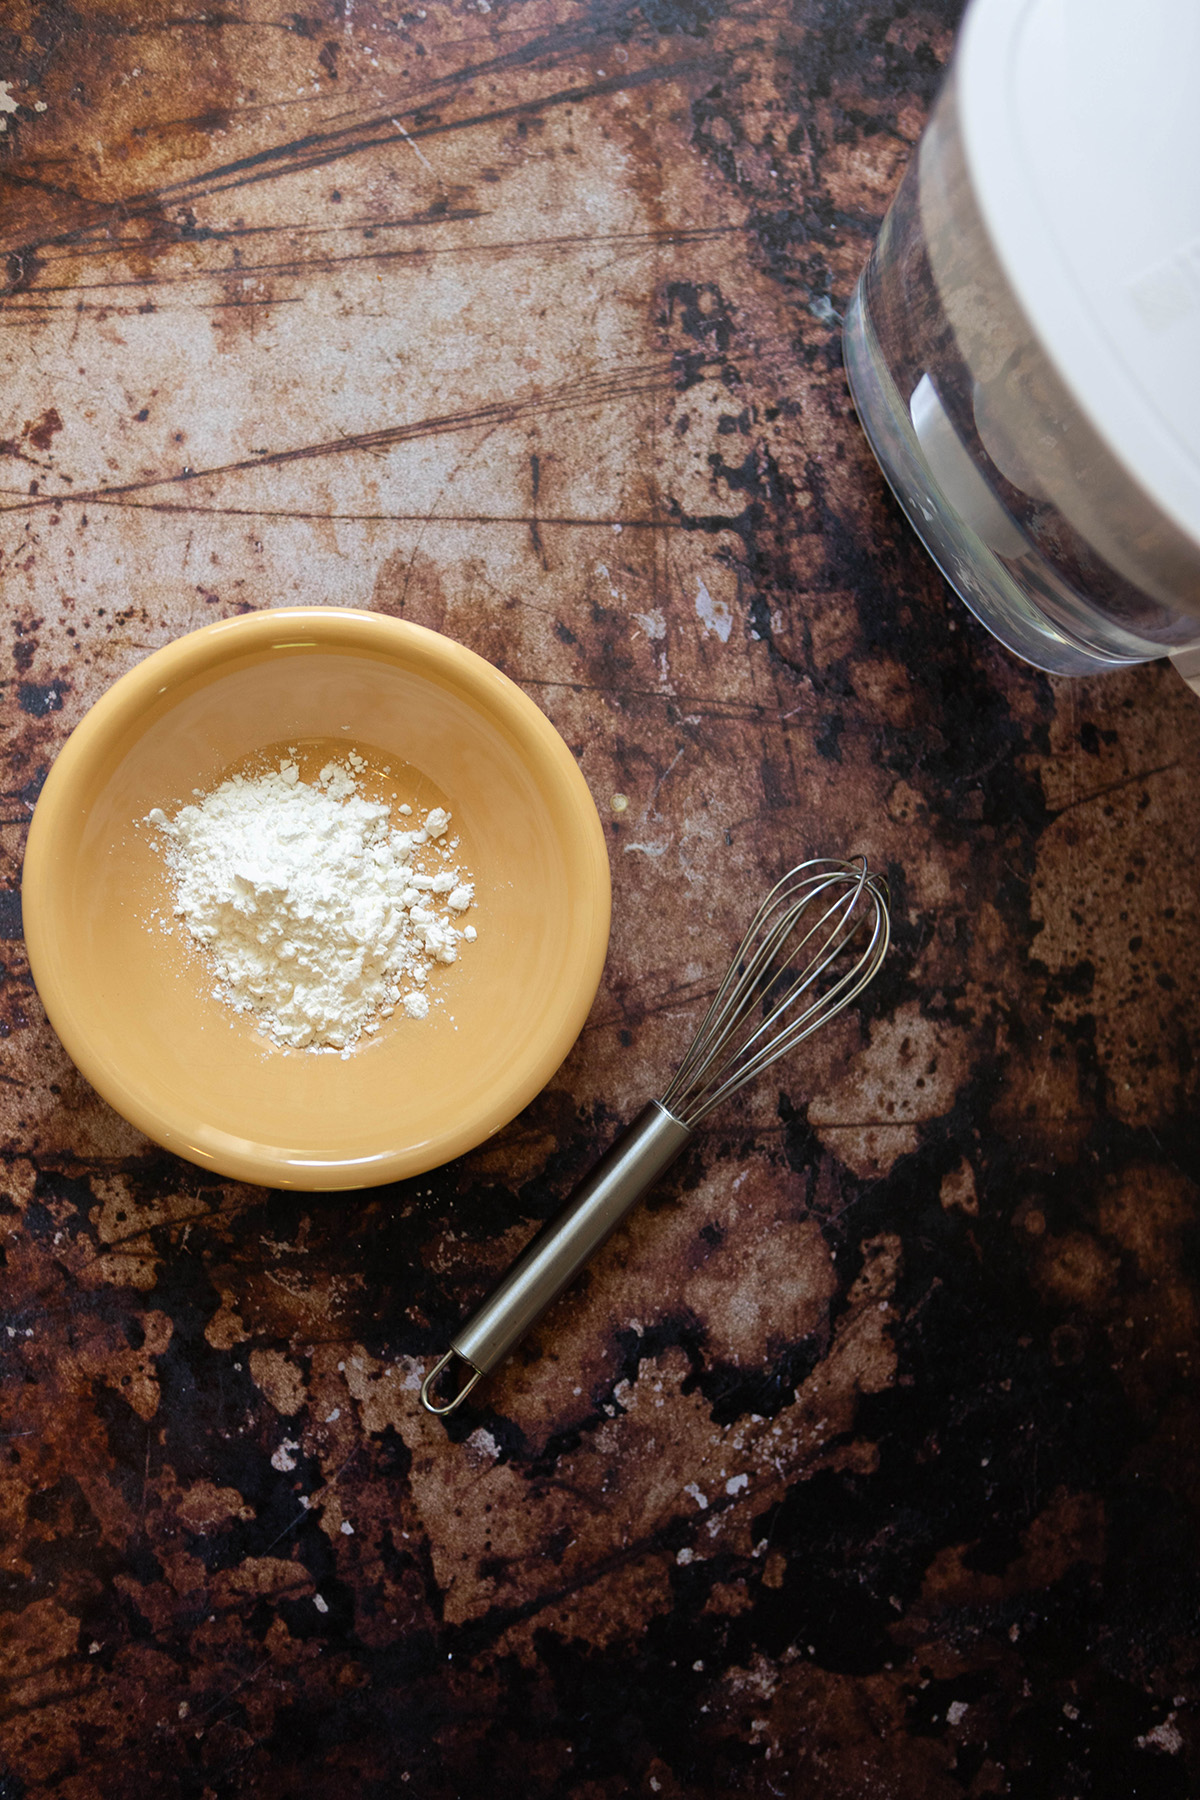
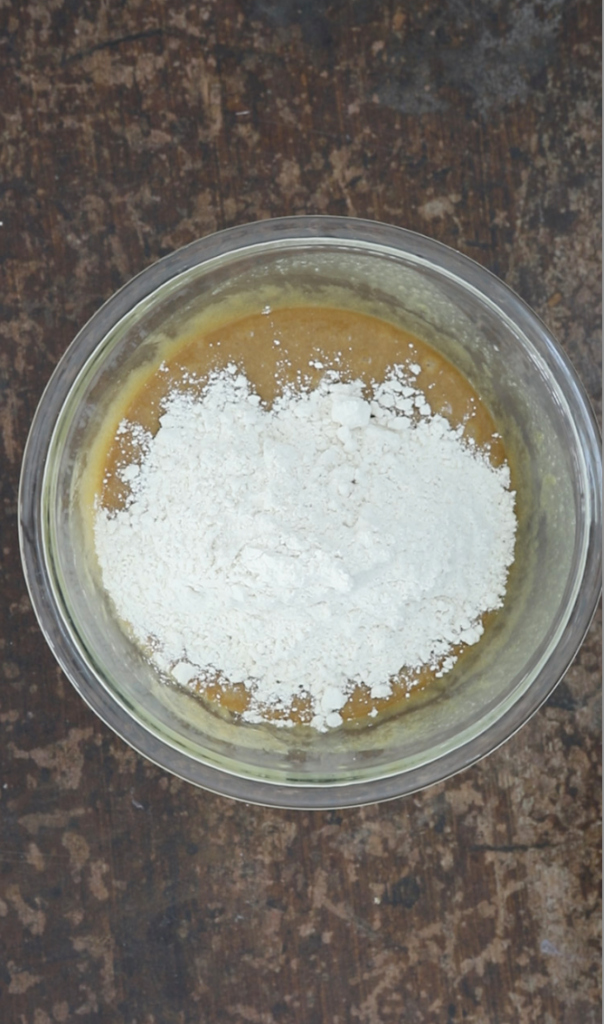
Gluten Free Flour: Flour is the thickening agent for this dish. I use gluten free flour and use King Arthur Measure for Measure but this is a 1:1 recipe so if you do not need to eat gluten free, regular white flour is fine
Dijon Mustard: Dijon pairs really nicely with seafood and just amps up the flavor
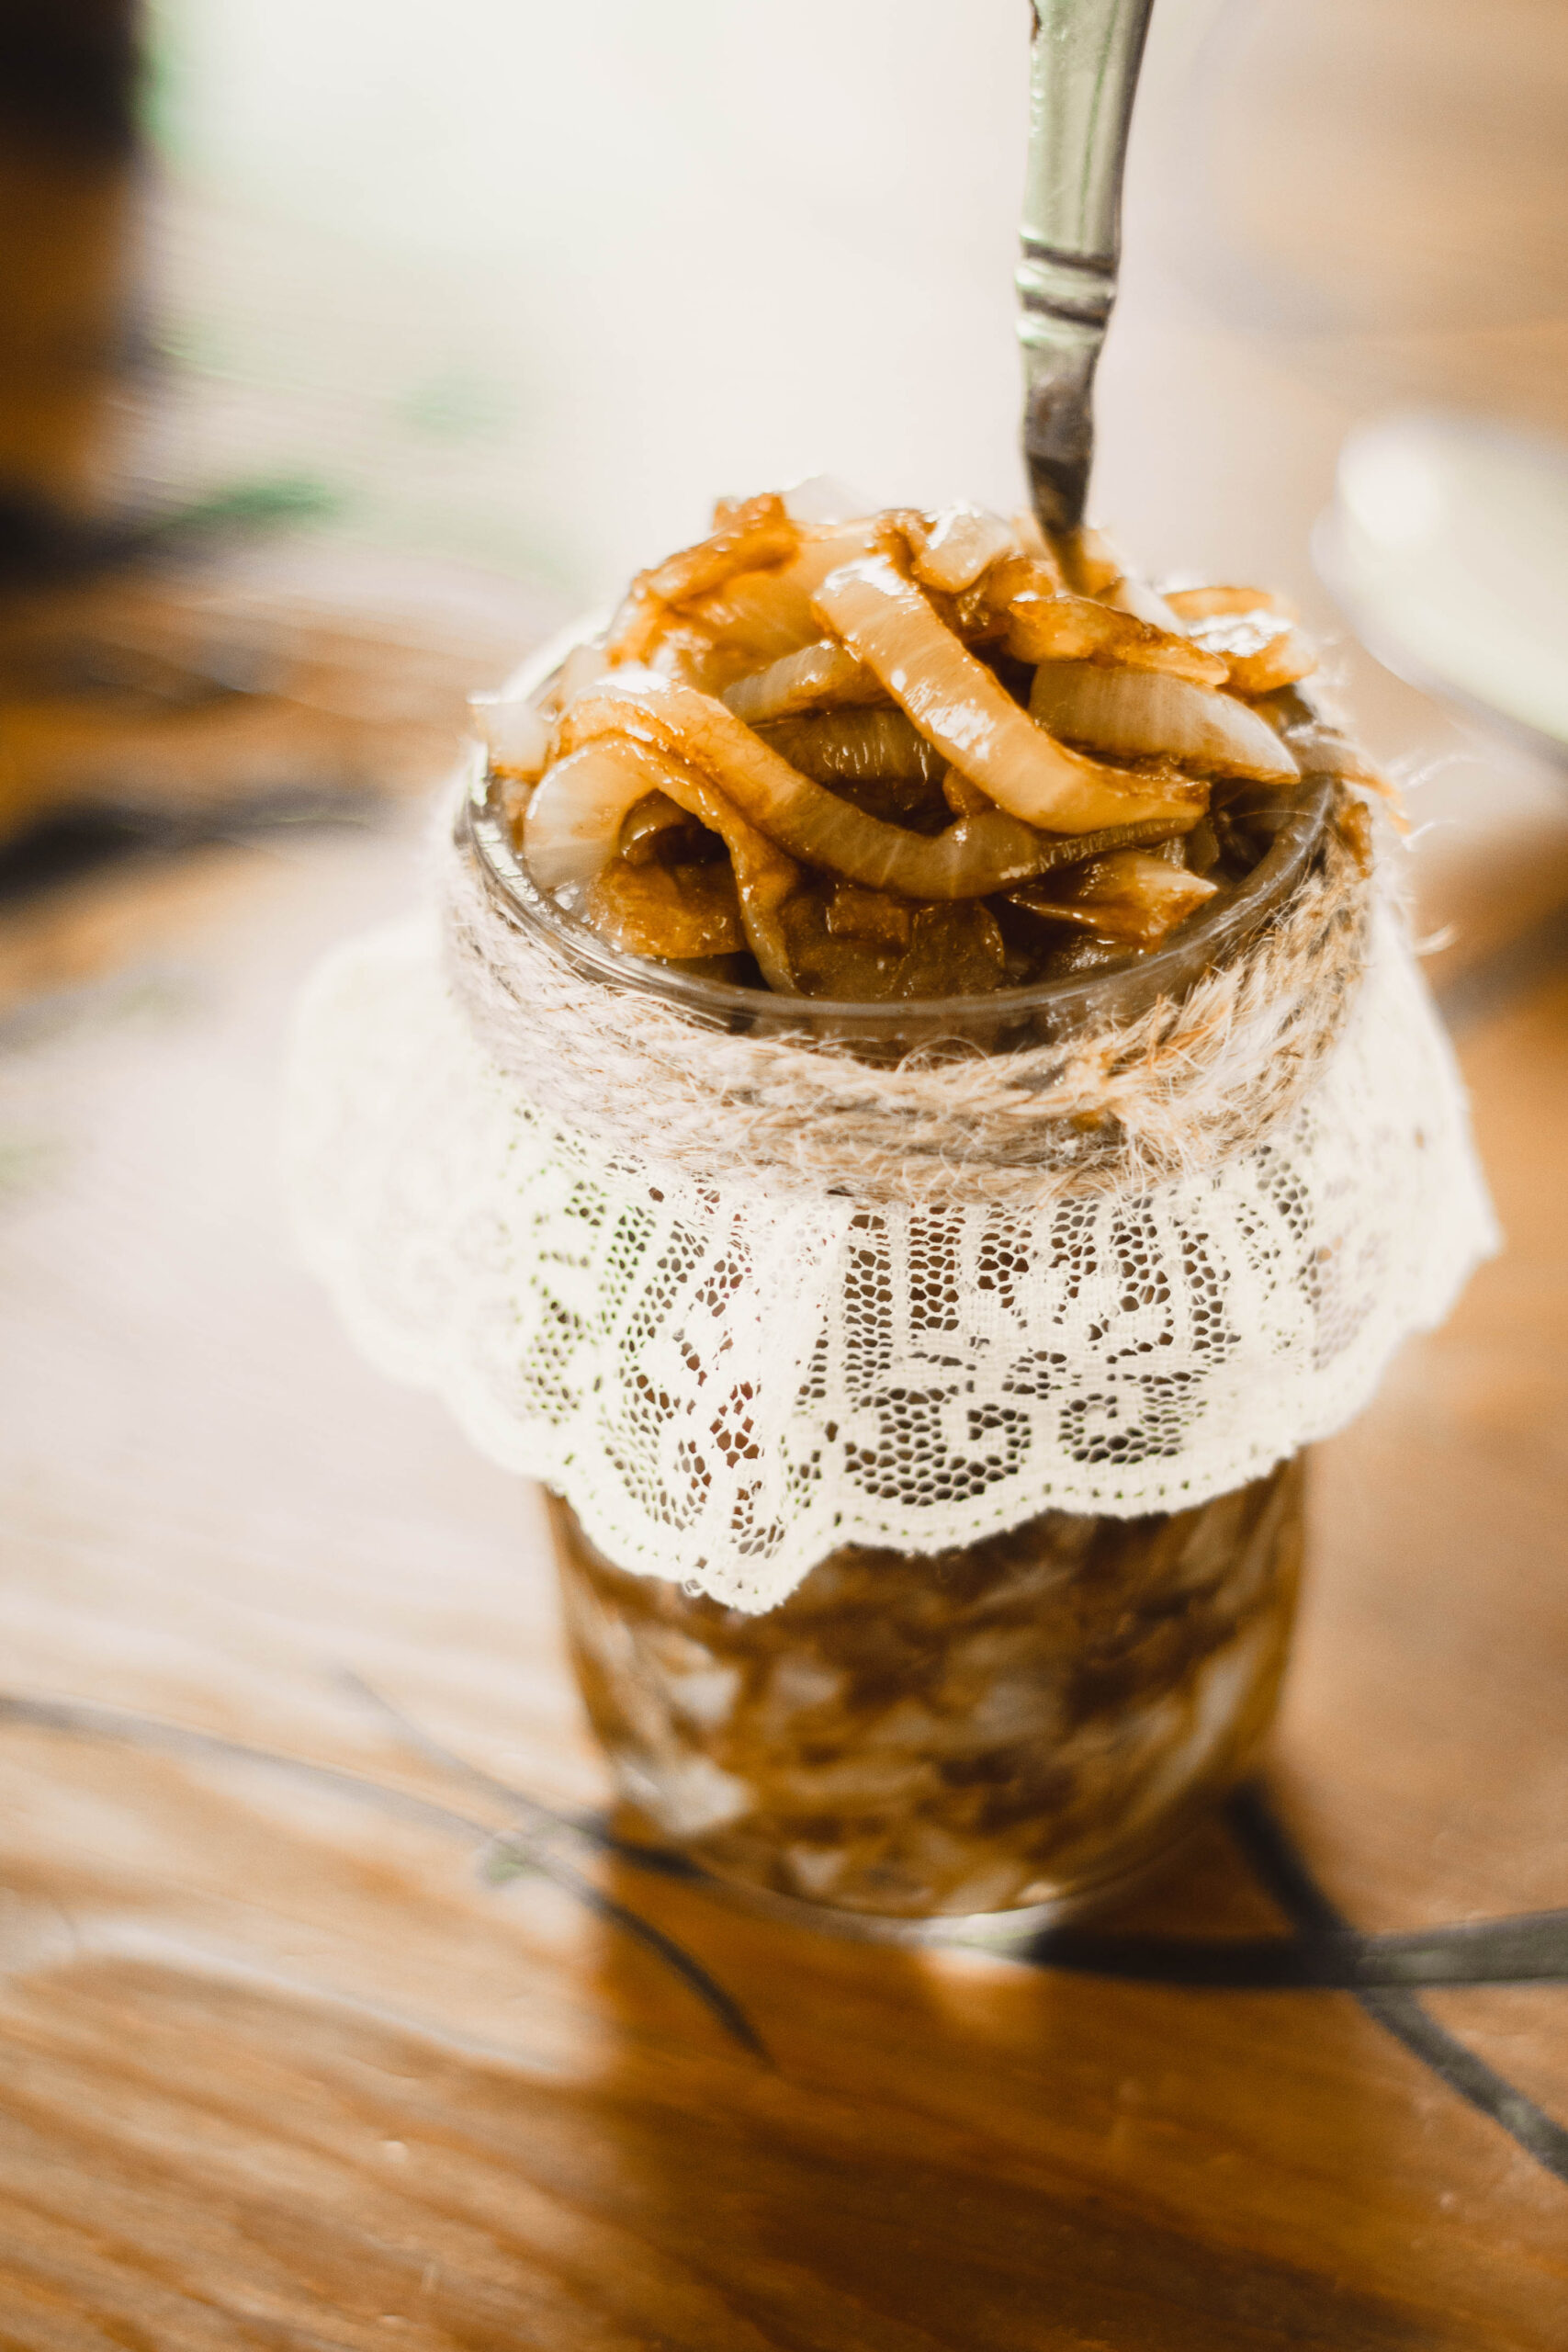
Onion: the flavor of onion is hard to beat and it goes so nicely in this dish
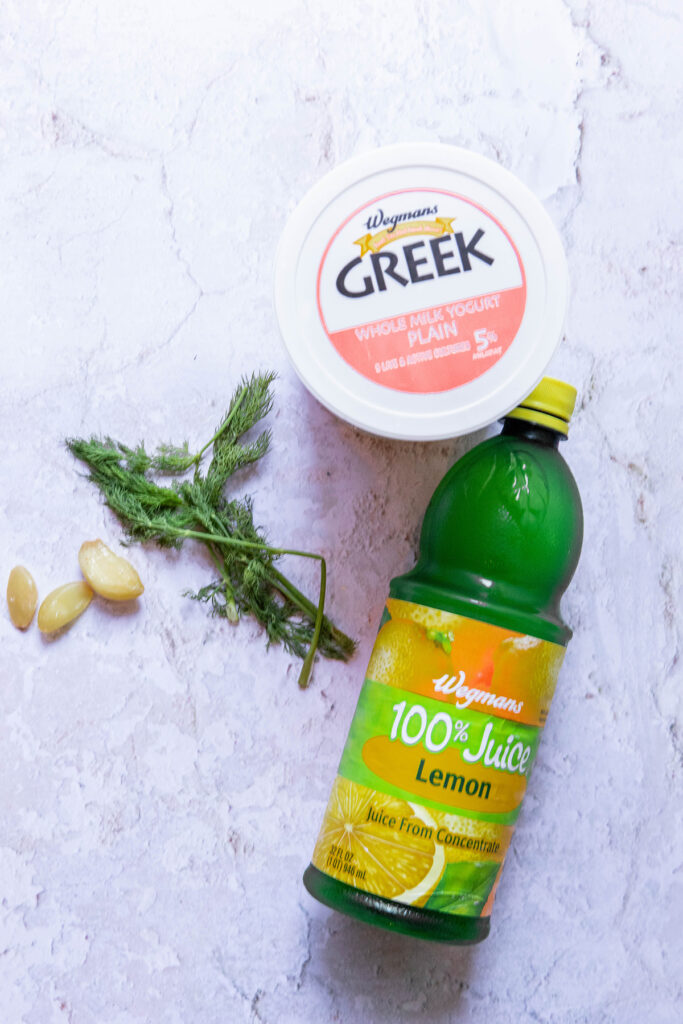
Lemon Zest: lemon zest adds such a burst of freshness to this dish
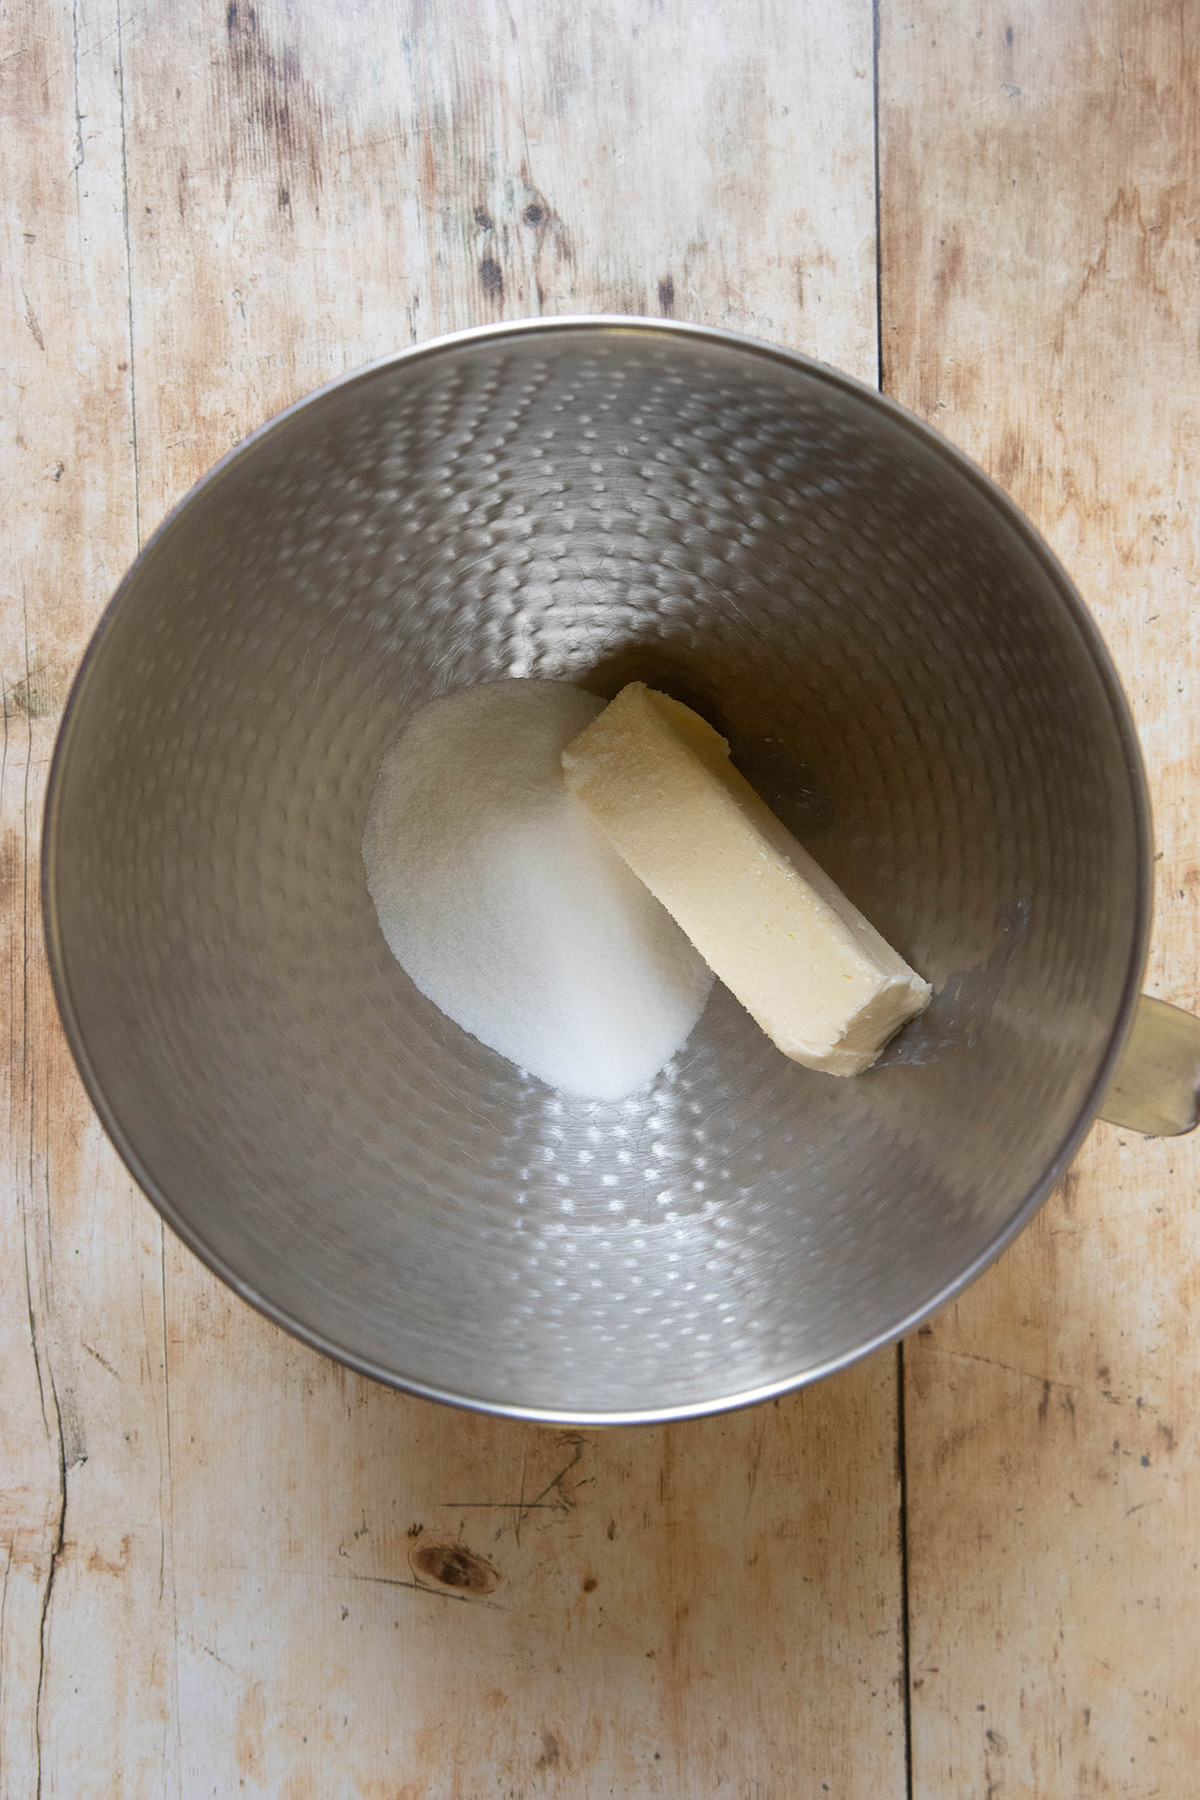
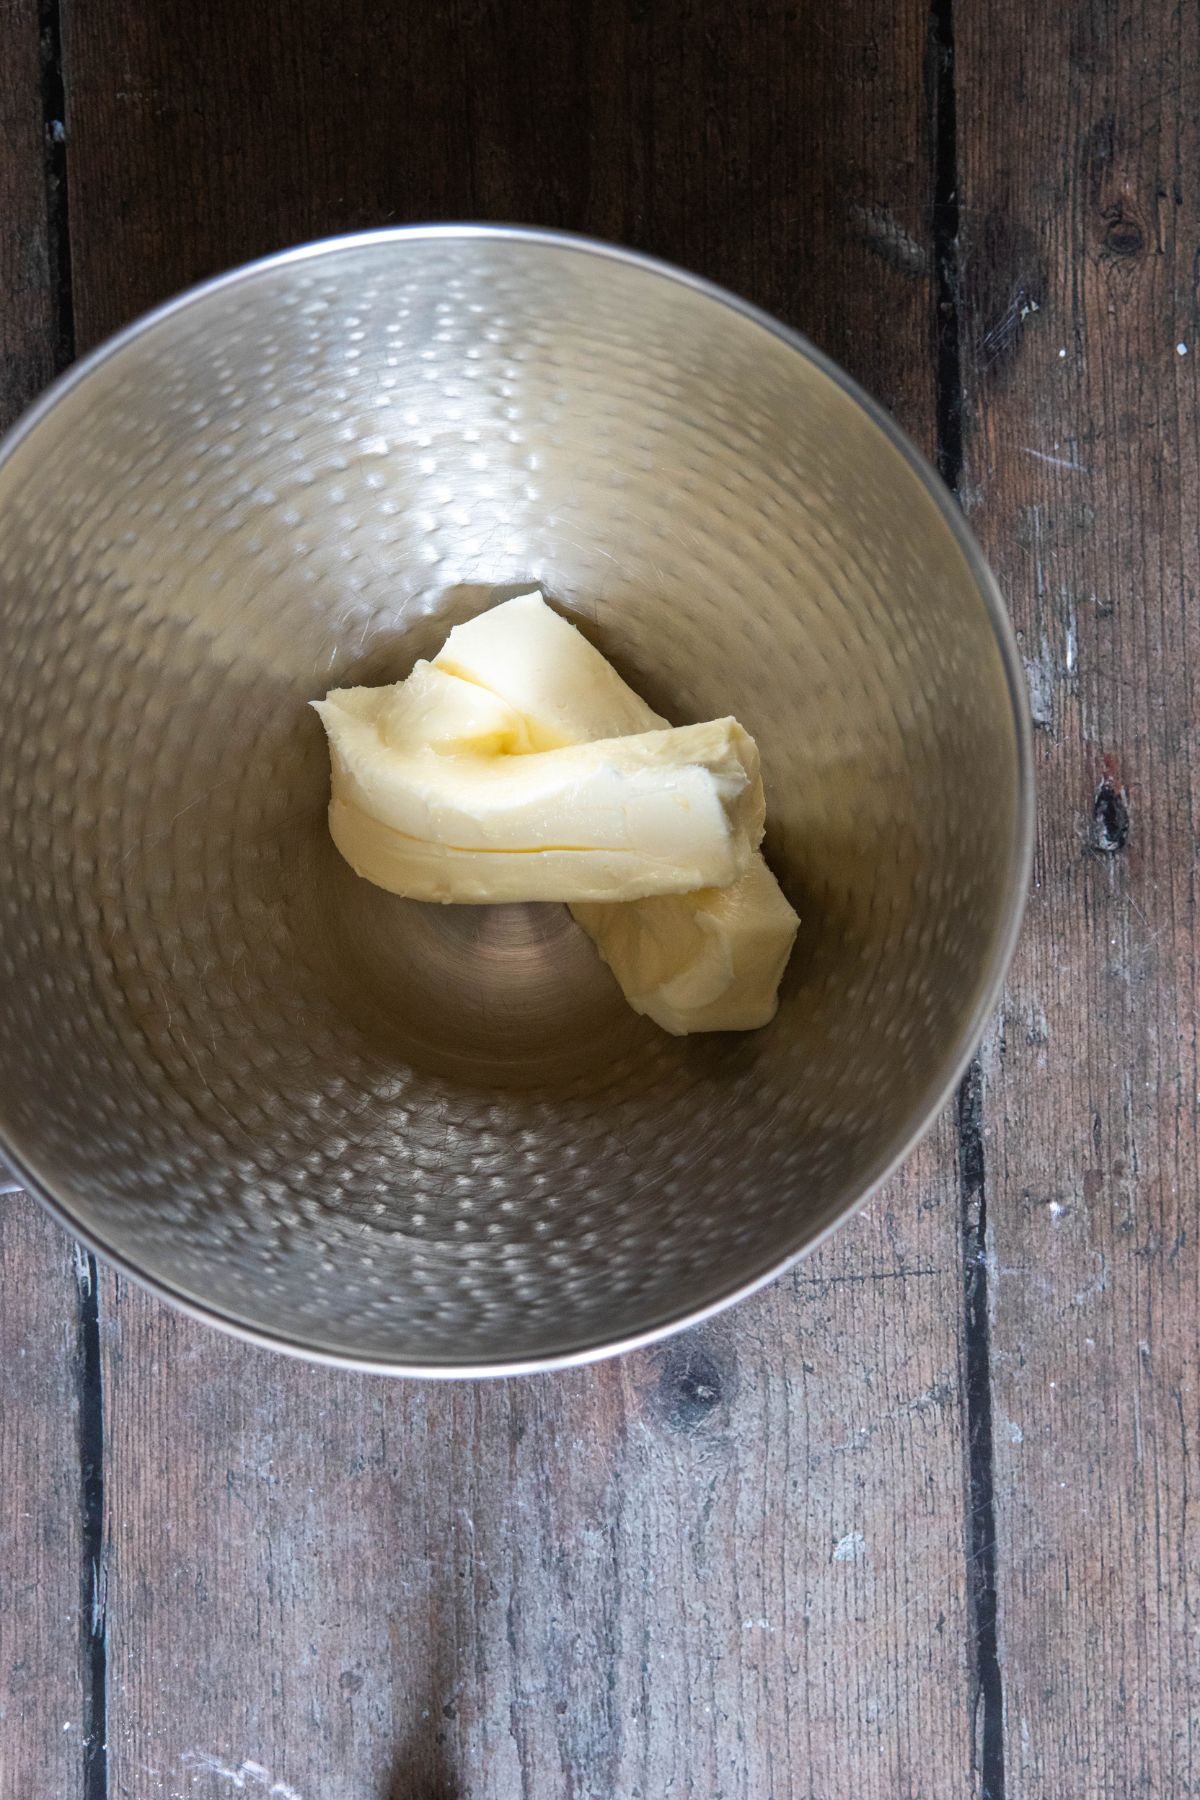
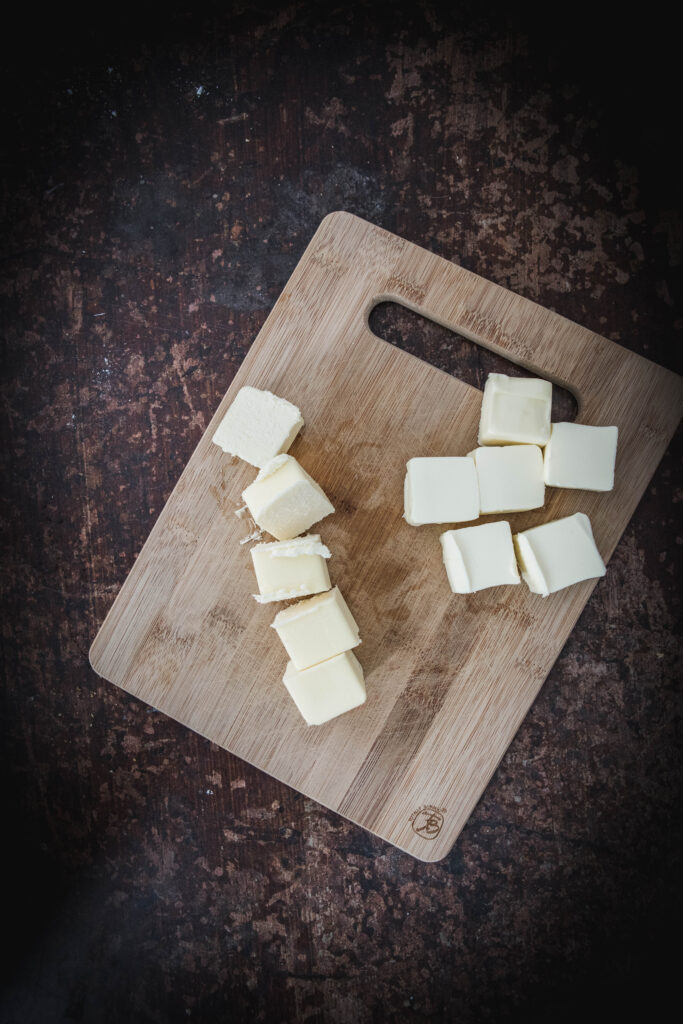
Butter: Butter is necessary to make the roux
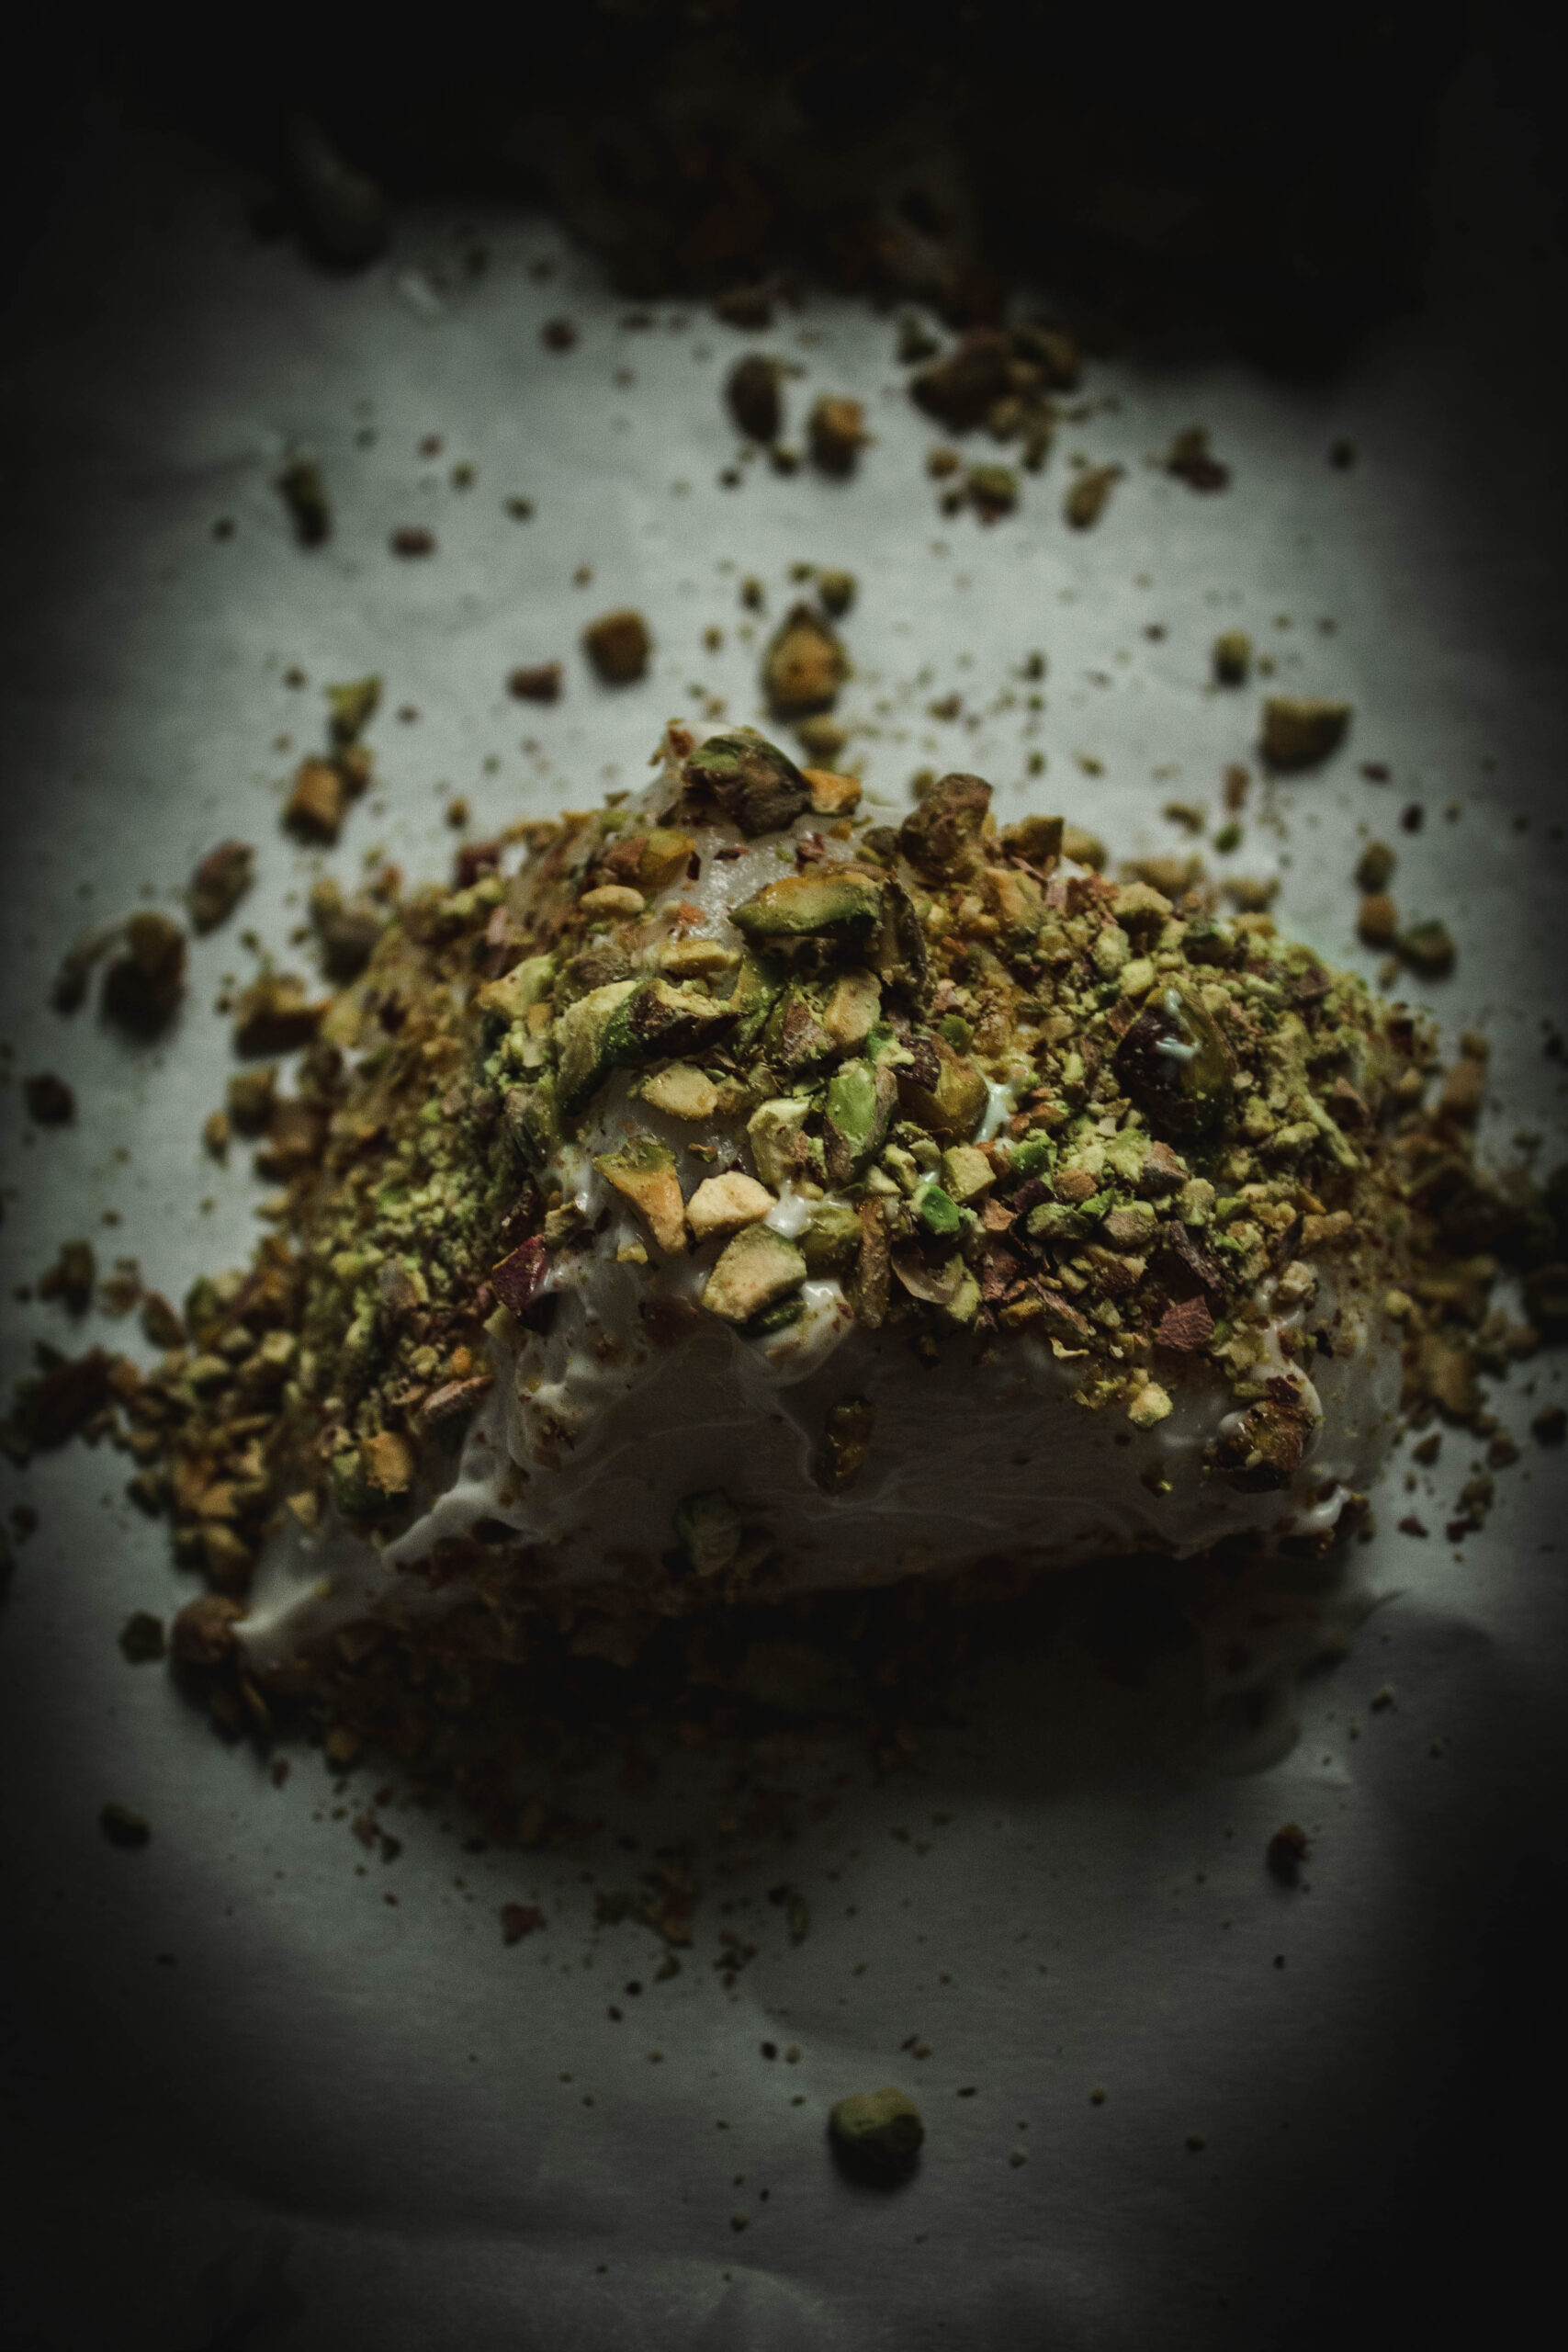
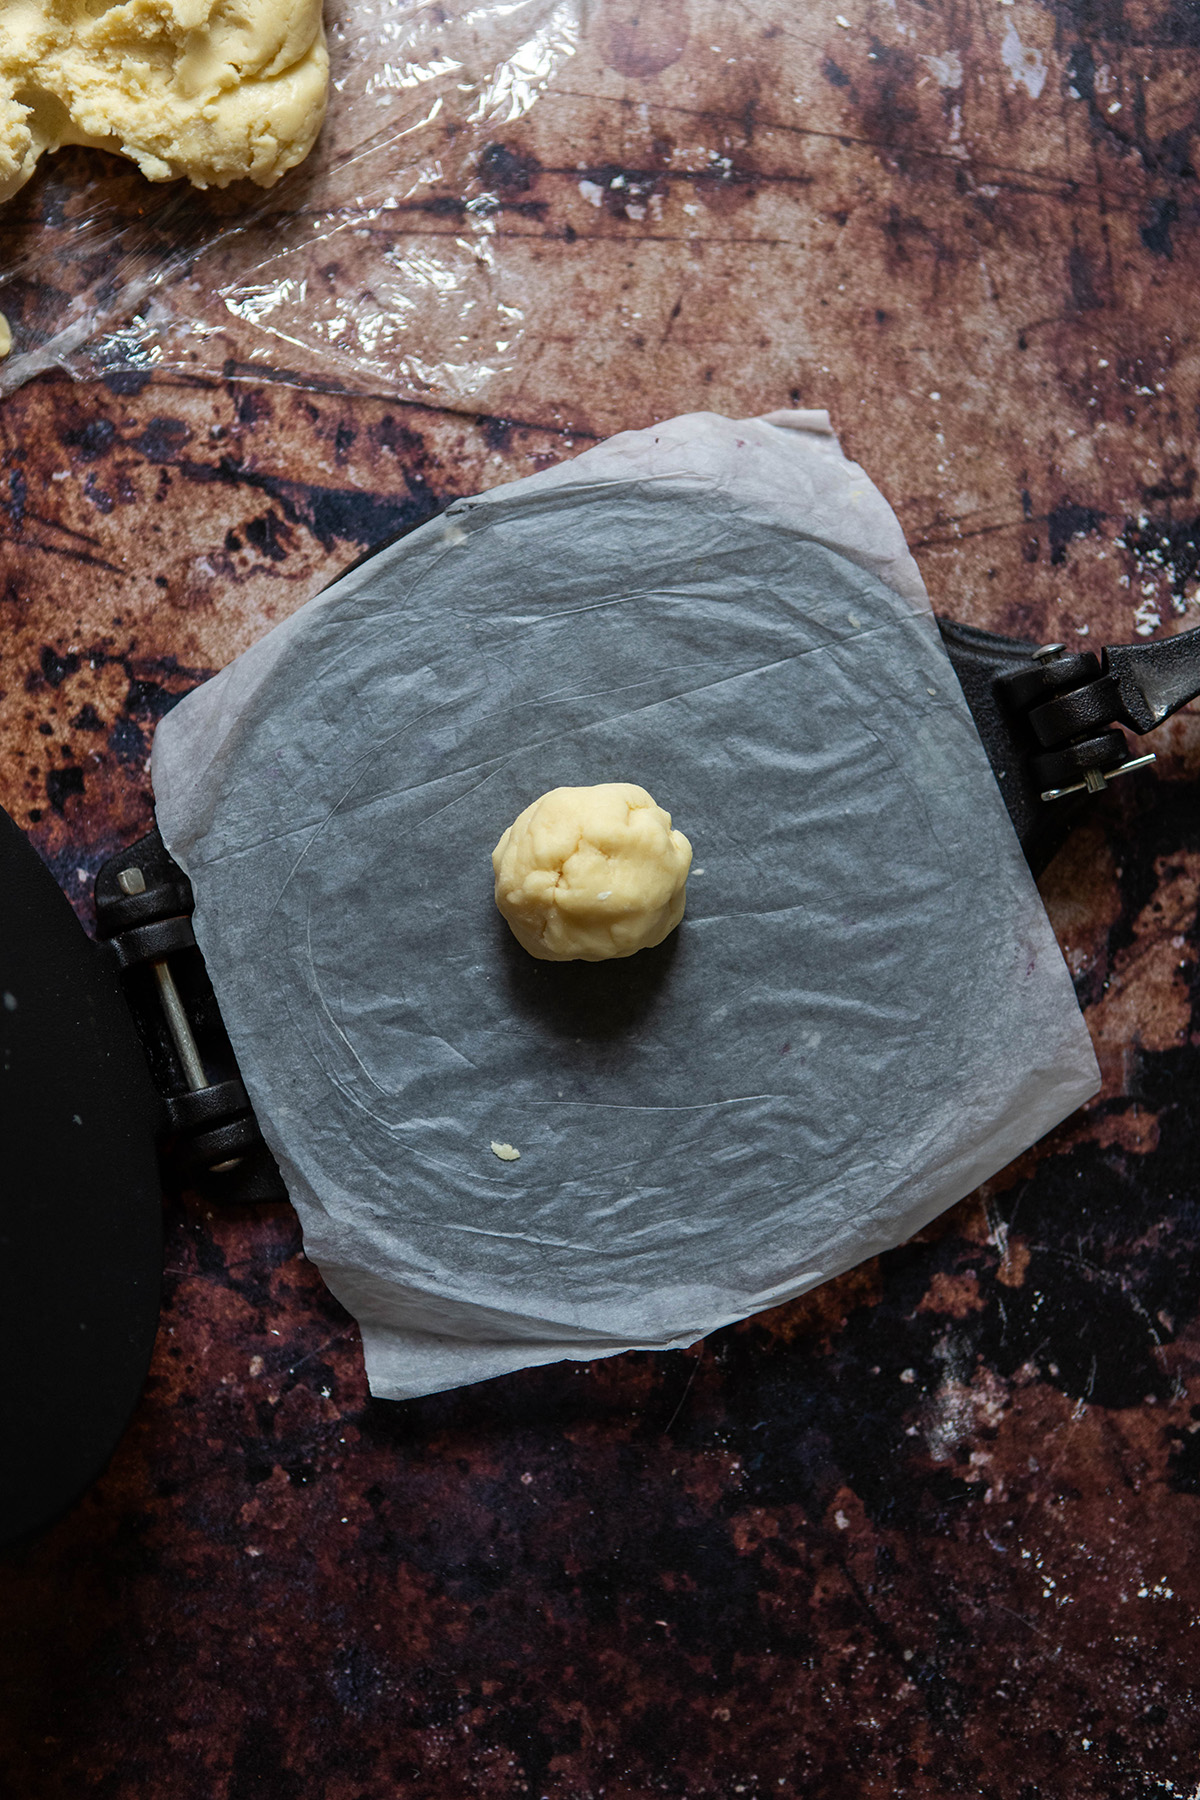
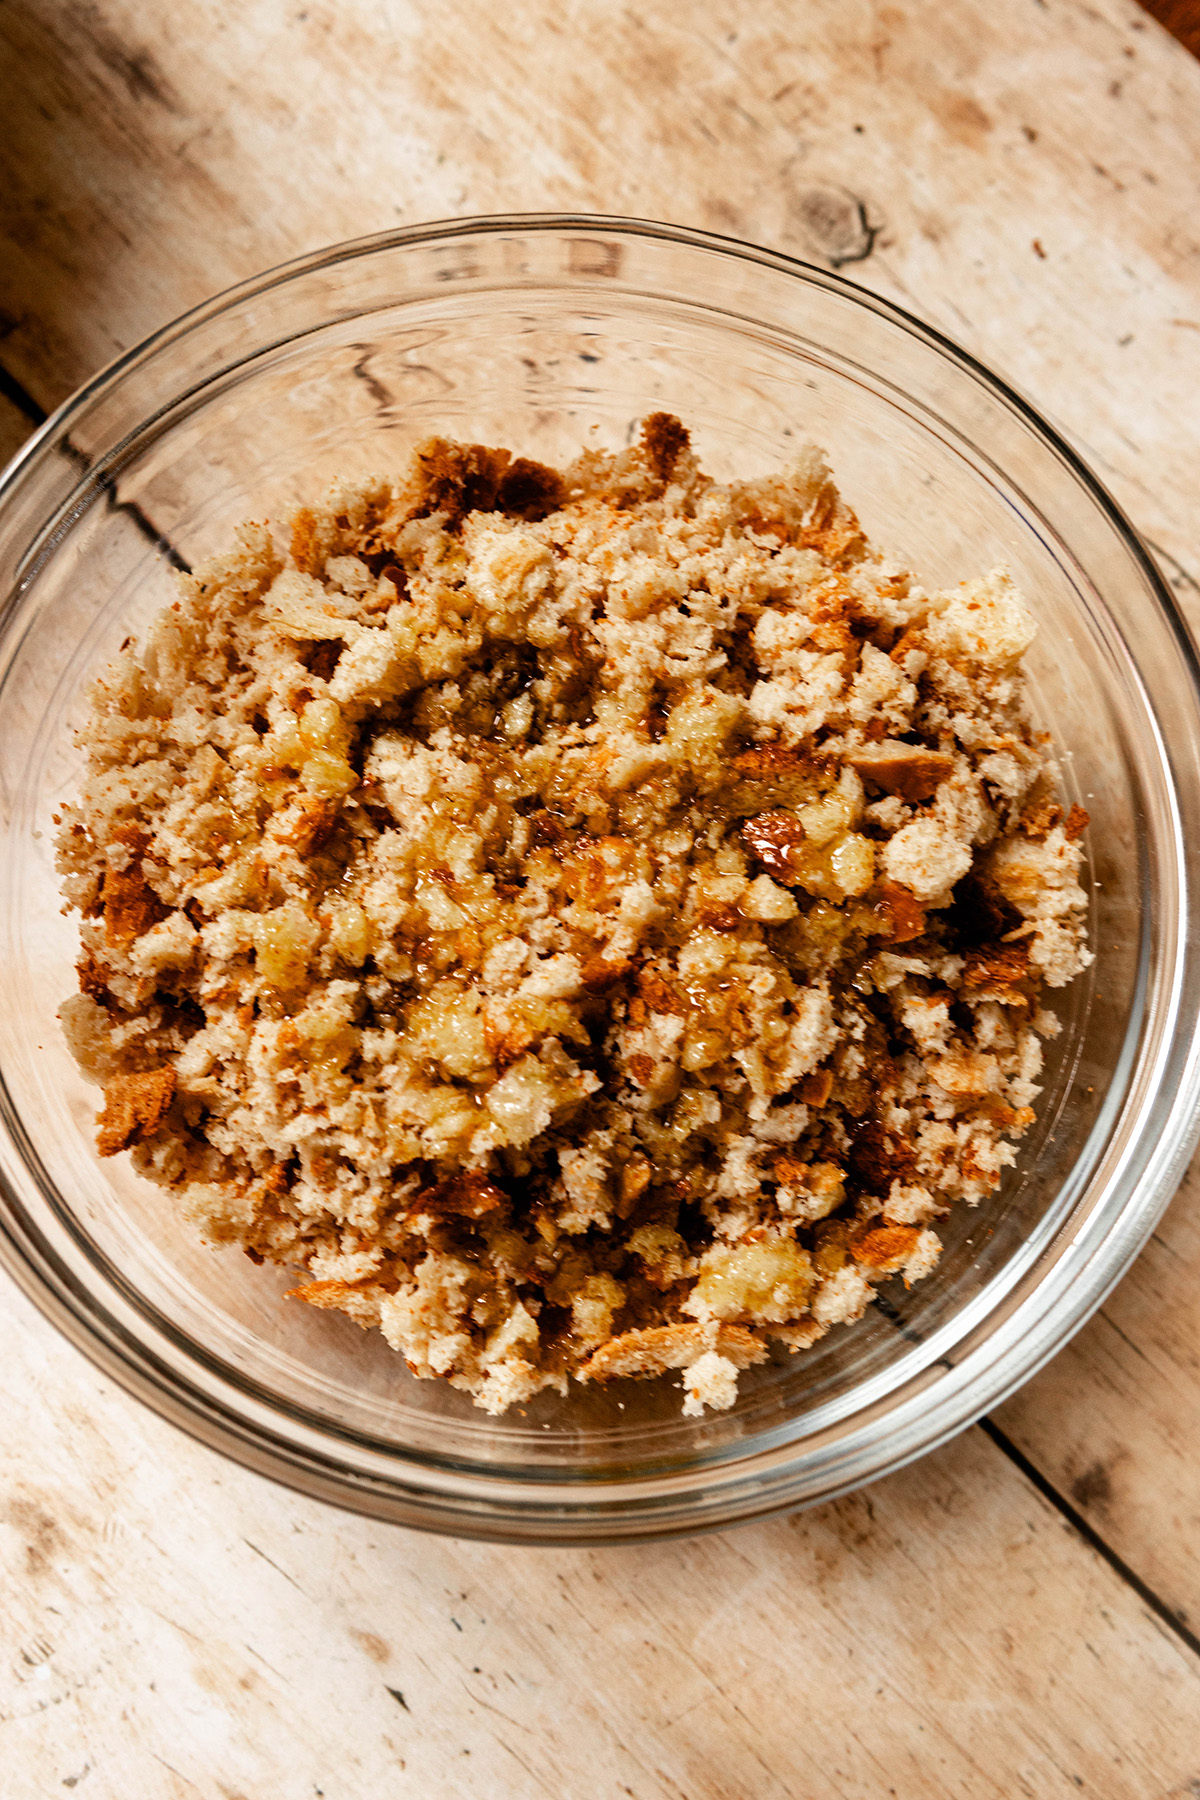
Breadcrumbs: The dish is covered in breadcrumbs. I use fresh gluten free breadcrumbs but non-gluten free breadcrumbs could work as well
Olive oil: this is optional for your breadcrumbs and to sauté the onions

How to make cod au gratin?

Set the oven to 350° degrees f.
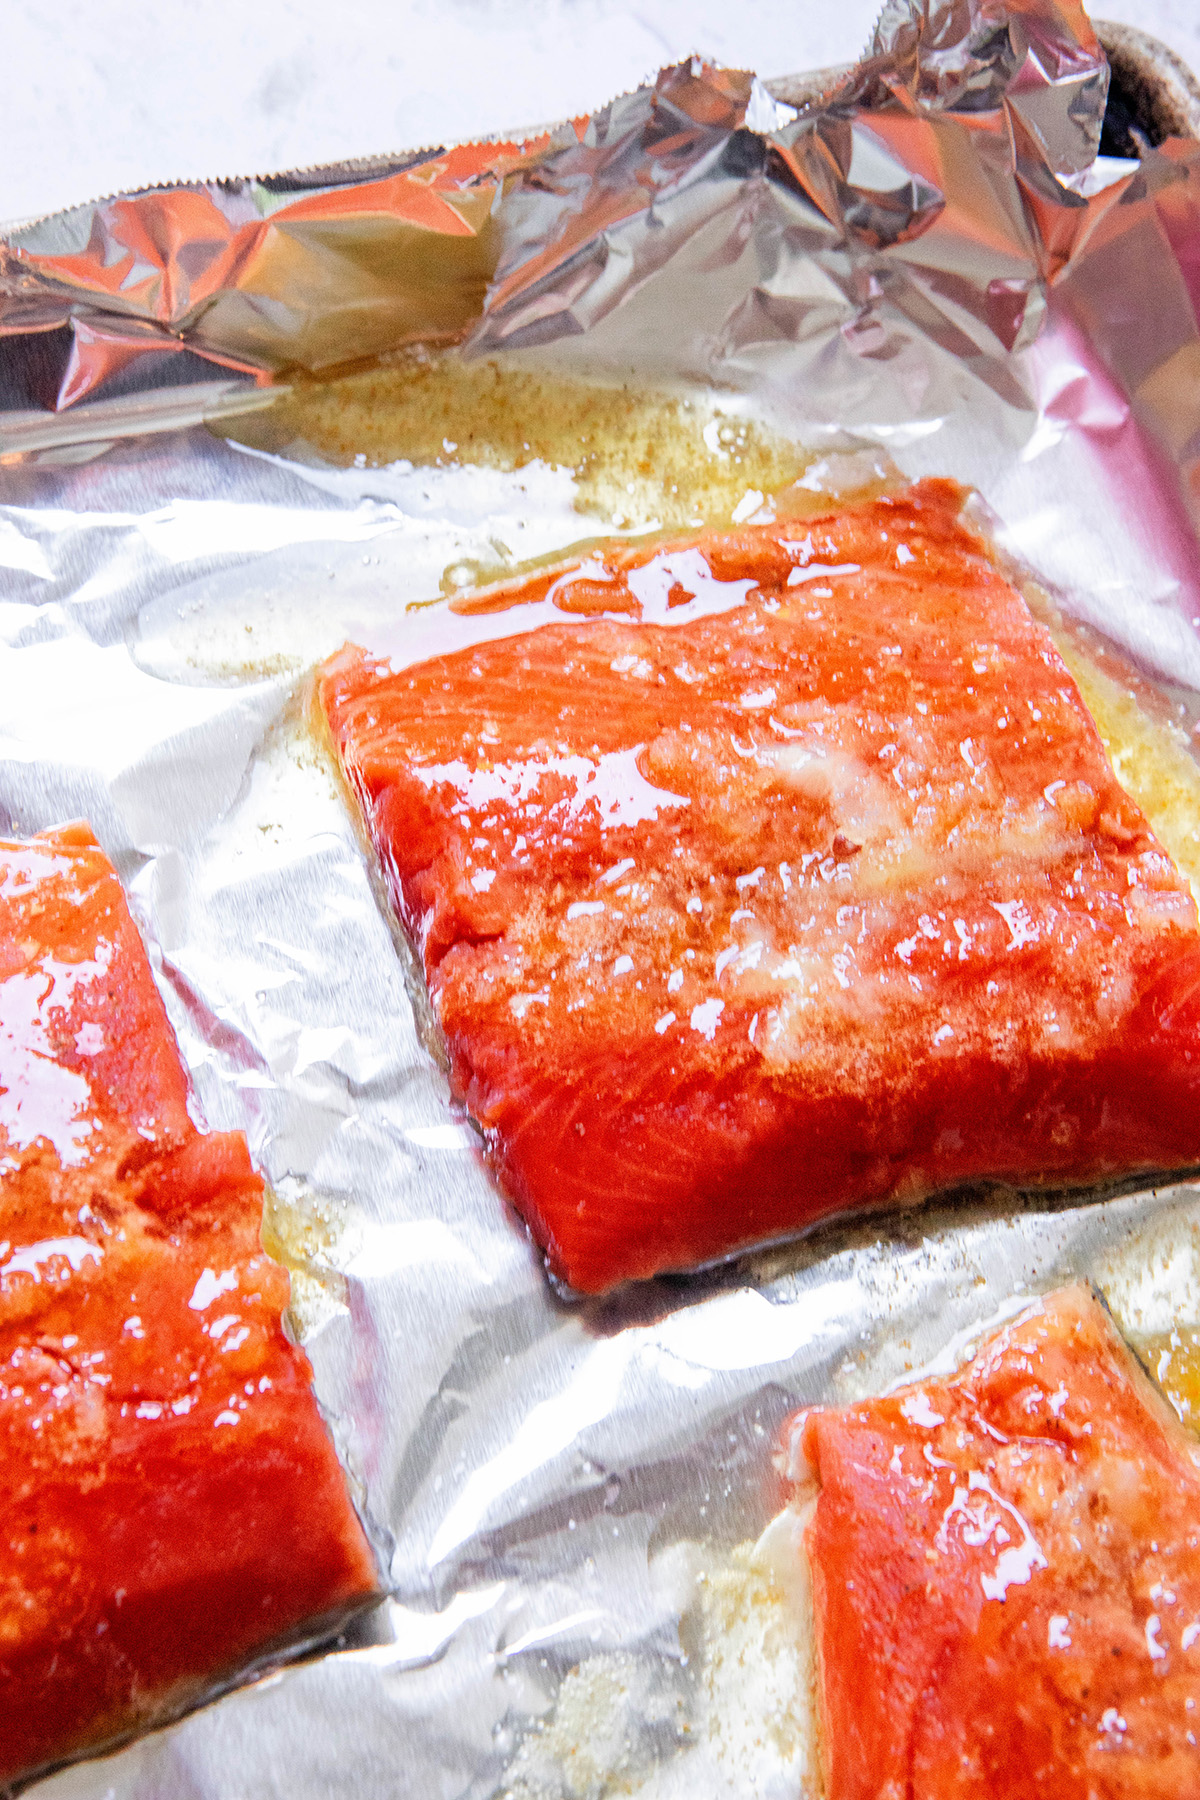
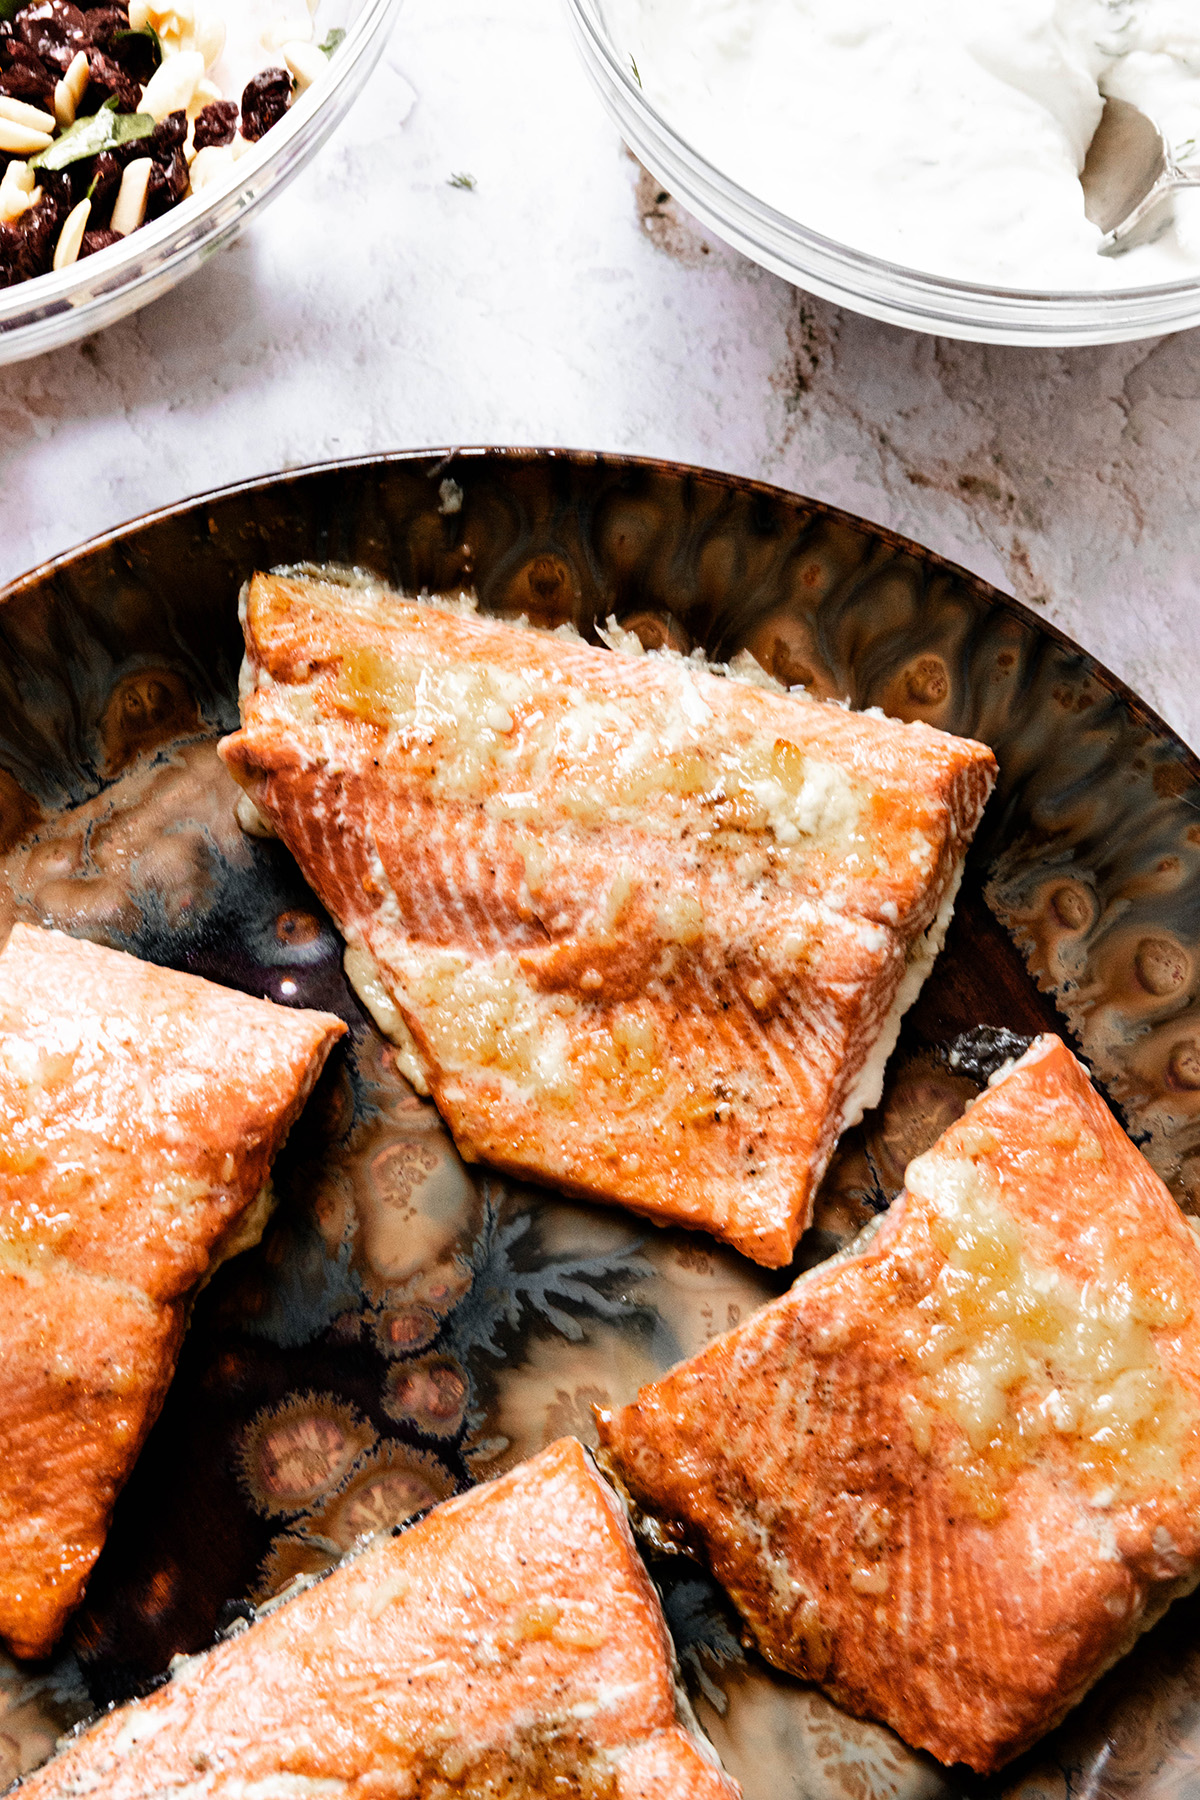
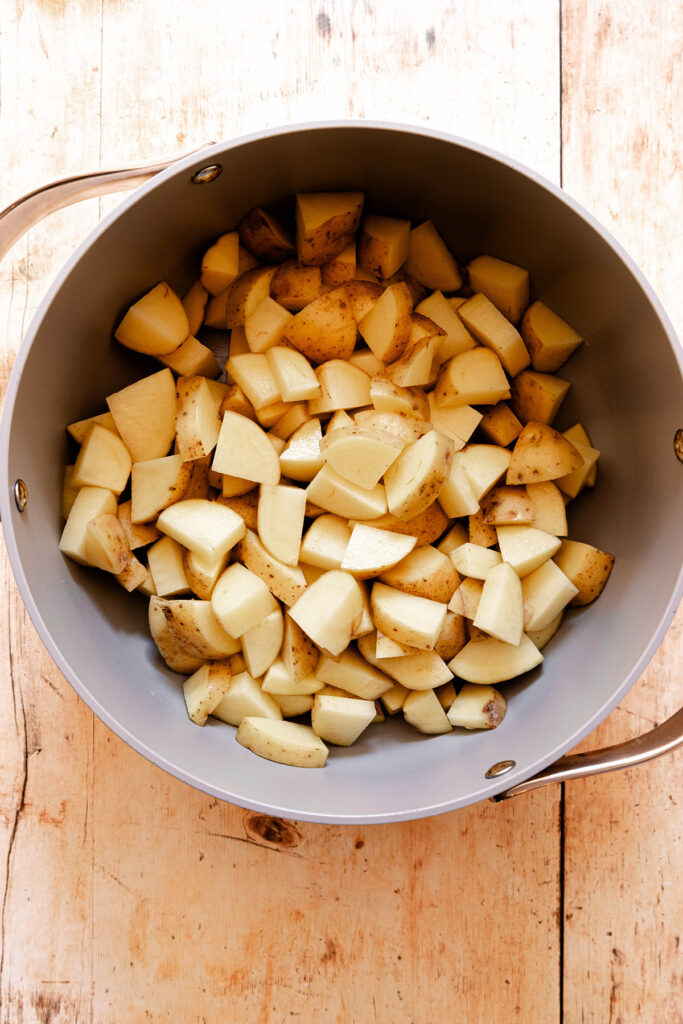
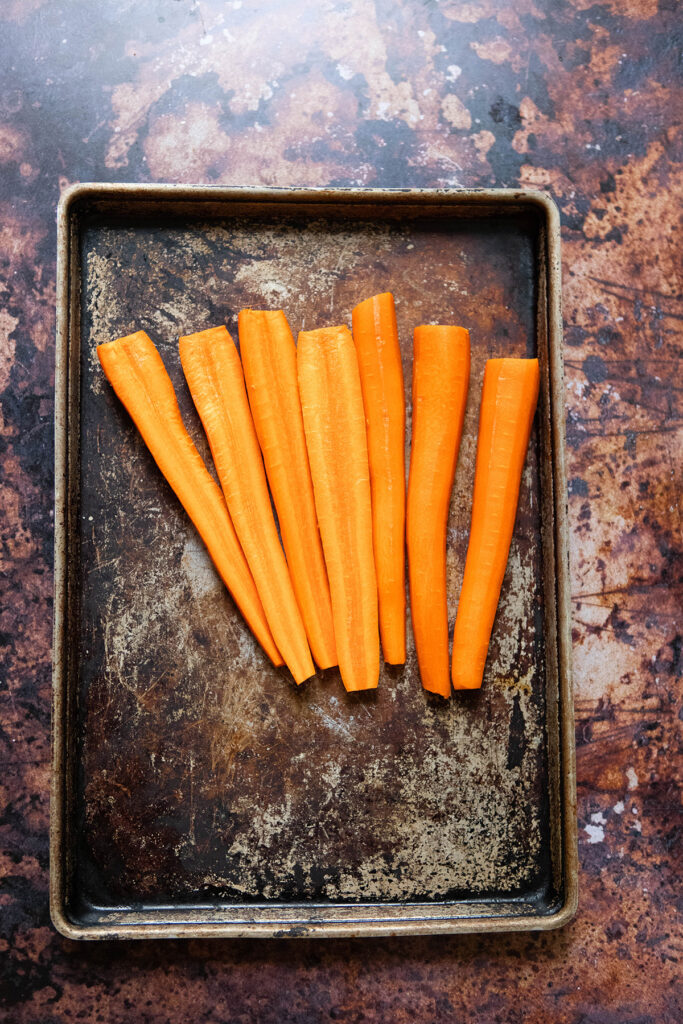
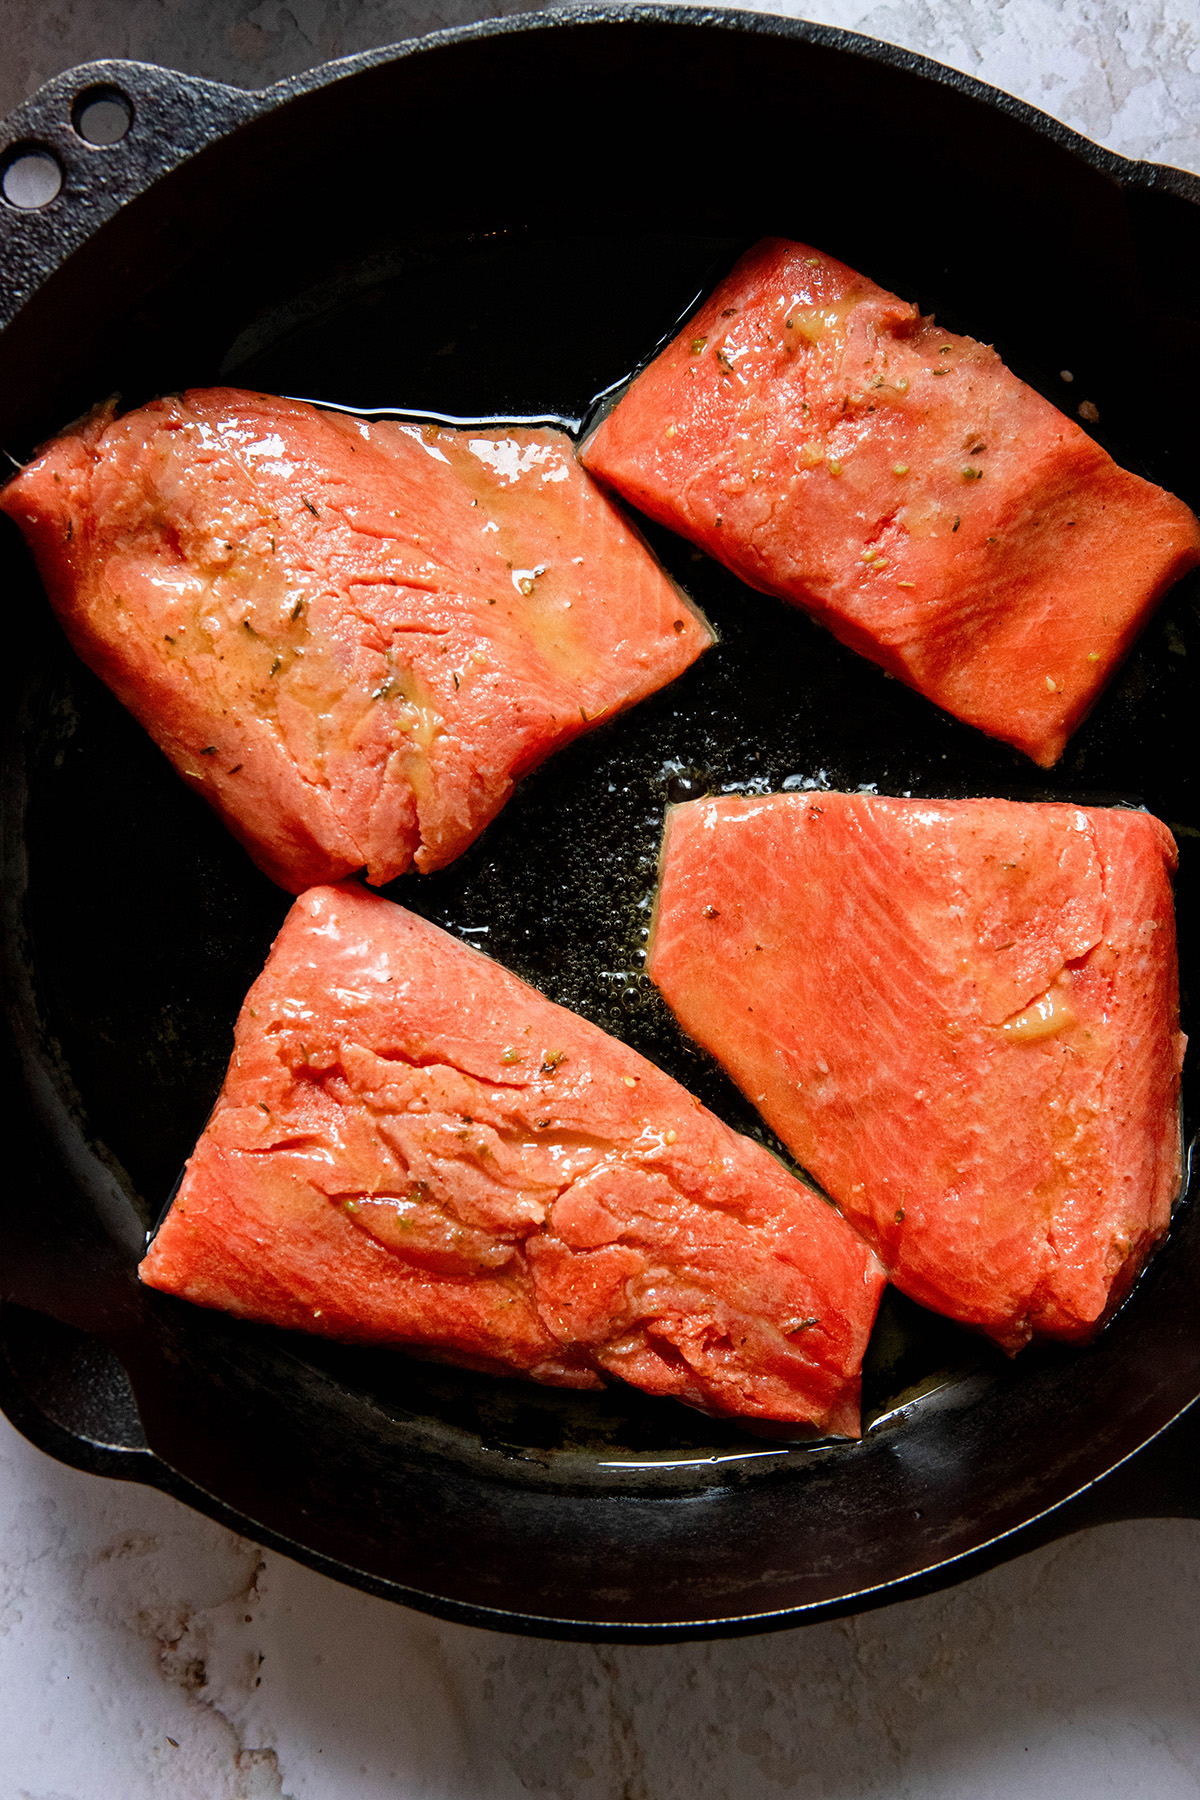
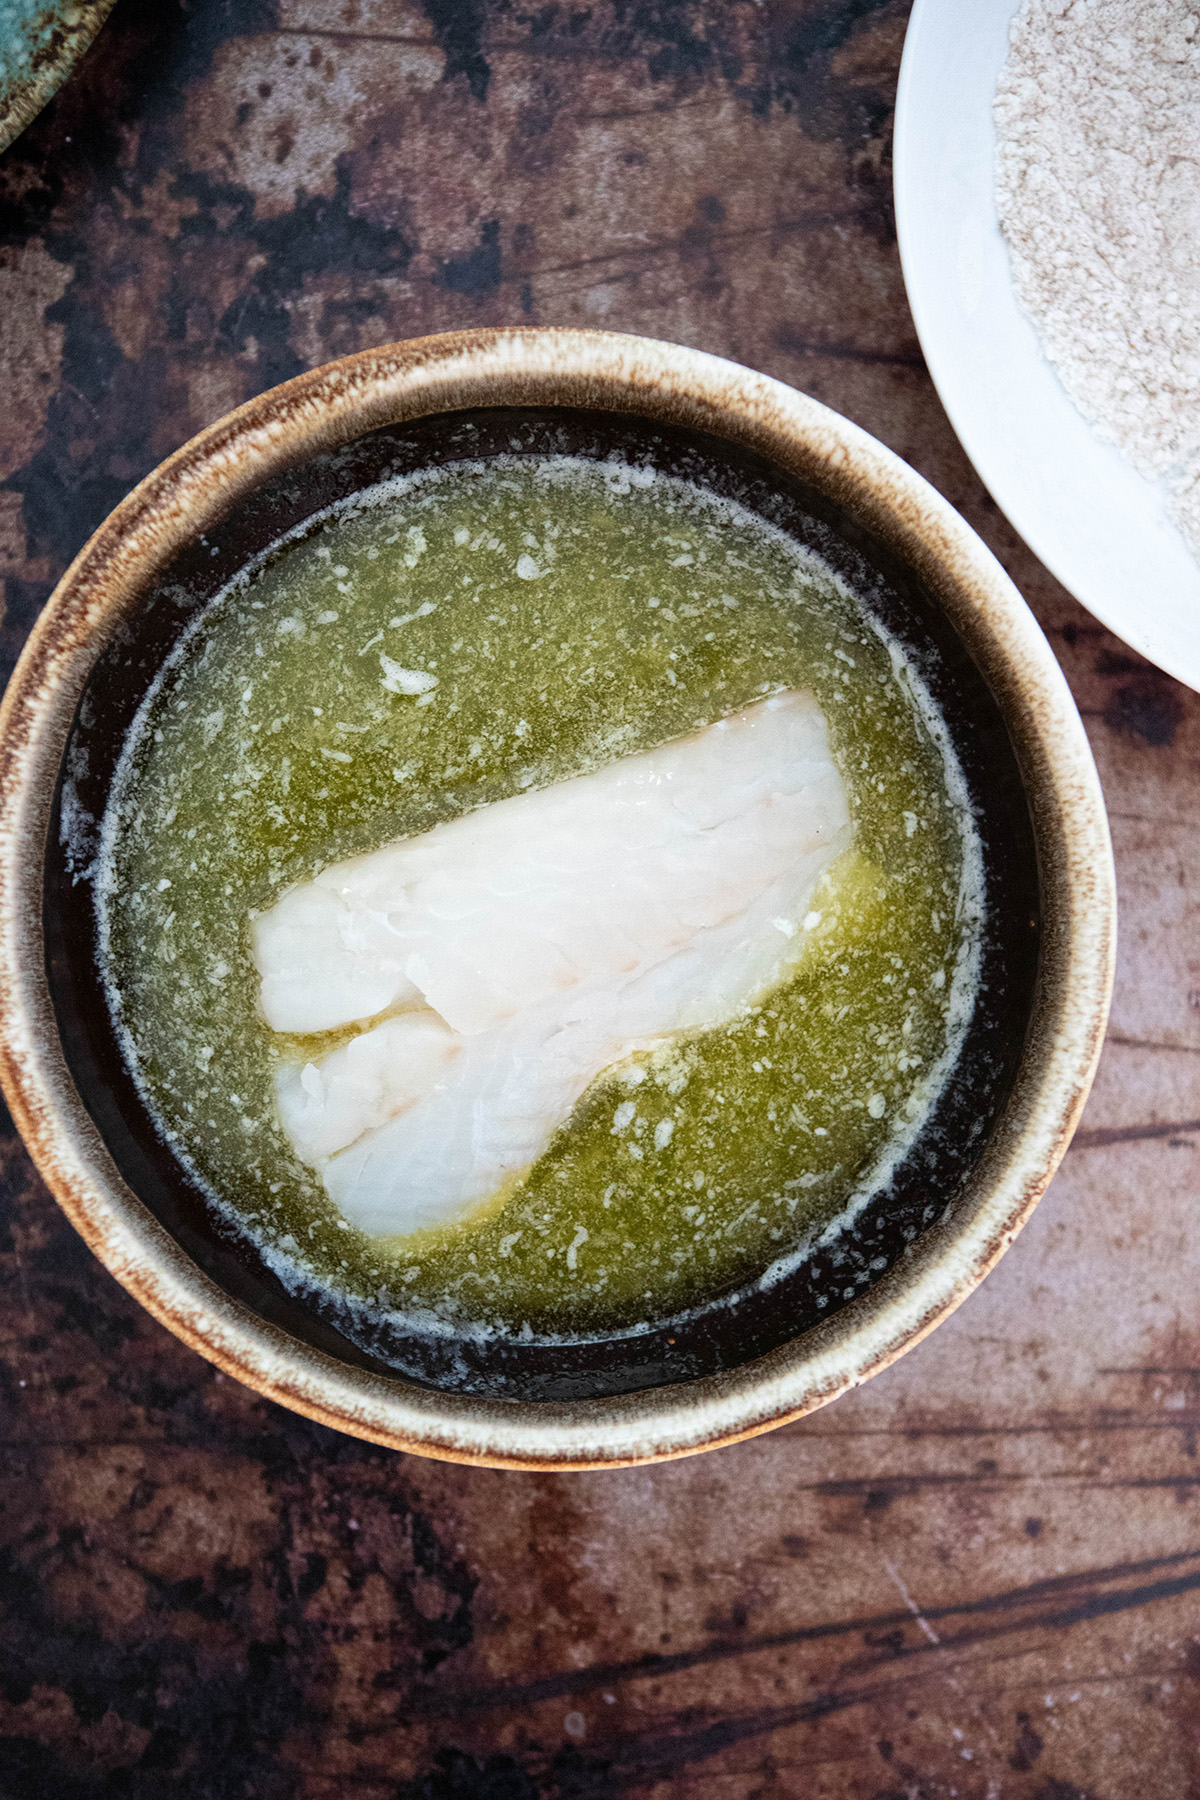
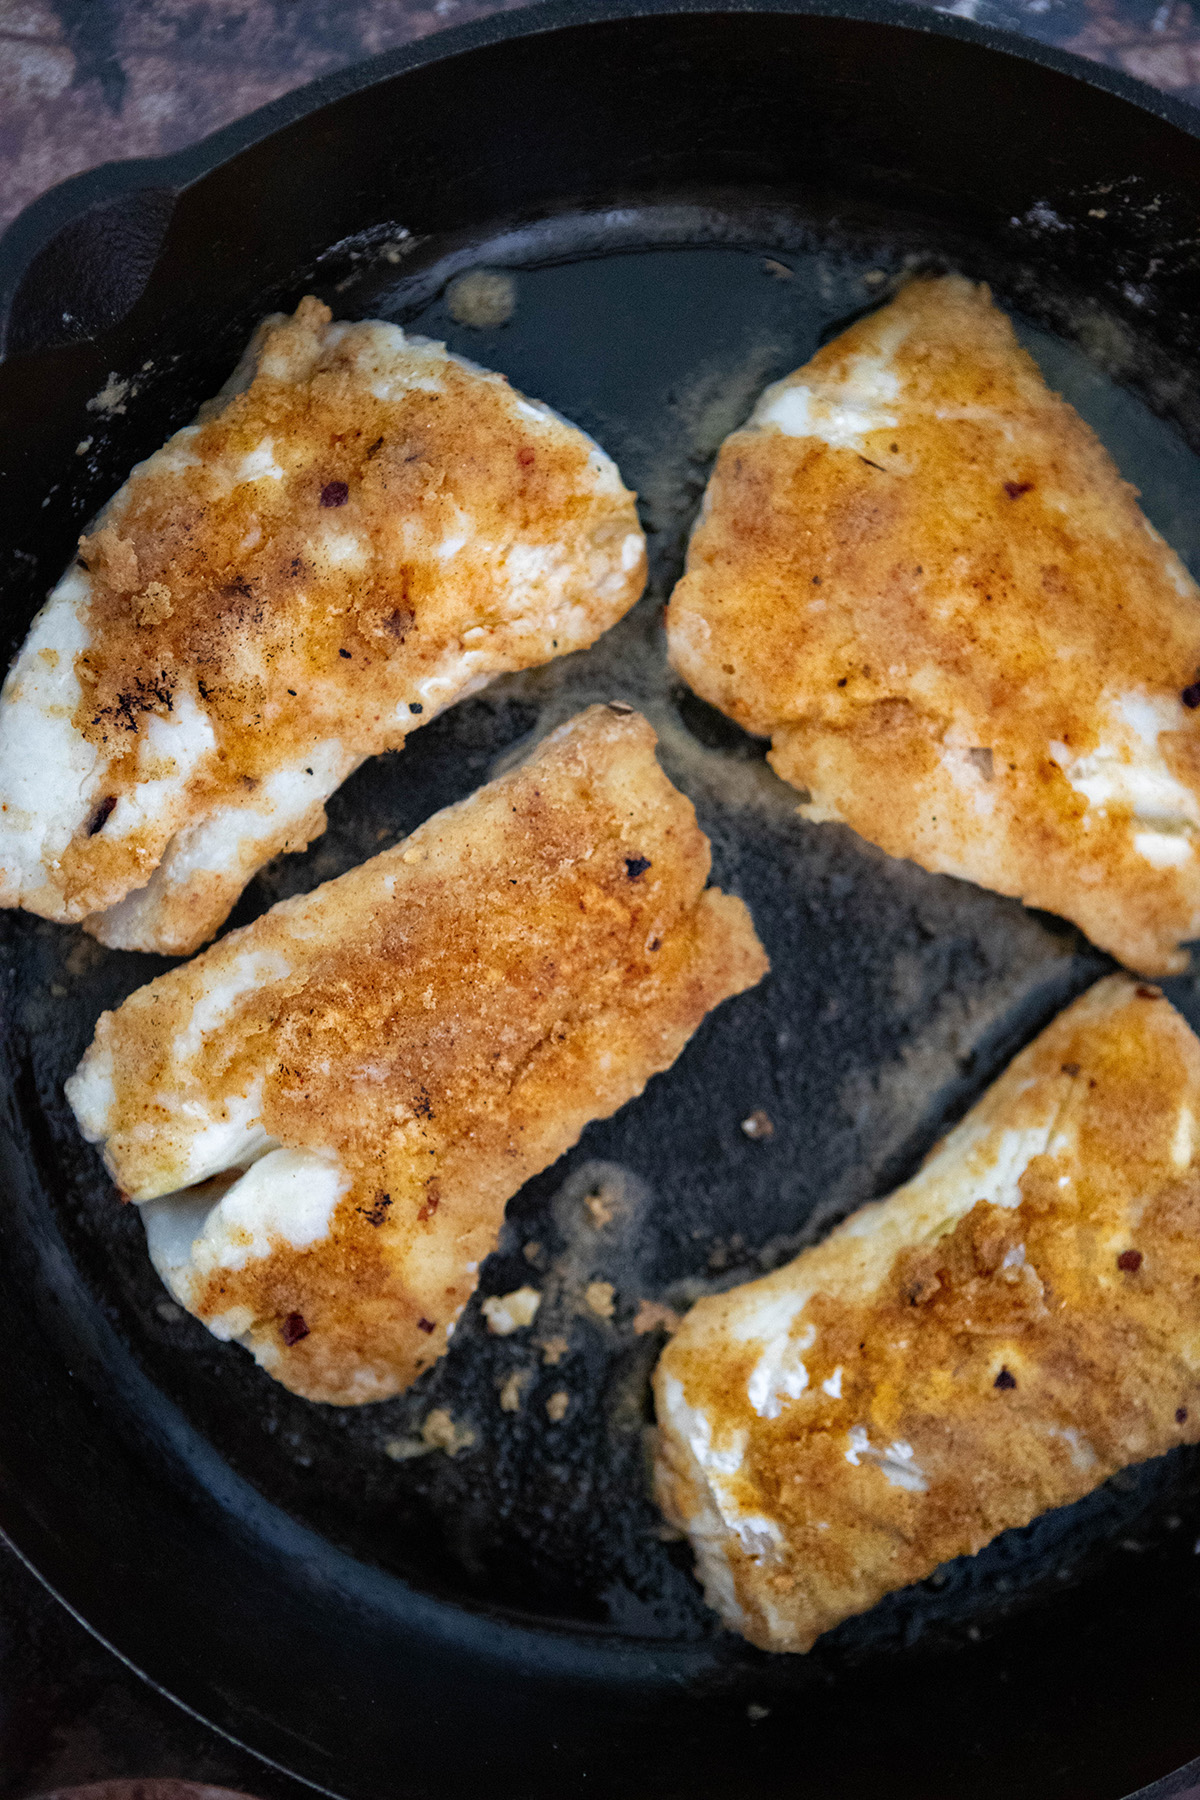
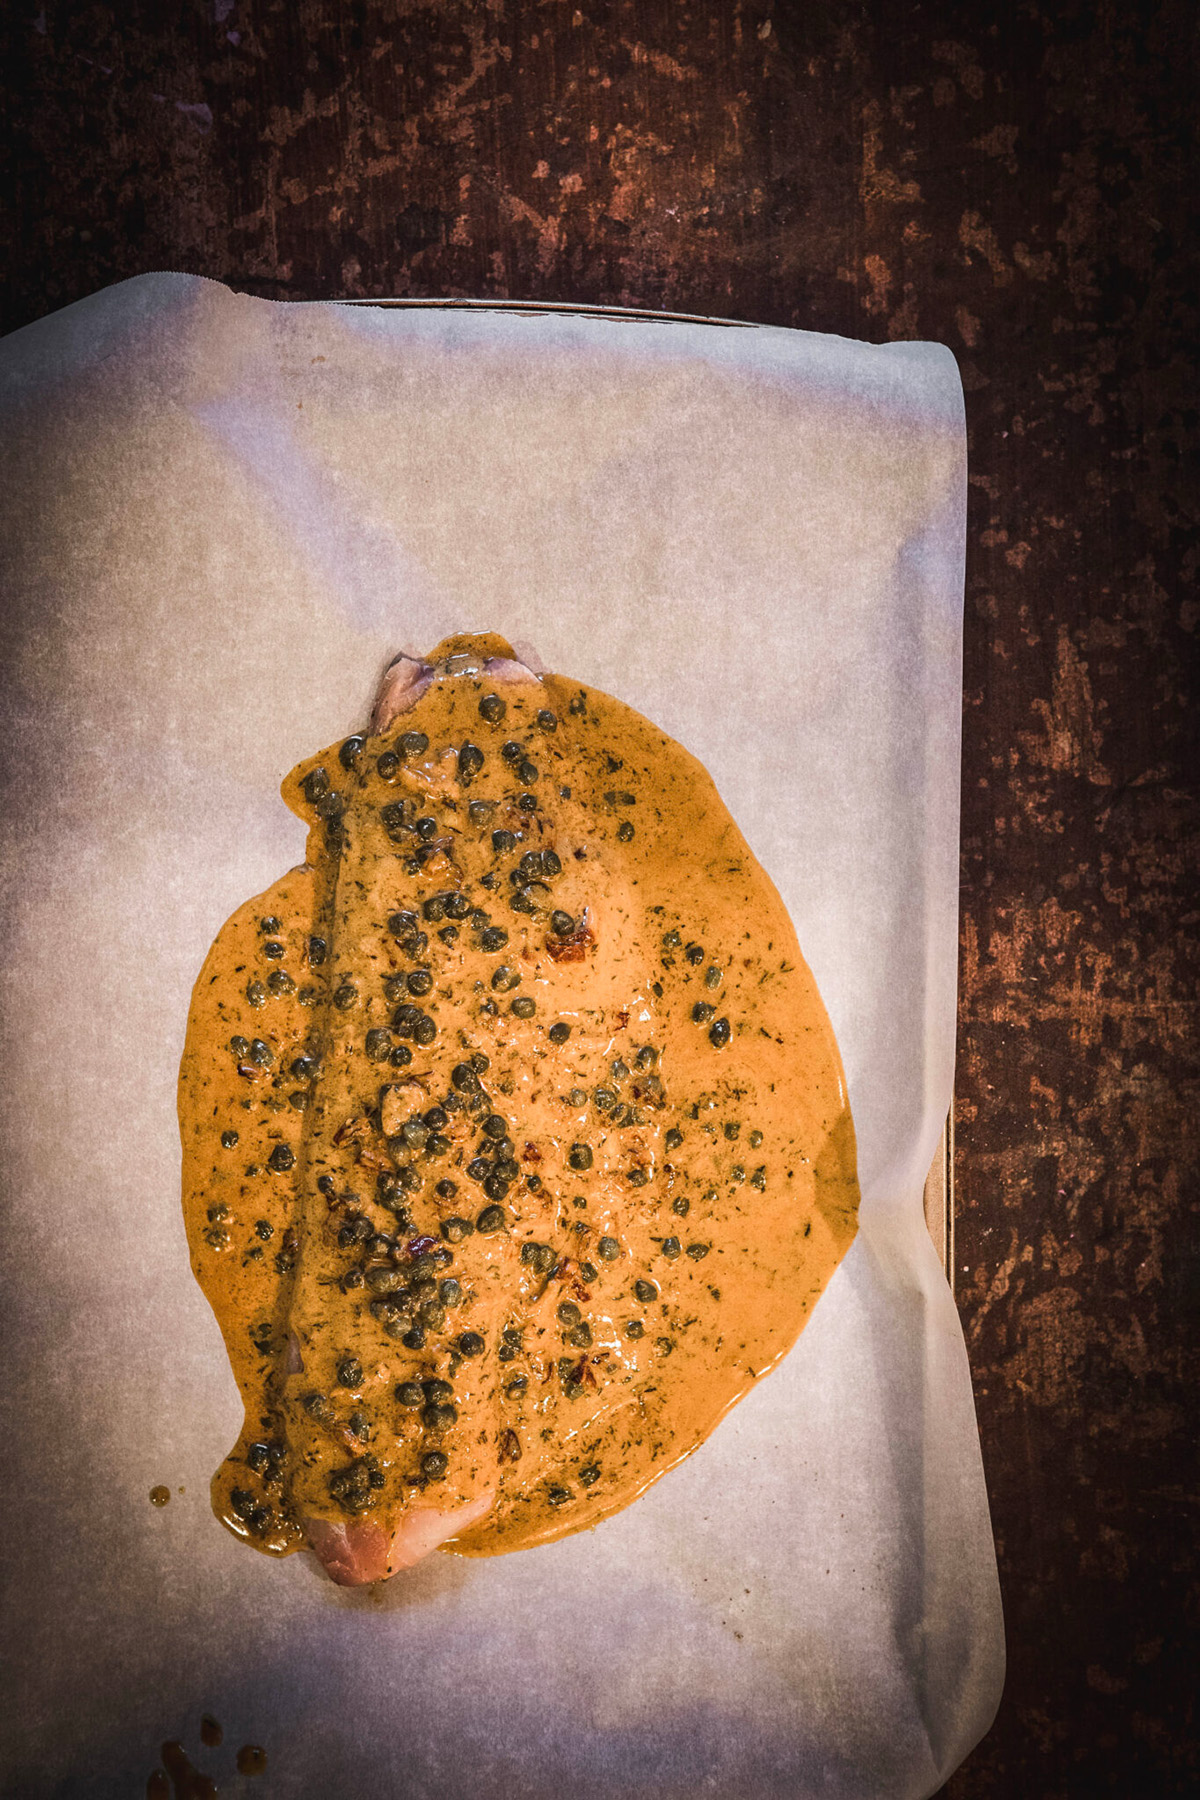
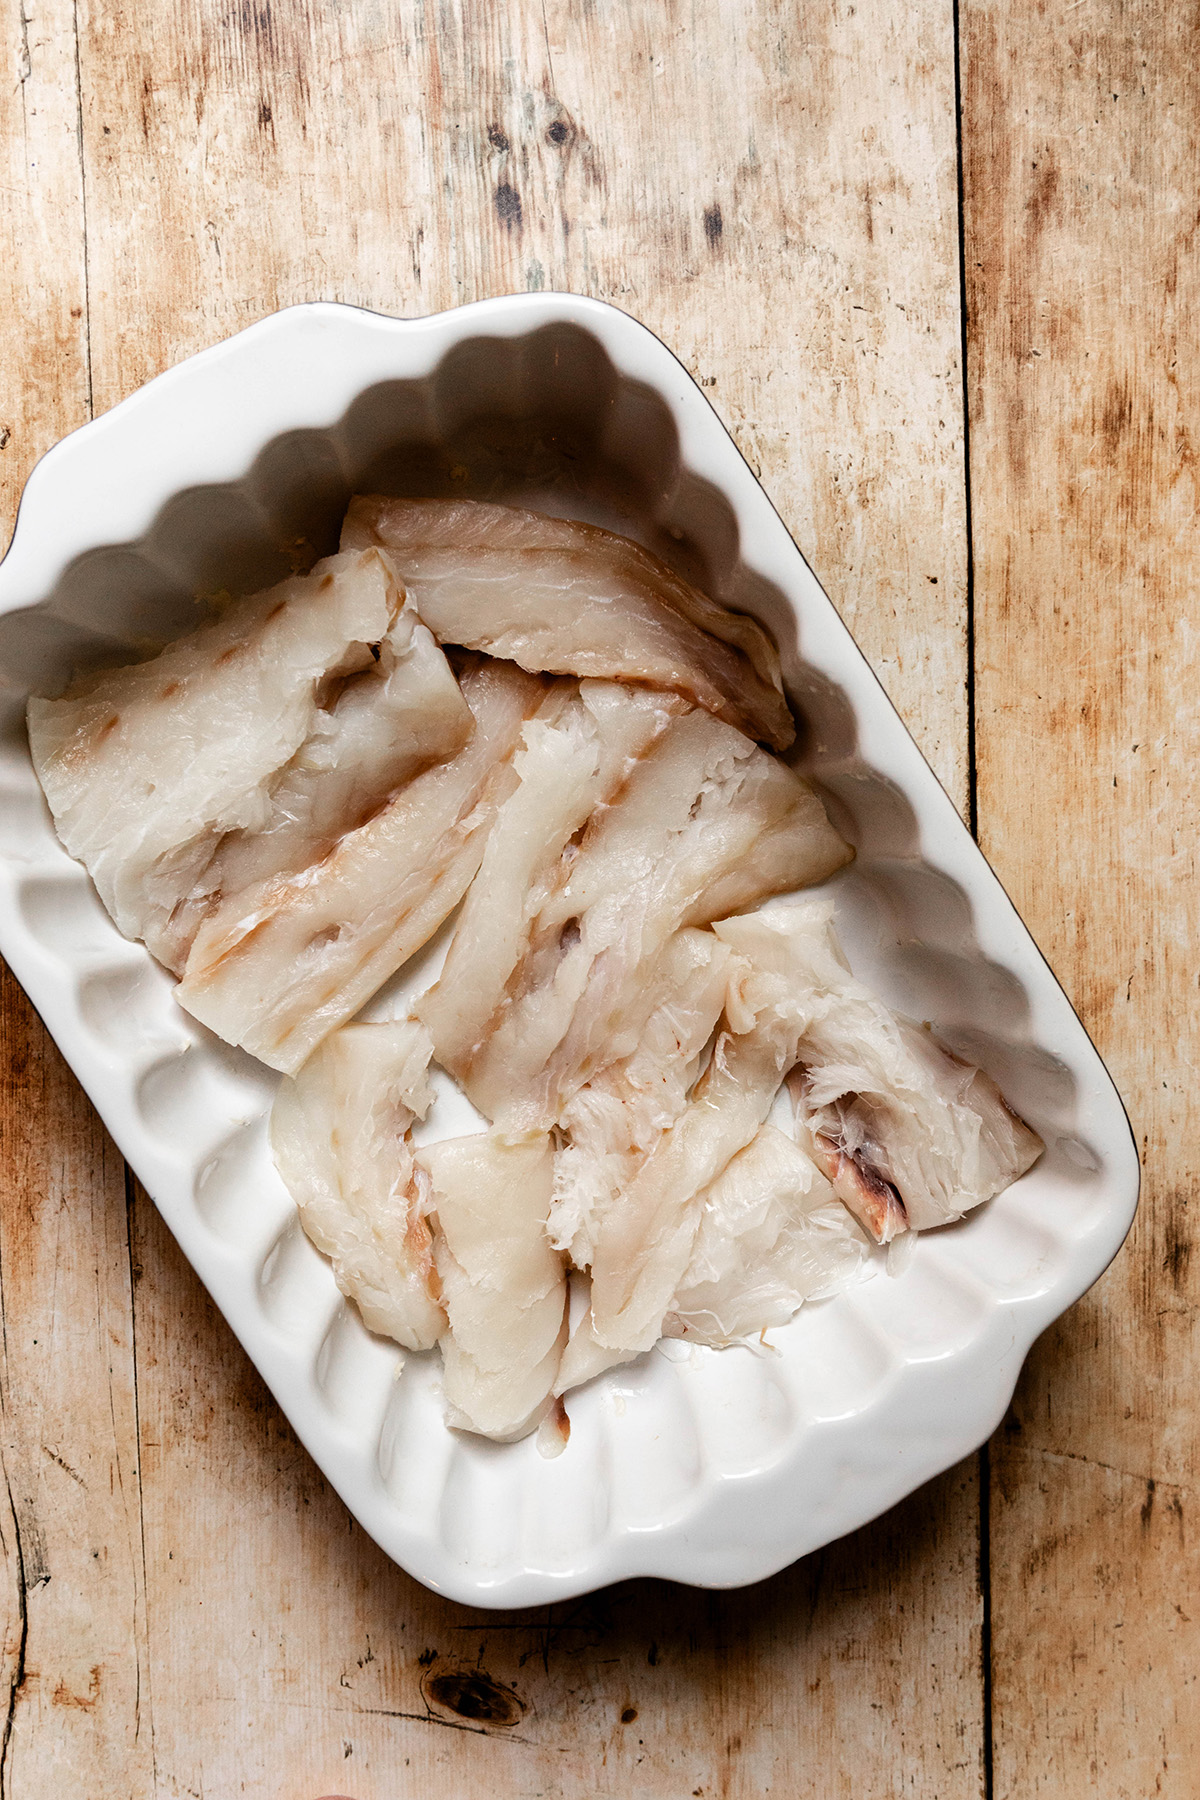
Pat the cod: with paper towel to make sure you get all of the excess water out of the fish
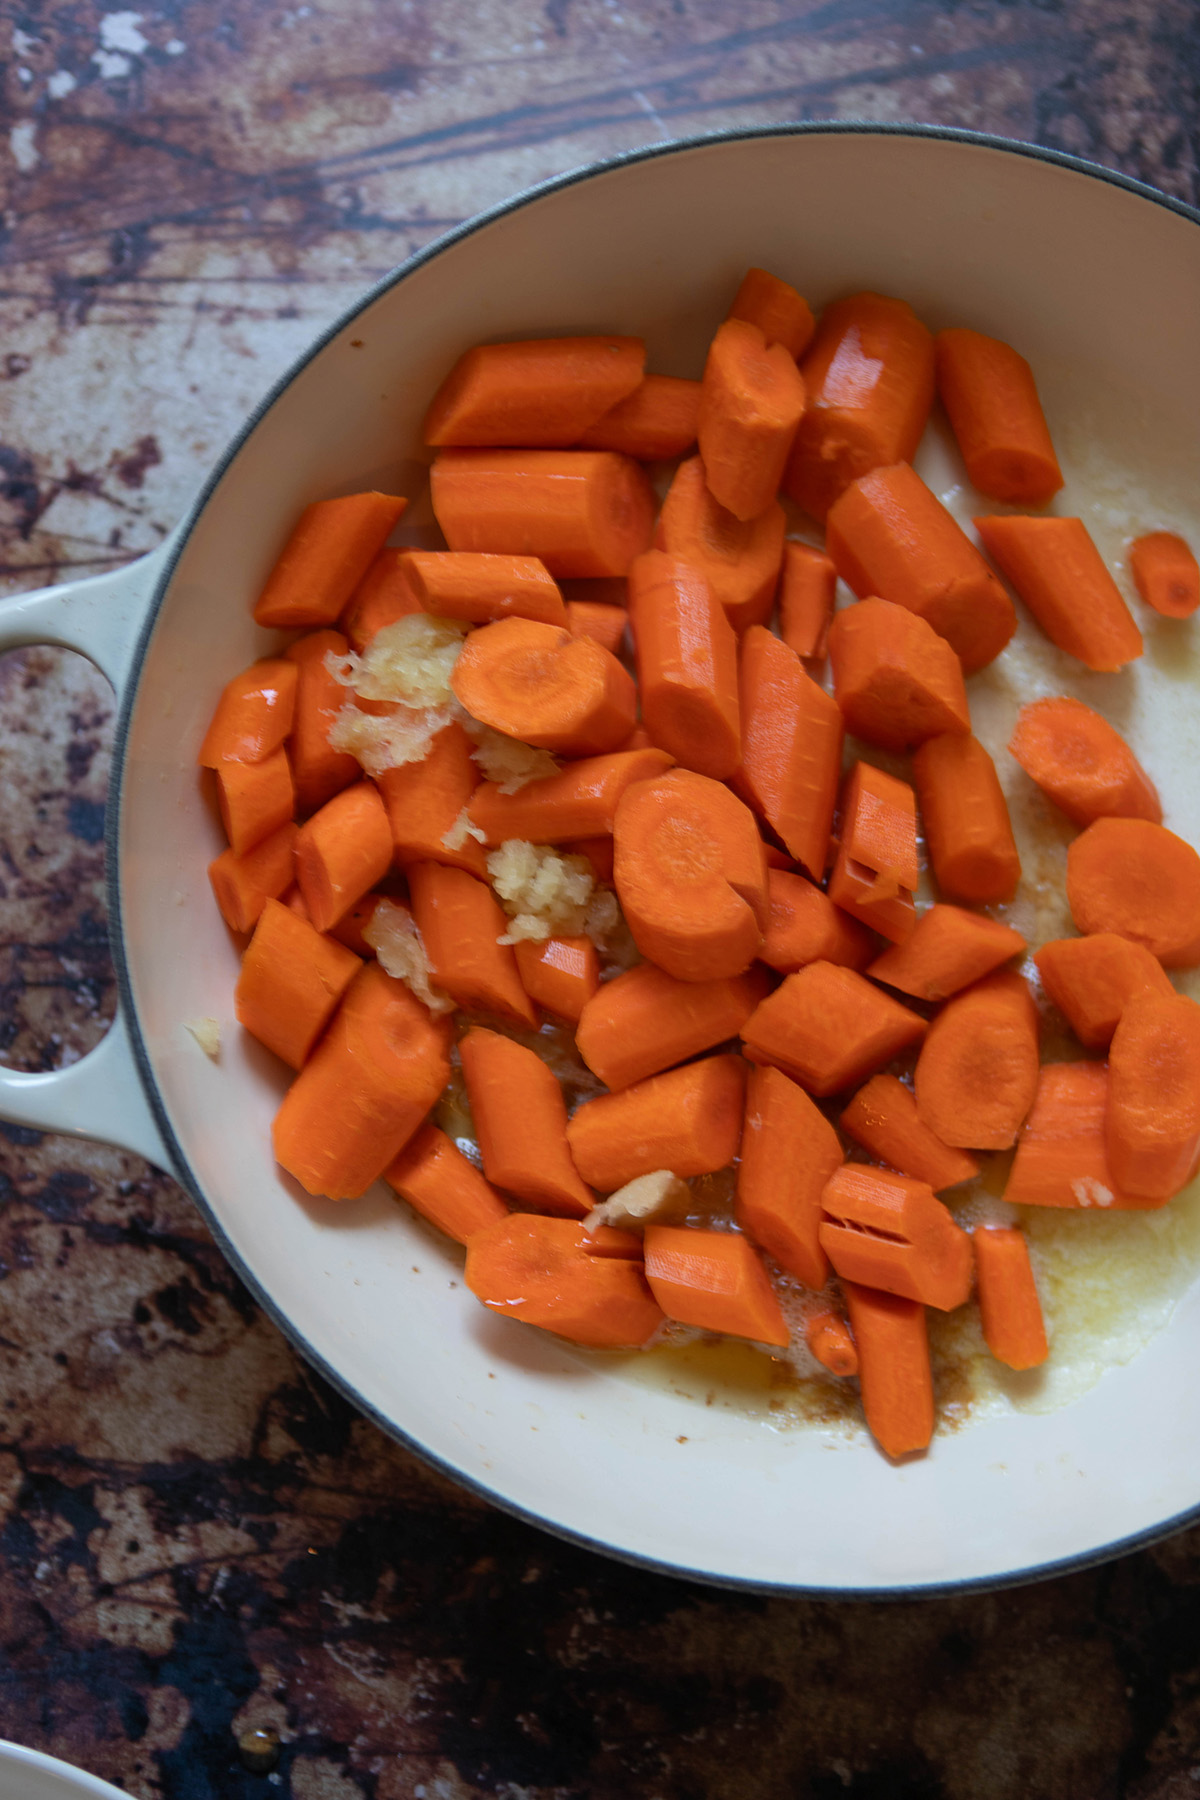
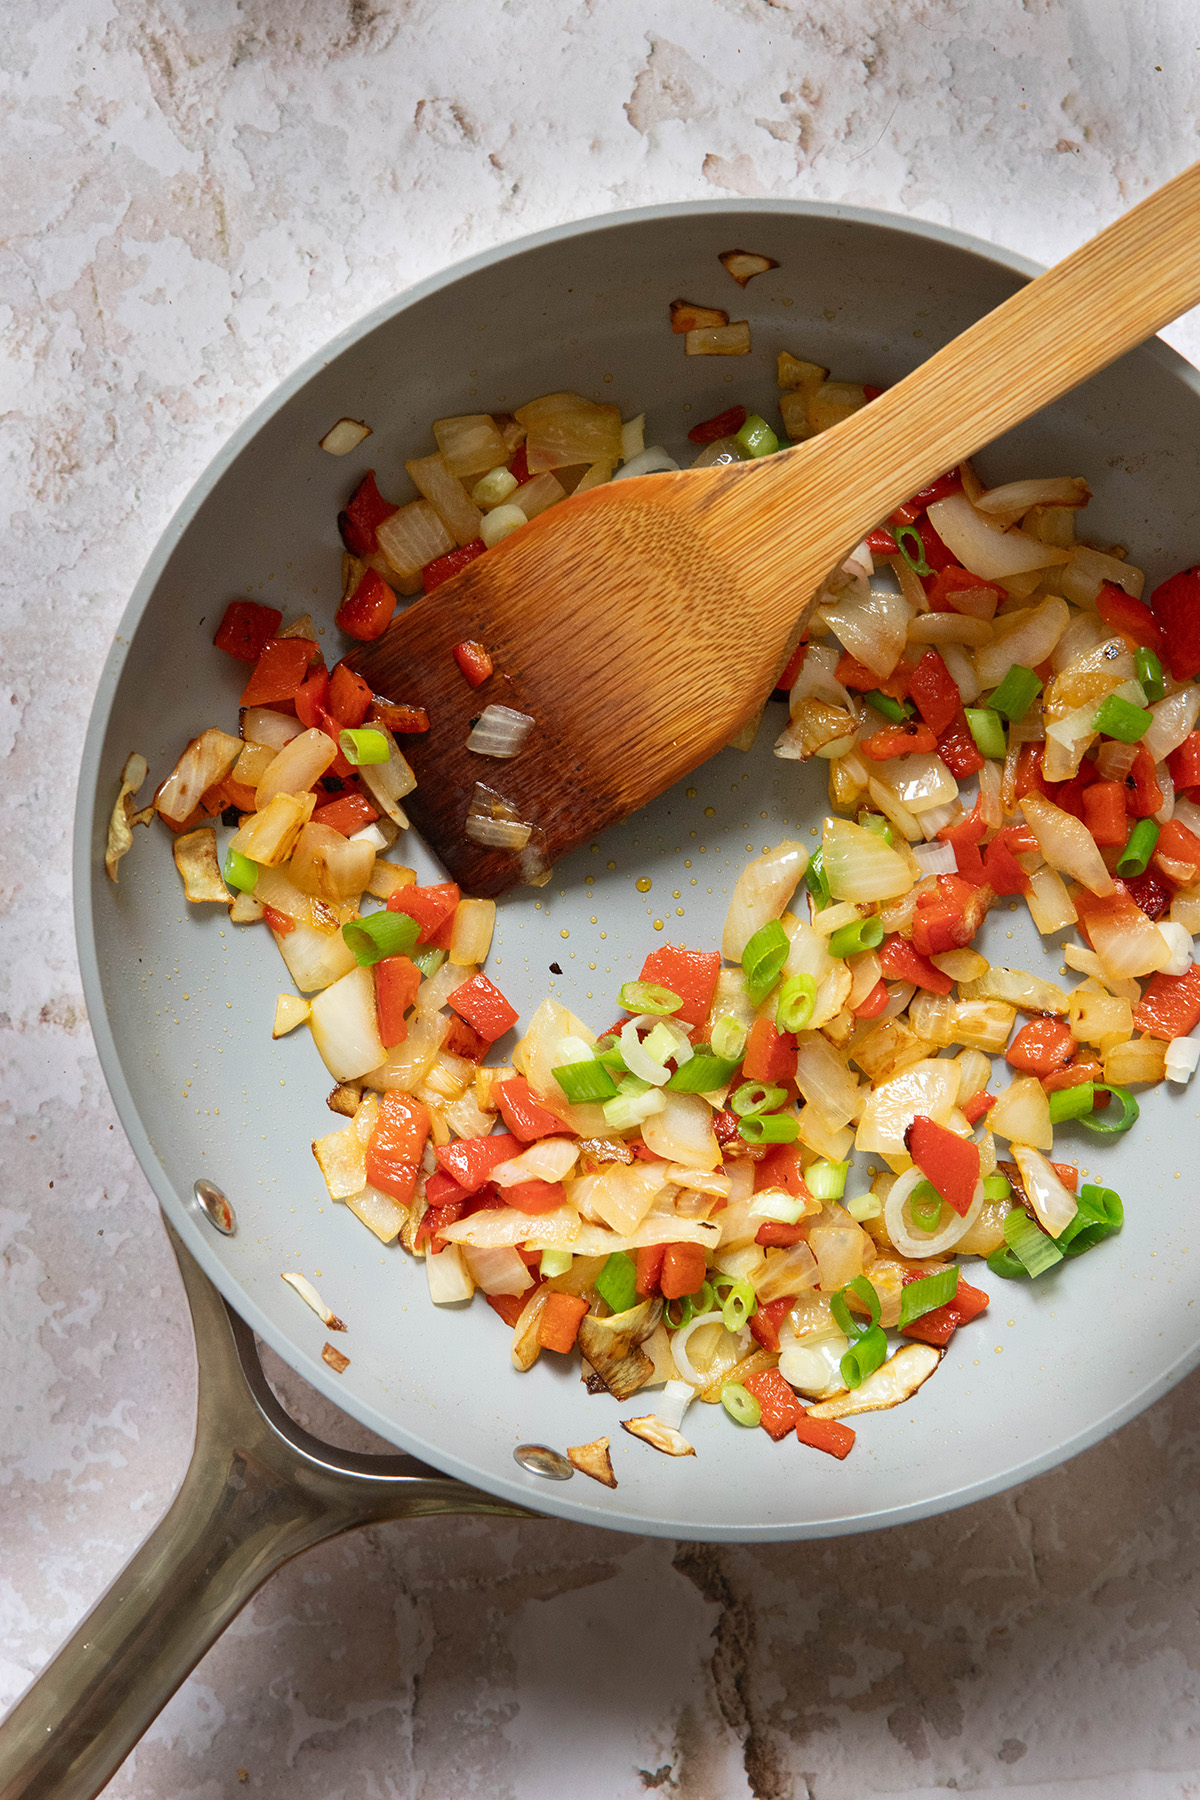
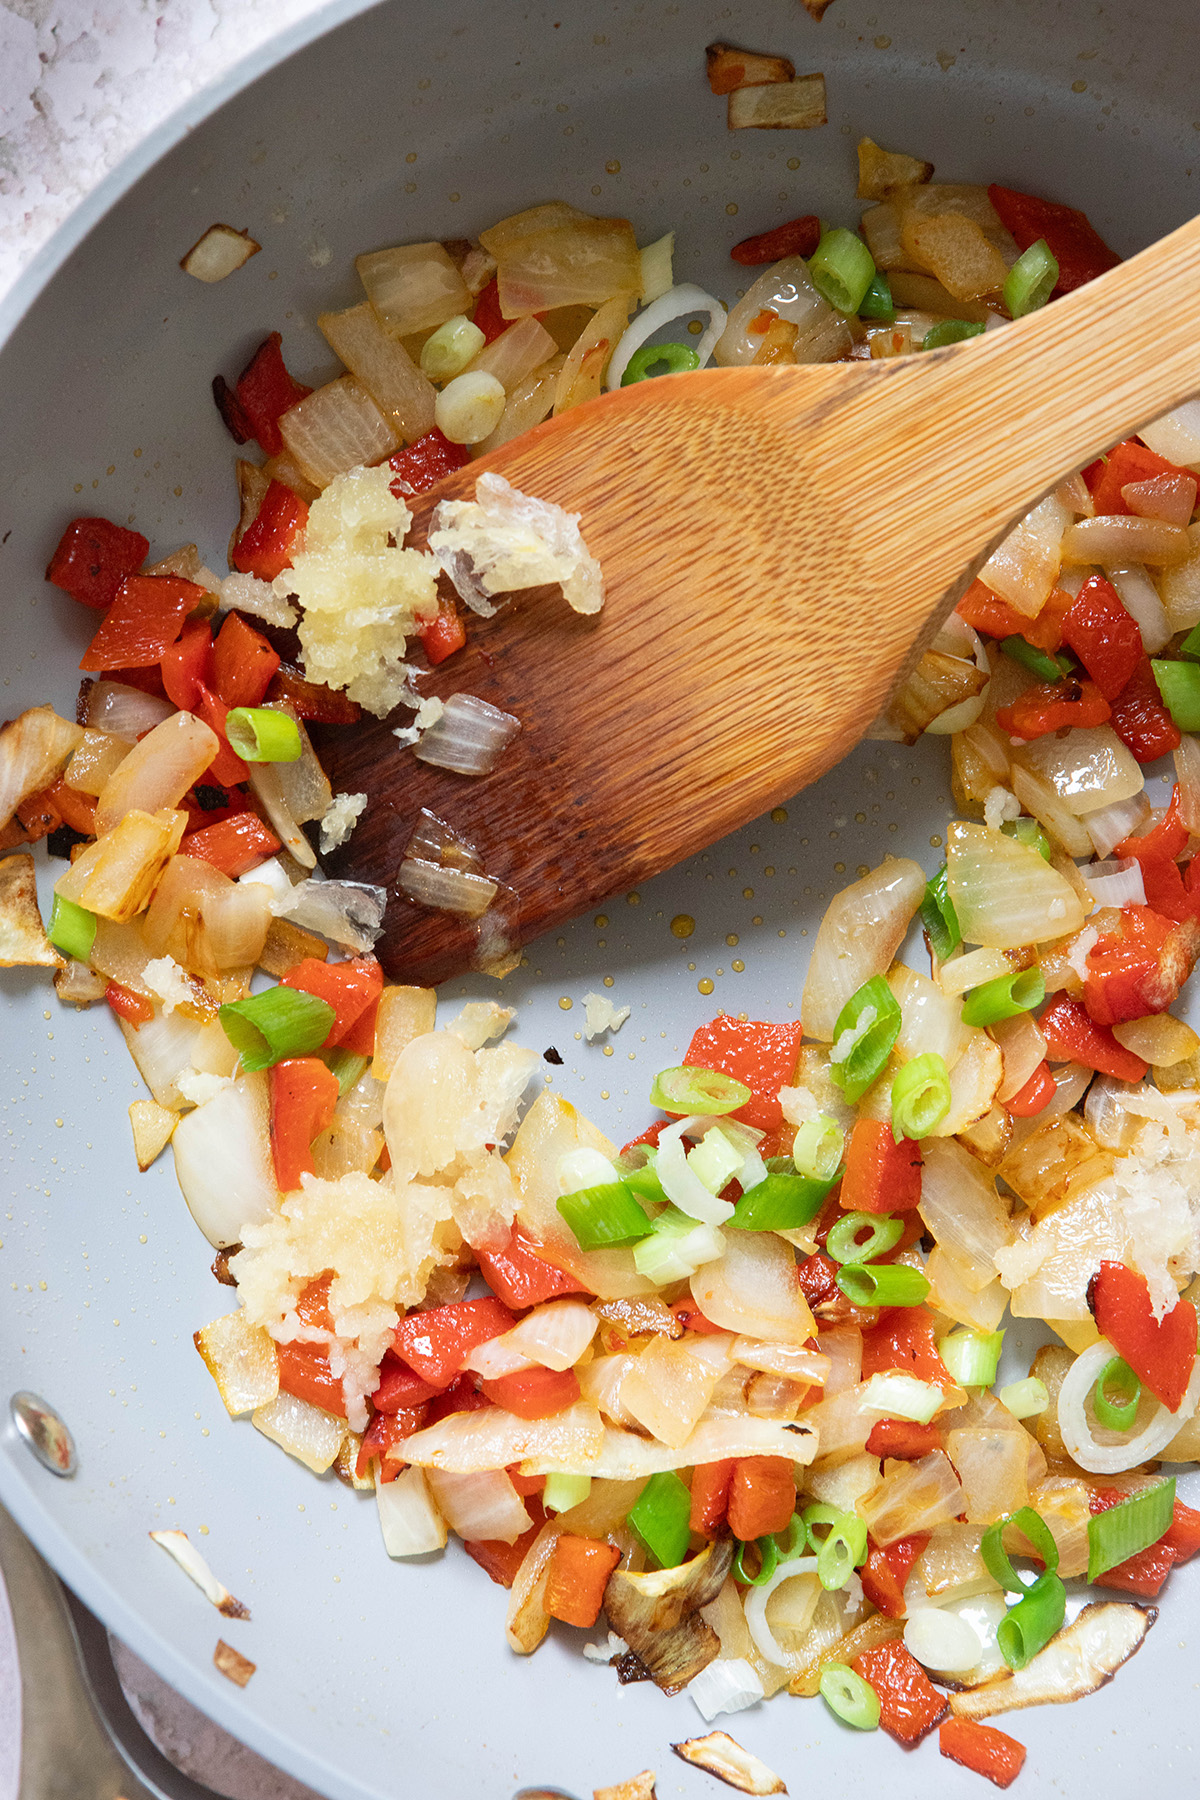
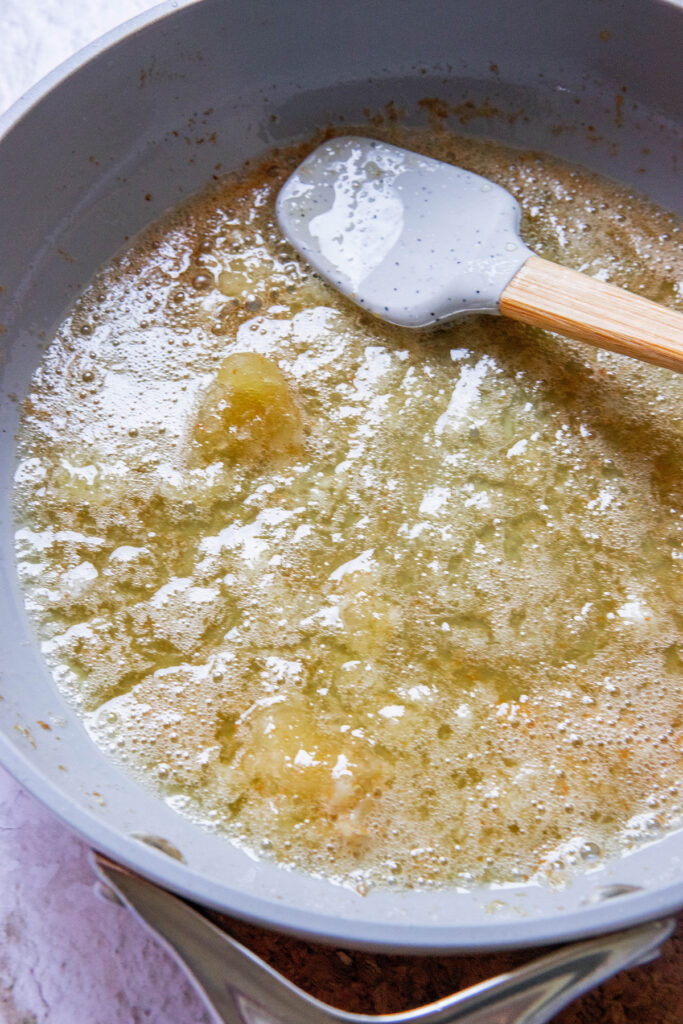
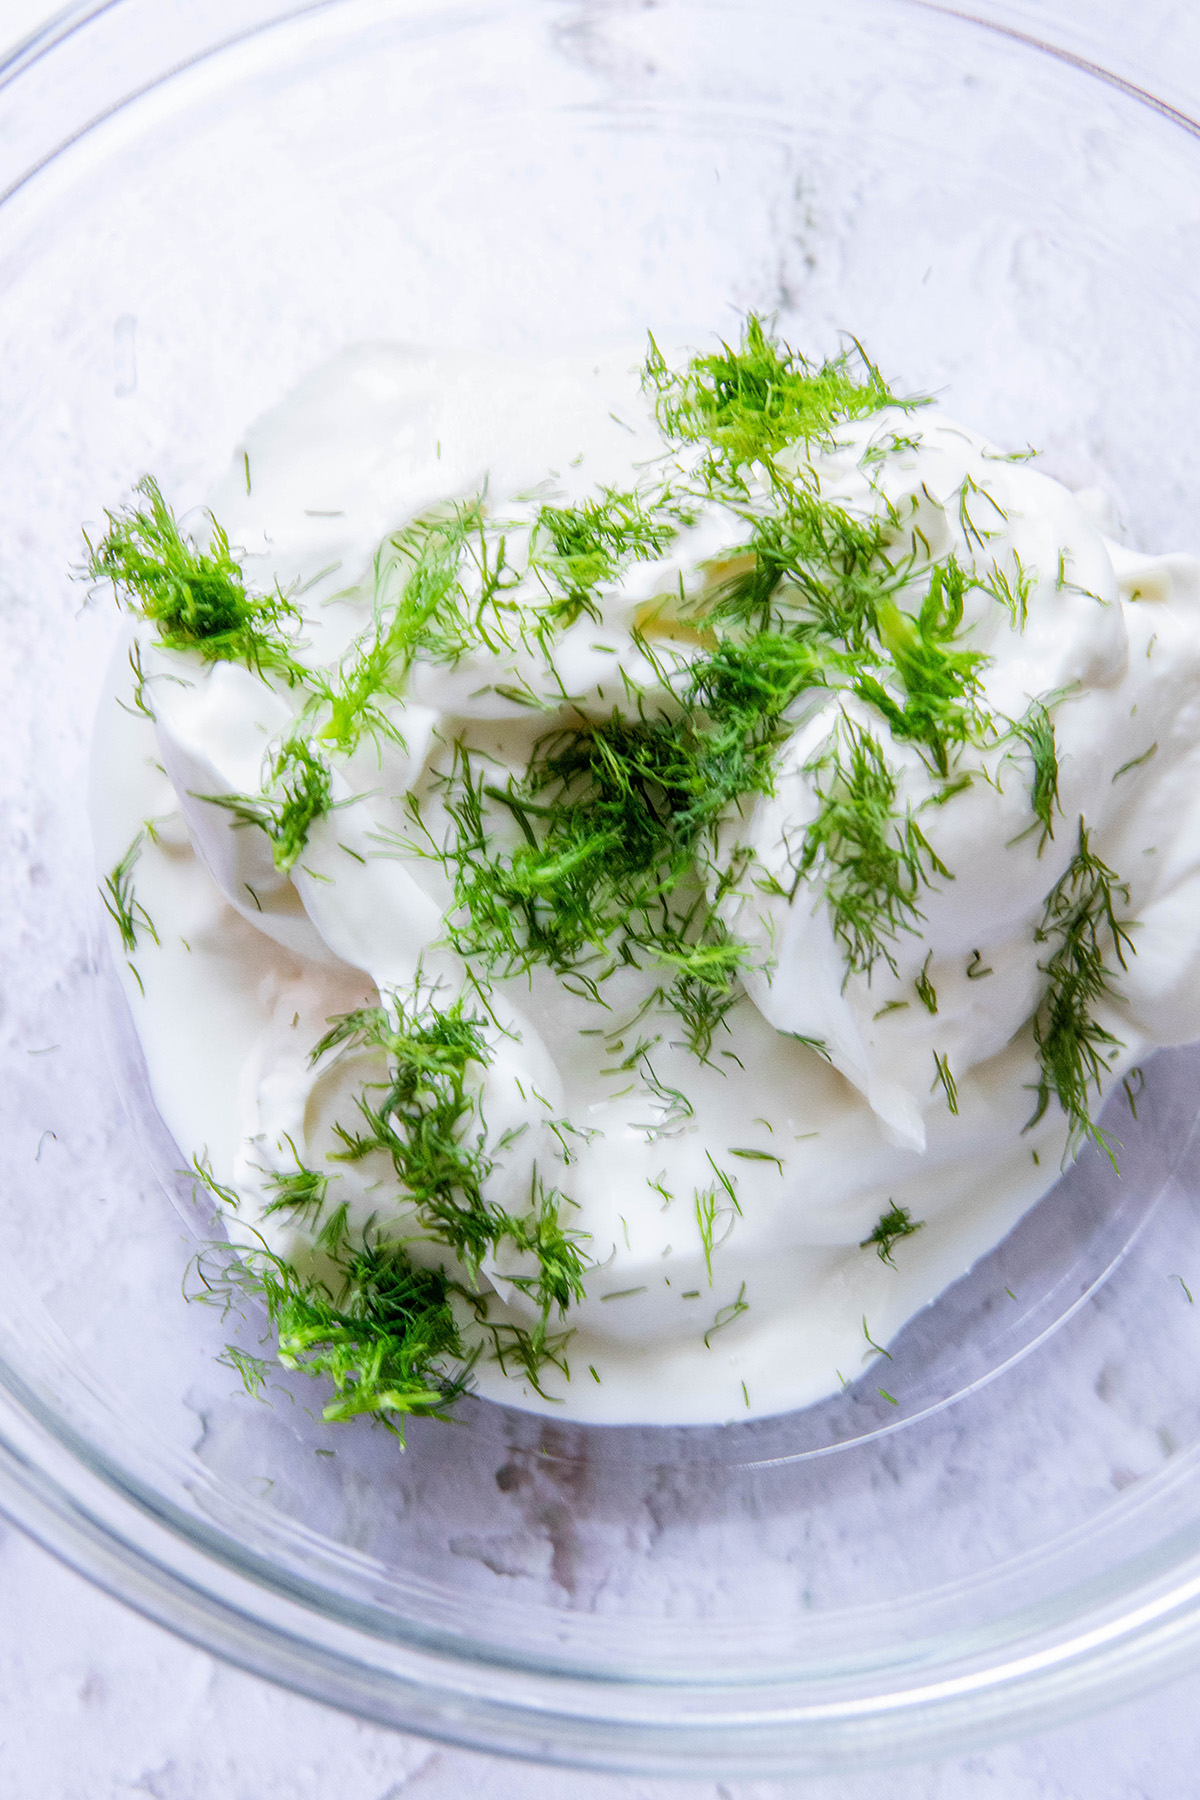
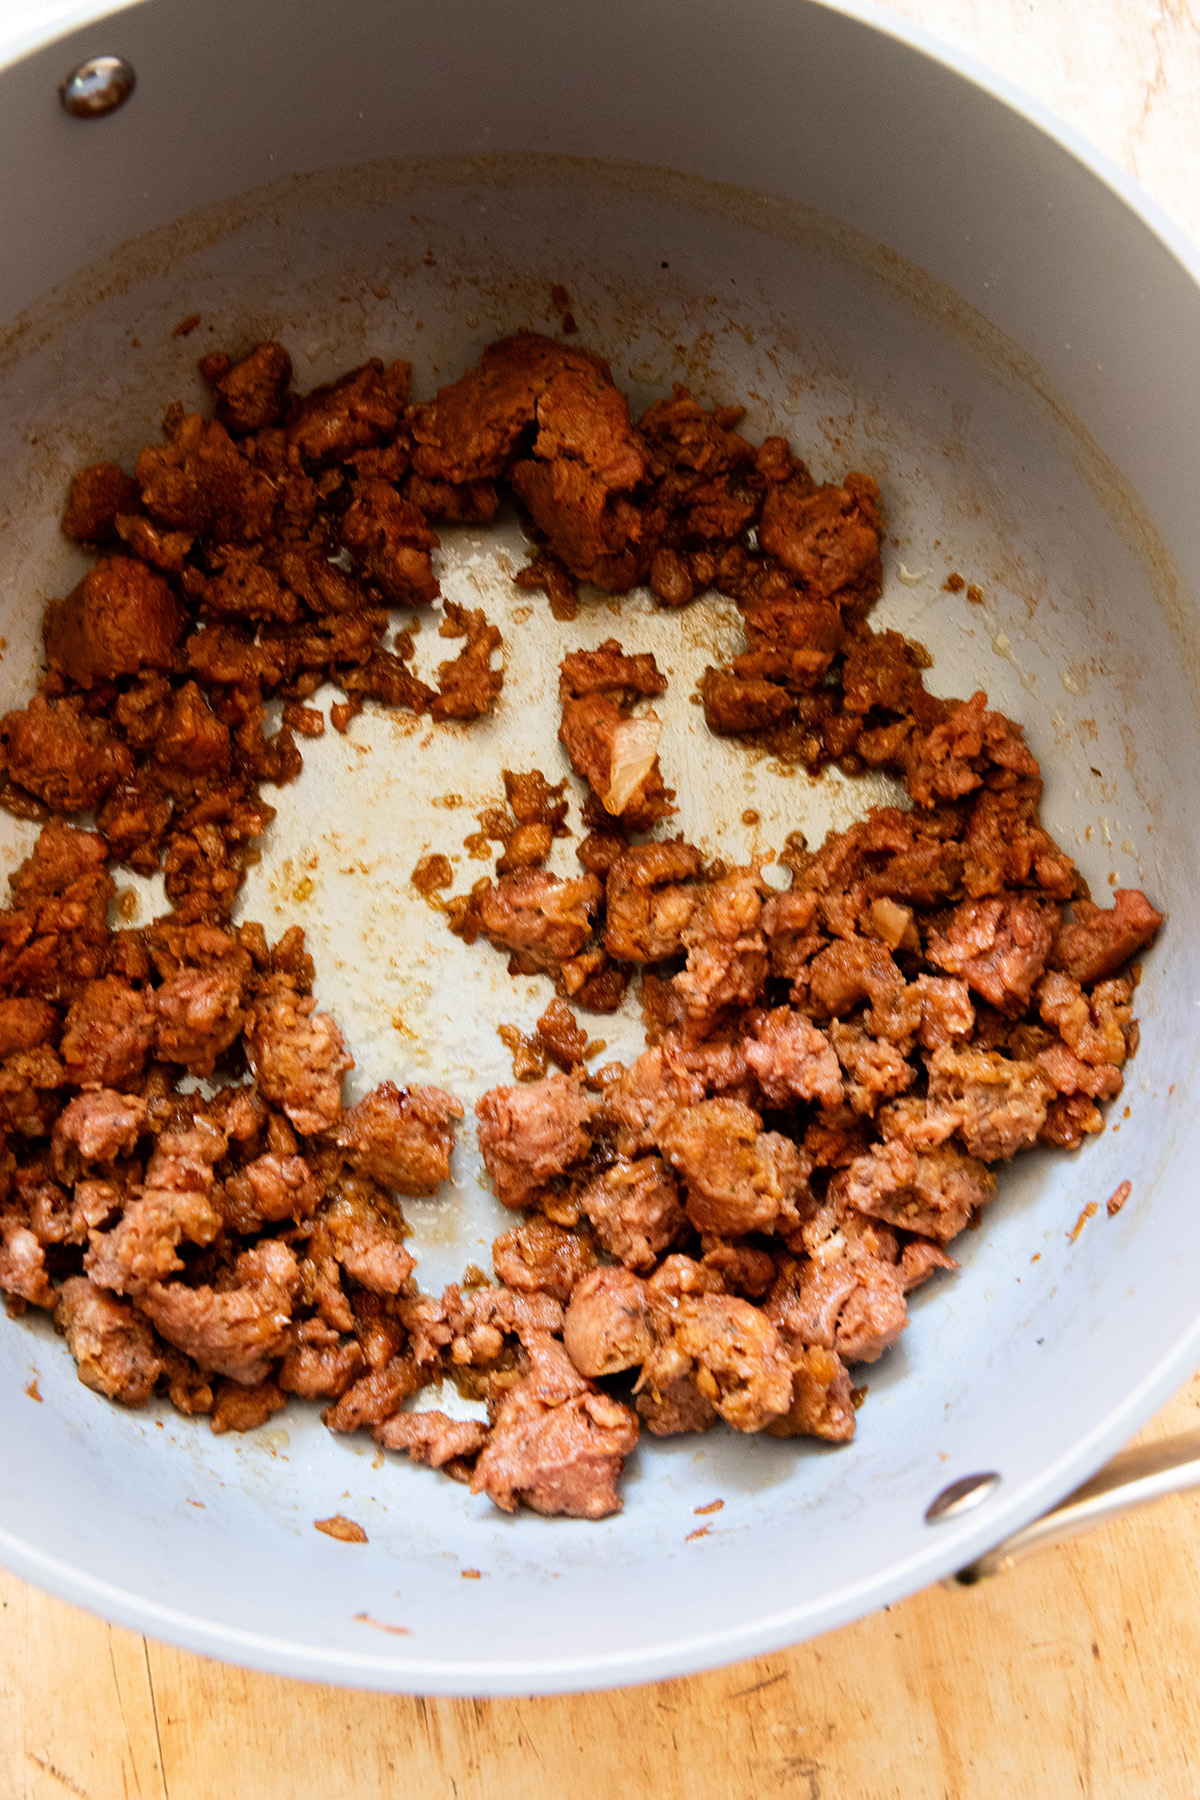
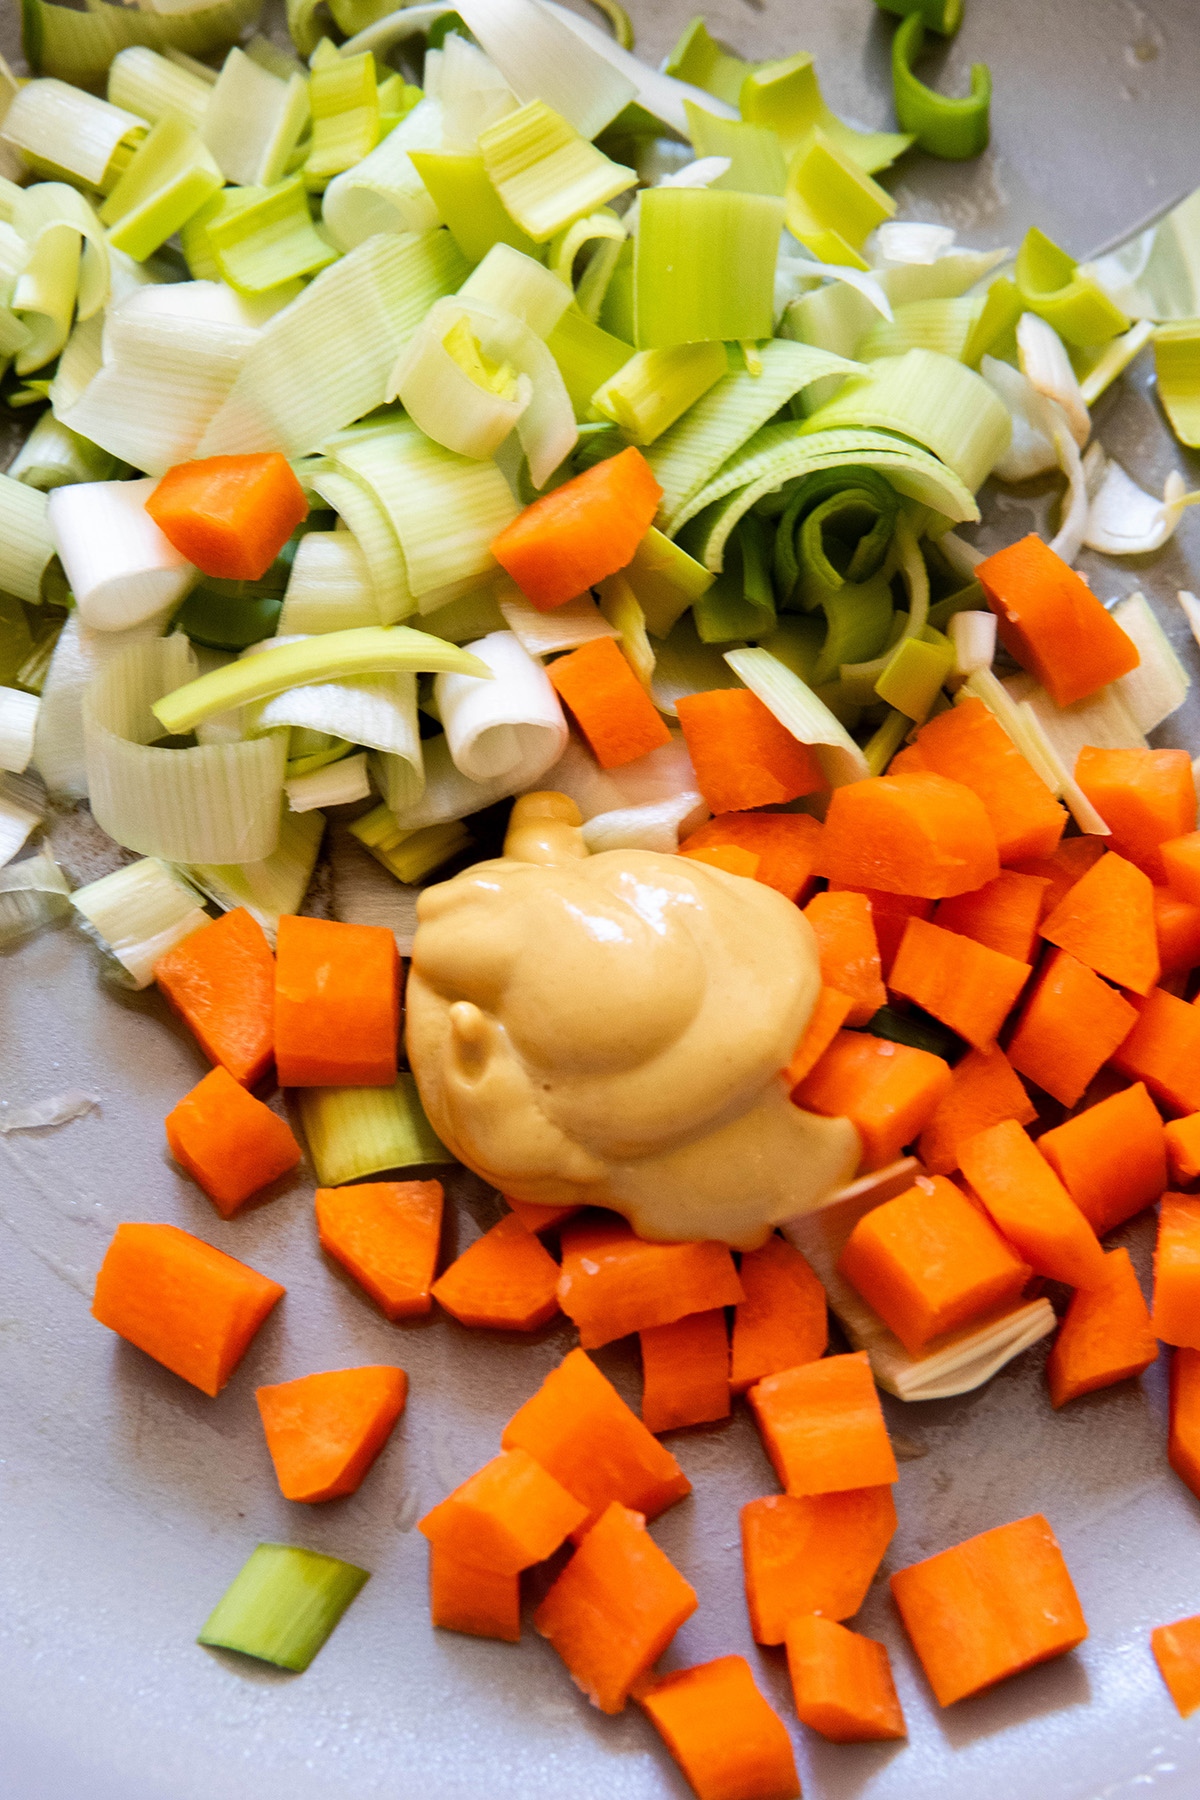
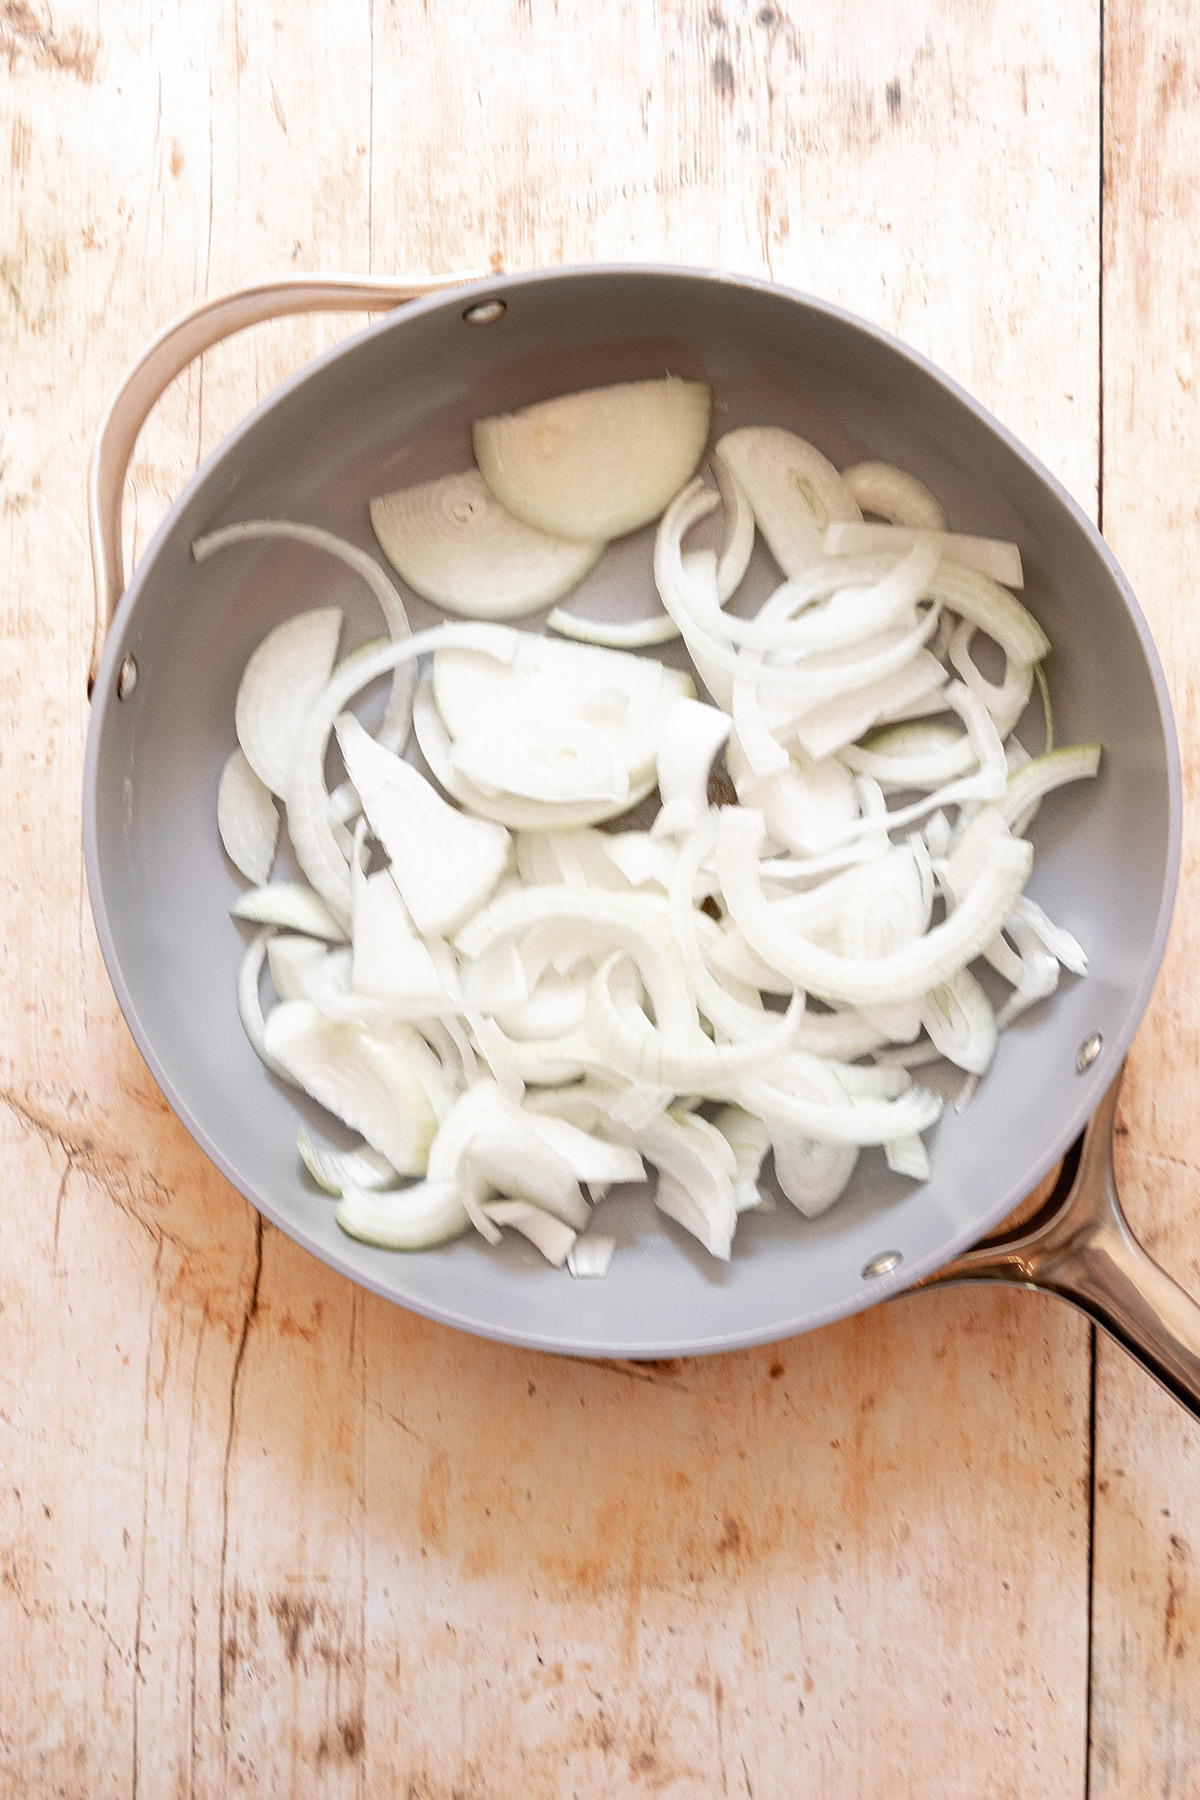
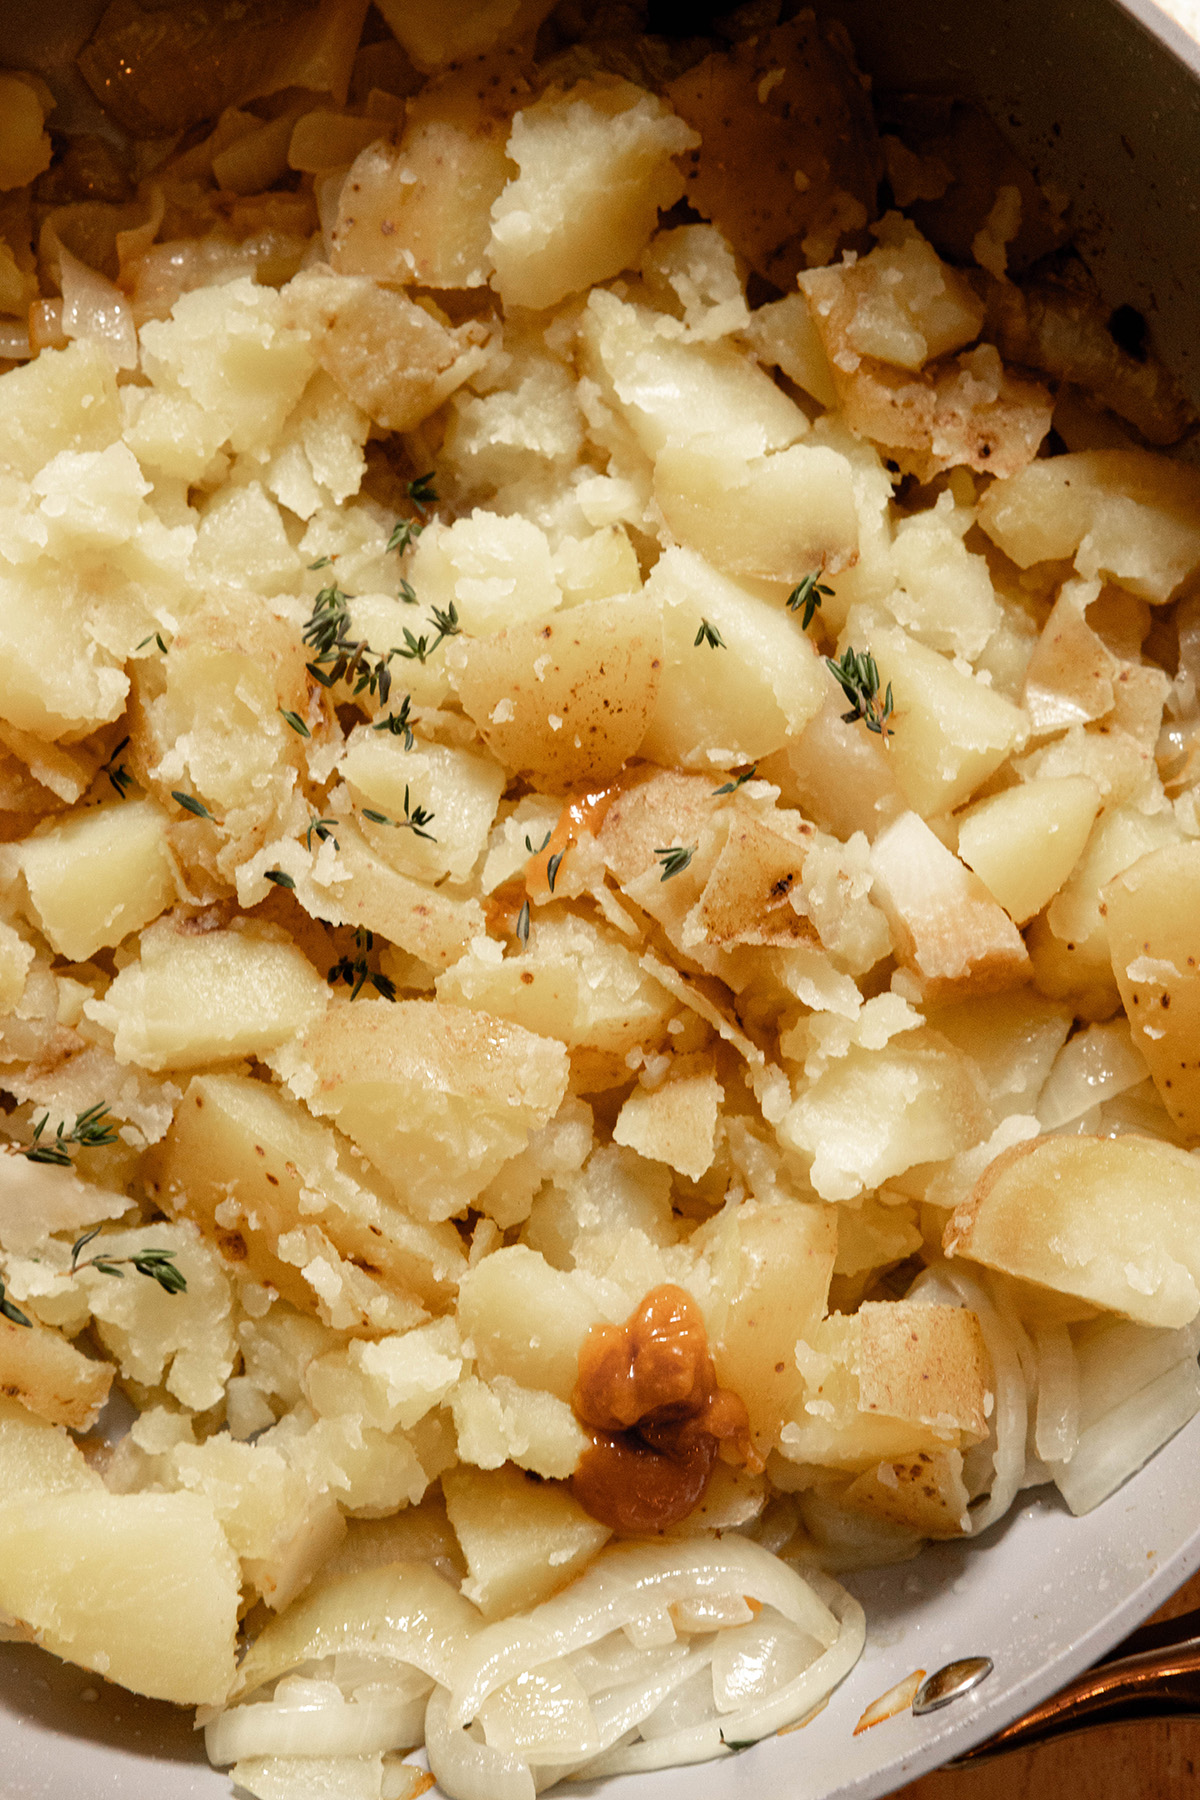
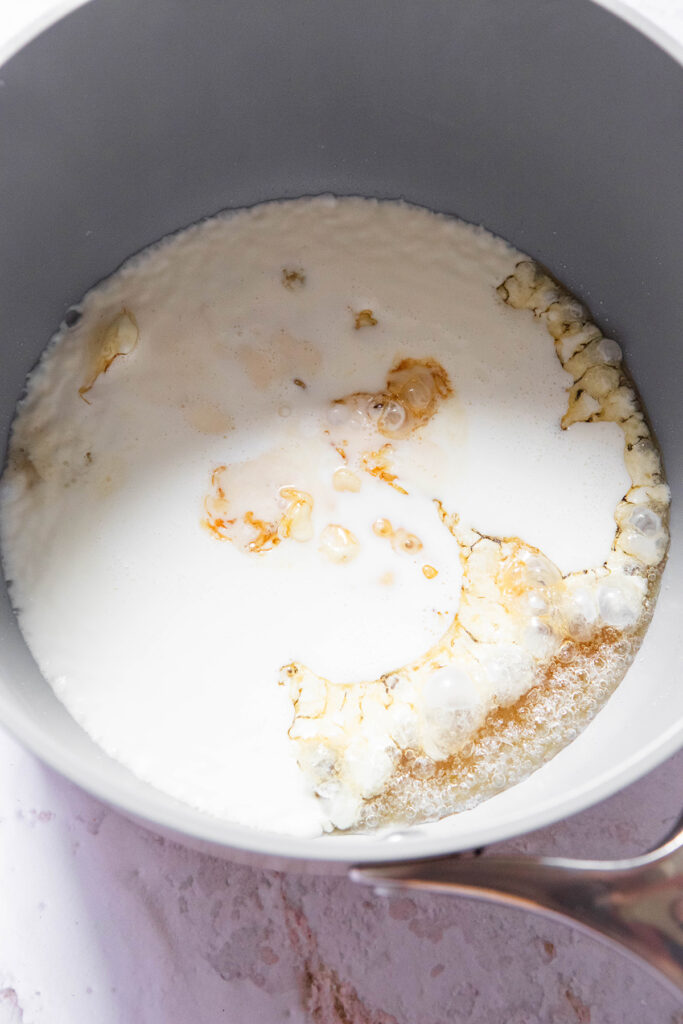
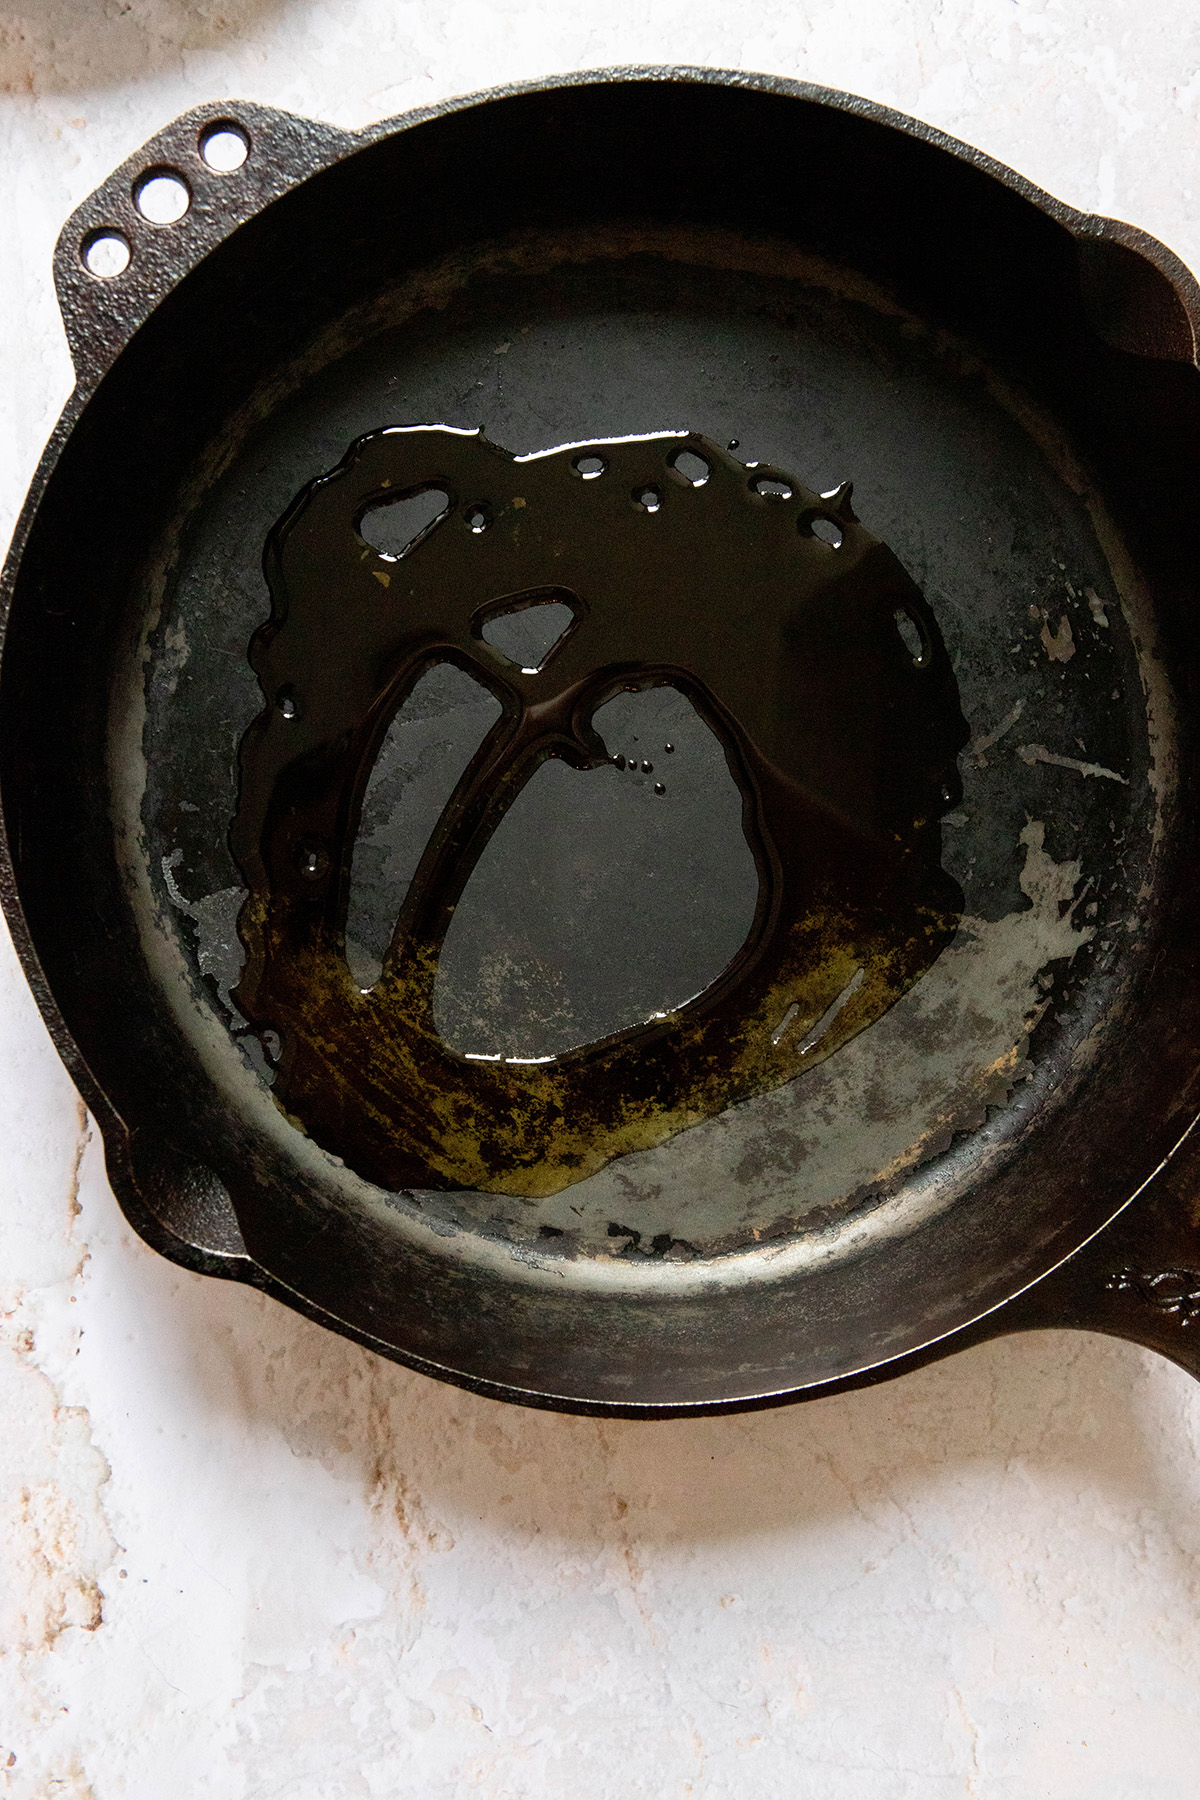
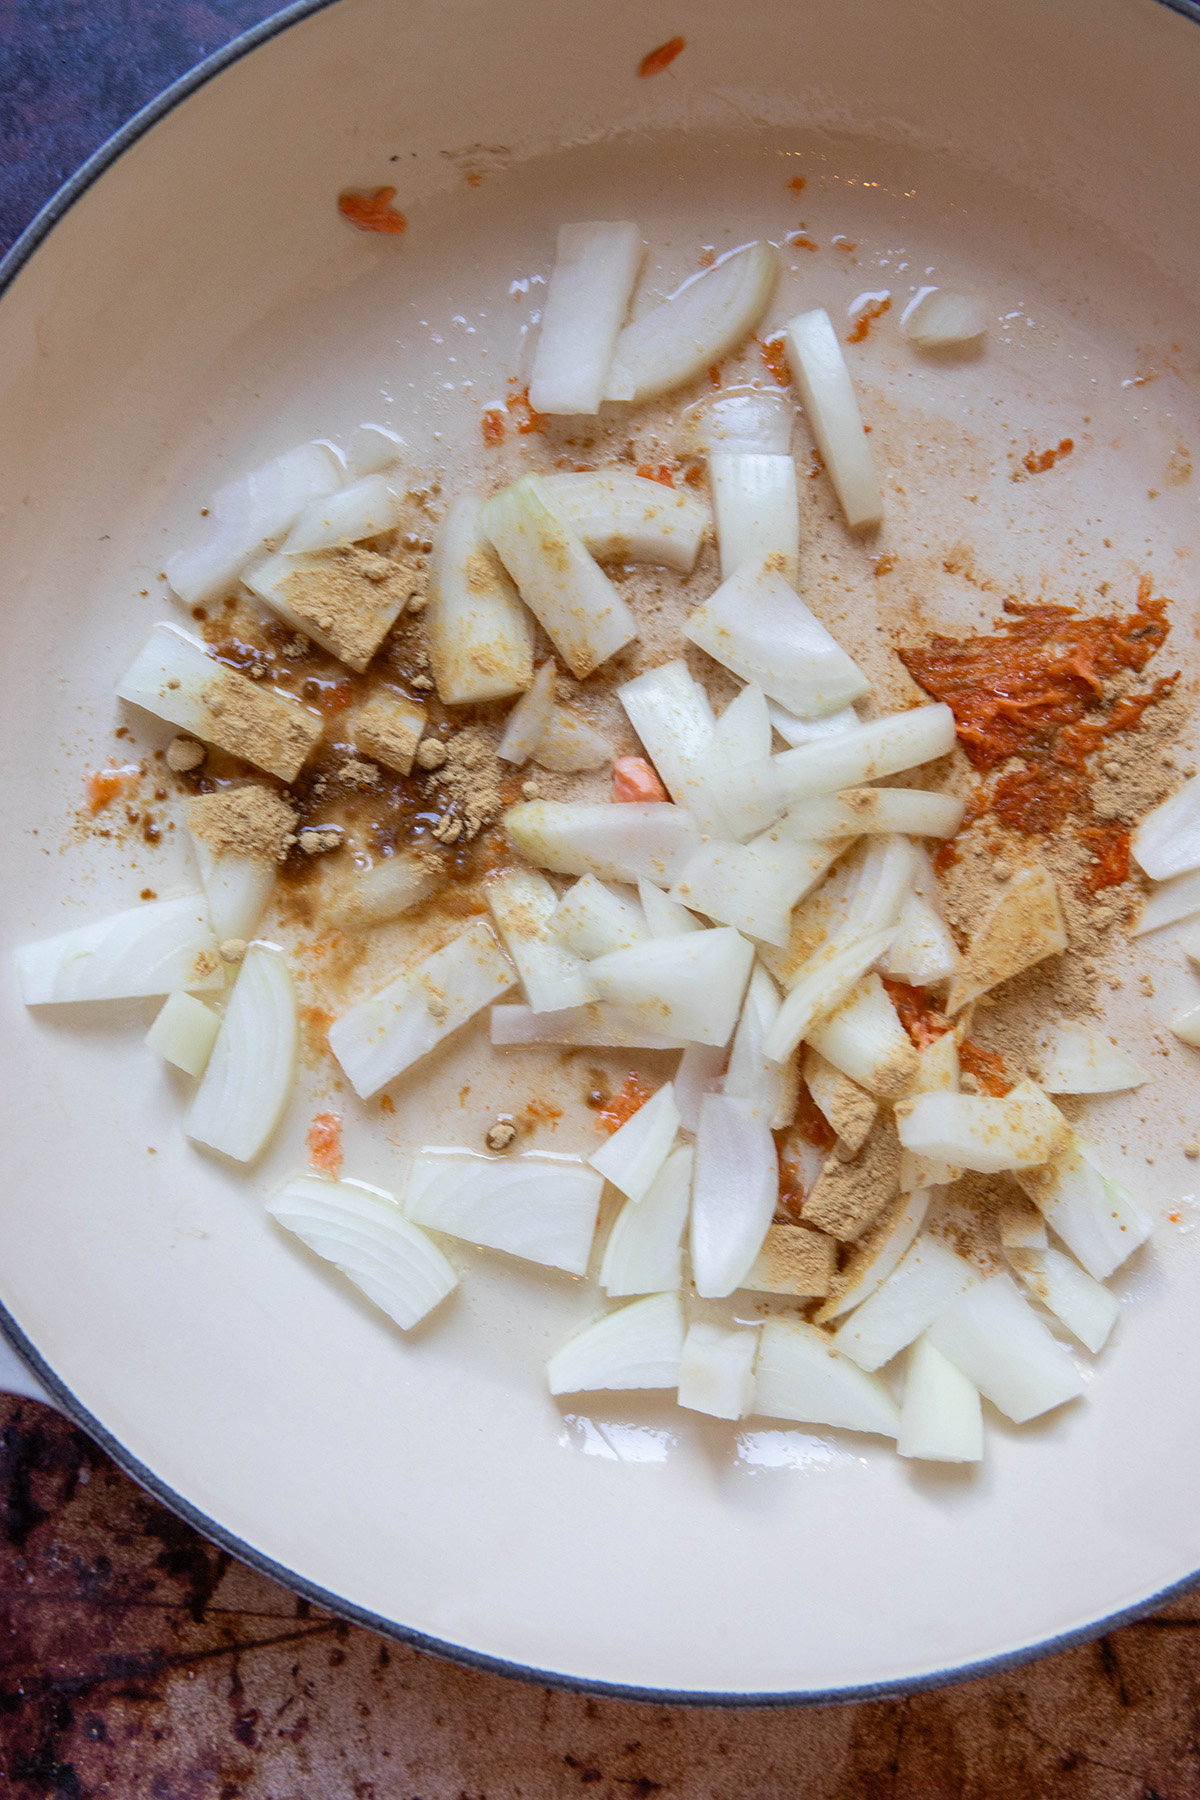
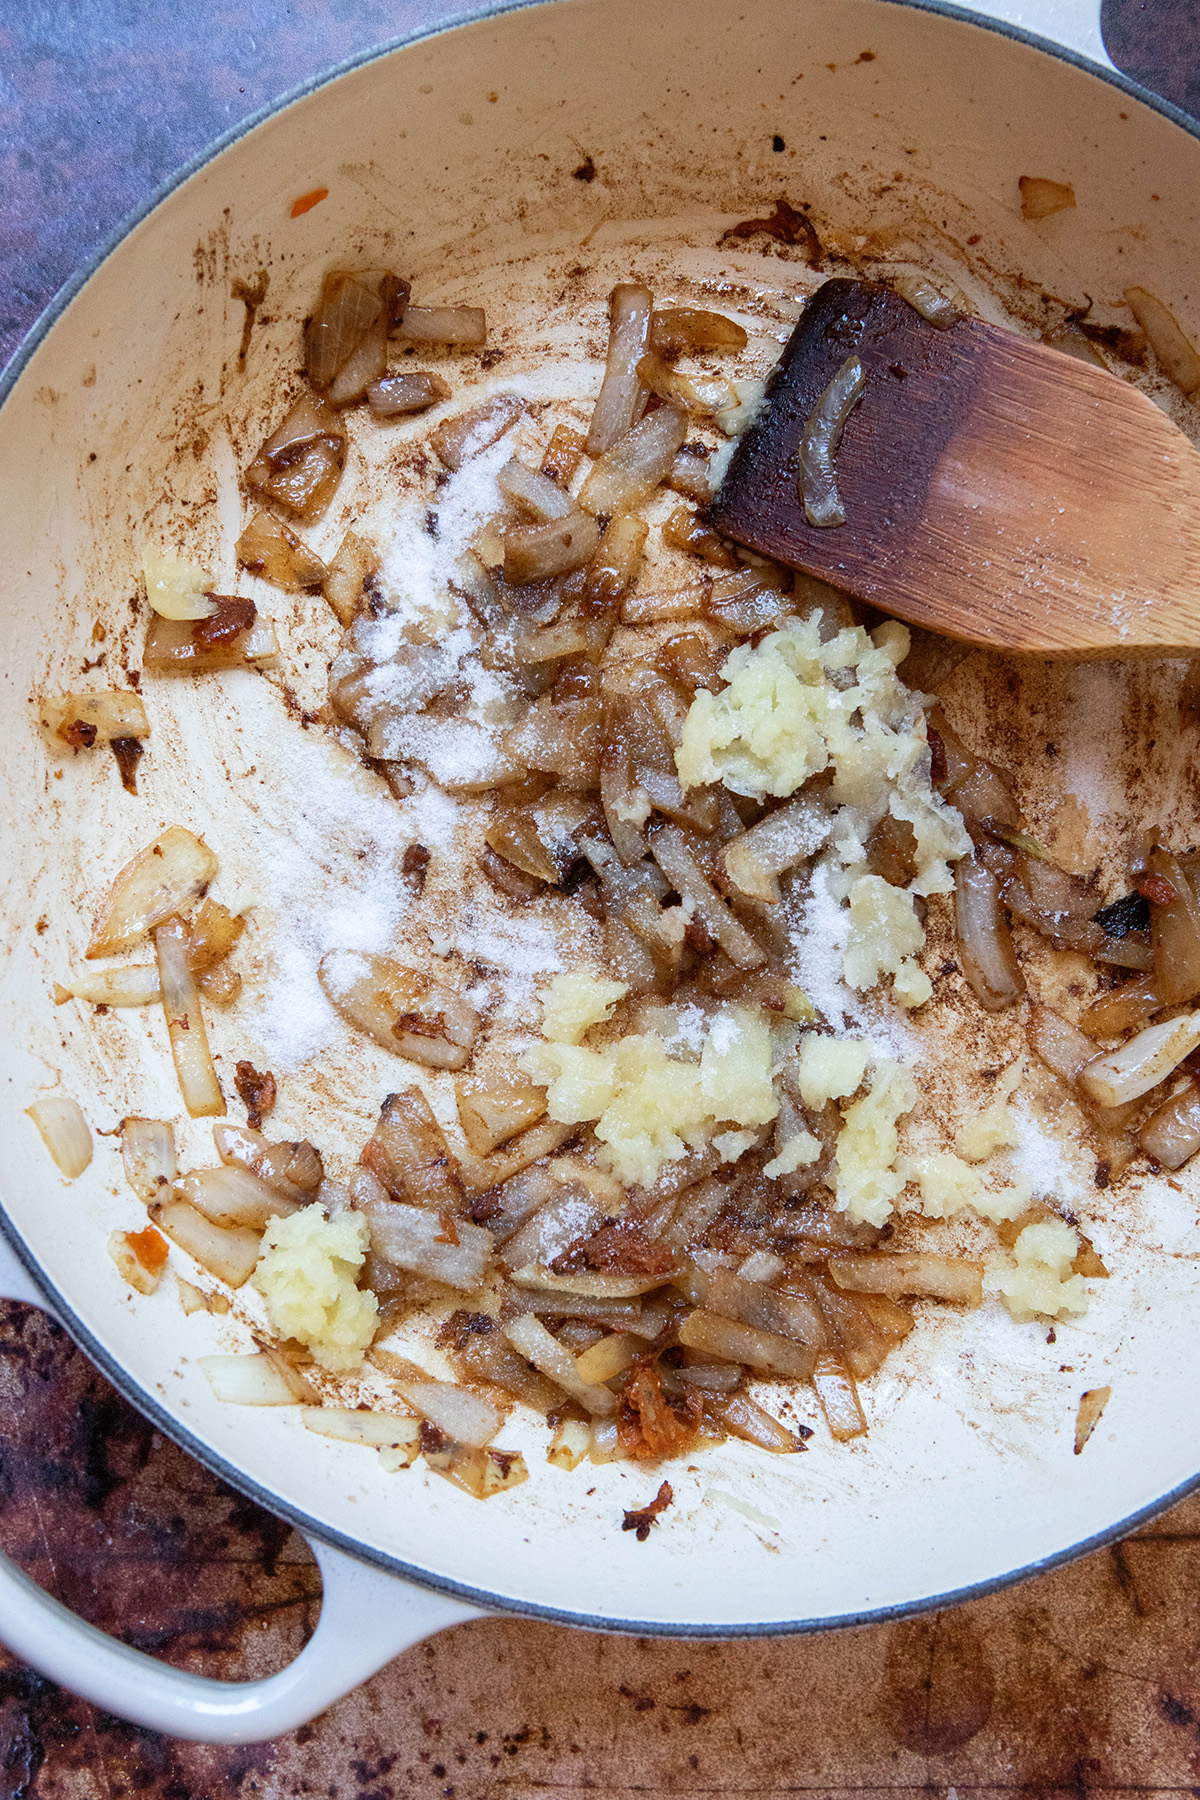
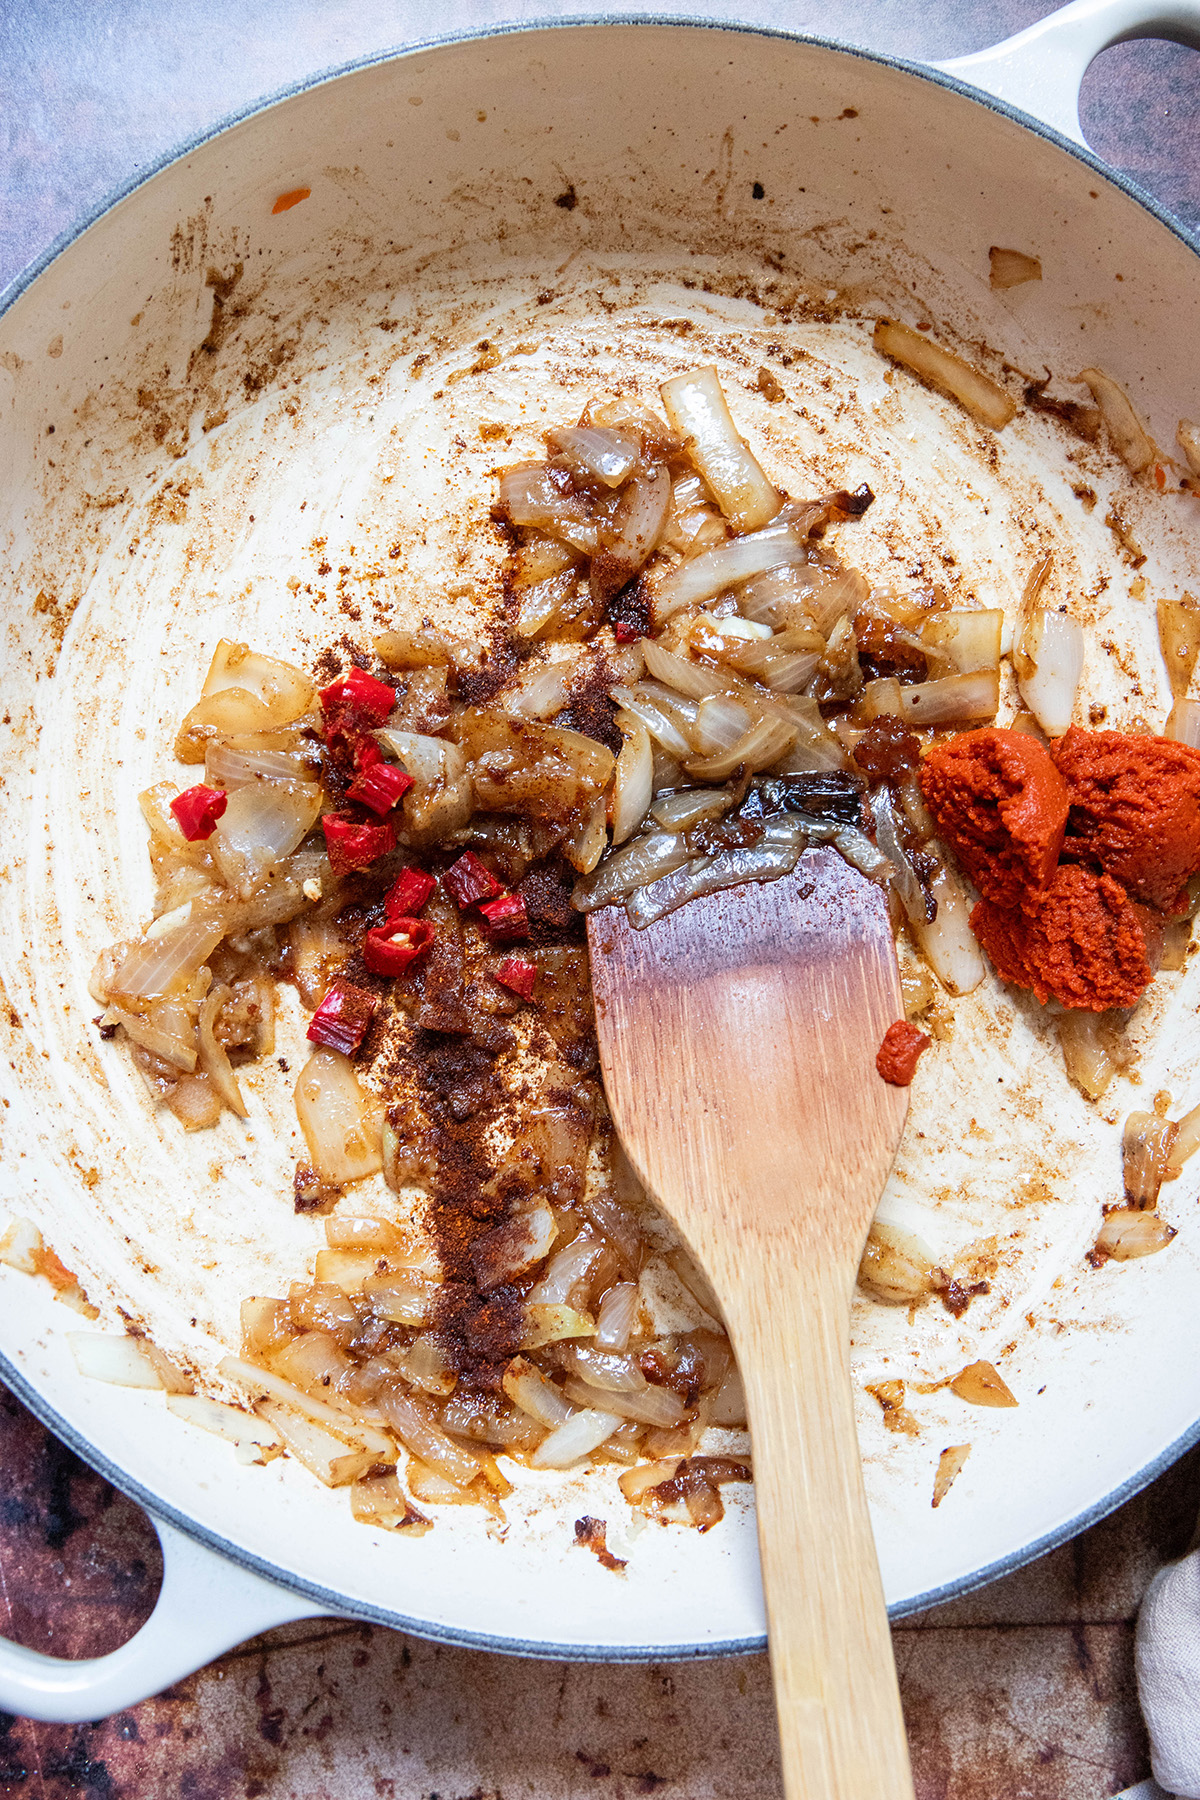
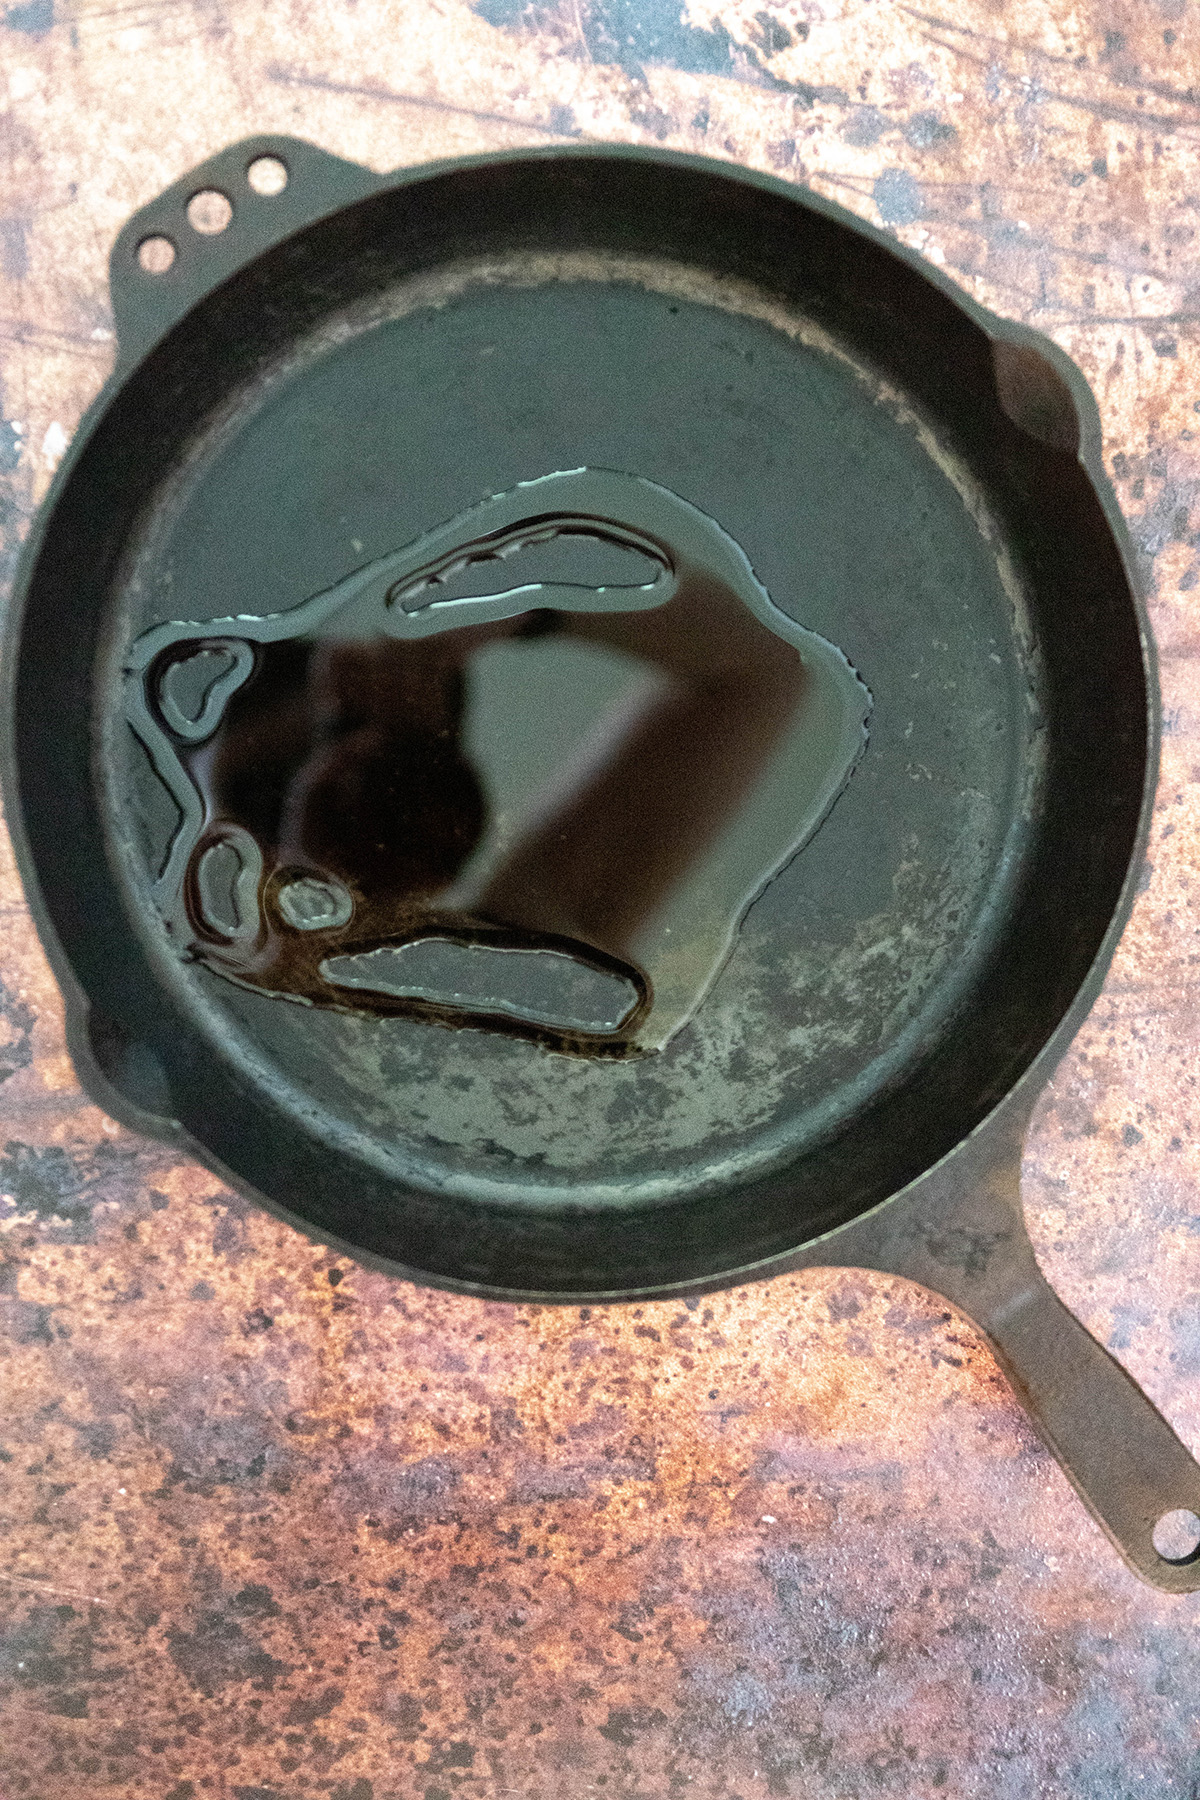
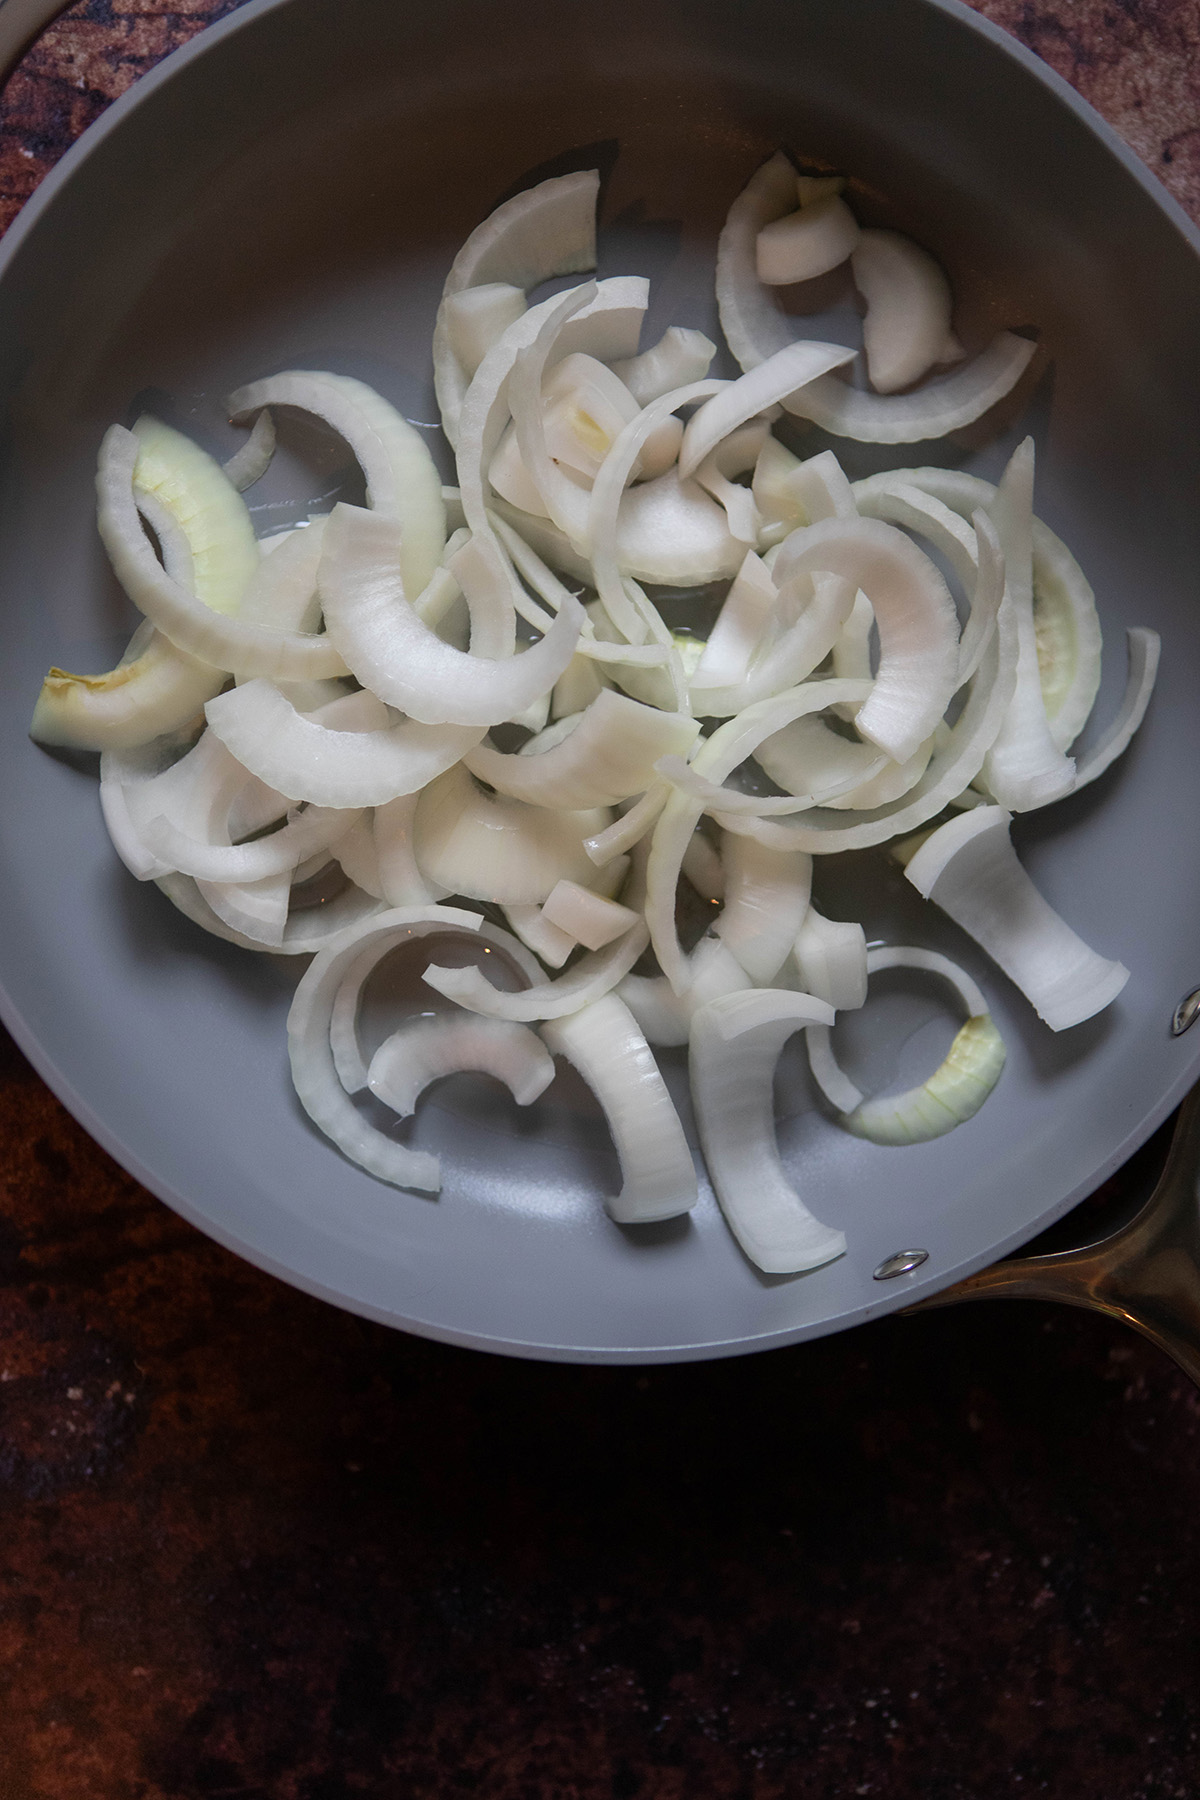
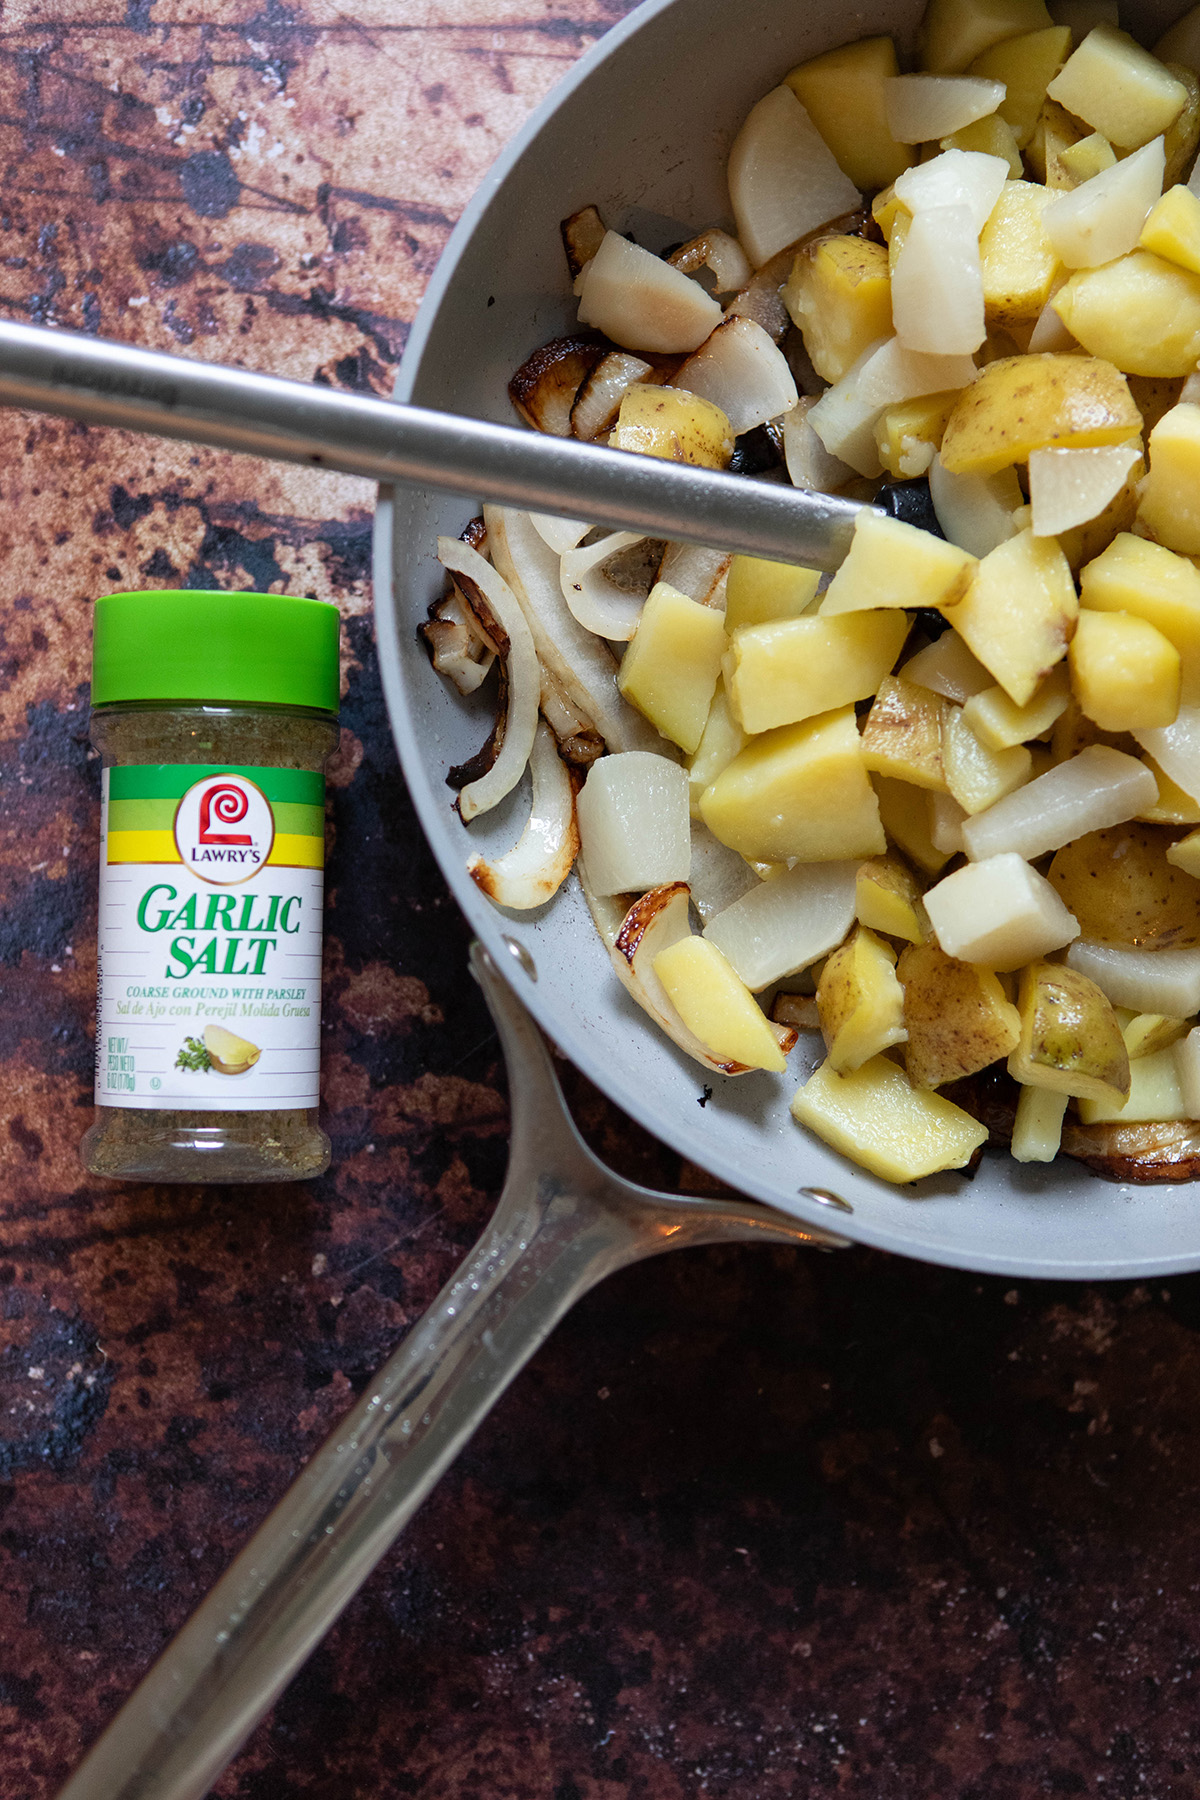
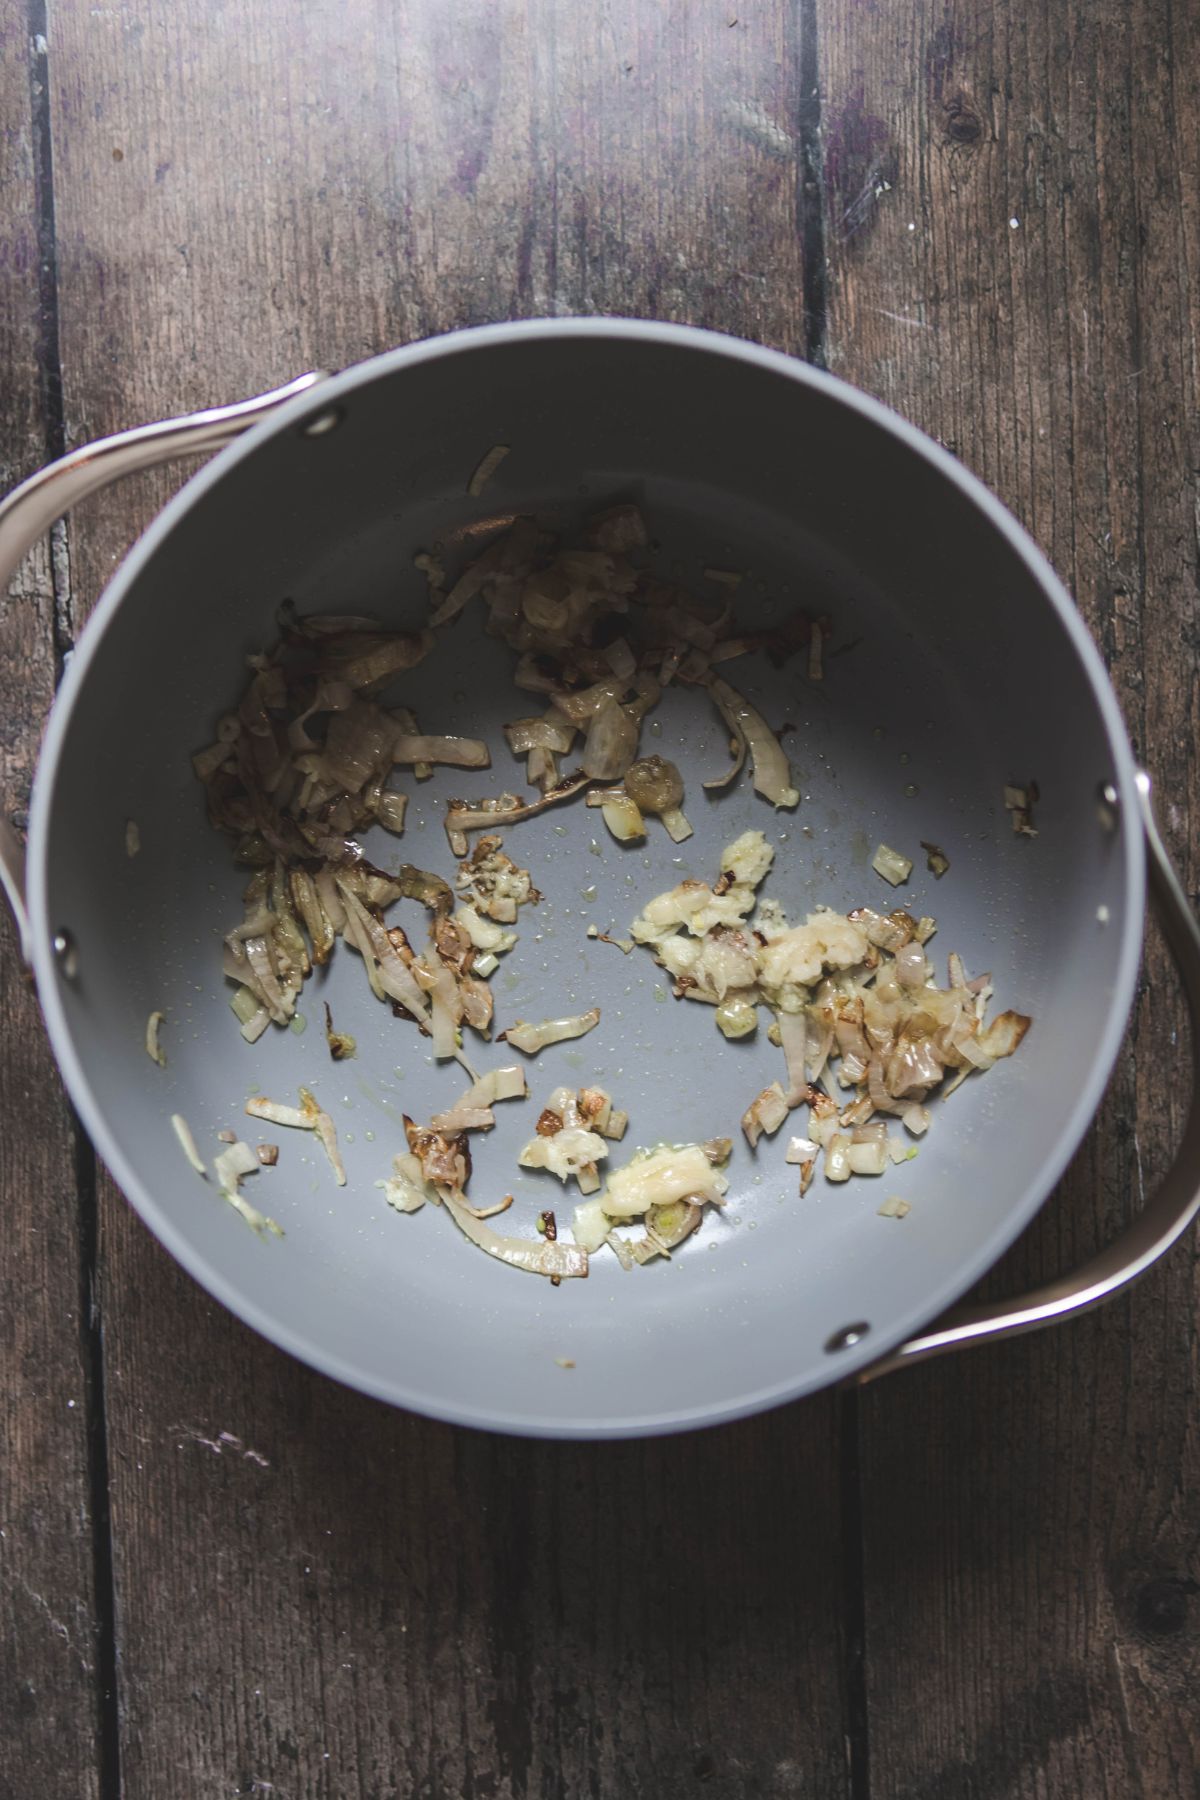
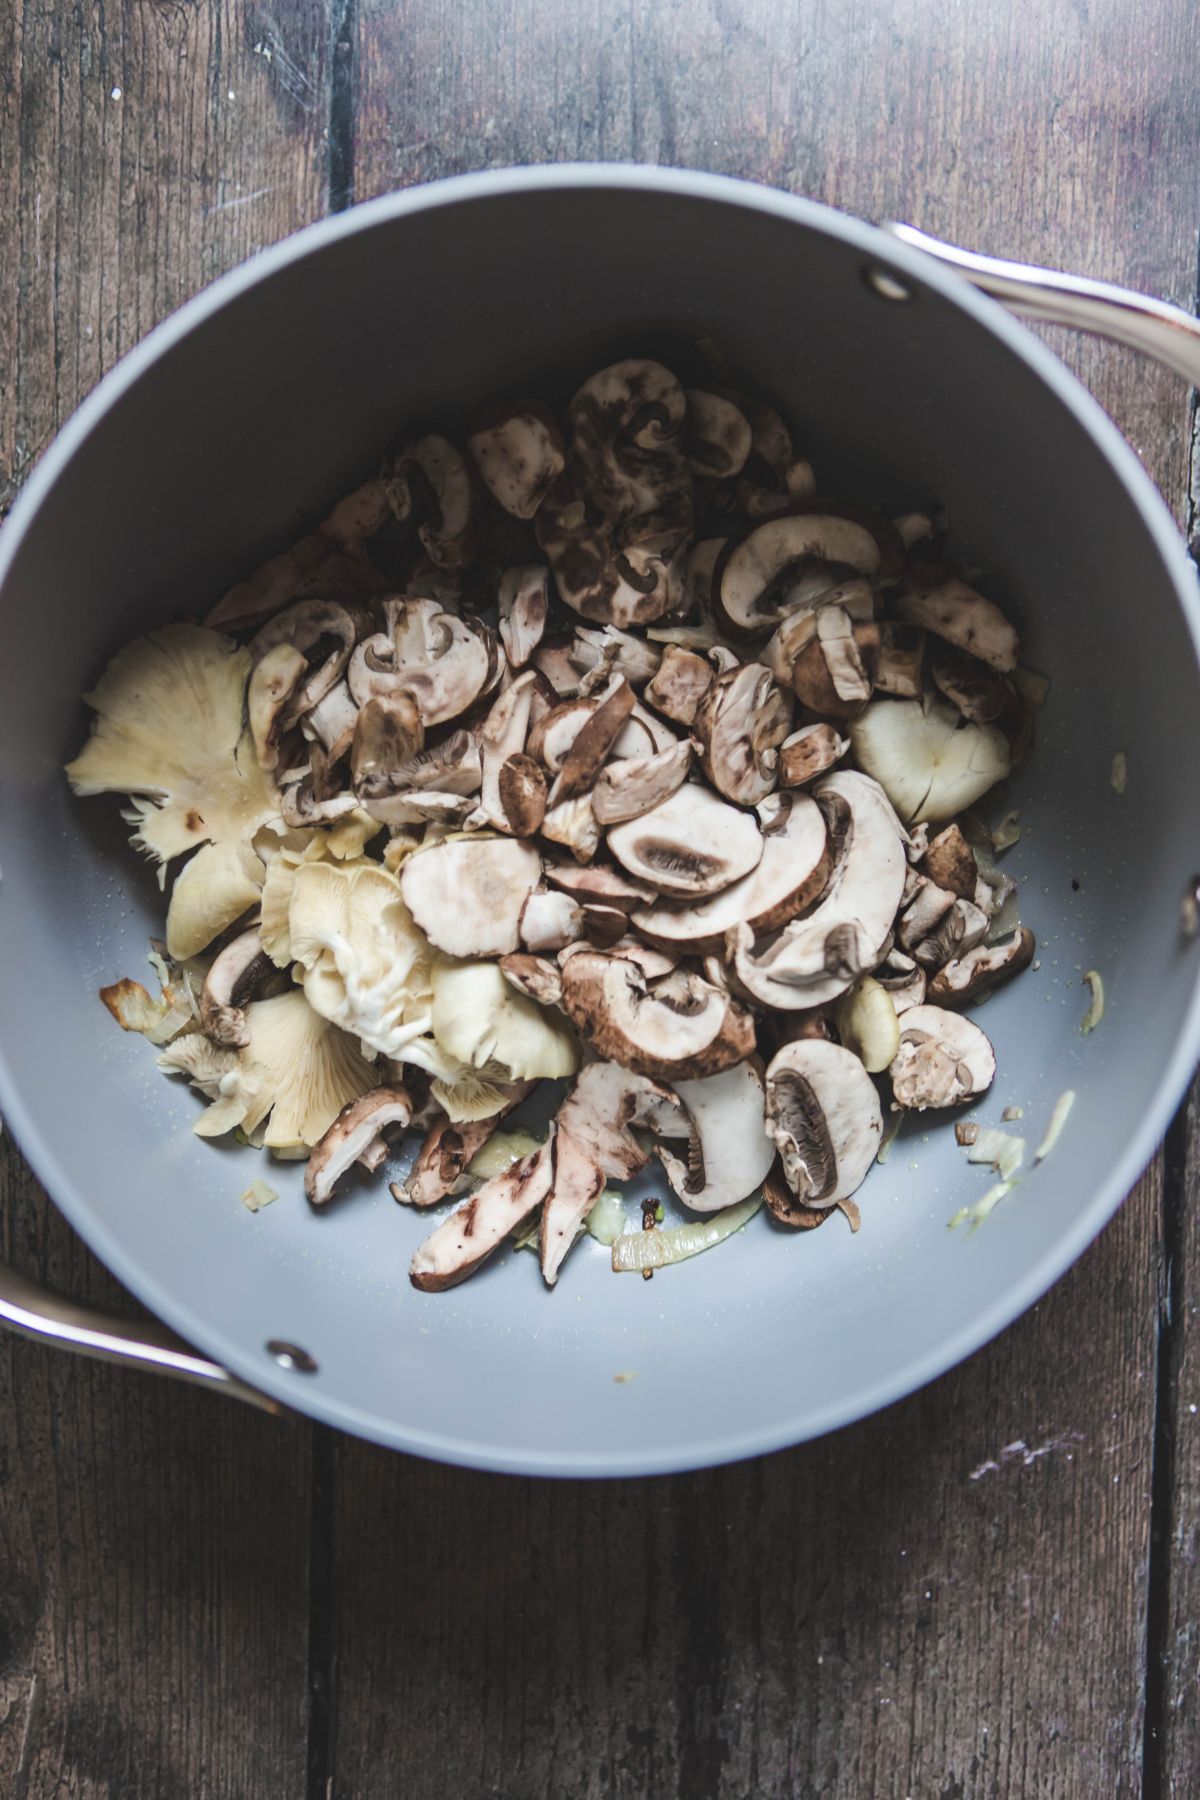
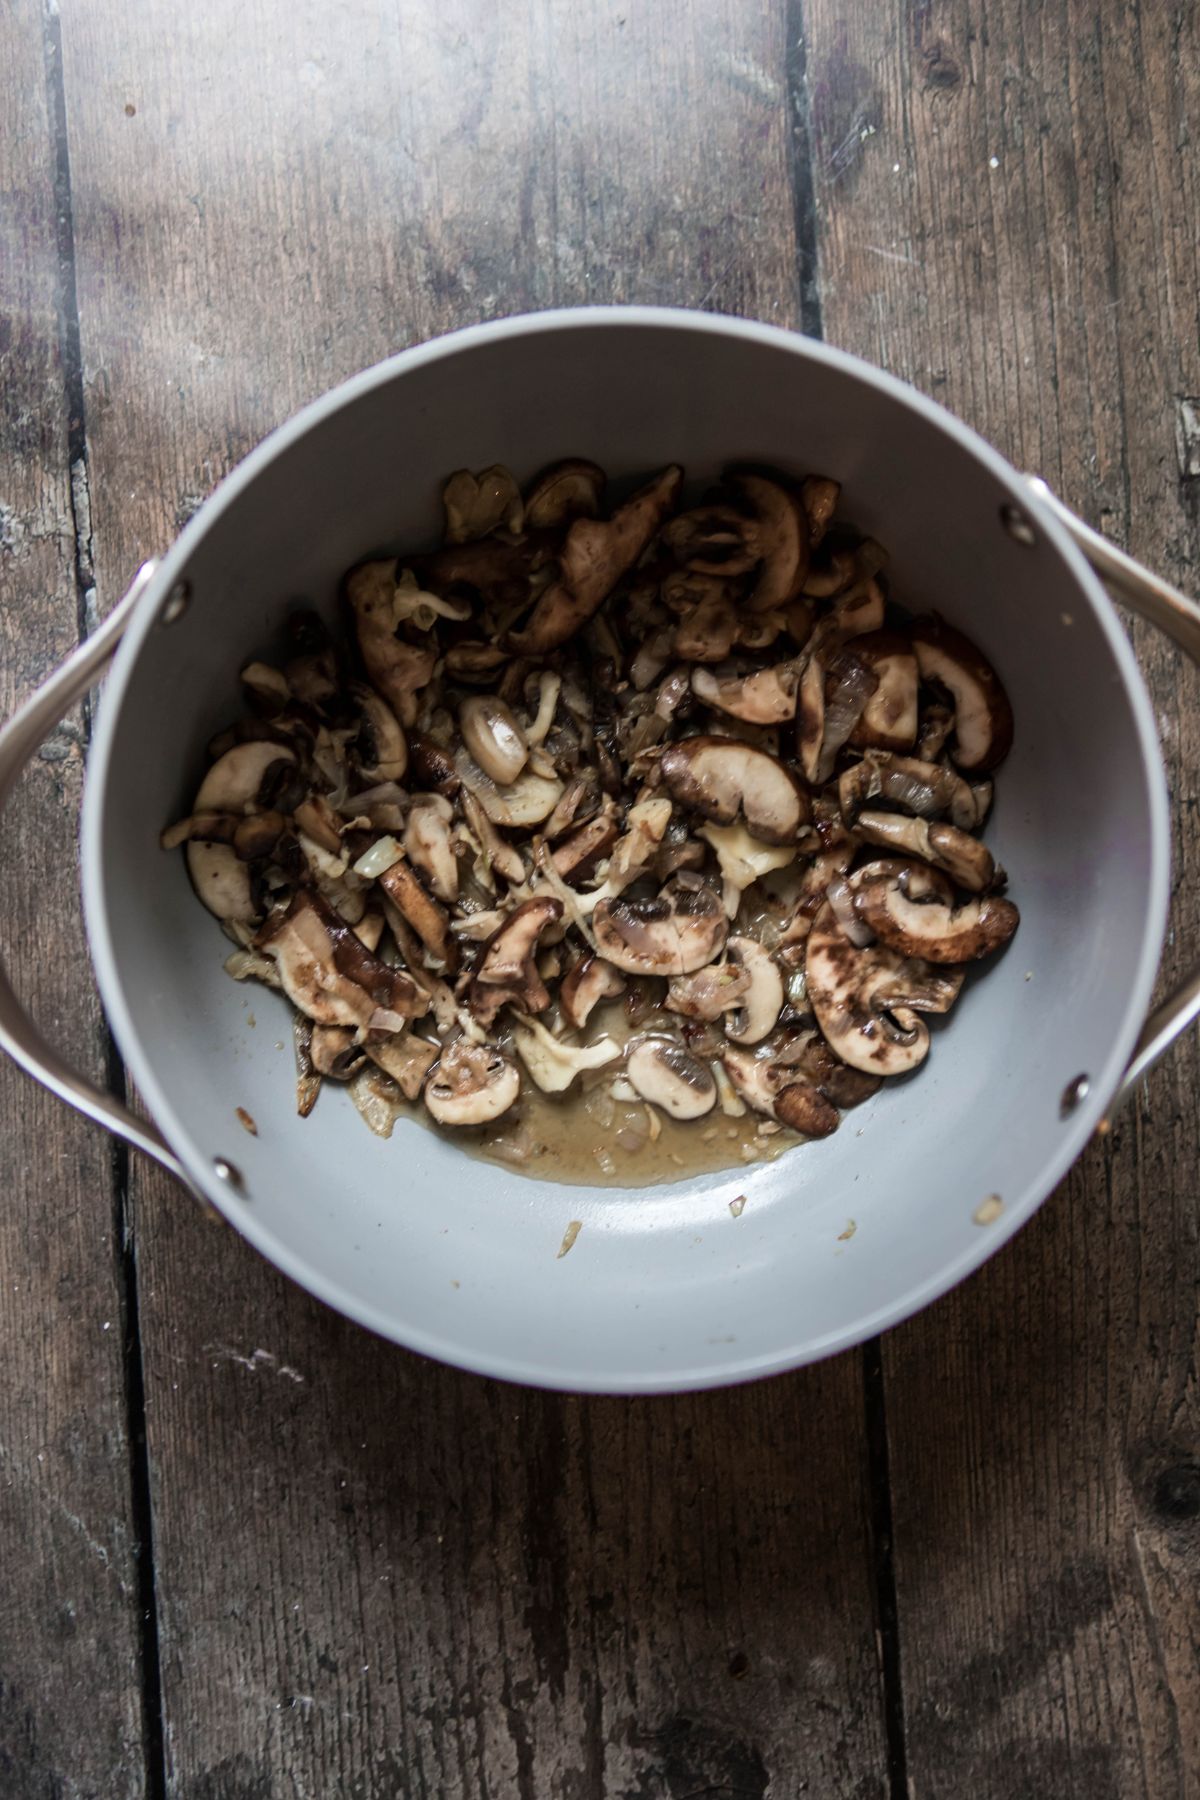
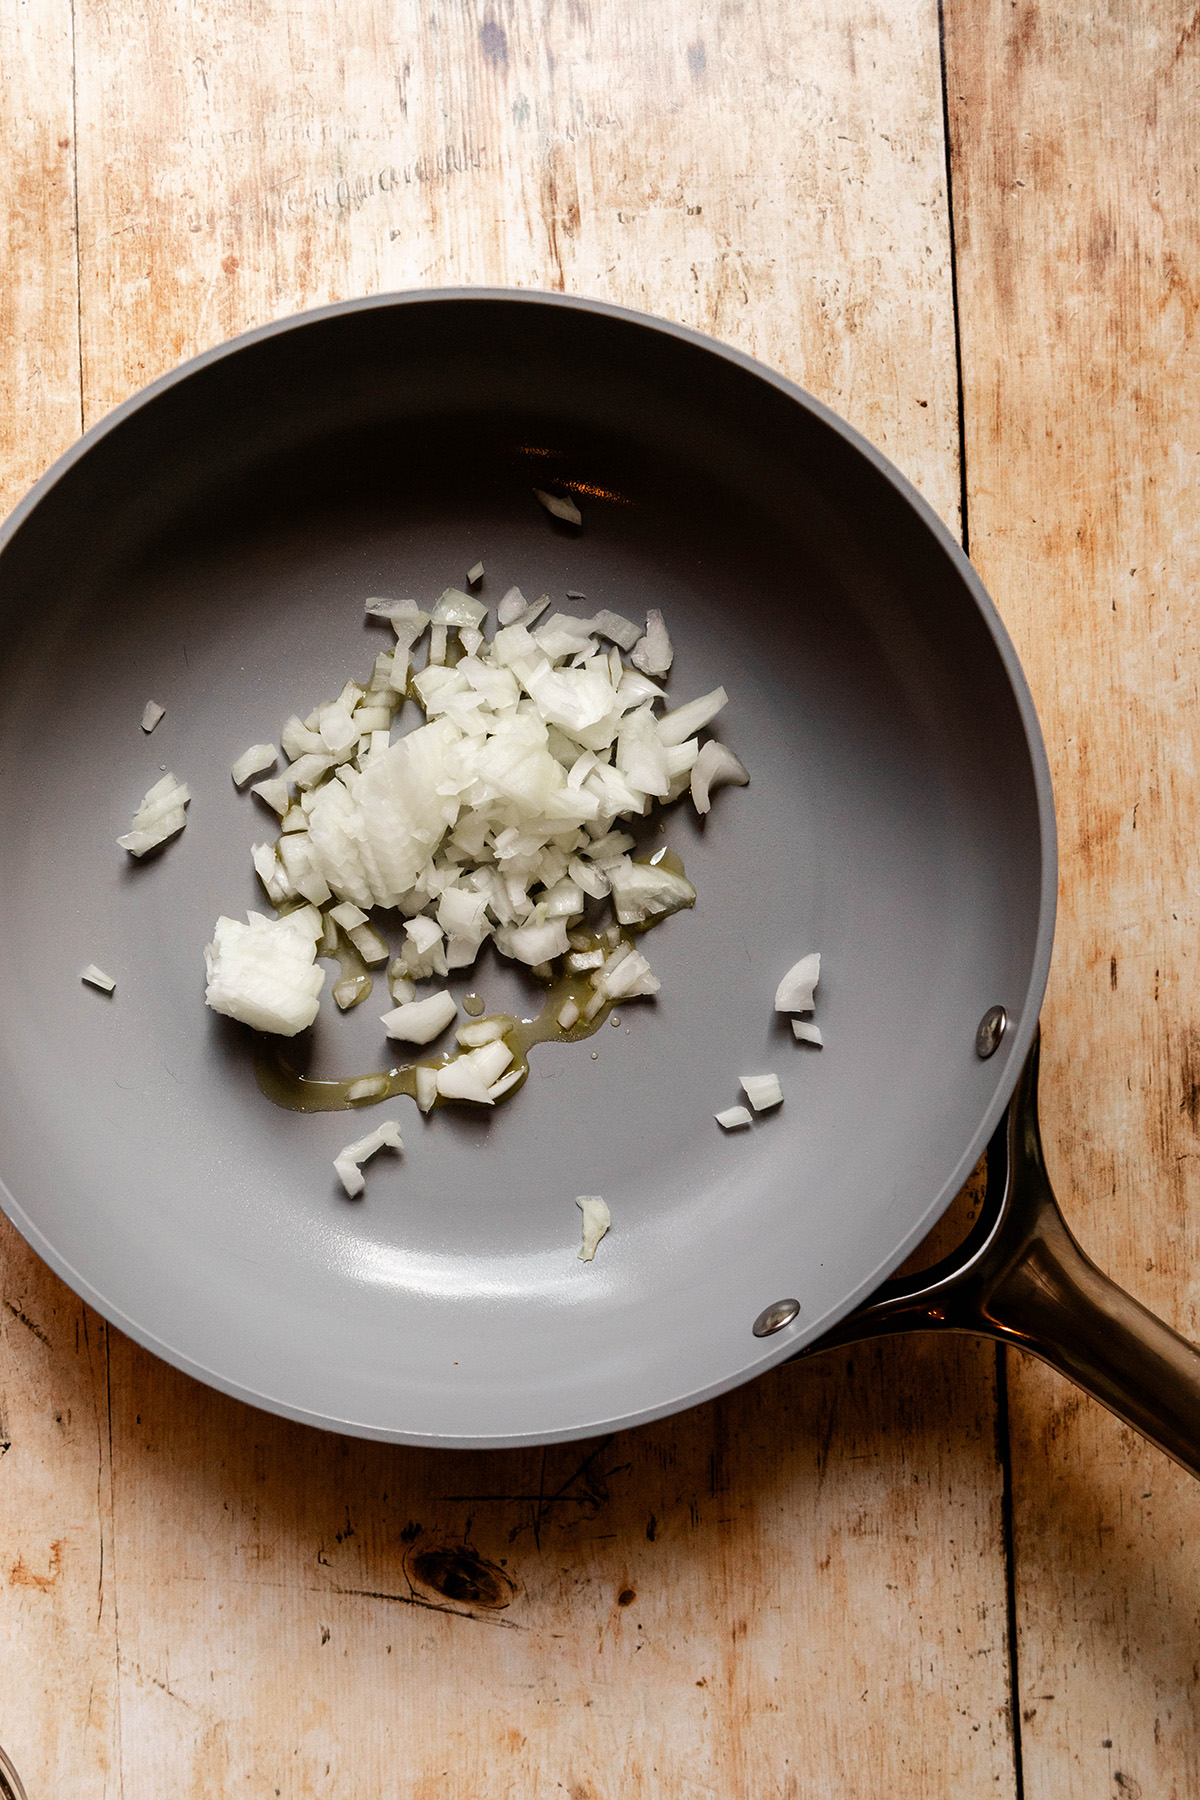
On a medium-low heat: add your oil to your pan and onions. Fry them for about 5-7 minutes until they soften and golden.
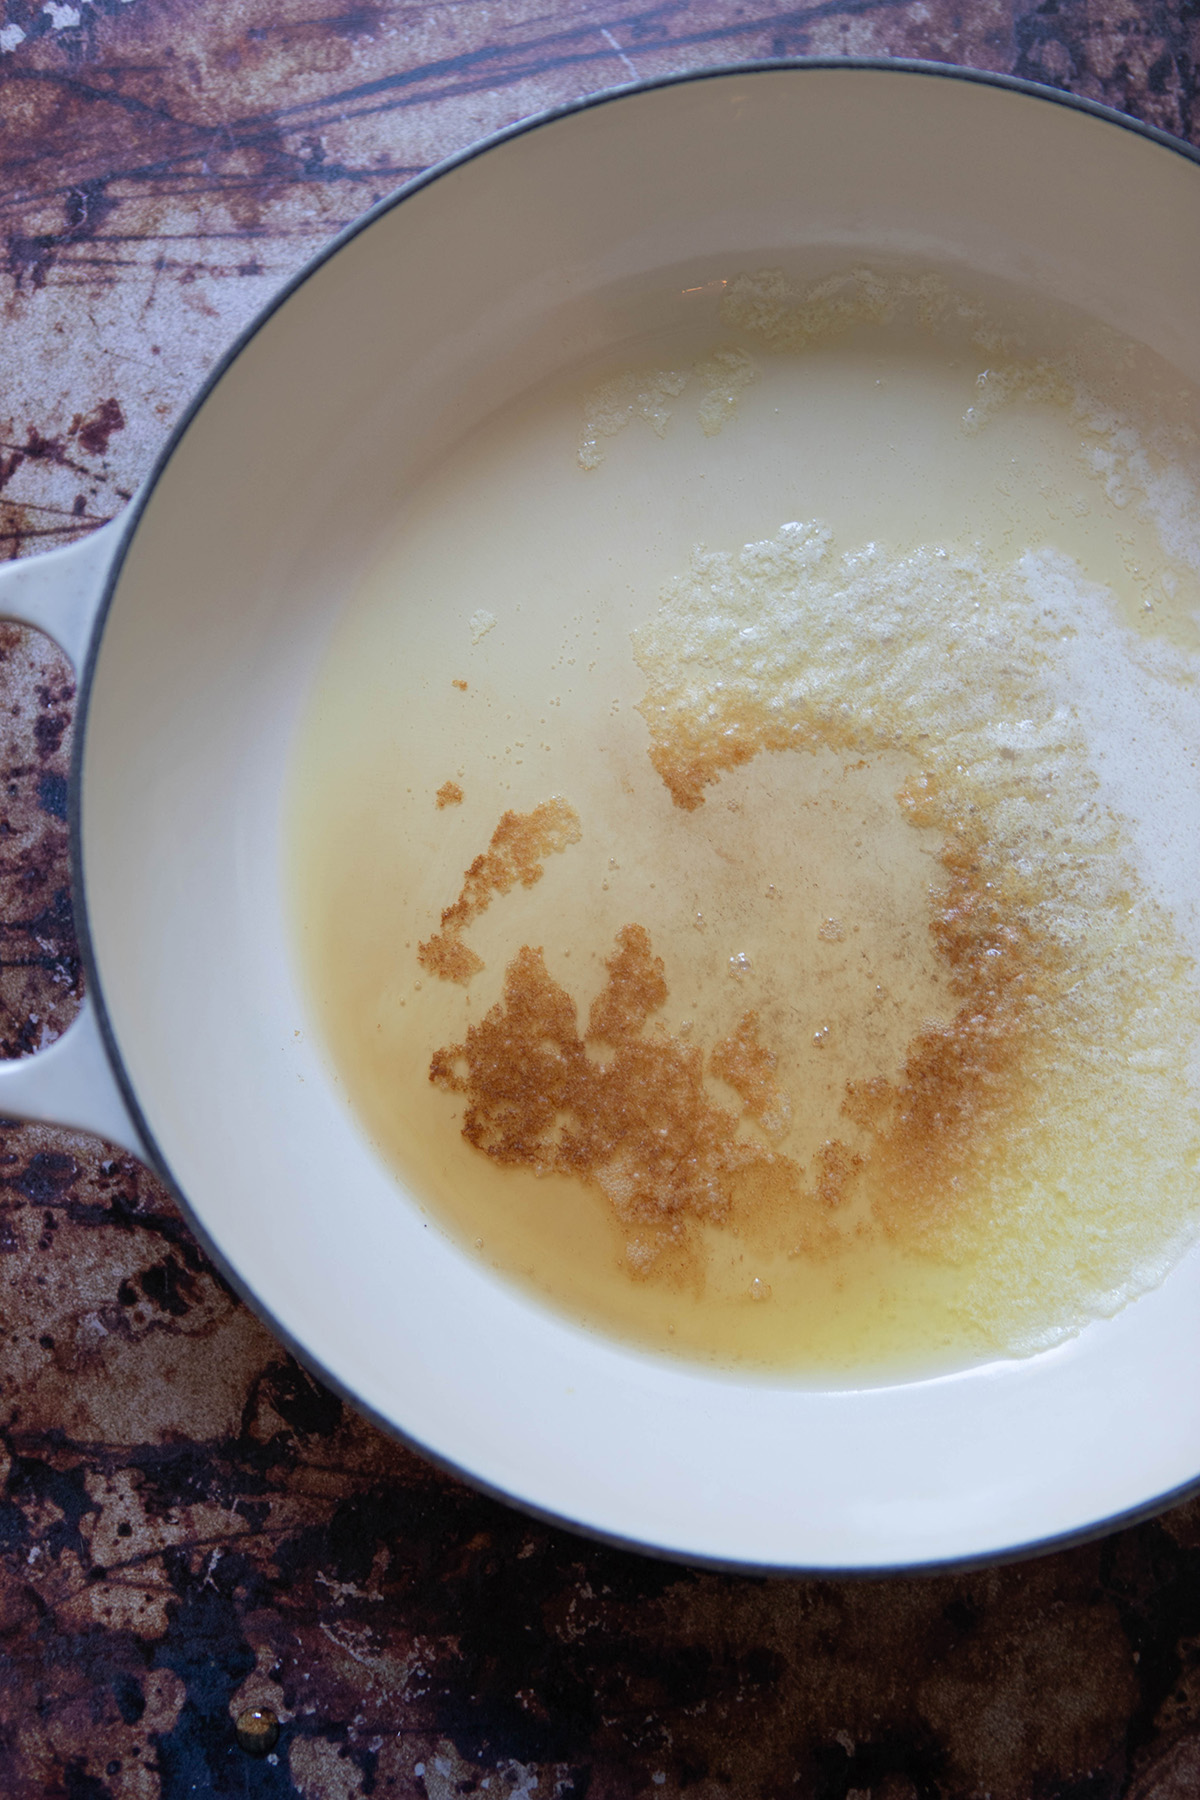
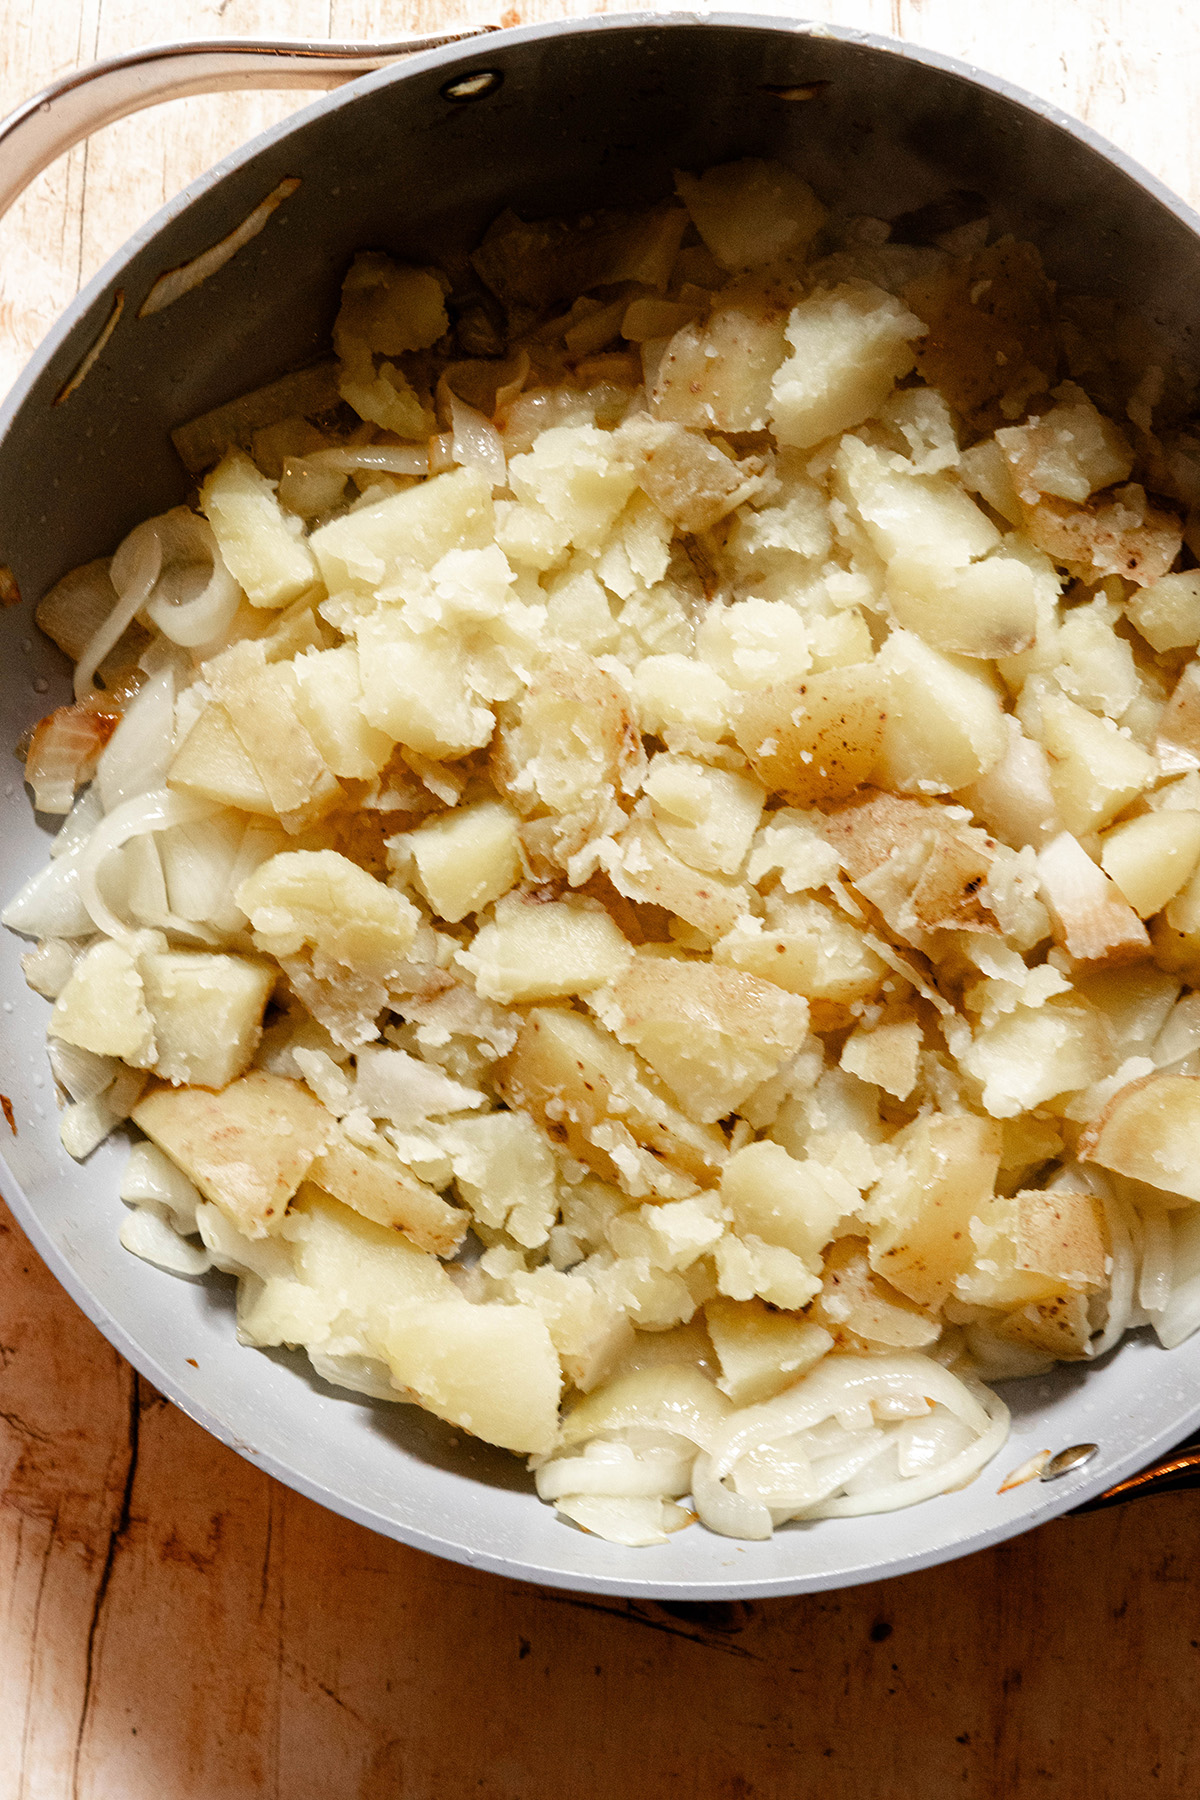
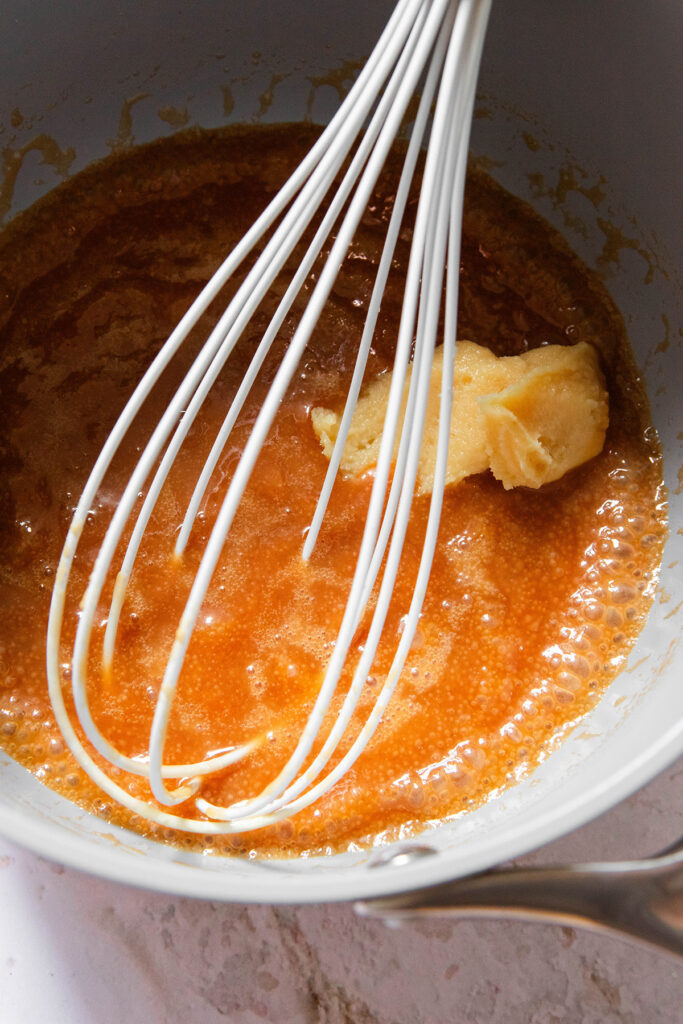
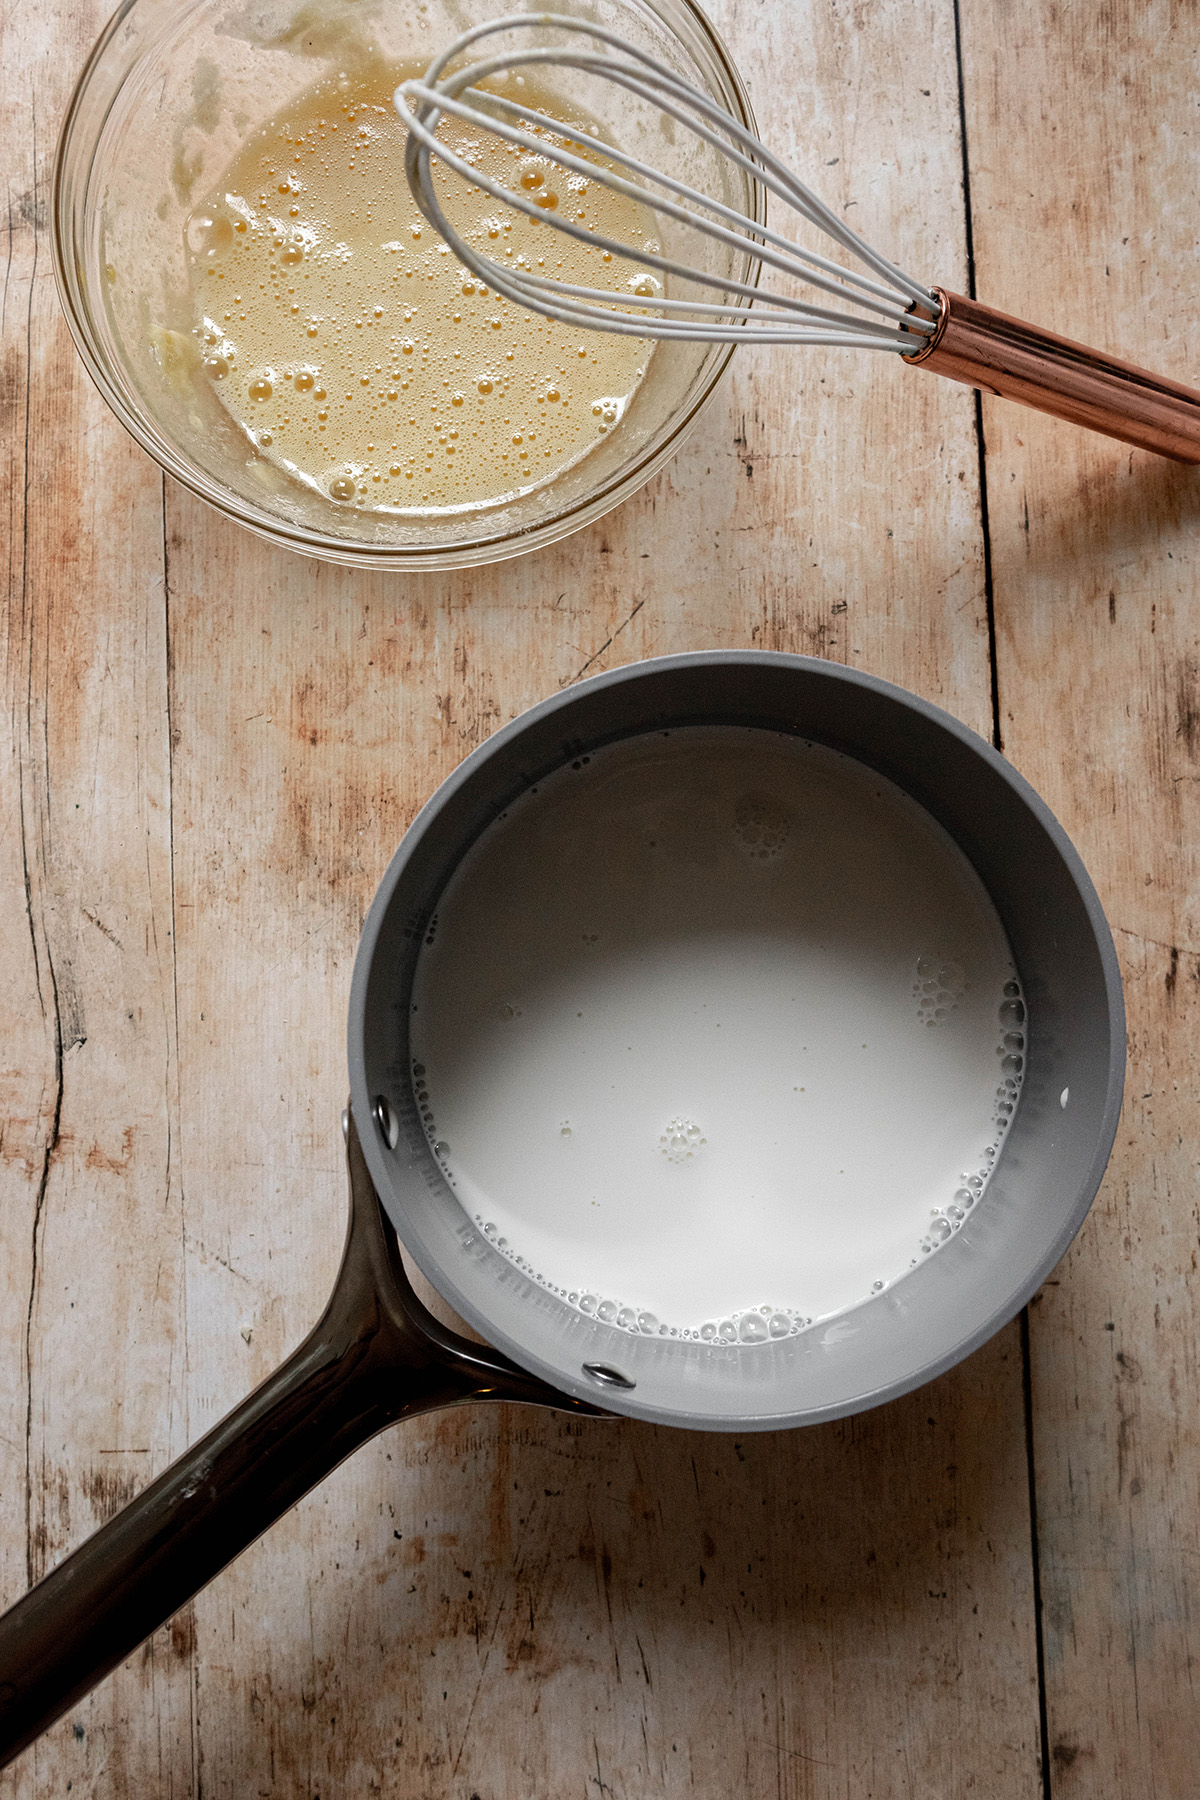
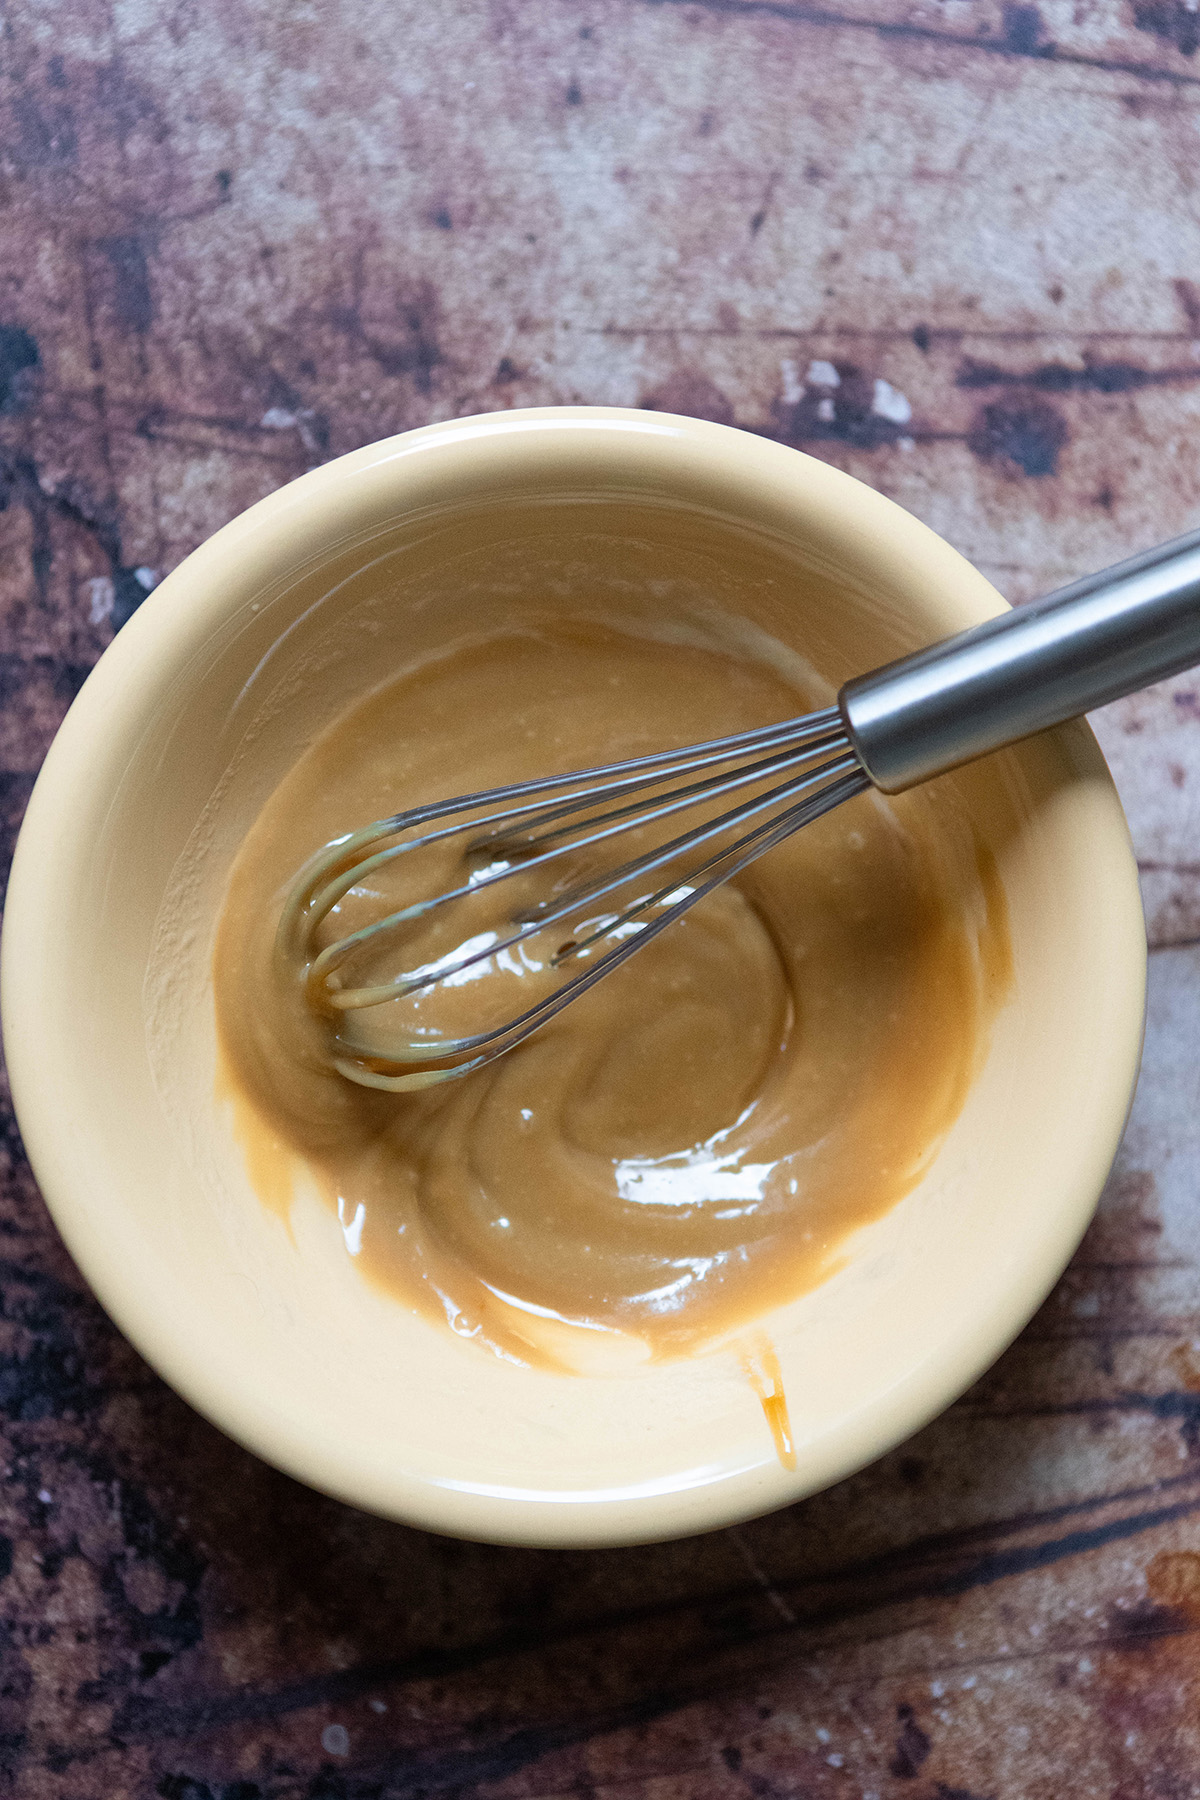
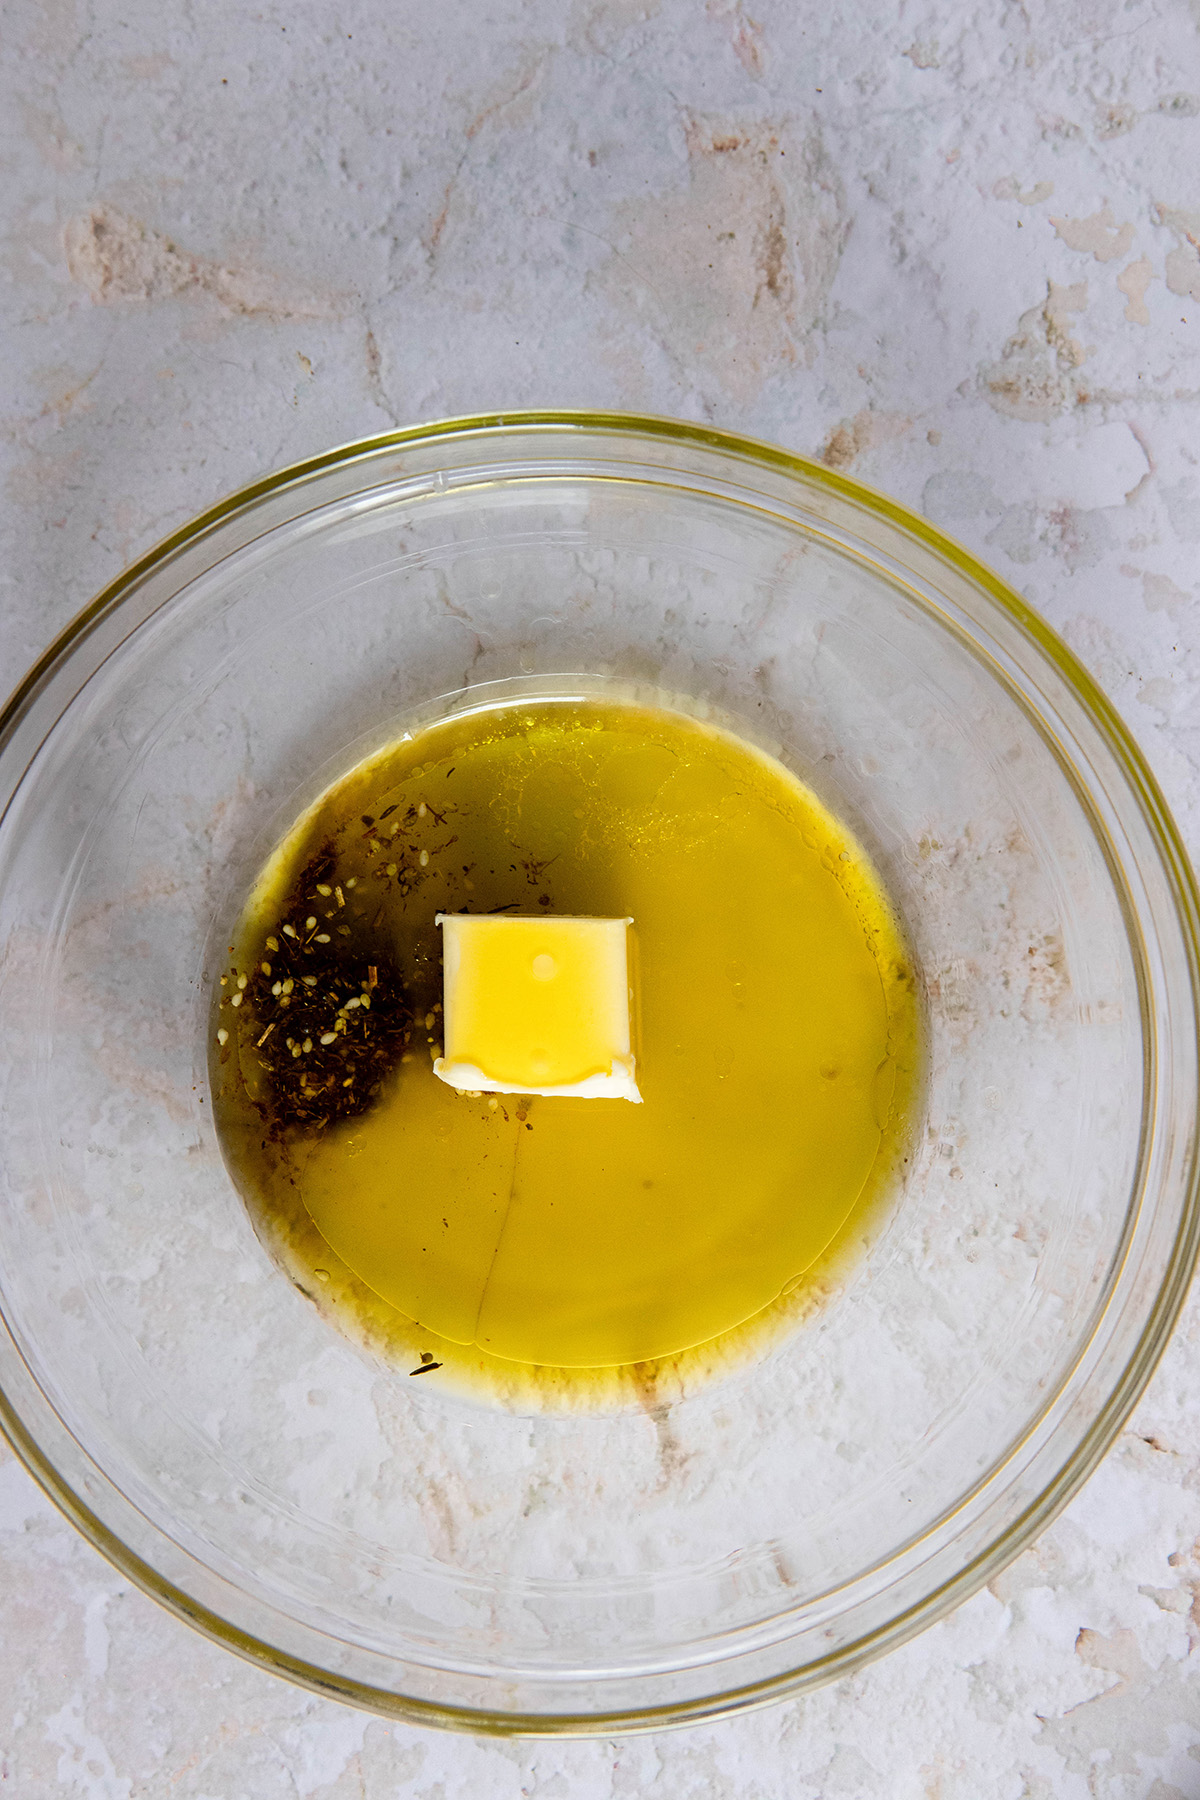
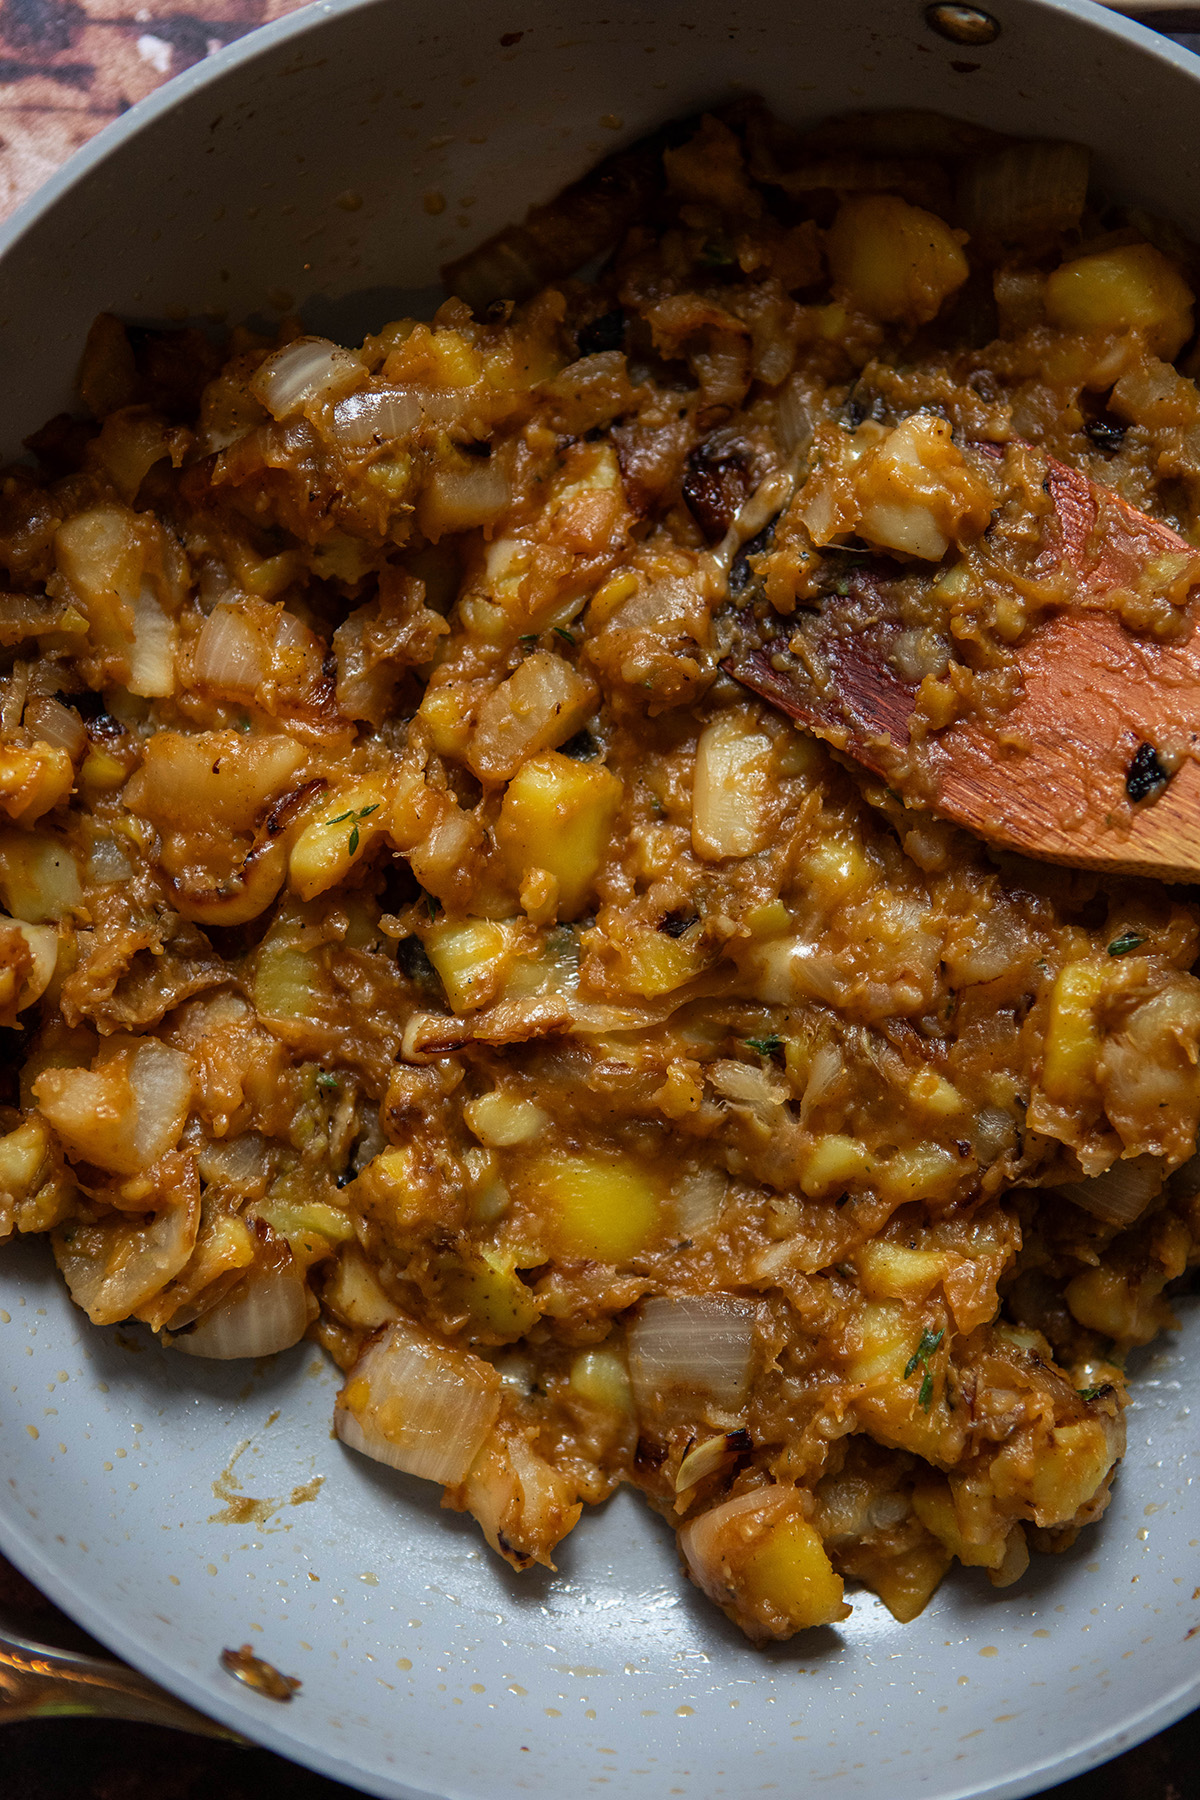
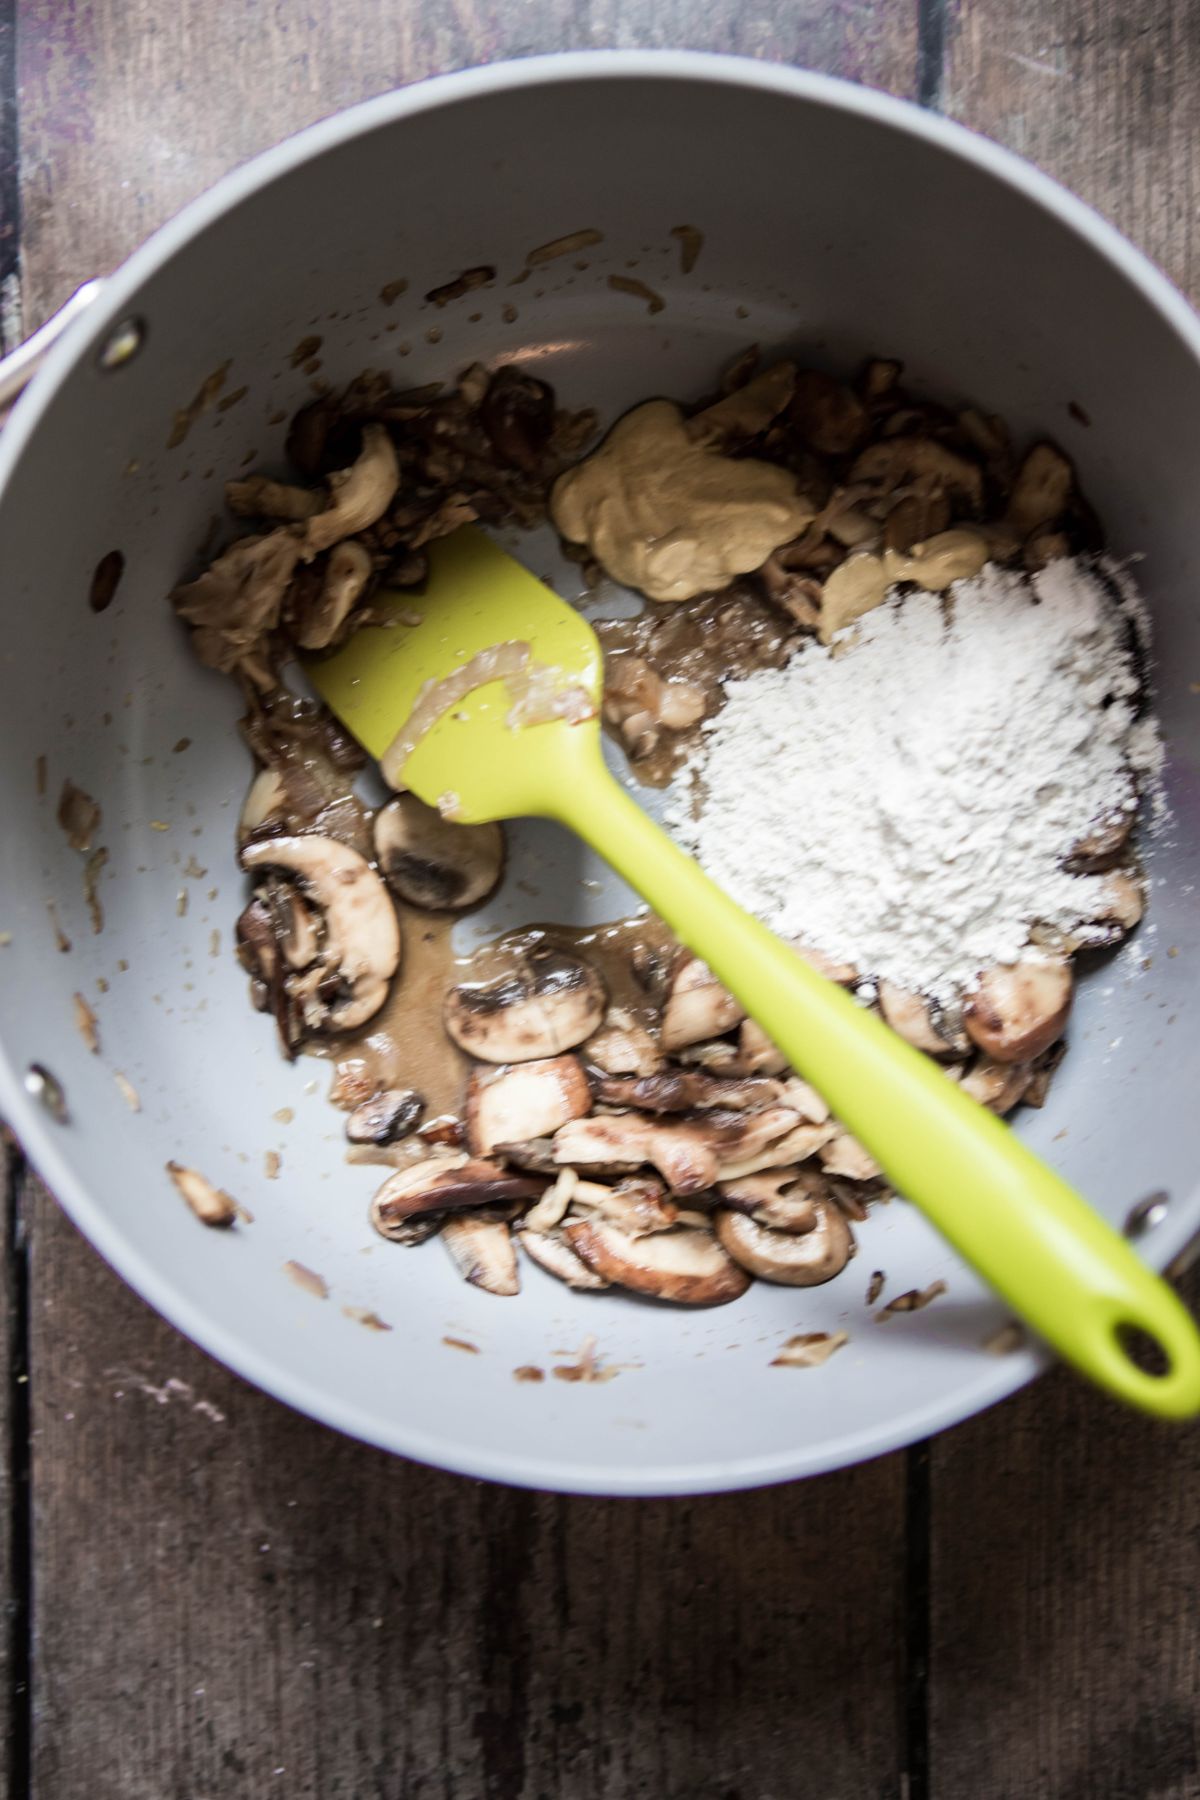
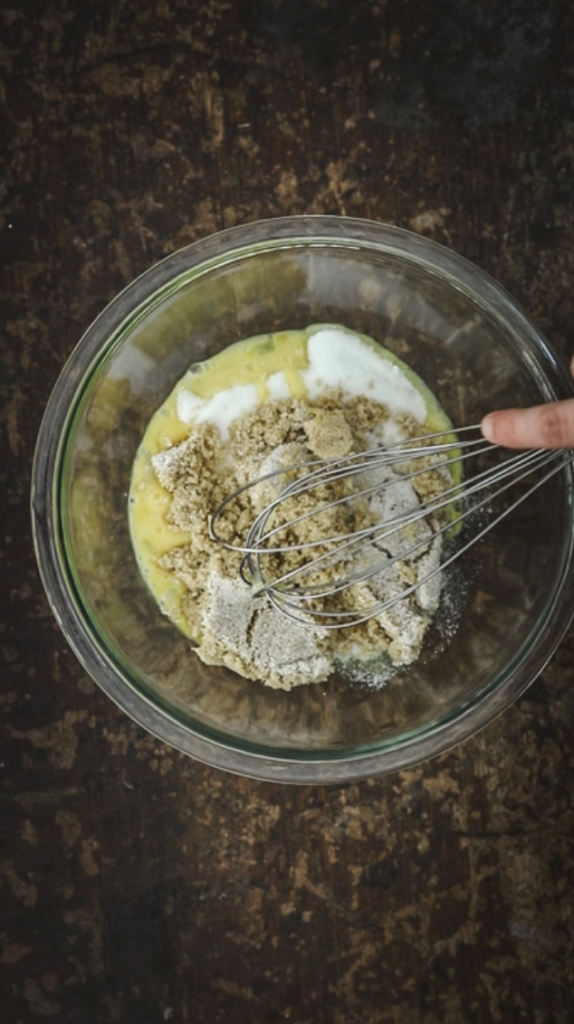
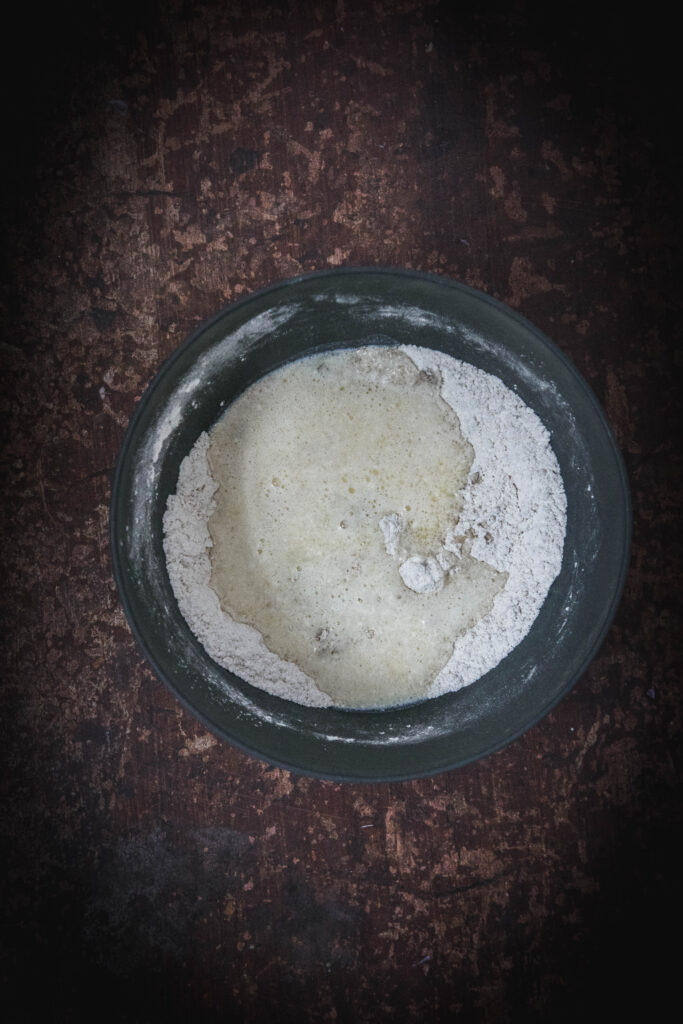
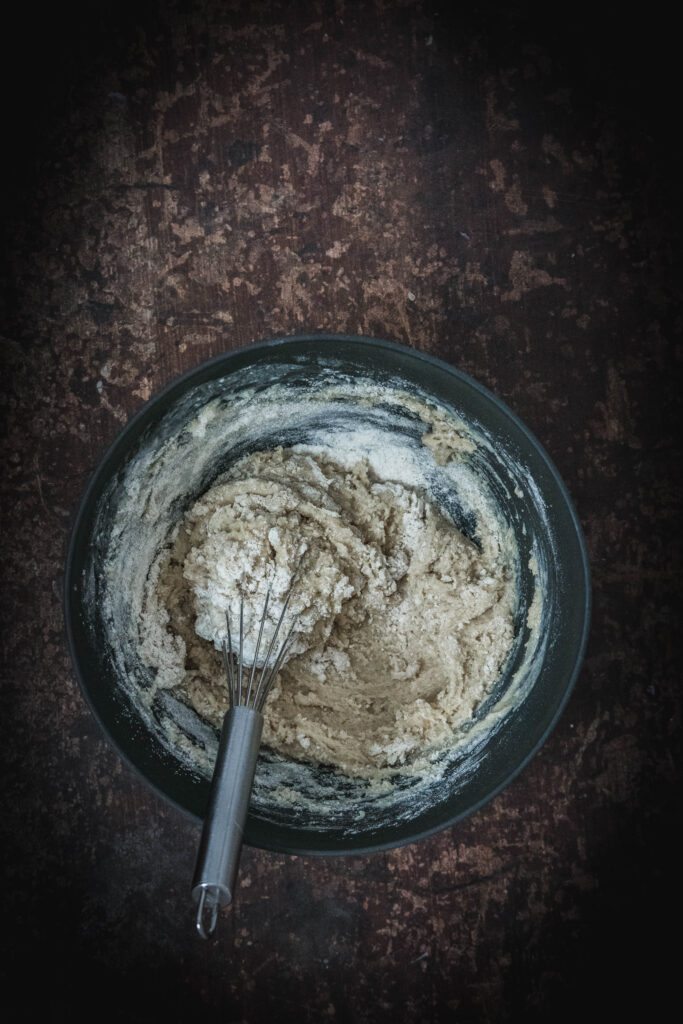
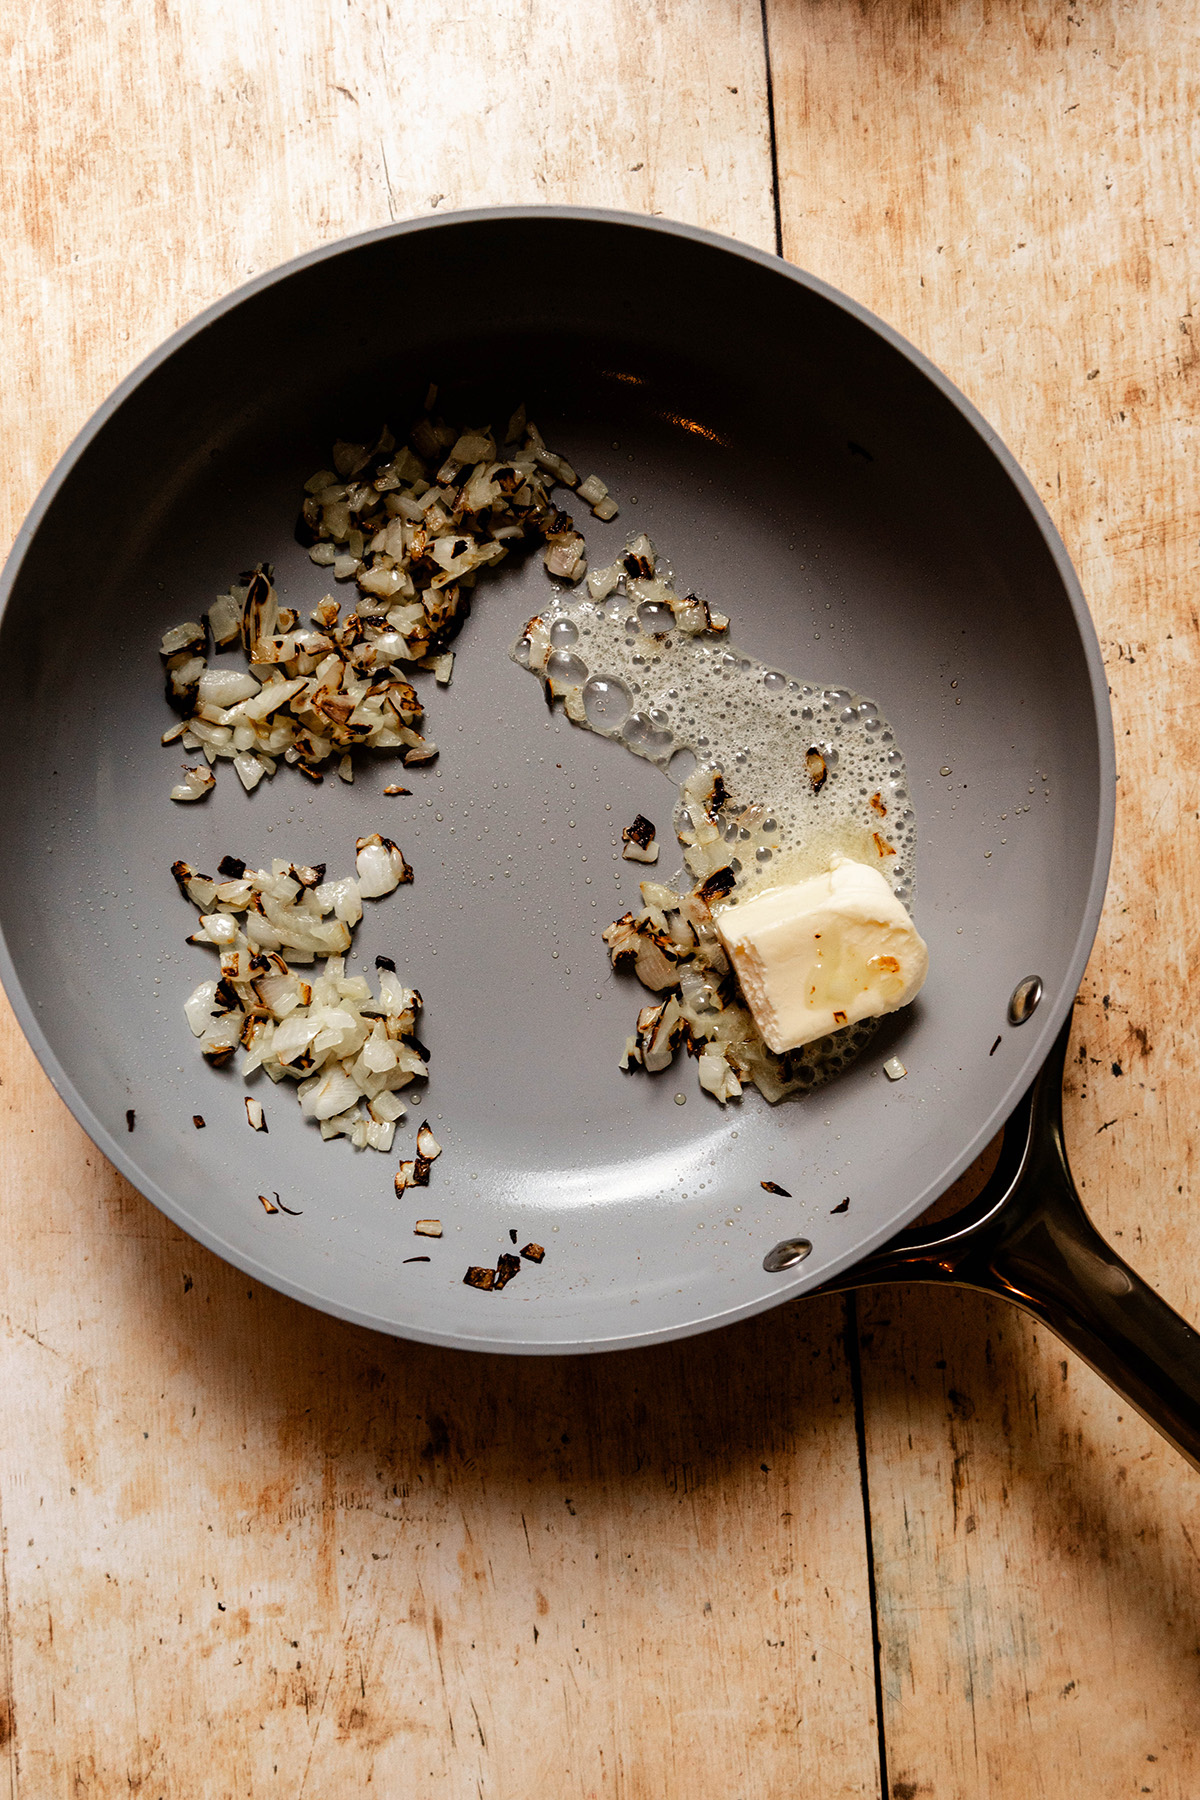
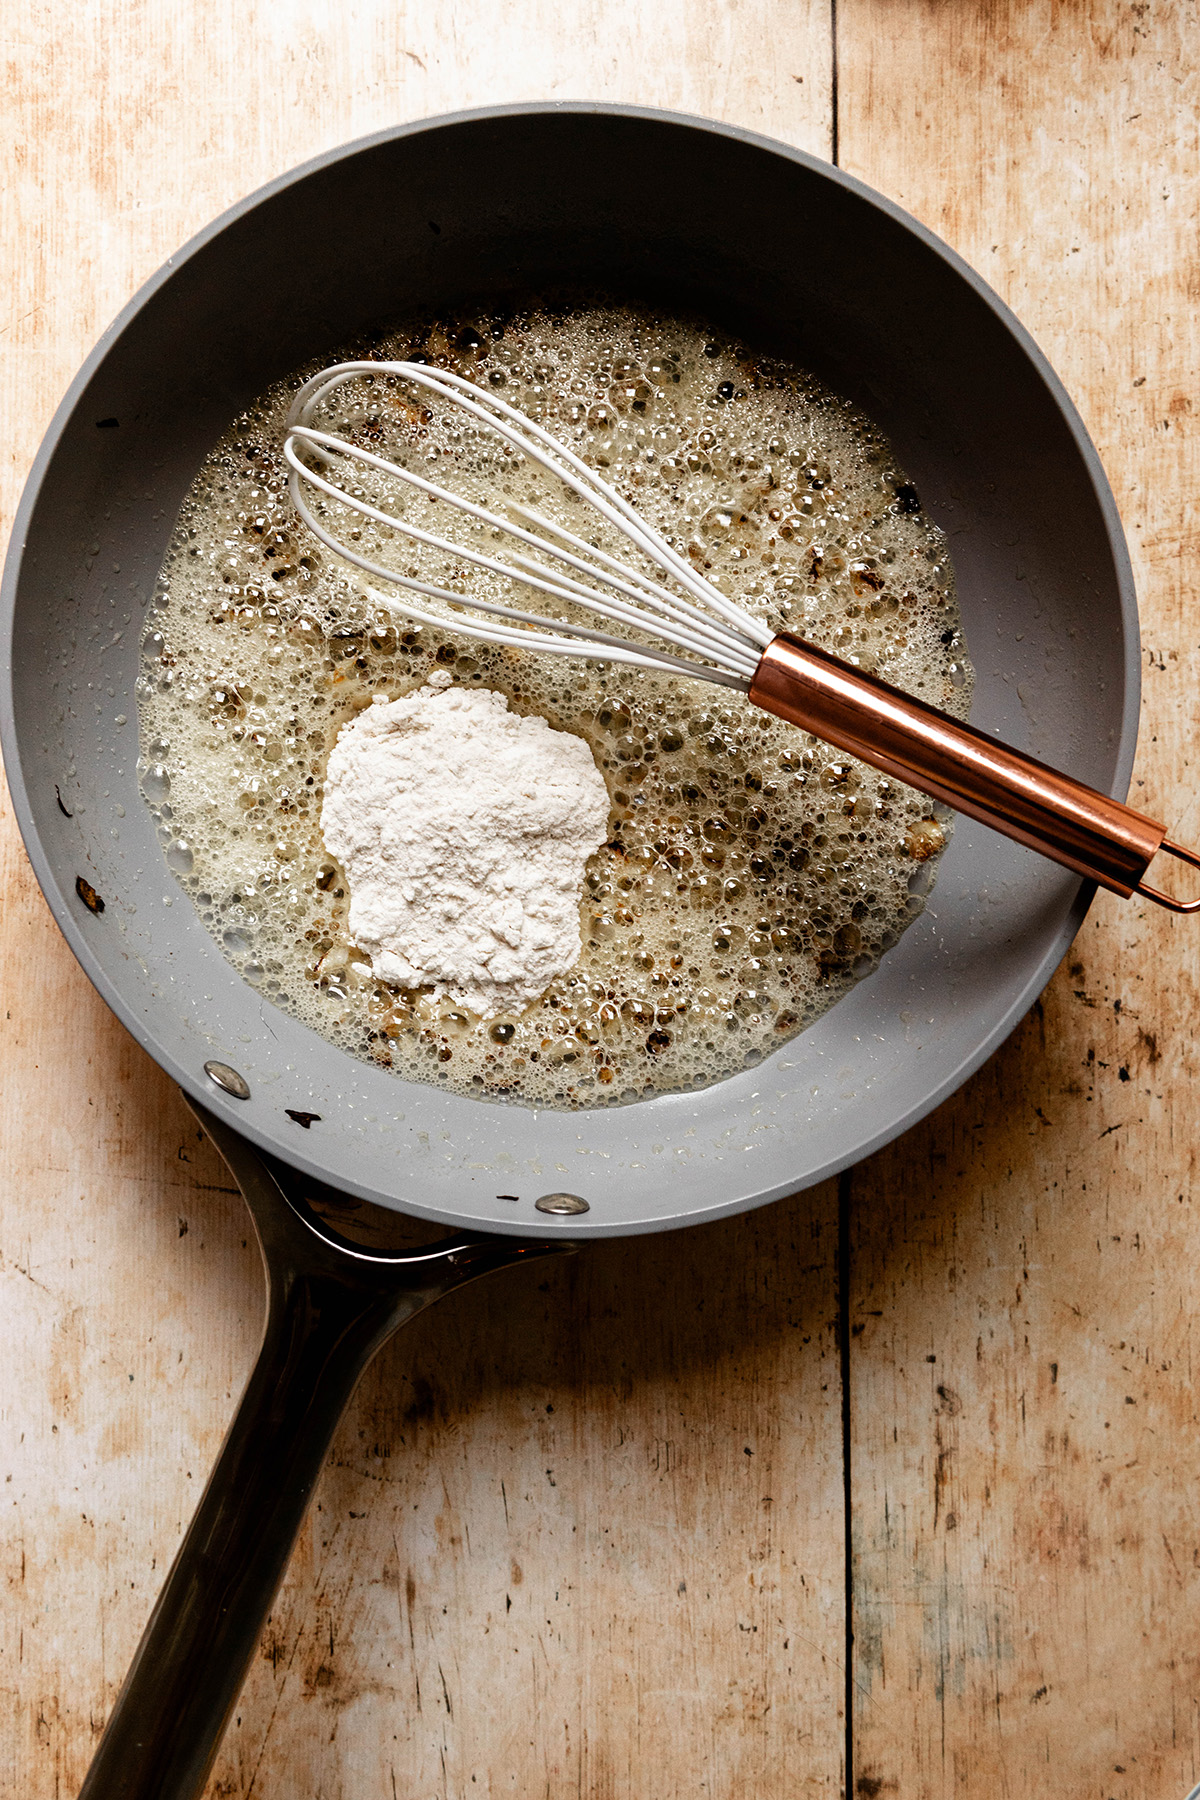
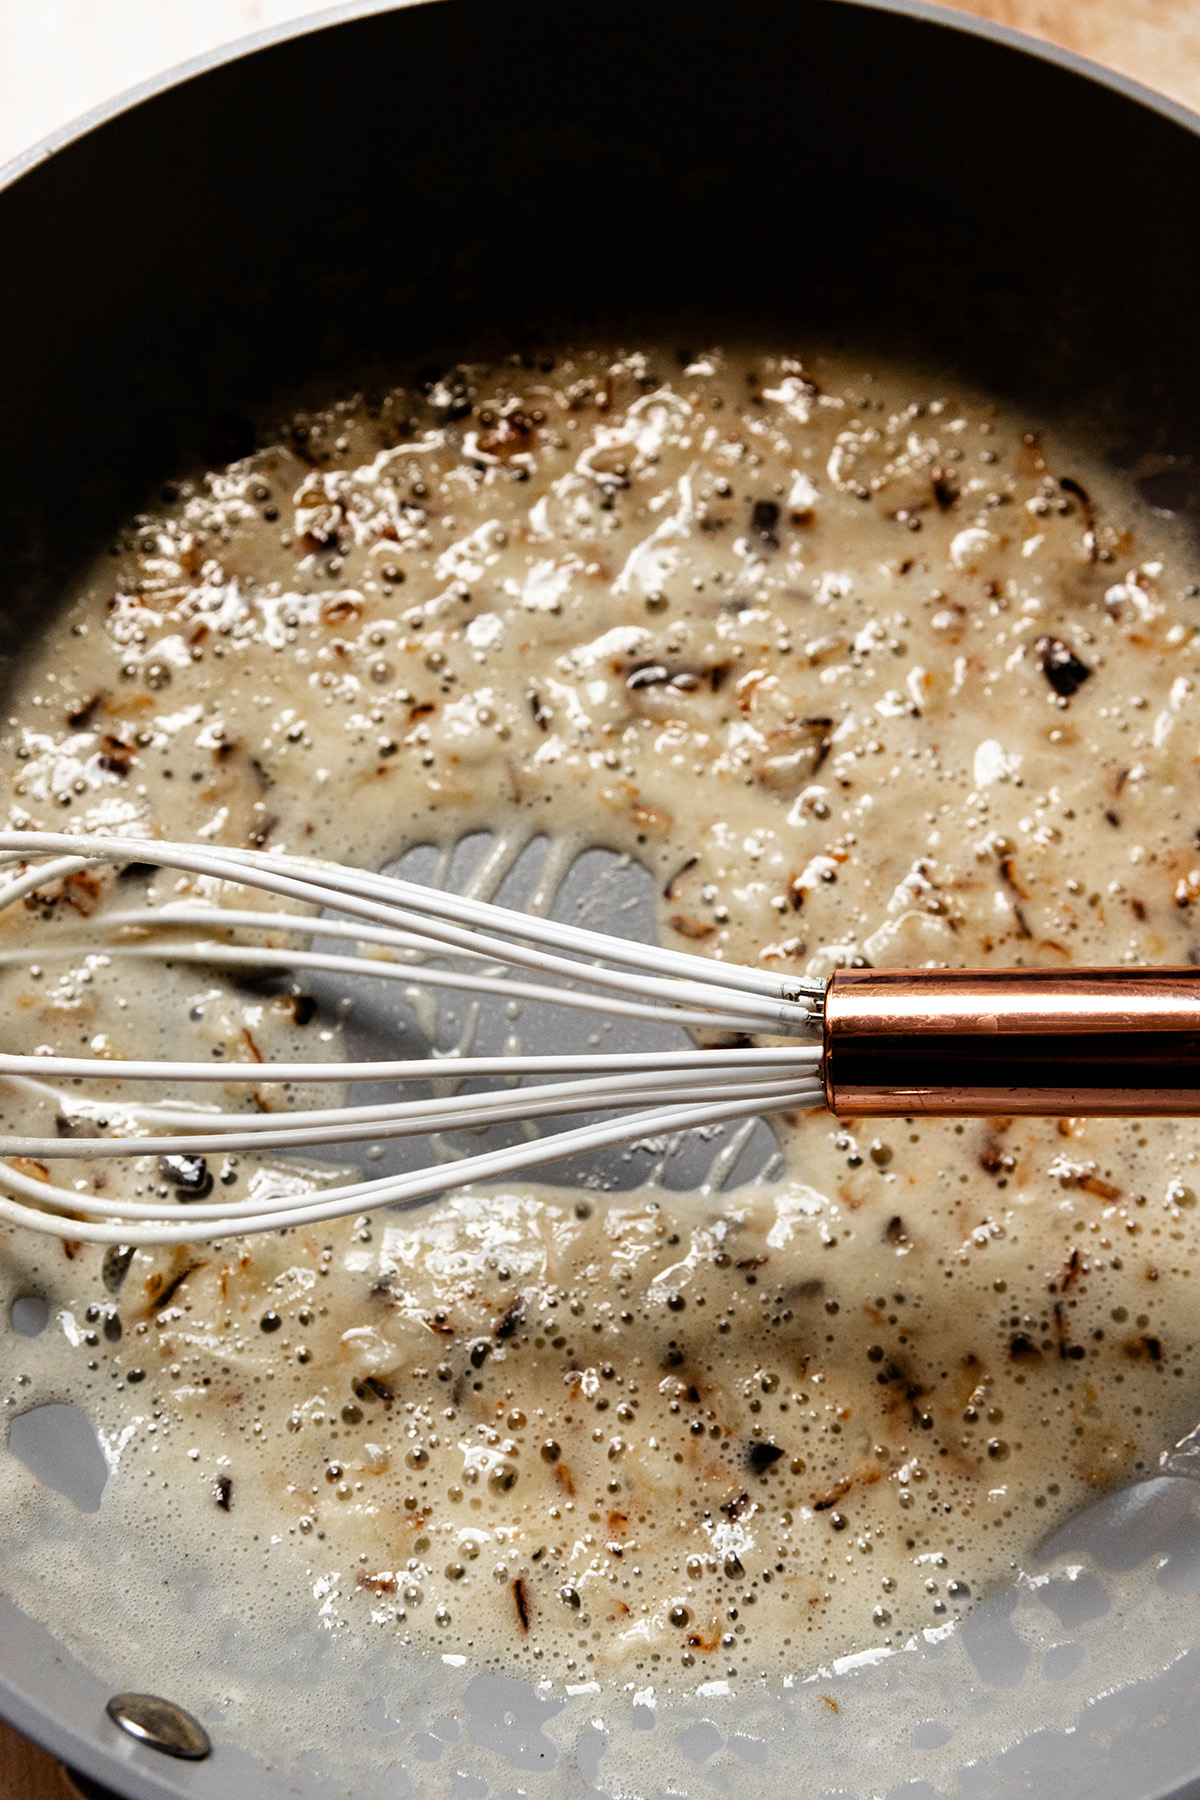
Melt butter: in the same pan with the onions and then add your flour. This is how you make the roux. 
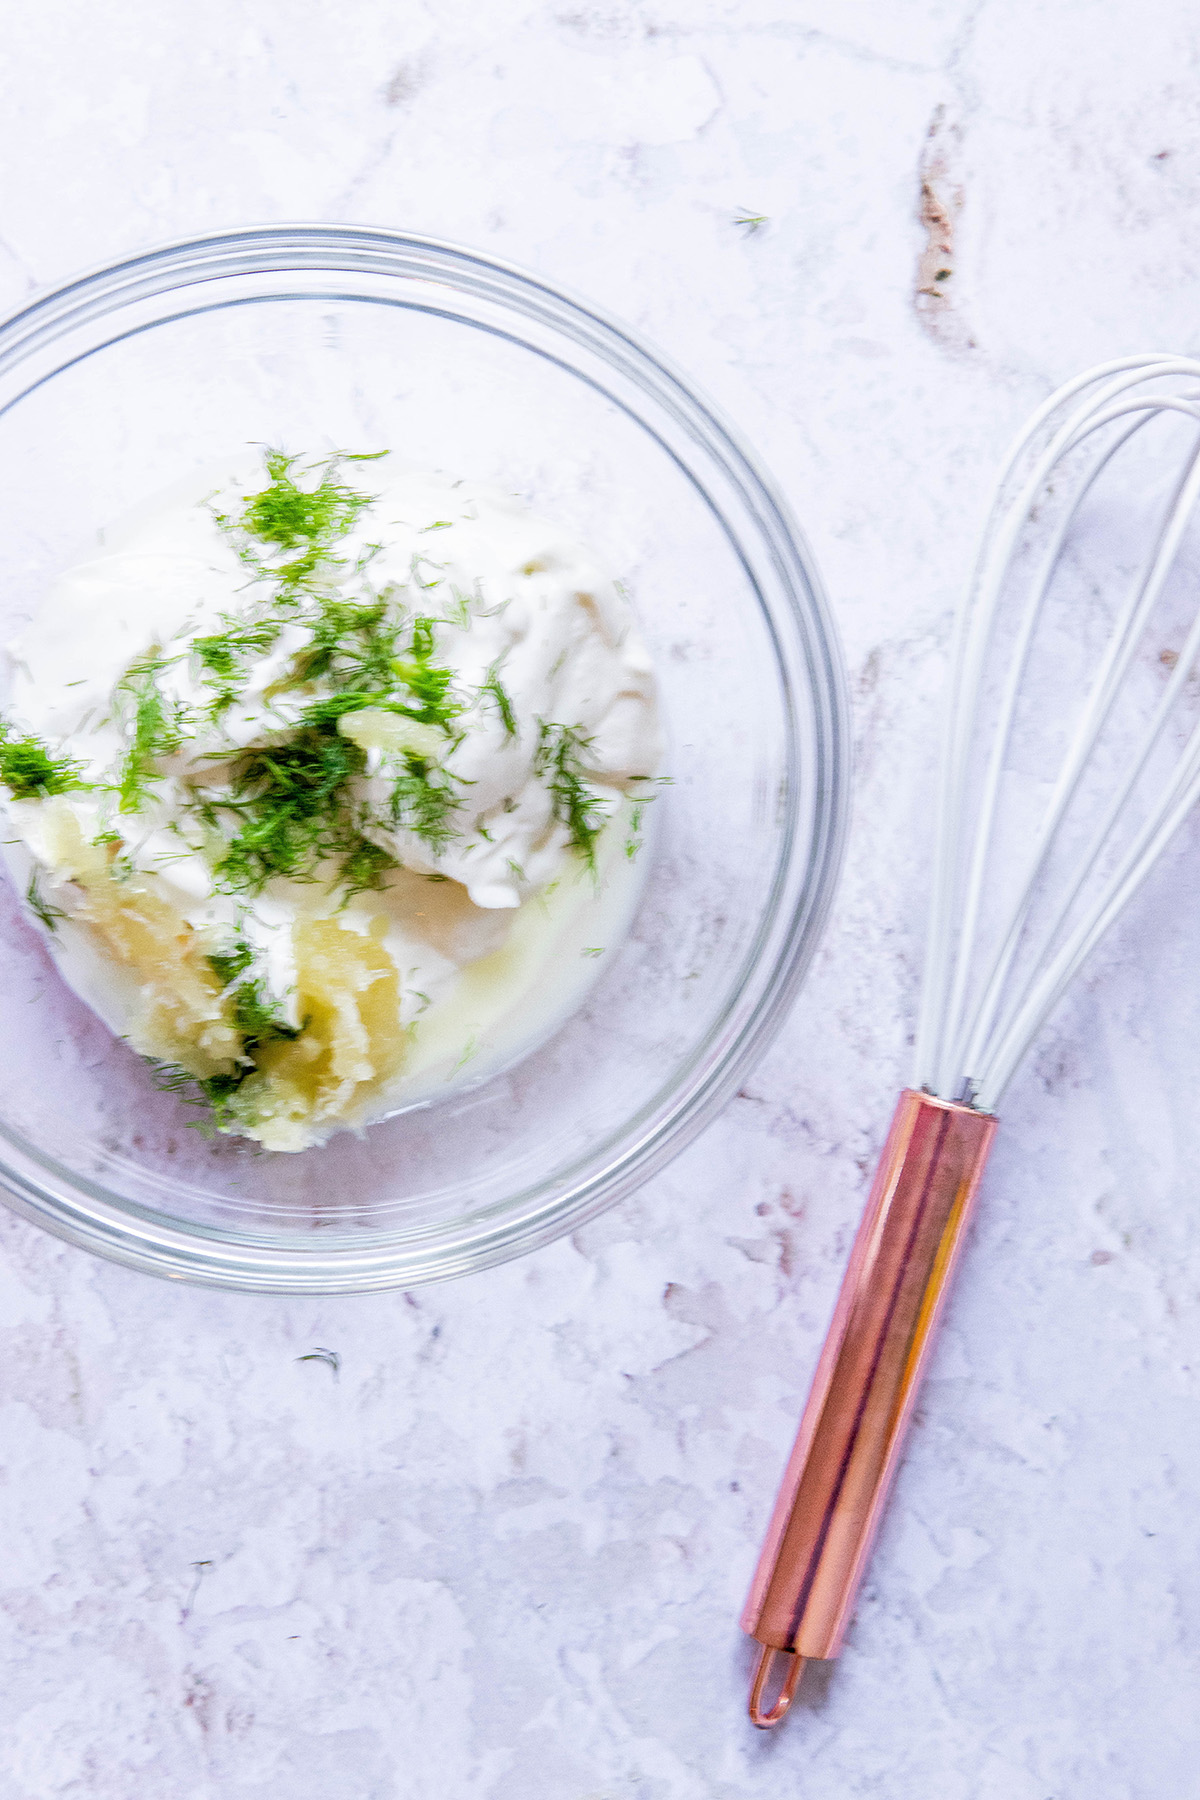
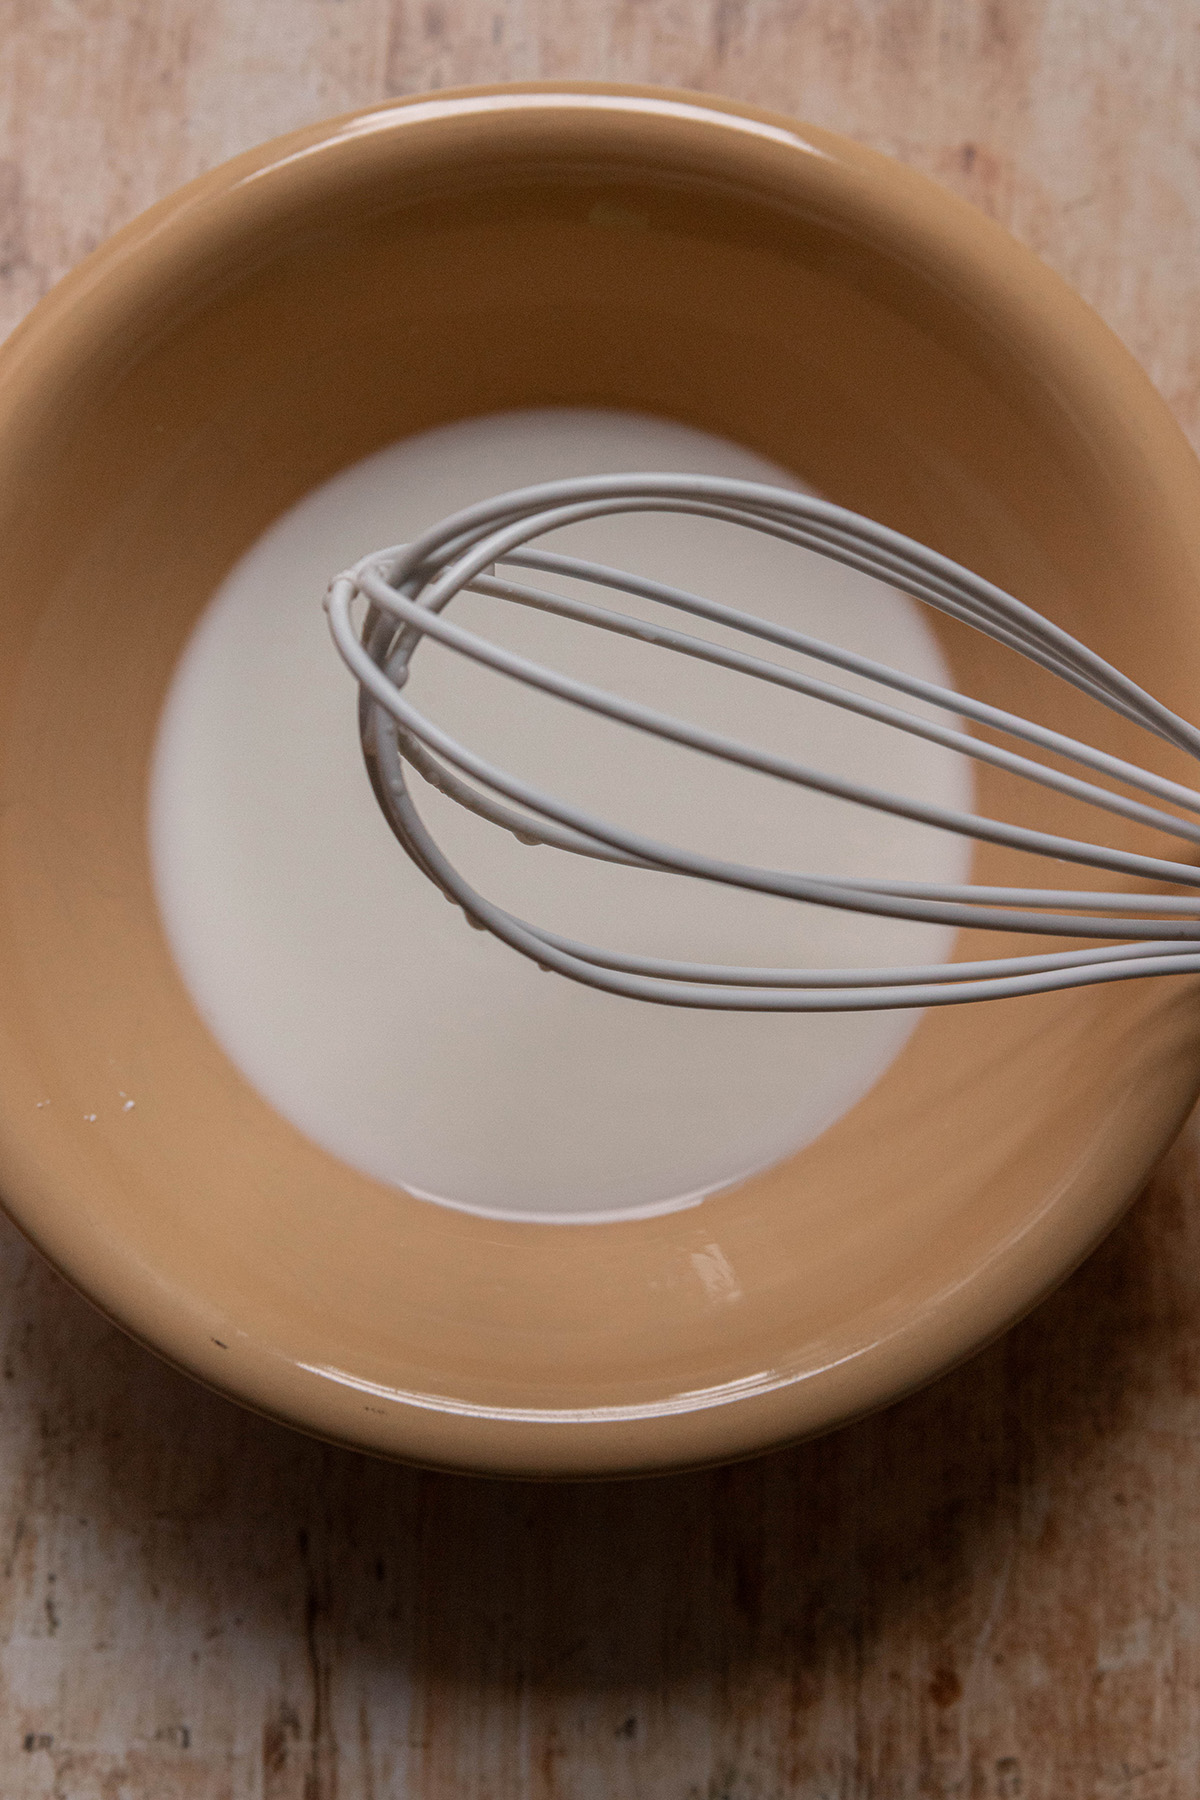
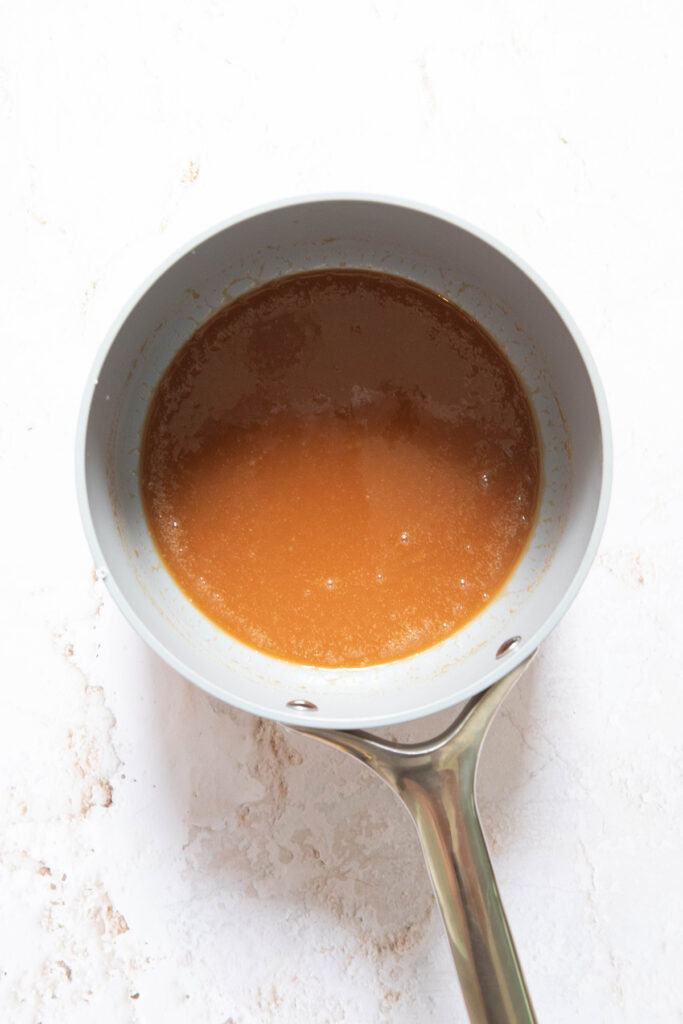
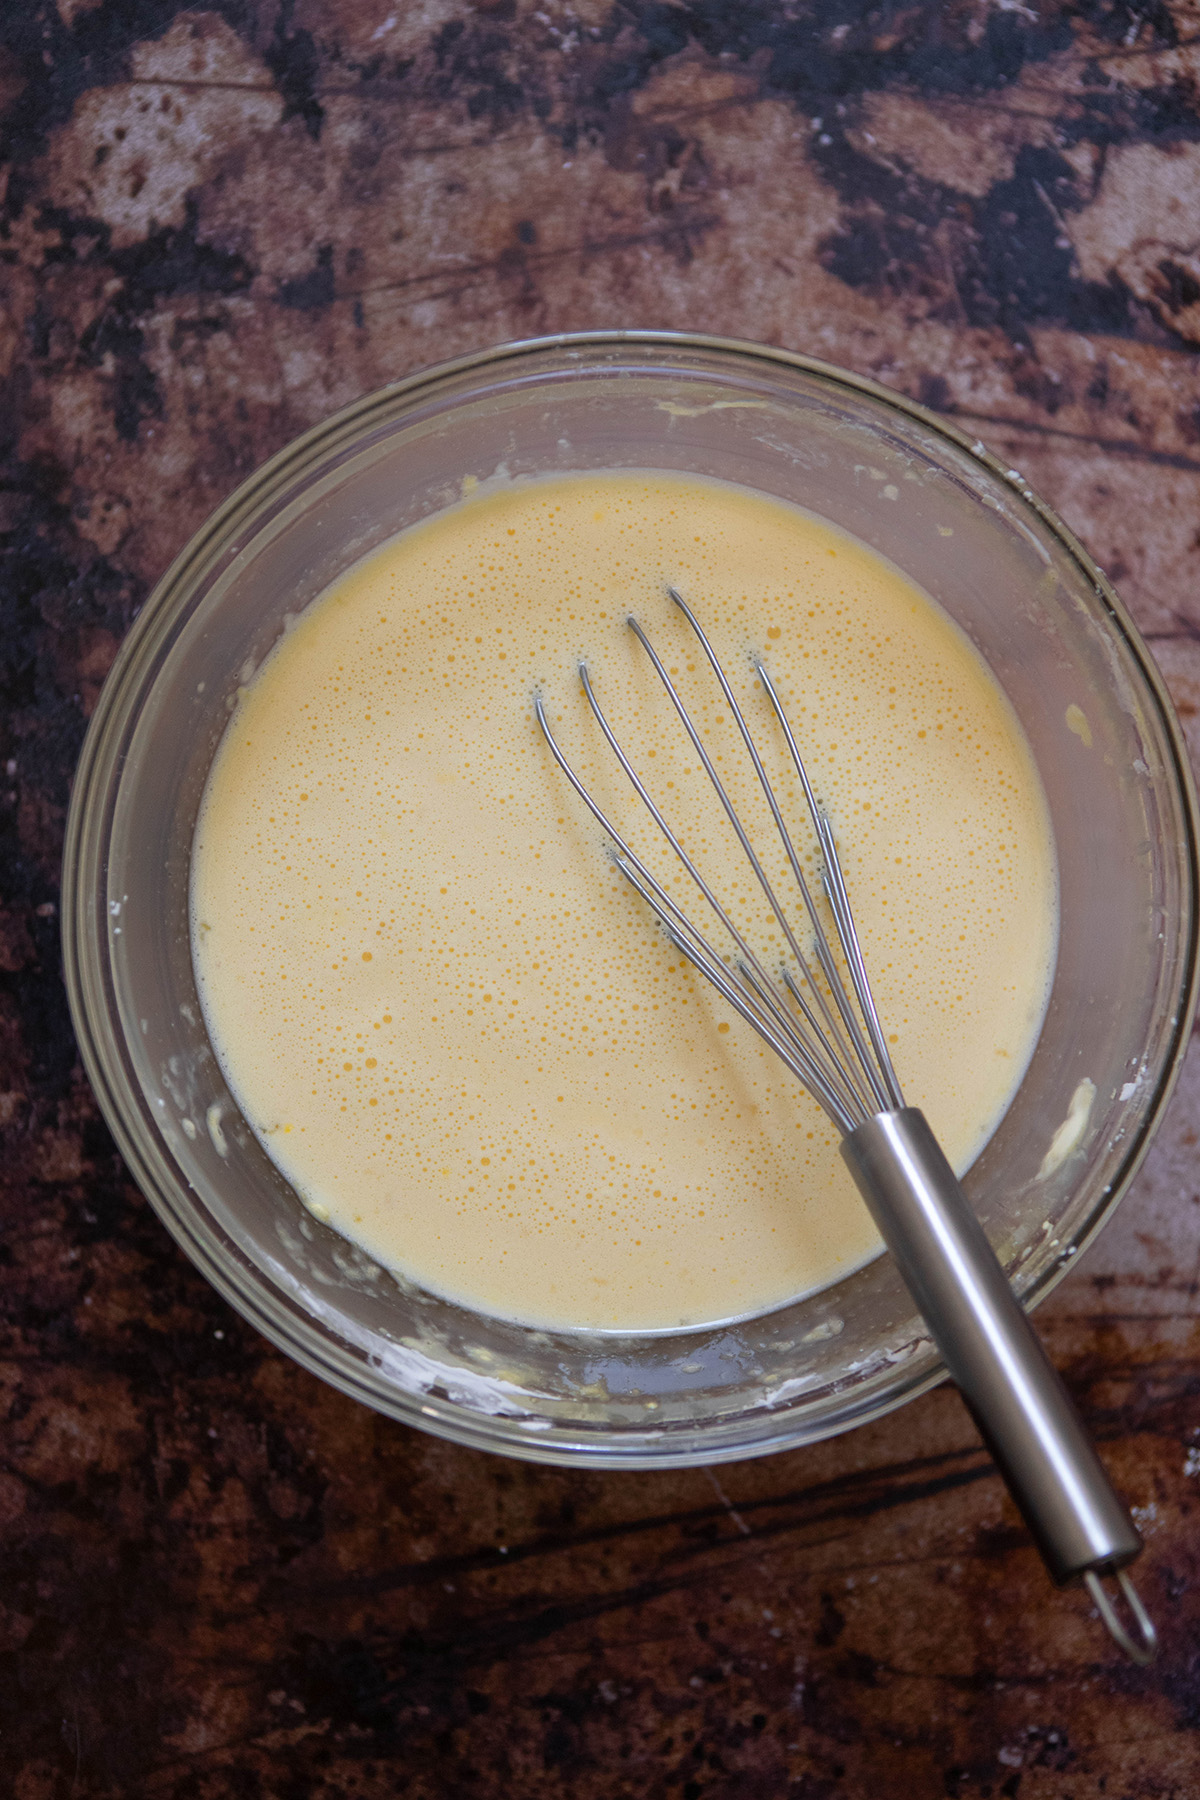
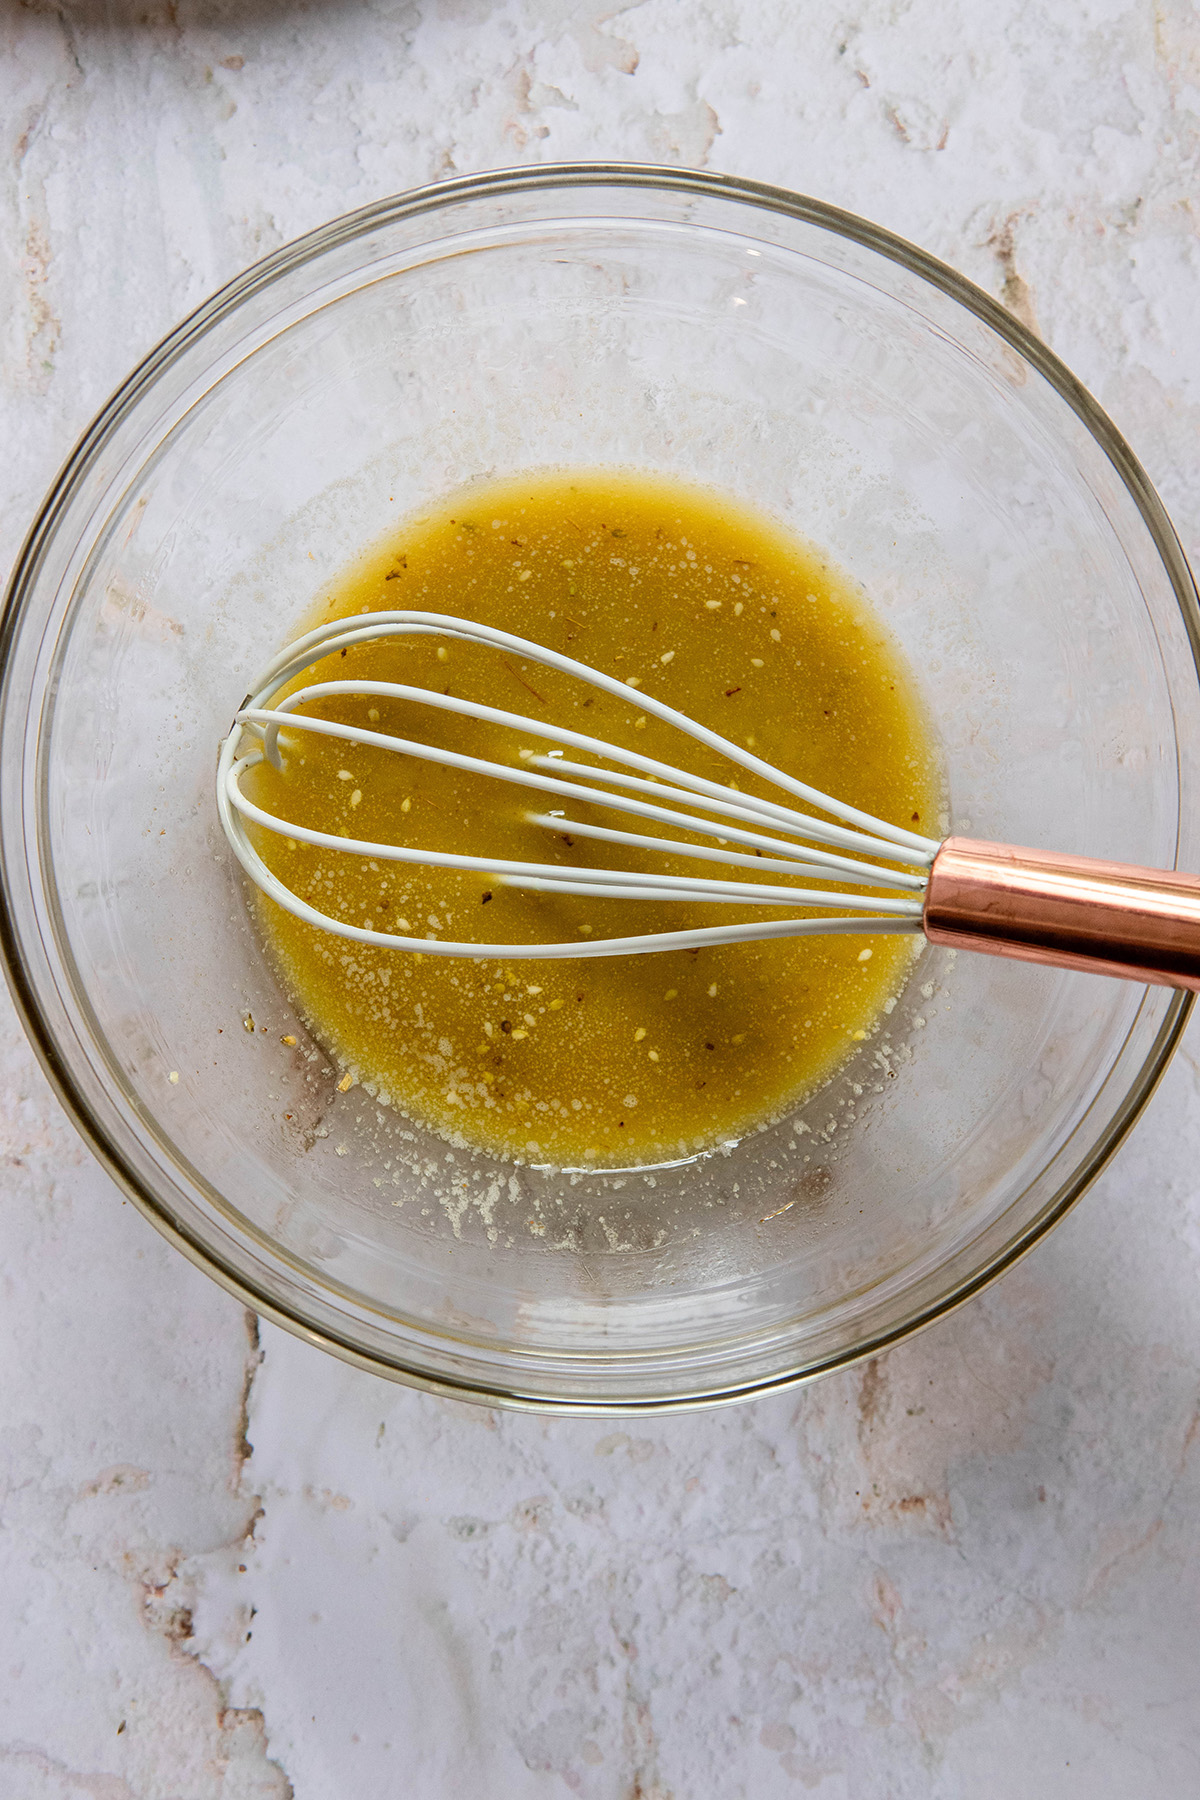
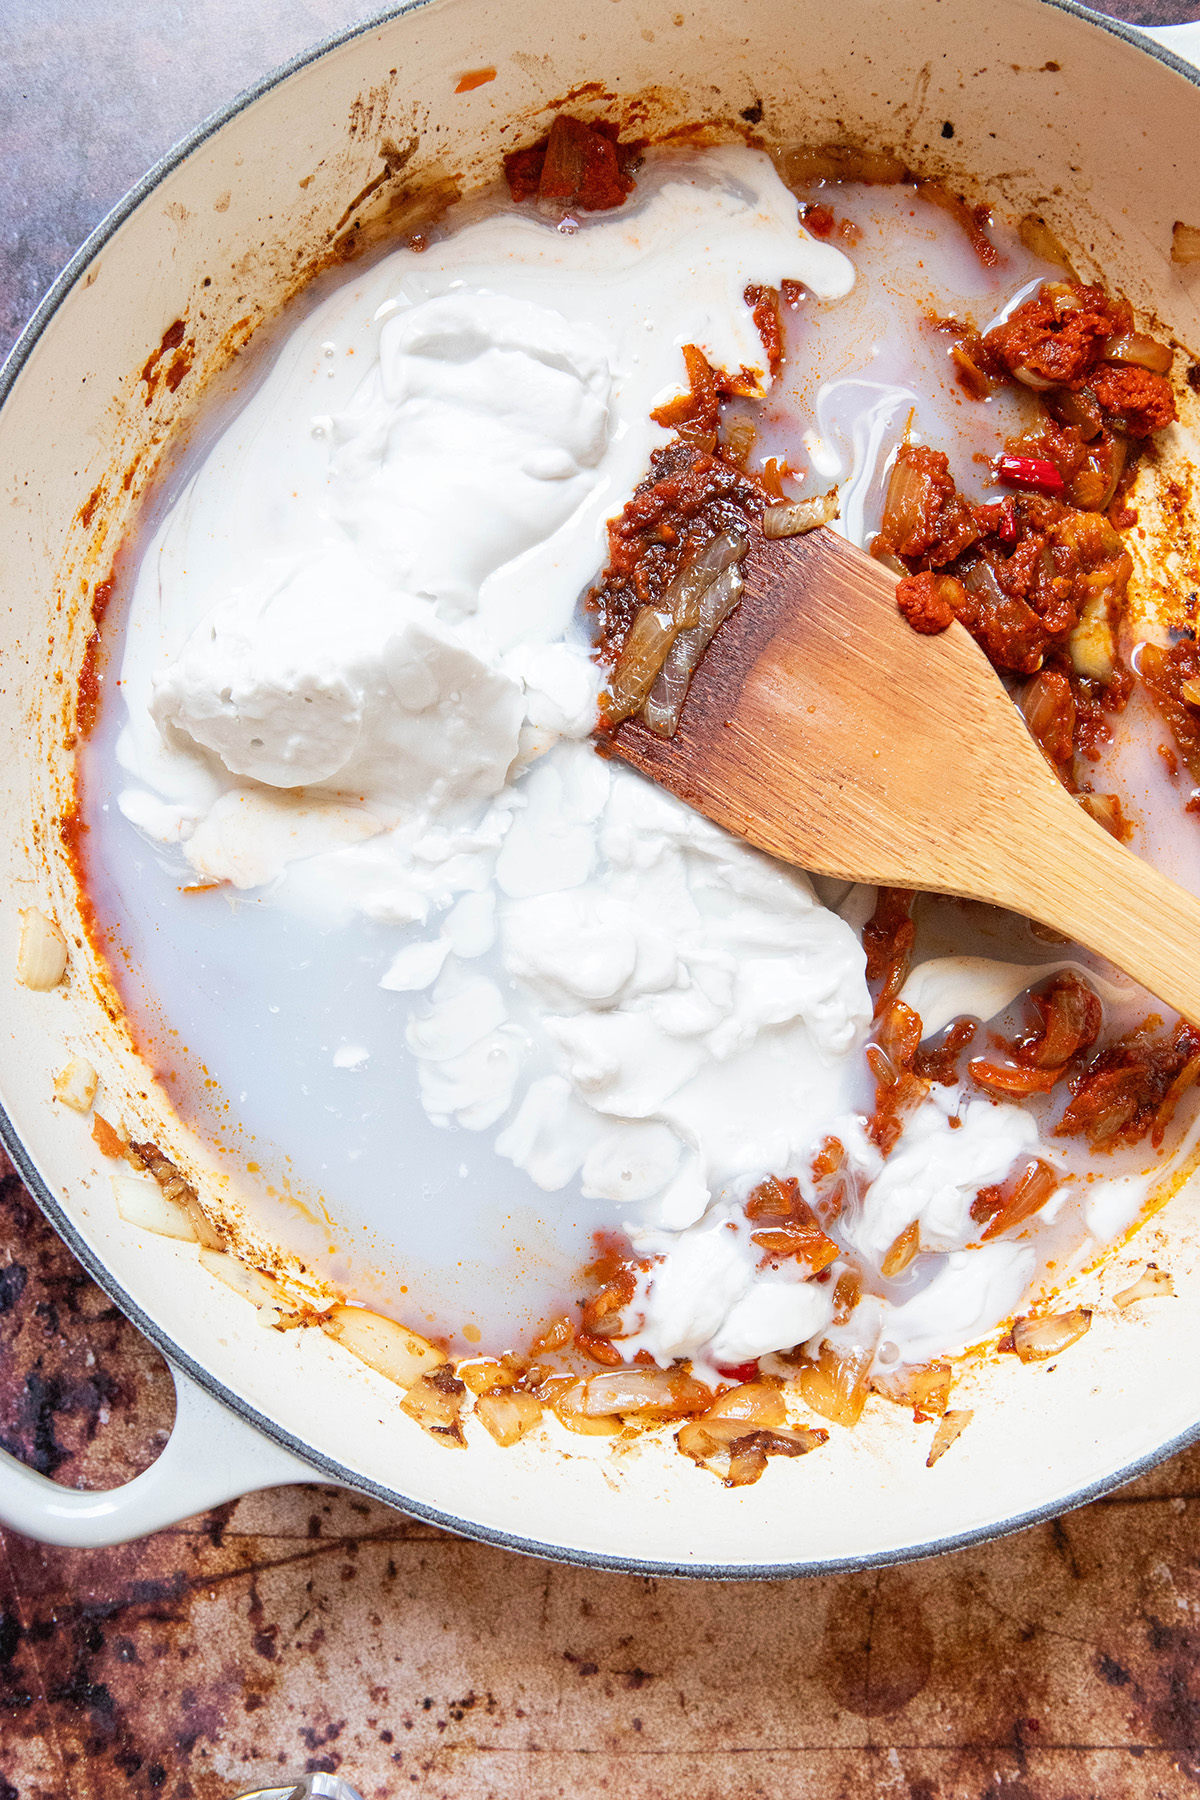
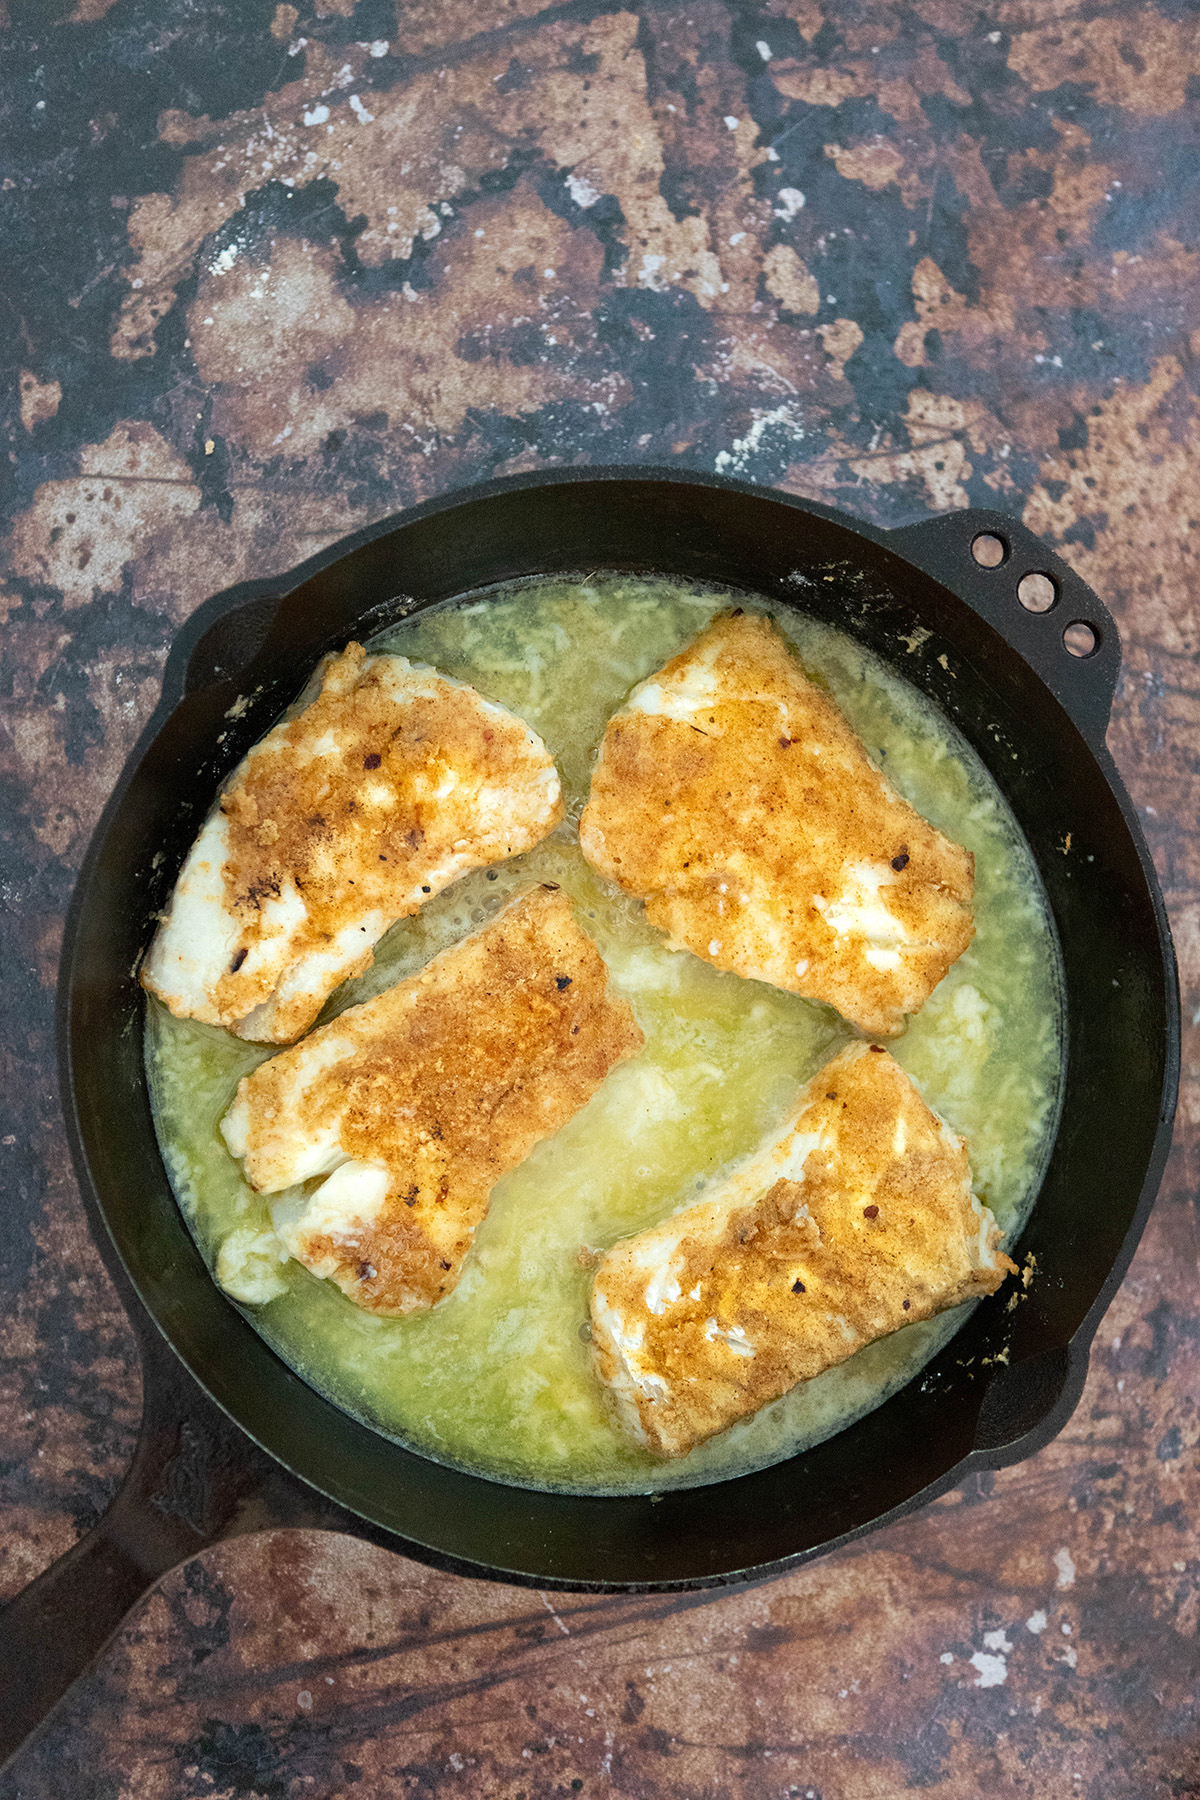
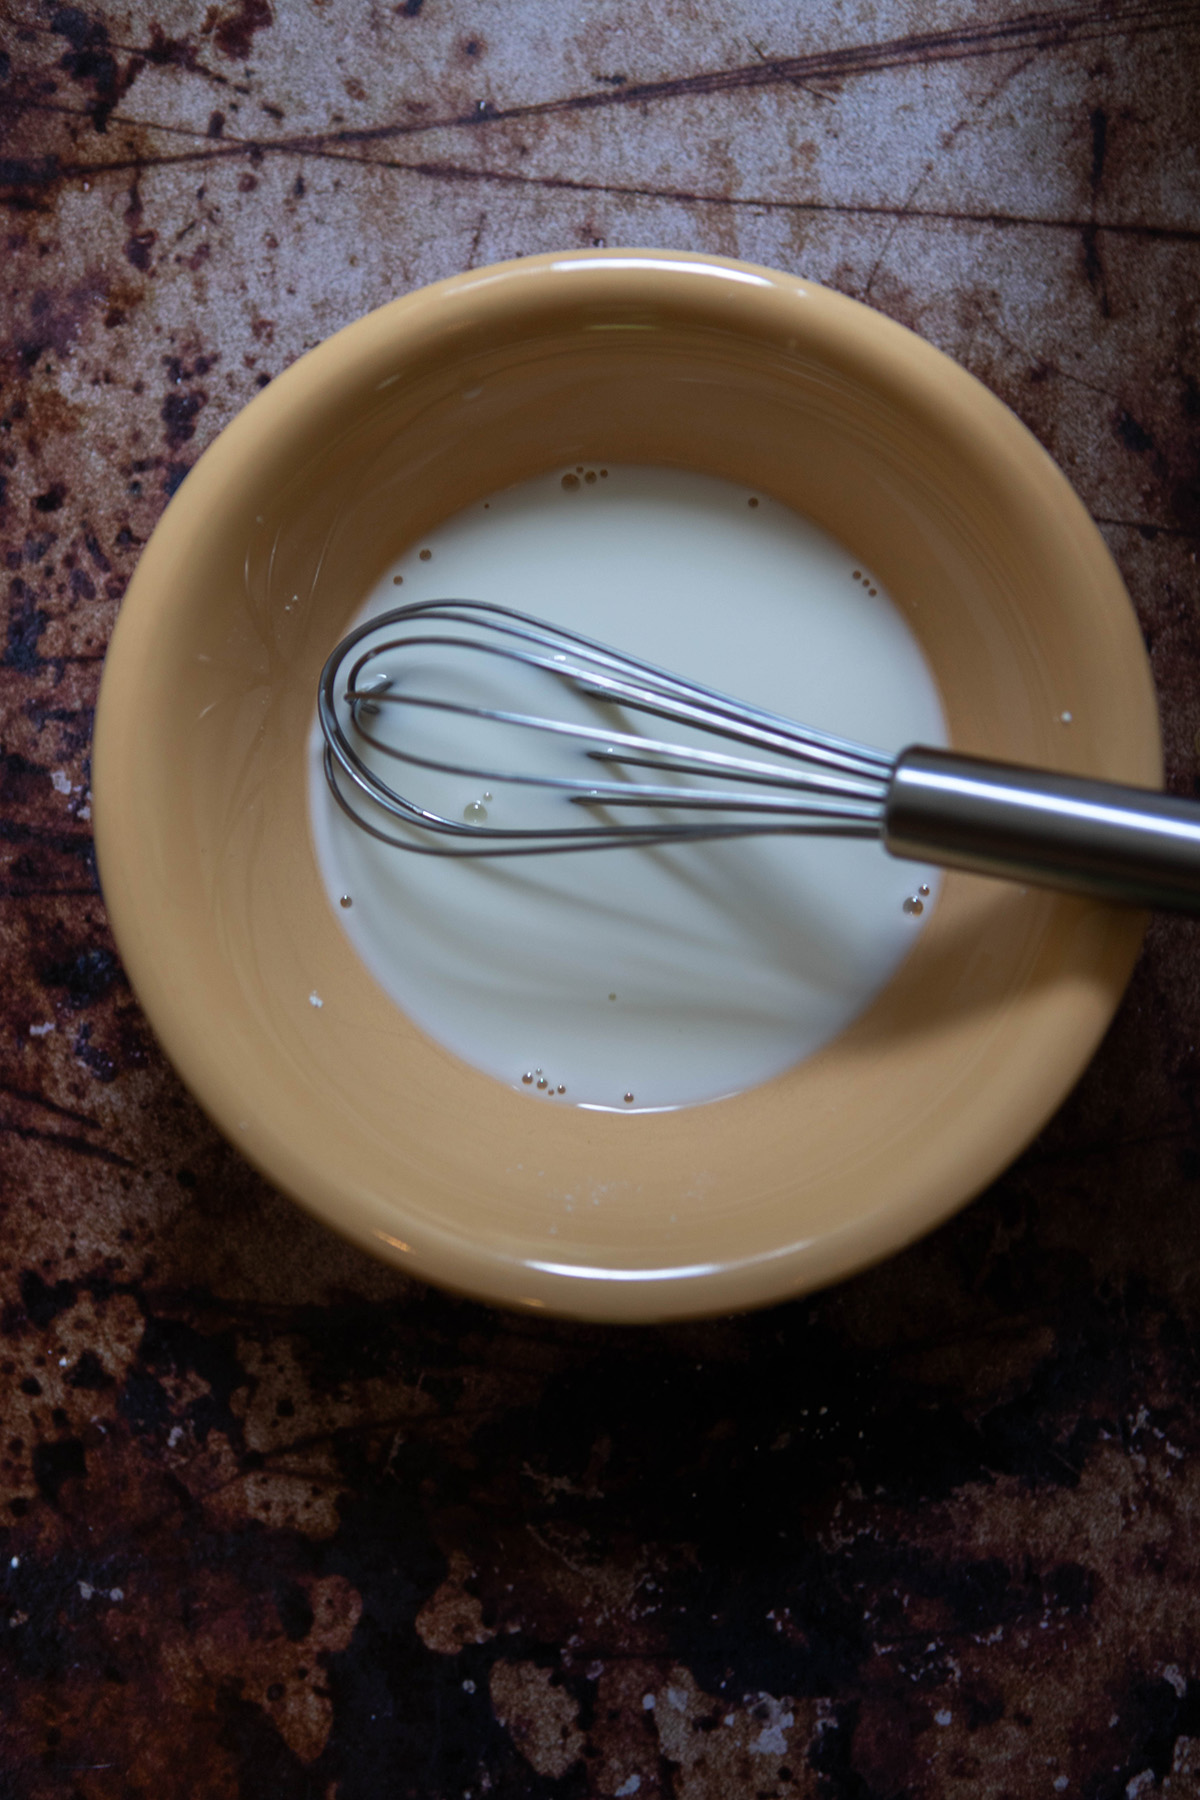
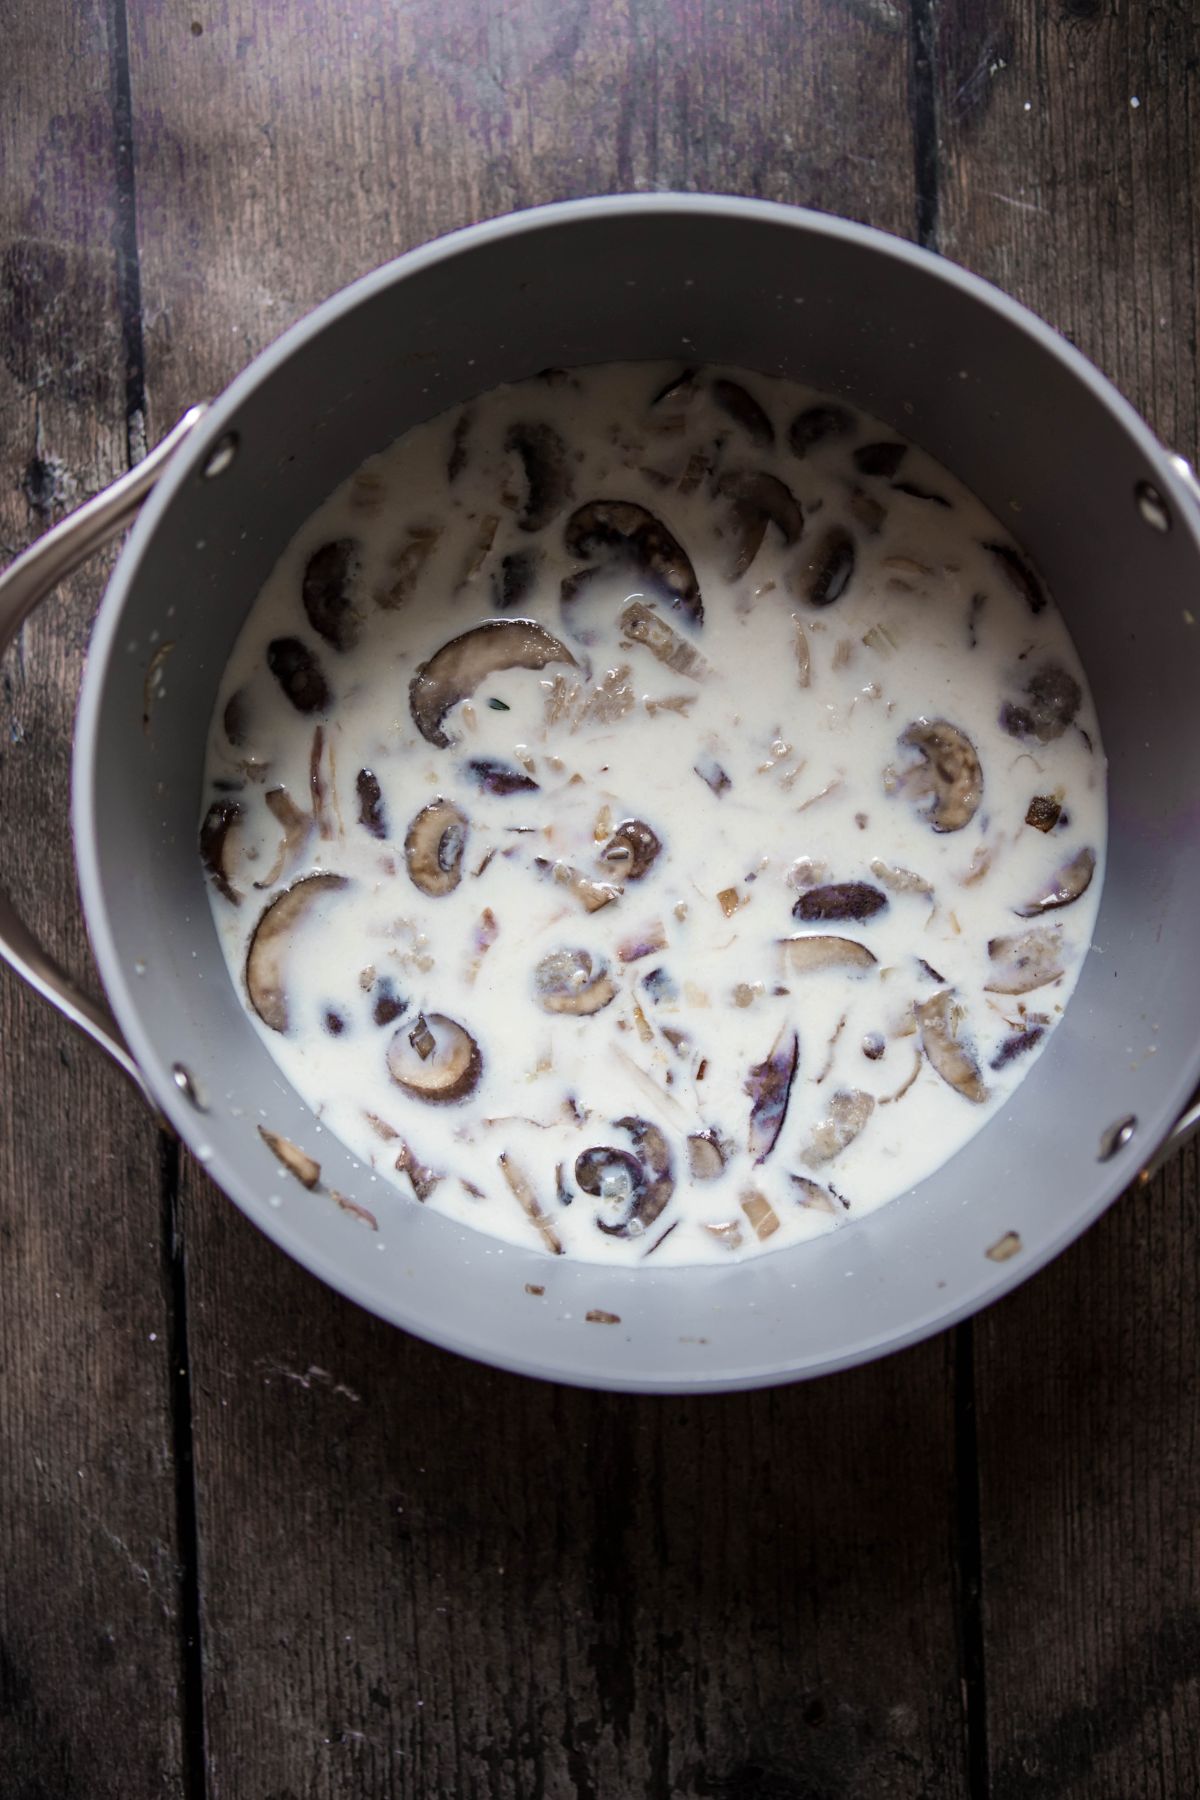
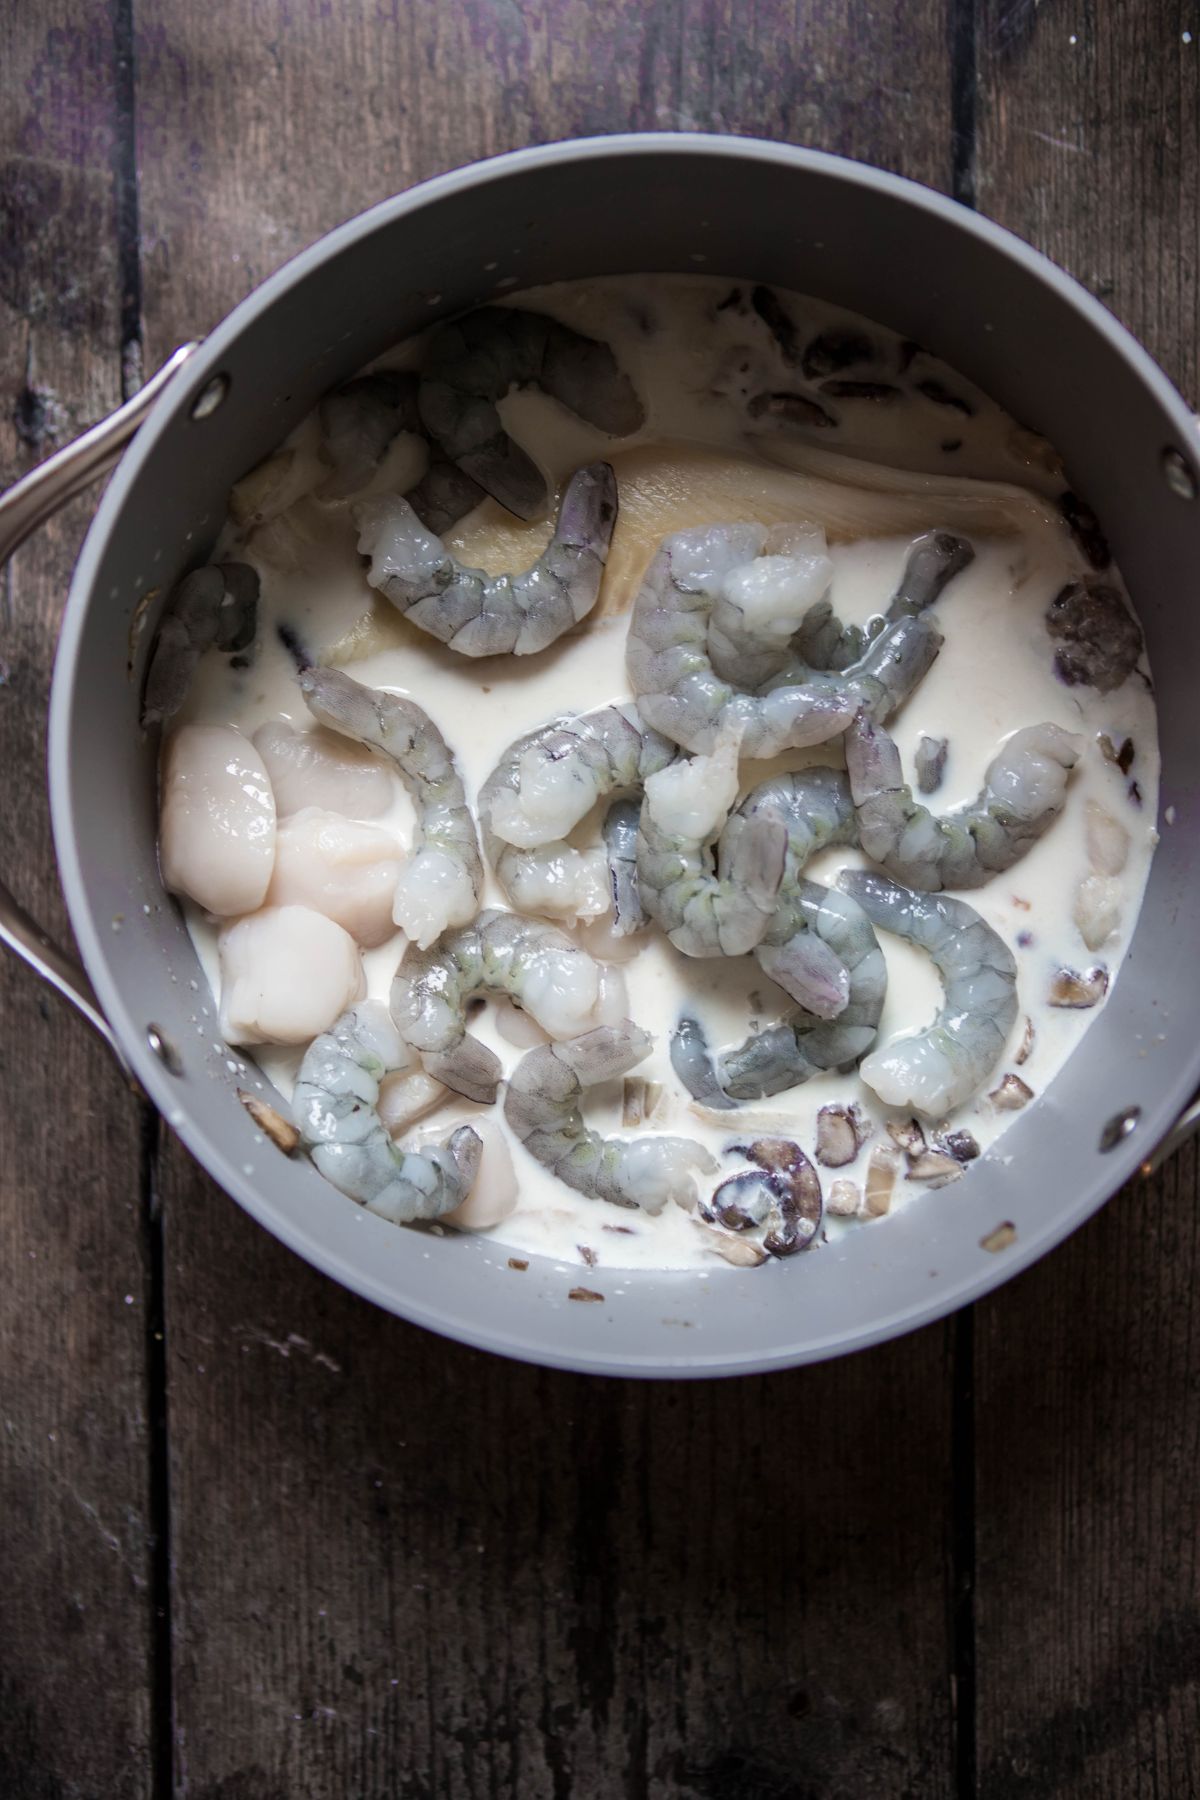
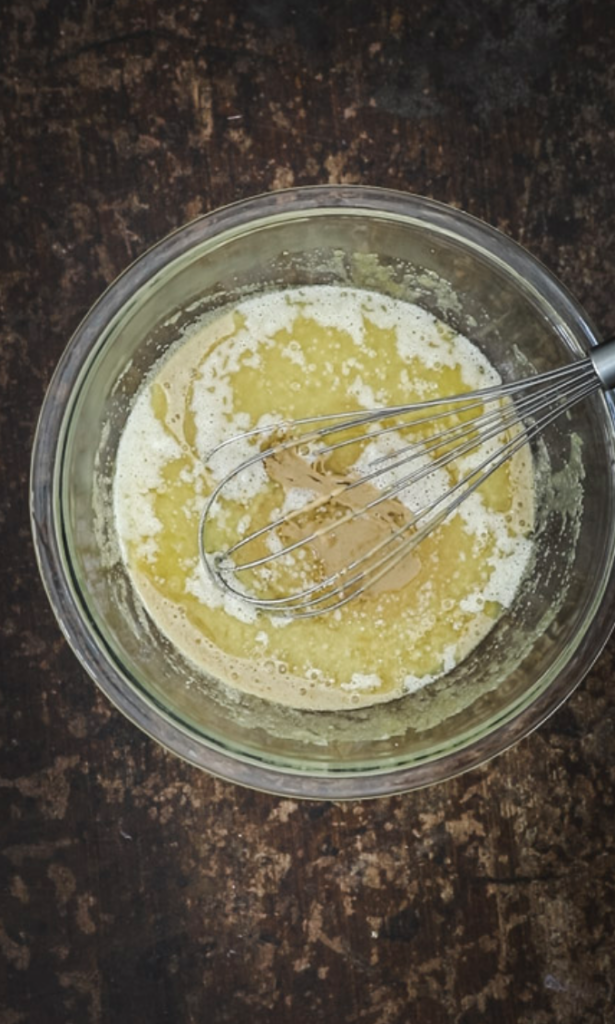
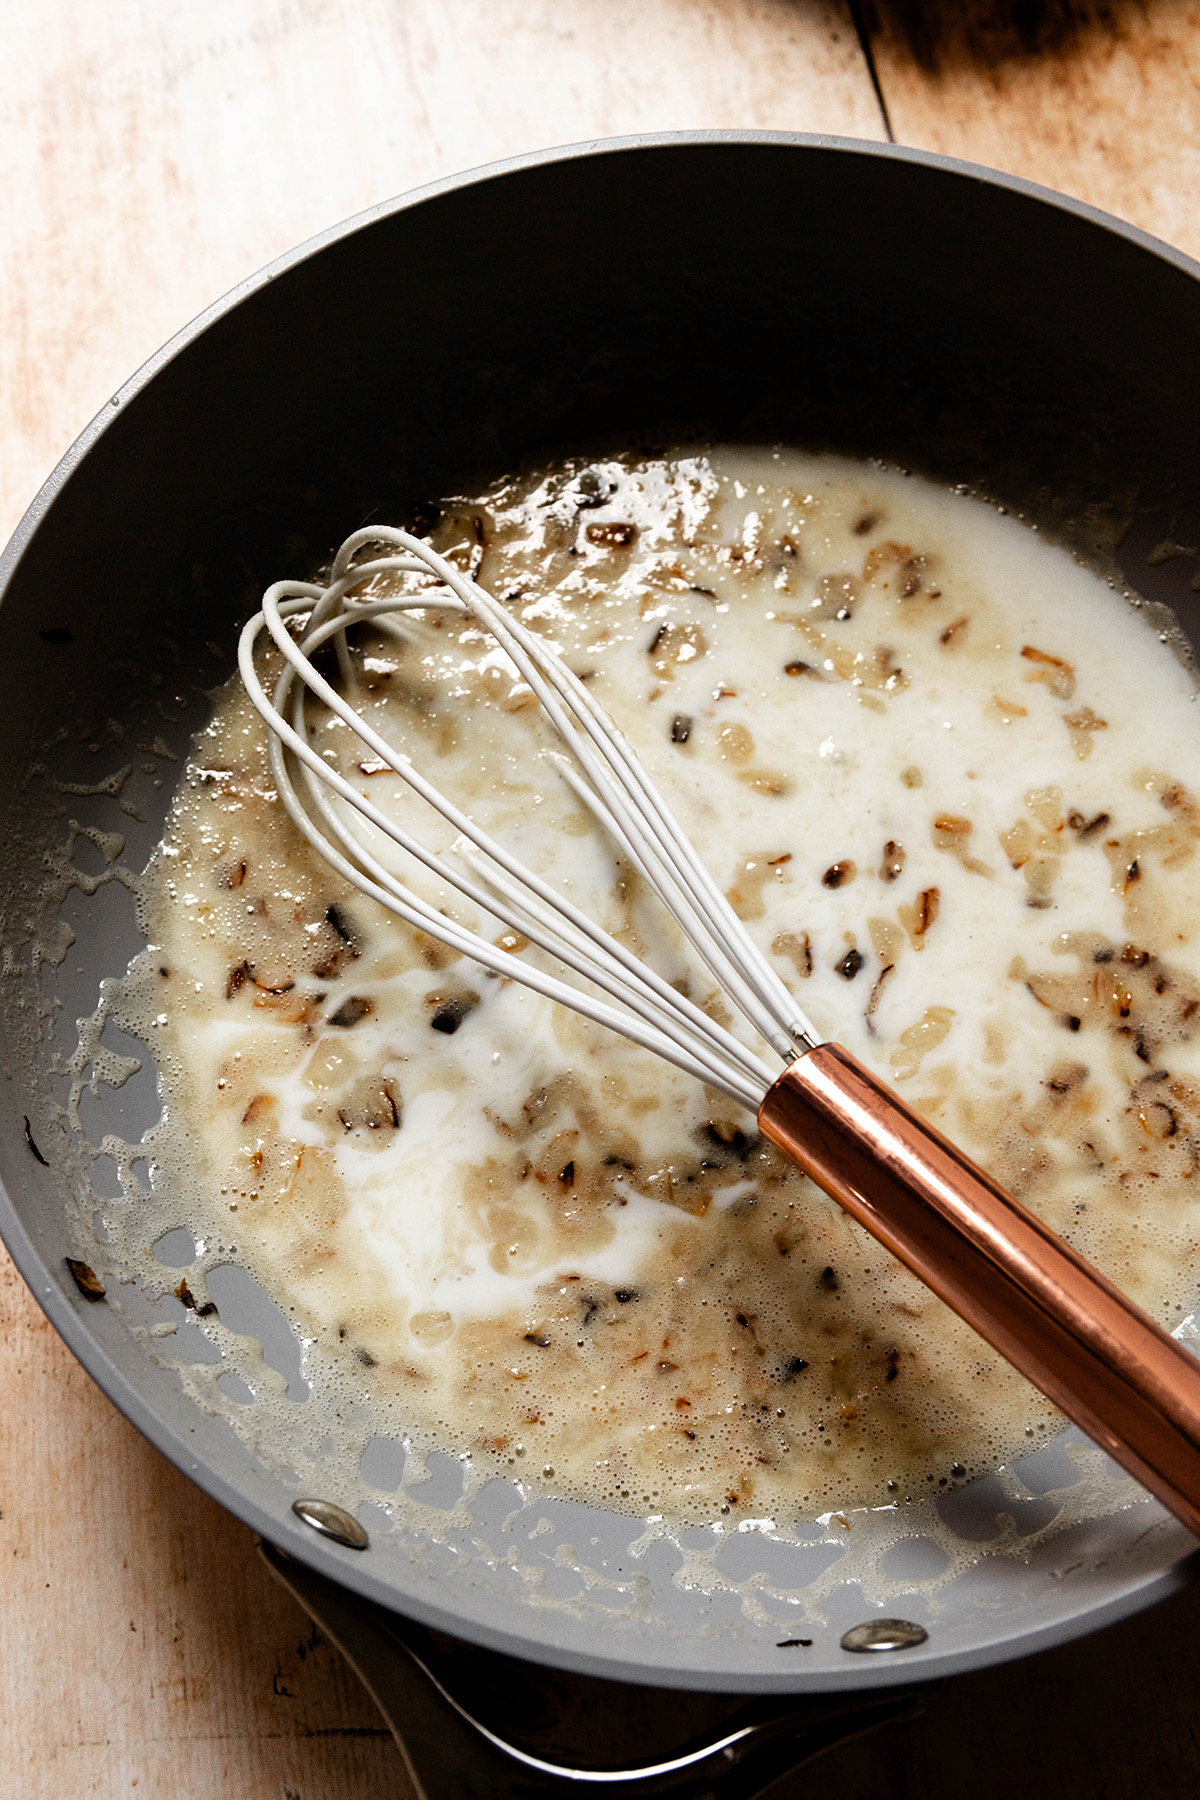
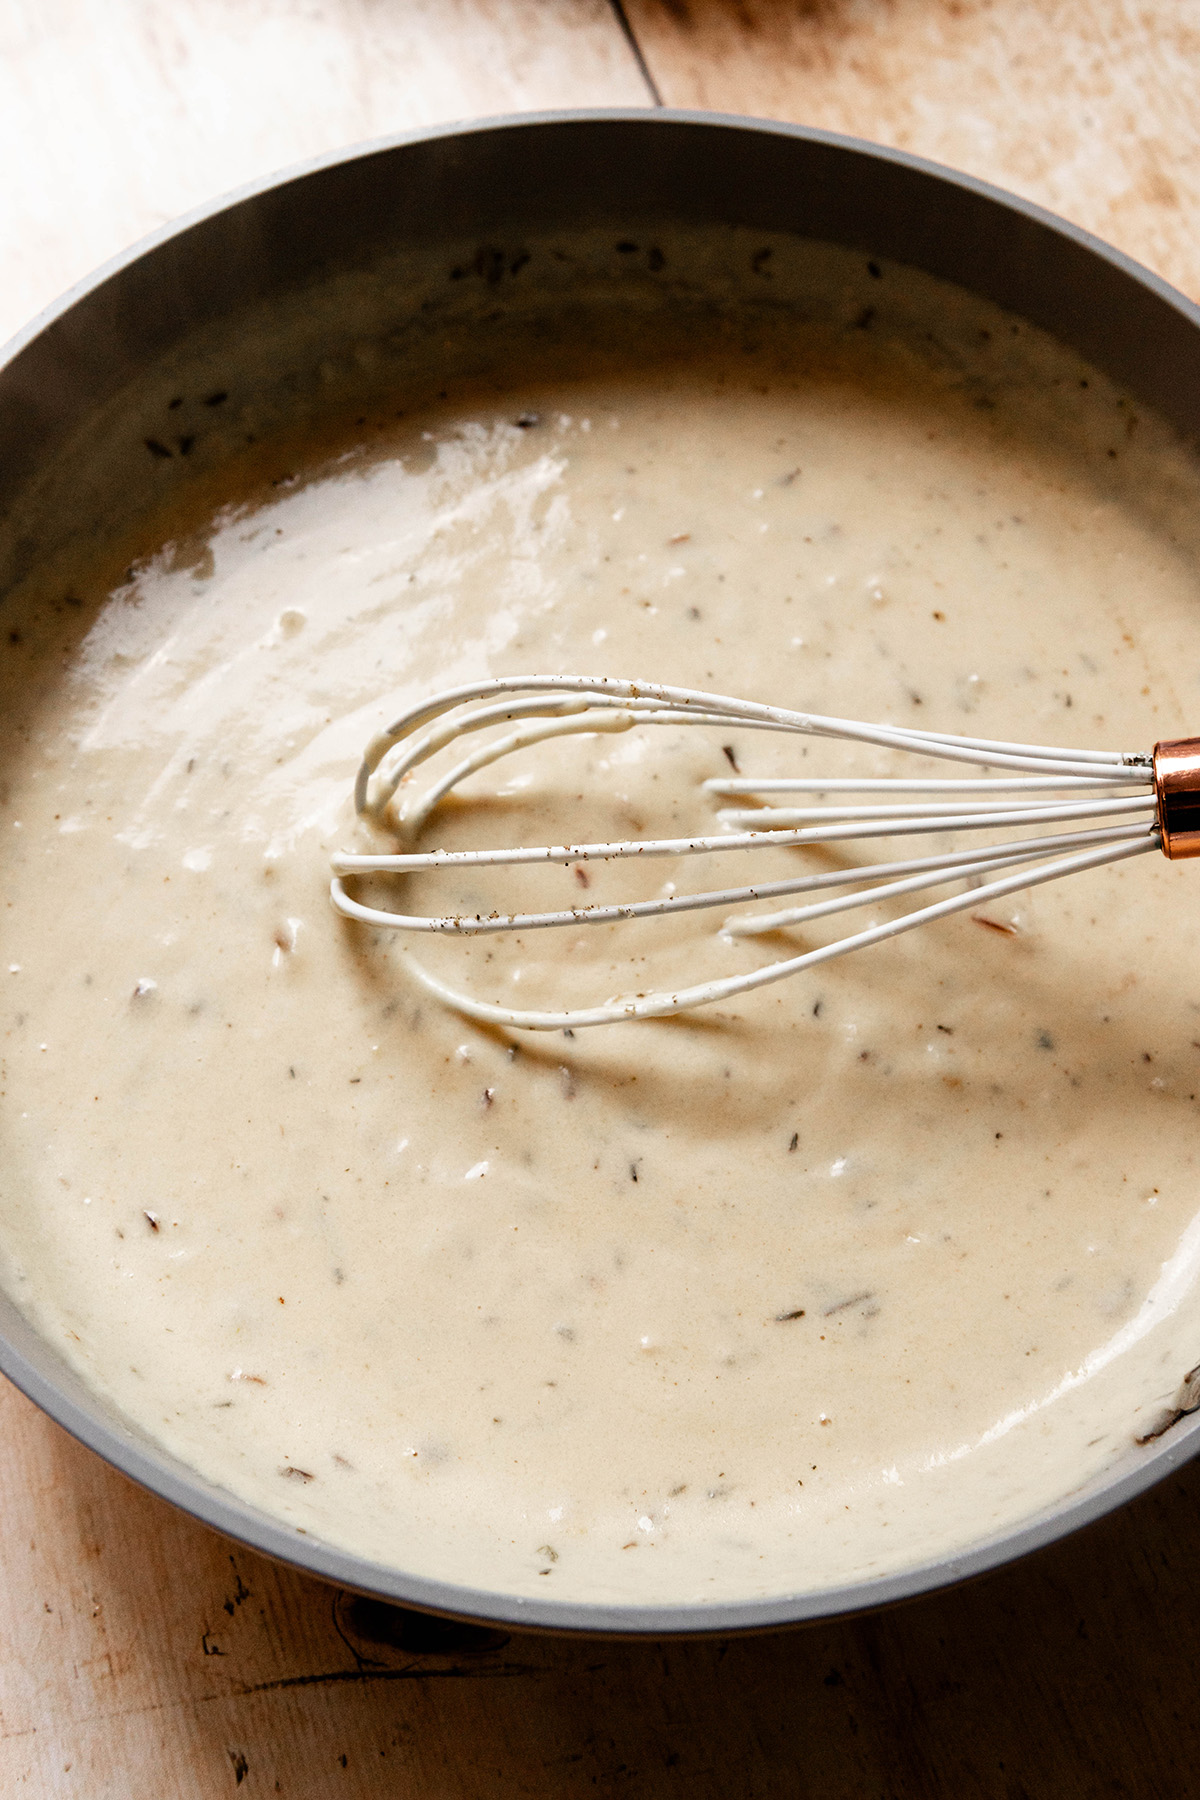
Slowly add the milk: pour the milk into the pan ¼ of a cup at a time and continue to whisk. While the sauce is thickening, you will have a few minutes to grease a baking dish and lay the fish in a single layer on the bottom of it. 
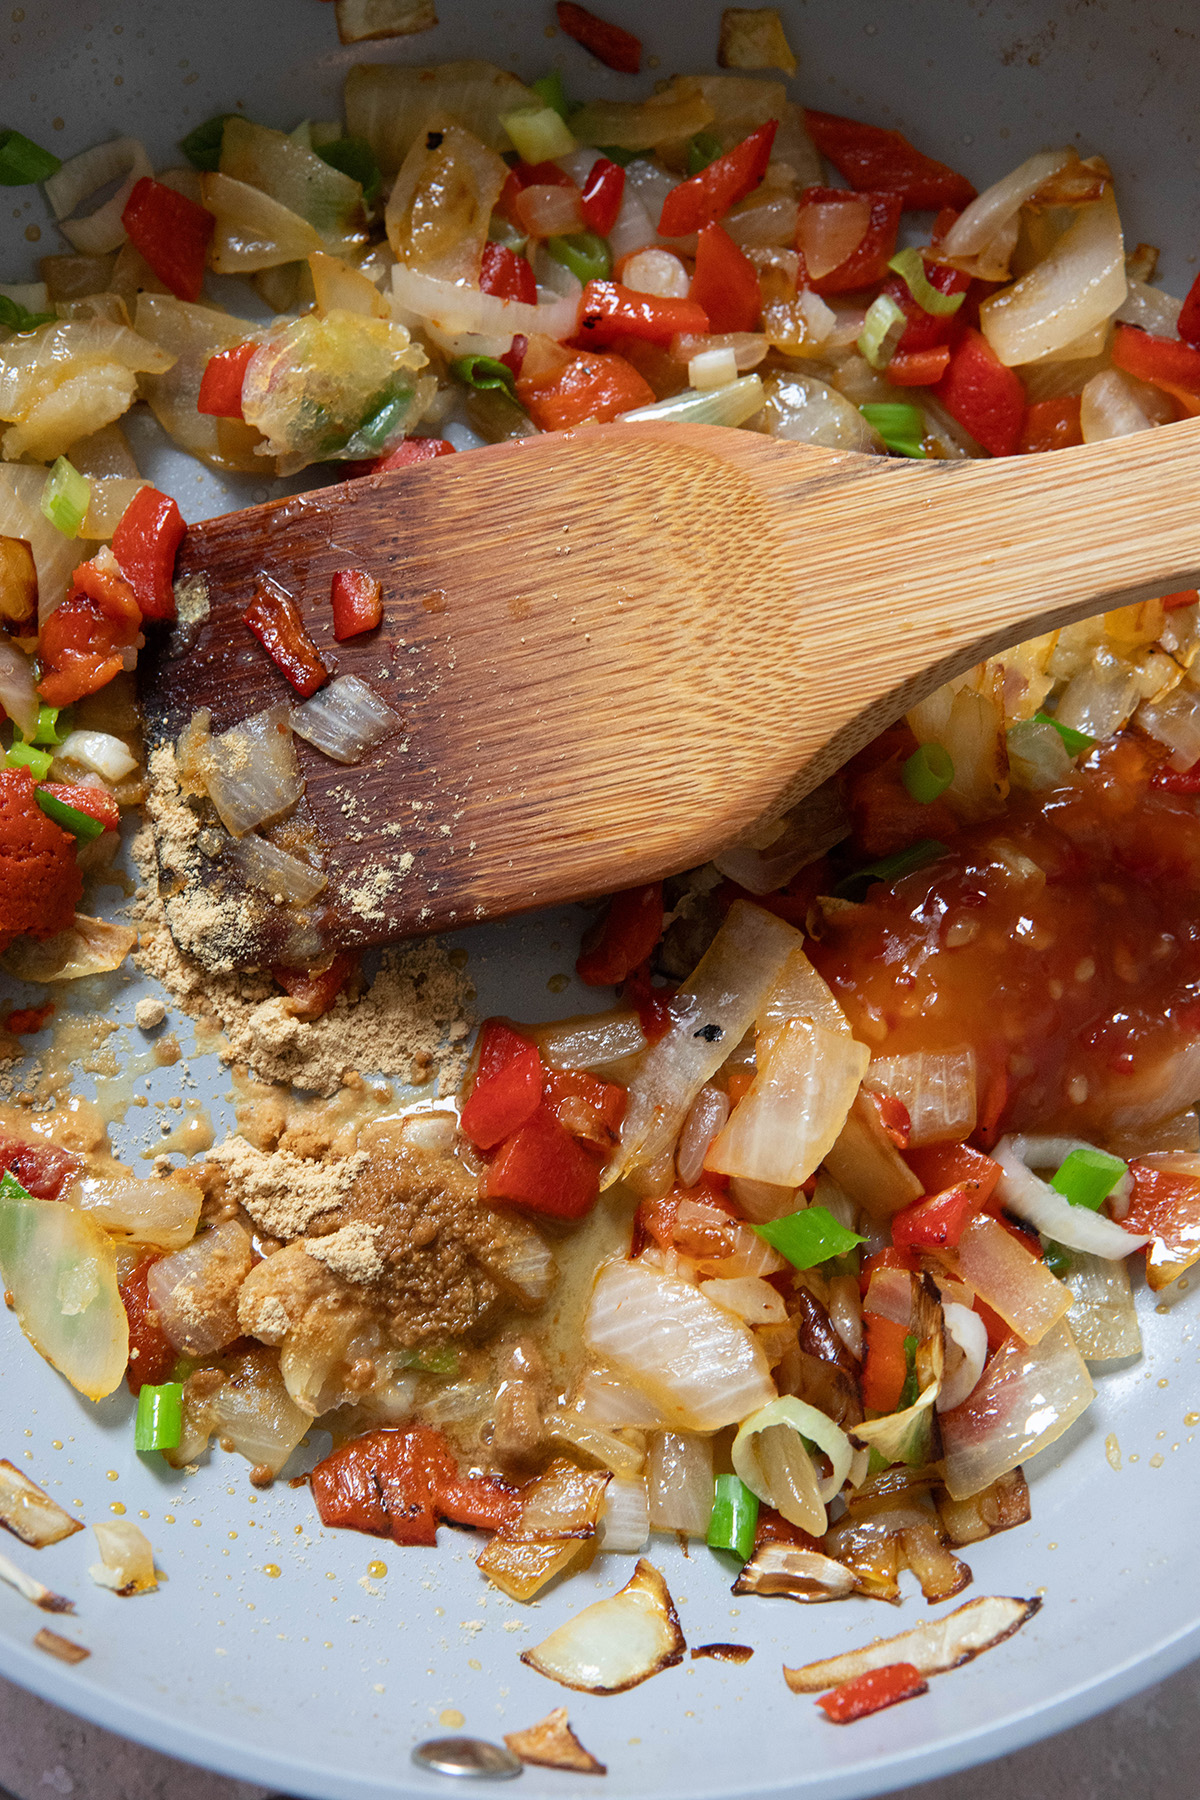
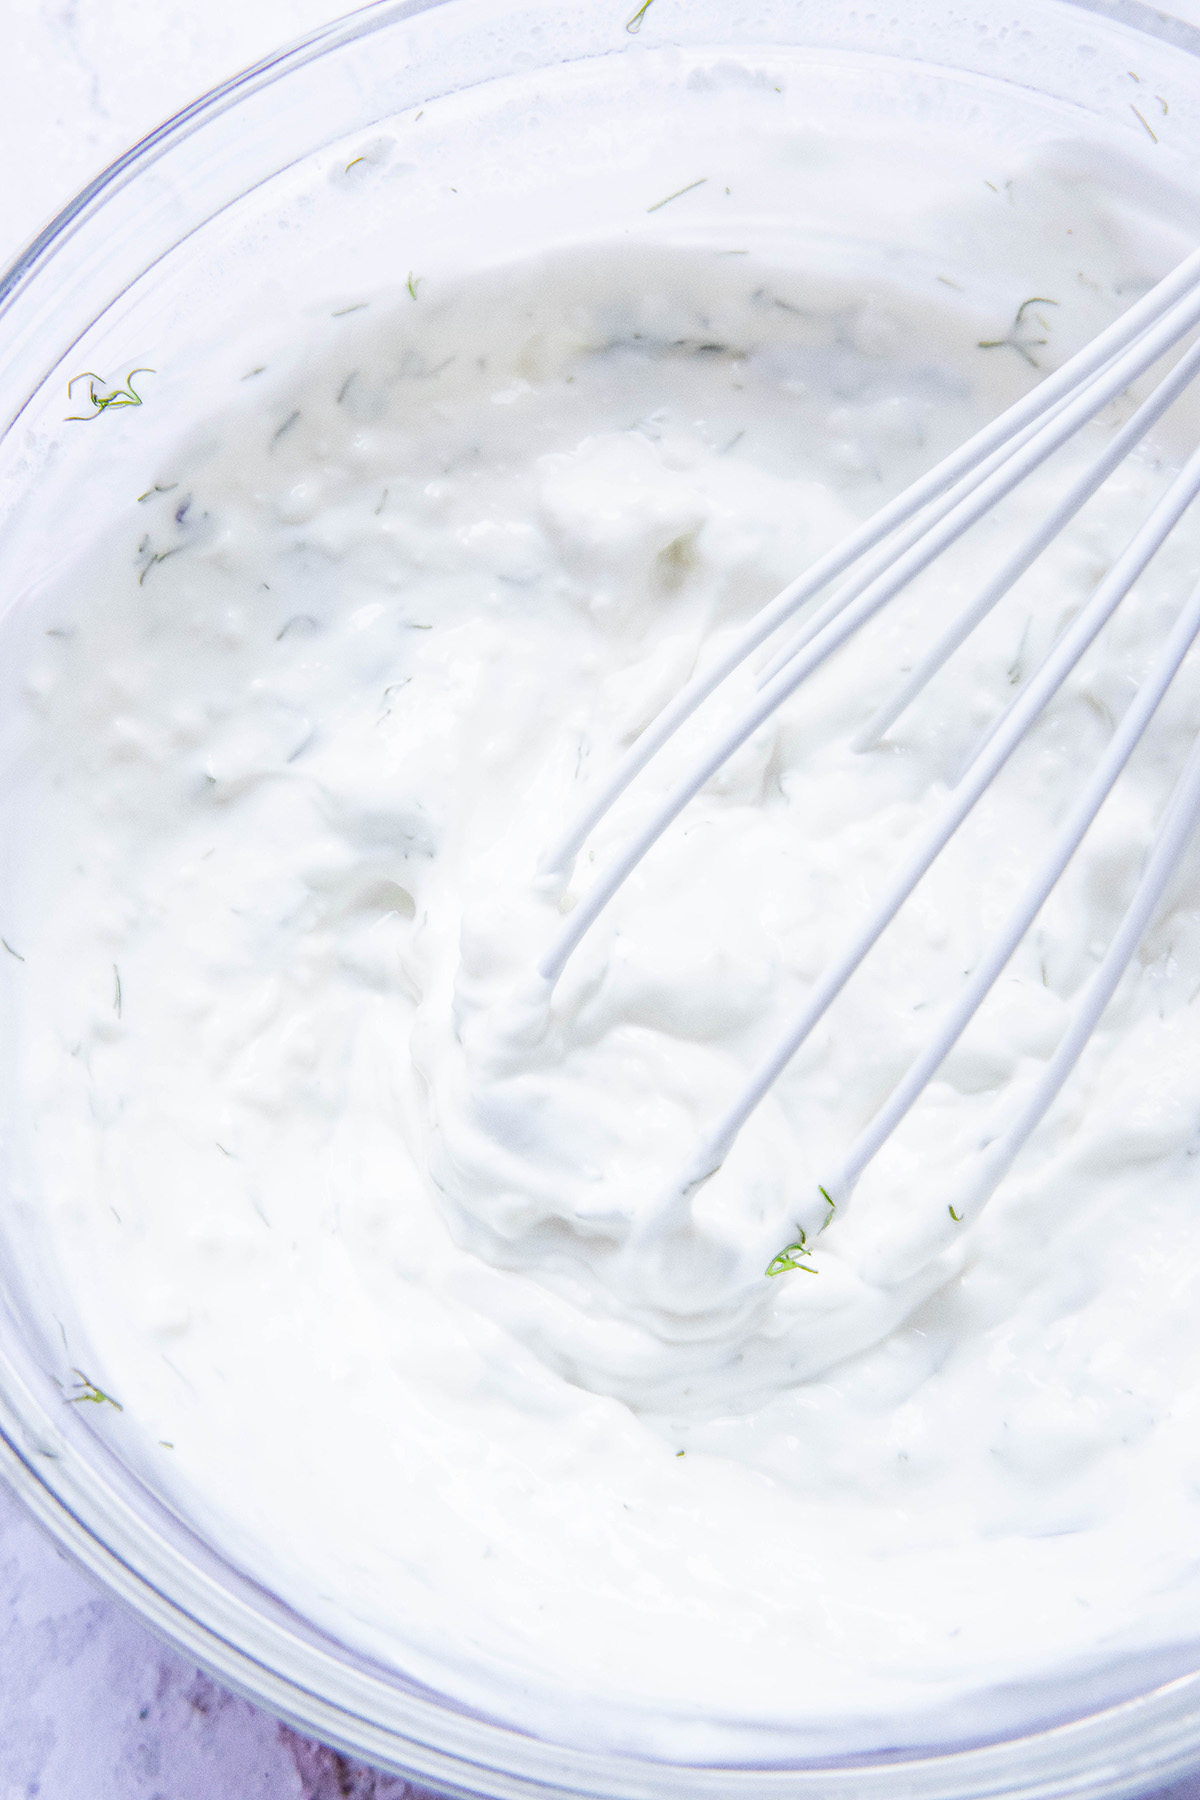
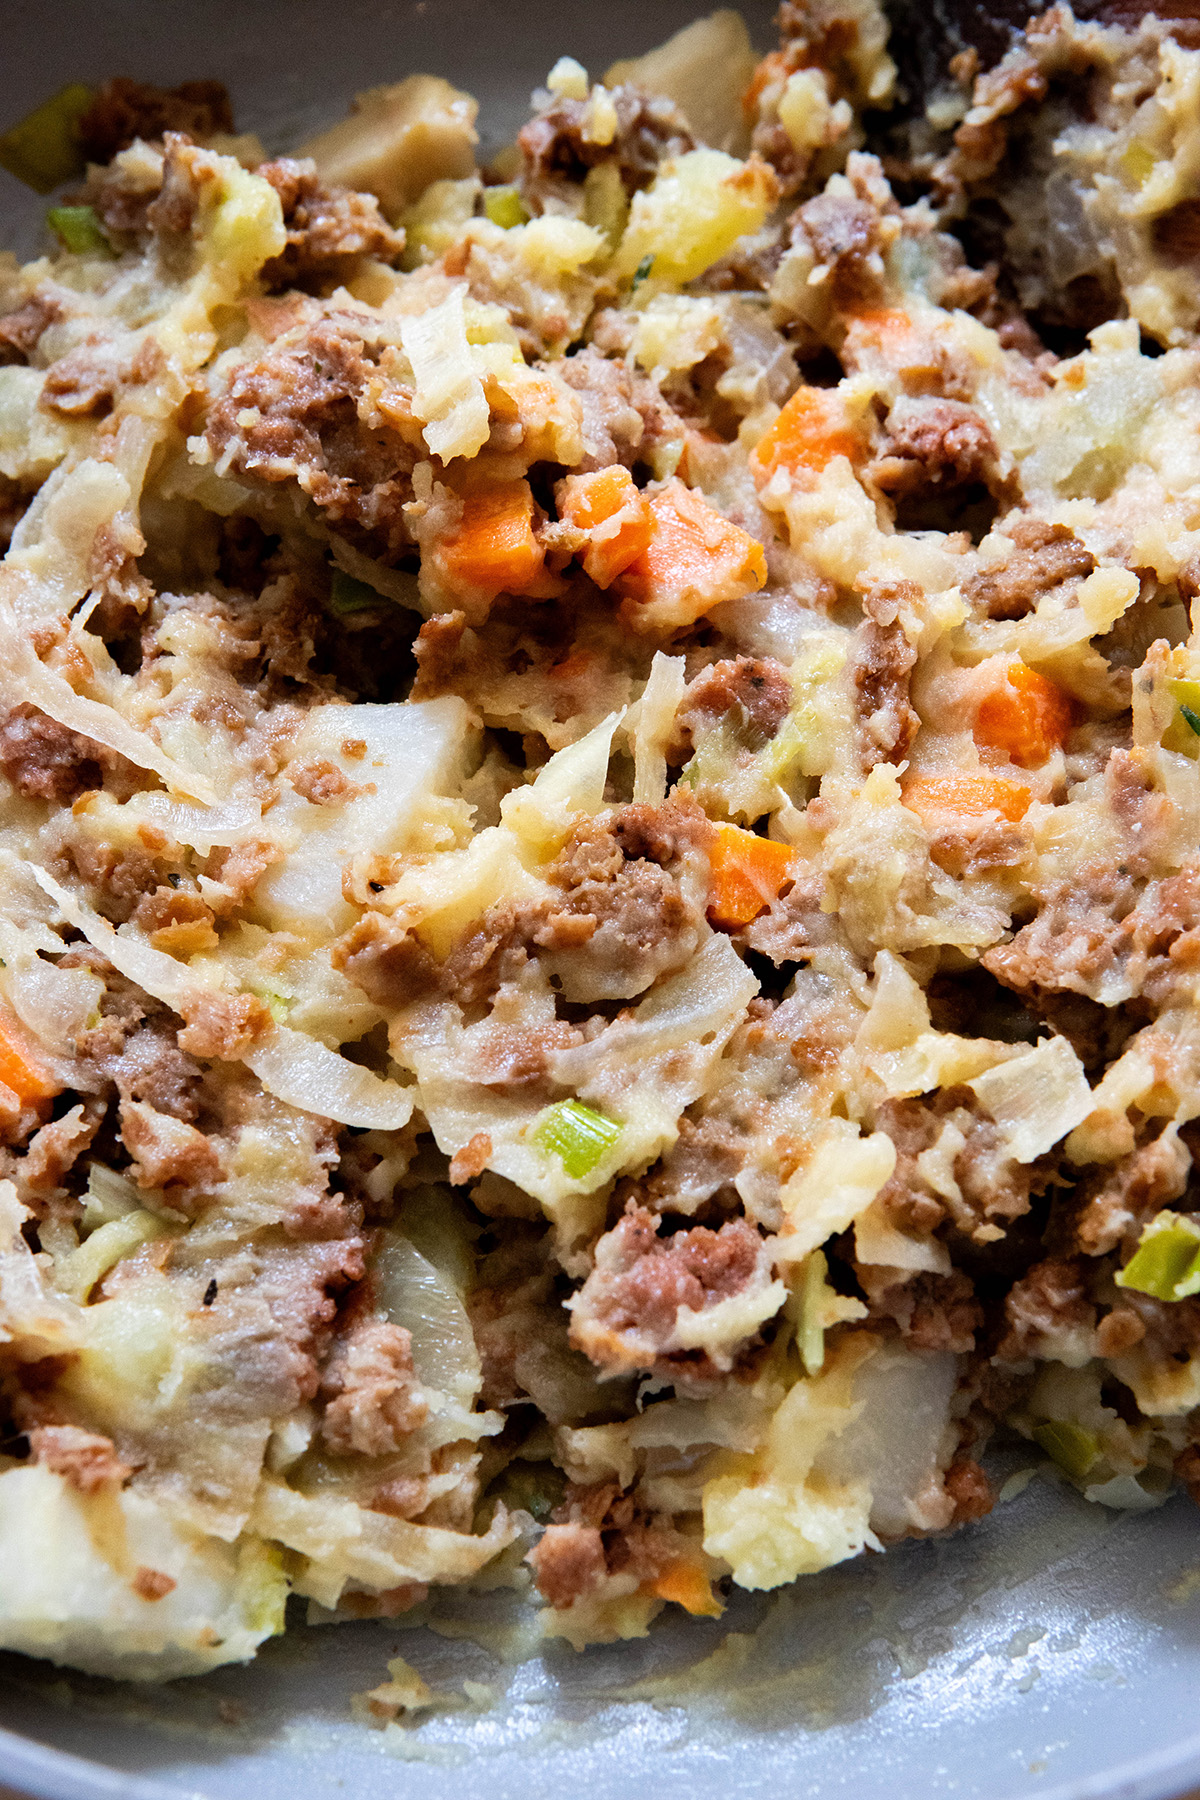
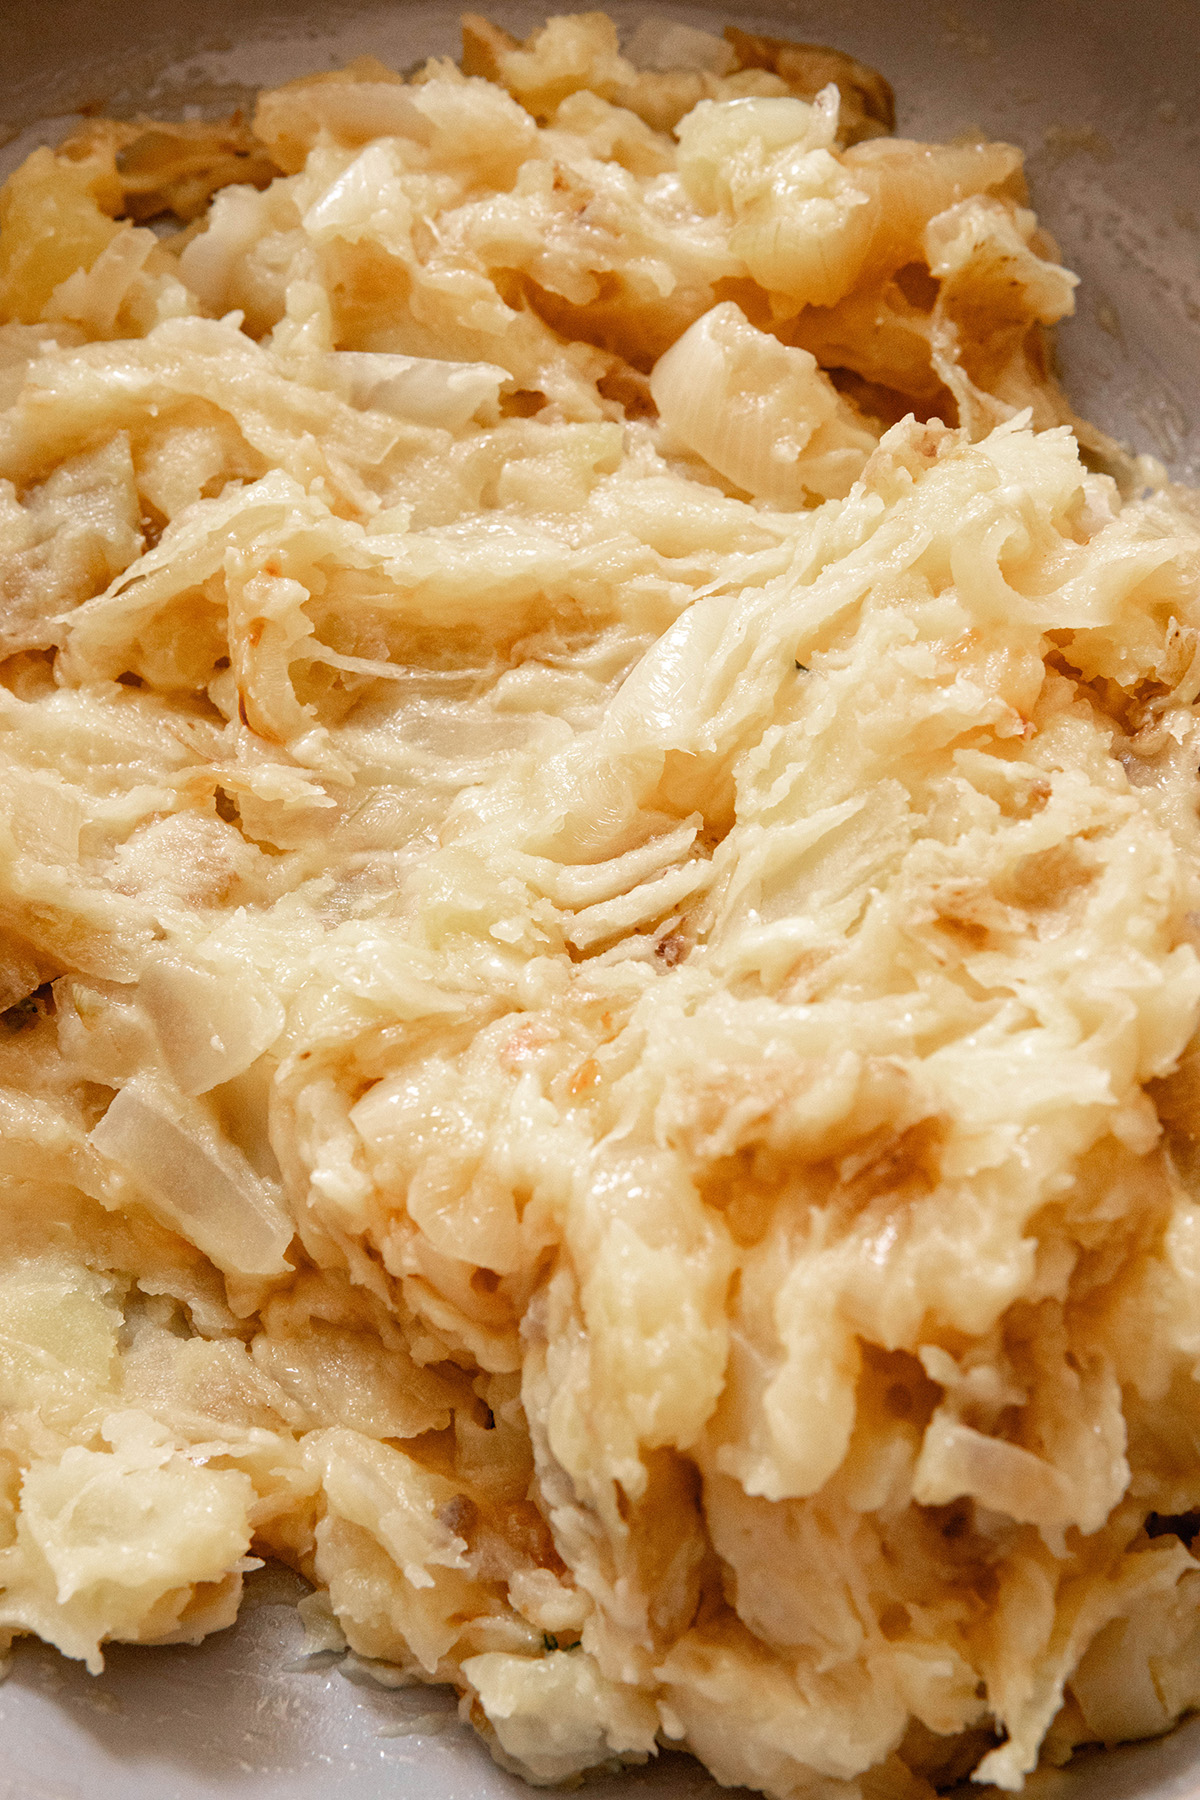
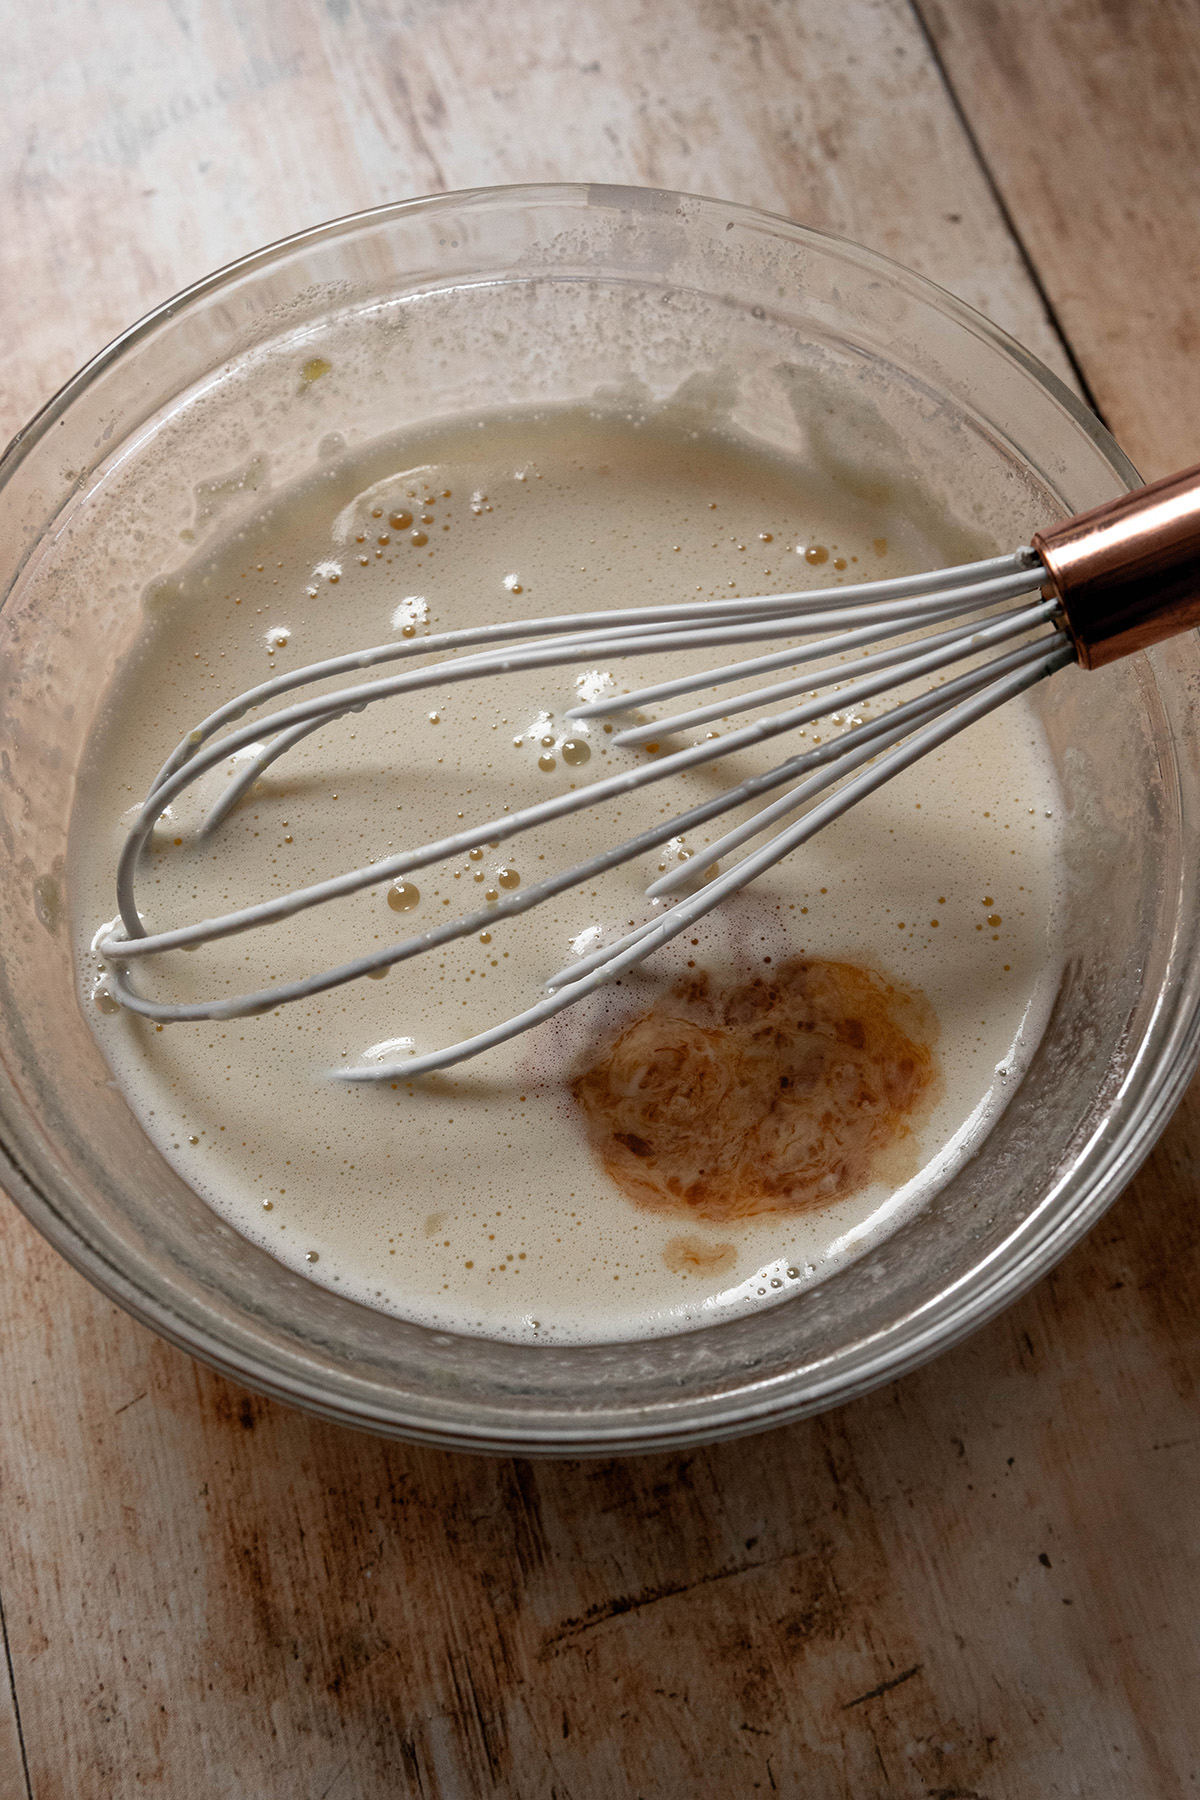
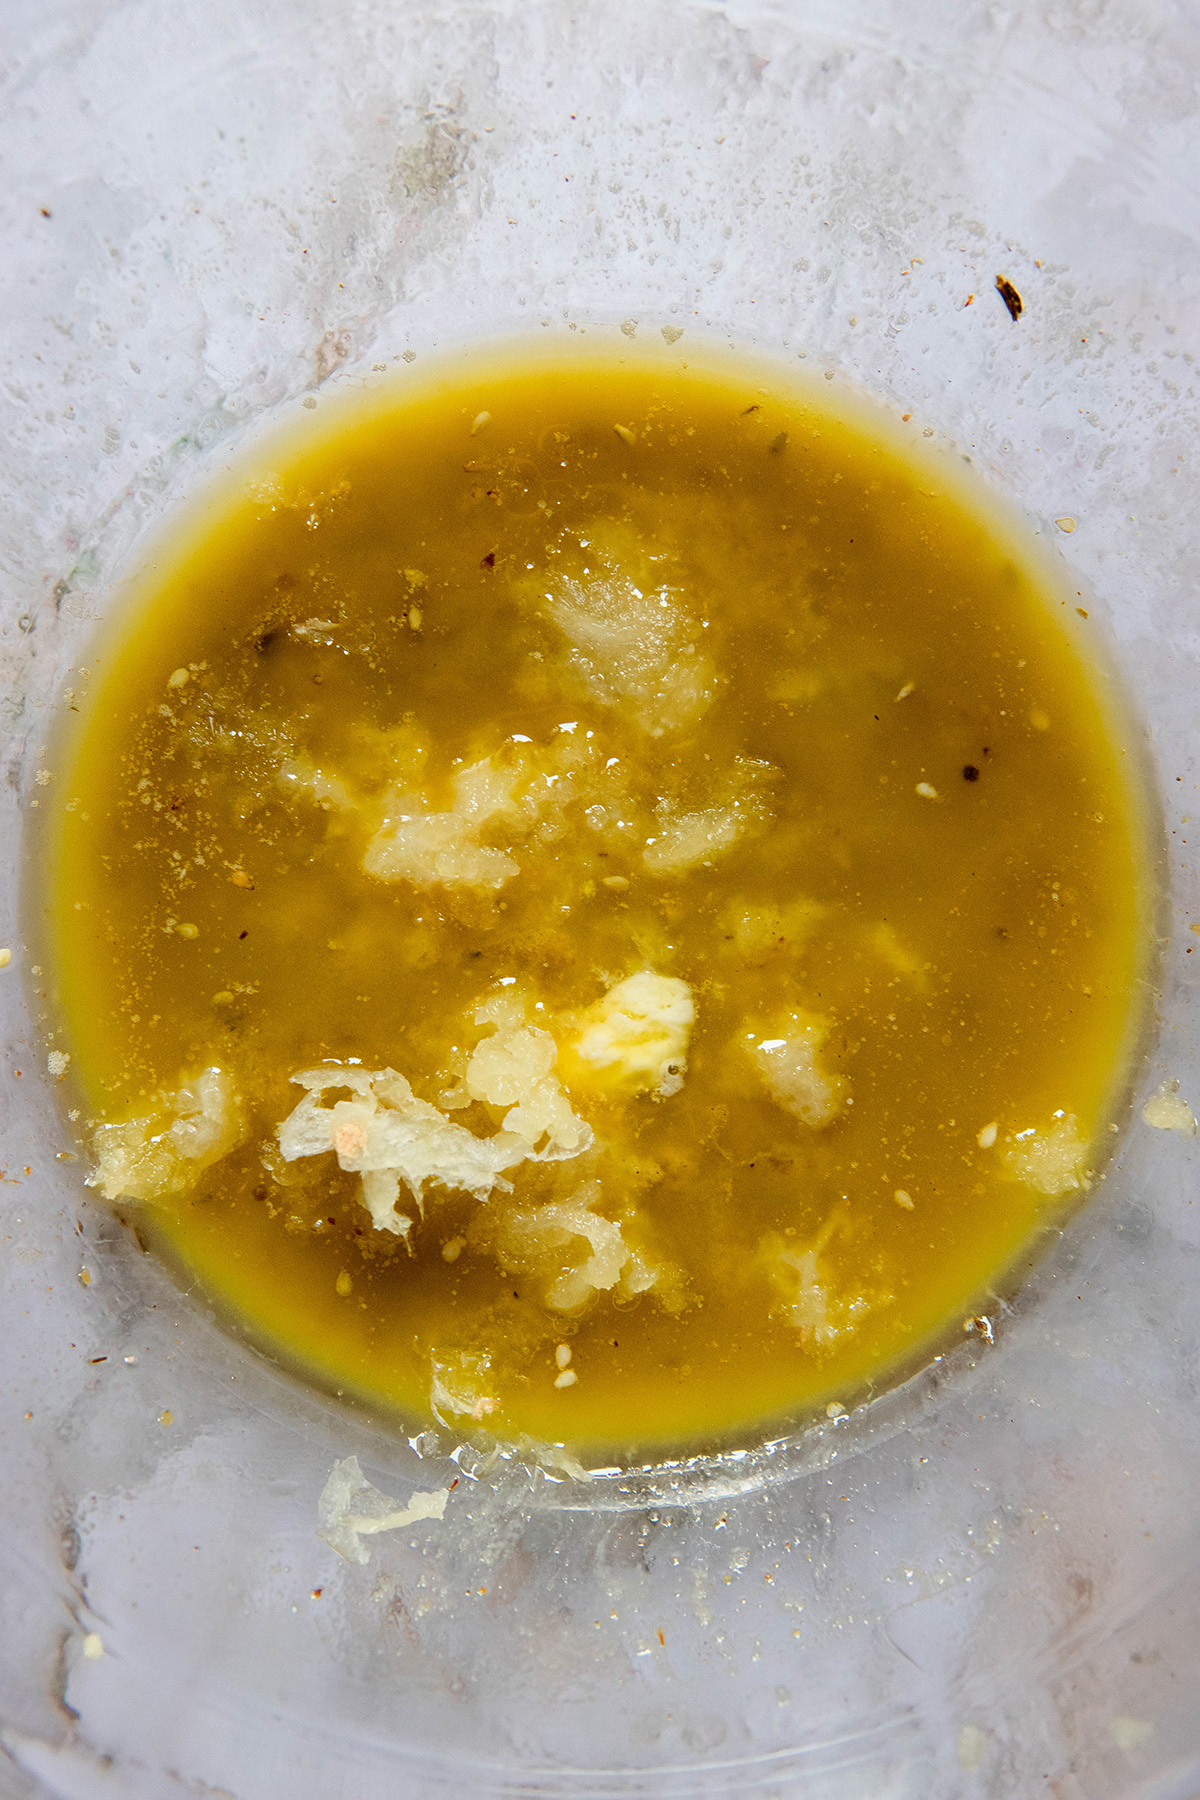
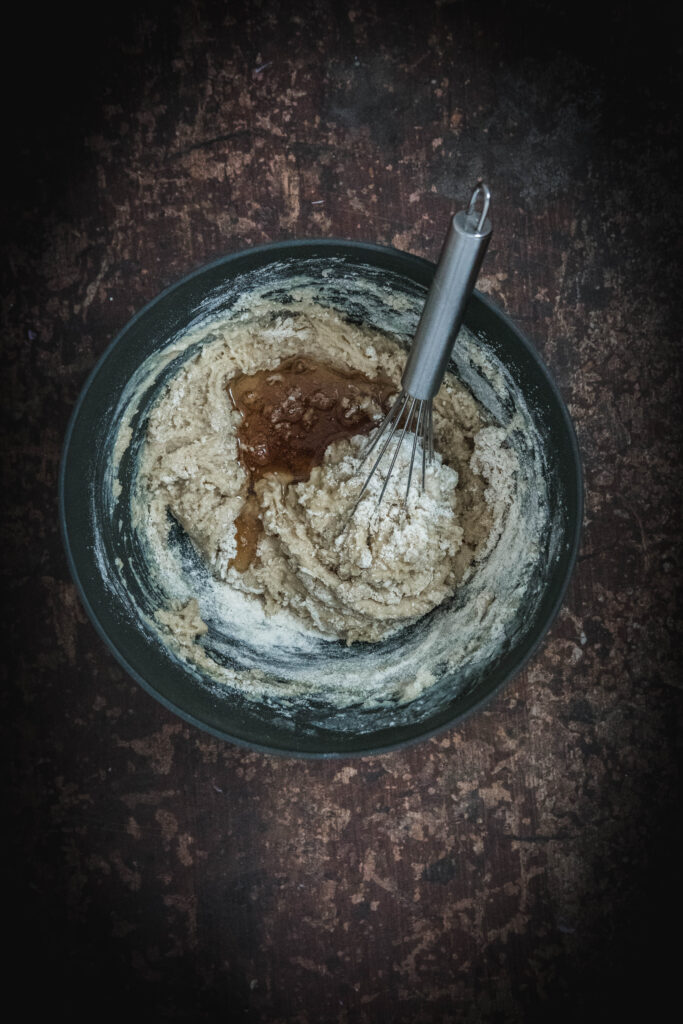
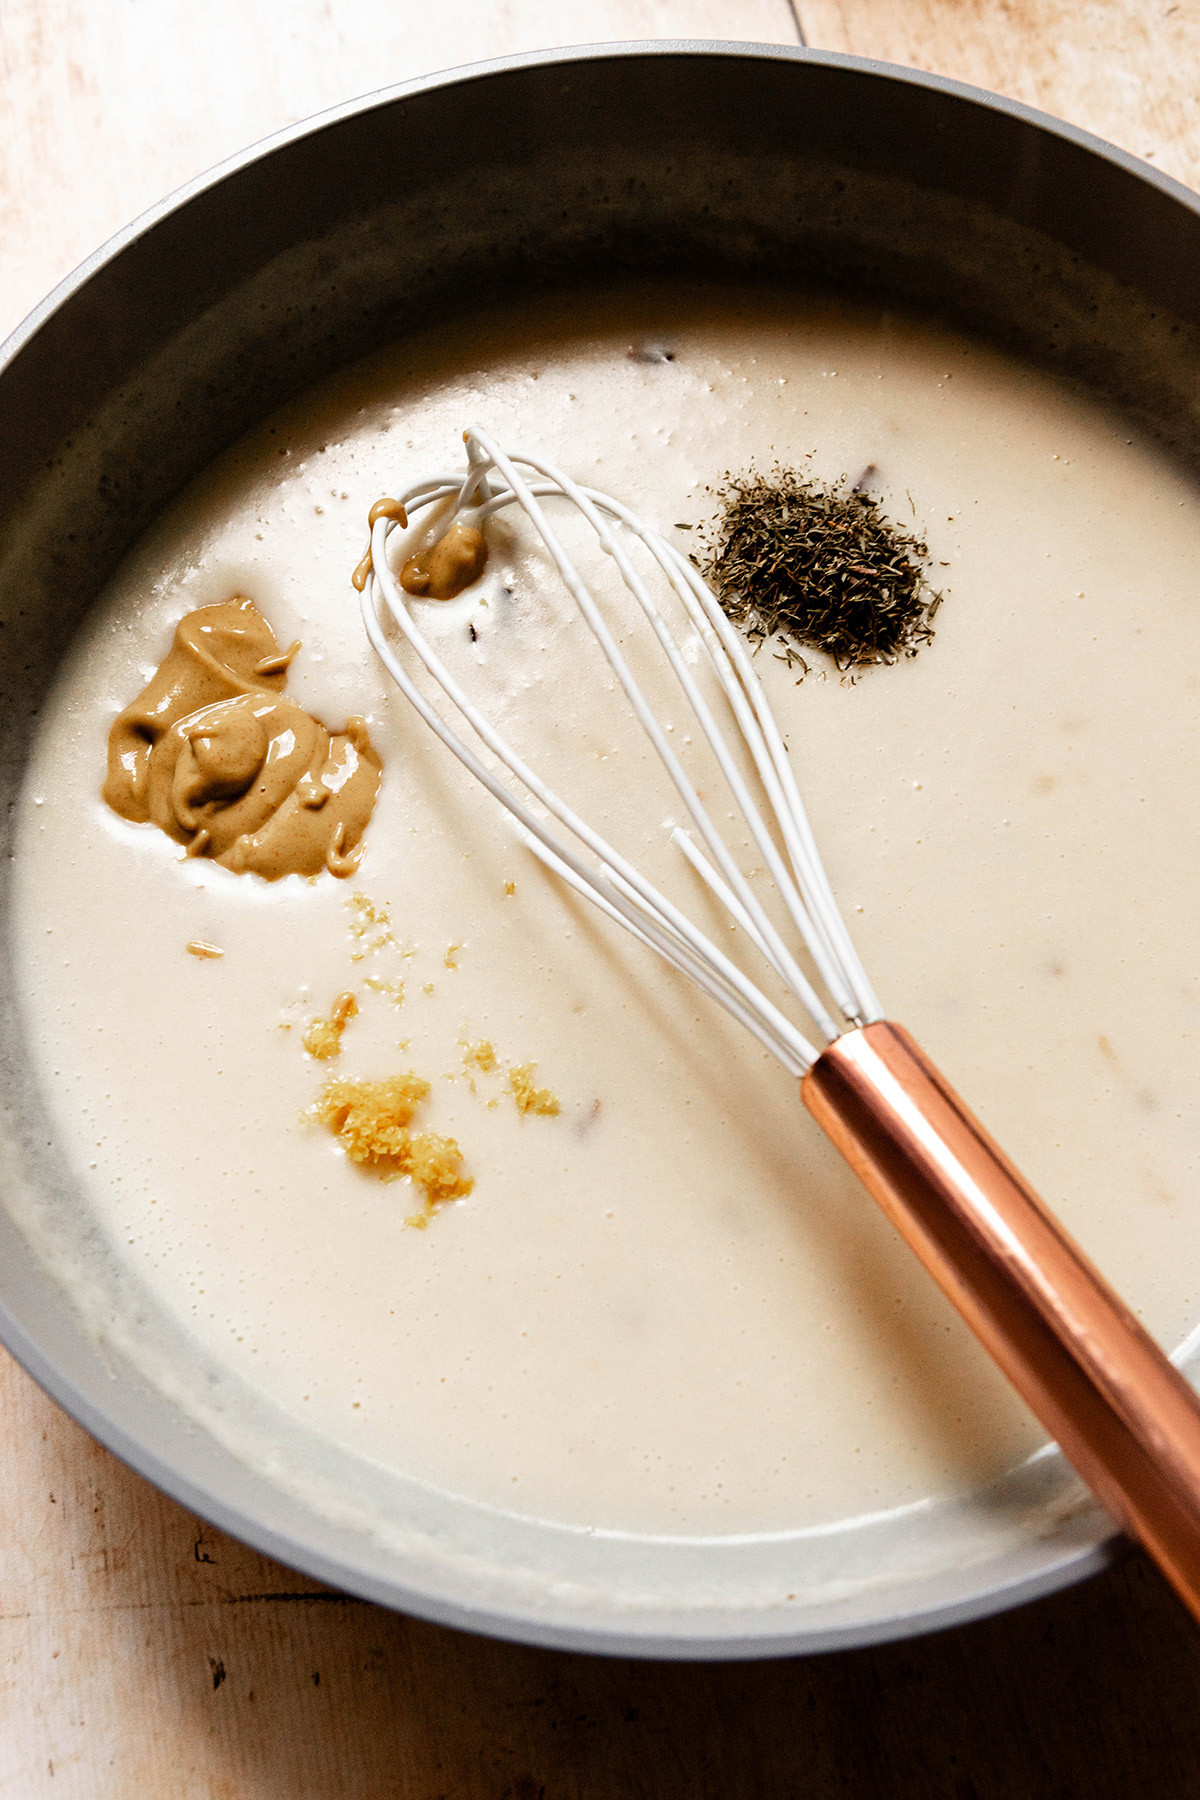
Once the sauce is thick: add the lemon zest, dijon, and spices. Season the sauce with salt and black pepper to your taste. 
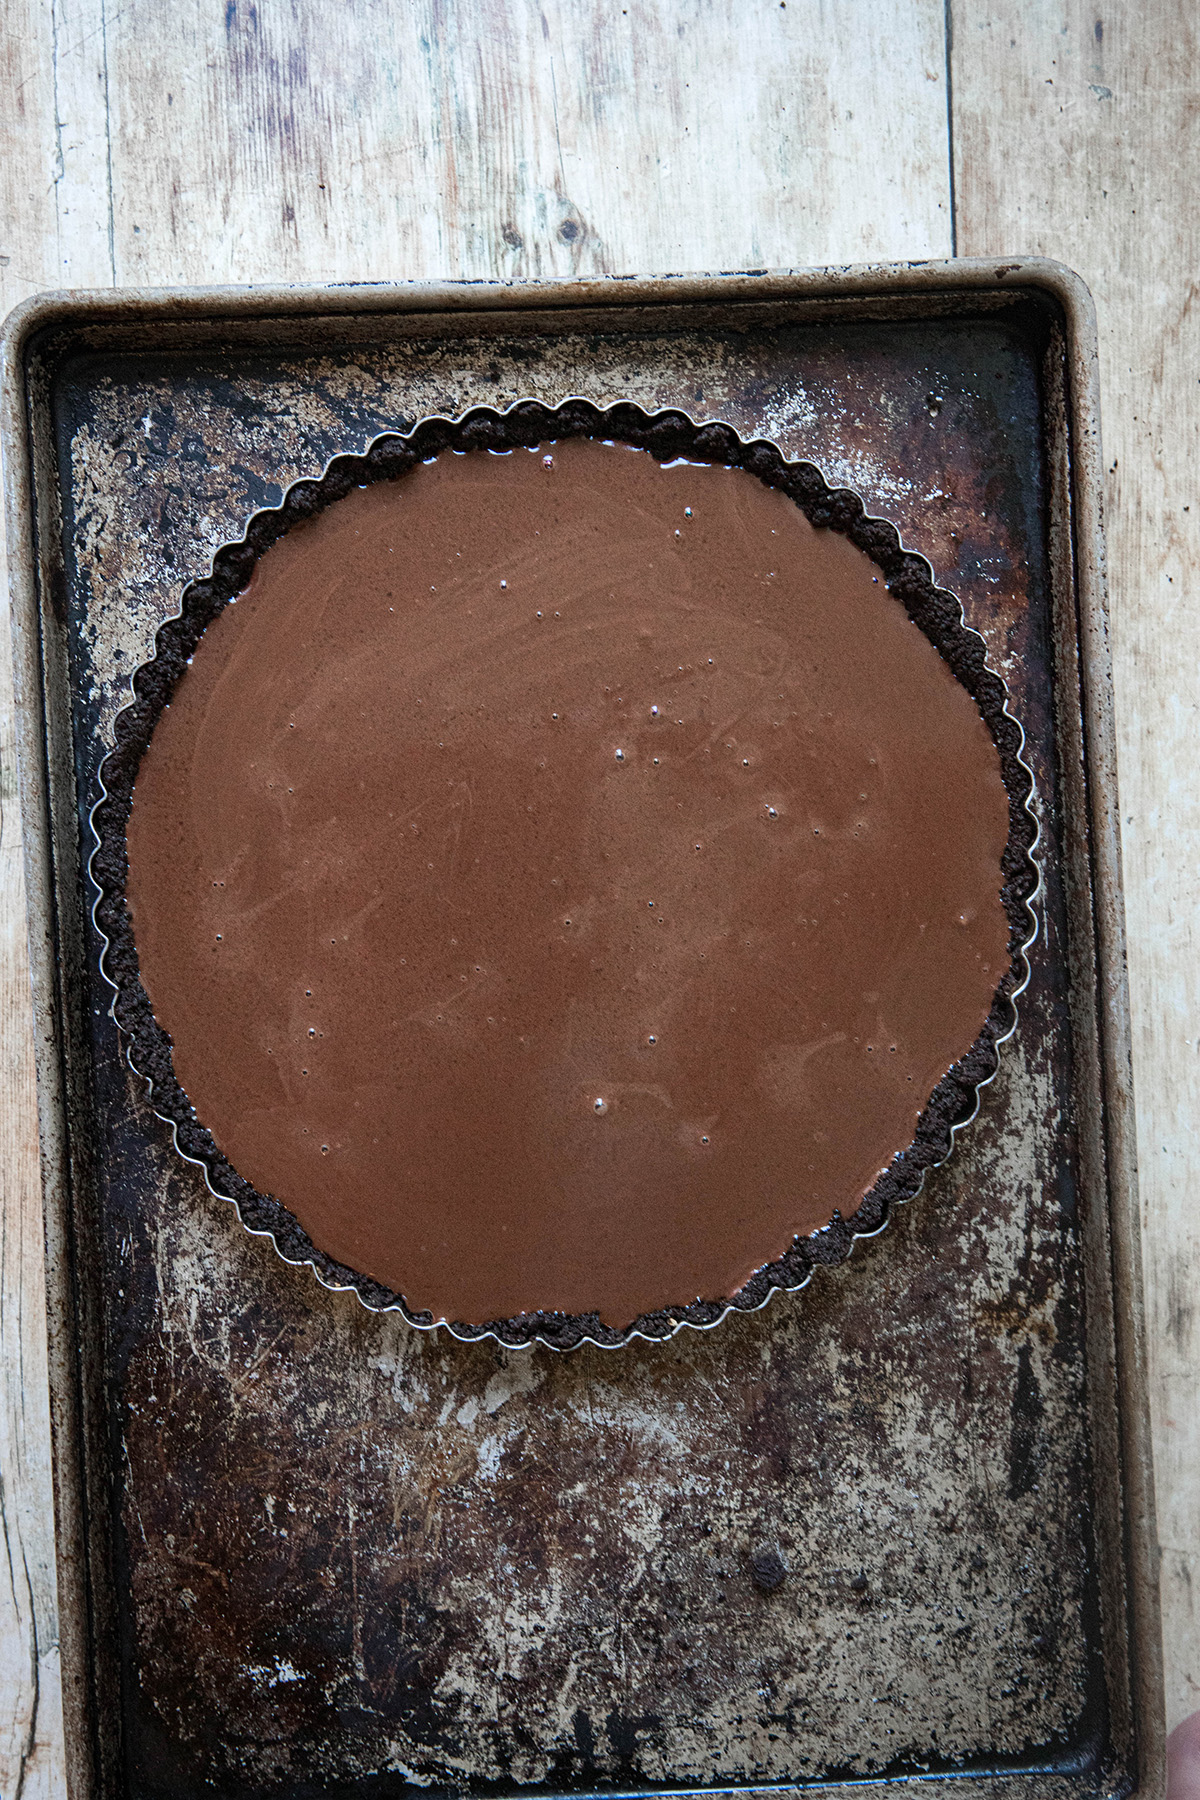
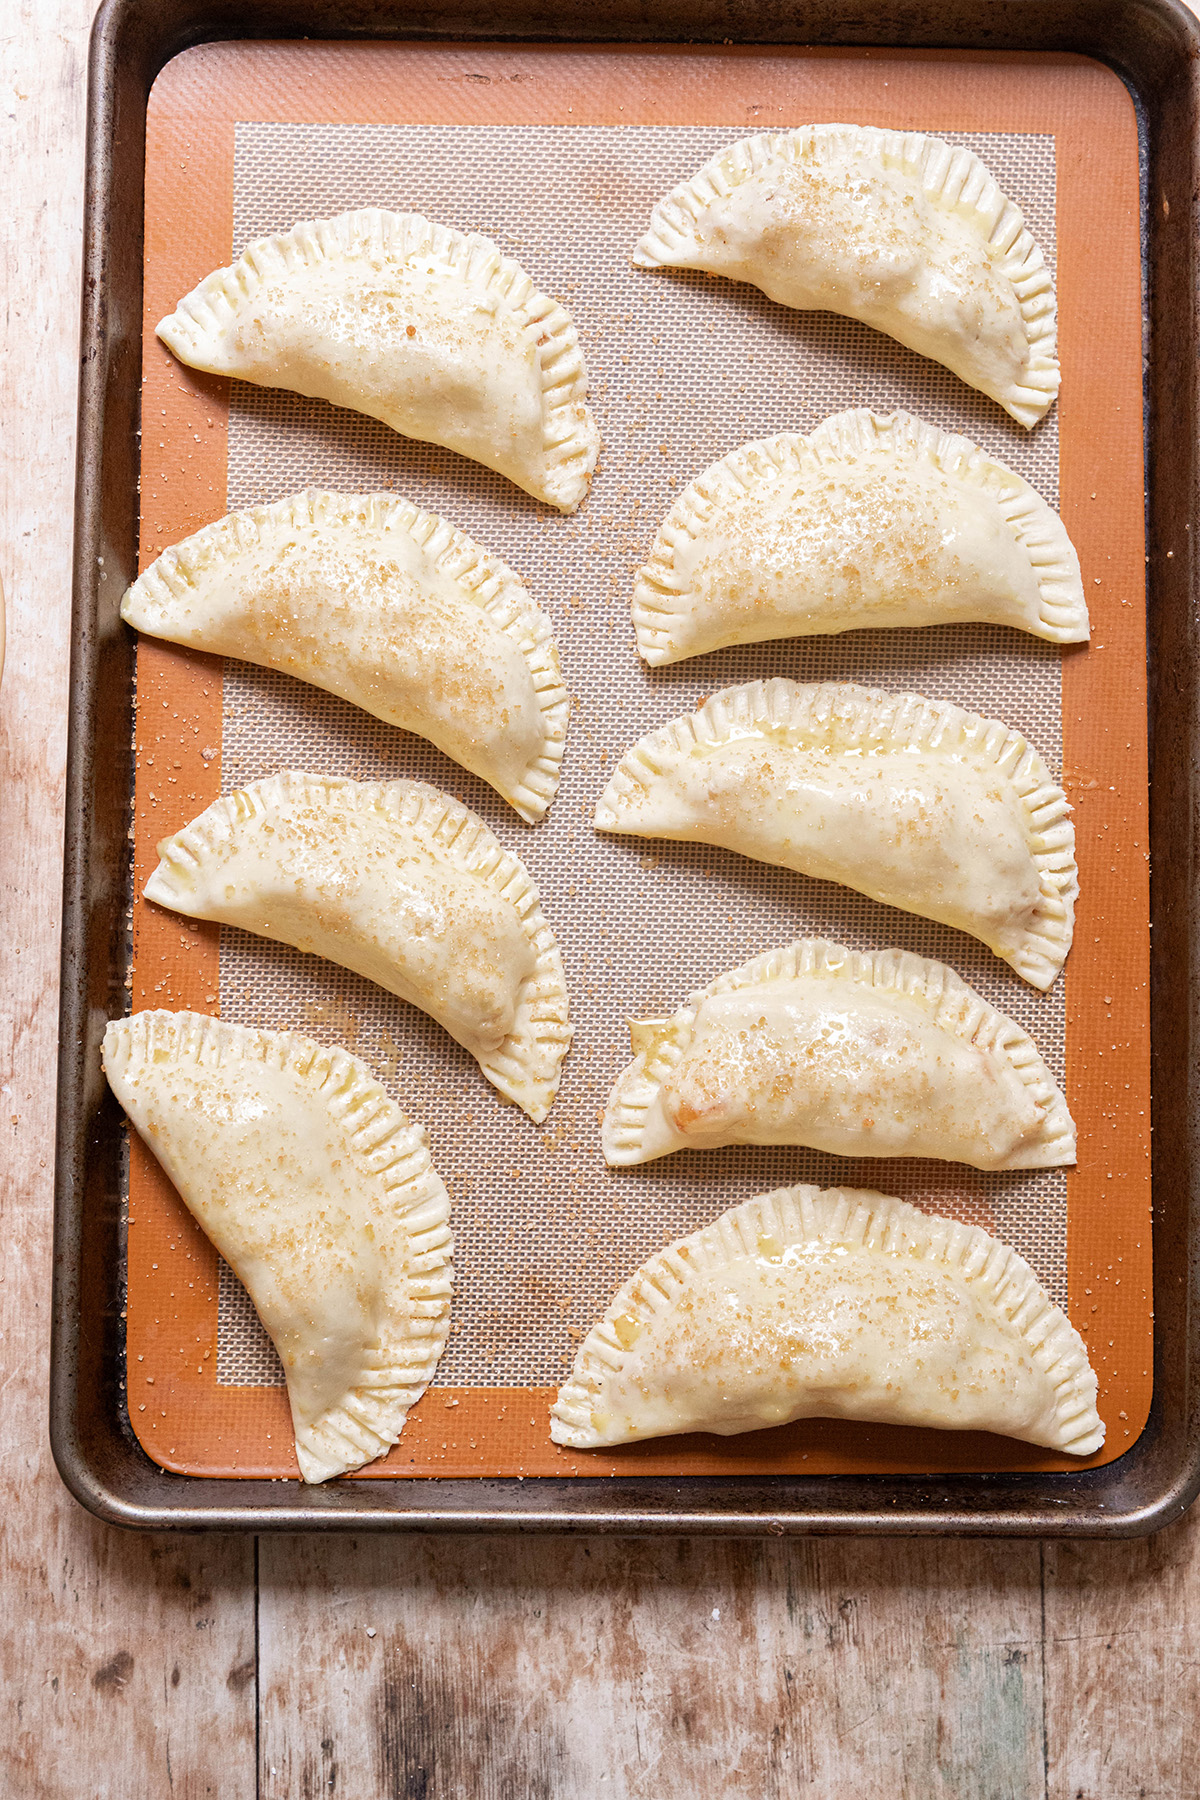
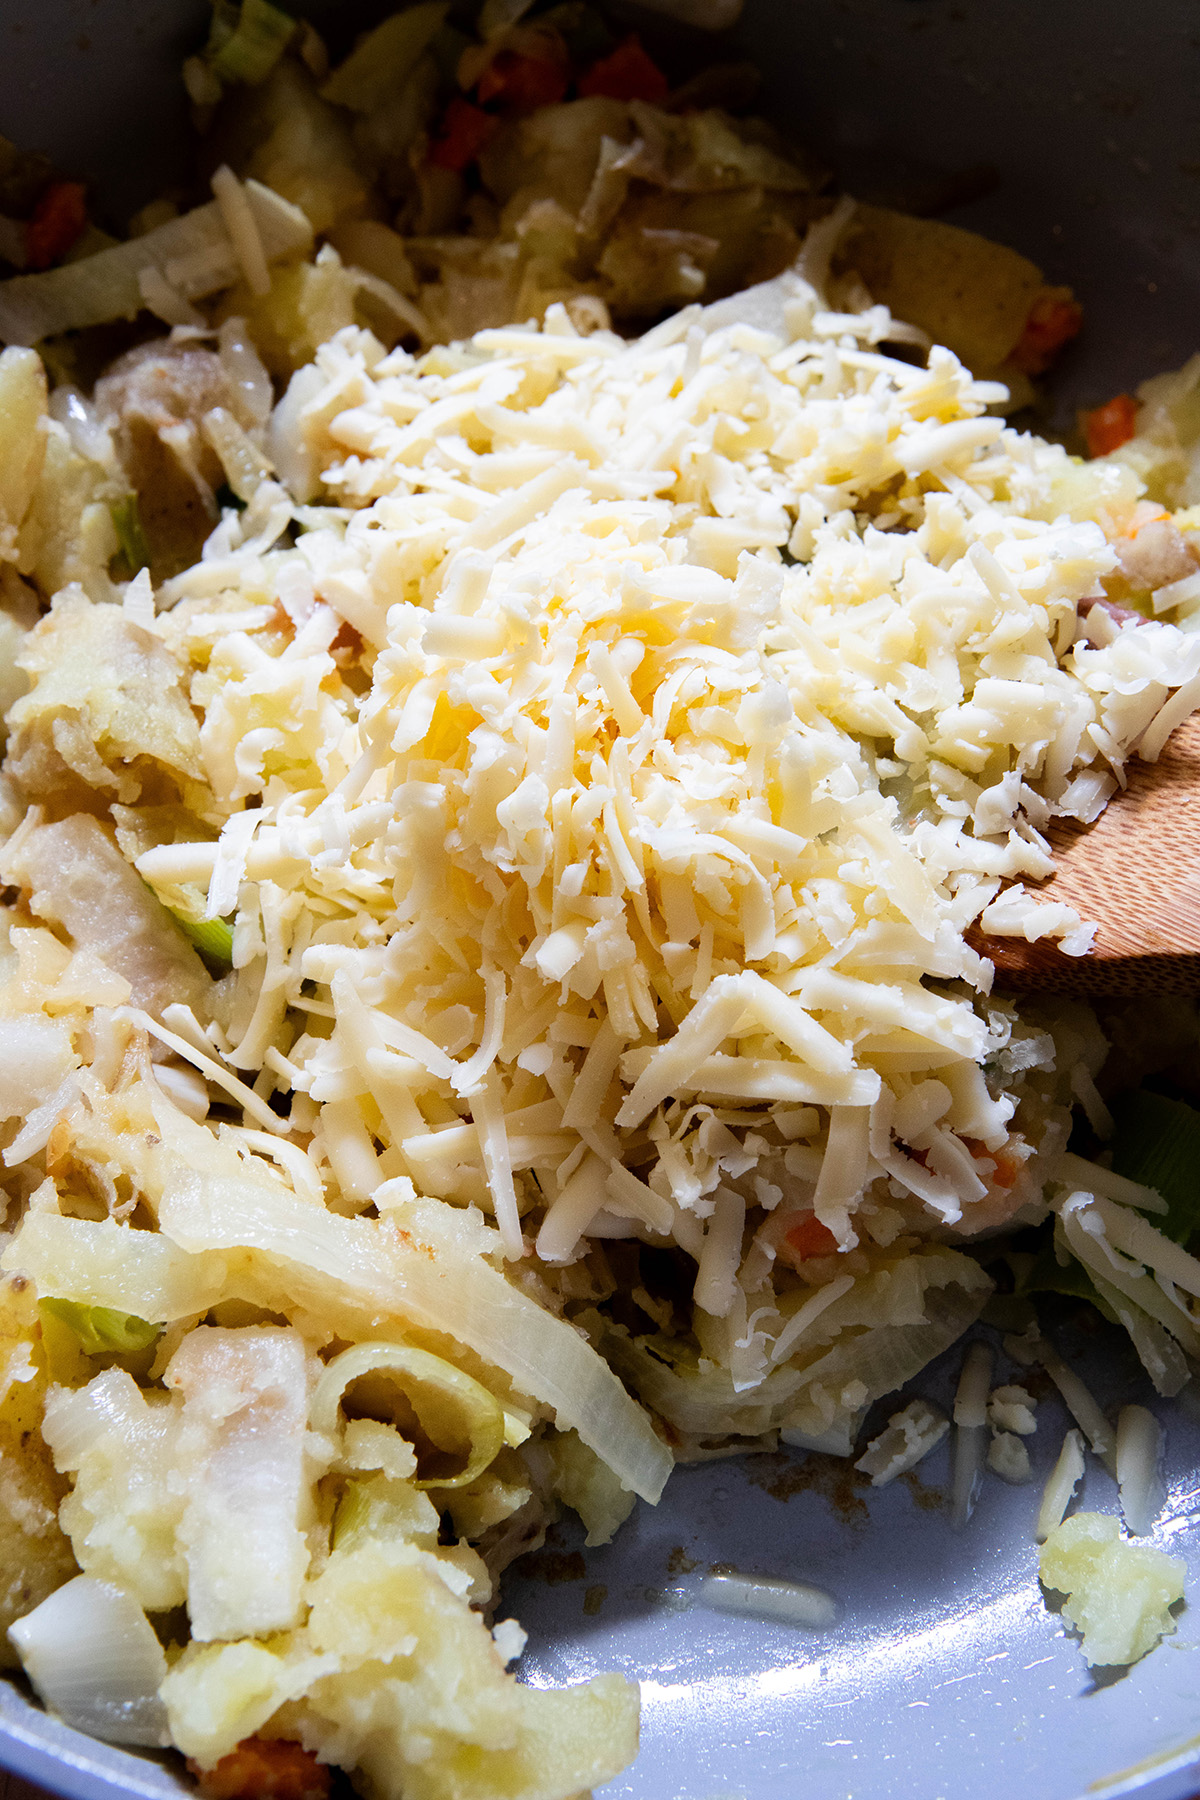
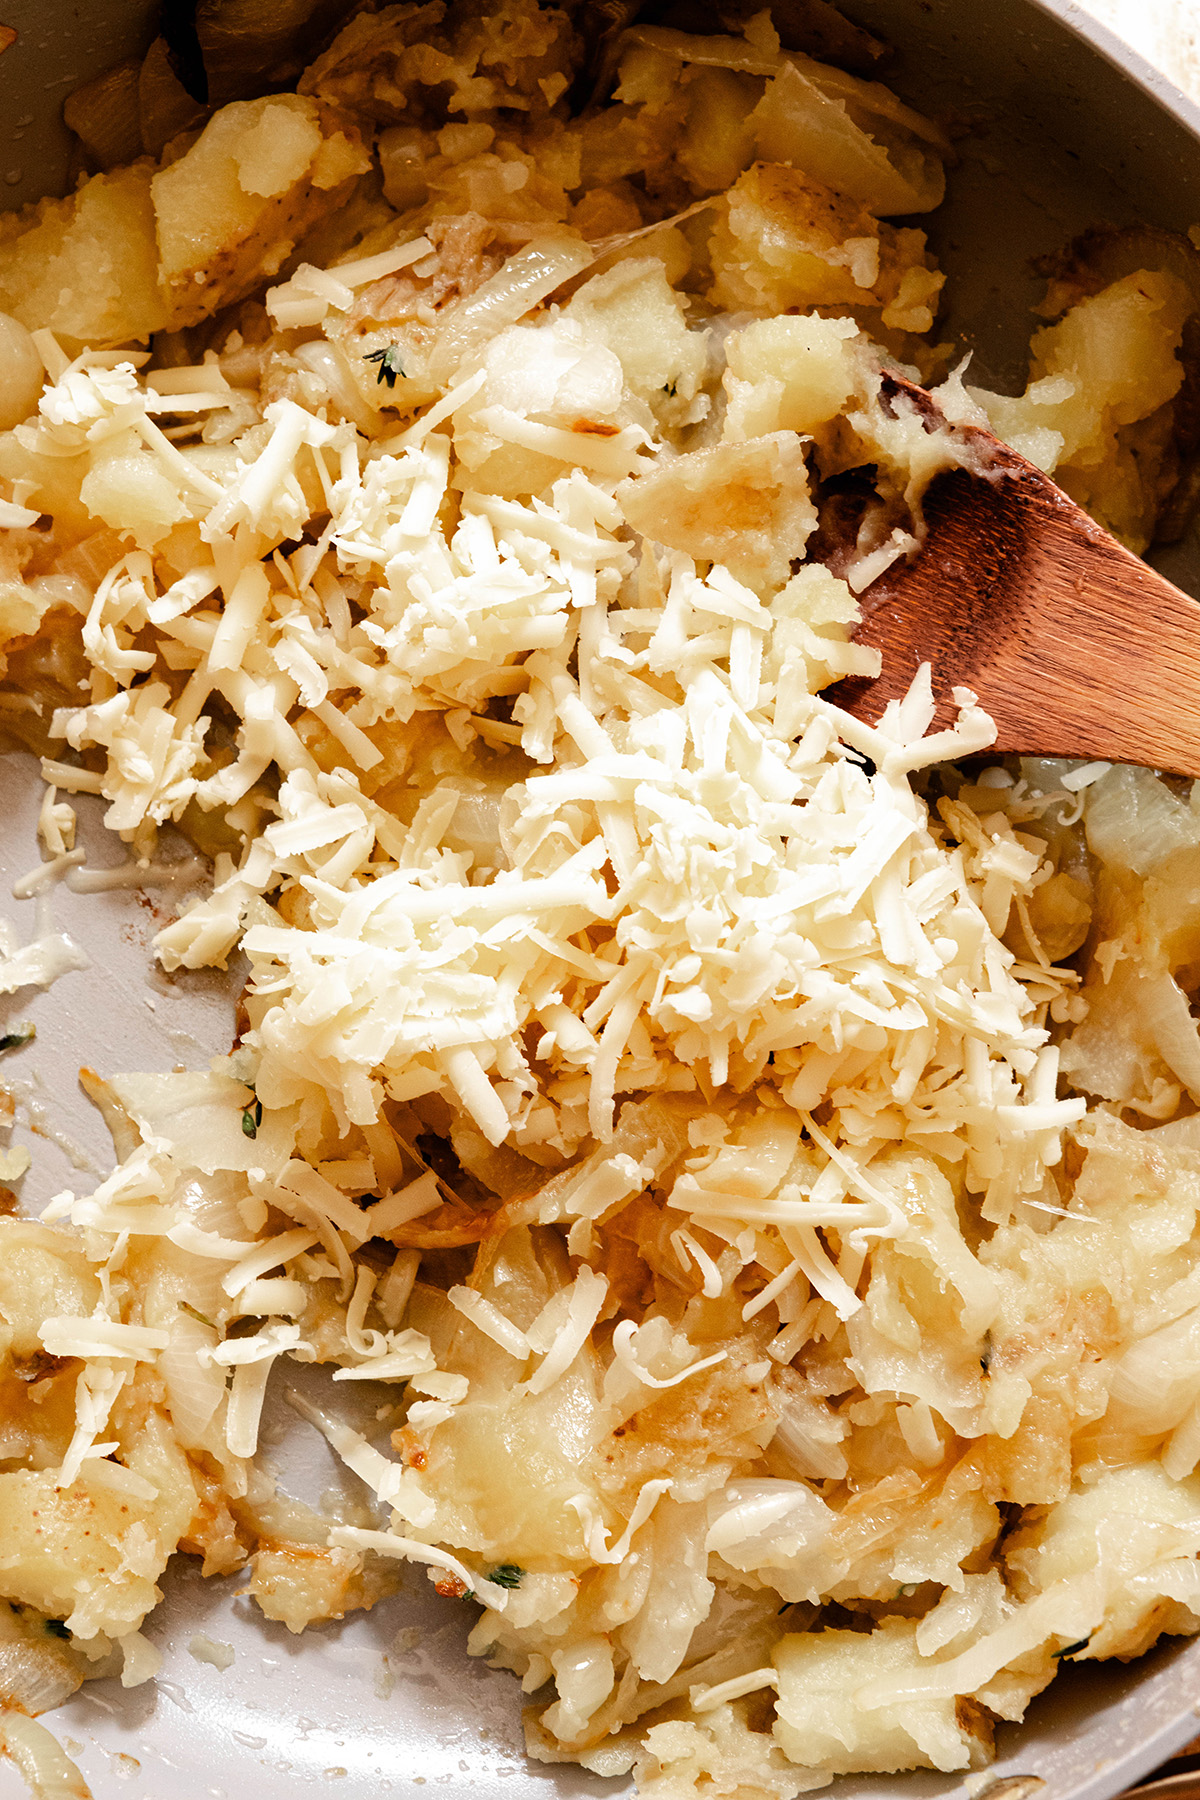
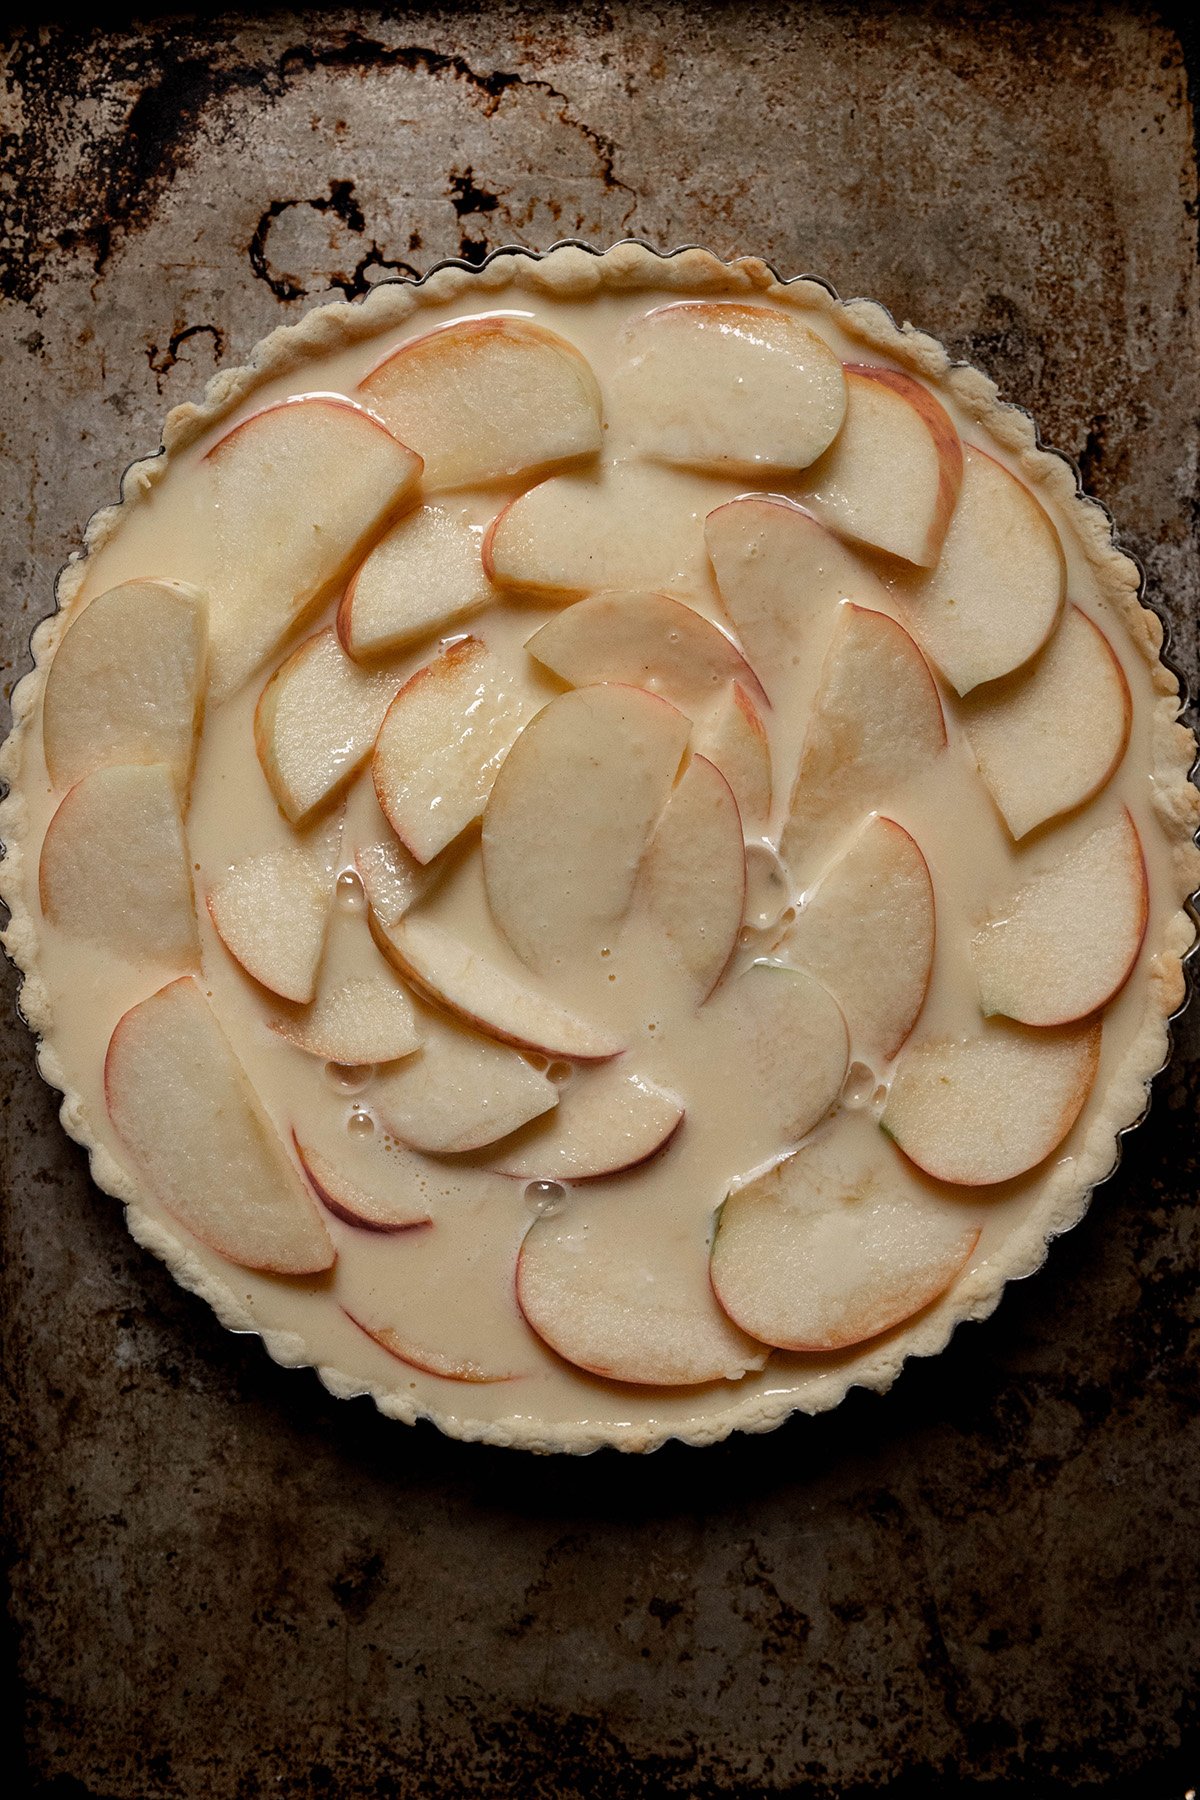
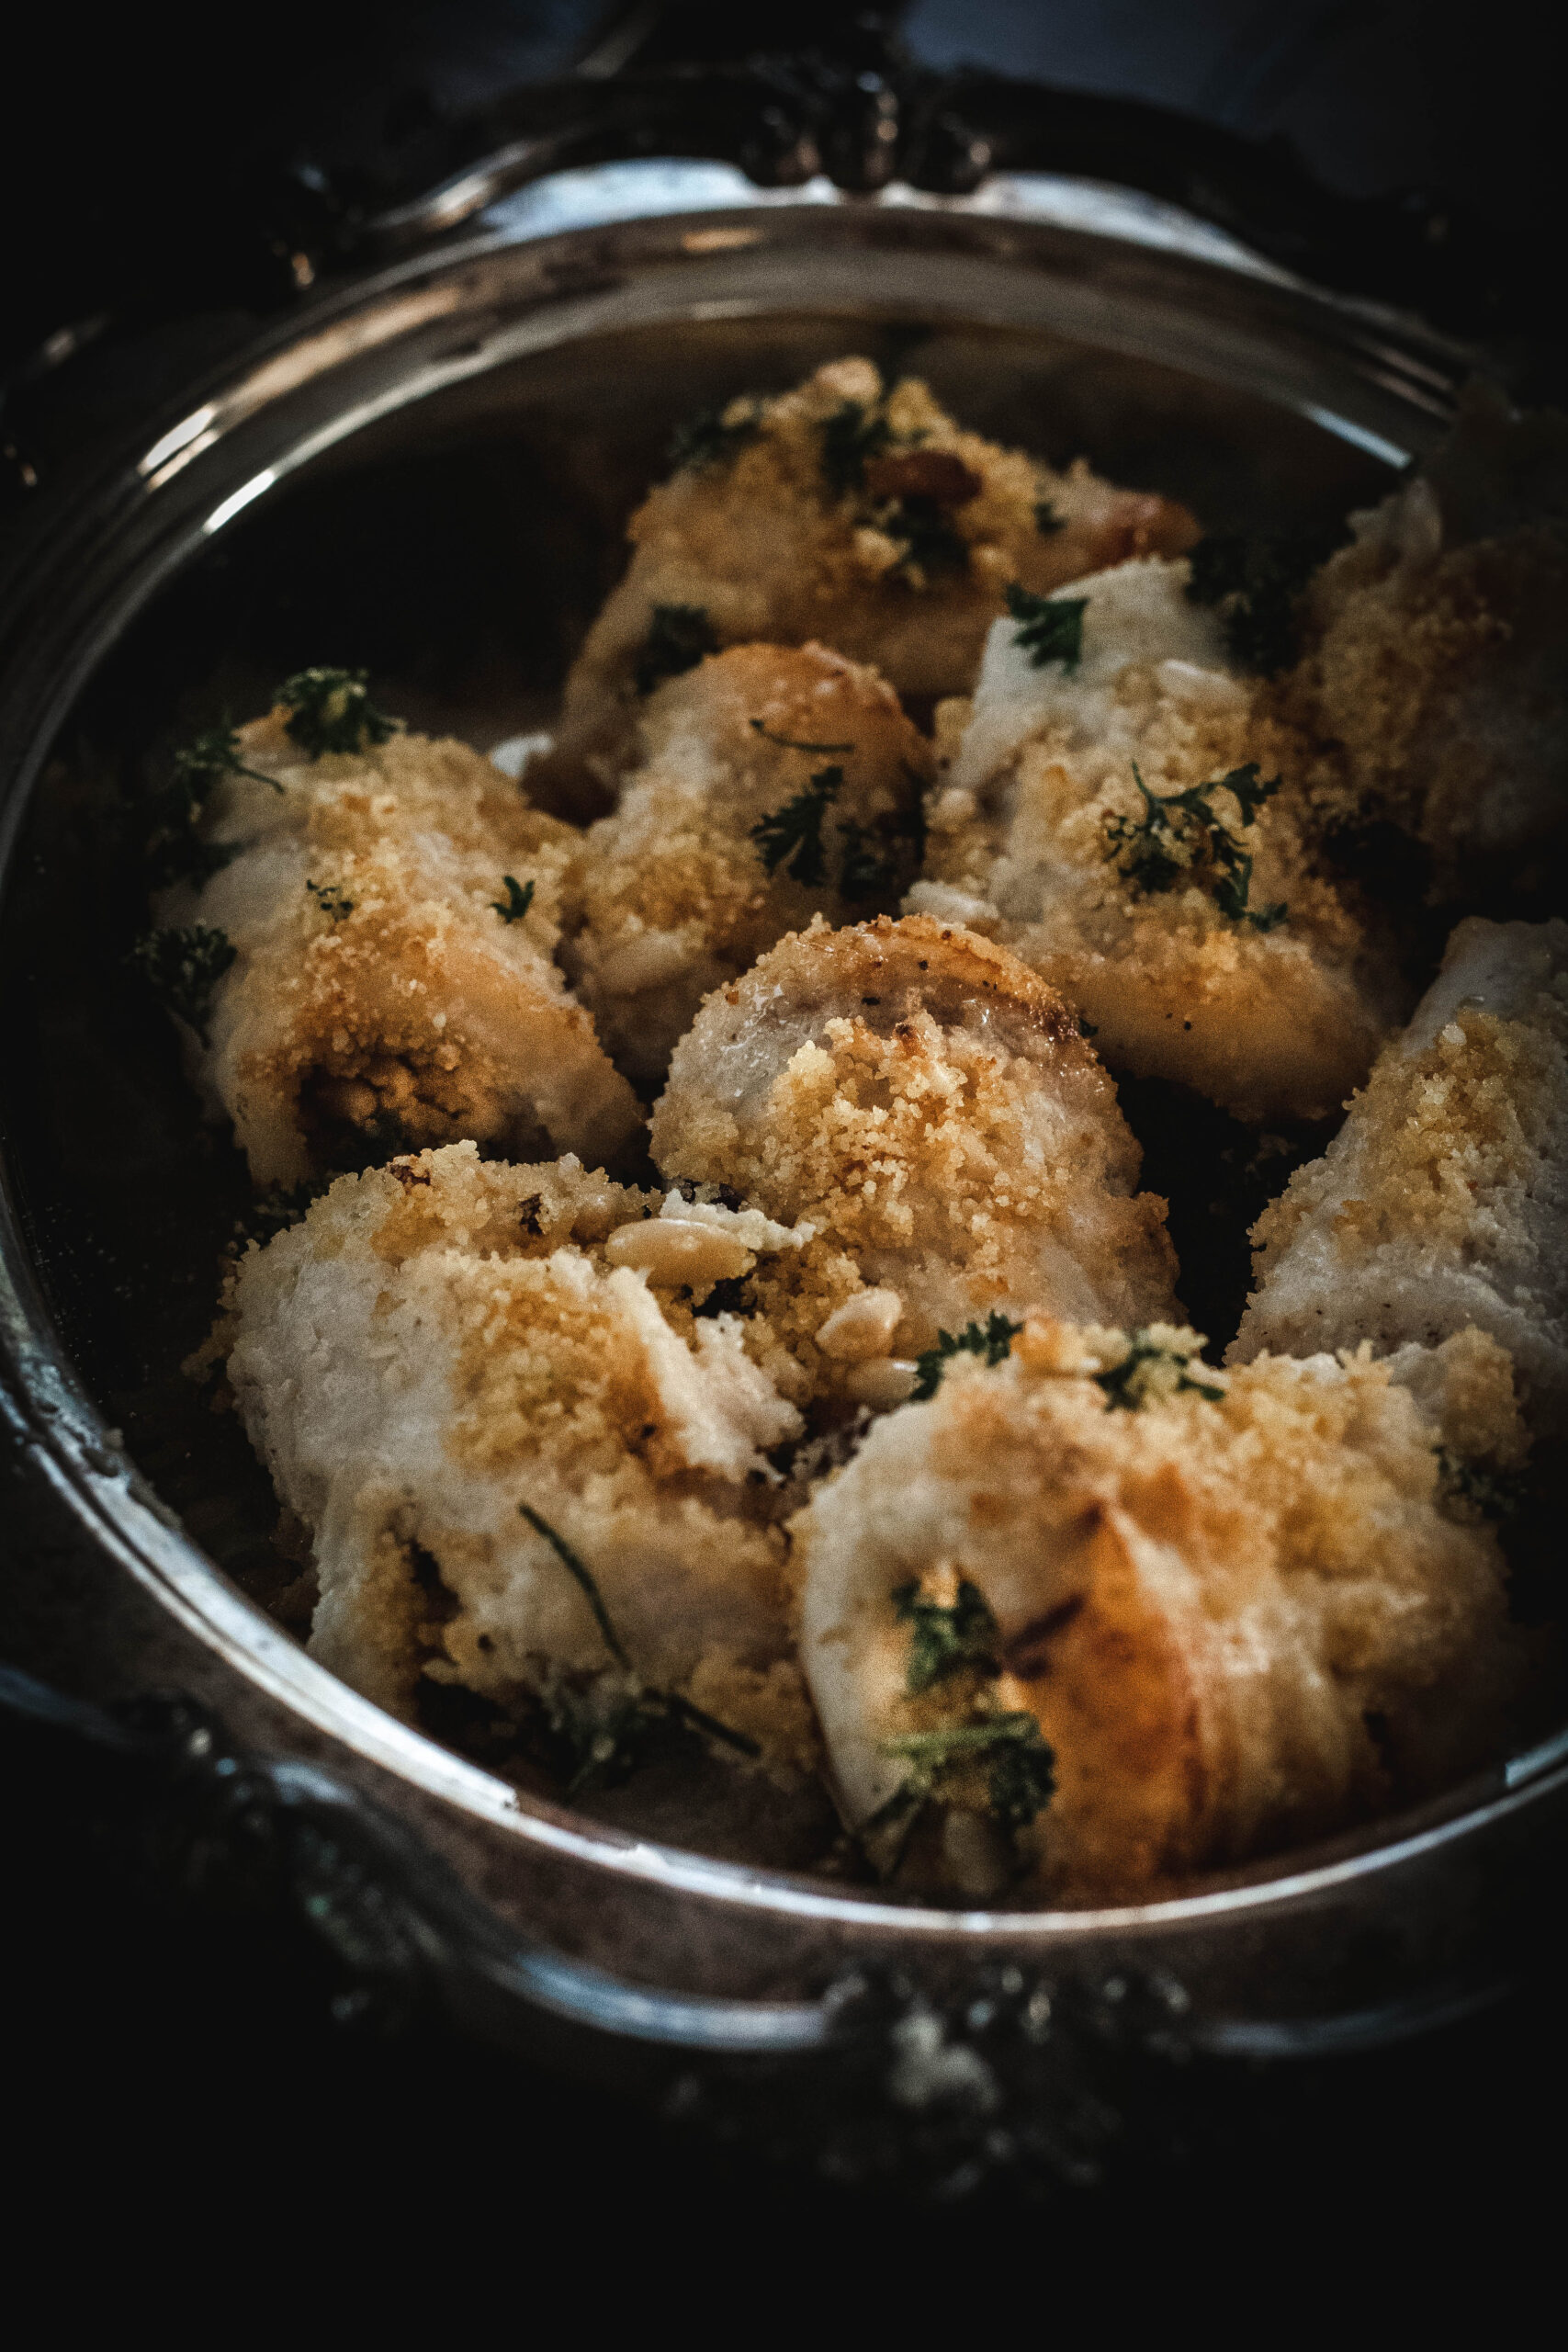
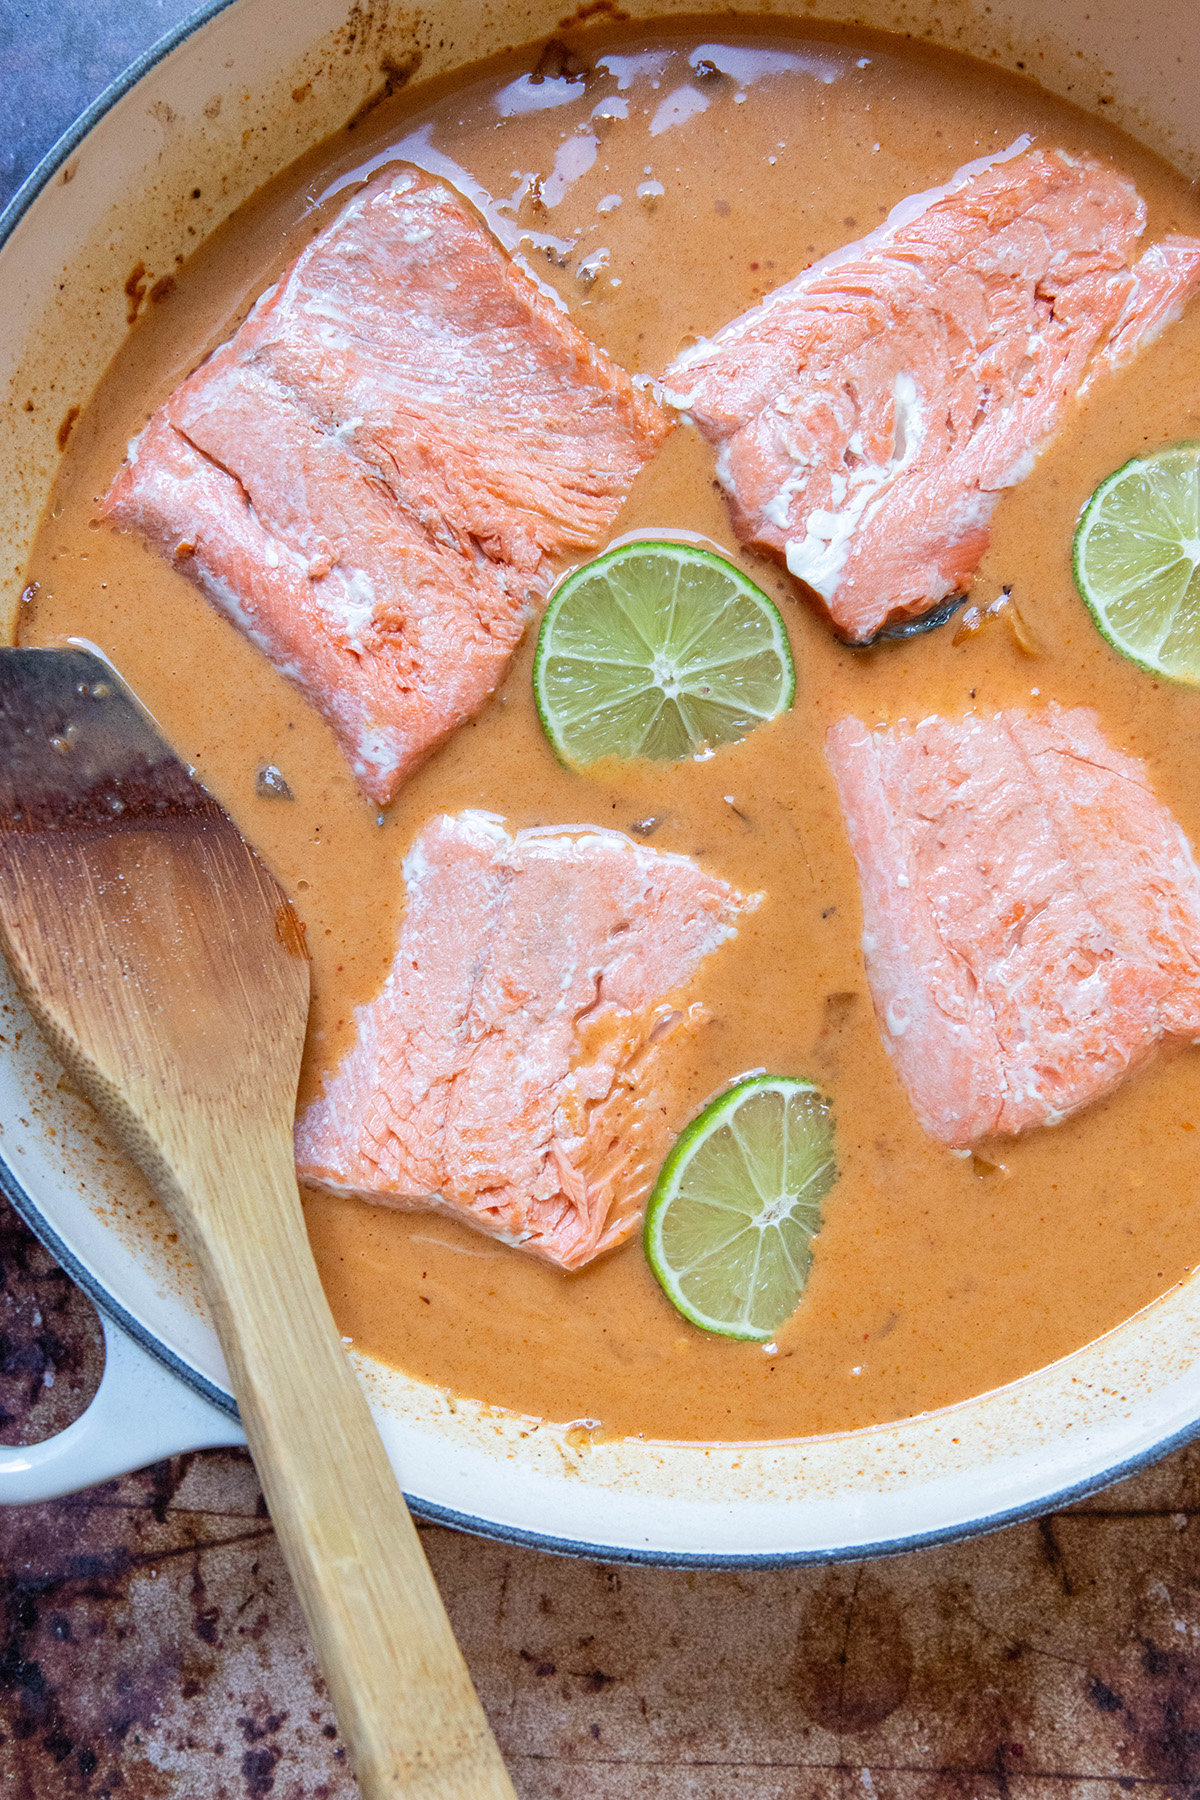
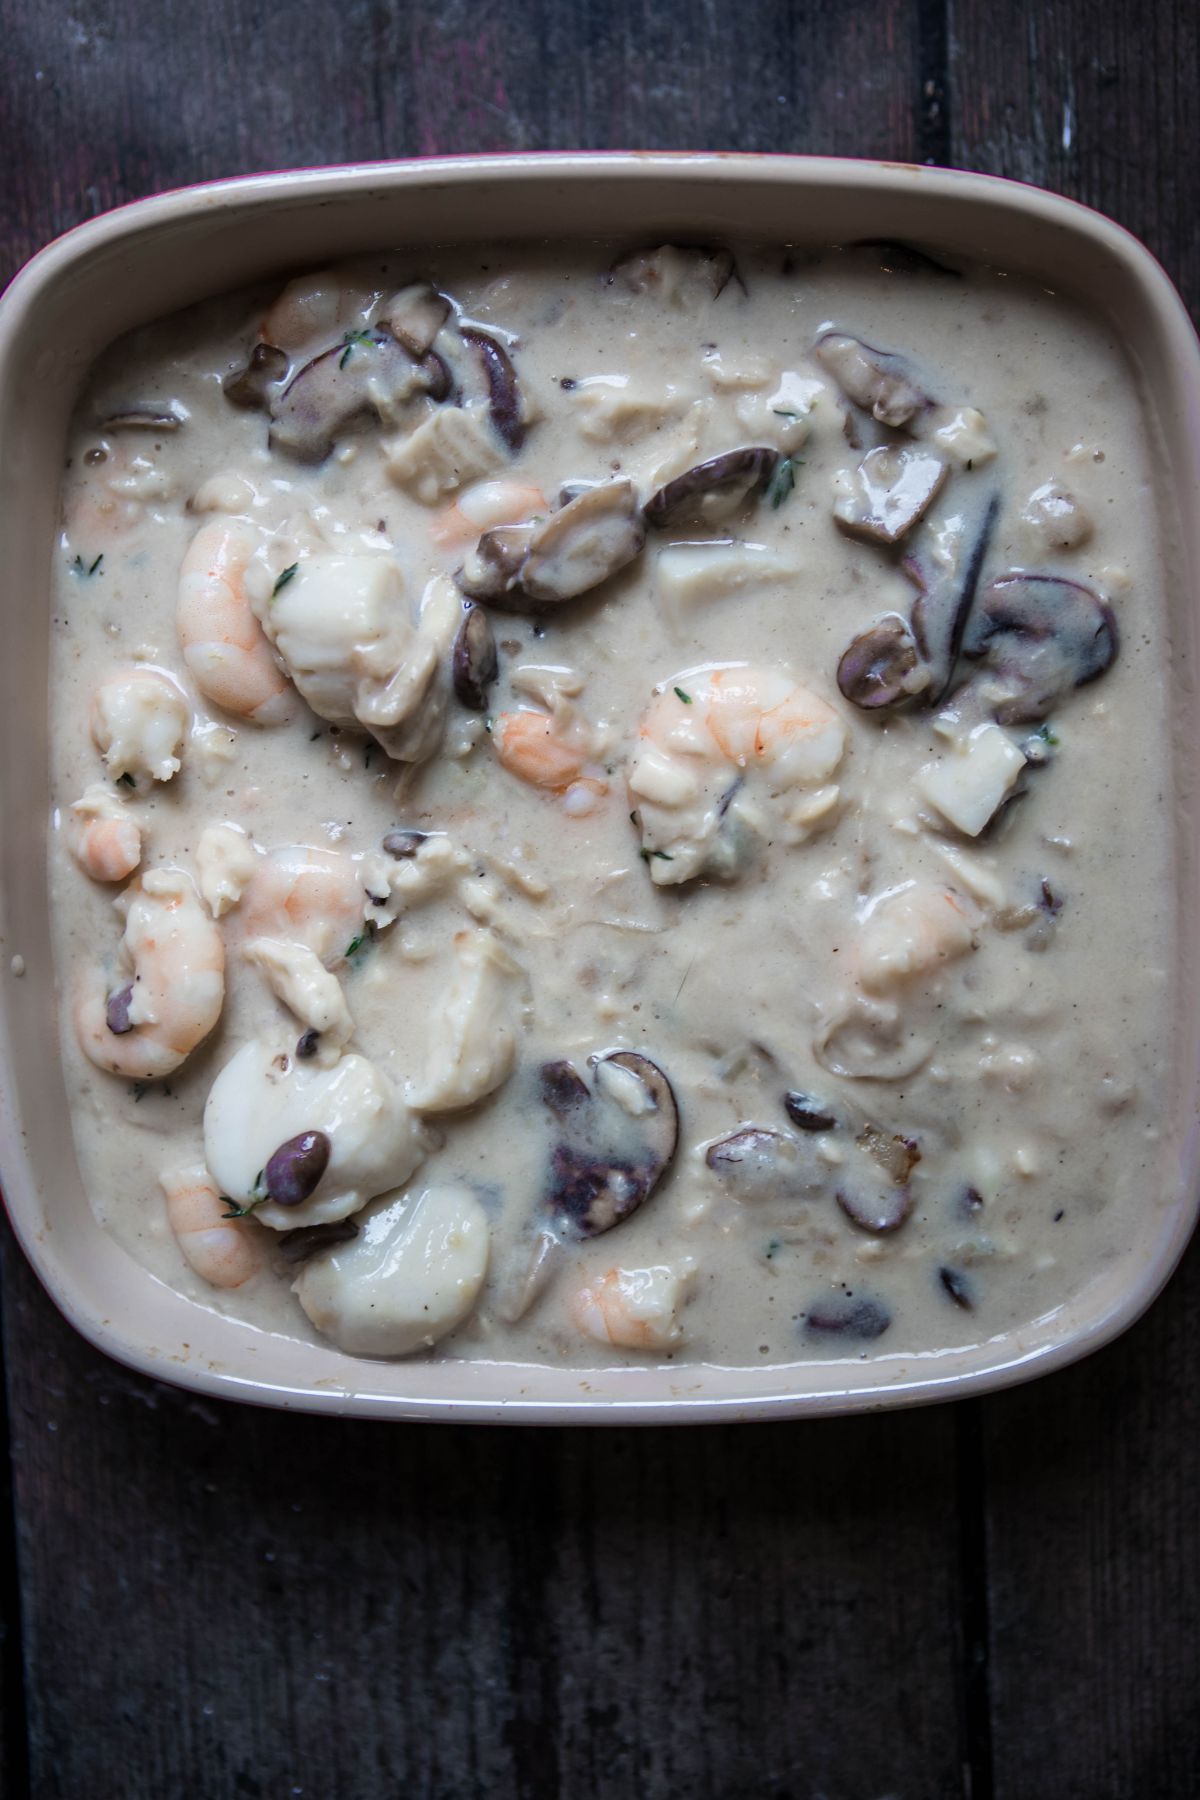
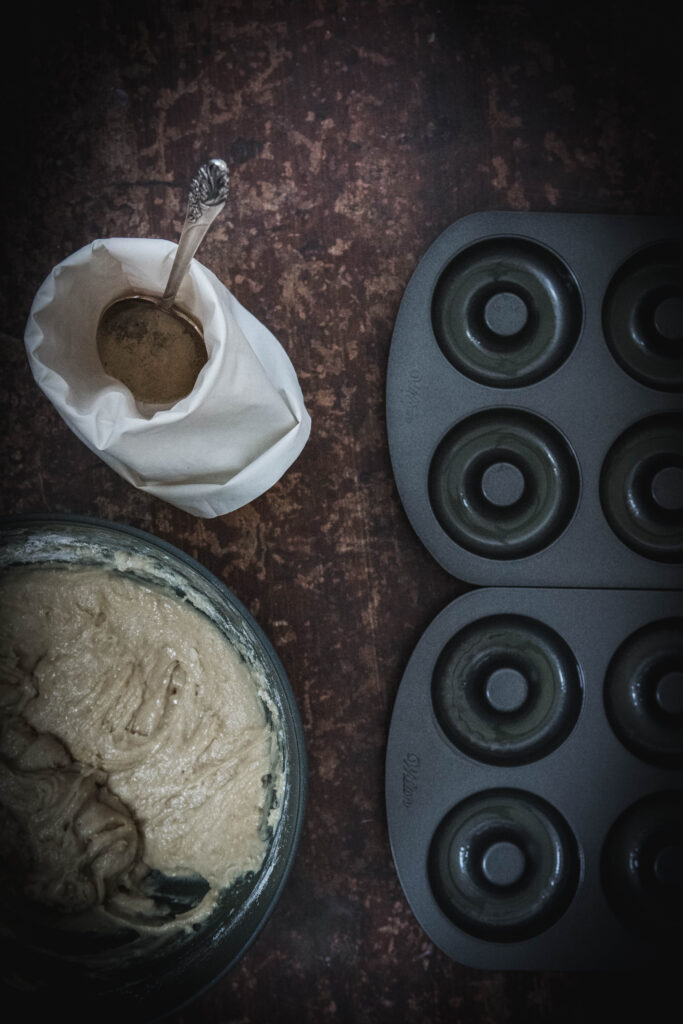
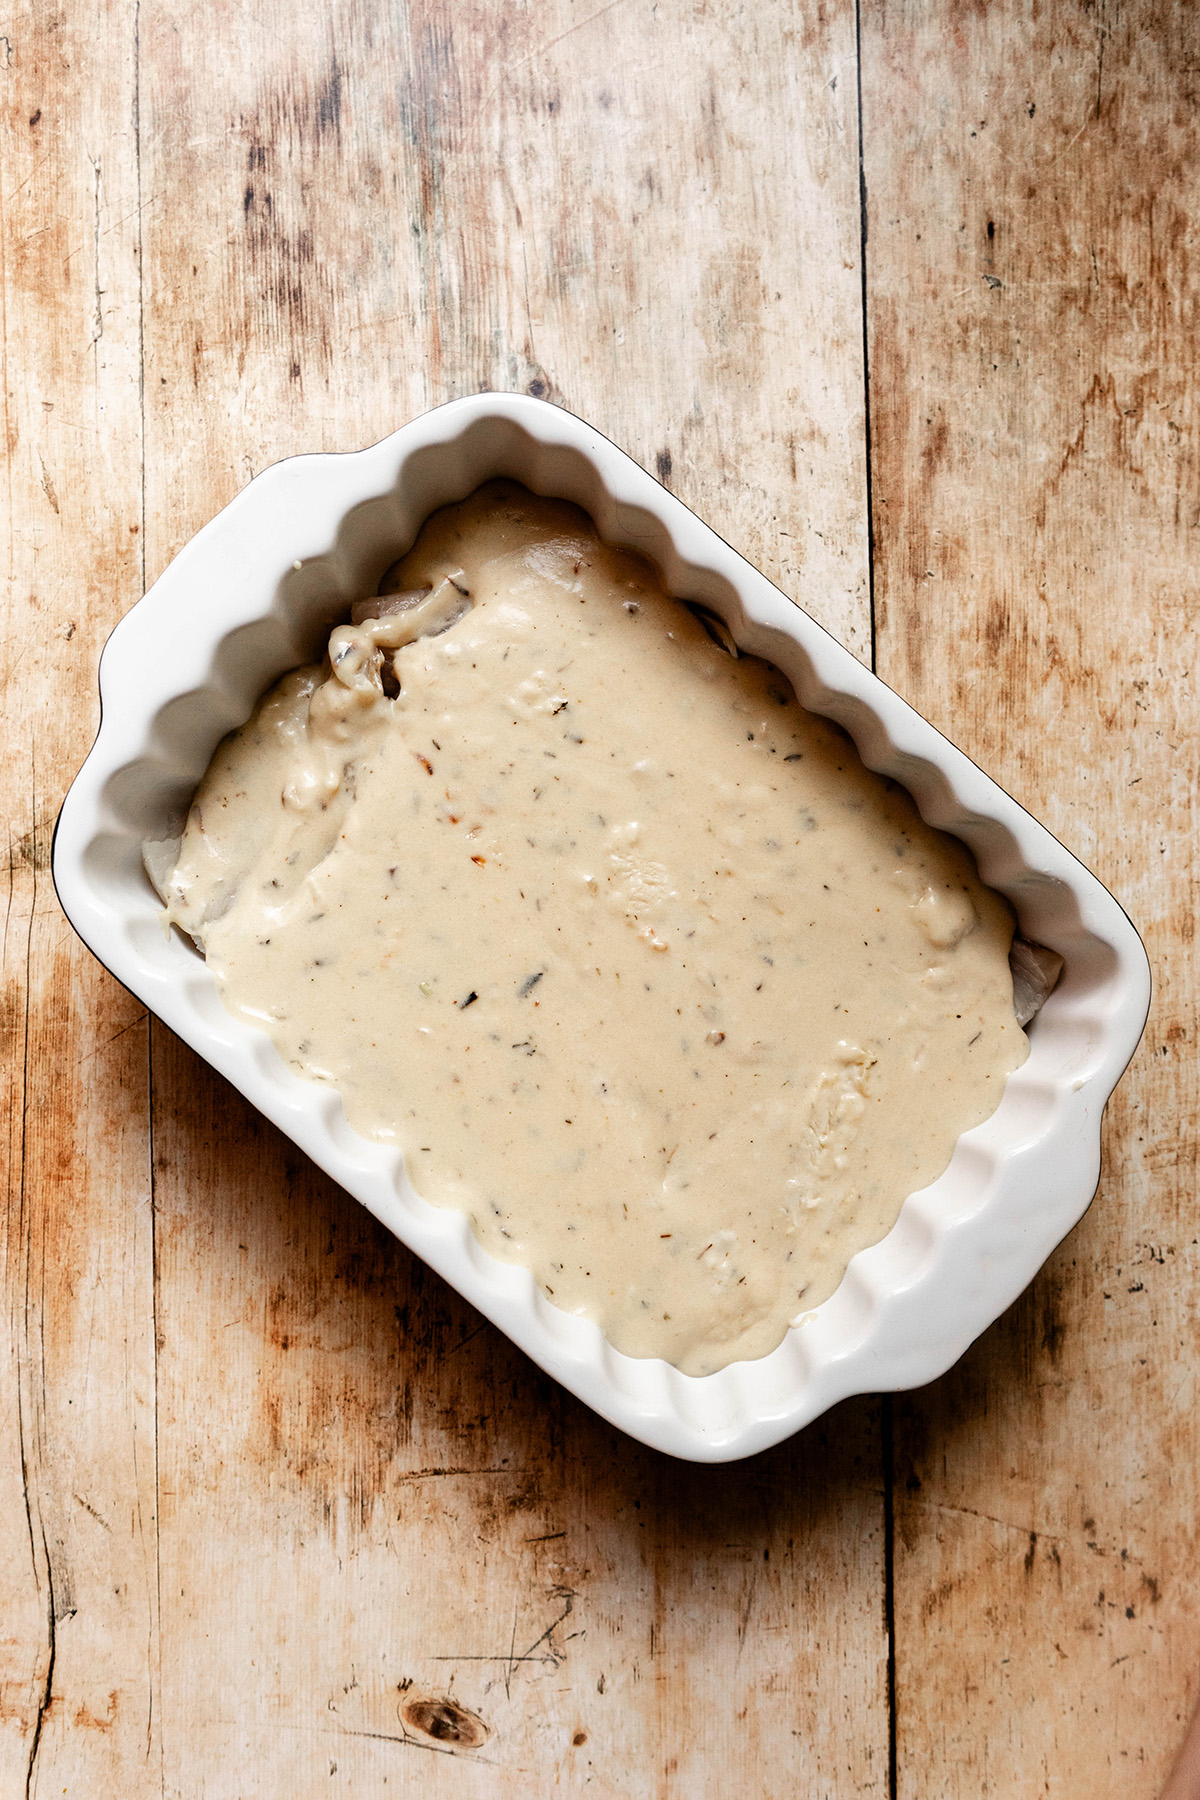
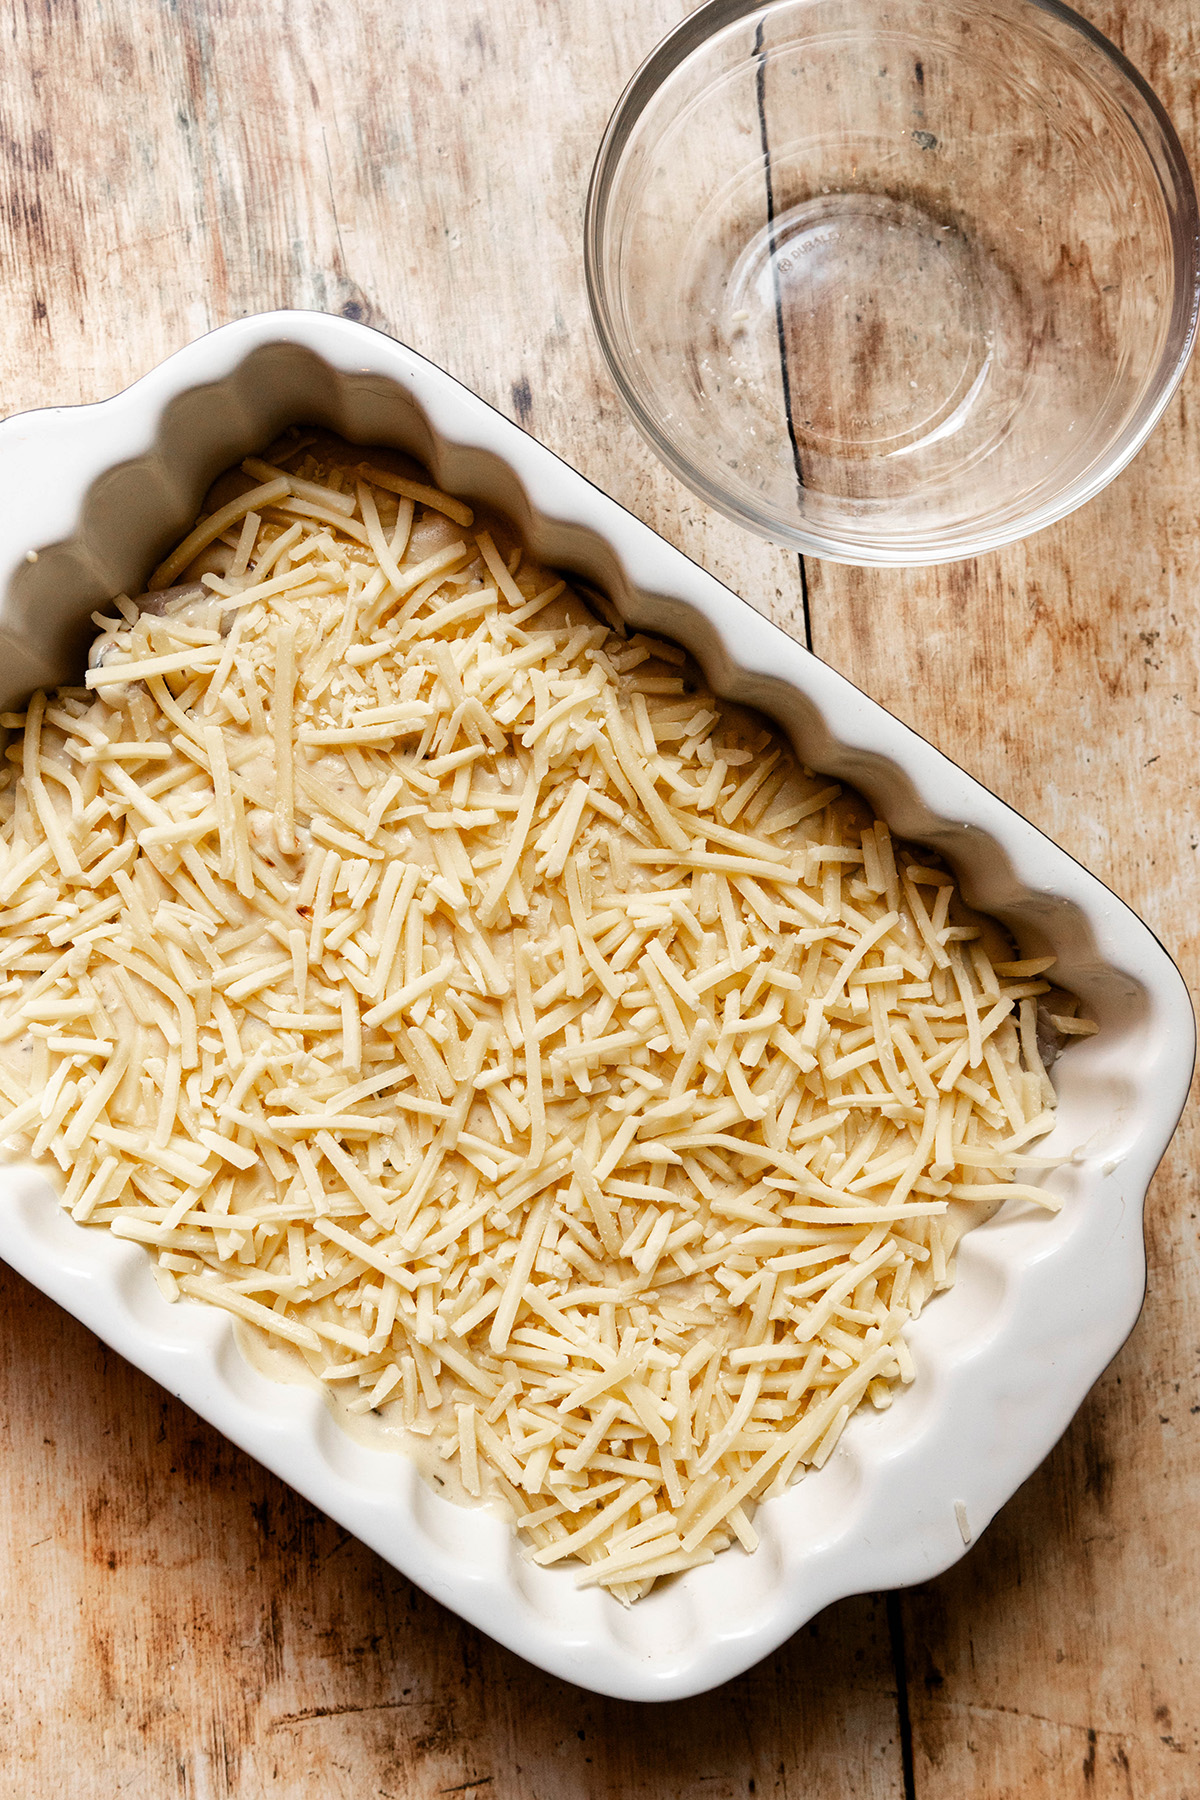
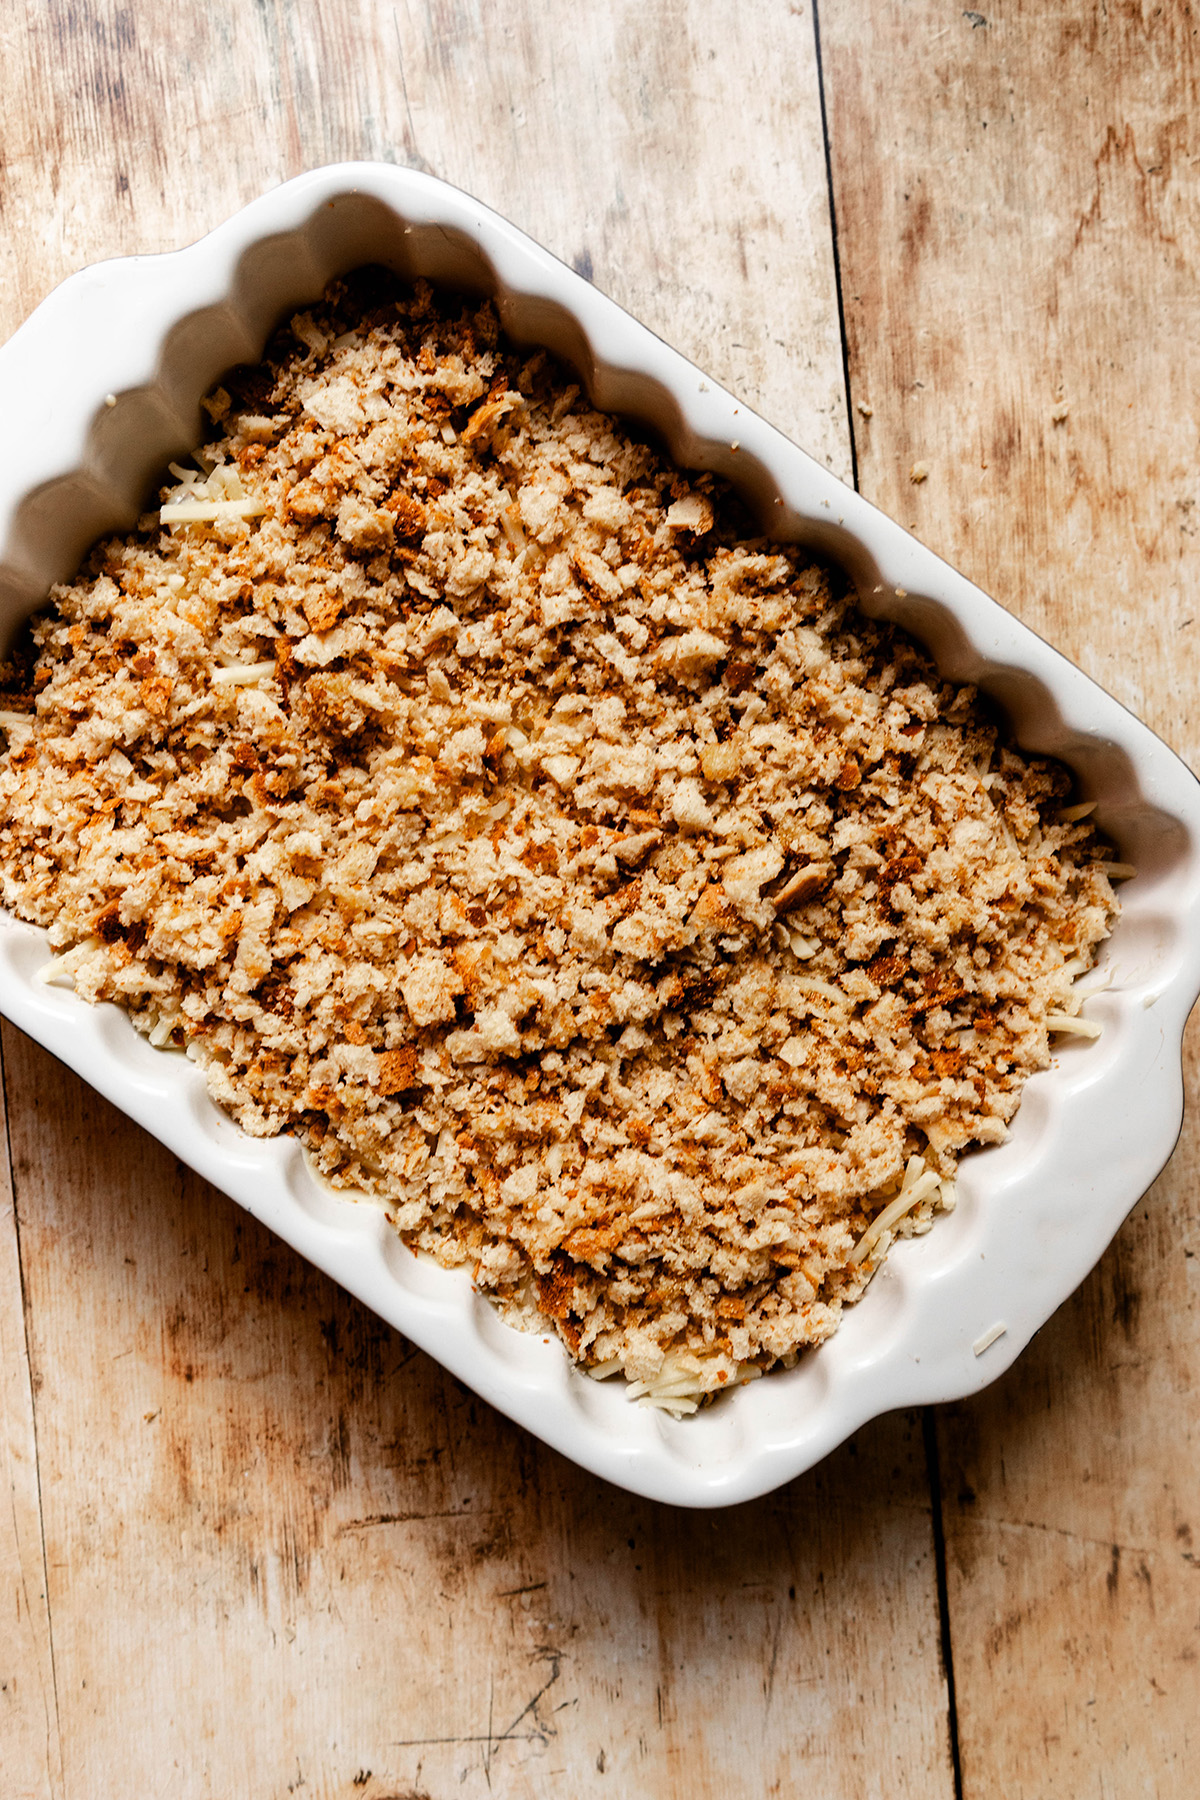
Pour the sauce: over the fish in the baking dish and then cover with the cheese.
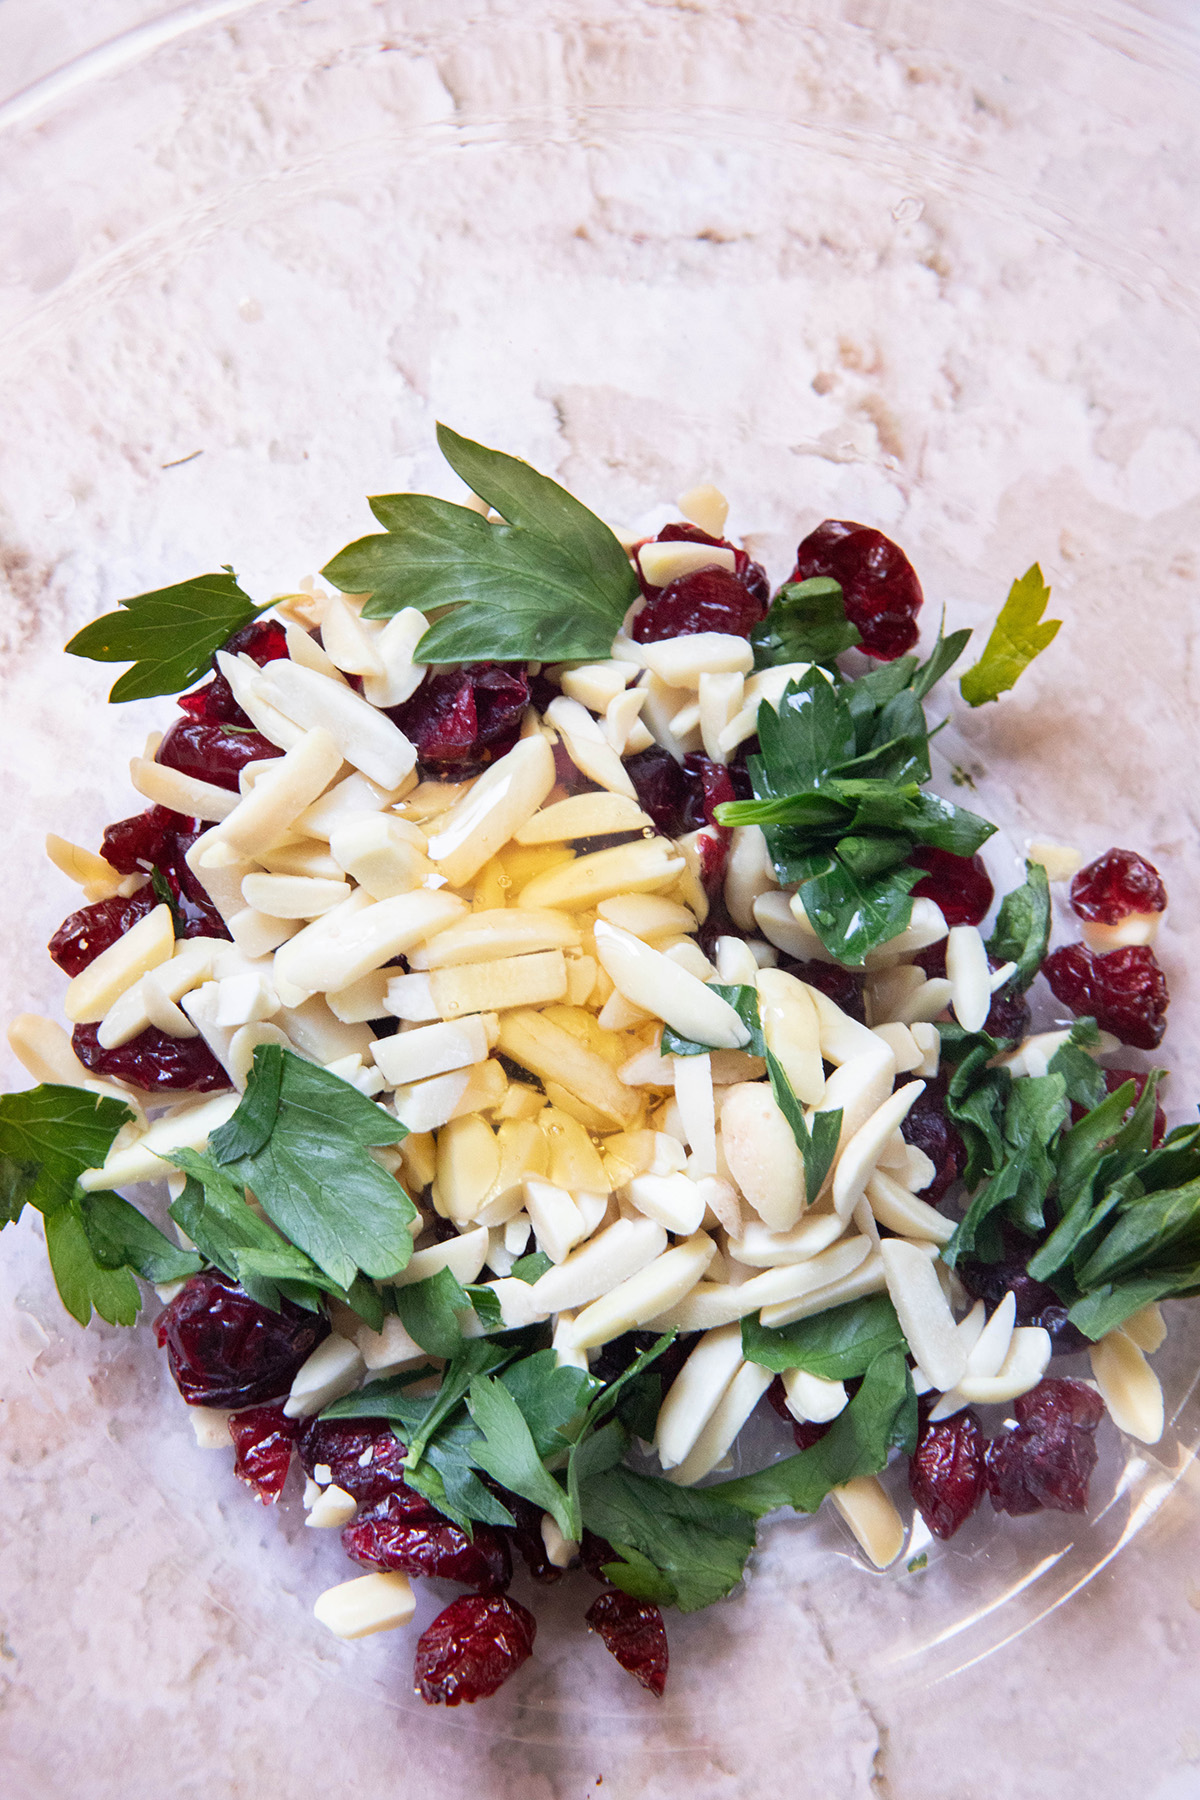
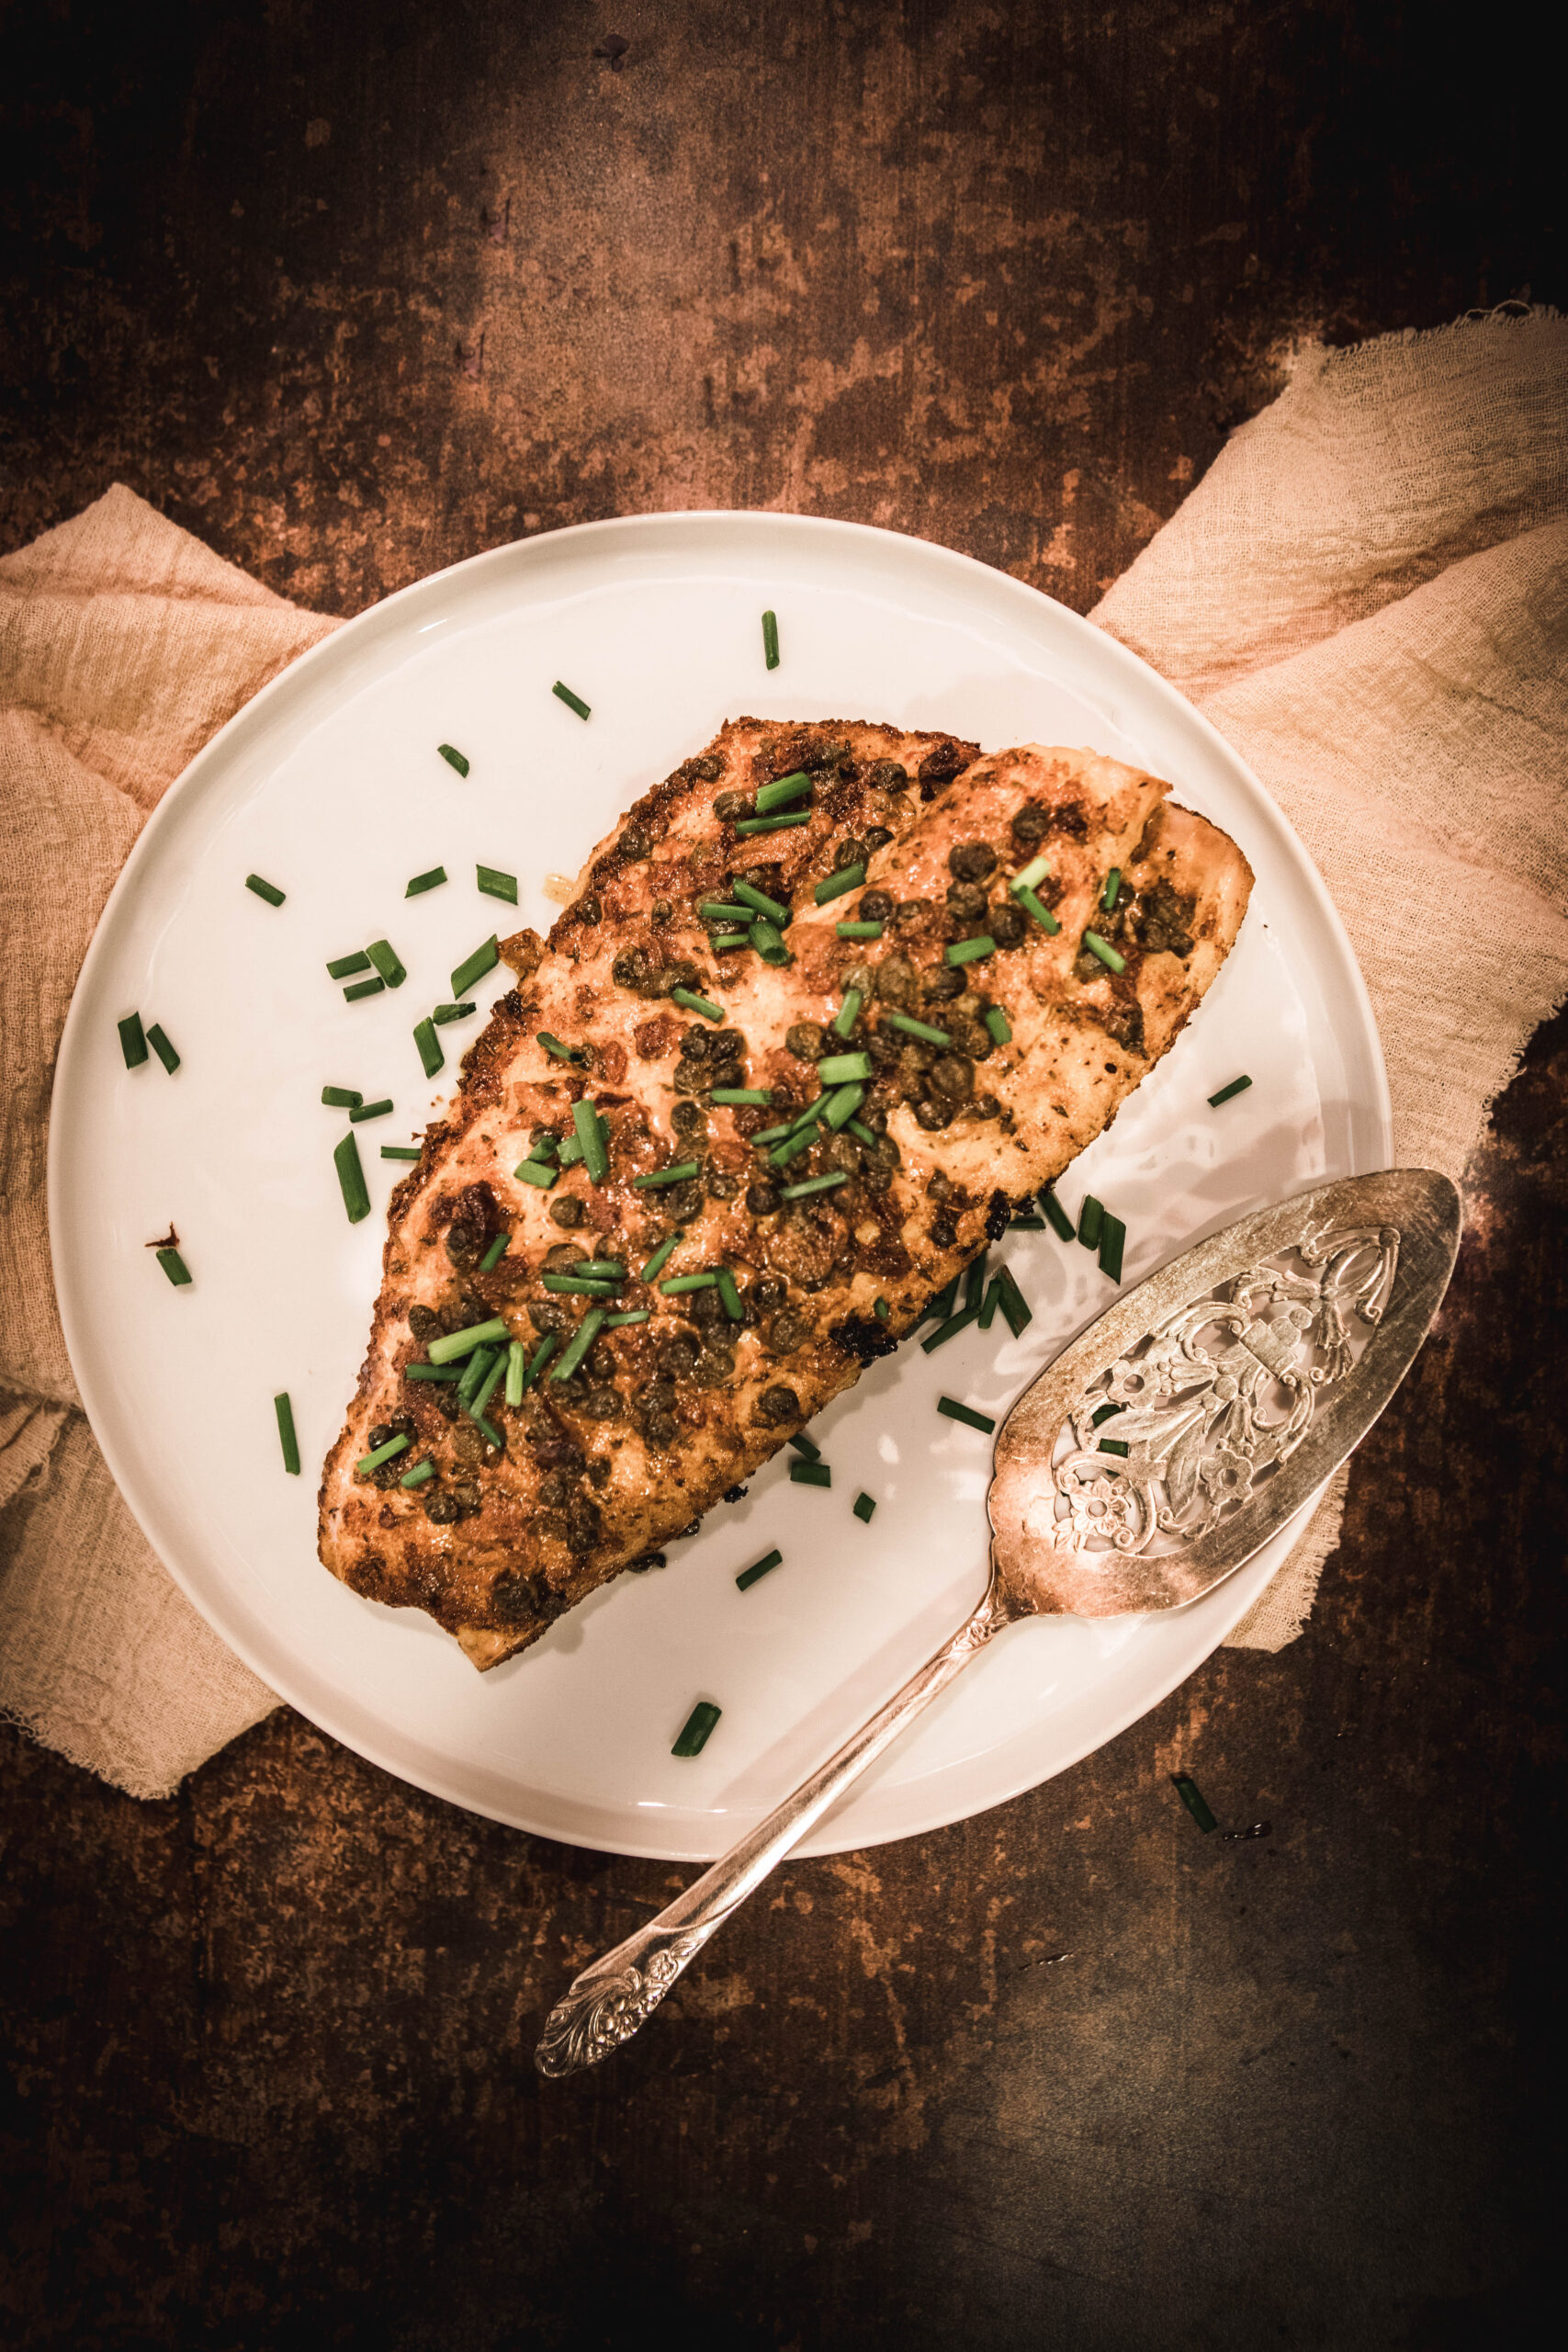
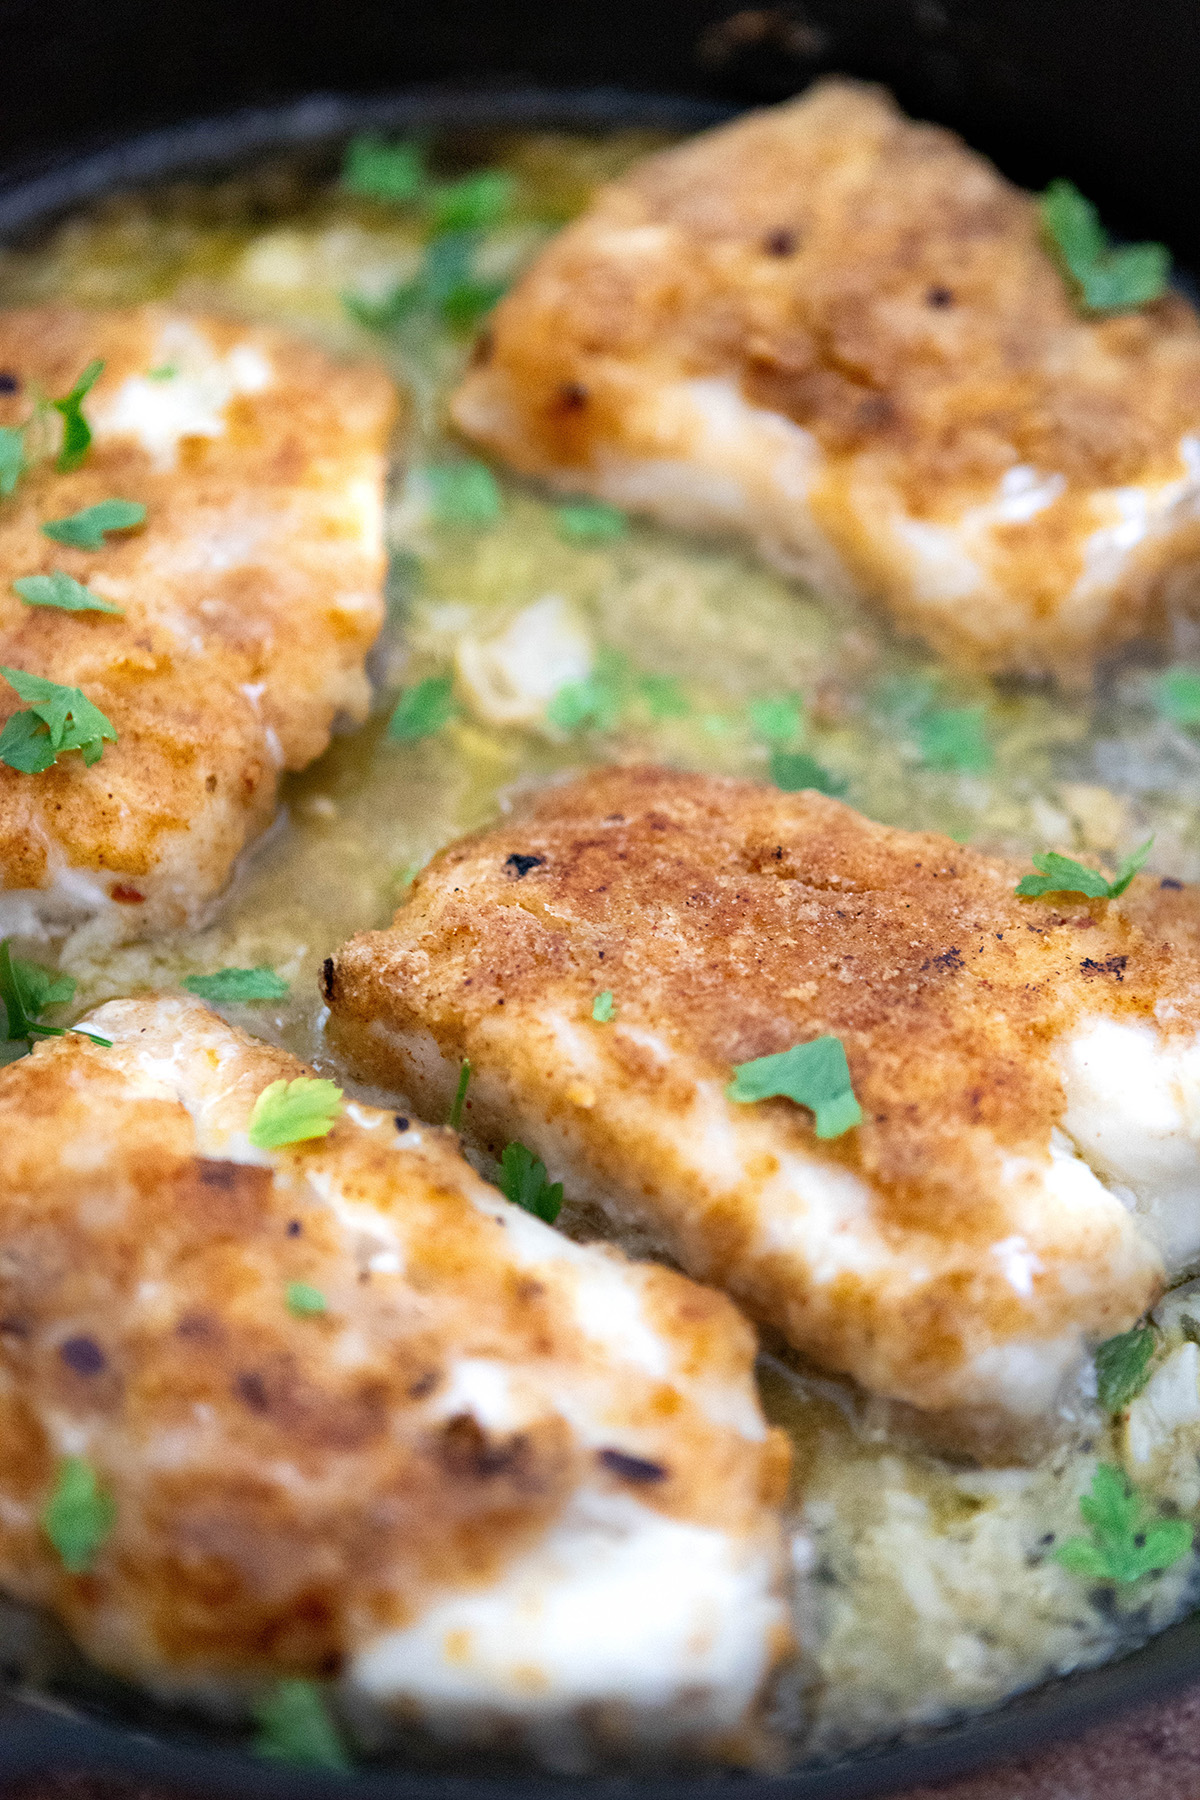
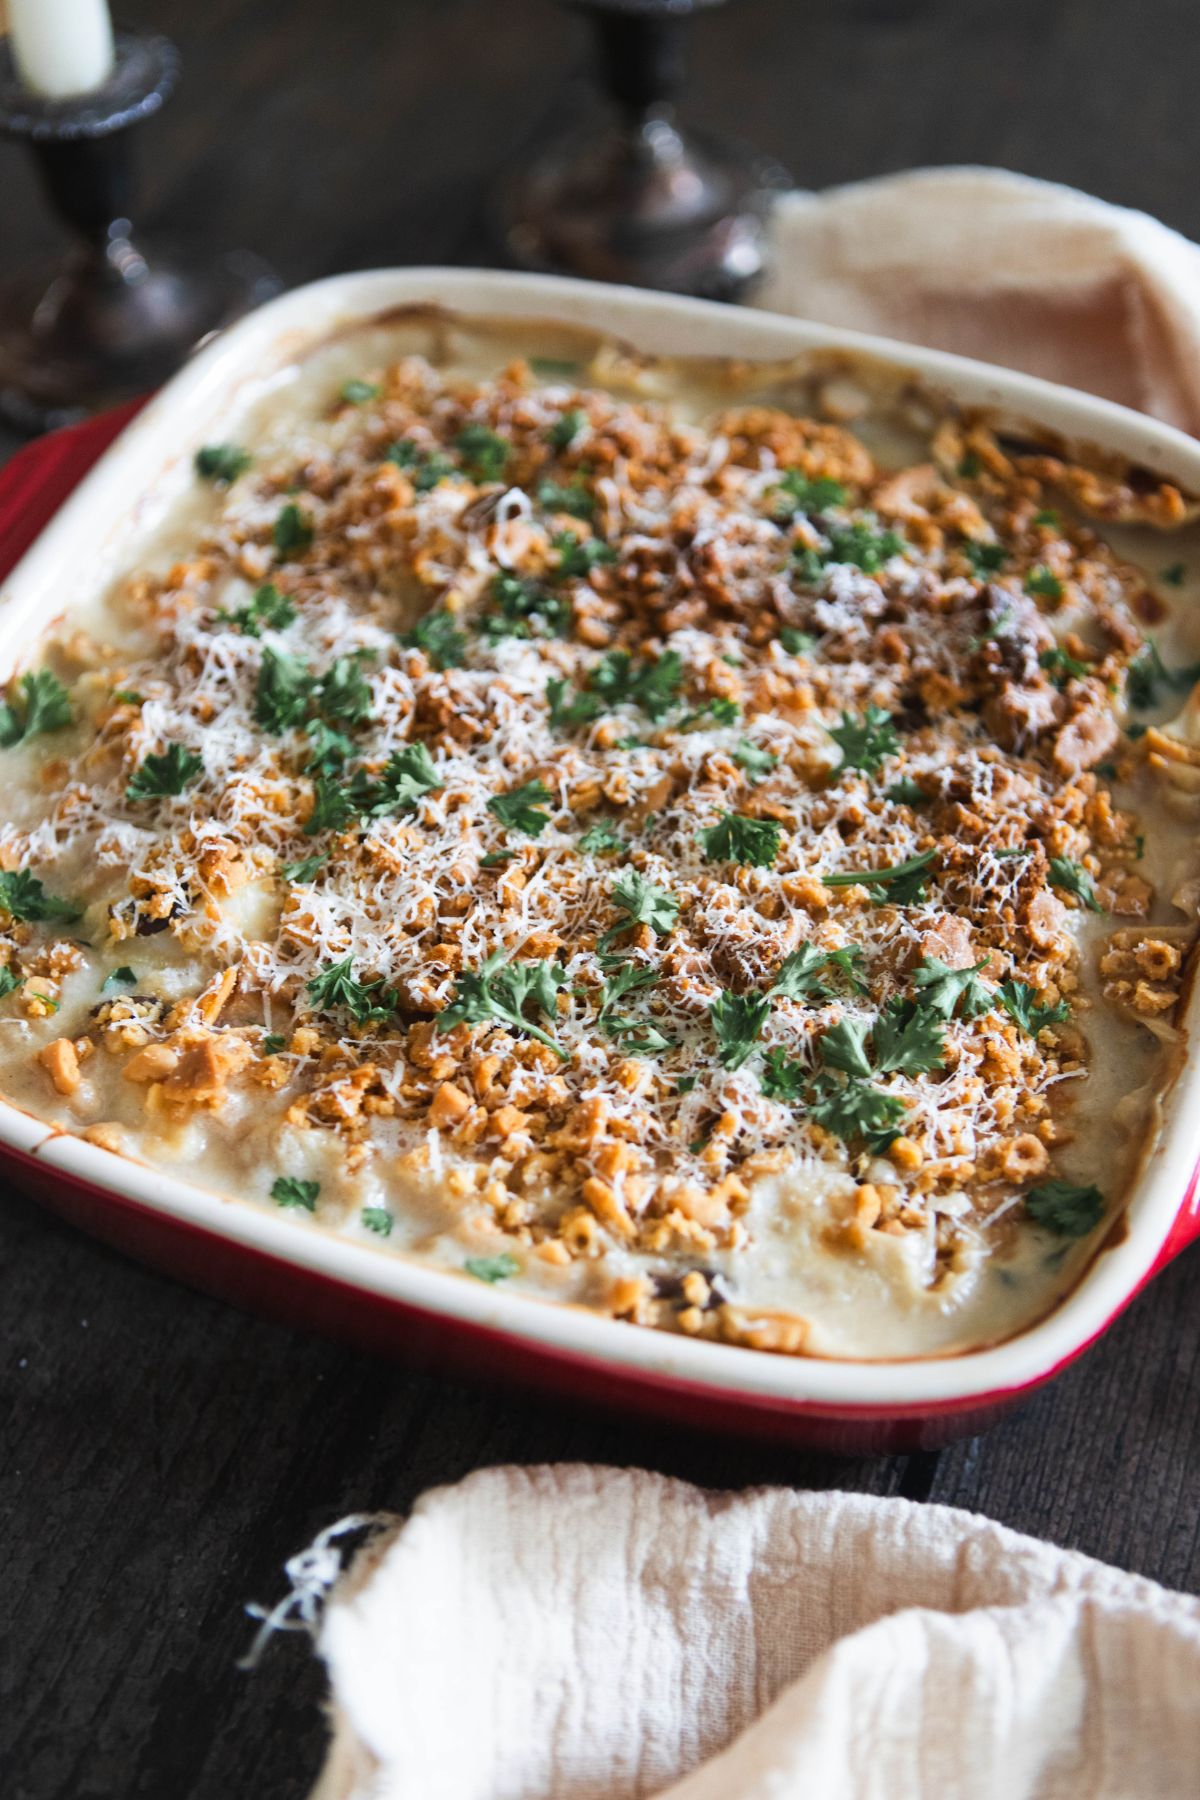
Toss the breadcrumbs: with a tablespoon of olive oil and garlic powder and top the baking dish with them. Proceed to bake for 35 minutes. While the cooking time is 35 minutes, you can check it at 30 minutes. If it looks like it is browning too much, you can take it out of the oven.
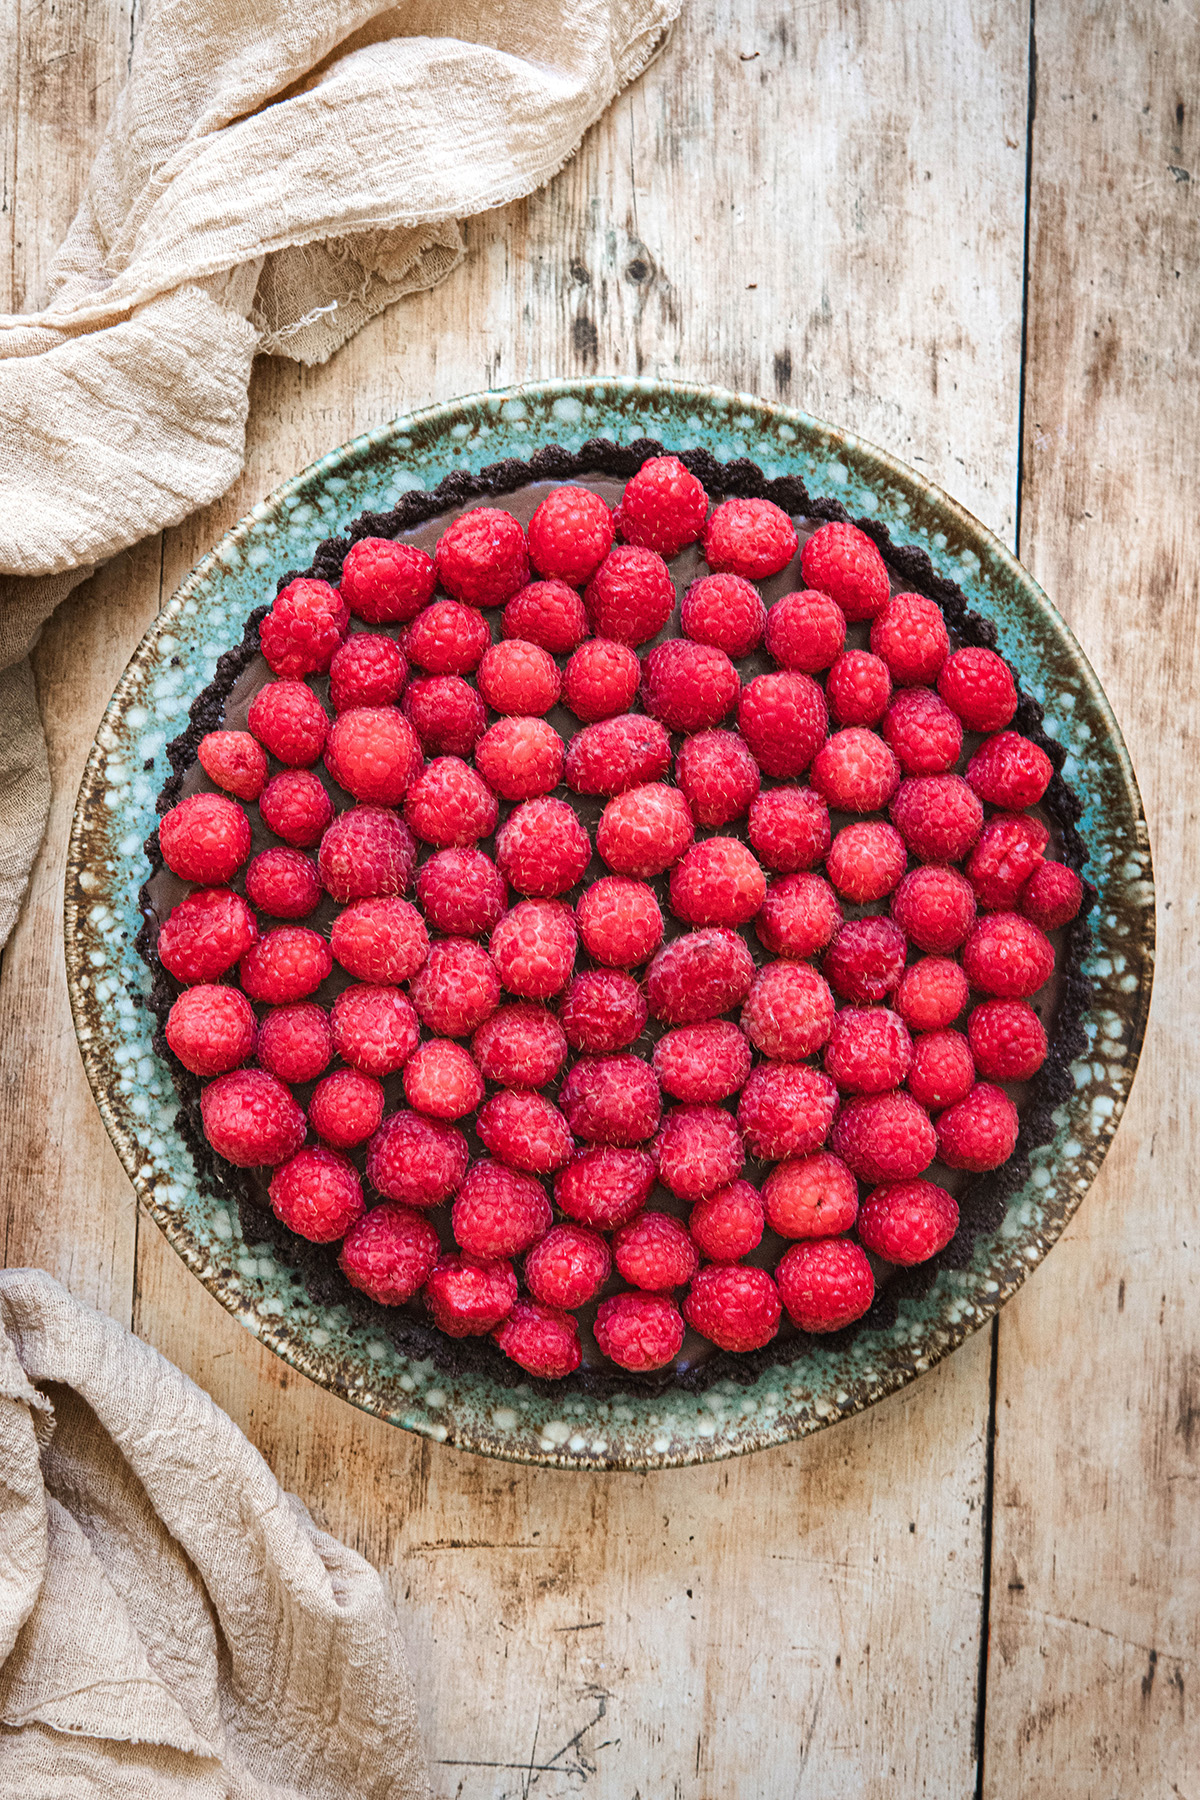
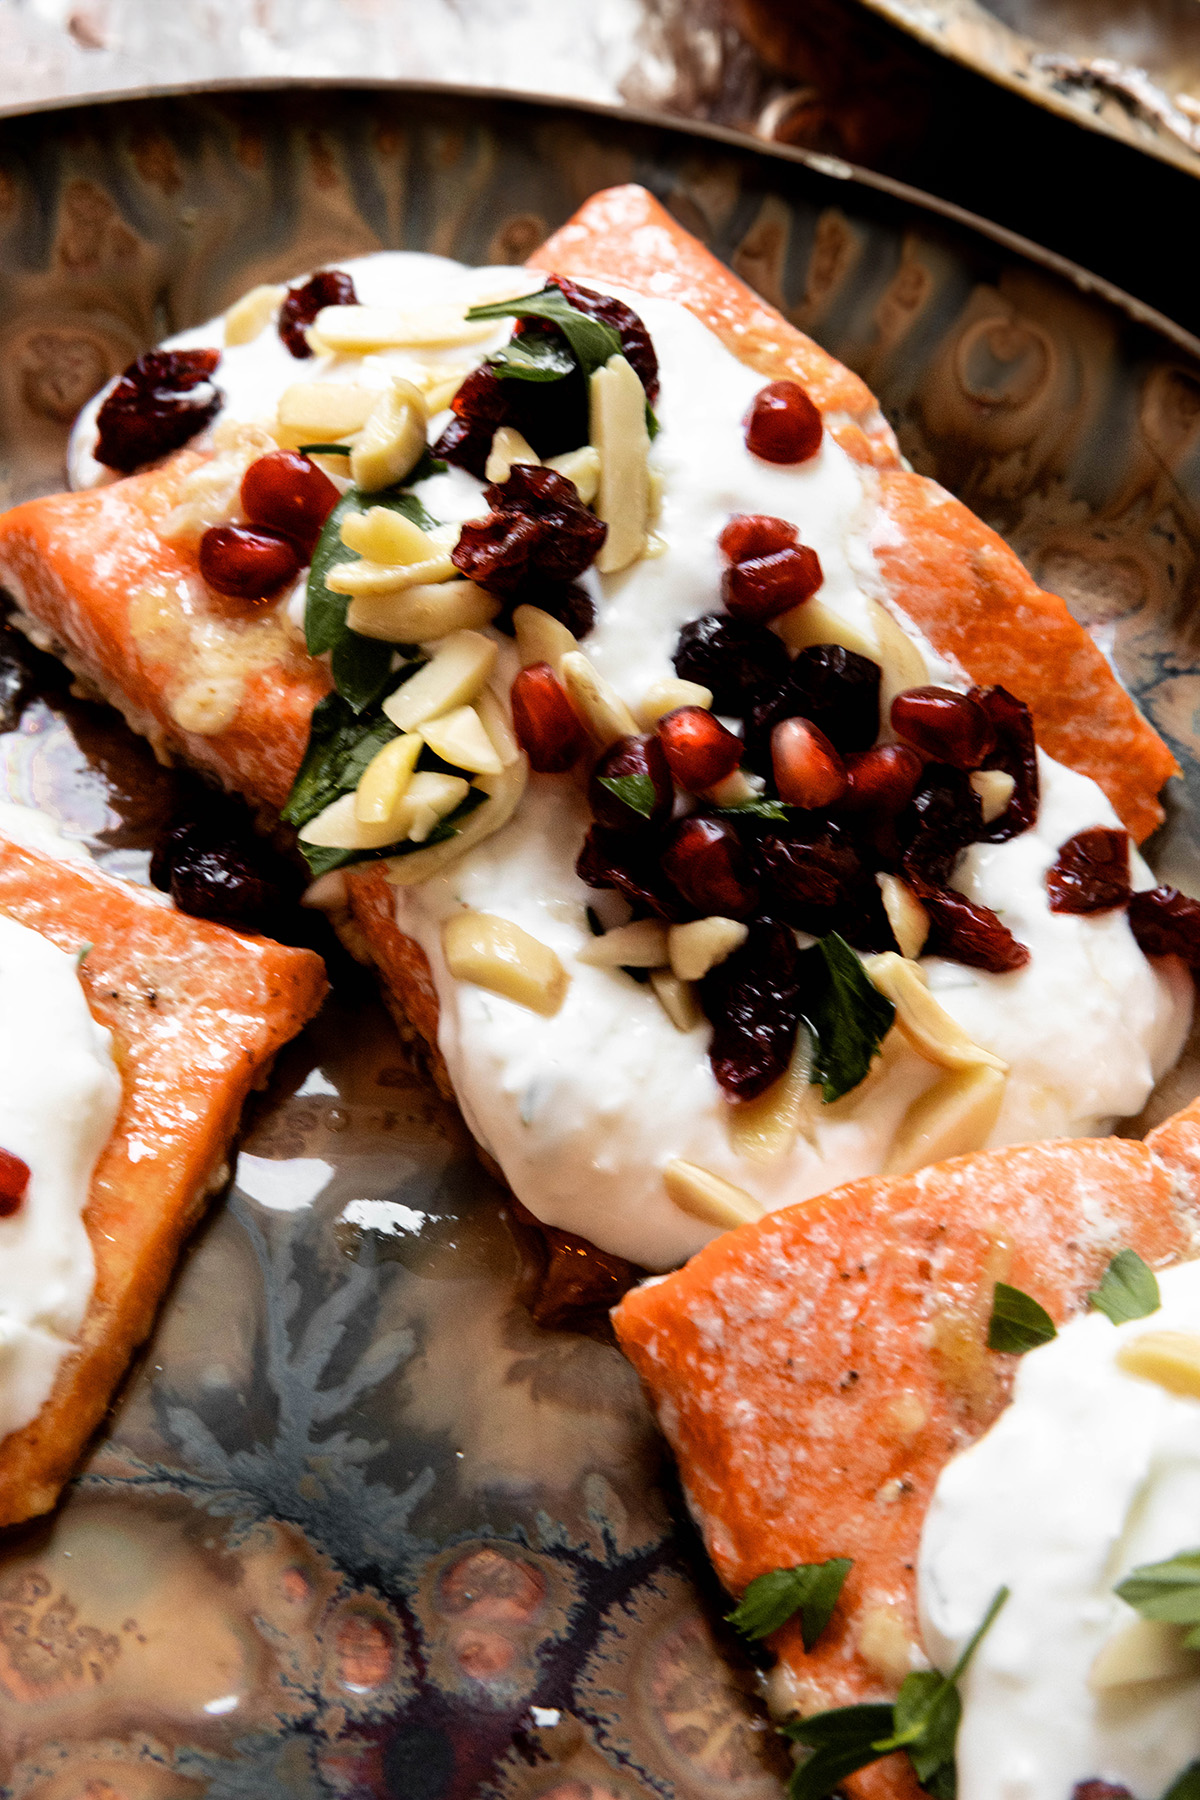
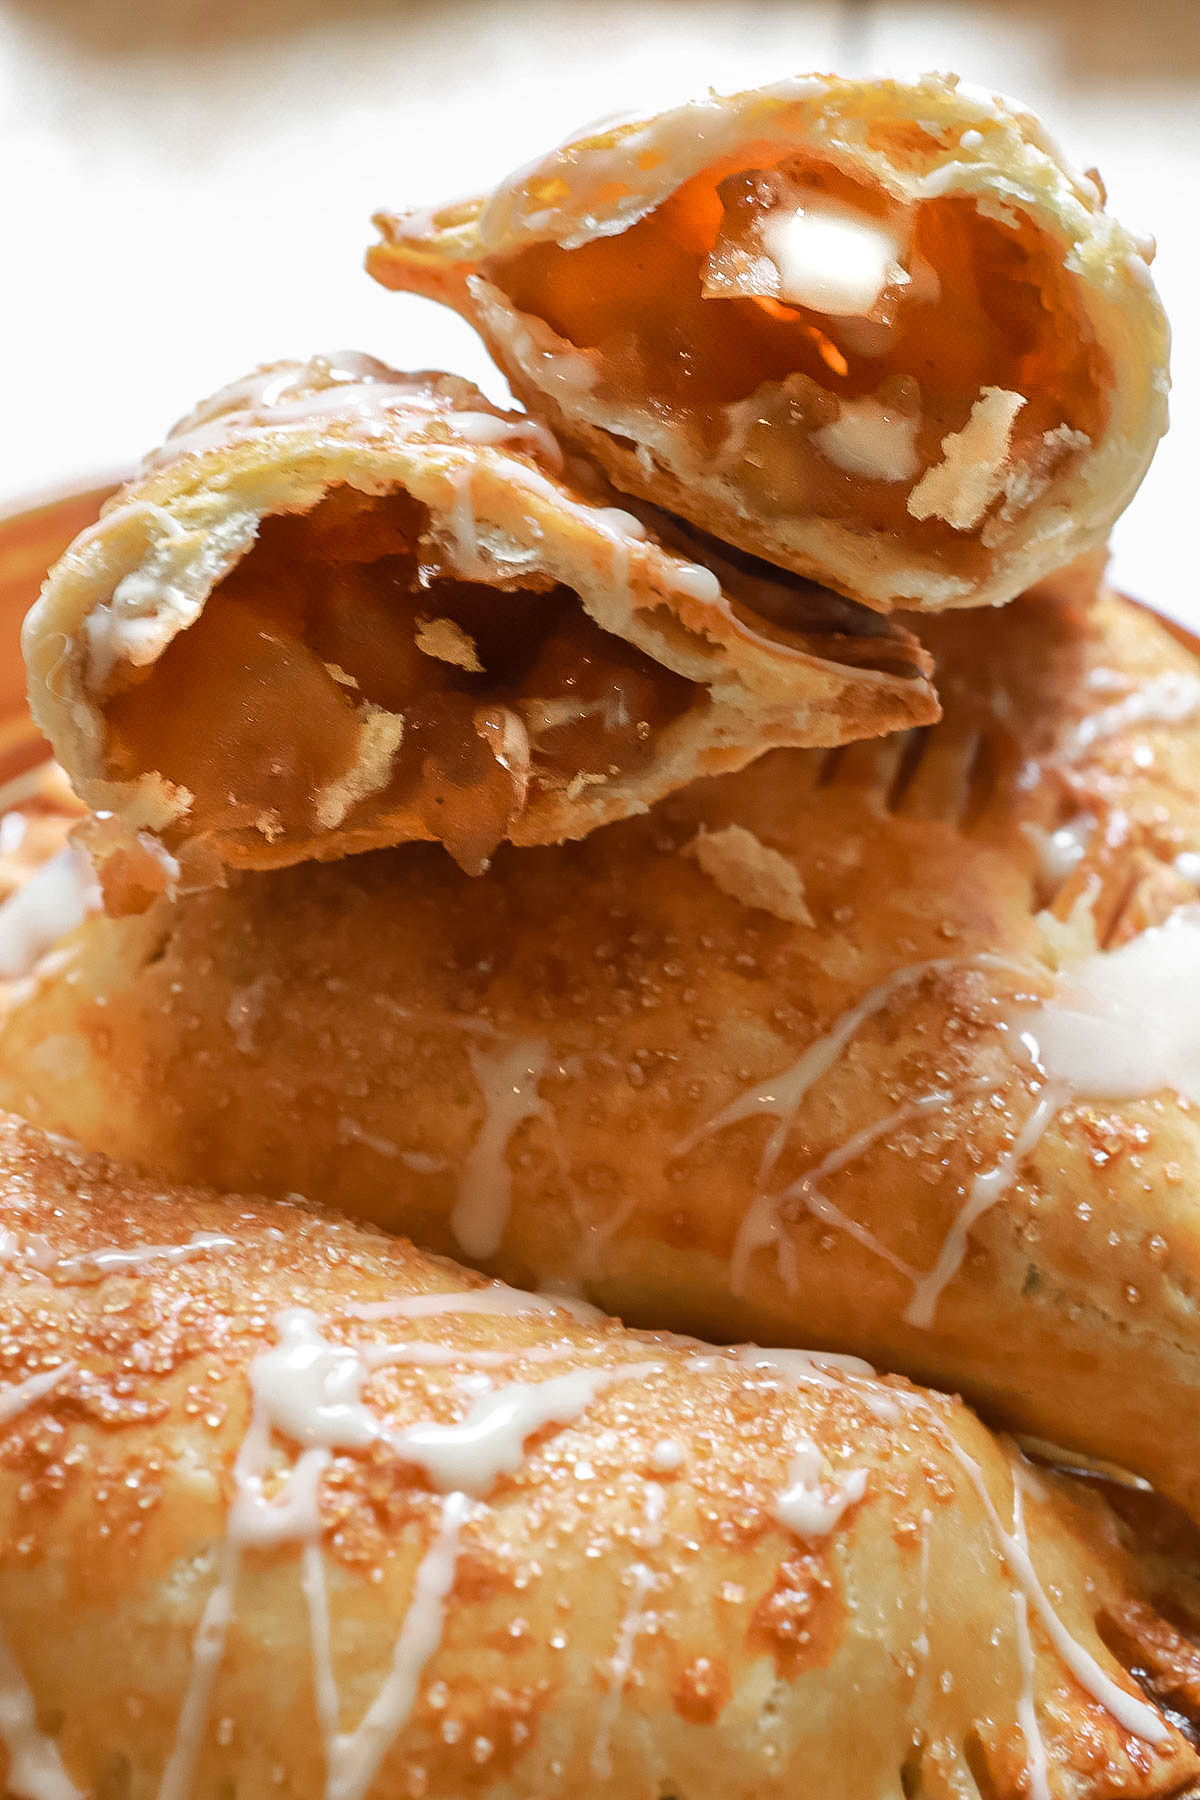
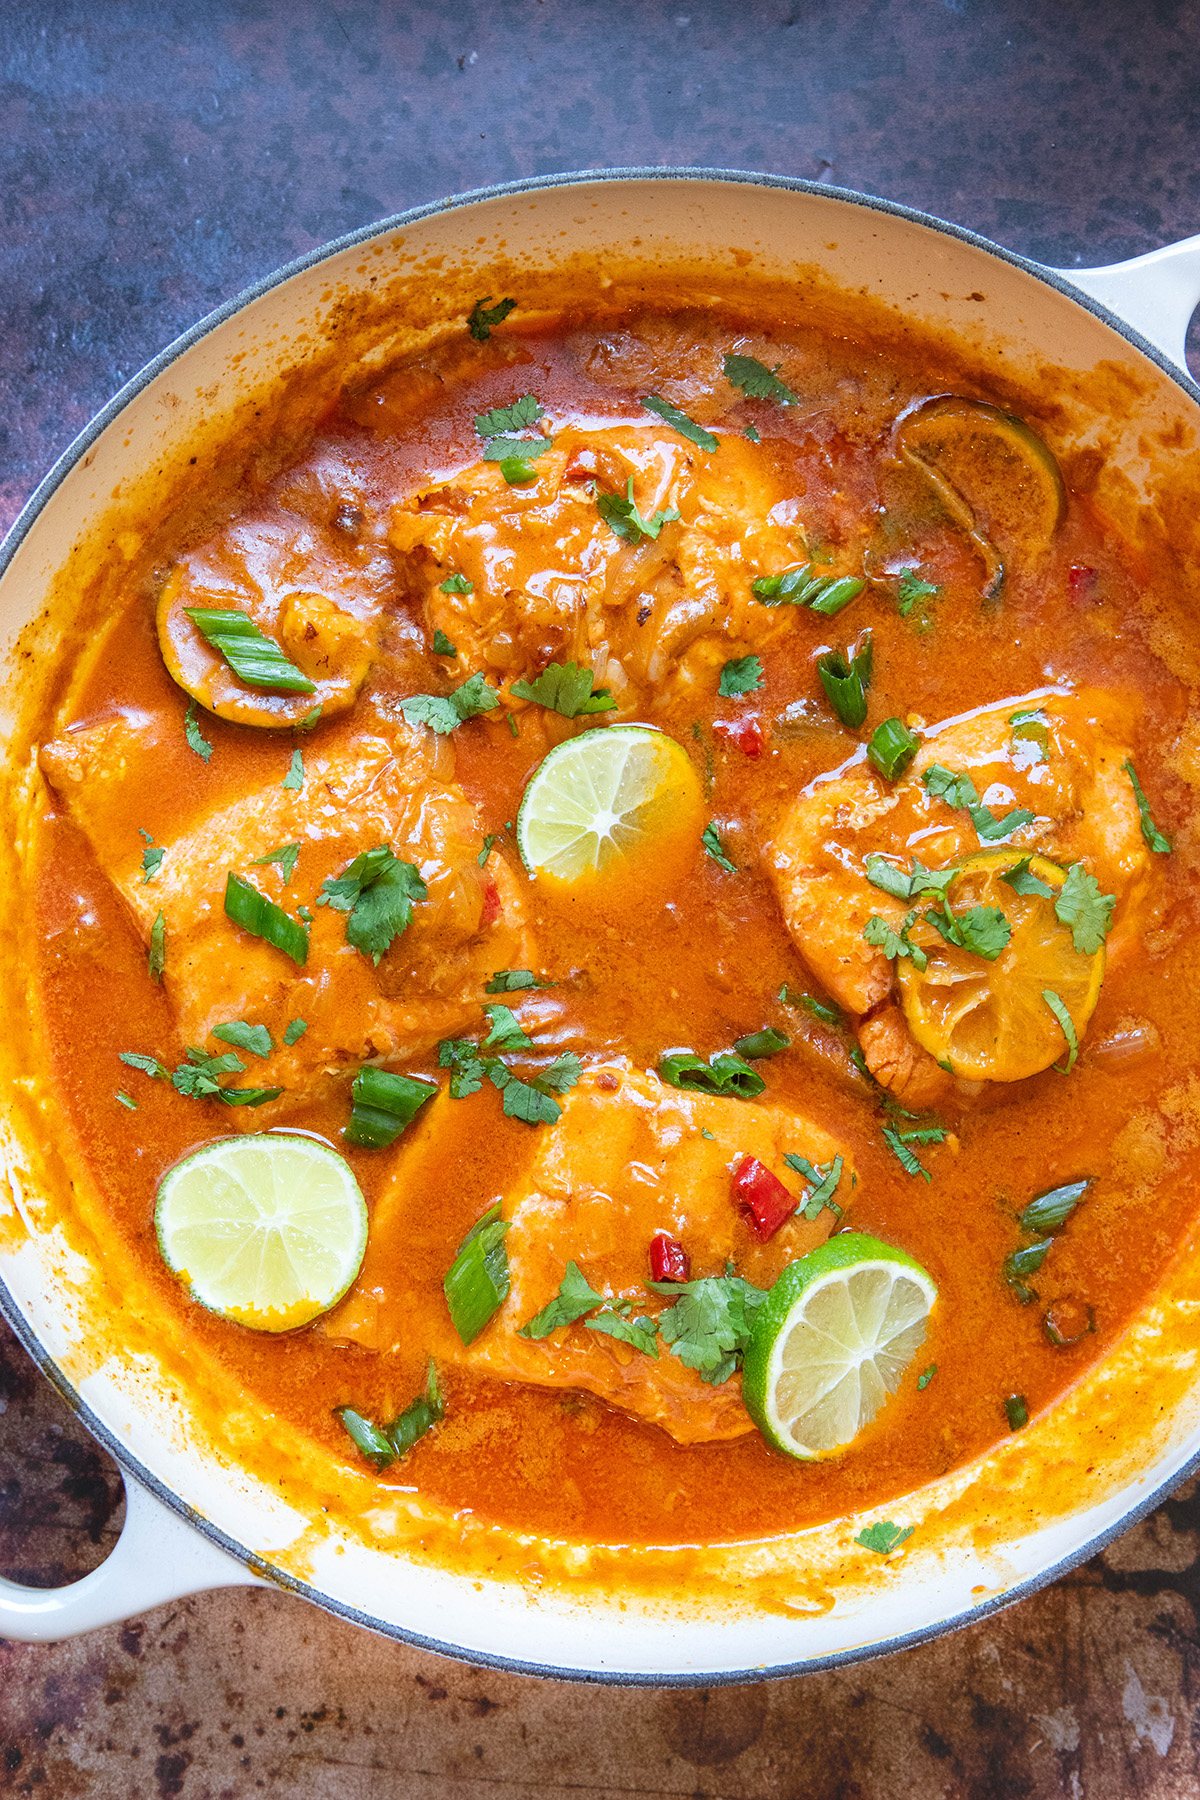
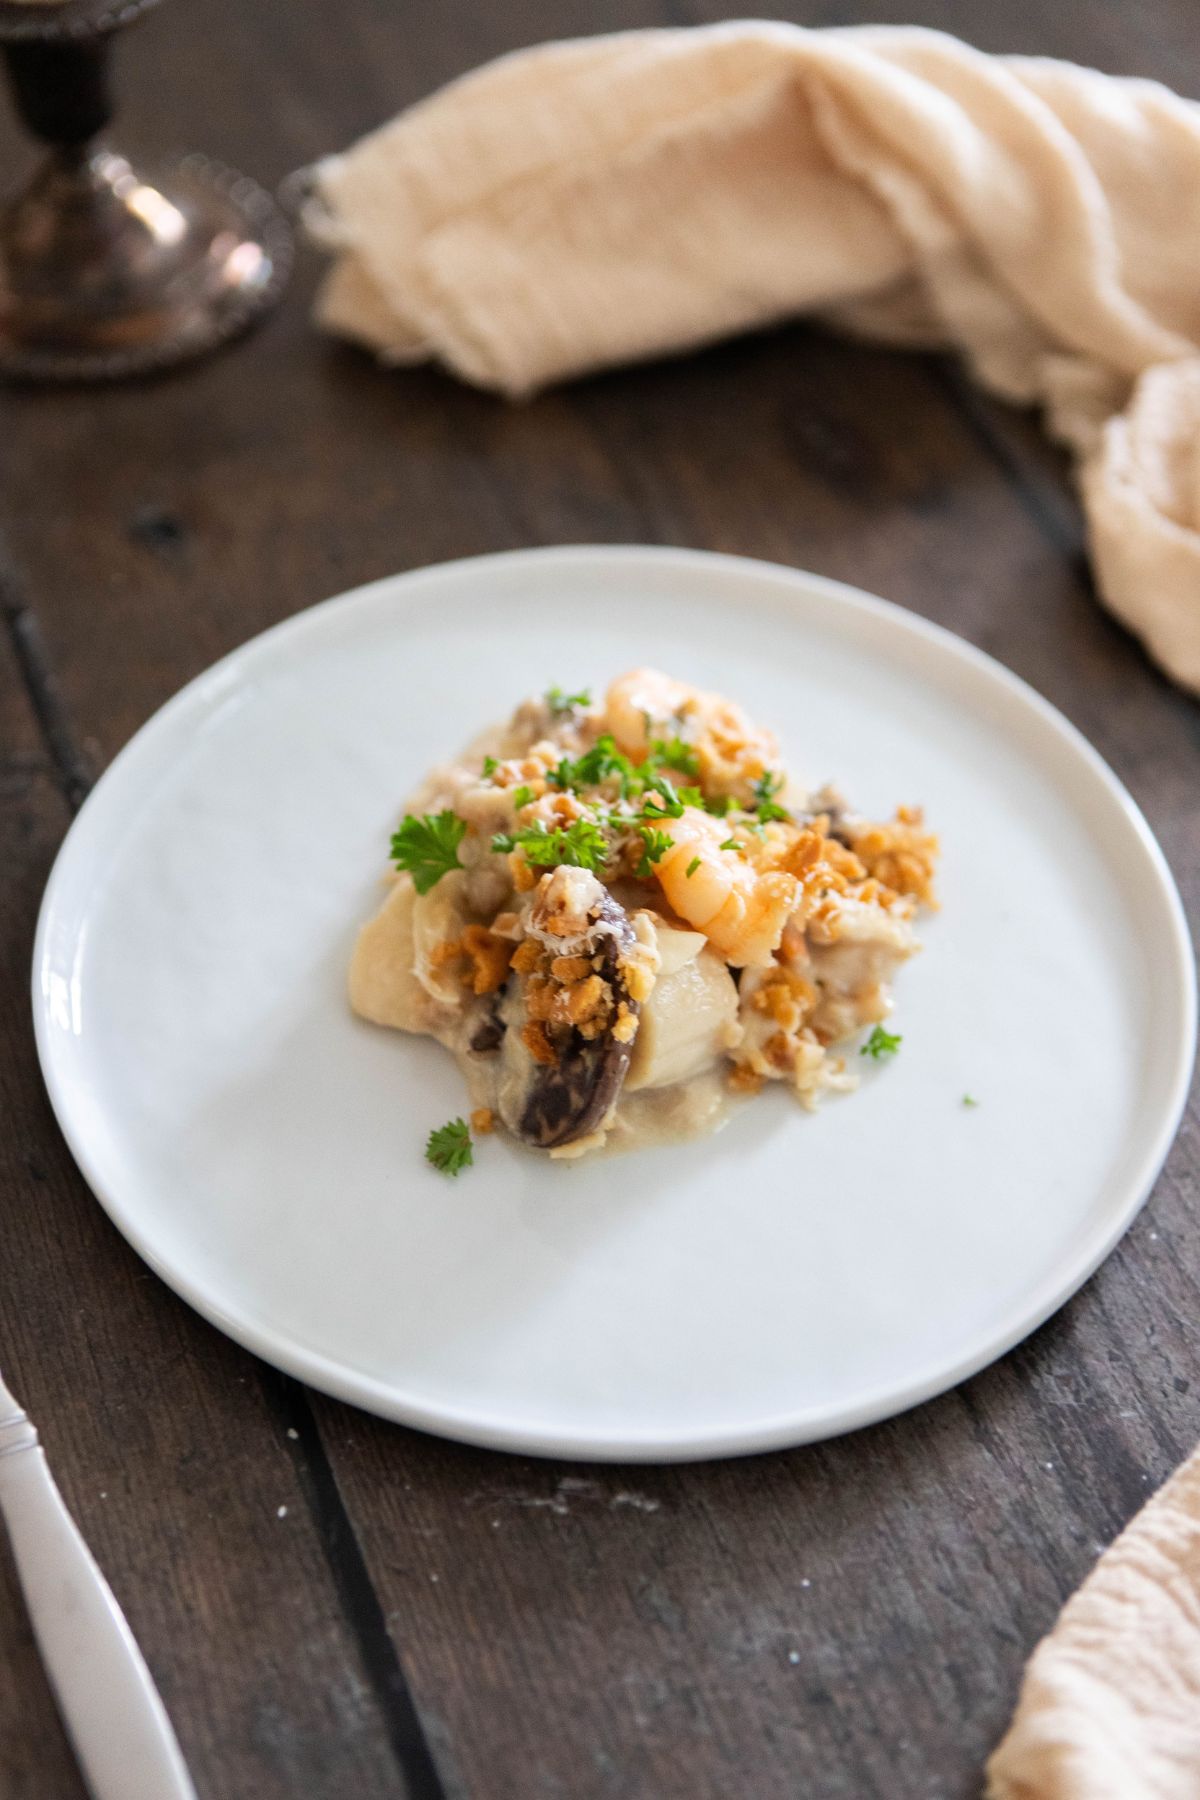
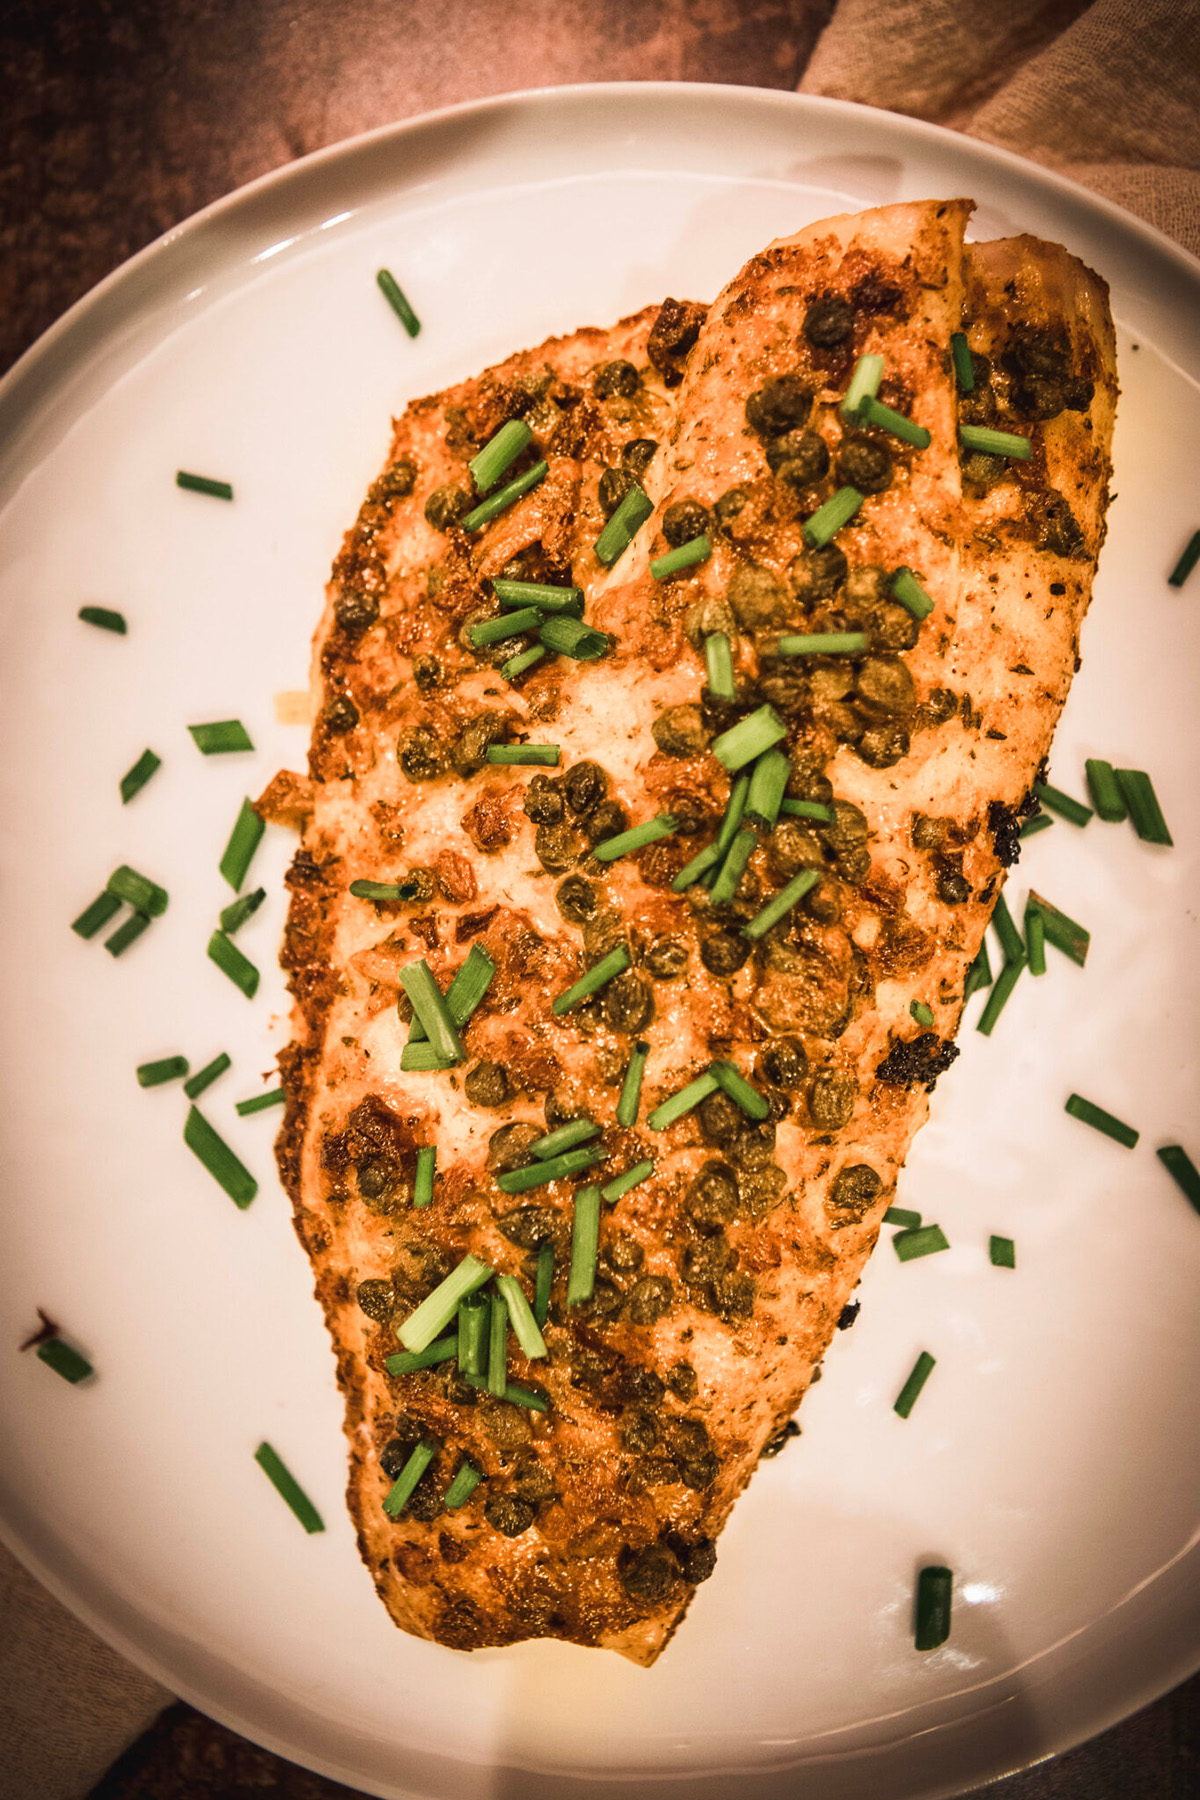
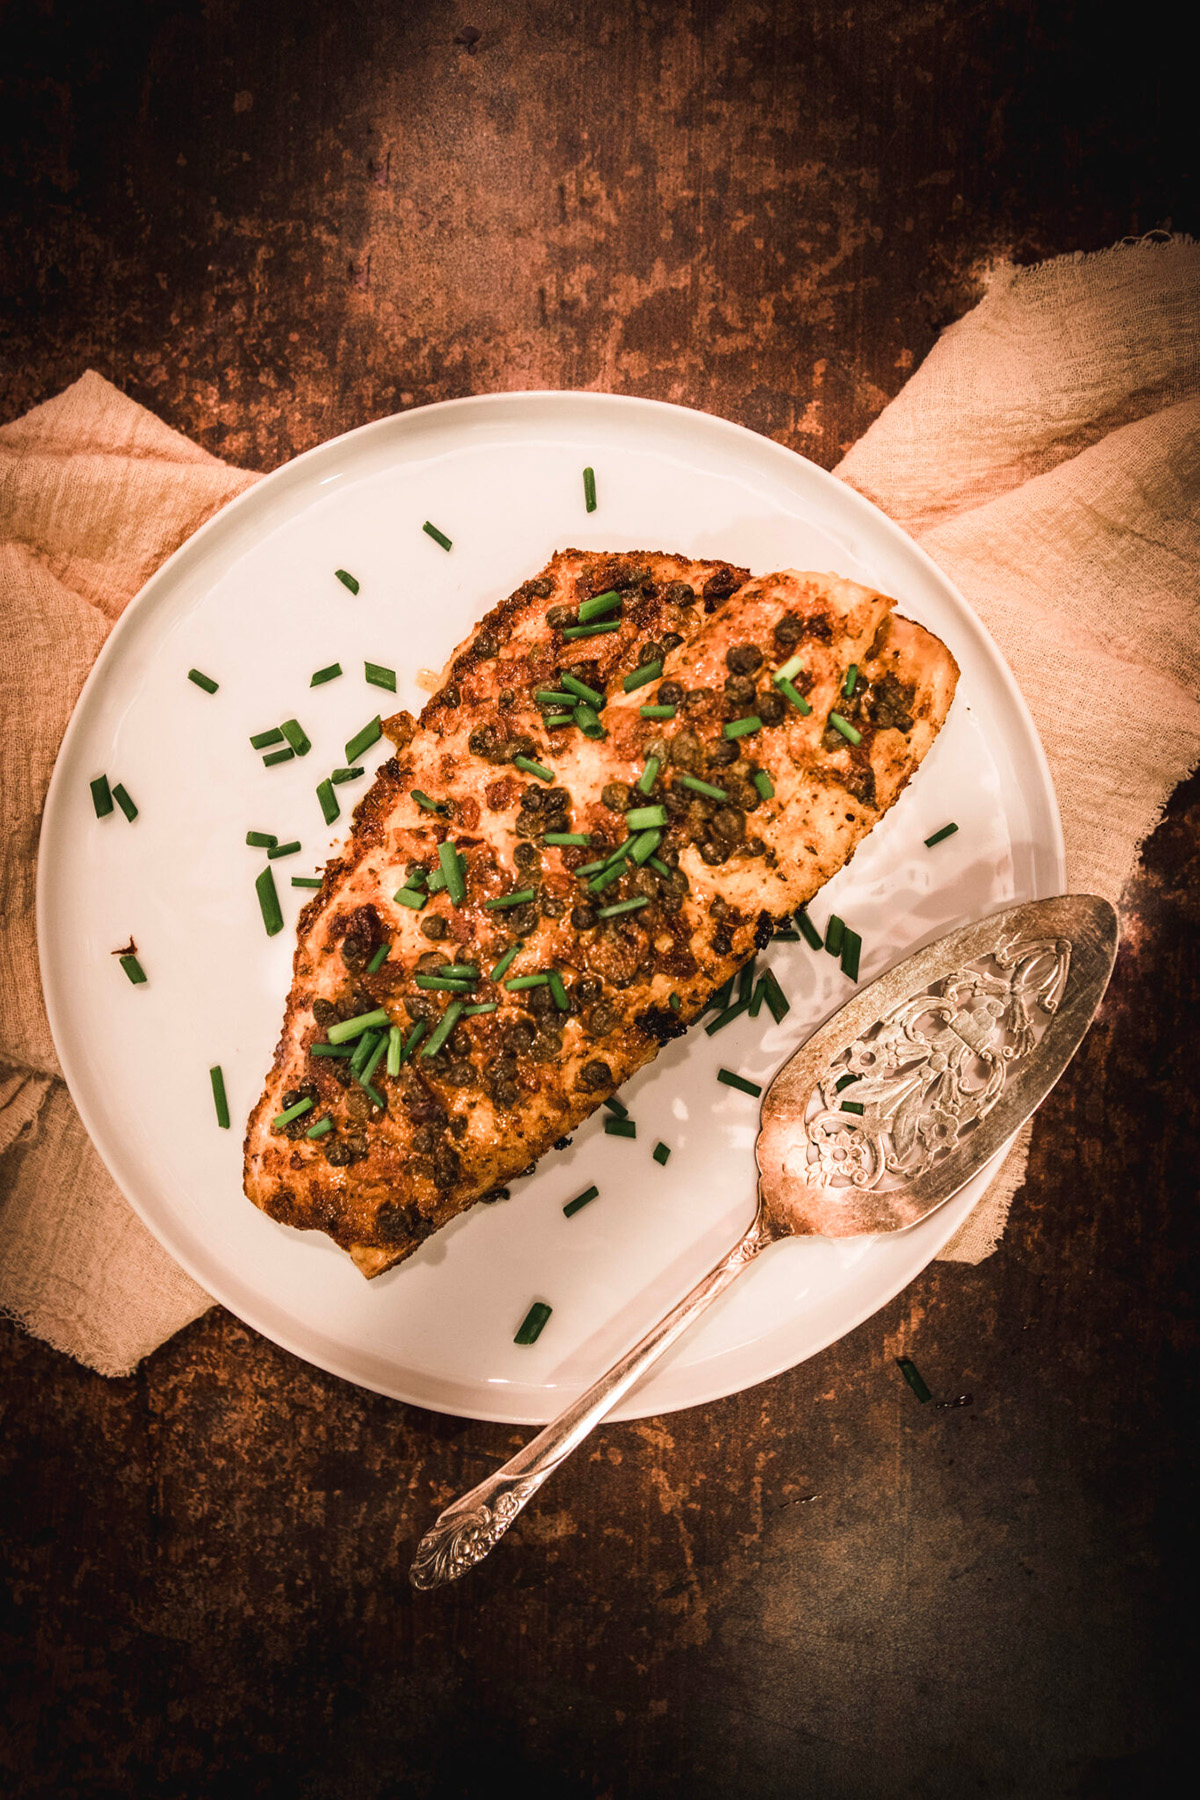
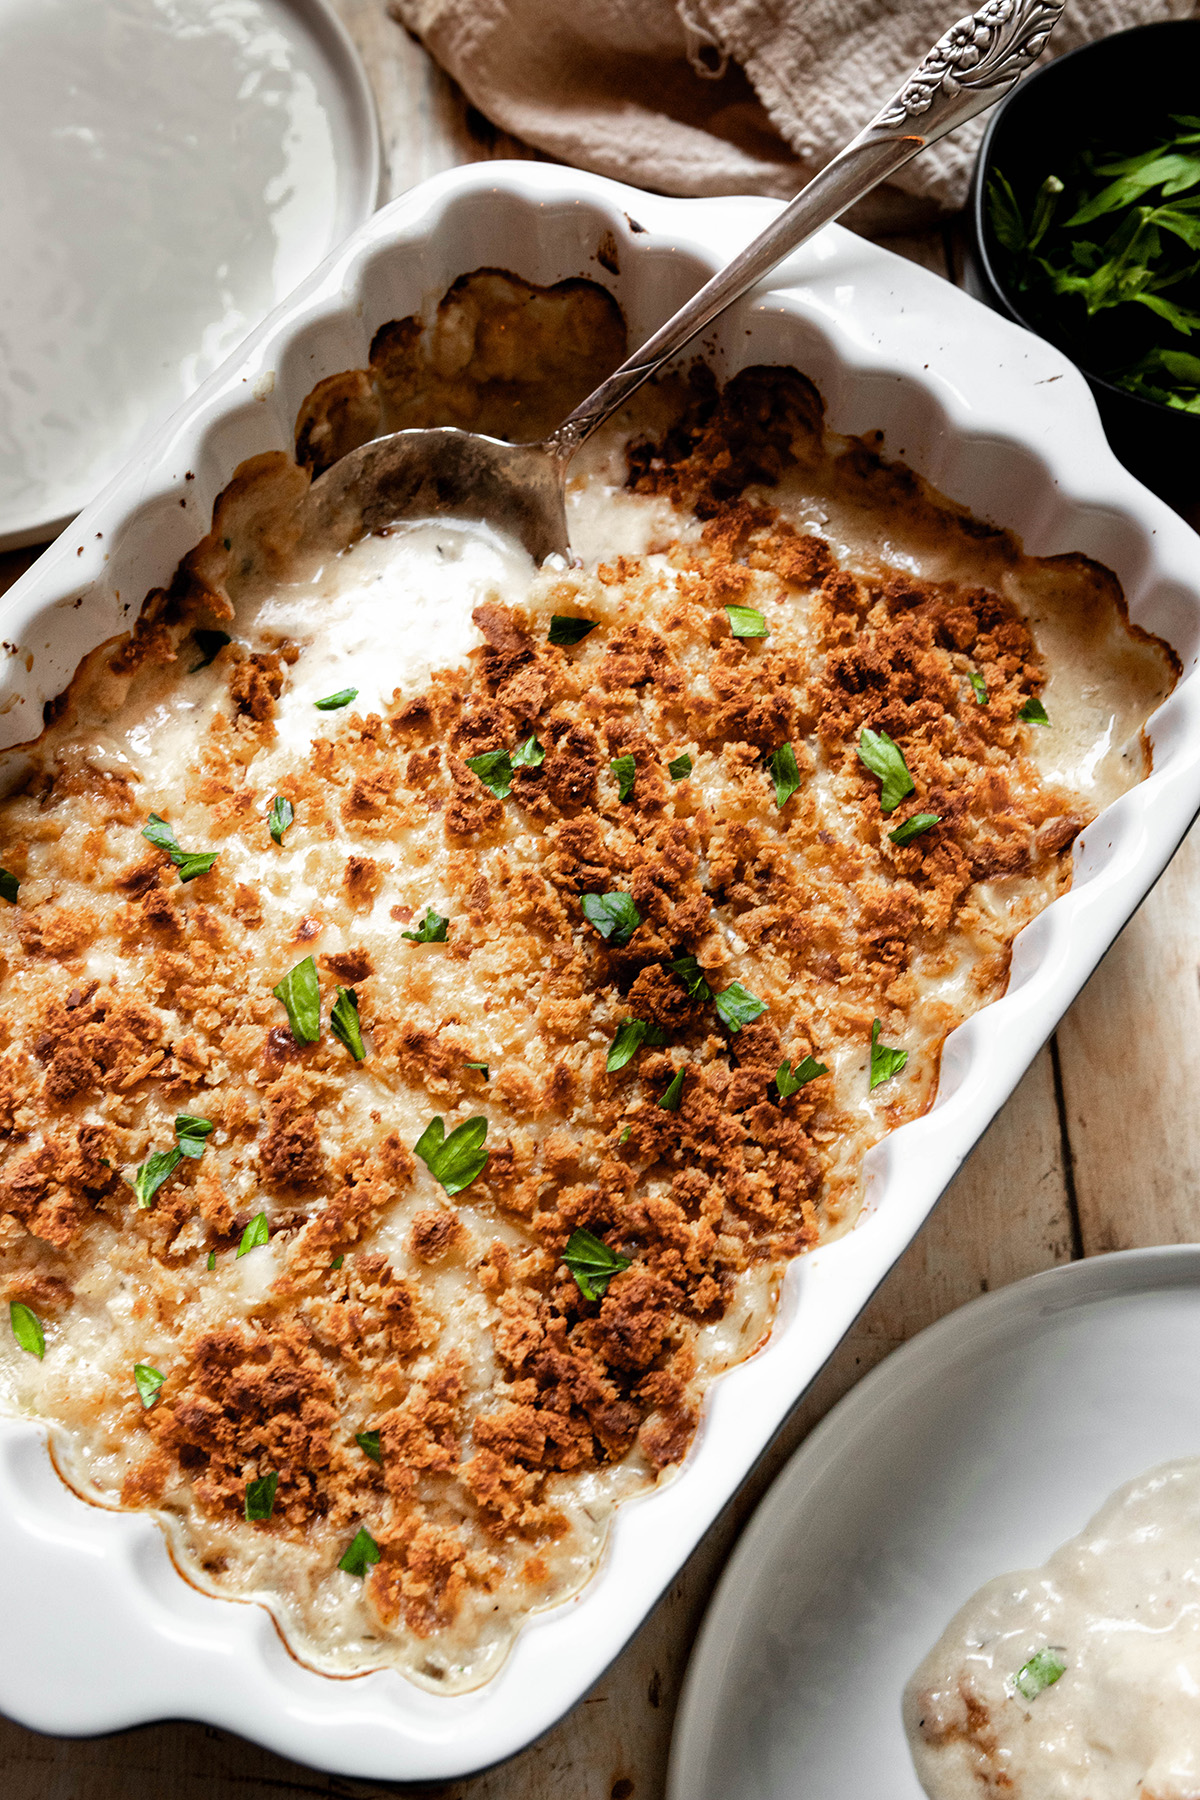
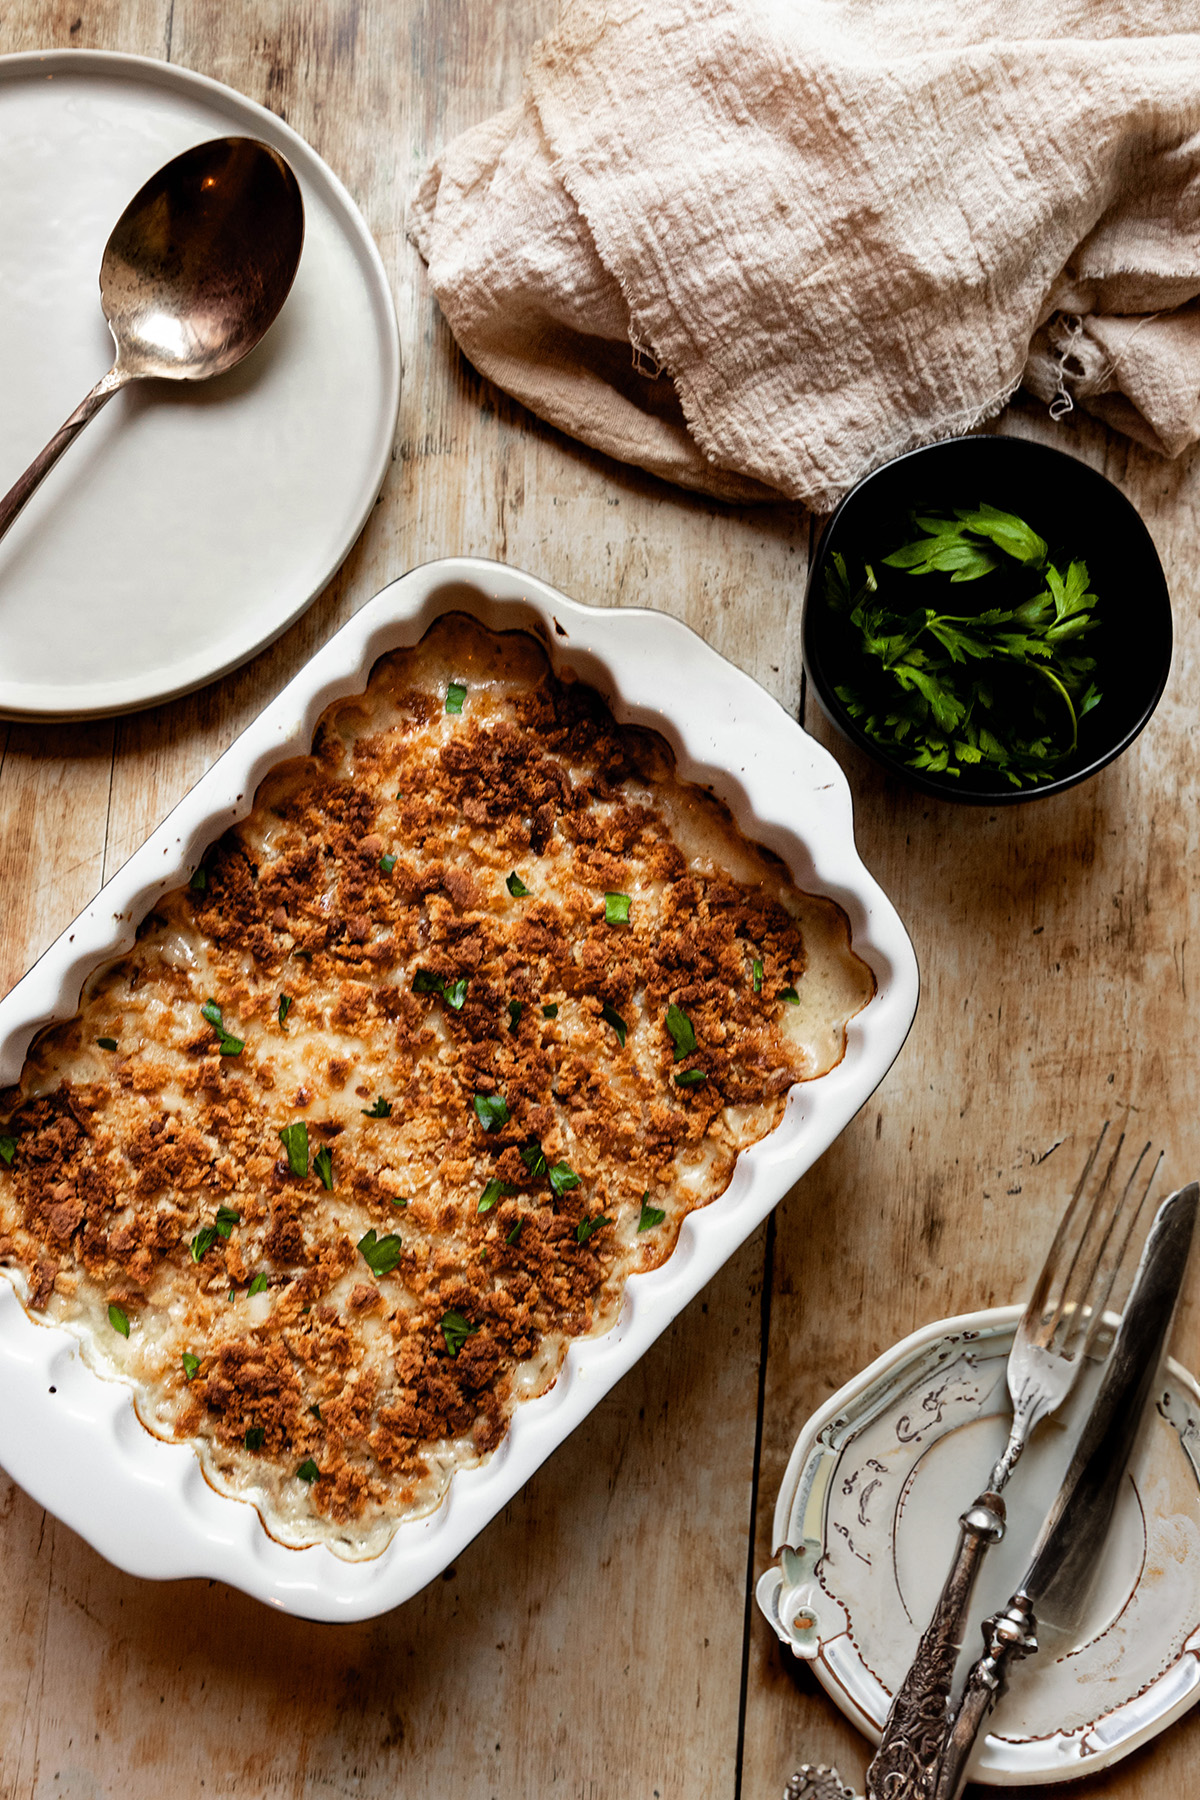
Once it is finished baking: remove from the oven and let sit for 5 minutes. Then serve. You can top with parsley but this is optional. 

onions in a frying pan
 Add your oil to your pan and onions
fish in a baking dish
Grease a baking dish and lay the fish in a single layer on the bottom of it. 
onions and butter in a pan
Melt butter in the same pan with the onions
flour and butter in a pan
Add your flour
roux in a pan
Make a roux
sauce in a pan
Add milk slowly and whisk
sauce in pan with spices and whisk
Once thick add the zest, mustard, and spices
sauce in a pan with a whisk
Whisk together
sauce in a pan with parmesan
Add the parmesan at the end
baking dish with cod gratin
Pour it over the fish
Best Cod Au Gratin Recipe: Classic Traditional Recipes
Top it with the cheese
breadcrumbs
Mix the breadcrumbs with oil and garlic powder
Best Cod Au Gratin Recipe: Classic Traditional Recipes
Cover the cheese with it and bake
Best Cod Au Gratin Recipe: Classic Traditional Recipes
Let it sit for 5 minutes when done and serve

Why is cod au gratin popular in Newfoundland?

Abundance of Cod: Newfoundland is located in the North Atlantic Ocean, and its waters have historically been rich in cod fish. Cod has been a significant part of the province's fishing industry for centuries, making it a readily available and affordable ingredient for local cuisine.
Cultural Heritage: Cod au gratin has deep cultural roots in Newfoundland. It is a dish that has been passed down through generations, with many families having their own variations and recipes. This cultural connection to the dish has helped keep it popular over the years.
Comfort Food: Cod au gratin is a hearty and comforting dish, often enjoyed during the colder months. Its creamy sauce, tender cod, and cheesy topping make it a satisfying meal that provides warmth and comfort.
Traditional Fare: Newfoundland has a strong tradition of hearty, home-cooked meals, and cod au gratin fits perfectly into this culinary tradition. It's a dish that reflects the region's history and the importance of fish in its cuisine.
Tourism: Newfoundland's unique culture and cuisine have become a draw for tourists in recent years. Visitors often seek out traditional Newfoundland dishes like cod au gratin to experience the local flavors and culinary heritage.
Versatility: Cod au gratin is a versatile dish that can be adapted to suit various tastes and dietary preferences. People can add different ingredients or spices to customize the dish to their liking.
Overall, cod au gratin's popularity in Newfoundland can be attributed to its deep cultural ties, the availability of cod in the region, its comforting qualities, and its role in preserving and celebrating the culinary traditions of Newfoundland and Labrador.

Tips and Tricks:

I use 2% milk in this recipe but if you want an even creamier sauce you can use whole milk. 
Some recipes will say that you need scalded milk but you do not, cold milk is fine.

I like really melted cheese and that is why I use gruyere but you can definitely use cheddar cheese. 

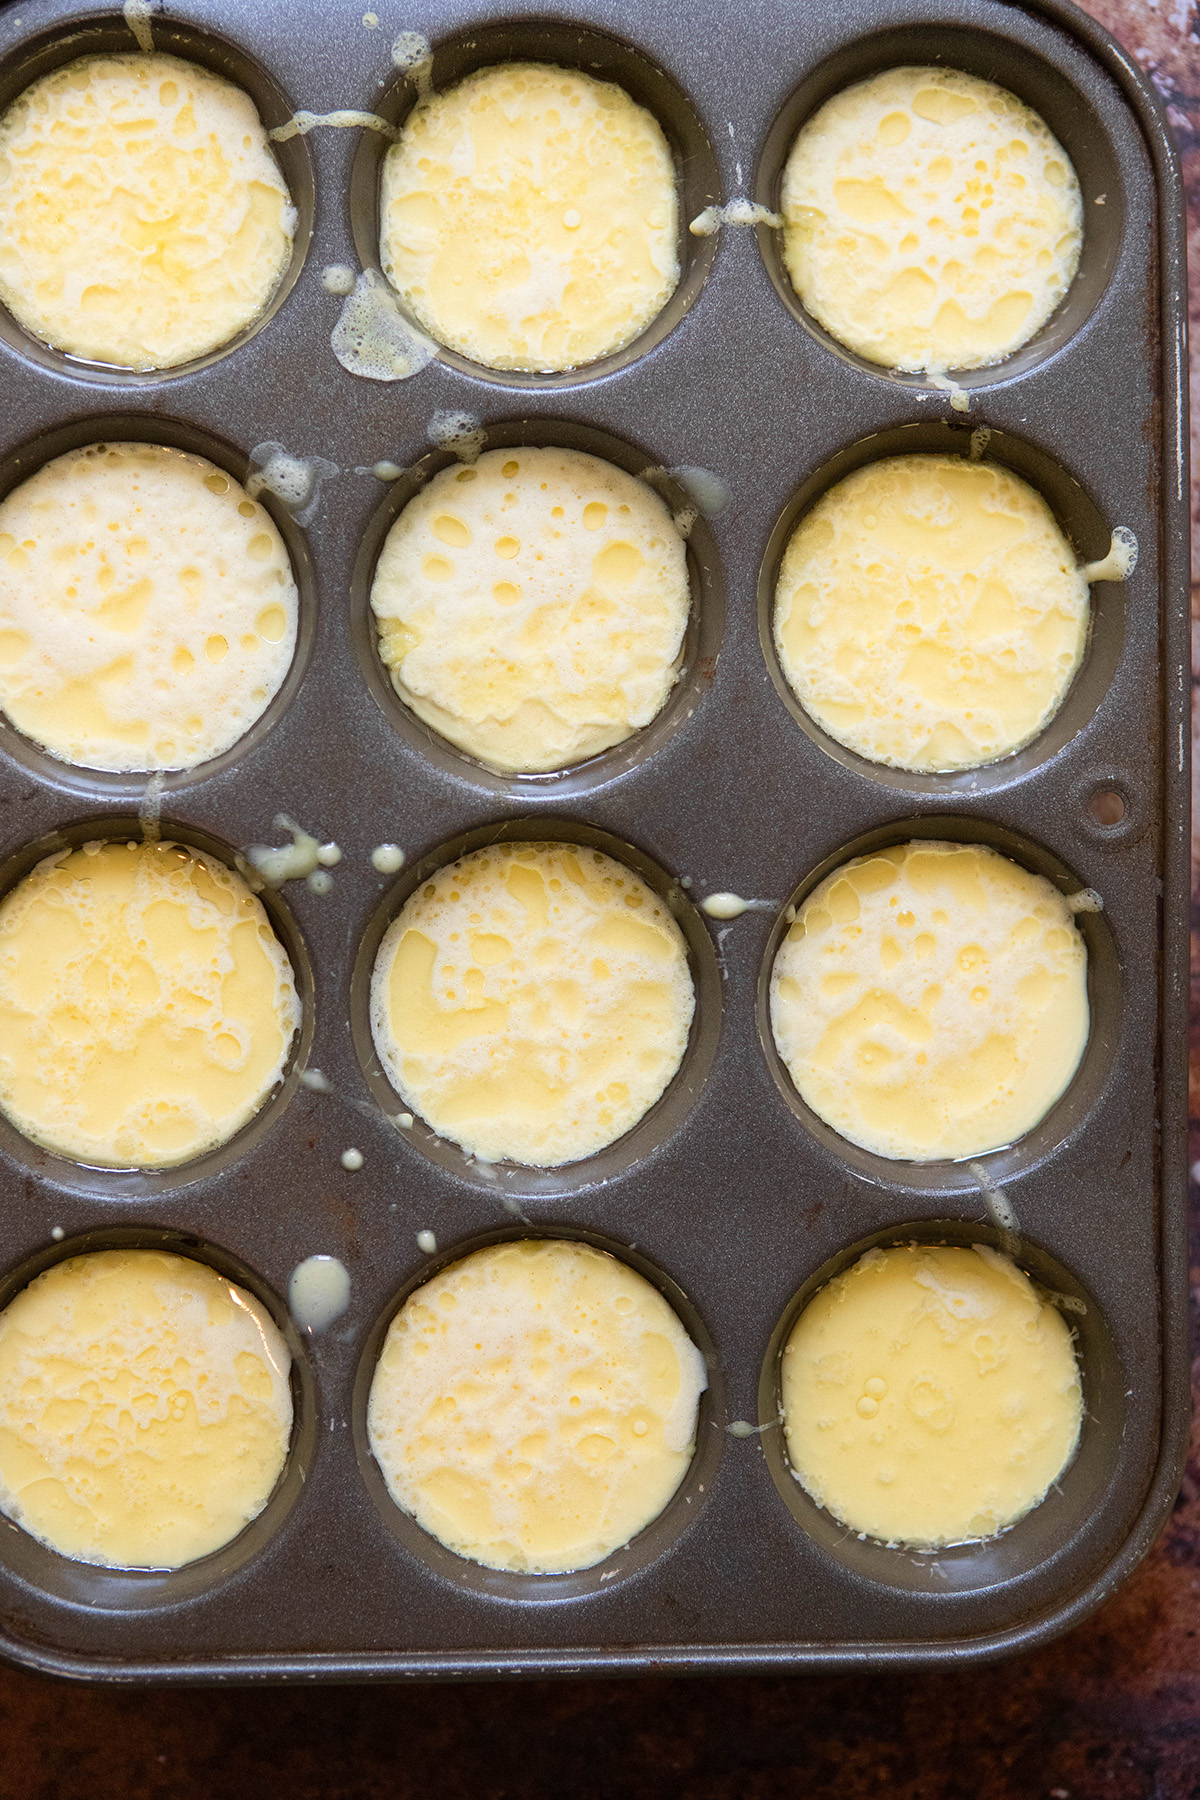
If you want to make this is individual gratin dishes, you can, just adjust your baking time depending of the size of the dish.

Best Cod Au Gratin Recipe: Classic Traditional Recipes

how to store cod au gratin?

Cooling Down: Allow the cod au gratin to cool down to room temperature for about 1-2 hours after cooking. It's important not to leave it out at room temperature for an extended period, as this can promote bacterial growth.
Refrigeration: Once it has cooled, transfer the cod au gratin to an airtight container or cover it tightly with plastic wrap or aluminum foil. Place it in the refrigerator. The dish can be stored in the fridge for up to 3-4 days.

Why should you make this cod au gratin?

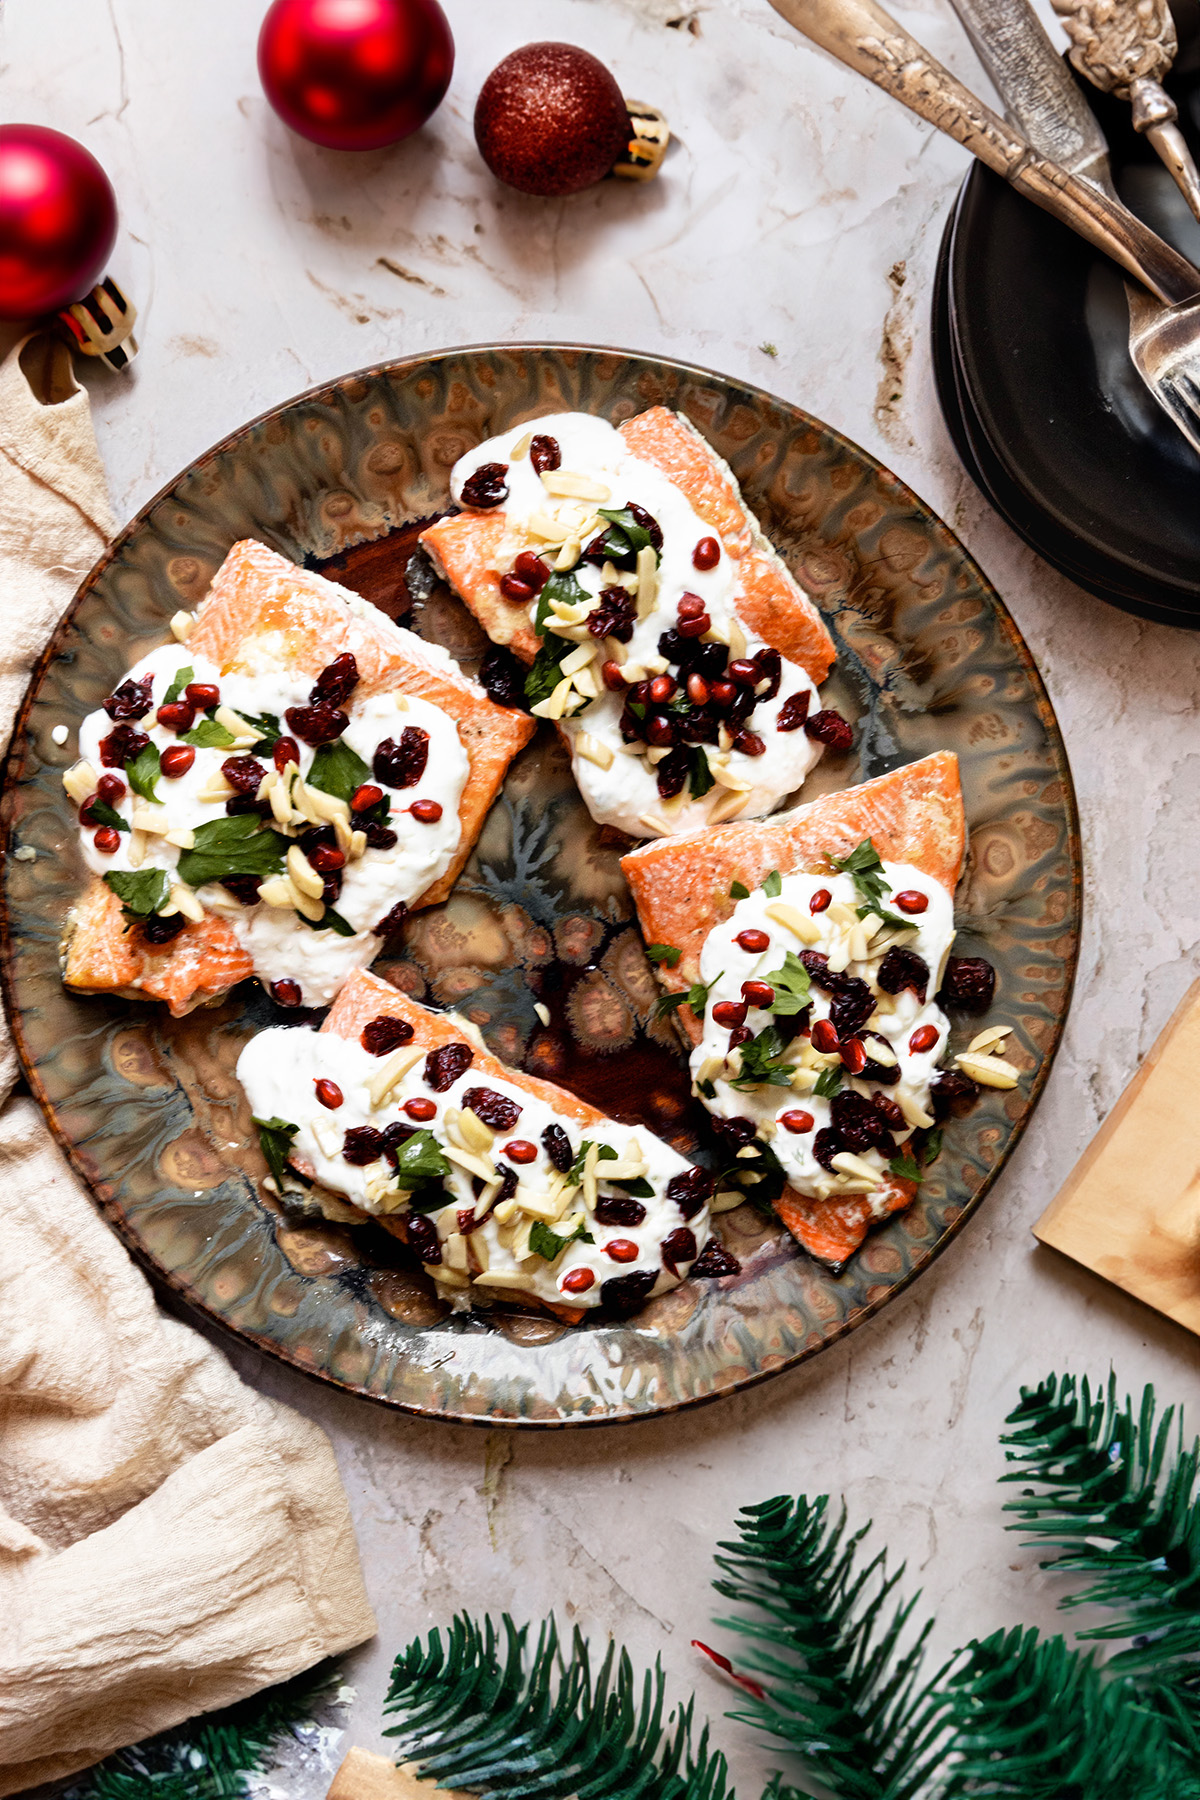
This dish only takes between 9-15 minutes of prep time, is great for the whole family, and will be one of the best new recipes you try. This cod recipe is a representation of a beautiful province (it can be argued any of the maritime provinces, Nova Scotia, New Brunswick, PEI, and Newfoundland). After a couple of spoonfuls of the gratin mixture, it will become a family favorite. 

LEAVE A RATING AND REVIEW!

Did you like this recipe? If you did, let me know! And let others know too by leaving a comment and star rating. Reviews are incredibly useful in helping other people find my site and make my recipes. Thank you so much!

Laura 

CHECK OUT OTHER RECIPES

  • Gluten Free Fish Recipes: Easy Gluten-Free Meals
  • Maple Miso Salmon Recipe: Make Easy Glazed Salmon
  • RED CURRY SALMON: EASY THAI RED CURRY SALMON RECIPE!
    Coconut Curry Salmon: Easy Thai Inspired Recipe
  • Easy Mediterranean Cod: Baked Fish Recipe with Lemon

Brown Sugar Honey Glazed Carrots Recipe: Easy & Sweet

October 4, 2023

If you are looking for the perfect side dish for a holiday (or any regular day) these brown sugar honey glazed carrots are it. They are easy, only a handful of ingredients, delicious, and ready in no time. 

Brown Sugar Honey Glazed Carrots Recipe: Easy & Sweet

If you are looking for a great side dish to accompany a main dish on your holiday table or for a special occasion, this easy carrot side dish is the best. All you need is a large skillet and a few simple ingredients in order to make these tender carrots. This recipe will no doubt become a staple of your dinner table and one of your favorite side dishes. I love to pair these carrots with my Christmas salmon or with my zaatar salmon. Let's make these carrots!

[feast_advanced_jump_to]

Ingredients for brown sugar honey glazed carrots: 

ingredients for Brown Sugar Honey Glazed Carrots Recipe: Easy & Sweet

Large Carrots: ​I like to use full size carrots in this but you could use baby carrots if you wish. The type of carrots does not really matter but I like a full size one (the cooking time is for full size)
Dark Brown Sugar: ​This is part of the sweetness of our glaze. It pairs beautifully with the natural sweetness of the carrots.
Honey: ​Honey is another part of our glaze
Garlic: I like to put garlic in this. The minced garlic helps enhance the flavor
Butter: ​Adds to the richness of the glaze
Ras El Hanout: ​this is such a warming spice, it is a great addition to your carrots

How do you make these brown sugar honey glazed carrots?


Cut the carrots: ​and set aside
Meanwhile melt the butter:​ I like to brown the butter first. Once it is melted add the carrots and the minced garlic.
Add the sugar and honey: along with the ras el hanout. The glaze is going to start to thicken and it is going to look like it is weird at points but it is fine and just go with it.
Sauté the carrots: ​for around 15-20 minutes in this glaze on a medium heat. The carrots will soften over the course of the cook time. 

browned butter in a skillet
Brown butter
carrots in a large skillet
Add the carrots and garlic
carrots in a large pan
Add the spice, honey, and sugar
Brown Sugar Honey Glazed Carrots
Cook in the pan for 15 minutes
Brown Sugar Honey Glazed Carrots
Carrots should be soft and covered in the glaze

*if you do not have honey and want a substitute for this sweet glaze, you can use maple syrup. 

Tips and tricks for brown sugar-glazed carrots:

Brown Sugar Honey Glazed Carrots

Remember that cook times may vary depending on the size of the carrots. If you cut them up into small enough pieces, it will be fine. However if you have the pieces being too big, you may need an additional 10-15 minutes of cook time. 

For best results, always remember to follow the recipe card!

Why should you make this recipe?

This is such an easy recipe and a simple side dish. Cooked carrots can be pretty bland but not this recipe. This is such an easy side dish recipe and will be a star on your holiday dinner table. It is the most delicious side dish, and I'm not saying that brown sugar glazed carrots will be the best part of your holiday meal, but, this beautiful glaze is perfection. It is a sticky glaze and the ras el hanout gives this amazing extra flavor. It is the best way to amp up your regular carrots. Even if it is not a holiday, they work perfectly for an easy weeknight meal or a family dinner. Best thing is, all of these ingredients are easily available at your local grocery store. 

LEAVE A RATING AND REVIEW!

Did you like this recipe? If you did, let me know! And let others know too by leaving a comment and star rating. Reviews are incredibly useful in helping other people find my site and make my recipes. Thank you so much!

Laura 

CHECK OUT OTHER RECIPES

  • Gluten-Free Sourdough Bread
  • Gluten-Free Sourdough Starter
  • Miso Butter Onions: Yotam Ottolenghi's Flavor Onions!
  • image
    Gluten Free Potato Recipes: Easy Gluten-Free Food

Thai-style Salmon Fishcakes

October 2, 2023

If you love a crab cake or a fish cake in general, then these Thai salmon fish cakes are the perfect recipe for you. Quick and easy to make, they are a crowd pleaser and absolutely delicious. This recipe is a great appetizer or perfect as a main dish. 

I have been on a salmon kick lately! Getting ready for the holiday season, I have my Christmas salmon, but, I have been craving Thai flavors lately. That is how my red curry salmon and these salmon fish cakes were born. I have been making salmon fish cakes for a long time but I love Thai flavors. With no Thai restaurants near me where I live, I rely on making Thai recipes at home. This recipe is packed full of flavor, is easy to make and can be easily made gluten free (or not). Let's make some Thai salmon cakes!

[feast_advanced_jump_to]

What equipment do you need to make Thai salmon fish cakes?

Food Processor: You will use this to blend all of your ingredients together
Large frying Pan: A frying pan to sauté the vegetables prior to being blended and to fry the Thai salmon fishcakes 

What ingredients do you need for Thai fish cakes?

Ingredients for Thai salmon fish cakes: Thai-style Fishcakes Recipe

Thai Red Curry Paste: This is part of the essence of our Thai flavor
Salmon Fillets: I like to use sockeye salmon for my thai-style salmon fishcake but you can use regular salmon as well
Garnish: Spring onions (green onions), cilantro, and Thai basil
Lime Juice: Lime flavor is central to Thai cooking as well as having acidity in the dish
Sweet Chili Sauce: I like to add this into the fishcakes themselves and use it as a dipping sauce 
Egg: Eggs help bind the dish together
Thai fish sauce: Fish sauce is integral to Thai cooking 
Bread crumbs: Bread crumbs are the other binding agent. I use gluten free but you can use regular or panko breadcrumbs
Sugar: Adding a bit of sugar to this dish helps balance the flavors
Onion: In addition to the fish and breadcrumb we have flavor from the onion
Red Pepper: I like to use roasted red pepper in this dish but regular red pepper is fine
Oil: for frying the vegetables and the cakes 
Mayo: Mayo is often paired with fish in Thai cooking
Garlic: Help adds to the flavor of the fish cakes
Ginger: Helps to flavor the dish

How do you make Thai salmon fish cakes?

Set oven to 400°
Prep time: the prep time for this dish is to dice up the roasted red pepper and the onion. You can also make your own breadcrumbs by pulsing bread in a food processor or you can purchase pre-made breadcrumbs or panko. 
Place oil in the pan: and sauté the green onion, onion, and red pepper until they are golden brown. Add the garlic and fry for a minute. Then add the ginger and the sweet chili sauce.
Meanwhile bake your salmon: Season your salmon with a pinch of salt and black pepper. Place on parchment paper (or a baking sheet) and put them on the baking tray. Place in the oven and bake for 10 minutes. If the internal temperature of the salmon is not 145° that is okay because they will finish cooking when you fry the cakes.
When the fish is done: place in the bowl of a food processor in addition to the rest of the ingredients. Blend together and form the cakes. 
Reuse the frying pan: from sautéing the vegetables. Add more oil and place the fish cakes in the pan. The cooking time for the salmon fish cakes is about 2-3 minutes per side. If they are golden brown, they are good to go. You can also check the internal temperature to see if it is 145°F.
Place on a platter: top with the garnishes of your choice and serve immediately.

salmon fillets
Season your salmon and place in the oven
veggies in a pan
Sauté the veggies
veggies in aa pan
Add the garlic
veggies in a pan with chili sauce
Add the chili sauce and ginger
fish and ingredients in a blender
Place the food in the food processor
food in food processor
Blend
Thai salmon fish cakes: Thai-style Fishcakes Recipe
Form the fish cakes and fry
Place on a serving platter
Thai salmon fish cakes: Thai-style Fishcakes Recipe
Look for suggestions what to serve with them in the post

When you are done with this recipe, make my Zaatar Salmon

How do I store these Thai salmon fish cakes?

In an airtight container. If you want to reheat them the next day then you can reheat them in the microwave or fry again in a pan. You can also place them in the oven if you wish. 

What do I serve these with?

A great way to serve these is with my garlic yogurt or with sweet chilli sauce. If you really want you could serve them with soy sauce (or a gluten free alternative like tamari or coconut aminos) but you don't need to!

Thai salmon fish cakes: Thai-style Fishcakes Recipe

Fresh Salmon vs Frozen Salmon

Something to keep in mind when cooking with fish that a lot of people like to look down on frozen fish. The reality is that all fish at your supermarket has been frozen at one point or another. If you purchase "fresh salmon" from the fish counter, that is fish that was frozen and then thawed to be presented at the store. Buying frozen salmon means you can use it whenever you want and not have to worry about using the fish that night for dinner. Both are good options. 

LEAVE A RATING AND REVIEW!

Did you love this recipe? If you did, let me know! And let others know too by leaving a comment and star rating. Reviews are incredibly useful in helping other people find my site and make my recipes. Thank you so much!
Laura 

CHECK OUT OTHER RECIPES

  • Best Cod Au Gratin Recipe: Classic Traditional Recipes
    Best Cod Au Gratin Recipe: Classic Traditional Recipe
  • Thai-style Salmon Fishcakes
  • Ingredients Baked Christmas Salmon Recipe: The Best Holiday Dinner
    Baked Christmas Salmon Recipe: The Best Holiday Dinner
  • Mediterranean Baked Za'atar Crusted Salmon

Quick and Easy Dark Chocolate Raspberry Tart

September 28, 2023

This recipe for chocolate raspberry tart is super simple to make and incredibly delicious. Made from an Oreo tart crust, with delicious dark chocolate, and covered in fresh raspberries, it is the ideal dessert for any chocolate lover. 

Quick and Easy Dark Chocolate Raspberry Tart Recipe

I love tarts, especially ones with fruit (see my cherry Bakewell tart and apple frangipane tart recipes). But, tarts with a smooth chocolate ganache too? It's hard to beat. It has a no bake chocolate ganache filling and is made with a gluten free Oreo crust (but of course you can use regular Oreos if you want). The whole thing can be put together in 20-30 minutes. The dark chocolate ganache filling with the fresh berries is the perfect balance of flavors. Perfect for Valentine's Day or Monday, or a Thursday, this tart is perfect for the every day treat or for a special occasion.

[feast_advanced_jump_to]

Why you’ll love this recipe:

It is such an easy dessert and has the best creamy chocolate filling. It is so delicious with its Oreo cookie crust (it really is the perfect crust) and is such a decadent dessert. This dark chocolate raspberry tart is a crowd pleaser and your guests will be begging you for the recipe after your next dinner party. 

what is chocolate ganache?

Chocolate ganache is a versatile and indulgent chocolate sauce or glaze that is made from just two primary ingredients: chocolate and heavy cream. It is known for its smooth, glossy, and luxurious texture, and it can be used in a variety of ways in baking and pastry making.

What equipment do you need for this recipe?

tart pan with a removable bottom
food processor
small saucepan

Ingredients needed for this chocolate raspberry tart?

Quick and Easy Dark Chocolate Raspberry Tart Recipe

Heavy Cream: this is the core of the ganache along with the chocolate
Dark Chocolate: I like to use a quality dark chocolate instead of chocolate chips. I have not made this recipe with chocolate chips but you can always try.
Gluten Free oreo cookies: Oreos are what make up our crust
Fresh Raspberries: The freshness of the raspberries pairs beautifully with the dark chocolate ganache
Vanilla Extract: Even though this is a chocolate based recipe, vanilla extract helps enhance flavor.
Butter: no need for it to be room temperature because you will melt it to blend together with the Oreos 

Tips, Tricks, and Alterations

I am not a vegan baker but if you wanted to try to make this recipe vegan it would be simple enough to do. Oreos by their nature are vegan. You can use a vegan melted butter to make your crust and sub out the heavy cream with coconut cream (do not use coconut milk- it is not thick enough). Coconut, dark chocolate, and raspberries always go really nicely together. I have not tried this but if you give it a go, let me know in the comments down below.

If you do not want a chocolate crust you would try graham crackers(if you want to continue for it to be gluten free, use a gluten free graham cracker crust). If you cannot find oreos and want a similar gluten free cookie, I suggest using Glutino.

If you want even more raspberry flavor, after you have chilled your tart and the chocolate mixture has hardened, you could add a layer of raspberry jam on top of the tart and then place the fresh raspberries on top of the jam.

If you do not want to use dark chocolate, you can substitute milk chocolate.  I have never tried it with white chocolate but you could also try that.

For the best results and outcome, always refer to the recipe card. 

How to make this chocolate raspberry tart?

Set oven to 350°F
In the bowl of a food processor: add the melted butter and oreo cookies. Pulse until you get fine crumbs. Make the tart shell by pouring the cookies into the tart pan. Use a measuring cup to press the crumbs into the tart and even everything out.
Place in the oven: If you want to place the tart pan on a baking sheet you can (it makes it easier to take in and out of the oven). Bake for 7-8 minutes.
Make the filling: In the pot, heat the cream on a low heat. You want the cream to get warm but not to boil. Remove from the heat and add in the chocolate. Mix until it is smooth. You do not need a double boiler to make this rich chocolate ganache. Just a pot. 
Remove the tart from the oven: and pour the chocolate into the tart. Place in the fridge for at least 2 hours. Overnight is ideal. 
Remove from the fridge: After the appropriate amount of time, remove this chocolate ganache tart from the fridge and top with raspberries. Serve immediately with pastry cream, whipped cream, or by itself it is so good. 

pulsed oreo cookies
Place Oreo cookies with melted butter into food processor and pulse
oreo tart crust
Use a measuring cup to press the cookies into the tart pan. Bake for 7-8 minutes
cream in a pot
Heat cream
cream and chocolate in a pot
Add the chocolate to warm cream
melted chocolate in a pot
Mix until chocolate is fully melted
chocolate tart on a baking sheet
Pour into tart shell and place in the fridge for at least 2 hours
Quick and Easy Dark Chocolate Raspberry Tart Recipe
When ready to serve, place raspberries on top
Quick and Easy Dark Chocolate Raspberry Tart Recipe
Slice and Serve

When you are done making this recipe, make my custard apple tart.

what are ways to use chocolate ganache?

Chocolate ganache is a versatile and delicious component in the world of baking and pastry making. Here are various ways to use chocolate ganache in your culinary creations:

  1. Cake Glaze: Pour warm or slightly cooled ganache over cakes for a smooth and glossy finish. Allow it to set for a stunning, professional appearance.
  2. Cupcake Frosting: Use ganache as a frosting for cupcakes. You can achieve different textures by allowing it to cool and thicken slightly or whipping it for a lighter, mousse-like frosting.
  3. Truffle Filling: Let ganache cool and set, then roll it into small balls to create homemade chocolate truffles. Coat them in cocoa powder, powdered sugar, or chopped nuts for added texture and flavor.
  4. Chocolate Tarts: Use ganache as a filling for chocolate tarts or tartlets. It creates a rich and velvety center when set.
  5. Brownie or Bar Topping: Spread ganache over brownies, bar cookies, or other baked goods for an extra layer of decadence.
  6. Doughnut Glaze: Dip doughnuts in warm ganache for a luscious coating. 

How to store?


You can store this in the fridge for 3-5 days. It does not need to be wrapped in plastic wrap. 

LEAVE A RATING AND REVIEW!

Did you love this recipe? If you did, let me know! And let others know too by leaving a comment and star rating. Reviews are incredibly useful in helping other people find my site and make my recipes. Thank you so much!
Laura 

FIND MORE OF MY FAVORITE TART RECIPES BELOW

Baked Christmas Salmon Recipe: The Best Holiday Dinner

September 27, 2023

Ingredients Baked Christmas Salmon Recipe: The Best Holiday Dinner

If you are looking for something other than meat to be the centerpiece of your Christmas dinner, look no further than this Christmas salmon. This salmon dish is perfect for special occasions and will be a perfect centerpiece for your table on Christmas day.

Baked Christmas Salmon Recipe: The Best Holiday Dinner

I live in a pescatarian household and therefore our Christmas looks a bit different. Salmon is such a versatile fish in the ways you prepare it and this recipe is a delicious way to celebrate the fish. Baked with a delicious glaze, topped with a creamy dill sauce and holiday tapenade, it is the perfect centerpiece for your Christmas table (or really any time during the holiday season). Who needs the traditional turkey? Do something a little different and make this delicious Christmas salmon.

[feast_advanced_jump_to]

What equipment do you need?

Roasting dish or baking tray
Tin foil or parchment paper
Bowls
Paper Towels
Serving platter

Why should you make this Christmas salmon?

This holiday salmon is made with simple ingredients but shines as a main course. It is on par with any of the traditional main dishes for Christmas eve or Christmas day. Once you make it, it will no doubt find a home in the repertoire of your Christmas recipes. The fresh herbs in the sauce, and the flavors of the holiday tapenade make this a great option for anyone who is looking for a main course that does not contain meat. It will be a delicious centrepiece on your holiday table. 

What are the ingredients needed for Christmas salmon?

Salmon Fillets:​ Salmon is our protein for this dish
Greek Yogurt: Greek yogurt is the base of our creamy dill sauce
Lemon Juice: this is for our dill sauce
Garlic: garlic goes into our glaze and also in the dill sauce
Honey: this is used 
Dill: Dill is such a great herb and it pairs beautifully with the yogurt and salmon
Dried Cranberries: The cranberries go into our holiday tapenade 
Champagne Vinegar: The acidity helps enhance the flavors of the tapenade 
Slivered Almonds: The flavor and texture are part of the tapenade
Parsley: gotta have fresh parsley to finish off the fish
Butter: to add to the richness of the glaze for the salmon
Pomegranate seeds: ​They are the final pop of beauty to our Christmas salmon

How do you make Christmas salmon?

Set the oven: ​to 400°F
Pat down the salmon: with paper towel. You do not want the fish to have too much excess water. Season the salmon with sea salt and black pepper.
Make the glaze: brown the butter. Once browned, add the garlic and honey. 
Place the salmon skin side: down on either tin foil or parchment paper on your baking sheet and cover with the honey glaze.
Put the baking sheet: into the preheated oven and bake for 13 minutes. Meanwhile make the dill yogurt.
Mix the lemon juice: ​greek yogurt, minced garlic, and dill in a bowl. Set side
Made the holiday tapenade: add the slivered almonds, vinegar, honey, pomegranate seeds, dried cranberries, and parsley. Set aside.
Remove the salmon: ​from the oven and place on a large platter. Place the dill yogurt on top of the salmon. Then top the yogurt with the holiday tapenade. Serve immediately.

Baked Christmas Salmon Recipe: The Best Holiday Dinner
Ingredients for Christmas Salmon and glaze
Ingredients Baked Christmas Salmon Recipe: The Best Holiday Dinner
Ingredients for dill sauce
Ingredients Baked Christmas Salmon Recipe: The Best Holiday Dinner
Ingredients for holiday tapenade
glaze in a pan
make the glaze
baked salmon on tin foil
pour the glaze over the salmon and bake
dill and yogurt in a glass bowl
meanwhile make the dill yogurt
dill yogurt ingredients in s bowl
add the garlic, dill, lemon juice and yogurt into a bowl
dill yogurt
mix together
holiday tapenade
set aside and make the holiday tapenade
Baked Christmas Salmon Recipe: The Best Holiday Dinner
Remove the salmon from the oven
Baked Christmas Salmon Recipe: The Best Holiday Dinner
top with the dill yogurt and tapenade

​*The internal temperature of cooked fish is 145°. 

Tips and Tricks:

If you cannot find champagne vinegar, you can sub in orange juice or apple cider vinegar. 

I made this using individual salmon fillets but you can use whole salmon filet if you want something more presentable with a dinner party or holiday dinner. The best part is this recipe works just as well. You would roast whole salmon fillets as you would individual salmon fillets but you need to remember that this will take longer to cook. So keep that in mind should you roast a whole salmon.

Instead of using honey, you can also use maple syrup.

Baked Christmas Salmon Recipe: The Best Holiday Dinner

How do you store Christmas salmon?

Place the individual portions in an airtight container and but in the fridge for a few days. Easy peasy! This recipe pairs beautifully with my herb potatoes or my creamy mashed potatoes. If you want to pair it with something traditional from your holiday table then a cranberry sauce would be perfect. If you are looking for a drink, this would pair well with a white wine or a sparkling cider.

LEAVE A RATING AND REVIEW!

Did you like this recipe? If you did, let me know! And let others know too by leaving a comment and star rating. Reviews are incredibly useful in helping other people find my site and make my recipes. Thank you so much!
Laura 

CHECK OUT OTHER RECIPES

  • Red Curry Salmon: Easy Thai Red Curry Salmon Recipe!
    Red Curry Salmon: Easy Thai Red Curry Salmon Recipe!
  • Slow Roasted Salmon with Herb Butter
    Slow Roasted Salmon
  • Quick and Easy Moroccan Salmon
    Moroccan Salmon

Baked Apple Empanadas: Easy Empanada (Hand Pies) Recipe

September 25, 2023

This recipe for homemade apple empanadas is quick, easy, and super delicious. It can easily be modified to make the Taco Bell inspired caramel apple empanadas as well! Let's make our dessert empanadas. 

Baked Apple Empanadas: Easy Empanada (Hand Pies) Recipe

I love hand pies and pasties. They can be sweet or savory and in this case, these apple empanadas are sweet with their apple pie filling and salted caramel sauce that goes on top. These delicious treats are ready in under an hour. Let's make our mini apple pies aka apple empanadas. The perfect sweet treat!

What are sweet empanadas?

Sweet empanadas, also known as "empanadas dulces" in Spanish, are a delightful and popular variation of the traditional savory empanadas. Empanadas are a type of pastry or turnover that originated in Spain and have been embraced by many Latin American and Hispanic cultures. While savory empanadas are typically filled with ingredients like meat, vegetables, or cheese, sweet empanadas are filled with sweet fillings, making them a delicious dessert option.

Baked Apple Empanadas: Easy Empanada (Hand Pies) Recipe

Here are some common types of sweet empanadas and their fillings:

  1. Fruit Empanadas: These sweet pastries are often filled with a variety of fruits. Some popular choices include apple, peach, guava, and pineapple. The fruit is usually sweetened and spiced with ingredients like cinnamon and sugar.
  2. Cream or Custard Empanadas: These empanadas feature creamy and custardy fillings. Vanilla or chocolate custard, pastry cream, or sweetened ricotta cheese are common choices. They can be flavored with extracts like vanilla or almond.
  3. Dulce de Leche Empanadas: Dulce de leche, a sweet caramel-like sauce made from condensed milk, is a favorite filling for sweet empanadas. It's rich, gooey, and incredibly sweet, making it a popular choice among those with a sweet tooth.
  4. Nut-Filled Empanadas: Some sweet empanadas are filled with nut-based fillings, such as chopped nuts mixed with honey, sugar, or syrup. Almonds, walnuts, and pecans are commonly used.
  5. Chocolate Empanadas: These empanadas are filled with chocolate in various forms, such as chocolate chips, chocolate ganache, or Nutella. They are a chocolate lover's dream.
  6. Cheese and Fruit Empanadas: These empanadas combine the sweetness of fruit with the creaminess of cheese. Common pairings include cream cheese with berries or queso fresco with guava paste.

Sweet empanadas are typically made by preparing a sweet pastry dough, which may include ingredients like sugar and sometimes a hint of cinnamon or citrus zest for added flavor. The dough is rolled out, filled with the sweet filling of choice, folded over, and sealed. They are then baked until golden brown or fried until crispy, depending on regional preferences.

Equipment Needed for this recipe

Baking Tray (or baking sheet)
Rolling pin (or a tortilla press)
parchment paper (or wax paper)
Large bowl
Food processor
Heavy Bottom Pot
Pastry Brush

Why you'll love this apple empanadas recipe?

It really is the perfect dessert. These delicious apple empanadas are super simple to make. They have this sweet caramel apple filling, and they would pair amazingly with a scoop of vanilla ice cream.

Tips, Tricks, and Alterations:

For best results, always follow the recipe card.

If you want to make this like the taco bell empanada, add a caramel sauce to the apple mixture (check out my miso caramel sauce- it would work great!). 

You can always add more all spices to the apple mixture such as ground cloves, ginger, etc.

Frying vs baking:

You can deep fry these if you want but be sure to use a clear oil like vegetable oil or canola oil. Do this in a heavy bottom pot, and fry until golden brown. 

Ingredients for apple empanadas:

Baked Apple Empanadas: Easy Empanada (Hand Pies) Recipe

Pie Dough: You can use a store bought pie dough or make your own. I use my gluten free pastry dough recipe
Apples: I use honeycrisp for this recipe but any baking apple is good
Brown Sugar: brown sugar helps add a caramel flavor to the apple filling
Cinnamon: Helps flavor our filling
Turbinado Sugar: I cover my baked apple empanadas with this to give them extra sweetness and crunch
Egg: Egg goes into my pie crust and is used for an egg wash
Icing Sugar: To help make the caramel drizzle
Vanilla Extract: Helps enhance the flavor of our filling and drizzle
Salted Caramel Syrup: For our drizzle
Corn Starch: ​To help thicken the filling

How do you make these apple empanadas?

Set oven to 350°F
First make your dough: if you are making homemade empanada dough and want to use my recipe, use my gluten free pastry dough recipe. Put the ingredients in the bowl of a food processor and pulse until it comes together. Set it aside.
Make the filling: Cut up the apples into small pieces and place in a heavy bottom pot. On medium heat, add the brown sugar and vanilla extract. Allow the apples to break down. They won't get super mushy but they will be soft. The juices from the diced apples along with the sugar will be getting very sticky and bubbling. This should take around 15-20 minutes. At this point, mix the cornstarch and water together in a separate bowl and pour it into the pot. Stir for a few more minutes then remove from the heat and set the apples into a bowl. 
Bring them together: in a tortilla press (or between two pieces of parchment paper) place a ball of the empanada dough. If using a tortilla press, place between the pieces of parchment, and then into the press. Push down and get it to the thickness you desire. If using a rolling pin, roll it out to the thickness you like. Scoop some of the filling onto the empanada discs. Fold it over and use a fork to press the edges together to seal it.  
Cover in egg wash: In a bowl, crack an egg and whisk. Using a pastry brush, brush the empanadas with it and. then place turbinado sugar on top of each empanada. Place into the oven and bake for 20-25 minutes. Check to see how golden they are. Baking time is up to 30 minutes. 
Make the glaze: in a small bowl, add the powdered sugar, vanilla, and salted caramel syrup. Whisk until it comes together. If it is too thick, add more water. 
Remove from the oven: and cover in the glaze. Serve and enjoy.

​

diced apples and brown sugar in a pot
Add apples, brown sugar, and vanilla to a pot and boil down.
cornstarch mixture
Make your cornstarch mixture
apple filling for empanadas
Add it to the apple filling mixture
apple filling and a tortilla press
Make the empanadas
Baked Apple Empanadas: Easy Empanada (Hand Pies) Recipe
Fold over the dough and crimp
Baked Apple Empanadas: Easy Empanada (Hand Pies) Recipe
Brush with egg wash and top with sugar and bake
glaze
Make the glaze
Baked Apple Empanadas: Easy Empanada (Hand Pies) Recipe
When the apple empanadas finish baking, take them out of the oven, cover in glaze, and serve

When you finish with this recipe, check out my apple frangipane tart

How do you store these apple empanadas:

​In an airtight container on the counter for 3-5 days. Icing you can also store on the counter or in the fridge.

LEAVE A RATING AND REVIEW!

Did you love this recipe? If you did, let me know! And let others know too by leaving a comment and star rating. Reviews are incredibly useful in helping other people find my site and make my recipes. Thank you so much!
Laura 

FIND MORE OF MY FAVORITE TART RECIPES BELOW

Cherry Bakewell Tart Recipe: Mini Frangipane Tarts

September 24, 2023

CHERRY BAKEWELL TART RECIPE: MINI FRANGIPANE TARTS

This recipe for Cherry Bakewell tart is the perfect dessert. It can be made as a traditional size tart or in these perfect bite-sized portions. It is the perfect dessert, with its almond essence and layer of cherry jam.

Cherry Bakewell Tart Recipe: Mini Frangipane Tarts

I love frangipane recipes! They are some of my favorites and frangipane tarts are hard to beat (see my pear and frangipane tart and peach frangipane tart). Cherry Bakewell Tarts are no different. I love the ease of this recipe yet the delicious flavor that it yields. They are incredibly simple to make and will quickly become your favorite new dessert.Let's make some individual cherry Bakewell tarts. 

What is a Bakewell Tart?

A Bakewell Tart is a traditional British pastry dessert that consists of a sweet, shortcrust pastry shell filled with a layer of fruit jam, often raspberry or strawberry, and topped with a frangipane mixture made from ground almonds, sugar, butter, and eggs. It's typically baked until the pastry is golden brown and the almond filling is set. Sometimes, it's garnished with flaked almonds and a drizzle of icing sugar glaze.

History of Bakewell tarts:

The history of the Bakewell Tart is a bit convoluted, but it is primarily associated with the town of Bakewell in Derbyshire, England. The dessert's precise origins are a subject of debate, and its creation is often credited to a happy baking accident.

According to popular legend, the Bakewell Tart's creation dates back to the 19th century when a cook at the Rutland Arms Inn in Bakewell misinterpreted a recipe. Instead of stirring the egg and almond mixture into the pastry as intended, the cook spread it over a layer of jam. This accidental variation turned out to be a delicious success, and the dessert became known as the Bakewell Pudding.

The Bakewell Pudding soon gained popularity and became a local specialty in the town. Over time, variations of the recipe emerged, and the term "Bakewell Tart" began to be used more broadly, encompassing both the original pudding and the tart. The exact evolution of the recipe and the transition from pudding to tart is not entirely clear, but what remains consistent is the combination of jam, almond filling, and pastry that defines the Bakewell Tart we know today.

Today, Bakewell Tarts and Puddings are celebrated as quintessential British desserts and are enjoyed both locally and internationally. They continue to be a delightful treat for those who appreciate the harmonious blend of sweet, fruity jam, and nutty almond filling encased in a buttery pastry shell.

Cherry Bakewell Tart Recipe: Mini Frangipane Tarts

Why You'll love this Cherry Bakewell Tart Recipe:

Irresistible Flavor Profile: This recipe perfectly balances the sweet and tart flavors of cherry jam with the rich, nutty essence of almond frangipane. The combination creates a symphony of flavors that are both comforting and indulgent.
Textural Delight: The contrast of textures is a standout feature. The crisp and buttery pastry shell pairs beautifully with the moist and almond-infused frangipane filling, offering a satisfying mouthfeel in every bite.
Classic British Dessert: It's a classic British dessert with a storied history, which adds a sense of tradition and nostalgia to your culinary experience.
No need to blind bake: You can skip this step. Which means no need for pie weights or extra time.

Tips and Tricks for this recipe:

You do not need to blind bake this recipe nor do you need a special tart tin. A muffin tin is all you need. If you wish to make them bigger you could use mini tart pans or if you wanted to make a full size tart, you could use a full size tart pan. Do be aware that the larger you make the tarts, the longer they will need to bake. 
For best results always follow the recipe card. 

What Equipment do you need for this recipe?


A Food Processor
Muffin Tin
Electric Mixer (if you do not have a stand mixer then a large bowl and an electric hand mixer)
Wire Rack
Small bowl
Whisk
Rolling pin, cookie cutter, and parchment paper, if making your own pastry dough

Ingredients needed for this Cherry Bakewell Tart:

ingredients for cherry bakewell tart

Almond Flour: almond flour is the core of our almond frangipane sponge layer. While it's not a "cake" when baked, it is super moist and delicious. I do not recommend using store bought almond paste but rather making your own. 
Almond Extract: Even though we have almond flour in the recipe, you still want a strong almond flavor and that will come from the almond extract.
Pastry Dough: You need a pastry case for our mini cherry Bakewell tart recipe. I use my gluten free pastry dough recipe but you can use your own recipe, mine, or store bought.
Butter: Butter goes into our frangipane filling (as well as pie crust)
Eggs: the whole egg (not just the egg yolk) is the binding agent in the frangipane
Cherry Jam: Cherry jam is used in this recipe rather than the traditional raspberry jam. 
Caster Sugar: We have sugar to sweeten the frangipane
Powdered Sugar: this is the base of our glaze for the top of our tarts
Lemon Juice: this is used to mix with the powdered sugar
Maraschino Cherry: The very top of our tarts is topped by a bright maraschino cherry

Step by Step Instructions: How do you make this cherry Bakewell recipe?

- Set oven to 350°F
- Make the pastry base: If you are using your own pie crust or pastry dough recipe, then follow the instructions for that. If you are wanting my recipe, make the dough, place between two pieces of parchment paper and roll it out until thin. Cut with cookie cutters or pastry cutters.
- Line the muffin tin: with the pastry that you used the cookie cutters to cut. Make sure they sit well in the muffin tin. Poke the bottom with a fork.
- Place the cherry jam: with a spoon, line the bottom of the pastry dough with jam. 
- Make the frangipane: To make the frangipane, in the bowl of a stand mixer (or a large mixing bowl) add room temperature butter, almond meal (same as almond flour), egg, sugar, and almond extract. Mix on a medium speed. The frangipane will come together and be sticky and soft.
- Fill the pastry cups: with the frangipane filling. You can do this with a spoon and then smooth it out with your hands if you wish.
- Place in the oven: bake for 25-30 minutes. They should be golden brown when they are finished. Remove from the oven when they are done baking and place on a wire rack. Allow them to cool completely before covering them in the glaze.
- Make the glaze: in a small bowl, mix the icing sugar and lemon juice together. The glaze should be thick but smooth. 
- Cover the tarts: Cover the tarts with the glaze but using a spoon. Top with a maraschino cherry that you have patted down with a paper towel to remove excess liquid. 

sugar and butter in a bowl
Place the butter and sugar in a mixing bowl and cream them together
makings of frangipane in a mixing bowl
Add almond flour, egg, and the almond extract, make the frangipane
cherry jam
If you are making your cherry jam from scratch, make it by placing sugar, cherries, and lemon juice into a pot and boil it down. When boiled down, add cornstarch to ⅓ cup of water in a separate bowl. Add to the pot, and your jam is done.
pastry dough between parchment
After making the pastry dough (or using store bought) place it between two pieces of parchment and roll it out thinly.
pastry dough rolled out with cuts in it
Use a cookie cutter to cut out the pastry dough
tartlets in a muffin tin
Place the cut out pastry in the muffin tin and poke the bottom with a fork
tartlets with jam in the bottom for cherry bakewell tarts
Place the cherry jam on the bottom
Cherry Bakewell Tart Recipe: Mini Frangipane Tarts
Fill the pastry cups with the frangipane and bake until golden brown
Cherry Bakewell Tart Recipe: Mini Frangipane Tarts
Make the glaze
Cherry Bakewell Tart Recipe: Mini Frangipane Tarts
Cover the cherry Bakewell tart with the glaze
Cherry Bakewell Tart Recipe: Mini Frangipane Tarts
Place a maraschino cherry on top

After you are done with this recipe, make my rhubarb tart.

Recipe Variations:

You really can use any kind of jam in the bottom of the tart case. Raspberry jam or strawberry jam would be the most typical choices. You could also do lemon or apricot. If you want to play with the glaze, you can mix different juices with the icing sugar. You would no longer have the traditional white icing but you could have a beautiful shade of pink if you chose a pomegranate juice to make your glaze instead. 

Know that even though I am a gluten free baker than the recipe works as a 1:1 recipe. 

I am not a vegan baker and therefore have not tried this recipe dairy free or egg free. If you do try it, let me know in the comments.

How do I store this cherry Bakewell tart?

In an airtight container for 2-3 days is best. I like to keep mine at room temperature but you can of course place them in the fridge. 

LEAVE A RATING AND REVIEW!

Did you love this recipe? If you did, let me know! And let others know too by leaving a comment and star rating. Reviews are incredibly useful in helping other people find my site and make my recipes. Thank you so much!
Laura 

Find more of my favorite Tart Recipes below

Remember to sign up for my newsletter to stay in the know!

Delicious Irish Pasty

September 20, 2023

IRISH PASTIES RECIPE: DELICIOUS IRISH PASTY RECIPES

This recipe for Irish pasties is perfect for any day (or St Patrick's day). Similar to Cornish pasties, but with their own spin, this delicious pastie supper will become a staple in your kitchen in no time.

Irish Pasties Recipe: Delicious Irish Pasty Recipes

Pasties are such a fabulous food because they are filled with hearty ingredients and are encased with pie crusts. There are different ways to make them and I love them so much that I have recipes for cheese and onion pasties, a vegetarian pasty recipe, gluten free pasty, and pumpkin pasties (as well as how to reheat and make frozen pasties). I just love them. When I heard that Irish pasties existed, I knew I had to make those as well. From the information I could gather, Irish pasties are more traditionally found in northern Ireland, have either ground beef or corn beef in them, which separates them from the traditional Cornish pasty. The thing is, my household is pescatarian, so, I have therefore subbed out the beef for a plant-based meat. I hope everyone in Ireland and Northern Ireland will forgive me! Let's make my version of a Traditional Northern Irish pasty. 

History of Irish Pasties

Irish pasties, also known as Irish meat pies, a hand-held pie, or simply "pasties," have a long history and are a traditional savory dish in Irish cuisine. While their exact origin is not definitively documented, they are believed to have evolved as a convenient and practical meal for Irish miners and laborers during the 18th and 19th centuries.

The key characteristics and historical context of Irish pasties are as follows:

  1. Miner's Lunch: Irish pasties were originally popularized in the mining regions of Ireland, particularly in counties like Cornwall and Dublin. Miners needed a portable and hearty meal that could withstand the harsh conditions of the mines, and pasties fit the bill perfectly.
  2. Filling: Traditional Irish pasties typically contain a savory filling made from diced or minced meat (such as beef or lamb), potatoes, onions, and sometimes additional vegetables like carrots or turnips. Seasonings like salt, pepper, and herbs are used to flavor the filling.
  3. Pastry: The pastry used for Irish pasties is often a simple and sturdy shortcrust pastry. This pastry was ideal for protecting the filling and keeping it warm until mealtime.
  4. Half-Moon Shape: Irish pasties are typically folded into a distinctive half-moon shape (half circles). This design made them easy to handle and eat without utensils, a crucial feature for miners working in remote locations.
  5. Baking: The pasties were baked until the pastry became golden brown and crisp, creating a protective shell around the filling.
  6. Portable and Nutritious: Irish pasties were not only filling and convenient but also nutritious, providing the miners with sustenance and energy during their demanding workdays.

It's worth noting that while Irish pasties share similarities with other regional pasty traditions, such as the Cornish pasty in Cornwall (also originally linked to Cornish miners), they have their own unique characteristics and regional variations.

Today, Irish pasties remain a popular comfort food and street food in Ireland. They are enjoyed not only for their historical significance but also for their delicious and satisfying flavor. You can find them in bakeries, pubs, and at various events throughout Ireland, and they continue to be a beloved part of Irish culinary heritage.

WHY SHOULD YOU MAKE THese irish pasties?

It is such a great meal! This is a really good pasty recipe in that it has a bunch of flavor and is super easy to make! The filling is a really rich filling and it leaves you completely sated! Plus, who doesn't love a bit of international flavor in their kitchen?

Irish Pasties Recipe: Delicious Irish Pasty Recipes

TIPS AND TRICKS

For best results always follow the recipe card

Even though my recipes are gluten free, I am not a vegan baker. Therefore, if you do try to make these little pasties vegan, you would need to use a vegan cheese, omit the egg (or find an egg substitute), and find a dairy free substitute for your crust. If you do decide to try it as a vegan recipe, let me know in the comments how it goes!

If you want to try to make this more like a pub food, you can deep fry the pasty and serve it with french fries!

You can add any kind of savory meat (or faux meat) that you would like. 

WHAT EQUIPMENT DO YOU NEED?

Baking Tray (or baking sheet)
Rolling pin (or a taco press)
parchment paper (or wax paper)
Large bowl
Food processor

INGREDIENTS FOR GLUTEN FREE PASTIES

ingredients for irish pasties

Onion: the onion mixture in this recipe is so delicious from the caramelization of the onions
Cheddar Cheese: a classic cheese, I use a mature cheddar cheese to really enhance the flavor of the cheese mixture. Aged cheddar is a delicious cheese and it is hard to beat in a pasty.
Fresh Thyme: Such a great flavor that brings out the cheesy filling
Gluten free all purpose flour: (make sure to use one with xanthan gum). This is if you want to make your own pastry and make it gluten free. You can use whatever pie dough you like for this recipe. 
Butter: Butter is used in the crust. Make sure you are not using room temperature butter, you need very cold butter.
Egg: Egg is used in our recipe twice. Once in the crust and once as an egg wash that goes on top of the pasty prior to being baked.
Water: A bit of water goes into our pie dough to help it come all together
Garlic Bouillon: Roasted garlic bouillon is a great source of flavor to savoury fillings and that is just as true in this recipe.
Black Pepper & Salt: Seasoning is always key to cooking!
Oil: To help fry the onions 
Cold Water: for our pie dough if you want to make my gluten free pastry dough. 
Leek: Leek is a great vegetable and adds some great flavor to the pasty
Carrot: Carrots are sweet by nature and sweeten the dish
Rutabaga: A great root vegetable, it makes for a fantastic pasty filling
Dijon Mustard: For some extra flavor
Beyond Meat: As stated above, I live in a household where we don't eat meat. To keep the spirit of the Irish pasties, I have subbed in plant-based meat but you are welcome to use ground beef or corn beef. Just cook those according to their instructions.

HOW DO YOU MAKE Irish pasties ? 

First you are going to make your dough: Add the flour, cold butter that is cubed, egg, and 1-2 teaspoon of cold water into your food processor. Blend until it comes together to form a dough. Place in the fridge after you have covered with plastic wrap to preserve it. 
To make your filling:  Cut up the potatoes. Place them in a pot and fill it with water. Salt your water, it will help add flavor to the food. Boil until soft.
Saute Onion: Slice the onions. You can keep them longer (as if making caramelized onions) or dice them to ensure that each pasty will have plenty of onion. On medium heat, heat around 2-3 tablespoons of canola oil in a pan, and place the onions in. Allow them to turn golden brown. Set Aside.
Cook the sausage meat: follow the instructions on the package and once the sausage is cooked, set aside.
Sauté the carrot and leek: in the mustard with a teaspoon of oil. Once soft, add to the onions. Then add the boiled potatoes allow it to start to come together to form a sort of mash. 
Add the thyme: add the 2 tablespoons of fresh time, and continue to stir. Begin to season with garlic bouillon, salt, and pepper (do one pinch of salt at a time). Stir to make sure it is incorporated.  Once you feel the flavor is balanced, add the 1 cup of cheddar cheese to the potato mixture. Once the filling has come together, add the sausage, and set it aside so it can cool until the point where it is lukewarm. You can transfer it to a large mixing bowl or keep it in the pan that you cooked it in. 
Putting them together: Heat your oven to 350°F. This recipe can make 8-9 small pasties or if you wish to make large pasties, it will likely make 3 or 4. 
To make your pie crust for your gluten free pasties, you can do this one of two ways.
Take two piece of parchment paper, then take a ball of dough and place it between them. Use your rolling pin to roll it out until it is the size of a corn tortilla. 
On a taco press, take two pieces of parchment paper, and place a ball of pie dough between them. Press down, and do this until it is the size of a corn tortilla. You will want pastry circles.
Once it is the size you want: scoop in the filling. Place it in the center of the dough in a line going across. Put enough filling but make sure you do not add too much filling, you do not want the pasty to pop open while it is baking. Fold the dough over, and crimp the dough along the edges of the pastry. Do this until all of the filling and dough is gone. 
Once the pasties are assembled: place the pasties onto a prepared baking sheet ) on baking sheets lined with parchment paper). Slit holes onto the top of each gluten free pasty to ensure that air can properly escape while baking. Now, take a beaten egg and brush the egg mixture onto the top of each pasty. Cut small slits on the top of each pasty. Place in the preheated oven and bake for 25-30 minutes or until golden brown. When removed from the oven, allow them to sit for a few minutes. You do not want to burn your tongue when you bite into them

potatoes and onions
Peel the rutabaga and chop it along with the potatoes, place in a pot and fill with water. Boil until they are soft.
onions in pan
Slice your onions and place 2 tablespoon of oil into your pan on medium heat and sauté the onions.
broken down cooked sausage in a pot
Cook the sausage and set aside
leeks and carrots
After they are sautéd, move them to a bowl while you sauté the leek and carrot.
carrots leeks and mustard
Add the mustard
cheese in pasty filling
Once your potatoes and rutabaga are soft, drain and place in the pain with the onions, carrot, and leek. Add the cheese. Season with garlic bouillon, salt and pepper.
sausage in pasty filling
Add the sausage and fold it in
pastry dough in food processor
Make your pastry dough
dough between parchment paper
In a taco press (or between two pieces of parchment paper) press a dough ball together
tortilla press
Press or roll out until it is the size you want
pastry dough between parchment paper
It should look like this
pasty filling on dough
Place filling in the middle of the circle
Irish Pasties Recipe: Delicious Irish Pasty Recipes
Fold over. Crimp the edges. Brush with egg wash, slit an air hole, and bake
Irish Pasties Recipe: Delicious Irish Pasty Recipes
Bake until golden brown

HOW TO STORE THESE irish PASTIES?

If you want to keep them in the fridge for a few days you can if you store them in an airtight container. If you want to freeze these pasties that is a great option. I have instructions here as to how to cook frozen pasties. Place them in a freezer bag, mark the date on them, and they will keep for up to 3 months. 

LEAVE A RATING AND REVIEW!

Did you love this recipe? If you did, let me know! And let others know too by leaving a comment and star rating. Reviews are incredibly useful in helping other people find my site and make my recipes. Thank you so much!
Laura 

Check out more fun recipes below

  • IRISH PASTIES RECIPE: DELICIOUS IRISH PASTY RECIPES
    Delicious Irish Pasty
  • VEGETARIAN PASTY RECIPE: CORNISH PASTIES RECIPE
    Vegetarian Cornish Pasties
  • CHEESE AND ONION PASTY RECIPE: VEGETARIAN PASTIES
    Cheese and Onion Pasty Recipe: Vegetarian Pasties
  • How To Cook Frozen Pasties: Cooking Pasty Instructions
    How To Cook Frozen Pasties: Cooking Pasty Instructions

Vegetarian Cornish Pasties

September 20, 2023

VEGETARIAN PASTY RECIPE: CORNISH PASTIES RECIPE

This vegetarian pasty recipe is based on the traditional Cornish pasty but instead of using meat focuses on root vegetables is packed full of great flavour. 

I love pasties! I have made a gluten free pasty (based on a classic Cornish pasty), pumpkin pasty, and cheese and onion pasty (which all of are also vegetarian pasties!). These are my homage to vegetarian Cornish pasties! We were lucky enough when we visited Cornwall to try a bunch of different pasty fillings (we did only vegetable pasties) and it made me want to make my own Cornish pasty recipe. Pasties have become some of our favorite recipes, and after you try them, you'll be making traditional Cornish pasties (or your own versions) in no time! 

WHAT IS THE HISTORY OF PASTIES?

The history of Cornish pasties dates back to the 17th century when they were commonly eaten by Cornish miners and workers as a portable and hearty meal. The thick crimped edge was designed as a handle so that the miners could hold the pasty with dirty hands and discard the crimped edge afterward, minimizing waste.

Vegetarian Pasty Recipe: Cornish Pasties Recipe

WHY SHOULD YOU MAKE THIS vegetarian PASTY RECIPE?

It is such a great meal! This is a really good pasty recipe in that it has a bunch of flavor and is super easy to make! The vegetable filling is a really rich filling (despite there being no neat) Plus it is gluten free and vegetarian pasties means that you can serve almost any guest and have it sorted!

TIPS AND TRICKS

For best results always follow the recipe card

Even though my recipes are gluten free, I am not a vegan baker. Therefore, if you do try to make these little pasties vegan, you would need to use a vegan cheese, omit the egg (or find an egg substitute), and find a dairy free substitute for your crust. If you do decide to try it as a vegan recipe, let me know in the comments how it goes!

If you want to brighten up their presentation, serve with some fresh parsley.

WHAT EQUIPMENT DO YOU NEED?

Baking Tray (or baking sheet)
Rolling pin (or a taco press)
parchment paper (or wax paper)
Large bowl
Food processor

INGREDIENTS FOR vegetarian PASTIES

Vegetarian Pasty Recipe: Cornish Pasties Recipe

Onion: the onion mixture in this recipe is so delicious from the caramelization of the onions
Cheddar Cheese:
 a classic cheese, I use a mature cheddar cheese to really enhance the flavor of the cheese mixture. Aged cheddar is a delicious cheese and it is hard to beat in a pasty.
Fresh Thyme: 
Such a great flavor that brings out the cheesy filling
Gluten free all purpose flour: (make sure to use one with xanthan gum). 
This is if you want to make your own pastry and make it gluten free. You can use whatever pie dough you like for this recipe. 
Butter: 
Butter is used in the crust. Make sure you are not using room temperature butter, you need very cold butter.
Egg: 
Egg is used in our recipe twice. Once in the crust and once as an egg wash that goes on top of the pasty prior to being baked.
Water: 
A bit of water goes into our pie dough to help it come all together
Garlic Bouillon:
 Roasted garlic bouillon is a great source of flavor to savoury fillings and that is just as true in this recipe.
Black Pepper & Salt: 
Seasoning is always key to cooking!
Oil: 
To help fry the onions 
Cold Water: for our pie dough if you want to make my gluten free pastry dough. 
Leek: Leek is a great vegetable and adds some great flavor to the pasty
Carrot: Carrots are sweet by nature and sweeten the dish
Rutabaga: A great root vegetable, it makes for a fantastic pasty filling
Dijon Mustard: For some extra flavor

HOW DO YOU MAKE THIS Vegetarian PASTY RECIPE? 

First you are going to make your dough: Add the flour, cold butter that is cubed, egg, and 1-2 teaspoon of cold water into your food processor. Blend until it comes together to form a dough. Place in the fridge after you have covered with plastic wrap to preserve it. 
To make your filling:  Cut up the potatoes. Place them in a pot and fill it with water. Salt your water, it will help add flavor to the food. Boil until soft.
In the meantime, slice your onions: You can keep them longer (as if making caramelized onions) or dice them to ensure that each pasty will have plenty of onion. On medium heat, heat around 2-3 tablespoons of canola oil in a pan, and place the onions in. Allow them to turn golden brown. Set Aside.
Sauté the carrot and leek: in the mustard with a teaspoon of oil. Once soft, add to the onions. Then add the boiled potatoes allow it to start to come together to form a sort of mash. 
Add the thyme: add the 2 tablespoons of fresh time, and continue to stir. Begin to season with garlic bouillon, salt, and pepper (do one pinch of salt at a time). Stir to make sure it is incorporated.  Once you feel the flavor is balanced, add the 1 cup of cheddar cheese. Once the filling has come together, set it aside so it can cool until the point where it is lukewarm. You can transfer it to a large mixing bowl or keep it in the pan that you cooked it in. 
Putting them together: Heat your oven to 350°F. This recipe can make 8-9 small pasties or if you wish to make large pasties, it will likely make 3 or 4. 
To make your pie crust for your gluten free pasties, you can do this one of two ways.
Take two piece of parchment paper, then take a ball of dough and place it between them. Use your rolling pin to roll it out until it is the size of a corn tortilla. 
On a taco press, take two pieces of parchment paper, and place a ball of pie dough between them. Press down, and do this until it is the size of a corn tortilla. You will want circles of pastry.
Once it is the size you want: scoop in the filling. Place it in the center of the dough in a line going across. Make sure you do not add too much filling, you do not want the pasty to pop open while it is baking. Fold the dough over, and crimp the dough along the edges of the pastry. Do this until all of the filling and dough is gone. 
Once the pasties are assembled: place the pasties onto a prepared baking sheet )on baking sheets lined with parchment paper). Slit holes onto the top of each gluten free pasty to ensure that air can properly escape while baking. Now, take a beaten egg and brush the egg mixture onto the top of each pasty. Place in the preheated oven and bake for 25-30 minutes or until golden brown. When removed from the oven, allow them to sit for a few minutes. You do not want to burn your tongue when you bite into them. 

potato and rutabaga in pot
Peel the rutabaga and chop it along with the potatoes, place in a pot and fill with water. Boil until they are soft.
onion in pan
Slice your onions and place 2 tablespoon of oil into your pan on medium heat and sauté the onions.
carrot and leek in a pan
After they are sauteed, move them to a bowl while you sauté the leek and carrot.
carrot leek mustard
Add the mustard
pasty filling with cheese
Once your potatoes and rutabaga are soft, drain and place in the pain with the onions, carrot, and leek. Add the cheese. Season with garlic bouillon, salt and pepper.
vegetarian pasty filling
Cook down and season to your taste until it becomes a bit mushy. Once it is done, set aside.
pastry dough in a food processor
Make your pastry dough
dough between parchment paper
In a taco press (or between two pieces of parchment paper) press a dough ball together
tortilla press
Press or roll out until it is the size you want
flat pastry dough
It should look like this
filling on pastry
Place filling in the middle of the circle
Vegetarian Pasty Recipe: Cornish Pasties Recipe
Fold over
Vegetarian Pasty Recipe: Cornish Pasties Recipe
Crimp the edges. Brush with egg wash, slit an air hole, and bake
Vegetarian Pasty Recipe: Cornish Pasties Recipe
Bake until golden brown

When you are finished making these, make my gluten free sausage rolls recipe.

HOW TO STORE THese vegetarian pasties?

If you want to keep them in the fridge for a few days you can if you store them in an airtight container. If you want to freeze these pasties that is a great option. I have instructions here as to how to cook frozen pasties. Place them in a freezer bag, mark the date on them, and they will keep for up to 3 months. 

LEAVE A RATING AND REVIEW!

Did you love this recipe? If you did, let me know! And let others know too by leaving a comment and star rating. Reviews are incredibly useful in helping other people find my site and make my recipes. Thank you so much!
Laura 

LOOKING FOR SOMETHING SIMILAR?

  • Gluten Free Pasty Recipe: Traditional Cornish Pasties
    Gluten-Free Traditional Cornish Pasties
  • Pumpkin Pasties: A Harry Potter Inspired Recipe
    Pumpkin Pasties: A Harry Potter Inspired Recipe

Cheese and Onion Pasty Recipe: Vegetarian Pasties

September 20, 2023

CHEESE AND ONION PASTY RECIPE: VEGETARIAN PASTIES

Based off of the original Cornish Pasty, this recipe for a cheese and onion pasty is quick, delicious, and the perfect blend of flavors. These homemade cheese and onion pasties are a delicious combination of mature cheddar, mashed potato, onion, and spices. 

Cheese and Onion Pasty Recipe: Vegetarian Pasties

I love pasties. Be it savory with my gluten free pasty recipe or sweet with my pumpkin pasties, but, one recipe just isn't enough. I decided to make an easy cheese and onion pasty. Cheese and onion pasties are known for their savory and comforting flavors, with the sweetness of the caramelized onions complementing the richness of the cheese. They are a versatile and satisfying treat that appeals to those who enjoy savory pastries and the delightful combination of cheese and onions.

[feast_advanced_jump_to]

WHAT IS THE HISTORY OF PASTIES?

The history of Cornish pasties dates back to the 17th century when they were commonly eaten by Cornish miners and workers as a portable and hearty meal. The thick crimped edge was designed as a handle so that the miners could hold the pasty with dirty hands and discard the crimped edge afterward, minimizing waste.

Why should you make this cheese and onion pasty recipe?

It is such a great meal! This is a really good pasty recipe in that it has a bunch of flavor and is super easy to make! Plus it is gluten free and vegetarian pasties means that you can serve almost any guest and have it sorted!

Tips and tricks

For best results always follow the recipe card

Even though my recipes are gluten free, I am not a vegan baker. Therefore, if you do try to make these little pasties vegan, you would need to use a vegan cheese, omit the egg (or find an egg substitute), and find a dairy free substitute for your crust. If you do decide to try it, let me know in the comments how it goes!

If you want to brighten up their presentation, serve with some fresh parsley.

WHAT EQUIPMENT DO YOU NEED?

Baking Tray (or baking sheet)
Rolling pin (or a taco press)
parchment paper (or wax paper)
Large bowl
Food processor

INGREDIENTS FOR cheese and onion PASTIES

Ingredients for Cheese and Onion Pasty Recipe: Vegetarian Pasties


Potato: Even though this is a cheese and onion pasty, potato pasties are a staple! Potato is the core of the filling in addition to the cheese and the onion. 
Onion: the onion mixture in this recipe is so delicious from the caramelization of the onions
Cheddar Cheese: a classic cheese, I use a mature cheddar cheese to really enhance the flavor of the cheese mixture. Aged cheddar is a delicious cheese and it is hard to beat in a pasty.
Fresh Thyme: Such a great flavor that brings out the cheesy filling
Gluten free flour: (make sure to use one with xanthan gum)
Butter: Butter is used in the crust. Make sure you are not using room temperature butter, you need very cold butter.
Egg: Egg is used in our recipe twice. Once in the crust and once as an egg wash that goes on top of the pasty prior to being baked.
Water: A bit of water goes into our pie dough to help it come all together
Garlic Bouillon: Roasted garlic bouillon is a great source of flavor to savoury fillings and that is just as true in this recipe.
Black Pepper & Salt: Seasoning is always key to cooking!
Oil: To help try the onions 

*A note on gluten free flour: when making your gluten free pasty, remember that not all gluten free flours are made equal. I always use Cup4Cup gluten free flour for pie crusts.

How do you make this cheese and onion pasty recipe? 

First you are going to make your dough: Add the flour, cold butter that is cubed, egg, and 1-2 teaspoon of cold water into your food processor. Blend until it comes together to form a dough. Place in the fridge after you have covered with plastic wrap to preserve it. 
To make your filling:  Cut up the potatoes. Place them in a pot and fill it with water. Salt your water, it will help add flavor to the food. Boil until soft.
In the meantime, slice your onions: You can keep them longer (as if making caramelized onions) or dice them to ensure that each pasty will have plenty of onion. On medium heat, heat around 2-3 tablespoons of canola oil in a pan, and place the onions in. Allow them to turn golden brown. Once this has happened, add the boiled potatoes aallow it to start to come together to form a sort of mash. 
Add the thyme: add the 2 tablespoons of fresh time, and continue to stir. Begin to season with garlic bouillon, salt, and pepper (do one pinch of salt at a time). Stir to make sure it is incorporated.  Once you feel the flavor is balanced, add the 1 cup of cheddar cheese. Once the filling has come together, set it aside so it can cool until the point where it is lukewarm. You can transfer it to a large mixing bowl or keep it in the pan that you cooked it in. 
Putting them together: Heat your oven to 350°F. This recipe can make 8-9 small pasties or if you wish to make large pasties, it will likely make 3 or 4. 
To make your pie crust for your gluten free pasties, you can do this one of two ways.
Take two piece of parchment paper, then take a ball of dough and place it between them. Use your rolling pin to roll it out until it is the size of a corn tortilla. 
On a taco press, take two pieces of parchment paper, and place a ball of pie dough between them. Press down, and do this until it is the size of a corn tortilla.
Once it is the size you want: scoop in the filling. Place it in the center of the dough in a line going across. Fold the dough over, and crimp the dough along the edges of the pastry. Do this until all of the filling and dough is gone. 
Once the pasties are assembled: on baking sheets lined with parchment paper, place the pasties onto them. Slit holes onto the top of each gluten free pasty to ensure that air can properly escape while baking. Now, take a beaten egg and brush the egg mixture onto the top of each pasty. Place in the preheated oven and bake for 25-30 minutes or until golden brown. When removed from the oven, allow them to sit for a few minutes. You do not want to burn your tongue when you bite into them. 

potatoes in a pot
Place potatoes in a pot and fill with water. Boil until they are soft.
onions in a pan
Slice your onions and place 2 tablespoon of oil into your pan on medium heat and sautee the onions.
potatoes and onions in a pan
Once your potatoes are soft, drain and place in the pain with the onions.
potatoes onions and spices in a pan
Add the roasted garlic bouillon and thyme.
potatoes onions spices and cheese in a pan
Add the cheese and fold it in
pasty filling
Cook down and season to your taste until it becomes a bit mushy. Once it is done, set aside.
pie dough being made
Make your pastry dough
pie dough between parchment paper
In a taco press (or between two pieces of parchment paper) press a dough ball together
pie dough in a tortilla press
Press or roll out until it is the size you want
circular pie dough
It should look like this
Place filling in the middle of the circle
Cheese and Onion Pasty Recipe: Vegetarian Pasties
Fold over
Cheese and Onion Pasty Recipe: Vegetarian Pasties sitting on a baking sheet
Crimp the edges and fold upwards
Cheese and Onion Pasty Recipe: Vegetarian Pasties sitting on a baking sheet
Brush with egg wash, slit an air hole, and bake

When you are finished making these, make my gluten free pasty recipe or my gluten free sausage rolls recipe.

How to store these cheese pasties?

If you want to keep them in the fridge for a few days you can if you store them in an airtight container. If you want to freeze these pasties that is a great option. I have instructions here as to how to cook frozen pasties. Place them in a freezer bag, mark the date on them, and they will keep for up to 3 months. 

Cheese and Onion Pasty Recipe: Vegetarian Pasties

LEAVE A RATING AND REVIEW!

Did you love this recipe? If you did, let me know! And let others know too by leaving a comment and star rating. Reviews are incredibly useful in helping other people find my site and make my recipes. Thank you so much!
Laura 

CHECK OUT MY FAVORITE PIE AND TART RECIPES 

This post might have affiliate links

Apple Frangipane Tart Recipe: Classic French Recipes

September 19, 2023

APPLE FRANGIPANE TART RECIPE: CLASSIC FRENCH RECIPES

Apple and almond are two of the best flavors. It therefore makes perfect sense to marry them in this French inspired apple frangipane tart. This apple tart is made with a delicious tart crust, rich almond frangipane, and is covered in beautiful apples. 

Apple Frangipane Tart Recipe: Classic French Recipes

Frangipane is no stranger to my blog. I have a recipe for a pear and frangipane tart, rhubarb tart (with frangipane), and peach frangipane tart. I love frangipane filling as it is just so beautifully flavored. Made from almond flavor and almond extract (with a few extra ingredients sprinkled in), this apple frangipane tart is the perfect is the perfect dessert. I have made this recipe into individual mini tarts but it works for 1 full size tart as well.

What is frangipane?

Frangipane is a sweet, almond-flavored filling or pastry cream that is commonly used in baking and pastry making. It is known for its rich and nutty flavor, which comes from the use of ground almonds or almond paste as a primary ingredient. Frangipane can be used in a variety of desserts, both as a filling and as a topping. Here are some common uses and characteristics of frangipane:

Tart Filling: Frangipane is often used as a filling in tarts, such as Bakewell tarts or fruit tarts. It adds a moist, nutty layer beneath the fruit or other toppings, creating a delicious contrast of flavors and textures.
Puff Pastry Filling: In some recipes, frangipane is spread over puff pastry before baking, resulting in a flaky, almond-filled pastry. This is often referred to as a "galette" or "pithivier."
Danish Pastries: Frangipane can be used as a filling for Danish pastries, providing a sweet and nutty element to the pastry.


Almond Croissants: Some almond croissants are filled with frangipane, which gives them a distinct almond flavor and a moist interior.
Cakes: Frangipane can be used as a layer between cake layers, especially in almond-flavored cakes. It adds moisture and flavor to the cake.
Tarts and Tartlettes: Small frangipane-filled tartlettes are a delightful treat, often featuring various fruits like berries or apricots on top.

Apple Frangipane Tart Recipe: Classic French Recipes

Frangipane is typically made by combining ground almonds or almond paste with sugar, butter, eggs, and sometimes a small amount of flour. The resulting mixture is smooth, creamy, and slightly thick, making it easy to spread or pipe onto pastry or use as a filling. It adds a delightful almond aroma and flavor to a wide range of baked goods, making it a favorite component in many classic and contemporary pastry recipes.

Why you'll love this apple frangipane tart recipe

It is the perfect tart with the fresh apple slices and the frangipane mixture, all while topped with a delicious apricot glaze. You can make this as one large tart or in perfect individualized portions. 

Tips and Tricks

I do not blind bake my tarts for this recipe. Which means no pie weights. However, if you want to par bake your crust you can do so for 15 minutes at 350°F. 

If you do blind bake your crust, poke the crust with a fork, cover the tart crust with an even layer of parchment paper. Cover the parchment paper with pie weights (aka baking beads or beans) and bake. 

What equipment do I need for this apple frangipane tart recipe?

If you want to make this as a full size tart then you need a singular tart pan (tart tin) - make sure it has a removable bottom
If you want to make this as I have you need mini tart pans- make sure they have removable bottoms
Baking sheet 
​Rolling Pin
Parchment Paper
Stand Mixer (or a large bowl and an electric hand mixer)
Wire Rack
Food Processor
Small bowl
Pastry Brush

Ingredients needed for this apple frangipane tart?

ingredients for Apple Frangipane Tart Recipe: Classic French Recipes

Softened Butter: The room temperature butter will be mixed in with the other frangipane ingredients.
Cold Butter: ​this is part of your pastry dough or pie crust recipe. I use my gluten free pastry dough recipe.
Almond Extract: Some people like to put vanilla extract in their frangipane however I do not want ti dilute the flavor of the almond. Therefore, I only add almond extract to my apple tart. 
Almond Flour (Almond Meal): Almond meal and flour are the same. The flour serves as the base of the frangipane. 
Apples: Apples of course top of tart. I use Honeycrisp but you can use any good baking apple. 
Eggs: There is an egg in the frangipane filling as well as in the tart crust. We do not just use the egg yolk but the whole egg.
Caster Sugar: To help sweeten the frangipane
Cinnamon: I like to sprinkle cinnamon on top of the apples to help bring out their flavor just before they go into the oven.
Apricot Jam: ​Apricot jam gives the apples the perfect shine and glaze. 

How do I make this apple frangipane tart recipe?

Set oven to 350°F
Make the crust: the frangipane is held together by a pastry case. If you are using my gluten free pastry dough recipe, place the flour, butter, egg, and water into the bowl of a food processor and pulse. The dough will come together in a ball in the food processor. This is when you know it is done. 
Roll out the crust: ​There are a few ways to do this. If you wish to roll out your crust you can. Do this by placing the dough between two pieces of parchment paper and rolling it between them. Lay the crust over the tart tin and make sure it fits. A second option is to put the dough into the tart pan and press it out with your fingers until you fill the entirety of the pan and make sure it is all even. If making mini tarts like I have done in this recipe, to make my tart shell, I use a tortilla press and place a ball of dough between two pieces of parchment paper and press down. I then take that piece of dough and mold it to my tart tin. 
Make the frangipane: place the softened butter, sugar, almond extract, almond flour, and egg into the bowl of your stand mixer and mix together. Frangipane is a really soft almond filling so it can be picked up but know that it is soft. If you do not have an electric stand mixer, use a bowl and an electric hand whisk. 
Fill the tarts: by hand with the frangipane to make sure that you get an even layer of the frangipane in all of them (or just in the one tart if you are making it full size). Set aside
Slice the apples: slice your apples in half and then thinly slice the halves. I like to decorate the tops of the tarts with a thin layer of apples that go in concentric circles, however, it is up to you how you wish to decorate the top. Sprinkle some cinnamon onto the top of the apples.
Bake: Place on a baking sheet and put into the oven. If you are making the mini tarts, bake for 30 minutes. If you are making the large tart then bake for 50 minutes. If you feel that the crust is not golden brown, continue to monitor every 5 minutes until you get the right color and bake on the dough (no one wants a soggy bottom for their tart crust). 
Glaze the tarts: ​After the tarts have finished baking, remove them from the oven. In a small bowl add the apricot jam and some water. Heat in the microwave and mix together. Using a pastry brush, brush the jam over the apples and serve.

frangipane in a bowl
Make the frangipane
empty tarts
Line the tarts or tart with the crust
tarts with frangipane
Fill with the frangipane
Apple Frangipane Tart Recipe: Classic French Recipes before being baked
Slice the apples and top the tart with them
Apple Frangipane Tart Recipe: Classic French Recipes on a baking sheet
Sprinkle with cinnamon and bake

After you have made this apple frangipane tart, make my Custard Apple Tart recipe!

How do I store these apple frangipane tarts?

​They will keep in an airtight container on the counter for around 3 days. I don't typically recommend freezing frangipane but there is no rule that says you cannot try it.

LEAVE A RATING AND REVIEW!

Did you love this recipe? If you did, let me know! And let others know too by leaving a comment and star rating. Reviews are incredibly useful in helping other people find my site and make my recipes. Thank you so much!
Laura 

Check out my favorite Pie and Tart Recipes 

Easy Miso Caramel Sauce

September 18, 2023

Easy Miso Caramel Sauce Recipe: How to Make Miso Caramel

If you love miso, miso caramel is the perfect recipe for you. Miso caramel sauce is ready in mere minutes and is so rich and delicious. The perfect topping for vanilla ice cream. 

Easy Miso Caramel Sauce Recipe: How to Make Miso Caramel

Caramel is my favorite topping for ice cream but I had grown tired of the classic dark caramel sauce or salted caramel sauce. I had miso paste in my fridge and realized, it was time to put this white miso to the test and make some miso caramel. It is now my favorite caramel and is the perfect balance of sweetness and umami flavor. This sauce pairs beautifully with ice cream or with my custard apple tart.

[feast_advanced_jump_to]

What is miso paste?

Miso paste is a traditional Japanese fermented paste condiment and seasoning made from fermented soybeans. It is a thick, savory paste with a salty and umami-rich flavor. Miso paste is a staple ingredient in Japanese cuisine and is also used in various other Asian and fusion dishes.

The process of making miso paste involves fermenting soybeans (or other grains) with salt and a specific type of fungus called Aspergillus oryzae, also known as koji. The mixture is left to ferment for an extended period, which can range from a few months to several years, depending on the desired flavor and type of miso being produced. This fermentation process not only preserves the soybeans or grains but also develops the complex flavors and aromas associated with miso.

Miso paste comes in different varieties, each with its own flavor profile and color, ranging from light yellow to dark brown. The three most common types of miso are:

Easy Miso Caramel Sauce Recipe: How to Make Miso Caramel

White Miso (Shiro Miso): This is the mildest and sweetest type of miso, made from fermented soybeans and rice or barley. It has a light yellow color and is often used in soups, salad dressings, and marinades.
Red Miso (Aka Miso): Red miso is fermented for a longer period, giving it a deeper, richer flavor and a dark brown or reddish hue. It has a stronger, more intense umami taste and is typically used in hearty soups, stews, and braised dishes.
Yellow Miso (Awase Miso): Yellow miso is a versatile option made by blending white and red miso. It offers a balanced flavor profile with moderate sweetness and umami. It's commonly used in a wide range of dishes, such as miso soup, glazes, and marinades.

Miso paste is not only a flavor enhancer but also a source of nutrients, including protein, vitamins, and minerals. It is known for its probiotic properties due to the fermentation process, which promotes the growth of beneficial bacteria. Miso is a key ingredient in Japanese cuisine, used in dishes like miso soup, miso ramen, and as a seasoning in sauces and marinades. It has also gained popularity in various global cuisines for its unique flavor and versatility.

Why should you make this miso caramel sauce?

This sauce has the sweetness of the caramel but with notes of umami from the addition of miso. The hint of miso comes through the caramel making it the best topping. When it comes off the heat, it has a pourable consistency making it great for vanilla ice cream, apple pie, or the perfect topping to a pound cake. 

Equipment for this miso caramel recipe?

Heavy saucepan
Pastry brush

Ingredients for miso caramel:

ingredients for miso caramel

It is such simple ingredients!

Heavy cream: This is what gives the richness to the caramel sauce
White Caster Sugar: sugar is the base of a caramel sauce along with water
Miso paste: miso paste is available at most grocery stores, if not it will be at local Asian grocery stores or online 
Water: This is central to our caramel along with sugar

How to make this miso caramel sauce:

Place the granulated sugar: and water into the saucepan and place on a medium heat. Stir the water and sugar together until the sugar appears to have "dissolved". It is key when you are making caramel not to stir after this point. Caramel comes together on its own and becomes a beautiful deep golden brown. Sugar crystals can appear and ruin the caramel if you have additional stirring. 
Bring it to a boil: ​While the mixture comes to a boil and turns golden brown, use a wet pastry brush to brush any sugar down from the sides of the pot.
When it turns golden brown: or begins to have wisps of smoke, remove from the heat and pour in the cream. This will cause the caramel to bubble and that is okay! Stir while it does this. If the caramel seizes and hardens, return to the heat for a few minutes while you stir until it becomes liquid again.
Add the miso paste: and whisk

*the addition of the cold cream to the warm sauce can cause it to harden but remember not to panic! Just look to the last step. 

sugar and water in a pot to make caramel
add sugar and water to pot
boiled sugar in a pot with cream in a measuring cup
remove from the heat when golden brown
cream in a pot with boiled sugar
add the cream
Easy Miso Caramel Sauce Recipe: How to Make Miso Caramel
whisk in the miso paste
Easy Miso Caramel Sauce Recipe: How to Make Miso Caramel
once it is incorporated it is done
Easy Miso Caramel Sauce Recipe: How to Make Miso Caramel
use the miso caramel immediately or place in a storage vessel

How to store miso caramel ?

Storing your homemade caramel sauce is easy! Store in an airtight container in the refrigerator for up to 1 month. If you want it to loosen up before you use it, place a bit in a small saucepan on low heat for a few minutes. 

Easy Miso Caramel Sauce Recipe: How to Make Miso Caramel

​Tips and Tricks:

Even though there are different types of miso, be sure to use white miso for this caramel mixture. 

Remember that the traditional caramel color comes from allowing the caramel to really come together on the stove top at the right temperature. 

LEAVE A RATING AND REVIEW!

Did you love this recipe? If you did, let me know! And let others know too by leaving a comment and star rating. Reviews are incredibly useful in helping other people find my site and make my recipes. Thank you so much!
Laura 

CHECK OUT OTHER RECIPES HERE

  • Butterscotch Icing: Fluffy, Fast, Delicious Butterscotch Frosting
    Butterscotch Icing
  • How to Make the Easiest Russian Buttercream Recipe
  • Easy Coffee Buttercream Icing Recipe
  • Fast and Easy Blueberry Buttercream Recipe: The Best Icing

Gluten-Free Yorkshire Pudding

September 13, 2023

Gluten Free Yorkshire Pudding Recipe: Gluten-free Puddings

If you are looking for the best side dish to your family dinner or holiday dinner, look no further than this gluten-free Yorkshire pudding recipe. This recipe is quick, easy, and beyond delicious.

Gluten Free Yorkshire Pudding Recipe: Gluten-free Puddings

Traditional Yorkshire pudding is often served along with roast beef for your roast dinner or your Christmas dinner. Just because you have Celiac Disease (also known as Coeliac Disease) does not mean that you have to continue to go without! These golden brown perfect gluten-free Yorkshire puddings are the perfect side dish. Made with a naturally gluten-free flour, corn flour, instead of plain flour, this gluten-free Yorkshire pudding recipe will yield fabulous results.

What equipment do you need for this recipe?

Muffin pans (or muffin tins): these will be the vessels in which we bake our perfect Yorkshire puddings

What Ingredients do I need for this gluten free Yorkshire pudding recipe?

gluten free yorkshire pudding ingredients

Corn Starch: Corn starch (aka corn flour) is super light and will allow this gluten-free Yorkshire puddings recipe to grow.
Oil: For this you want to use an oil like vegetable oil or canola oil. You do not want to use olive oil because you want a really high smoke point. For best results, use vegetable oil/
Eggs: Eggs in this recipe are our ever trusty binding agent
Milk: I use regular cows milk in this recipe. If you need to use plant-based milk 
Salt: For flavor

This recipe is a 3-ingredient Yorkshire puddings recipe as the batter itself is truly 3 ingredients (the salt can be optional)

This recipe uses simple ingredients, making this recipe a super easy dish (and one of my favorites of British cuisine).

How do I make them?

Preheat oven: to 425°F or 220°/200° c fan
Place oil: place 1 teaspoon of oil into each hole on the non-stick muffin tray
Bake: for 15-20 minutes. You want very hot oil (if it is spitting, that is good)
Make the Yorkshire pudding batter: wisk the eggs into the dry ingredients (salt and cornflower aka cornstarch) in a large mixing bowl.
Add the milk: into the large bowl- a little bit at a time until fully incorporated. you want a smooth batter. 
Open oven door: remove the hot tins, and immediately fill each muffin tin to ¾ full. You need to be quick about this because the oil needs to remain hot. They should sizzle a bit when you add the batter to the hot oil.
Place back into oven: and bake for 15-20 minutes. They should rise and be golden brown. Never open the oven door while they are baking. It will cause them to fall and not rise.
Remove from the oven: once they are baked and serve them with dinner (they pair wonderfully with gravy).

whisk next to bowl with eggs and corn starch
Place eggs and cornstarch in a large mixing bowl
whisked eggs and cornstarch in a glass bowl
Whisk until it is smooth
gluten free yorkshire pudding batter
Slowly add milk and mix as you go
gluten free yorkshire pudding batter in muffin tin
Take the hot muffin tins from the oven and quickly pour the batter into them
Bake for 15-20 minutes. Do not open the oven while they bake
Gluten Free Yorkshire Pudding Recipe: Gluten-free Puddings
Serve immediately

Recipe Tips: How to make this gluten free Yorkshire pudding recipe the best?


For best results, always follow the recipe card. 
Do not open the oven door while they are baking- it will cause them to sink and stop growing the way they should.

It is always a good idea to be on the side of keeping the muffin tins in longer (you really want the oil in your non-stick muffin tin to sizzle). Giving a little extra time is never go to be a bad thing. 

Things to remember: not every Gluten free flour blend is made equal. However, for this recipe we are just using cornstarch (sometimes known as corn flour). 

Why should you make this gluten free Yorkshire pudding recipe?

After recipe testing and determining that this is the best recipe and so easy to make, there really is no way for to you go wrong. They are just like eating the real thing, you would never know these are gluten free. The idea that gluten free recipes taste terrible is one that is really outdated. It is easy to make almost any recipe gluten-free and we have done that here with these gluten free Yorkshire puddings. They would be perfect at a Sunday roast dinner, a holiday meal, or just a fun side to any meal.

what is the history of Yorkshire puddings

Yorkshire puddings are a traditional British dish with a history that dates back several centuries. 

Origins: Yorkshire puddings have their origins in Yorkshire, England, as the name suggests. They were initially a simple and economical dish created by cooks to make use of excess fat and juices from roasting meat. The batter was placed in a pan beneath the roasting meat, where it would collect the drippings and cook to form a delicious and crispy pudding.
First Recorded Recipe: The first recorded recipe for Yorkshire pudding appeared in a cookbook called "The Whole Duty of a Woman" in 1737. The recipe referred to it as "a dripping pudding" and was served as a side dish with roast meats.
Rise in Popularity: Yorkshire puddings gained popularity throughout the 18th and 19th centuries, particularly in the north of England. They were commonly served as an appetizer before the main meal to help fill up hungry diners and make the meat go further.
Size and Use: Originally, Yorkshire puddings were larger and flatter than the modern versions. They were often filled with gravy and served as a starter. The trend of making smaller individual puddings, similar to what we know today, started to develop in the 20th century.
Association with Roast Beef: Yorkshire puddings became closely associated with roast beef, forming an integral part of the traditional British Sunday roast. The combination of roast beef, Yorkshire pudding, vegetables, and gravy became a quintessential British meal.
Adaptations: Over time, Yorkshire puddings have been adapted and incorporated into various dishes. For instance, toad in the hole is a dish where sausages are baked in Yorkshire pudding batter. Mini Yorkshire puddings are also popular as appetizers, often filled with various ingredients.
International Spread: While Yorkshire puddings are a British staple, their popularity has spread internationally, particularly in countries with a British culinary influence. They are enjoyed in various forms and settings, from home-cooked meals to upscale dining.


If you are looking to make more food from the UK, look at my gluten free pasty recipe and treacle tart recipe!

LEAVE A RATING AND REVIEW!

Did you find this helpful? If you did, let me know! And let others know too by leaving a comment and star rating. Reviews are incredibly useful in helping other people find my site and make my recipes. Thank you so much!

Laura 

CHECK OUT OTHER RECIPES HERE

  • Roasted Miso Carrots Recipe with Brown Butter Glaze
  • Brown Sugar Honey Glazed Carrots Recipe: Easy & Sweet
  • Gluten Free Yorkshire Pudding Recipe: Gluten-free Puddings
    Gluten-Free Yorkshire Pudding
  • Harrisa Carrots : Roasted Carrot Recipe with Harissa

Custard Apple Tart: A French Normande Tarte Recipe

September 12, 2023

Custard Apple Tart: A French NormandeTarte Recipe

This recipe for custard apple tart is the perfect treat for fall. With the flavors of an apple pie and the lusciousness of a tart, it is the perfect blend. The apple slices make it the most beautiful dessert, and while it looks detailed and difficult, this tart is incredibly simple to make. 

Custard Apple Tart: A French Normande Tarte Recipe

I love custard and I love apples. In addition to that, I love tarts (see my pear and frangipane tart, French tomato tart, and orange tart). Naturally, Fall time is the best time to make anything apple related but rather than making a traditional apple pie, I decided to make an apple tart inspired by the tarte normande. 

Normandie tart, also known as Tarte Normande, is a classic French dessert that originates from the Normandy region of France. It is a delightful pastry that combines the flavors of apples and almonds, often with a hint of Calvados (an apple brandy from Normandy) or rum. My recipe is few ingredients but does not compromise on the flavors. It tastes like Fall with every bite.

[feast_advanced_jump_to]

What equipment do you need?


Tart Pan with a removable bottom
Food Processor, if making your own pie crust- I use my gluten free pastry dough for this recipe
Large Bowl
Small Saucepan
Pastry Brush
Pie Weights
Parchment Paper

What Ingredients do you need for this custard apple tart?

ingredients for Custard Apple Tart: A French Normande Tarte Recipe

Half and Half: you can also use heavy cream, if you want. However half and half works fine.
Eggs: They will help bind our custard together
Flour: I use gluten free flour and use King Arthur Gluten Free Measure for Measure in the custard and Cup4Cup for my gluten free pastry dough recipe
Vanilla: Vanilla extract will help flavor the custard mixture
Apples: There are different apples you can use in this recipe. The ones I used for this are Honeycrisp however you can use any good baking apple, or my personal favorite Macs if you want a tarter tart recipe. 
White Sugar: I use white sugar in the custard for this recipe.
Apricot Jam: apricot jam or apricot jelly is going to be brushed on the top of our baked tart. 

How do you make this custard apple tart?

Set oven to 350°F
If making your own pastry dough: Follow the instructions for that recipe or look at my gluten free pastry dough recipe here. You can also use a store bought crust (I have not tried this with puff pastry). Once the dough is made, transfer it to your tart pan. There are two methods of doing this. Some like to press the dough into the tart pan by hand, while others like to roll it out with a rolling pin and drape it over the tart pan and then press it in. it is your choice. Poke the base of the tart with a fork all over.
Cover the tart with: parchment paper and the pie weights. Place in the oven for 15 minutes. 
Meanwhile make the custard: by cracking the eggs into the large bowl (medium bowl is fine too, just make sure it is big enough to whisk ingredients without them coming out of the side). Whisk with the sugar and flour (or corn starch). Set aside.
Warm the half & half: by placing it into the pot and put on medium heat. You want the milk to warm but not to boil. Once it is warm, start to pour it into the bowl with the eggs and sugar but whisk continuously. When you pour anything warm into eggs, it cooks the eggs. By constantly whisking, it will avoid any clumping. Once all of the half and half is whisked in, add the vanilla and continue to whisk. It will be a very loose custard. 
Slice the apples: ​set the custard aside and slice the honey crisp apples. The apple wedges should be thin slices. 
Put the tart together: ​arrange the apple slices in concentric circles and pour the pastry cream (custard) on top of the apples. Place in the oven and bake for 28 minutes. The tart is done when it is nice and gold on top and you can see that the crust is golden brown.
Remove from the oven: and dust some icing sugar on top of the custard. While allowing it to cool for a few minutes, heat the apricot glaze with some water in the microwave. Stir with a pastry brush and brush the glaze over the whole tart (but but sure to really get the sliced apples). Once the tart has cooled enough you can separate the tart ring from the bottom, place on a serving platter if you wish to keep it whole and serve. Or you can cut it while still in the tart tin and serve. It goes beautifully with miso caramel and vanilla ice cream. 

pie beads in crust
Place pie weights in the crust and bake
eggs sugar and flour in a bowl
Make the custard
whisked egg and sugar
Whisk the ingredients
half and half in a pot
Heat the half and half
custard in a bowl
Once the half and half is added, add the vanilla and whisk
Custard Apple Tart: A French Normande Tarte Recipe
Put the tart crust on a baking sheet after you have filled the crust with apples
Custard Apple Tart: A French Normande Tarte Recipe
Pour the custard on top and bake
Custard Apple Tart: A French Normande Tarte Recipe
When out of the oven, cover with icing sugar
Custard Apple Tart: A French Normande Tarte Recipe
Finally top with apricot glaze and serve

Tips, Tricks, and Substitutes

Granny Smith Apples are a favorite for baking. These will work for the slices of apple in this recipe but honestly, so many variations of apple work.

You could use brown sugar instead of white if you wanted to but for custard it is usually advised to use white sugar. 

​Why should you make this custard apple tart?

This is the best apple tart. The custard filling with its vanilla flavor is so delicious. The fresh fruit paired with the custard makes it one of my favorite apple desserts to make this time of year. 

Custard Apple Tart: A French Normande Tarte Recipe

LEAVE A RATING AND REVIEW!

Did you like this recipe? If you did, let me know! And let others know too by leaving a comment and star rating. Reviews are incredibly useful in helping other people find my site and make my recipes. Thank you so much!

Laura 

CHECK OUT OTHER RECIPES

Harrisa Carrots : Roasted Carrot Recipe with Harissa

September 11, 2023

If you are looking for a recipe to step up your roast carrots game, this recipe for harissa carrots is so simple and delicious. It will become your go-to carrot recipe in no time.

Harissa Carrots: Roasted Carrot Recipe with Harissa

What is harrisa?

Harissa is a spicy and flavorful chili paste that originated in North African cuisine, particularly in countries like Tunisia, Morocco, and Algeria. It's a versatile condiment that adds heat and depth of flavor to a variety of dishes. Harissa typically consists of a blend of chili peppers (often red ones), garlic, olive oil, spices like cumin and coriander, and sometimes additional ingredients like tomatoes and roasted red peppers.

The paste can vary in heat intensity, ranging from moderately spicy to quite fiery, depending on the type and quantity of chili peppers used. Harissa is often used as a marinade for meats, poultry, or seafood, as well as a flavor booster in stews, soups, and tagines. It's also spread on bread, used as a dip, or added to couscous and rice dishes to infuse them with its rich and aromatic flavor profile.

Harissa has gained popularity beyond North Africa and can now be found in international cuisines and gourmet markets worldwide, where it adds both heat and a complex depth of flavor to a wide range of culinary creations.

Harissa can come as a harissa paste or as a spice. In my harissa roasted carrots I like to use the spice rather than the paste. However, should you wish to use a paste you can use spicy harissa or regular harissa. If you do want to get the best results, I would suggest you stick to the recipe.

Often a sweetener gets paired with carrots, and that tends to be honey or maple syrup. In this recipe however, we are sticking with our Middle Eastern ingredients and we are using silan which is a date syrup. Silan will elevate all of your carrots recipe.


Silan, also known as date syrup or date honey, is a sweet and rich syrup made from dates. It is a traditional condiment that has been used in Middle Eastern and North African cuisines for centuries. Silan is made by cooking down dates into a thick, sticky syrup with a smooth consistency and a dark brown color.

What is silan?

Silan has a natural sweetness that comes from the sugars present in the dates. It offers a deep and complex flavor profile with hints of caramel and a touch of fruitiness. It can be used as a sweetener in both savory and sweet dishes, providing a unique and exotic taste.

In Middle Eastern cooking, silan is commonly used as a topping for various dishes, such as yogurt, pancakes, waffles, and ice cream. It's also brushed onto pastries and baked goods for added sweetness and shine. Additionally, silan can be incorporated into marinades, dressings, and sauces to enhance flavor and impart a touch of sweetness.

With its rich history and versatile applications, silan is not only a delicious natural sweetener but also a delightful way to infuse Middle Eastern flavors into a wide range of dishes from around the world.

Ingredients for harissa carrots:

ingredients for Harissa Carrots: Roasted Carrot Recipe with Harissa

Carrots: for this recipe you should not use baby carrots. I use the humble carrot, regular carrots, aka orange carrots. You can use rainbow carrots if you like, but, they can be difficult to find at times.
Harissa: Use the dry spice blend for this recipe. If you can only find the harissa sauce, that is fine but typically try to go for the spice.
Silan: The date syrup is where we will get our sweetness from in our sauce
Tahini: a delicious middle eastern paste made from sesame seeds that will go into our sauce
Cumin: ground cumin is one of the spices in addition to harissa used
Extra Virgin Olive Oil: by glazing the carrots, it will help them bake and bring out the carrot's natural sweetness
Pistachios: A topping for the carrots`
Lemon Juice: for your sauce, you can use fresh lemon juice or from a bottle.

How do you make harissa carrots?

Set the oven to 425°F and peel the carrots: you want them peeled for this recipe
On a large rimmed baking sheet: place the peeled carrots and use a drizzle of olive oil. Make sure to coat all of the carrots.
Add the harrisa: and the cumin. Make sure to coat the carrots. If you wish, you can also add sea salt (or kosher salt) at this time.
Bake the carrots: Place in the oven and bake for 30 minutes. Halfway through, turn the carrots to make sure all sides are properly roasted.
While they are baking: make the sauce. Mix the silan, tahini, and lemon juice in a bowl. Whisk. If you find it is too thick, add a bit more lemon juice, or some water. 
Take the: harissa-roasted carrots from the oven. Transfer them to a serving platter. Top with the sauce, and then the pistachios. Serve immediately.

Harissa Carrots: Roasted Carrot Recipe with Harissa
Place your sliced and peeled carrots on a baking sheet
Harissa Carrots: Roasted Carrot Recipe with Harissa
Drizzle with olive oil
carrots sliced on a baking hseet
Sprinkle your spices on and mix. Place in the oven and bake
ingredients for silan tahini sauce in a bowl
While carrots are baking, make sauce
silan tahini sauce in a bowl
Set aside and cover the carrots with it when they finish baking
Harissa Carrots: Roasted Carrot Recipe with Harissa

Notes:
If your whole carrots are too large, slice them in half so that you have smaller pieces. This way the carrots will all cook evenly. 

Why should you make this harrisa carrots recipe?

This recipe is the perfect side dish and is full of sweet flavor. You have the sweetness of the carrot in addition to the sweetness for the date and tahini sauce. Plus, on a serving plate, it is a stunning center piece to any table. This roasted carrot recipe will soon become a favorite in your household because it is that good.

Can I add anything to these harissa carrots?

If you want to stay on theme and in the Mediterranean, you could top these with feta cheese. Greek yogurt or labneh is often used in this part of the world as well. However, instead of a spread labneh, I would use a whipped feta. However, you really do not need anything else in this recipe. There is so much flavor in this that it makes a perfect recipe for regular dinners and holiday dinners alike. It will become a staple of your roasted vegetables. 

How to store these carrots

Cool Completely: Allow the roasted carrots to cool completely at room temperature before storing. This helps prevent condensation and moisture buildup in the storage container.
Refrigeration: Place the roasted carrots in an airtight container or a resealable plastic bag. Seal the container tightly to prevent air from getting in, which can cause the carrots to dry out.
Refrigerate: Store the container of roasted carrots in the refrigerator. They can typically be stored for up to 3-5 days without significant loss of quality.
Avoid Freezing: Roasted carrots have a higher water content than raw carrots, and freezing can lead to changes in texture when they thaw. It's best to enjoy them within the recommended refrigeration timeframe.
Reheating: To reheat the roasted carrots, place them in an oven preheated to about 350°F (175°C) for a few minutes until they are warmed through. You can also reheat them in a microwave, but be careful not to overheat them and make them mushy.

LEAVE A RATING AND REVIEW!

Did you love this recipe? If you did, let me know! And let others know too by leaving a comment and star rating. Reviews are incredibly useful in helping other people find my site and make my recipes. Thank you so much!

Laura 

Looking for similar recipes?

  • Garlic Yogurt Recipe: An Easy Homemade Dip & Sauce
    Garlic Yogurt
  • modern waldorf salad in a brown bowl
    Modern Waldorf Salad Recipe
  • Gluten Free Sausage Rolls
  • Easy and Delicious Seafood Nachos
    Homemade Easy Nachos Recipe

Mediterranean Baked Za'atar Crusted Salmon

September 6, 2023

If you love Mediterranean-inspired dishes and salmon, you will love this zaatar salmon. This dish is ready in under 30 minutes and is full of flavor.

Zaatar Salmon: Mediterranean Baked Za'atar crusted Salmon

We always have salmon fillets in our freezer as it is a fish that we love and there are so many ways to make it. We are big fans of Middle Eastern flavors and spices, specifically harissa and zaatar. It finally occured to me one night that we had salmon in the freezer and a bunch of zaatar in our pantry, and thus this dish was born.

What is zaatar?

Zaatar is an aromatic spice blend and popular spice blend or seasoning mixture used in Middle Eastern and Mediterranean cuisines. It is known for its distinctive flavor and aroma, which is both savory and slightly tangy. The primary ingredients in zaatar typically include:

Thyme: The base of most zaatar blends is dried thyme leaves. Thyme contributes a earthy and herbal flavor to the mixture.
Sesame Seeds: Toasted sesame seeds are a common addition to zaatar, providing a nutty and slightly crunchy texture.
Sumac: Sumac is a tangy spice made from dried and ground berries. It gives zaatar its characteristic tartness and bright red color.
Salt: Salt is added to season the mixture and enhance the overall flavor.

These core ingredients form the base of zaatar, but variations exist, and additional spices like oregano, marjoram, cumin, coriander, or even dried lemon zest may be included in different recipes. Zaatar is versatile and can be used in various ways:

Spice Blend: Zaatar can be used as a dry spice blend to season meats, vegetables, and grains. It's often sprinkled on flatbreads or used as a rub for grilled meats.
Dip or Spread: Zaatar is frequently mixed with olive oil to create a paste that can be used as a dip for bread or a spread for sandwiches and wraps.
Flavoring for Dishes: It can also be used as a flavor enhancer in dishes like salads, roasted vegetables, and soups.

Zaatar is a staple in Middle Eastern cuisine and is cherished for its unique flavor profile. Its popularity has spread to other parts of the world, and you can find it in many international grocery stores or make your own blend by combining the individual ingredients to suit your taste.

Ingredients for zaatar salmon

ingredients

Salmon: Salmon is our fish for this dish!
Butter: Butter helps add some creaminess to the sauce
Olive oil: Olive oil is used in our sauce
Lemon juice: Helps give a tangy flavor to the dish
Zaatar: I would describe it as herbaceous za’atar. It is earthy and so flavorful. 
Garlic: Garlic cloves helps add to the flavor of the dish
Garlic Yogurt: This sauce will go on top of the salmon and is so delicious

​What equipment do you need?

oven-safe sauté pan or a cast iron skillet
tablespoon
teaspoon
whisk
medium bowl

How do you make zaatar salmon?

Set oven to 400°F: and pat down your salmon with a paper towel.
Melt the butter: in medium bowl. Add it to the olive oil and lemon juice. Dip the salmon into the sauce and set aside.
Add a tablespoon of oil: into a cast-iron or a large ovenproof sauté pan, set it to a medium-high heat. Allow it to heat and place the salmon in skin side down for 2 minutes. 
Mince the garlic: add the minced garlic to the remaining sauce Pour the sauce into the pan.
Cover the filets:​ in zaatar while it is in the pan. Cover with lemon slices and bake for 15 minutes.
Remove from the oven: and place the garlic yogurt on the top of the fish. Then take some of the sauce from the pan and place that on top of the yogurt. Place on a serving platter or on your plate and eat immediately.

* a note on salmon: fish is cooked when the internal temperature is 145°F. 

liquids in a book
melt the butter in a bowl with the lemon juice, olive oil, and zaatar
oil in a cast iron pan
place oil in a cast iron or ovenproof pan
sauce with a whisk in a bowl
mix together the sauce
salmon fillet dipped in a sauce
dip the fillets into the sauce
minced garlic in a sauce
add the garlic to the leftover sauce
Zaatar Salmon: Mediterranean Baked Za'atar crusted Salmon
place the salmon fillets in the pan skin side down
Zaatar Salmon: Mediterranean Baked Za'atar crusted Salmon
season the filet with zaatar
add the lemon slices (they are optional)
bake
Zaatar Salmon: Mediterranean Baked Za'atar crusted Salmon
serve after topping with garlic yogurt

Why should you make this zaatar salmon?

This dish is so amazing for the great flavor it packs in. This will be the new way you cook salmon. It is a delicious meal and perfect for those on a Mediterranean diet (and those who are not). This will be your go to salmon recipe.

Zaatar Salmon: Mediterranean Baked Za'atar crusted Salmon

​Tips and Tricks for zaatar salmon:

If you do not want to make garlic yogurt then tahini pairs really nicely with this. The nutty tahini flavor helps enhance the za'atar spice. Another alternative is labne dips (cava makes really delicious ones if you can find them). Baby spinach is also a great idea if you'd like to toss a leafy green in there. I make my garlic yogurt sauce with Greek yogurt but you could also use labne if you wanted to. Zaatar is an incredible spice mixture that you will love to have in your kitchen and you'll find it will become one of your go to key ingredients!

My favorite thing to pair with this dish is my roasted potatoes with zaatar and harissa. 

LEAVE A RATING AND REVIEW!

Did you make this recipe? If you did, let me know! And let others know too by leaving a comment and star rating. Reviews are incredibly useful in helping other people find my site and make my recipes. Thank you so much!

Laura 

CHECK OUT OTHER RECIPES HERE

  • Gluten Free Fried Fish: A Pan-Fried & Gluten-Free Recipe
    Gluten-Free Pan Fried Fish
  • New England Seafood Casserole Recipe: The Best Recipe!
  • baked rockfish with chives on top on a white plate with a silver serving utensil next to it
    Quick and Easy Oven Baked Rockfish Fillets Recipe
  • Little Mermaid's Les Poissons
    Les Poissons

Garlic Yogurt

September 4, 2023

Garlic Yogurt Recipe: An Easy Homemade Dip & Sauce

If you are looking for the perfect easy dip or sauce to top fish or poultry with, then this garlic yogurt sauce is the recipe for you. Ready in a matter of minutes with simple ingredients, it is super quick and delicious.

Garlic Yogurt Recipe: An Easy Homemade Dip & Sauce

I love a dip or a sauce that I can use for multiple things. This delicious dipping sauce is perfect with salmon, potatoes, and could easily be used on poultry. It is not a thin sauce like a salad dressing but it is thick because it is a yogurt based sauce. This sauce is inspired by a sauce that I would get at a local Middle Eastern restaurant that they would serve with potatoes. I loved it so much that I wanted to make my own. 

Main Ingredients for yogurt garlic sauce

Fresh Garlic Cloves: I like using fresh garlic in this recipe (not garlic powder). It gives the rich flavor to the sauce. 
Yogurt: I use Greek yogurt in this recipe not regular yogurt. You could try using regular yogurt however I like the sauce to be thicker, especially if you are using it for a dip (it is an amazing dip with french fries) Use plain yogurt.
Lemon Juice: The acidity helps elevate the garlic yogurt and give it more tangy flavors.
Spices: I use Zaatar and fresh mint leaves in this recipe. It is the thing that brings the dip to its peak tastiness. 
Pomegranate seeds: optional but they add a nice textural difference and flavor to the yogurt.

ingredients for Garlic Yogurt Recipe: An Easy Homemade Dip & Sauce

What equipment do you need?

All you need is a medium sized bowl and a whisk (along with a garlic mincer). You do not need anything fancy like a food processor. 

In a medium size bowl (do not use a small bowl, you want to be able to stir everything). 

How do you make this garlic yogurt sauce 

Add the yogurt: to the bowl, specifically one cup of Greek yogurt
Mince your garlic and add the minced garlic to the bowl along with the lemon juice, and spices.
Mix together: If going to be using right away, add the pomegranate seeds on top and use. If not, place in the fridge until use and when ready to use place the pomegranate seeds on top. 

glass bowl with ingredients for garlic sauce
Garlic Yogurt Recipe: An Easy Homemade Dip & Sauce

This dish is the perfect accompaniment to so many things and cuisines. Indian cuisine often pairs yogurt with its dishes and this would be beautifully with a tandoori chicken. This greek yogurt sauce is a favorite for me with salmon. It honestly would go great with potato chips, fresh veggies, zucchini fritters, or anything you dip! 

How do you store this delicious sauce?

Simply place the the yogurt into an airtight container and place in the fridge. You can keep it in there for as long as your yogurt would be good for. 

Tips and Tricks For Garlic Yogurt:

For best results always follow the original recipe however there are different ways you can make yogurt dip. You can omit the zaatar if you wish or substitute different spices however, once you have a little bit of the original dish, you won't want it any other way. It will likely become a household staple because Yogurt has a similar texture to sour cream except it doesn't have all of the calories! Honestly, this dip pairs beautifully with so many things, pita bread, a mezze platter, raw veggies, chicken wings, pita chips, any number of delicious recipes. I really do love it with salmon but as someone who used to eat chicken, it owuld also go beautifully with chicken souvlaki or roast chicken. 

LEAVE A RATING AND REVIEW!

Did you like this recipe? If you did, please let me know! And let others know too by leaving a comment and star rating. Reviews are incredibly useful in helping other people find my site and make my recipes. Thank you so much! I greatly appreciate it, and you!

Laura 

CHECK OUT OTHER RECIPES HERE

  • fried tortilla chips
    How to make homemade tortilla chips
  • caramelized onions in a jar
    How to make Caramelized Onions
  • Quick and Easy Orzo Recipe!
    Creamy Tomato orzo pasta
  • Kronk's Spinach Puffs Recipe
    Kronk's Spinach Puffs

Red Curry Salmon: Easy Thai Red Curry Salmon Recipe!

August 30, 2023

Red Curry Salmon: Easy Thai Red Curry Salmon Recipe!

If you love salmon and are looking to spice up your weekly dinners, this red curry salmon is perfect. Ready in 30 minutes, and absolutely delicious, it will become a meal in your weekly rotation. 

Red Curry Salmon: Easy Thai Red Curry Salmon Recipe!

Salmon filets are a food that I constantly have in my freezer. It is a staple in my house. Salmon is packed with omega-3s, is great for brain development, and is just delicious. However, regular salmon can get boring pretty quickly. Enter this red curry salmon aka my red Thai salmon curry. This recipe is so quick to make and so easy, but packed full of flavor and is absolutely delicious. 

A brief note on curry paste:

The history of curry paste in Thai food is deeply intertwined with the culinary and cultural development of Thailand. Thai cuisine is known for its intricate balance of flavors, vibrant colors, and aromatic herbs and spices. Curry pastes are essential components of many Thai dishes, providing the foundation for the rich and complex flavors that Thai food is famous for.

While the exact origins of curry paste in Thai cuisine might not be definitively documented, it's believed that curry paste recipes were influenced by a combination of local ingredients and influences from neighboring countries, as well as historical trade routes and migration patterns.

What ingredients do you need for red curry salmon?

ingredients for Red Curry Salmon: Easy Thai Red Curry Salmon Recipe!

Fish sauce: a staple in Thai cooking. Fish sauce is a very unique taste and can add a ton to a dish. We don't use soy sauce in this recipe, only fish sauce.
Lime juice: lime juice adds a great acidity to the dish.
Thai Red Curry Paste: This adds so much flavor and really is the essence of the dish. It also gives our sauce its color. In Thai cooking, you use curry paste and no so much curry powder as you would in Indian cooking. I use a store-bought curry paste.
Salmon filets: This is our protein for this dish. I use sockeye salmon but you can use wild salmon, fresh salmon, or frozen (be sure to thaw is overnight in the fridge first if you plan to use frozen)
Fresh Cilantro: This is a garnish you will use at the end of the dish
Sugar: To add a bit of sweetness to the dish
Chili Pepper: To add some spice
Chili Powder: For flavor in our dish
Garlic: Everything tastes better with garlic
Ginger: I use ginger powder in this recipe as I never have enough of an excuse to use enough fresh ginger to warrant having it in my fridge but we use it to help bring out the flavor in the dish.
Coconut Cream: Coconut cream is the liquid in our dish, the base of our sauce. Coconut cream allows the dish to be dairy free but does not compromise on creaminess. Coconut milk is great but it does not have the same level of creaminess that coconut cream can afford.
Small Onion: You can also use small shallots but a small onion works just fine in this recipe
Salt and Pepper: To taste
Oil: I like using a clear oil like canola or vegetable but you can use olive oil.
Green Onion: As a garnish and is optional

Another optional topping is Thai basil (or fresh basil aka regular basil)

Red Curry Salmon: Easy Thai Red Curry Salmon Recipe!

How do you make this red curry salmon?

Make sure your: salmon filets aren't too wet. Press paper towel onto them to remove the moisture. You do not want too much water releasing while you are cooking them. 
Fill your baking dish with oil: place it on a medium heat. Take the salmon filets and place with the skin side up - this means place the non-skin side face down in the pan. Cook the salmon fillets for 2 minutes and then remove from the pan and set aside.
Put oil into the pan: and add your chopped onions along with the ginger. You want these to caramelize and brown. If you find that the onions are sticking to the bottom of your pan, you can add a bit of water to deglaze your pan. Cook these for about 7 minutes on a medium heat.
Once the onions are cooked: add the sugar, chili pepper, and minced garlic to the pan and allow it to cook for one minute. Add the red Thai curry paste and let it cook for one minute.
Proceed to then add: the chili spice, fish sauce, and your coconut cream. You want to make a creamy curry sauce, therefore coconut cream is your best option (not full-fat coconut milk). Use the entire can and break it down with a wooden spoon.
Add the juice: from half of a lime and some lime slices into the sauce. Then place the salmon filets into the pan and cook for 10-15 minutes on a medium heat. The internal temperature of salmon when cooked is 145°F. Check the salmon steaks while you are cooking them (you can check every 2-3 minutes) to make sure that they reach the desired internal temperature.
Remove from the stove: top with green onion, fresh cilantro, and serve immediately. You can serve this over rice, mashed potatoes, or with some sort of flat bread.

oil in a pan
Place oil in pan
Salmon filets skin up in a pan
Put the salmon filets skin side up and cook for 2 minutes
chopped onion and spices in a pan
Add more oil, onion and ginger to the pan
chopped onion and garlic with spices to make Red Curry Salmon: Easy Thai Red Curry Salmon Recipe!
Once caramelized, add the minced garlic and sugar
Red Curry Salmon: Easy Thai Red Curry Salmon Recipe!
Add the chili powder and red curry paste, cook for a minute
coconut milk and red curry paste in a pan with a wooden spoon
Pour the coconut cream in and break down
Red Curry Salmon: Easy Thai Red Curry Salmon Recipe!
Add the salmon filets back to the red curry sauce along with lime wedges
Red Curry Salmon: Easy Thai Red Curry Salmon Recipe!
Cook until the internal temperature is 145°F
Red Curry Salmon: Easy Thai Red Curry Salmon Recipe!
Garnish and serve immediately

*Use large limes and slice them if you'd also like to garnish the dish with lime slices. 

Why should you make this recipe?

Making Thai food at home can be easy and delicious. This Thai coconut salmon curry aka red curry salmon is perfect for the whole family. Ingredients are available at your local grocery store, and the red curry sauce for this dish is delectable. The meal itself takes around 30 minutes and is the perfect weeknight meal or an easy recipe for your weekend. the Thai flavors in this dish are evident from the fish sauce and the red curry paste. The flavor profile is unique but is the perfect blend of sweet and savory. This red salmon curry is the ideal meal.

Tips for this red curry salmon recipe:

If you are unfamiliar with cooking salmon: be sure that the internal temperature is 145°F. That is when you know salmon is fully cooked.
Make sure to use red curry paste in this recipe: there are many different types (green curry paste, yellow curry paste). The essence of this dish is red curry paste
If you'd like a bit more heat: add more red chili peppers

Red Curry Salmon: Easy Thai Red Curry Salmon Recipe!

Storage Tips for this red curry salmon:

Cooling: Allow the cooked salmon to cool down to room temperature before storing it. Avoid leaving it at room temperature for more than 2 hours, as bacteria can start to grow.
Refrigeration: If you plan to consume the cooked salmon within a couple of days, store it in an airtight container or wrap it tightly in plastic wrap. Place the container in the refrigerator at a temperature of 40°F (4°C) or lower. Cooked salmon can be stored in the refrigerator for up to 3-4 days.

LEAVE A RATING AND REVIEW!

Did you find this helpful? If you did, let me know! And let others know too by leaving a comment and star rating. Reviews are incredibly useful in helping other people find my site and make my recipes. Thank you so much!

Laura 

CHECK OUT OTHER RECIPES HERE

  • Easy One Pot Fish Stew
    Fish Soup
  • Sliced Ahi Tuna on a plate
    Easy Ahi Tuna Marinade Recipe: Seared Marinated Tuna
  • Chilean Sea Bass
  • Gluten Free Soft Shell Crab Sandwich
    Soft Shell Crab Sandwich

Gluten-Free Pan Fried Fish

August 28, 2023

Gluten Free Fried Fish: A Pan-Fried & Gluten-Free Recipe

Being gluten-free doesn't mean you have to go without some of your favorite things. This gluten-free fried fish recipe is so quick and easy that it will become part of your weekly rotation.

Gluten Free Fried Fish: A Pan-Fried & Gluten-Free Recipe

Growing up, my exposure to fried fish was a fresh fish (usually a white fish) that was a battered fish that came with french fries. It was the classic play on fish and chips. However, just because you can't have gluten doesn't mean that you can't make yourself delicious gluten free fried fish at home. While this isn't a traditional fish and chips recipe. this is more a mediterranean fried fish, it is so delicious, an easy recipe and is a great option for anyone on a gluten-free diet. 

What Equipment do you need:

Medium bowl
Cast iron pan
Thermometer (if you want to make sure your fish is fully cooked).

Ingredients for gluten free fried fish

Gluten Free Fried Fish: A Pan-Fried & Gluten-Free Recipe ingredients

Olive oil: is the oil you will fry the fish in, and it goes in the sauce.
White Fish: cod fish,- cod I like the best but you can also use other white fish fillets. Mahi Mahi would likely work nicely)
Gluten Free Flour: I like to use King Arthur Measure for Measure gluten free flour. If you want to try to emulate regular flour (wheat flour) or all purpose flour, it is best you avoid single flours (i.e. white rice flour) and go for a gluten-free flour mix. 
Spices: Harissa, Cumin, Paprika (sweet paprika), garlic powder, salt, pepper - cayenne pepper is optional if you'd like some spice added to it
Lemon Juice: To help lift up the flavor of the dish
Butter: To give some richness to the sauce 
Garlic: For your sauce

How to make this gluten free fried fish recipe:

Set your oven: to 425°F. Even though we panfry this recipe, it gets baked as well for extra flavor.
Dry the fish: Take paper towels and pat down the fish filets. You want to make sure that they are dry for your fish dry. If the pieces of fish are too wet, it will not coat properly and it will not give you a crispy coating, but a soggy one.
Take a large skillet: specifically cast iron and place the oil in the pan. Have it on a medium-high heat. By allowing the oil to heat up, it will help crisp up the coating on the fish when it is put into the pan.
Melt your butter: and mix it together with the lemon juice and olive oil (do not add the garlic yet). Pour ¼ of the sauce into a bowl that you can then dip the fillets into. 
Mix your dry ingredients: You do not need a large bowl for this but rather a medium or small bowl and a plate. Mix the dry ingredients together, and pour onto a plate so that you can dip the fish into it. 
Dip the fish: first into the sauce mixture and then into the flour mixture. Once they are covered, place in your skillet in the hot oil. Fry them for 2-4 minutes per side (until they are golden brown) on a medium heat. 
Bake: Once you have panfried the fish, put the garlic into your sauce and place it into your pan. Do not pour it over your fish as you want the top to stay crispy. Bake for 10 minutes.
Remove from the oven: and serve immediately.

frying pan
place oil in pan so it can heat up
liquid and fish in a bowl
make your sauce and dip. fish both sides into it
cod filet in flour
proceed to then dip the filets in flour
battered fish on plate
do this for every filet
Gluten Free Fried Fish: A Pan-Fried & Gluten-Free Recipe
place the filets in the heated oil
Gluten Free Fried Fish: A Pan-Fried & Gluten-Free Recipe
cook for 2-3 minutes per side
Gluten Free Fried Fish: A Pan-Fried & Gluten-Free Recipe
remove from the heat
Gluten Free Fried Fish: A Pan-Fried & Gluten-Free Recipe
pour the sauce around the filets, not over
Gluten Free Fried Fish: A Pan-Fried & Gluten-Free Recipe
proceed to bake for 10 minutes
Gluten Free Fried Fish: A Pan-Fried & Gluten-Free Recipe
remove from the oven and serve immediately

*If you do check the internal temperature, fish is cooked when it reaches 145°F.

Notes:

There is no deep frying in this recipe or excess batter (as there is no real batter to be made in this dish). However this crispy gluten free fish is one of my favorite gluten free dinners. Deep-fried fish (while delicious) can create such a mess. By using this coating mix, you get great flavor on the fish, and the final product is a gluten free fried fish without all of the mess but it has such good flavor. 

With this recipe, you or your friends with celiac disease can add this into your weekly rotation of meals. Serve it with a gluten-free beer for a more relaxed meal, or, take the fish and use it to make fish tacos. This fish fry is so tender that it would make fish taco filling. It does not need homemade tartar sauce to go with it because of the sauce that is poured onto it before the bake, but, you can always add that if you'd like.

How to store this gluten free fried fish?

This is of course best served right after it is made as it has the crisp on top but should you wish to store it (it does reheat well), store it in an airtight container and keep it in the fridge. Eat within 2-3 days. 

Can't find Cod? here are other white fish:

Haddock: Haddock is similar to cod and is often used as a substitute. It has a slightly sweet flavor and is popular for frying, baking, and smoking.
Pollock: Pollock has a milder taste and softer texture. It's often used in processed seafood products like surimi (imitation crab) and fish sticks.
Flounder: Flounder is a flatfish with delicate, flaky white flesh. It has a subtle flavor and is commonly pan-fried, baked, or broiled.
Halibut: Halibut is known for its firm texture and slightly sweet flavor. It's versatile and can be grilled, baked, or used in dishes like fish tacos.
Sole: Sole is a delicate flatfish with tender, mild-flavored meat. It's often used in gourmet preparations like Sole Meunière.
Tilefish: Tilefish has a slightly sweet flavor and firm texture. It's popular for grilling, baking, and broiling.
Whiting: Whiting is a small fish with a mild flavor and fine texture. It's often used in dishes like fish chowder or battered and fried.
Catfish: While some types of catfish have darker flesh, there are also white-fleshed catfish species. They have a mild taste and are popular for frying.
Perch: Perch has a mild, delicate flavor and can be found in freshwater and saltwater varieties. It's often pan-fried or grilled.

LEAVE A RATING AND REVIEW!

Did you love this recipe? If you did, let me know! And let others know too by leaving a comment and star rating. Reviews are incredibly useful in helping other people find my site and make my recipes. Thank you so much!

Laura 

Find more of my favorite pescatarian recipes below

  • Cajun Catfish Recipe on a plate
    Cajun Catfish
  • Savory Galette
  • Linguine With Clams
  • Gluten Free Beer Steamed Mussels

If you want to learn to make any recipe gluten free be sure to subscribe to my newsletter where you can learn to make your favorite recipes gluten-free. 

Blueberry Pie with Frozen Blueberries

August 20, 2023

Blueberry Pie with Frozen Blueberries: Easy Homemade Pie

If you are looking to make a blueberry pie and only have frozen blueberries in the house, this recipe is for you. This blueberry pie with frozen blueberries is quick, easy, and just as delicious as if you were using fresh blueberries.

Blueberry Pie with Frozen Blueberries: Easy Homemade Pie
[feast_advanced_jump_to]

I love blueberries. It might be evident from other recipes on my blog like glazed blueberry donuts, blueberry burnt Basque Cheesecake, or my blueberry muffins. I love blueberries, and while I love a fresh blueberry, I use frozen more often than not. Fruit pies are so simple to make that once you make one, you can pretty much apply the process to all of them. There is not too much of a difference when using frozen berries vs fresh berries for your blueberry pie filling but let's talk about how you can make a blueberry pie with frozen blueberries.

Tips and Tricks:

Things to keep in mind while making your blueberry pie. You can use frozen blueberries as they are, and that is what I did for this recipe, or, you can let them come to room temperature first. Either is fine. Typically, if you want to avoid any risks of a runny pie then you would use room temperature berries. However, this is avoidable if you follow the right steps.

What do I need for this blueberry pie recipe?

Rolling Pin
Parchment Paper
Pie Pan 
Pastry Brush
Pot
Pastry cutter

Ingredients for blueberry pie with frozen blueberries

ingredients for Blueberry Pie with Frozen Blueberries: Easy Homemade Pie
Ingredients for blueberry pie with frozen blueberries

Frozen Blueberries: The frozen blueberries are the core of our easy blueberry pie. Blueberry filling is so delicious and makes for the perfect pie.
Pie crust: For a yummy homemade pie crust and flaky crust you can use my gluten free pastry dough recipe. You can also use store-bought if you like. 
Lemon Juice: The acidity and the lemon flavor helps enhance the natural flavor of the blueberry mixture. You can also use lemon zest if you want but this is optional.
Sugar: I use two types of sugar in this recipe. White sugar in the filling, and then turbinado sugar on the top of the lattice pie crust. 
Spices: I use cinnamon and coriander to help enhance the flavor of the fruit filling
Egg: There is no egg in the recipe itself but it is used for an egg wash for the top crust and the sides of the bottom crust that lean on the lip of the pie dish. 
Cornstarch: Cornstarch is our thickening agent for our pie. Without it, the pie filling is just soup! This helps the juicy blueberries congeal a bit to help the filling solidify so when you cut the pie, it does not run out everywhere.
Vanilla Ice cream: This is completely optional, but, I like to put a generous scoop of vanilla ice cream on top of my pie.

Blueberry Pie with Frozen Blueberries: Easy Homemade Pie

How do you make blueberry pie with frozen blueberries?

Make the crust: If you are using a store-bought crust, follow the instructions. If you are making a homemade crust, set your oven to 350°F and par bake the bottom crust. Cover it with parchment paper (after pricking it with a fork) and fill with baking beads and bake for 20 minutes. While the crust is baking, make the berry filling.
Make the filling: Place the frozen blueberries into a pot and add the sugar and spices in at the same time. Add the lemon juice and set your burner to a medium. The berries will melt in the pot and release the juices. 
As the berries melt: You will see that there will be a lot of juice in the pot. You can remove some if you would like to make sure that you do not have a runny pie. Meanwhile, place the cornstarch into a bowl with water and whisk together. Pour the cornstarch mixture into the pot with the berries. The filling will start to congeal. 
Remove the pie from the oven: Place your juicy filling into the pie crust. Now, I like a lattice top for my blueberry pies, but, if you do not want to do a lattice crust then you can do a whole crust for the top of the pie. If you are doing a lattice crust, a great way to make it is to use a pastry cutter (or a pizza cutter) to slice up rolled out pastry dough. Make your top, and then brush it with the egg wash. Make sure to not just do the top but to get the outer crust as well. you want the whole pie top to be brushed with the egg wash and then top it with the turbinado sugar. 
Bake the pie: Place the pie into the oven and bake for 30-40 minutes. You want the pie to be golden brown. When you remove it from the oven, make sure to let the pie cool. If you cut the pie while it is still really warm, the pie may be a bit too runny. You can place it in the fridge if you want it to cool faster and congeal a bit more.

blueberries in a pot
Place blueberries in a pot
blueberries in a pot with sugar on top
Cover them in sugar
blueberries in a pot with spices for Blueberry Pie with Frozen Blueberries: Easy Homemade Pie
Add your spices and lemon juice and place on the burner on a medium heat
cornstarch in a bowl
While the filling is being made, make your cornstarch mixture
cornstarch mixed with water in a yellow bowl
Whisk it together
blueberry pie filling in a pot
Pour the mixture into your blueberry filling
Blueberry Pie with Frozen Blueberries: Easy Homemade Pie
Place the blueberry filling into the bottom of the pie
Blueberry Pie with Frozen Blueberries: Easy Homemade Pie
place the top on and brush with eggwash
Blueberry Pie with Frozen Blueberries: Easy Homemade Pie
Bake for 30 minutes or until golden brown

Why should You make this Blueberry Pie with Frozen Blueberries?

Limiting yourself to blueberry pie during blueberry season only is a terribly sad way to live. You can have frozen sweet blueberries in your freezer at any time and put them to good use to make a delicious homemade blueberry pie. This is a great recipe as it is honestly so quick and simple to make. The blueberries you use can be frozen fresh blueberries, frozen wild blueberries, it honestly does not matter, any kind will work. 

Tips for your pie crust:

I use a food processor for my pie crust. My gluten free pastry dough recipe is my go-to recipe for tarts and pies. With one pastry dough recipe, I have enough dough to make the bottom and top pie crust (because I make a lattice crust). I feel a lattice crust is the epitome of the classic pie. When making the strips for the top of your pie, use a pastry cutter to cut wide strips. It gives such an elegant and beautiful look to the pie.

LEAVE A RATING AND REVIEW!

Did you find this helpful? If you did, let me know! And let others know too by leaving a comment and star rating. Reviews are incredibly useful in helping other people find my site and make my recipes. Thank you so much!

Laura 

CHECK OUT OTHER RECIPES HERE

Are Gluten Free Oreos Dairy Free or Vegan? Gluten-Free Oreos

August 17, 2023

Are Gluten Free Oreos Dairy Free or Vegan? Gluten-Free Oreos

If you are a lover of oreos but are gluten free and dairy free you may have asked yourself "are gluten free oreos dairy free?". In this post, we discuss what is safe for you to eat and recipes you can make.

are gluten free oreos dairy free

What are Gluten Free Oreos?

Milk’s Favorite Cookie Is Now Gluten Free OREO fans will celebrate this delightful, certified gluten free treat. These gluten free chocolate wafer cookies are made with real cocoa and a blend of gluten free flour! OREO Gluten Free Chocolate Sandwich Cookies are a tasty new spin on the classic treat, and just as dunkable. The combo of chocolate wafer cookies and creme makes any moment or occasion a little bit sweeter. A Taste of Nostalgia Resealable packs make it easy to share this iconic treat, and your cookies stay fresh until you’re ready to enjoy them! Delight friends at work or in the classroom, or put a sweet twist on party favors, goodie jars, or gift bags. This package contains 1 pack of OREO Gluten Free Chocolate Sandwich Cookies.

What are the ingredients in gluten-free oreos?

SUGAR, WHITE RICE FLOUR, TAPIOCA STARCH, PALM OIL, CANOLA OIL, WHOLE OAT FLOUR, CORNSTARCH, COCOA (PROCESSED WITH ALKALI), INVERT SUGAR, SOY LECITHIN, BAKING SODA, SALT, XANTHAN GUM, CHOCOLATE, ARTIFICIAL FLAVOR.

As we can see from the ingredients list from the Oreo website. Gluten free oreos are free of several allergens:
They do not contain any dairy products, animal products, peanut butter. They are therefore not only safe for those with celiac disease, but those on a vegan diet. The flours that they use are gluten-free flour (such as rice, tapioca, oat). It is relatively simple ingredients compared to some other processed cookies, but, it is true that gluten-free oreos are a vegan-friendly cookie and good for those on a dairy-free diet.

If you are highly sensitive as a celiac, you need to be sure of the manufacturing process to ensure that there is no cross-contamination of any product. If you feel that it is not worth the risk, you can buy gluten-free sandwich cookies from a gluten free company (such as Glutino). Their cookie also does not contain any animal-derived ingredients, is safe for those on a gluten free diet, and is just as good as vegan oreos. 

Gluten free oreos are available at most grocery stores. 

Are regular oreo cookies gluten free?

No- regular oreos are not gluten free (neither are golden oreos). They both contain wheat flour. Original oreos are not safe for those on a gluten free diet.

Recipes to make with gluten free and dairy free oreos.

Since oreos gluten-free are also dairy free, let's look at some recipes that use them! They have all of the flavor of classic oreos except these are safe for the gluten free and dairy free folks in your life. These are great for any oreo fan. Amp up your recipe game while using these gluten-free cookies and let's get creative. 

Oreo Milkshake without Ice Cream

Gluten Free Dairy Free Oreo Milkshake

This 3 ingredient oreo milkshake without ice cream is rich, thick, and creamy. It's made with simple ingredients and takes less than 5 minutes to blend together. Here

GLUTEN FREE DAIRY FREE OREO CUPCAKES

are gluten free oreos dairy free

Gluten-free Dairy-free Oreo Cupcakes are your favorite cookie made into a tall, tender dessert. Here

GLUTEN & DAIRY-FREE TRIPLE CHOCOLATE PIE (GLUTEN, DAIRY, EGG, PEANUT & TREE NUT FREE; VEGAN)

are gluten free oreos dairy free

Oreo Cream Cheese Cookies are buttery, chewy and soft. Loaded with rich white chocolate chips, cream cheese and lots of oreo cookies, baked until chewy on the outside with a soft buttery center. Here

These recipes are a great option for anyone on a gluten-free diet. Gluten-free oreo cookies are also dairy-free cookies (and vegan as they contain no animal ingredients) that are safe for anyone with Celiac or a gluten intolerance. 

LEAVE A RATING AND REVIEW!

Did you find this helpful? If you did, let me know! And let others know too by leaving a comment and star rating. Reviews are incredibly useful in helping other people find my site and make my recipes. Thank you so much!

Laura 

CHECK OUT OTHER ARTICLES AND RECIPES

  • Are Corn Tortillas Gluten Free? Homemade Gluten-Free Recipe
  • image
    Are Potatoes Gluten Free? Gluten Free Potato Recipes
  • Is Miso Gluten Free?
    Is miso gluten free? Gluten-free Recipes / What to Know

How To Cook Frozen Pasties: Cooking Pasty Instructions

August 16, 2023

How To Cook Frozen Pasties: Cooking Pasty Instructions

If you have ever been to the heart of Cornwall, then chances are you have heard of pasties. If you have bought them premade and frozen, or if you gave simply stored ones that you have made yourself from home, you may be wondering how to cook frozen pasties. In this post I'll guide you through. 

How To Cook Frozen Pasties: Cooking Pasty Instructions

What are Cornish Pasties?

The Cornish pasty is a baked pastry filled with a delicious combination of ingredients. The history of Cornish pasties dates back to the 17th century when they were commonly eaten by Cornish miners and workers as a portable and hearty meal. The thick crimped edge was designed as a handle so that the miners could hold the pasty with dirty hands and discard the crimped edge afterward, minimizing waste.

What equipment / tools will I need to cook frozen pasties?

Parchment paper (if you do not have this, then wax paper is fine)
Baking tray (or a baking sheet or cookie sheet)
Egg Wash Brush / Pastry Brush

How to cook frozen pasties

For the best results, if you have made the pasties yourself (check out my gluten free pasty recipe) I like to let the pasty come to room temperature. However, if you want to work with a completely frozen pasty that is completely fine.

Set your oven to 350°F. 
Place pasties onto a baking tray: that is lined with parchment paper
Make sure that each of the pasties: has an a cut in it so that the heat can escape while baking and they won't explode. 
Make the egg wash: in a bowl, whisk an egg. Using a pastry brush, brush the egg wash onto each pasty. Make sure that they are covered. The best way to make sure is to do 2 coats of egg wash. 
Bake: Place the pasties in the preheated oven and bake until they are golden brown. The cooking time for that is usually 25-30 minutes. If you feel that they are not golden enough then place them back to the center of the oven and make for an additional 
Remove from the oven: Take the hot tray out of the oven and let them sit out for 10-15 minutes to ensure that you do not burn your mouth. If you want to be risky, give it 3-4 minutes.

How To Cook Frozen Pasties: Cooking Pasty Instructions
Place frozen pasties on a lined baking sheet
How To Cook Frozen Pasties: Cooking Pasty Instructions
Brush the frozen pasties with an egg wash and slit a hole on top of each pasty
How To Cook Frozen Pasties: Cooking Pasty Instructions
Bake the pasties for 30 minutes or according to the instructions of the pasties you bought
baked pasties that were frozen on parchment paper
Leave for a few minutes on the counter to cool and then serve.

If you are making frozen pasties from a premade pasty that you yourself did not make, the best methods for those are to follow the cooking instructions that come on the packaging. 

Larger pasties may take a bit longer. Aim to bake those for at least 35-40 minutes. 

If you wish to take the temperature of your pasties to make sure that when you bake pasties they are fully cooked inside, look for an internal temperature 165°F to know that they are baked. 

The cooking process of homemade pasties or store-bought pasties is so simple. Uncooked pasties and their delicious filling are such a good option for dinner (or lunch, or breakfast). Traditional Cornish recipes, like pasties, are the best option if you are wishing you were on vacation on the beautiful Cornish coast. The half-moon shape makes them a super fun meal that every member of the family will love. It will soon be on the list of family favorites recipes. 

History of Cornish Pasties

Cornish pasties are a traditional British pastry that originated in Cornwall, a county in the southwest of England. They are a type of hand-held pie or turnover filled with a delicious combination of ingredients.

The classic Cornish pasty is made with a simple pastry dough, consisting of flour, butter, or lard, water, and sometimes a pinch of salt. The dough is rolled out into a circular shape and then filled with a mixture of diced beef, potatoes, onions, and swede (rutabaga). These ingredients are typically raw when placed inside the pastry, and they cook as the pasty bakes in the oven.

Once the filling is placed on one half of the pastry circle, the other half is folded over the top to create a semicircular shape. The edges are then crimped together, either by hand or using a fork, to seal the pasty. This crimped edge not only ensures that the filling remains enclosed during baking but also serves as a handle for eating the pasty while holding it.

The origins of Cornish pasties date back several centuries and are often associated with the region's mining communities. The pasties were favored by miners as a convenient and portable meal that provided a hearty and filling option for their long shifts underground. The thick crimped edge allowed the miners to hold the pasty with their dirty hands and then discard it without eating the edge, reducing waste.

Cornish pasties have become a culinary icon of Cornwall and are popular throughout the United Kingdom and beyond. While the traditional filling consists of beef, potatoes, onions, and swede, there are now many variations available, including vegetarian and vegan options, as well as creative combinations with different meats and vegetables.

Authentic Cornish pasties are protected under the European Union's Protected Geographical Indication (PGI) status, meaning that for a pasty to be labeled as "Cornish," it must adhere to specific traditional standards and be made in Cornwall.

LEAVE A RATING AND REVIEW!

Did you find this helpful? If you did, let me know! And let others know too by leaving a comment and star rating. Reviews are incredibly useful in helping other people find my site and make my recipes. Thank you so much!

Laura 

Check out other recipes here

  • Quick and Easy Masala Chai Recipe
    Masala Chai
  • Creamy Mashed Potatoes
    Creamy Mashed Potatoes
  • Chilean Sea Bass Recipe on a Thanksgiving table
    Gluten Free Thanksgiving Recipes
  • Kluskies

Gluten-Free Traditional Cornish Pasties

August 14, 2023

Gluten Free Pasty Recipe: Traditional Cornish Pasties

Learn how to make your favorite Cornish staple at home and gluten-free—introducing the gluten-free pasty. This savory hand pie is delicious, hearty, and the perfect meal to eat with your hands.

Gluten Free Pasty Recipe: Traditional Cornish Pasties

Prior to visiting Cornwall several years ago I had researched where I could find gluten free Cornish pasties. I ended up finding several that were so delicious that I have worked at perfecting the recipe since coming home. 

What is the history of Cornish Pasties?

The history of Cornish pasties dates back to the 17th century when they were commonly eaten by Cornish miners and workers as a portable and hearty meal. The thick crimped edge was designed as a handle so that the miners could hold the pasty with dirty hands and discard the crimped edge afterward, minimizing waste.

What equipment do you need?

I make my pie crust in a food processor so for this recipe I would suggest that.

In addition you will need:
Baking Tray (or baking sheet)
Rolling pin (or a taco press)
parchment paper (or wax paper)
Large bowl

Ingredients for gluten free pasties


Rutabega, root vegetables are integral to a pasty.
Potato
Onion
Cheddar Cheese
Fresh Thyme
Vegetable Boullion 
Gluten free flour (make sure to use one with xanthan gum)
Butter
Egg
Water
Garlic Salt
Black Pepper
Oil

*A note on gluten free flour: when making your gluten free pasty, remember that not all gluten free flours are made equal. I always use Cup4Cup gluten free flour for pie crusts.

Ingredients

How to make a gluten free Cornish pasty

First you are going to make your dough: Add the flour, cold butter that is cubed, egg, and 1-2 teaspoon of cold water into your food processor. Blend until it comes together to form a dough. Place in the fridge after you have covered with plastic wrap to preserve it. 
To make your filling: Peel the rutabagas and then cut it up into small pieces. Rutabaga takes some time to soften while it is boiled, so, the smaller the pieces, the easier it will be. Proceed to then cut up the potatoes. Place them both in a pot and fill it with water. Salt your water, it will help add flavor to the food. Boil until the components are all soft.
In the meantime, slice your onions: You can keep them longer (as if making caramelized onions) or dice them to ensure that each pasty will have plenty of onion. On medium heat, heat around 2-3 tablespoons of canola oil in a pan, and place the onions in. Allow them to turn golden brown. Once this has happened, add the boiled potatoes and rutabaga and allow it to start to come together to form a sort of mash. Begin to season with garlic salt, pepper, and 1 tablespoon of vegetable bouillon. Stir to make sure it is incorporated. 
Add the thyme: add the 2 tablespoons of fresh time, and continue to stir. Once you feel the flavor is balanced, add the ¼ cup of cheddar cheese. Once the filling has come together, set it aside so it can cool until the point where it is lukewarm. You can transfer it to a large mixing bowl or keep it in the pan that you cooked it in. 
Putting them together: Heat your oven to 350°F. This recipe can make 8-9 small pasties or if you wish to make large pasties, it will likely make 3 or 4. 
To make your pie crust for your gluten free pasties, you can do this one of two ways.
Take two piece of parchment paper, then take a ball of dough and place it between them. Use your rolling pin to roll it out until it is the size of a corn tortilla. 
On a taco press, take two pieces of parchment paper, and place a ball of pie dough between them. Press down, and do this until it is the size of a corn tortilla.
Once it is the size you want: scoop in the filling. Place it in the center of the dough in a line going across. Fold the dough over, and crimp the dough along the edges. Do this until all of the filling and dough is gone. 
Once your pasties are assembled: on baking sheets lined with parchment paper, place the pasties onto them. Slit holes onto the top of each gluten free pasty to ensure that air can properly escape while baking. Now, take a beaten egg and brush the egg mixture onto the top of each pasty. Place in the oven and bake for 30 minutes or until golden brown. When removed from the oven, allow them to sit for a few minutes. You do not want to burn your tongue when you bite into them.

Peel the rutabaga and chop it along with the potatoes, place in a pot and fill with water. Boil until they are soft.
Slice your onions and place 2 tablespoon of oil into your pan on medium heat and sautee the onions.
Once your potatoes and rutabaga are soft, drain and place in the pain with the onions. Season with garlic salt.
Add the vegetable bouillon, cheese, and thyme. Cook down and season to your taste until it becomes a bit mushy. Once it is done, set aside.
Make your pastry dough
In a taco press (or between two pieces of parchment paper) press a dough ball together
Press or roll out until it is the size you want
Do not make it too thin or too fat
pastry dough between parchment paper
It should look like this
filling on pastry dough
place filling in the middle of the circle
Gluten Free Pasty Recipe: Traditional Cornish Pasties
fold over
Gluten Free Pasty Recipe: Traditional Cornish Pasties
Crimp the edges and fold upwards
Gluten Free Pasty Recipe: Traditional Cornish Pasties
place on your backing sheet
Gluten Free Pasty Recipe: Traditional Cornish Pasties
brush with egg wash and bake
Gluten Free Pasty Recipe: Traditional Cornish Pasties
remove from the oven and let sit for a few minutes

*Making gluten free pastry can be daunting at first but it is simple once you get the hang of it!

*A note on gluten free pie dough: I prefer working with gluten free pie dough before it is chilled. I find it is easier to roll out and less likely to crack. I make my dough typically after I make my filling, however, it is entirely your choice and you do what you prefer.

*If you do not have gluten free pie dough nor wish to make it but do have a gluten free puff pastry, you could use that (even though traditional pasties use regular pie crust. For a flaky crust, it is hard to beat making your own pie crust).

What to do with extra filling?

If you have extra filling, you can freeze it or keep it in the fridge for a few days. If you freeze it it will last for three months. You can also freeze pasties and heat them up and bake them at a later time. The time to freeze them would before the baking step and egg wash. 

So why make this gluten free pasty recipe?

This is such a delicious recipe and it becomes so easy to make after the first time you have made it. The half-moon shape is so nice and you have delicious food at the tips of your fingers! The pastry dough is deliciously flakey, and who doesn't want to have their very own Cornish pasty recipe? It is an easy recipe and is a winner whenever you are having non-meat eating friends over for dinner. With each bite you should get equal pieces potato, rutabaga, and onion (along with some flavor from cheddar). Hard to beat that!

LEAVE A RATING AND REVIEW!

Did you find this helpful? If you did, let me know! And let others know too by leaving a comment and star rating. Reviews are incredibly useful in helping other people find my site and make my recipes. Thank you so much!

Laura 

Looking for something similar?

Butterscotch Icing

August 14, 2023

Butterscotch Icing: Fluffy, Fast, Delicious Butterscotch Frosting

This recipe for butterscotch icing is the perfect and decadent treat. Fluffy, sweet, and ready in under 5 minutes. This icing pairs beautifully with carrot cake and only has a handful of ingredients!

Butterscotch Icing: Fluffy, Fast, Delicious Butterscotch Frosting

Butterscotch is such a warming flavor that I think it sometimes gets associated with more fall flavors, however, this recipe for butterscotch icing is so delicious and pairs well with so many things, you can enjoy butterscotch frosting all year round.

Are Frosting and Icing the same?

While the terms "frosting" and "icing" are often used interchangeably, there can be slight differences in their composition and usage depending on regional preferences and culinary traditions. Generally, frosting and icing refer to sweet toppings used to decorate and enhance the flavor of baked goods. In this post, icing and frosting will be used interchangeably.

What is butterscotch?

Butterscotch is a delectable confectionery flavor that is beloved for its rich, buttery, and caramel-like taste. It is often associated with desserts and candies, adding a delightful sweetness and depth of flavor. The word "butterscotch" itself is believed to have originated from the combination of "butter" and "scotch," with "scotch" referring to the Scottish origin of the candy.

How is butterscotch made / what is it made of?

Traditionally, butterscotch is made by melting butter and combining it with brown sugar, creating a smooth and velvety mixture. Sometimes, additional ingredients such as cream, vanilla, or salt may be added to enhance the flavor and texture. The mixture is then cooked until it reaches a specific temperature or consistency, resulting in a thick and creamy butterscotch sauce or candy.

Do I need to make my own butterscotch for butterscotch icing?

Absolutely not! I used a butterscotch syrup in this recipe because I am a working mom and I need to be quick about things but still get all the delicious flavor of butterscotch.

What pairs well with butterscotch and what can I use it with?

It can be drizzled over ice cream, used as a filling or topping for cakes and pastries, or even incorporated into beverages and cocktails.

Where does butterscotch come from?

Scotland, particularly the town of Doncaster, became renowned for its production of butterscotch in the early 19th century. Butterscotch candies gained popularity and became widely enjoyed throughout Britain and beyond.

Why you should make this butterscotch icing recipe

  • It is ready in under 5 minutes
  • it is made up of 4 ingredients
  • it is so rich and decadent, it is like a dessert itself

Ingredients

Butterscotch Icing: Fluffy, Fast, Delicious Butterscotch Frosting
Ingredients for Butterscotch Icing

½ cup Unsalted Butter, softened to room temperature
1 8oz Cream Cheese, softened to room temperature
3 cups Powdered Sugar
2 teaspoon Butterscotch Syrup
1 tablespoon Milk (or cream), optional

How to make Butterscotch Icing

  1. Take the softened unsalted butter and softened cream cheese, place in the bowl of a stand mixer or a bowl that is safe to use a hand mixer. Beat for 2 minutes so it starts to get fluffy.
  2. Cream your butter mixture and sugar:
    Add the powdered sugar and beat for 3 minutes until it gets fluffy. Add the butterscotch syrup and beat a minute more. If you feel like your butterscotch icing is too thick, add 1 tablespoon of milk (or cream) and continue to beat. Do this until it reaches the consistency that you like.
  3. Decorate:
    Fill your icing into a piping bag (preferably a reusable one!) and pipe the butterscotch icing onto cakes, cupcakes, or into the center of cookies.
Butterscotch Icing: Fluffy, Fast, Delicious Butterscotch Frosting ingredients
Place the butter and cream cheese in the bowl of a mixer
Butterscotch Icing: Fluffy, Fast, Delicious Butterscotch Frosting
Add the powdered sugar into the bowl once you have mixed the cream cheese and butter and fluffed it up
Butterscotch Icing: Fluffy, Fast, Delicious Butterscotch Frosting
Add the syrup and mix again for a couple of minutes. When done, pipe immediately or see storing instructions
Butterscotch Icing: Fluffy, Fast, Delicious Butterscotch Frosting

Recipe Success Tips

  • Make sure the butter and cream cheese are at room temperature. This is important because of neither is, it will be clumpy and your frosting will have chunks in it. You do not want this 1) for taste and 2) it will clog up the nozzle of your piping bag.
  • If you find that your frosting is too thick, it is a simple fix. Add 1 tablespoon of milk at a time and continue to beat the icing. This will help loosen it up!
  • If you find that for some reason your icing isn't thick enough, add a bit more powdered sugar (¼ cup) and beat and it will thicken up immediately.

How much butterscotch icing does this recipe make?

It will make you enough to ice 12 cupcakes. Or several mini cakes as are seen in the photos above.

Can I freeze butterscotch frosting?

Yes! You absolutely can freeze icing. I love freezing it because it means I have some saved up for the next time I want to use it. Simply place the icing into an airtight or freezer friendly bag and seal it up. The icing will last 3 months in the freezer. When ready to use, remove from freezer the night before and place in the fridge. The next day, place on the counter to warm up a bit before use. If you find it is still a bit too stiff, beat it up with a mixer and it will taste like new.

Does Butterscotch Icing need to be refridgerated?

Buttercream icing typically does not need to be refrigerated if it is used to frost a cake or cupcakes that will be consumed within a day or two. However, if you plan to store the frosted cake or cupcakes for an extended period or if the weather is very hot and humid, refrigeration can help maintain the freshness and stability of the buttercream.

Refrigeration can cause the buttercream to firm up, so it's important to bring the cake or cupcakes to room temperature before serving to ensure a softer and more enjoyable texture. If you choose to refrigerate the buttercream, it's advisable to store the cake or cupcakes in an airtight container to prevent them from absorbing any odors from the refrigerator.

LEAVE A RATING AND REVIEW!

Did you love the recipe? If you did, let me know! And let others know too by leaving a comment and star rating. Reviews are incredibly useful in helping other people find my site and make my recipes. Thank you so much!

Laura 

Looking for Similar Recipes?

Gluten-Free Halloween Recipes

August 11, 2023

Gluten Free Halloween Recipes: Gluten-free Fun Treats!

If you are going to or hosting a Halloween party and eating gluten-free, you may be looking for some gluten-free Halloween recipes. In this post, we will go over fun and easy gluten-free recipes that will liven up all your Halloween parties.

Gluten Free Halloween Recipes

Halloween is fast approaching and it is the perfect time get ready for the Halloween season. Full disclosure, I get ready for Fall and Halloween in August, so there is no judgment here when you start. While some of the traditional halloween foods are fun (little ghosts (ghost meringues), caramel apples, or gluten free halloween cookies with chocolate chips) are all fun, you can make some other fun food this holiday season.

It is not much fun whenever you are dealing with food allergies and having to figure out how you are going to feed people or yourself at party. Living with dietary restrictions can be hard, but do not worry, the perfect Halloween treat is here! Whether your are dealing with Celiac Disease or a gluten sensitivity, you can have an easy halloween and a spooky dessert. You do not have to miss out on Halloween fun by just being limited to Halloween candy. Let's dive into some fun and delicious gluten free treats.

Gluten Free Halloween Recipes:Harry Potter Recipes Edition

Whenever Halloween comes around, I immediately think of Harry Potter. It is likely because in the first film, he heads to school in the fall and we see the amazing feast at Hogwarts. They aren't just eating candy corn, gummy worms, and apple slices in those movies, but delicious and now iconic food.

Here are recipes for Harry Potter gluten-free halloween treats

Polyjuice Potion

Gluten Free Halloween Recipes

Pumpkin Pasties

Gluten Free Halloween Recipes

Chocolate Frogs

Gluten Free Halloween Recipes

Butterbeer

Gluten Free Halloween Recipes

Hagrid's Rock Cakes

Gluten Free Halloween Recipes

Black Lake Brownies

Pumpkin Juice

Sorting Hat Cupcakes

Mexican Hot Chocolate Cookies

Mexican Hot Chocolate Cookies

Gluten-Free Halloween Recipes

Here are some other fun treats for your homemade halloween sweet treats

Gluten Free No Bake Pumpkins

No bake pumpkins

frankenstein krispies

Halloween Rice Krispies

Pumpkin Pie

vegan pumpkin pie

Halloween Puppy Chow

gluten free puppy chow

Gluten Free Halloween Cake Pops

gluten free cake pops

Tools & Tips for Gluten Free Halloween Recipes


Large Bowl
Gluten-free flour (for cookies I love King Arthur Measure for Measure (with Xanthan Gum), and for pie crust I exclusively use Cup4Cup). 
Piping Bag
Cookie Sheet
Parchment Paper
Electric Mixer

Don't let Celiac disease or a gluten intolerance hold you back this spooky season. There are great recipes and plenty a gluten free option for you to make sure that you (and the young kids) in your life, don't have to feel left out of the festivities or on Halloween night. 

A fun way to enjoy Halloween is to have pumpkin carving, and then dig into your Halloween treats!

Happy Halloween!

what is the history of halloween?

Halloween's origins trace back to the ancient Celtic festival of Samhain, marking the end of summer and honoring the dead. Over time, it merged with Christian traditions, like All Saints' Day, evolving into a night of costumes, bonfires, and superstitions. Irish immigrants brought these customs to America, where Halloween transformed into a community-centered holiday with trick-or-treating and pumpkin carving. Today, it's a vibrant fusion of ancient rituals and modern festivities, celebrating both spooky and lighthearted elements, making it a beloved and culturally rich occasion worldwide.

Some tips to have the easiest gluten-free halloween:

Gluten free dessert can be overwhelming if you have never made it before but luckily with the amount of quality gluten free ingredients readily available, you shouldn't have to worry too much about making your festive treats delicious.

LEAVE A RATING AND REVIEW!

Did you find this helpful? If you did, let me know! And let others know too by leaving a comment and star rating. Reviews are incredibly useful in helping other people find my site and make my recipes. Thank you so much!

Laura 

Looking for similar recipes?

  • Gluten Free Halloween Recipes: Gluten-free Fun Treats!
    Gluten-Free Halloween Recipes
  • Harry Potter Cake
  • No Churn Coconut Ice Cream Recipe
    "Coconut Ice" Cream
  • Gluten Free Mincemeat Pies recipe Harry Potter inspired stacked
    Mincemeat Pies

New England Seafood Casserole Recipe: The Best Recipe!

July 10, 2023

If you love a hearty meal and are a fan of seafood, then you will love this New England Seafood Casserole Recipe! It is stuffed full of delicious ingredients that seafood lovers will be unable to stop themselves for going for seconds.

New England Seafood Casserole Recipe: The Best Recipe!

I love an easy recipe, (you can see my vegetable tater tot casserole if that is your thing) especially an easy seafood casserole recipe. We are a pescatarian household, so, hearty meals that will have leftovers, yes please!

Ingredients for new England seafood casserole recipe:

Sea scallops
Parmesan cheese
Salt/ black pepper
Thyme
Butter, unsalted 
Large shrimp
Dry sherry
White fish, you can use a firm white fish like cod or you can use flounder
Shallots, if you do not have, then a medium onion works fine
Garlic cloves
Ritz crackers (I use a gluten free equivalent)
Dijon mustard
Milk
All purpose flour (I use King Arthur Measure for Measure gluten free flour)
Mushrooms

New England Seafood Casserole Recipe ingredients

How to make this New England seafood casserole Recipe:

Place Oil or unsalted butter into a pot: if you are using butter, use 1-2 tablespoon and place the chopped shallot into the pot until they are golden brown. Then mince the garlic and place in the pot for 2-3 minutes. Proceed to then add the mushrooms and allow them to brown for 4 or 5 minutes.
Add the Sherry: and allow it to boil down. Once it has, add the mustard and flour.
Once you have added the flour: Make sure the flour covers everything in the pot. It is going to thicken the sauce.
Add the milk: Add the milk to the pot and let it sit for 3-4 minutes. You can stir it in this time. It will begin to thicken.
Add the seafood: Add the seafood to the pot and allow it to cook for a few minutes. The shrimp will start to turn pink, and the filets of fish will begin to break down.  Season your dish and taste it here. Add as much salt or pepper as you like.
Pour into your baking dish: Pour the filling into your baking dish and then top it with the cracker. For this, melt 1-2 tablespoons of butter and mix it with the cracker crumbs. If you want, you can add the parmesan at this point, or, once it comes out of the oven.
Bake: Place your baking dish into a preheated oven and bake for 25-30 minutes at 400°F. When it comes out of the oven, allow it to sit for 5-10 minutes. Cover with parmesan (if you didn't put it on while it was going into the oven), and fresh parsley. 

New England Seafood Casserole Recipe ingredients
Make sure your seafood is dry and set your oven to 400°F
shallots and garlic in a pot
Cut up your shallots and fry with either olive oil or butter for 2-3 minutes. Then add the garlic and fry for 1-2 minutes
mushrooms, shallots in a pot
Add the mushrooms and fry for 3-4 minutes
mushrooms in sherry in a pot
Add the sherry to the mushrooms and let the sherry boil down
mushrooms with flour and mustard and a green spatula in a pot
Mix in the dijon mustard and flour
mushrooms in milk in a pot
Pour in the milk and let it thicken for a few minutes.
New England Seafood Casserole Recipe in a pot
Place the seafood into the pot and allow it to cook for a few minutes
New England Seafood Casserole Recipe in a baking dish
Pour into a baking dish, cover with the topping, and bake for 25-30 minutes
New England Seafood Casserole Recipe baked in a baking dish
Add the parmesan and fresh parsley. Allow to sit for 5-10 minutes, then serve.

Substitutions for this recipe:

There are several seafood components to this dish and you can sub in different types of fish:

Tail meat of lobster tails, lobster meat, crab meat, dry white wine can be substituted for dry sherry, fresh garlic is always the best way to go but if you cannot find any, then you can use garlic powder

You can use cream instead of milk if you want a richer gravy.

The type of seafood you use is not overly specific, it can be up to your tastebuds. We love shrimp and scallops, so we pair that with white fish in our household, but, all options are equally delicious!

New England Seafood Casserole Recipe

Storing New England Seafood Casserole Leftovers

To store a casserole properly, follow these guidelines:

  1. Allow the casserole to cool: Before storing, allow the casserole to cool down to room temperature. This helps prevent condensation from forming inside the storage container, which can lead to sogginess or spoilage.
  2. Choose an appropriate container: Select a container that is suitable for storing the casserole. Ideally, it should be airtight to keep the casserole fresh and prevent any odors from transferring to other foods in the refrigerator.
  3. Portion into individual servings (optional): If you anticipate only needing a portion of the casserole at a time, consider dividing it into individual servings before storing. This way, you can easily take out and reheat only what you need, minimizing waste.
  4. Cover the casserole: If the casserole is still in the original baking dish, you can cover it tightly with plastic wrap or aluminum foil. Ensure that the covering completely seals the dish to prevent air and moisture from entering.
  5. Label and date: Use a marker or label to indicate the contents and date of storage. This helps you keep track of freshness and easily identify the casserole later.
  6. Store in the refrigerator: Place the covered casserole in the refrigerator. Make sure it is stored away from raw meats or other foods that could potentially contaminate it.
  7. Use within recommended timeframe: Consume the casserole within 3-4 days of storage to ensure its freshness and quality. Discard any leftovers beyond this time to avoid the risk of foodborne illness.

Why should you make this recipe?

This is such a great recipe! The creamy sauce mixed with the fresh seafood is absolutely delicious and makes this one of the best main courses you are ever going to have as a seafood lover. It is a delicious casserole with a creamy base that will leave your taste buds dancing. I promise. The crunchy top mixed with the melted butter is so good that you will wish you used more of it and be wondering how you can add to this other dishes in your repertoire. 

LEAVE A RATING AND REVIEW!

Did you find this helpful? If you did, let me know! And let others know too by leaving a comment and star rating. Reviews are incredibly useful in helping other people find my site and make my recipes. Thank you so much!

Laura 

Check out other Fish Recipes

How to Make the Easiest Russian Buttercream Recipe

June 13, 2023

Discover the epitome of indulgence with this Easy Russian Buttercream Recipe. With its whipped butter base, this is a simple recipe to make while delivering the most satisfying and flawless results. Get ready to experience a fluffy texture and achieve the perfect frosting like never before.

russian buttercream recipe on chocolate cake

There's nothing quite like discovering a new frosting recipe and exploring various delightful variations. And if you're a fan of simplicity, I've got great news for you! This Russian buttercream recipe is not only incredibly quick and easy to make, but it also guarantees exceptional results every single time. Prepare to indulge in the best frosting imaginable.

The beauty of Russian buttercream lies in its versatility. You can incorporate it into your favorite desserts with absolute ease. From cakes to cupcakes, cookies to pastries, the possibilities are endless. With numerous Russian buttercream uses and countless ways to customize it, why settle for a traditional buttercream when you can effortlessly create the easiest frosting and most delicious frosting? Give it a try and experience the magic for yourself.

What is the difference between American and Russian Buttercream?

The main difference between American buttercream and Russian buttercream lies in their ingredients and preparation methods. Here are the key distinctions:

American Buttercream: Due to the high amount of powdered sugar, American buttercream is very sweet. It has a thicker consistency and can be quite firm, making it suitable for piping decorations and maintaining shape.
Russian Buttercream: Russian buttercream is also sweet, but the sweetness comes from the sweetened condensed milk. It has a softer and creamier consistency, making it easier to spread and creating a smoother finish on cakes.
Stability and Shelf Life:

American Buttercream: American buttercream is known for its stability at room temperature and can hold its shape well, which is advantageous for decorating cakes. However, it can become crusty on the outside over time.
Russian Buttercream: Russian buttercream is also stable but tends to have a shorter shelf life at room temperature due to the inclusion of sweetened condensed milk. It is recommended to refrigerate cakes frosted with Russian buttercream.

American Buttercream: American buttercream has a straightforward buttery and sweet flavor. It serves as a neutral base that can be easily flavored with various extracts, such as almond, lemon, or coconut, to create different tastes.
Russian Buttercream: Russian buttercream has a distinct sweet and creamy flavor from the sweetened condensed milk. While it can also be flavored with extracts, the condensed milk flavor is more pronounced, giving it a unique taste.

Both American and Russian buttercream have their merits and are widely used in cake decorating. The choice between them depends on personal preference, desired consistency, and the specific cake decoration techniques you plan to employ.

What Ingredients do you need for this Russian Buttercream Recipe?

russian buttercream recipe ingredients
Ingredients for Russian Buttercream Frosting

It is minimal ingredients and simple ingredients! 
Main Ingredients 

Unsalted Butter: You will want to use room temperature butter, it helps give the icing its buttery flavor. 
Condensed Milk: You will use a full can (14 oz). This gives a creamy finish and creamy consistency to the Russian buttercream. 
Vanilla Extract: For some delicious vanilla flavor
Salt: ​A pinch of salt
Powdered Sugar: The recipe does not call for it, but, it can help you should your Russian buttercream icing split, this is optional

How to make this Russian Buttercream Recipe

This is such an easy recipe with simple steps. 
Unsalted Butter: Take the sticks of butter and place it into the bowl of a stand mixer. If you do not have a stand mixer, place it into a large mixing bowl and plan to use a hand mixer. You are going to use a whisk attachment for this recipe, do not use the paddle attachment. 
Whip the butter: You need to whip the butter for 5-10 minutes. No need to start on a low speed, start on medium-high speed and move up to high speed. 
Add the vanilla: Lower the speed on the mixer and add the vanilla, and the salt. You can then increase the speed.
Slowly add the Condensed Milk: Add ⅓ of the can at a time. You want to only add a little bit at a time rather than large amounts, you do not want it to pool at the bottom. To avoid this, use a rubber spatula to scrape down the sides to make sure everything is being incorporated. Add the final third of the condensed milk to the buttercream and whisk on a medium speed. IT will become a silky smooth texture, and voila, you have your Russian buttercream frosting. 

softened butter in a mixing bowl
Add softened butter to the bowl of the mixer
whipped butter with vanilla in a mixing bowl for russian buttercream
beat for 7-10 minutes with a whisk attachment then add the vanilla and salt and whisk for a minute more
whipped butter with condensed milk
Add the condensed milk (dulce de leche) ⅓ at a time and whisk until it is incorporated
russian buttercream in a yellow bowl
either take the icing and place into a piping bag or see the instructions for freezing
russian buttercream recipe on chocolate cake
if piping, pick a piping bag and nozzle, fill with Russian buttercream, and decorate
russian buttercream recipe on chocolate cake
If you have questions about storage, be sure to check out that section

What is Russian Buttercream used for?

Russian buttercream can be used on a variety of baked goods and desserts to add a creamy and flavorful finishing touch. Here are some popular options:

Cakes: Russian buttercream is commonly used to frost and decorate cakes. Whether you're making a classic layer cake, a birthday cake, or a special occasion cake, mini chocolate cake, Russian buttercream can be spread over the cake layers or used for piping decorative patterns and designs.
Cupcakes: Top your chocolate cupcakes with a dollop of Russian buttercream for a delightful and indulgent treat. It can be piped using different nozzles to create various designs or simply spread over the cupcakes for a smooth and creamy finish.
Pastries: Russian buttercream can be used to fill or decorate pastries such as éclairs, cream puffs, or danishes. It adds a creamy and rich element to these delicate treats, enhancing their flavor and texture.
Macarons: Russian buttercream can be sandwiched between two macaron shells to create a luscious filling. Its smooth consistency pairs well with the delicate and chewy texture of macarons, creating a delightful combination.
Cookies: Use Russian buttercream to sandwich cookies together, such as whoopie pies or Linzer cookies. The buttercream adds a creamy layer that complements the sweetness of the cookies.
Dessert Bars: Spread Russian buttercream on top of dessert bars like brownies or blondies for an added layer of indulgence. It can also be swirled or piped on cheesecake bars or cookie bars for an attractive presentation.
Sweet Rolls and Buns: Russian buttercream can be used as a filling or drizzled over sweet rolls, cinnamon buns, or babka to elevate their taste and appearance.
Cake Pops: Dip cake pops into melted Russian buttercream for a smooth and creamy coating. Decorate them further with sprinkles or drizzles for a fun and delicious treat.

Remember, Russian buttercream can be customized with different flavors and colors, allowing you to create a wide range of dessert variations. Its smooth and creamy texture makes it a versatile frosting that can be adapted to suit your creative ideas and personal preferences.

russian buttercream recipe on 3 chocolate mini cakes
Russian buttercream cakes

What are other types of Buttercream to Russian Buttercream?

In addition to Russian buttercream, there are several other types of buttercream that are commonly used in baking and cake decorating. Here are a few notable examples:

American Buttercream: American buttercream is one of the most basic and widely used types of buttercream. It is made by creaming together softened butter and powdered sugar, along with flavorings such as vanilla extract. This buttercream is quick to make and has a sweet and creamy flavor. It's commonly used for frosting cakes and cupcakes.
Swiss Buttercream: Swiss meringue buttercream is a light and silky buttercream made by heating egg whites and sugar over a double boiler until the sugar dissolves, and then whipping the mixture to form stiff peaks. Softened butter is gradually incorporated into the meringue, resulting in a smooth and airy frosting. Swiss meringue buttercream has a less sweet taste compared to American buttercream and is known for its stability and versatility in cake decorating.
Italian Meringue Buttercream: Italian meringue buttercream is similar to Swiss meringue buttercream but uses a different method to create the meringue base. It involves whipping a hot sugar syrup into egg whites to create a stable meringue, which is then combined with softened butter. Italian meringue buttercream has a lighter texture and a silky smooth consistency. It's often used for filling and frosting cakes, and it pairs well with fruit flavors.
French Buttercream: French buttercream is made by whisking egg yolks and sugar until pale and fluffy, then adding softened butter and flavorings. This buttercream has a rich and velvety texture and a luxurious taste due to the egg yolks. It's often flavored with vanilla or other extracts and is a popular choice for filling pastries and layer cakes.
German Buttercream: German buttercream, also known as custard buttercream or pastry cream buttercream, combines pastry cream with softened butter. Pastry cream is a thick, egg-based custard made with milk, sugar, eggs, and cornstarch. Once the pastry cream has cooled, it is blended with softened butter to create a creamy and flavorful buttercream. German buttercream is commonly used for filling pastries, cream puffs, and cakes.

Can you freeze Russian Buttercream? How to store:

To store Russian buttercream, follow these guidelines to maintain its freshness and quality:

Refrigeration: Russian buttercream should be stored in the refrigerator to keep it cool and prevent it from spoiling. Transfer the buttercream to an airtight container or cover it tightly with plastic wrap or a sealable bag.
Proper Sealing: Ensure that the container or covering is airtight to prevent any odors or flavors from other foods in the refrigerator from being absorbed by the buttercream. This will also prevent the buttercream from drying out or developing a crust.
Duration: Russian buttercream can typically be stored in the refrigerator for up to 1 week without any significant loss of quality. However, it's best to consume it within a few days for the best taste and texture.
Softening: When you are ready to use the refrigerated Russian buttercream, allow it to come to room temperature before using or spreading it on your baked goods. This will make it easier to work with and restore its creamy consistency.
Freezing: If you have leftover Russian buttercream or want to prepare it in advance, you can freeze it for longer-term storage. Place the buttercream in an airtight container or wrap it tightly in plastic wrap, then place it in the freezer. It can be stored in the freezer for up to 2 to 3 months.
Thawing: When you're ready to use the frozen buttercream, transfer it to the refrigerator and let it thaw overnight. Once thawed, allow it to come to room temperature and give it a good stir or re-whip it briefly to restore its smooth texture before using.

It's important to note that buttercream can soften and melt at warmer temperatures, so avoid leaving it at room temperature for extended periods, especially in hot weather.

By following these storage guidelines, you can preserve the freshness and quality of your Russian buttercream, allowing you to enjoy it for a longer period of time and use it whenever needed.

Recipe Variations:

Vanilla Bean Paste: ​You can use this instead of extract. It will add beautiful flecks of vanilla into the smooth frosting. 
Almond Extract: ​If you would prefer an almond flavor rather than vanilla, you can definitely use almond extract. 
Dulce de leche: If you would like to swap this for the condensed milk, then go ahead! 
Cocoa Powder: ​If you would like to have a chocolate Russian Buttercream recipe then add ¼ cup - ½ cup of cocoa powder. 

For Best Results + Recipe Tips for Russian Buttercream Recipe

I love to decorate with a colored frosting and the best way to add color to frosting is with gel food colorings. My favorite brand for this is Americolor. 
To pipe your frosting, place the buttercream into a piping bag and along with the nozzle of your choice and pipe. If you have leftover buttercream, take the rest of the buttercream and store it (see the section on freezing it). If you are having a hard time with the piping, make sure that the nozzle is not blocked.

In order to achieve the right consistency for your Russian buttercream frosting, you will want to be sure that you do not use cold butter. That rich flavor comes from the condensed milk so be sure if there is any left in the can to use the rest of the condensed milk, do not leave a drop in there! 

LEAVE A RATING AND REVIEW!

Did you love the recipe? If you did, let me know! And let others know too by leaving a comment and star rating. Reviews are incredibly useful in helping other people find my site and make my recipes. Thank you so much!

Laura 

Looking for Similar Recipes?

  • Chantilly Cake (Gluten-Free)
  • Funfetti Cake
  • Cake from Sleeping Beauty
    Cake from Sleeping Beauty
  • Gluten Free Clafoutis Recipe
    Clafoutis

Easy Coffee Buttercream Icing Recipe

June 5, 2023

Get ready to elevate your desserts with this irresistible coffee buttercream icing! In just 5 minutes, you can whip up a batch of this fluffy and delicious frosting that will take your cakes and cupcakes to the next level. With its delightful coffee flavor and unbelievably easy preparation, this icing is a must-have for any coffee lover and baking enthusiast.

A close-up of creamy coffee buttercream frosting piped on a cake

Calling all coffee lovers! Discover the ultimate indulgence with our delectable coffee buttercream icing. Whip up a batch of this heavenly frosting and experience a burst of rich coffee flavor in every bite. Whether you’re decorating a cake or topping your favorite cupcakes, this coffee-infused delight will take your desserts to new heights. Get ready to satisfy your coffee cravings and elevate your baking game with this irresistible coffee buttercream icing recipe!

HOW TO THICKEN COFFEE BUTTERCREAM?

If your coffee buttercream icing is too thin and you need to thicken it, there are a few steps you can take:

  1. Add more powdered sugar: Gradually incorporate additional powdered sugar into the icing, a little at a time, until you achieve the desired thickness. This will help absorb excess moisture and thicken the icing.
  2. Chill the icing: Place the coffee buttercream in the refrigerator for about 15-30 minutes to allow it to firm up. The cooler temperature will help solidify the fats in the icing, resulting in a thicker consistency.
  3. Adjust the liquid-to-solid ratio: If you used too much liquid (such as coffee or milk) in the original recipe, you can balance it out by adding more solid ingredients, such as butter or powdered sugar, to thicken the icing. Gradually add small amounts until the desired consistency is reached.
  4. Whip the icing: Using an electric mixer, beat the buttercream on medium-high speed for a few minutes. This will incorporate air into the mixture and help it become lighter and fluffier, potentially thickening it as well.
  5. Refrigerate or freeze the icing: If the above steps don’t yield the desired thickness, you can try refrigerating or freezing the icing for a longer period. However, keep in mind that chilling the icing may also make it slightly harder to spread, so you may need to let it come to room temperature and give it a quick whip before using.

Remember to make adjustments gradually to avoid over-thickening the icing. If needed, you can always balance the consistency by adding small amounts of liquid (such as milk or cream) to thin it out slightly.

Remember to make adjustments gradually to avoid over-thickening the icing. If needed, you can always balance the consistency by adding small amounts of liquid (such as milk or cream) to thin it out slightly.

Why has my buttercream split?

If your coffee buttercream has split or separated, it is usually due to one of the following reasons:

  1. Temperature imbalance: Buttercream is sensitive to temperature changes. If the ingredients are at different temperatures when combined, it can cause the butter to solidify or the liquids to curdle, resulting in a split appearance. Make sure all the ingredients, particularly the butter and any liquids, are at room temperature before mixing.
  2. Overmixing: Overmixing the buttercream can cause it to separate. When the fats in the butter become overworked, they can separate from the liquids and cause the mixture to look curdled or greasy. To avoid this, mix the buttercream just until the ingredients are fully incorporated and stop mixing as soon as it reaches a smooth consistency.
  3. Adding ingredients too quickly: Adding liquid ingredients, such as coffee or milk, too quickly or in large quantities can cause the buttercream to split. Gradually add the liquids while mixing on low speed to ensure proper emulsification and prevent separation.
  4. Incompatible ingredients: Some ingredients may not be compatible with the buttercream base and can cause it to split. For example, adding an acidic ingredient like lemon juice or too much liquid flavoring can disrupt the emulsion. Use caution when adding additional flavorings or ingredients that may affect the stability of the buttercream.

If your coffee buttercream has split, there are a few steps you can take to try to fix it:

  1. Stop mixing: If you notice the split appearance, stop mixing immediately to prevent further separation.
  2. Adjust temperature: If temperature imbalance is the issue, allow the mixture to come to room temperature, then beat it again to help it come together. Alternatively, you can warm the mixture slightly by placing the bowl in a warm water bath and gently stirring until it starts to combine.
  3. Incorporate slowly: If you added liquids too quickly, try adding a small amount of the liquid at a time while mixing on low speed until the buttercream comes back together.
  4. Re-whip or use a hand blender: If the buttercream has only partially split, you can try re-whipping it with an electric mixer or using a hand blender to bring it back to a smooth consistency.

If none of these methods work and the buttercream remains split, it may be necessary to start again with fresh ingredients and follow the recipe and mixing instructions carefully to achieve a smooth and stable buttercream.

What happens if you use salted butter for buttercream?

Using salted butter in buttercream can alter the flavor and saltiness of the final frosting. Salted butter contains added salt, which may result in a slightly saltier taste in the buttercream compared to using unsalted butter. This can be desirable in some cases, as a touch of salt can enhance the flavor and balance the sweetness in buttercream.

A close-up of creamy coffee buttercream frosting piped on a cake

WHAT ARE THE INGREDIENTS FOR THIS COFFEE BUTTERCREAM RECIPE?

Whole Milk: You will add the espresso powder to the whole milk to mix into your coffee buttercream. If you do not want to use milk, you can use hot water, or heavy cream.
Icing Sugar: This helps thicken your buttercream frosting this is also known as confectioner's sugar
Butter: Helps give to the name buttercream
Cream Cheese: It adds such a great creaminess to the buttercream
Instant Espresso Powder: This is where the coffee flavor comes from. You use instant espresso because it is the easiest way to get enough coffee flavor
Vanilla Extract: Every buttercream icing has a pinch of vanilla to help bring out all of the flavor of coffee. Make 

How to make coffee buttercream icing?

Make the coffee: Take the instant coffee granules (the instant espresso powder) and mix with whole milk or hot water in a small bowl, and set aside.
Fluff up the butter and cream cheese: Beat the two with the paddle attachment on your stand mixer for 3 minutes
Add the powdered sugar: Toss the powdered sugar in (make sure your mixer is on the lowest setting when making buttercream recipes- you do not want the powdered sugar to fly out of the large bowl) for a few minutes until it comes together 
Mix in the coffee and vanilla: Pour the coffee mixture and vanilla into the easy coffee buttercream and beat for 1 more minute. You can increase the mixer speed to high after the coffee mixture is added and mixed in slowly for a few seconds.
Pipe or store: Place the coffee buttercream into a piping bag and or store the coffee frosting for later. For storage tips see below.

Ingredients for coffee buttercream
Ingredients for coffee buttercream icing
butter and cheese cream in a mixing bowl
place the butter and cream cheese
 in a bowl of a stand mixer
 (use the whisk attachment
)
mix and add the powdered sugar
 on the lowest speed
buttercream
beat and add the coffee and vanilla. Scrape the bottom of the bowl with a spatula,
 to make sure everything has been mixed properly
coffee buttercream frosting in a yellow bowl
Place the espresso buttercream
 into a pastry bag
 and pipe or store your buttercream
A close-up of creamy coffee buttercream frosting piped on a cupcake
Enjoy!

How to store and freeze Coffee Buttercream Frosting

To store coffee buttercream frosting:

  1. Transfer the frosting to an airtight container.
  2. Ensure the container is properly sealed to prevent air exposure and maintain freshness.
  3. Place the container in the refrigerator.
  4. The coffee buttercream frosting can be stored in the refrigerator for up to 1 week.

To freeze coffee buttercream frosting:

  1. Transfer the frosting to a freezer-safe container or freezer bag.
  2. Ensure the container or bag is tightly sealed to prevent freezer burn and maintain quality.
  3. Label the container or bag with the date of freezing.
  4. Place the container or bag in the freezer.
  5. The coffee buttercream frosting can be frozen for up to 3 months.
  6. When ready to use, thaw the frozen frosting in the refrigerator overnight.
  7. Once thawed, bring the frosting to room temperature and give it a quick stir or re-whip to restore its smooth and fluffy texture.
  8. Use the thawed coffee buttercream frosting as desired for frosting cakes, cupcakes, or other treats.

Proper storage and freezing will help preserve the quality of the coffee buttercream frosting, ensuring that it maintains its flavor and texture for future use.

Can I make this coffee buttercream in advance ?

Yes, you can make coffee buttercream icing in advance. It is a convenient option for planning ahead or saving time when preparing desserts. Here's what you can do:

  1. Prepare the coffee buttercream icing according to your recipe.
  2. Once the icing is ready, transfer it to an airtight container.
  3. Make sure the container is properly sealed to prevent air exposure and freezer burn.
  4. Place the container in the refrigerator if you plan to use the icing within a few days.
  5. If you want to make it further in advance, you can store the icing in the freezer.
  6. For freezing, ensure the container is well-sealed and consider double-wrapping it with plastic wrap or placing it in a freezer bag for added protection.
  7. When you're ready to use the icing, thaw it in the refrigerator overnight.
  8. Before using, bring the icing to room temperature and give it a quick stir or re-whip to restore its smooth and fluffy texture.
  9. Use the thawed coffee buttercream icing to frost your cakes, cupcakes, or any other desired desserts.

By making coffee buttercream icing in advance, you can have it readily available for future baking projects, saving you time and effort while still enjoying its delightful flavor and fluffy texture.

Recipe Tips

Room temperature ingredients: Make sure your butter is softened at room temperature before starting. This will ensure easy blending and a smooth texture.
Gradually add powdered sugar: Add the powdered sugar to the butter mixture gradually, a little at a time. This will prevent lumps and help you achieve a creamy consistency.
Adjust consistency: If your buttercream is too thick, add a teaspoon of milk or cream at a time until you reach the desired consistency. If it's too thin, add more powdered sugar.
Taste and adjust: Before spreading or piping the buttercream, taste it to ensure the coffee flavor is to your liking. You can always add more coffee or a touch of coffee extract if desired.

What can I frost with this coffee buttercream icing?

You can use this coffee icing for cupcakes. You can use this coffee icing recipe for cake, chocolate cupcakes, espresso brownies (or mini chocolate cakes)! Frost a variety of baked goods with coffee buttercream icing to enhance their flavor and add a delicious coffee twist. It pairs wonderfully with chocolate cakes, cupcakes, cookies, and even brownies. You can also use it to frost coffee-flavored cakes or any other dessert where you want to infuse a delightful coffee taste. The creamy and fluffy texture of the coffee buttercream adds an extra layer of decadence to your favorite treats. Get creative and let the coffee-flavored frosting elevate your desserts to a whole new level!

Why You'll love this recipe

Irresistible coffee flavor: If you're a coffee lover, this buttercream will be a dream come true. It's infused with the rich and aromatic taste of coffee, adding a delightful twist to your desserts.
Creamy and fluffy texture: The buttercream is perfectly whipped to achieve a light and airy texture. It spreads and pipes beautifully, allowing you to decorate your cakes and cupcakes with precision and elegance.
Versatile and customizable: This coffee buttercream pairs well with various flavors, such as chocolate, vanilla, and caramel. You can easily customize the intensity of the coffee flavor by adjusting the amount of coffee or espresso used.
Easy and quick to make: This coffee buttercream with espresso is the perfect coffee buttercream. If you don't have espresso on hand, you can also easily make coffee buttercream with brewed coffee. It is a versatile coffee buttercream icing and it is so delicious and easy!

LEAVE A RATING AND REVIEW!

Did you love the recipe? If you did, let me know! And let others know too by leaving a comment and star rating. Reviews are incredibly useful in helping other people find my site and make my recipes. Thank you so much!

Laura 

Looking for similar recipes?

  • Orange Cakes with Olive Oil
    Orange Olive Oil Cakes
  • Gluten Free Cinnamon Rolls Recipe
  • Gluten Free Chocolate Cake Recipe Cakes
    Mini Chocolate Cakes
  • Gluten Free Lemon Loaf Cake
    Lemon Loaf

Espresso Brownies

May 31, 2023


These quick one-bowl espresso brownies are perfect for satisfying your chocolate and coffee cravings in no time. They're chewy, delicious, and boast a classic crinkly top. This recipe combines the richness of melted chocolate and cocoa powder with the bold flavor of espresso, resulting in an intensely chocolatey and coffee-infused delight. Best of all, you'll only need one bowl, making for an easy cleanup. Get ready to indulge in homemade espresso brownies with minimal fuss and maximum satisfaction!

Decadent Espresso Brownies: Rich, Fudgy, and Bursting with Coffee Flavor!


This one-bowl espresso brownies recipe is a game-changer for baking enthusiasts. It simplifies the entire process, requiring minimal cleanup and effort. The combination of melted chocolate, cocoa powder, and espresso creates an intense and heavenly flavor profile. With its fudgy texture and delightful coffee infusion, these brownies are a quick and delectable way to indulge in a rich and satisfying treat.

Do Espresso Brownies have caffeine?

Yes, espresso brownies typically contain caffeine. Espresso, which is a concentrated form of coffee, is one of the key ingredients in espresso brownies. As a result, the brownies will retain some of the caffeine content from the espresso used in the recipe. The exact amount of caffeine in espresso brownies can vary depending on factors such as the type and quantity of espresso used, but it is generally safe to assume that they will have some level of caffeine.

Normally is there caffeine in brownies?

In general, brownies do not naturally contain caffeine as it is not a standard ingredient in traditional brownie recipes. However, if a brownie recipe includes ingredients like coffee or chocolate that naturally contain caffeine, the brownies will have a small amount of caffeine as a result. The actual caffeine content in brownies will depend on the specific recipe and the amount of caffeine-containing ingredients used. Keep in mind that the caffeine levels in brownies are typically lower compared to a cup of coffee or a chocolate bar, but they can still contribute a small amount of caffeine. If you are specifically concerned about caffeine content, it's best to check the recipe and the ingredients used to have a better understanding of the caffeine levels in the brownies you're consuming.

Can you add espresso to brownies?

Yes! There are a few different ways to incorporate espresso powder to your brownies however for this espresso brownies recipe, we just add the espresso powder straight into the batter!

Decadent Espresso Brownies: Rich, Fudgy, and Bursting with Coffee Flavor!

What should brownie batter look like?

Brownie batter should have a smooth and thick consistency. It should be pourable but not too runny. When properly mixed, the batter should hold its shape when you lift the mixing spoon or whisk, and it should easily spread in the baking pan. I tend to spread mine out with a spatula.

Here is what to keep in mind with brownie batter:

  1. Texture: The batter should be smooth and free of lumps. Mix the ingredients until they are well combined and you achieve a homogeneous mixture.
  2. Thickness: The batter should have a thick consistency, similar to a thick chocolate sauce or melted chocolate. It should flow easily off a spoon but not be watery or runny. If the batter seems too thick, you can add a small amount of liquid (such as milk or water) to achieve the desired consistency. However, if you typically follow the recipe, this should not be a problem!
  3. Glossy appearance: A properly mixed brownie batter will have a glossy or shiny appearance due to the melted chocolate or cocoa powder used. This indicates that the ingredients are well incorporated.

It's important not to overmix the batter, as this can lead to dense and tough brownies. Mix until the ingredients are just combined and there are no streaks of dry ingredients remaining. You do not want to have streaks of flour through your beautiful batter.

Remember that different brownie recipes may have slight variations in the consistency of the batter, depending on the specific ingredients and ratios used. It's always a good idea to follow the instructions in your chosen recipe for the best results.

Ingredients for Espresso Brownies

Ingredients for espresso brownies
  1. ½ Cup Butter, unsalted- ½ cup is 8 tbsp
  2. 1 Cup Milk Chocolate Chips, You can also use semi sweet if you wish
  3. 3 Eggs
  4. 1 Cup Sugar
  5. ½ cup Flour, I used King Arthur Gluten Free Measure for Measure Flour
  6. ¼ cup Cocoa Powder
  7. 2 tablespoon Espresso Powder
  8. ½ Cup Chocolate Covered Coffee Beans
  9. 1 teaspoon Vanilla
  10. Kosher Salt, Optional

How do you make Espresso Brownies

Combining the Butter and Chocolate: Melt the butter in a microwavable safe bowl. Once the butter is completely melted, add the chocolate chips to the bowl and whisk together. They should all melt to form a beautiful chocolatey mix.

Adding the Sugar, Vanilla, and Eggs: Add the eggs one at a time and whisk until the batter thickens. Once all three eggs have been added, pour the sugar and vanilla into the brownie batter and whisk again.

Mixing in the dry ingredients: Add the flour, cocoa powder, and espresso powder to the brownie batter. Switch out the whisk for a spatula now and fold in the ingredients. Once they are practically all mixed in, add the chocolate covered coffee beans.

Baking: Set the oven to 350°F. Line a baking dish (I used 9x13 but you can use 8x8) with parchment paper (it is easier if you grease the bottom first) pour the batter into the baking dish and smooth the top with a spatula. Place the baking dish into the oven. If you are using a 9x13, bake for 28 minutes. If you are using an 8x8 bake for 30-35 minutes. Check for doneness when removing from the oven with a toothpick. If you want them to cook up a bit more, place back in for 3 minutes at a time. Allow them to cool before you cut into them.

melted butter and chocolate chips for espresso brownies
Add chocolate chips to the melted butter and whisk
brownie batter
Mix in each egg one at a time
brownie batter
Incorporate the sugar and vanilla with a whisk
brownie batter
Place the dry ingredients into the bowl and fold in by hand with a spatula
brownie batter for espresso brownies
Pour the brownie batter into a baking dish lined with parchment paper
Decadent Espresso Brownies: Rich, Fudgy, and Bursting with Coffee Flavor!
Bake and allow to cool before cutting into them

Why You'll love this recipe for Espresso Brownies

  • Moist and Fudgy
  • One Bowl Recipe
  • Ready in under 30 minutes
  • Made with simple and accessible ingredients
  • Super simple and easy to make!

Recipe Tips for Success

Use a metal baking pan: Metal baking pans (in my opinion) can control the heat better and this will lead to a better and more even bake
Use a good quality gluten free flour (if making these gluten free- they are fine to be made with regular flour as well): King Arthur Measure for Measure Gluten Free Flour is my gluten free flour of choice when baking bars, brownies, and cookies. They are also great for cakes. This recipe was made using this flour, so remember, if you use a different flour (such as Bobs Redmill 1:1 Gluten Free Flour) you may not get the same result. Each gluten free flour has pros and cons and will produce a different result.

Can I freeze Espresso Brownies? How can I store them?

  1. Allow the brownies to cool completely: Before storing, ensure that the brownies have cooled down to room temperature. This helps to prevent moisture buildup and maintain their texture.
  2. Cut into portions: If your brownies are in a large pan or baking dish, you can cut them into individual portions or squares. This makes it easier to grab a serving when needed without having to cut through the whole batch each time.
  3. Use an airtight container: Place the brownies in an airtight container or a resealable plastic bag. This helps to prevent them from drying out and keeps them fresh for a longer period. Ensure that the container is large enough to accommodate the brownies without squishing them.
  4. Layer with parchment paper or wax paper: To prevent the brownies from sticking together, you can place a layer of parchment paper or wax paper between each layer of brownies in the container. This makes it easier to separate them when you want to enjoy one.
  5. Store at room temperature or in the refrigerator: Brownies can be stored at room temperature for a few days, typically up to 3-4 days. If you live in a warm or humid climate, it might be best to store them in the refrigerator to maintain their freshness and prevent spoilage. Refrigerated brownies can last up to a week.
  6. Freezing option: If you want to store brownies for an extended period, you can freeze them. Wrap each individual brownie tightly in plastic wrap or place them in a freezer-safe container or bag. Frozen brownies can typically be stored for up to 3 months. Thaw them at room temperature or in the refrigerator before consuming.

What is the best type of chocolate for brownies?

Typically, a semisweet chocolate would be best for brownies (you can also use bittersweet chocolate). However for this recipe because you are adding in espresso powder and chocolate covered coffee beans (which tend to be coated in dark chocolate), I opted for milk chocolate. Milk chocolate yields a sweeter brownie. If you would like your espresso brownies to be less sweet, then opt for a semisweet chocolate chip instead.

LEAVE A RATING AND REVIEW!

Did you love the recipe? If you did, let me know! And let others know too by leaving a comment and star rating. Reviews are incredibly useful in helping other people find my site and make my recipes. Thank you so much!

Laura 

Looking for Similar Recipes?

  • Ube Crinkle Cookies (Purple Yam Cookies)
  • Matcha White Chocolate Chip Cookies With Brown Butter
  • The Best Strawberry White Chocolate Cookies Recipe
  • Reeses Peanut Butter Cup Cookies Recipe: Best Cookies

Modern Waldorf Salad Recipe

May 29, 2023

modern waldorf salad in a brown bowl

Experience a modern twist on the classic Waldorf Salad with this modern Waldorf salad recipe! This contemporary rendition combines the crispness of apples, the crunch of walnuts, the tanginess of blue cheese, and the sweetness of dates, all brought together by a creamy yogurt dressing for a flavor explosion in every bite.

Modern Waldorf Salad Recipe

Where did the Waldorf Salad originate?

The Waldorf salad is named after the Waldorf-Astoria Hotel in New York City.

Why is it called a "Waldorf Salad?"

It was at this renowned hotel that the salad was first created and popularized in the late 19th century. The hotel's maître d'hôtel, Oscar Tschirky, is credited with inventing the salad and including it on the hotel's menu.
As the Waldorf-Astoria Hotel was considered a symbol of luxury and high society, the salad's association with the prestigious establishment helped to elevate its status and contributed to its widespread recognition and popularity. The Waldorf salad's name has endured over the years, even as variations and adaptations of the original recipe have emerged.

Does Waldorf Salad Have Lettuce In It?

Traditionally, Waldorf salad does not contain lettuce. The classic recipe for Waldorf salad consists of apples, celery, walnuts, and a dressing, typically mayonnaise-based. However, modern Waldorf salad recipes have emerged over time, and some modern Waldorf salad interpretations may include lettuce or mixed greens as an additional component.

Mayo or Yogurt for Modern Waldorf Salad?

The choice between mayo or yogurt for Waldorf salad dressing depends on personal preference and dietary considerations. Traditionally, Waldorf salad dressing is made with mayonnaise, which lends a rich and creamy flavor to the salad.

I personally love Greek yogurt and opt to use it in my salad!

Modern Waldorf Salad Recipe

Ingredients

  • 1 Honeycrisp Apple
  • 3-4 small Celery Sticks
  • 6-7 Dates, pitted
  • ¼ cup Walnuts, chopped
  • ⅓ cup Greek Yogurt
  • ¼ cup Blue Cheese, I used 'Cashel Blue'
  • ¼ cup Fig Cake, chopped
  • Mint, for garnish

How do you make this Modern Waldorf Salad?

  1. Grab a large mixing bowl, and spoon. Set aside.
  2. Take a knife and cutting board and cut up / chop the apple, celery, walnuts, dates, and fig cake. When you are finished, place them in your mixing bowl.
  3. Cut (or crumble) the blue cheese and place into the bowl, along with the yogurt. Use the spoon to mix. Take some mint, and rip it up, toss it into the salad and mix a few more times. When all of the elements are coated with yogurt, place into your serving bowls and top with more mint. Serve immediately.
Modern Waldorf Salad Recipe Ingredients
Ingredients for Modern Waldorf Salad
ingredients in a bowl
Chop up the ingredients for the Modern Waldorf Salad and place into a mixing bowl
Modern Waldorf Salad Recipe ingredients
Add the yogurt to the mixing bowl and begin to mix until everything is coated
Modern Waldorf Salad Recipe mixed in a bowl
Once all of the ingredients in the mixing bowl are coated in the yogurt, serve your Modern Waldorf Salad

How Long Can Waldorf Salad be Stored?

Here are some general guidelines for storing Waldorf salad:

  1. Freshly made Waldorf salad should be consumed within 2 to 3 days for optimal freshness. The texture and quality of the ingredients, especially the apples and celery, may start to deteriorate after this period. No one wants soggy food in their salad!
  2. If the salad contains a mayonnaise-based dressing, it is important to note that mayo can spoil relatively quickly when left at room temperature. Therefore, if the Waldorf salad has been left out for more than 2 hours, it is best to discard it to avoid the risk of foodborne illness.
  3. If you plan to store Waldorf salad for longer periods, consider preparing the components separately. Store the chopped apples, celery, walnuts, and dressing in separate airtight containers. Then, when you're ready to serve, simply combine the ingredients. This approach can help extend the shelf life of the salad.

It's worth noting that Waldorf salad is typically at its best when served fresh, as the texture and flavors are at their peak. Biting into the salad and getting that crunch from the apple, celery, and or nuts is ideal when eating your modern Waldorf salad.

How can I serve this?

Modern Waldorf salad offers a range of creative serving options to elevate your dining experience. Here are a few ways to present and serve a modern Waldorf salad:

  1. Classic Bowl: Serve the Waldorf salad in a large bowl as a centerpiece. Toss the ingredients together, ensuring they are evenly coated with the dressing. This approach works well for family-style meals or gatherings where guests can serve themselves.
  2. Individual Mason Jars: Create individual servings by layering the Waldorf salad ingredients in small, clear mason jars. Start with a layer of dressing at the bottom, followed by the chopped apples, celery, walnuts, and any other additional ingredients. This presentation not only looks visually appealing but also makes it convenient for guests to grab and enjoy. This fun layered Waldorf Salad is a very modern take on the original!
  3. Lettuce Wraps: For a lighter and portable option, serve the Waldorf salad wrapped in large lettuce leaves. Use sturdy lettuce leaves like romaine or butter lettuce as a base, and spoon the Waldorf salad mixture onto each leaf. Roll up the lettuce wraps and secure them with toothpicks for an elegant and handheld presentation.
  4. Stuffed Apples: Take a creative approach by hollowing out whole apples and filling them with the Waldorf salad mixture. Cut off the top of each apple and scoop out the core to create a cavity. Fill the apples with the salad mixture and garnish with additional walnuts or blue cheese crumbles. This unique presentation combines the flavors of the salad with the natural sweetness of the apple.
  5. Canapés or Crostini: Transform the Waldorf salad into bite-sized appetizers by serving it on toasted baguette slices or crackers. Top each piece with a spoonful of the salad mixture and garnish with a sprinkle of blue cheese, a walnut piece, or a drizzle of honey for added visual appeal.

Recipe Tips

Make sure to use only the freshest ingredients if you want your salad flavors to really pop!

If you do not like blue cheese then you can use feta or a goat cheese substitute. It will still give that tangy flavor that the blue cheese offers, it will just be slightly different!

Make sure to use Honeycrisp apples! They are the absolute best in this salad. You also want to make sure that it is crisp so that when you bite into it, you get the best crunch and bite.

What can I serve with this Modern Waldorf Salad?

If you are a carnivore then Grilled Chicken or Turkey: The light and refreshing flavors of the modern Waldorf salad complement grilled chicken or turkey beautifully. The savory and juicy meat provides a satisfying contrast to the salad's sweetness and crunch.

If you are a vegetarian, Crusty Bread or Baguette: Serve the Waldorf salad alongside some crusty bread or a fresh baguette. The combination of the creamy salad and the bread's texture creates a delightful contrast, making it a perfect accompaniment. A cheese plate would also be a great option.

Recipe Modifications

If you would like to add or change some things to the recipe to make it your own, here is what I suggest:
Using red apples or tart green apple if you want to play around with the apples in the recipe
rotisserie chicken (make sure this would be in bite-size pieces) or smoked turkey
If you want the dressing to have more flavor to it, you can consider using a full-fat yogurt or if you want to use mayo just use less mayo than the classic Waldorf salad recipe calls for. 
You can add red grapes as well 

If you are fancy, Sparkling Wine or Champagne: The effervescence and crispness of sparkling wine or champagne pair well with the refreshing qualities of the modern Waldorf salad. The bubbles and acidity cleanse the palate and enhance the overall dining experience.

LEAVE A RATING AND REVIEW!

Did you love the recipe? If you did, let me know! And let others know too by leaving a comment and star rating. Reviews are incredibly useful in helping other people find my site and make my recipes. Thank you so much!

Laura 

Looking for other recipes?

  • Gluten Free Gravy Recipe in a pumpkin tin
    Carrot Gravy
  • Easy Polish Potatoes: Best Potato Recipe with Dill
  • Roasted Potatoes Recipe on a plate
    Roasted Potatoes
  • Ratatouille on a white plate surrounded by sauce and parsley.
    Ratatouille

Fast and Easy Blueberry Buttercream Recipe: The Best Icing

May 25, 2023

Are you ready to take your cupcakes to the next level? Look no further than this blueberry buttercream frosting recipe. Bursting with vibrant blueberry flavor and a luscious creamy texture, this blueberry frosting will make your cupcakes truly unforgettable. Whether you're baking for a special occasion or simply craving a sweet treat, let's dive into the world of blueberry bliss with this irresistible blueberry buttercream frosting.

Fast and Easy Blueberry Buttercream Recipe: The Best Icing

Some minor housekeeping, frosting and buttercream will be used interchangeably in this post. There is not really a difference. Icing and buttercream are both used to frost a cake, therefore a frosting. There are different types of buttercream, however, that is for a different time. In this post, we will be focusing on blueberry frosting aka blueberry buttercream.

Q&A

Q: Do I need to use blue food coloring in order to get color in my blueberry buttercream?
A: No! The color comes from the blueberries. It is all natural in this blueberry buttercream (and it is so pretty).

Q: What flavors pair well with blueberry?
 Lemon and blueberry are a pretty classic combination. You can also pair this icing with a vanilla cupcake (or cake), blueberry cupcake. I love it with lemon cake, or a cupcake that has lemon curd inside. If you combine that with the sweet blueberries in this creamy frosting, you will be wondering why you weren't doing this sooner.

Q: Can I use fresh blueberries in this recipe? Or should I use dried or freeze dried blueberries?
A: You can use fresh blueberries if you want to. However, freeze dried blueberries and dried blueberries have a great flavor and will add less moisture to your blueberry buttercream. However, if all you have at home is fresh blueberries, just make sure they are broken down enough, because when you go to pipe you do not want your icing to come out all over the place like this ⤵️

Fast and Easy Blueberry Buttercream Recipe: The Best Icing

Tips for making blueberry frosting

What happens if you use salted butter for your buttercream? it will simply add a bit of saltiness to your buttercream. In this recipe, we would like to avoid that so stick to using unsalted butter at room temperature.

How to get buttercream blue: in this recipe, there is no food coloring required. The color of the blueberries will naturally change the color of the frosting

What is the best way to thicken runny buttercream icing? By adding more powdered sugar, it will thicken the icing right back up!

What is the best way to loosen up icing that is too thick? Adding 1 tablespoon of milk at a time

Dried Blueberries vs Freeze Dried Blueberries

Freeze dried blueberries are a form of blueberries that have undergone a specific preservation process called freeze drying. Freeze drying involves freezing the blueberries and then placing them in a vacuum environment, where the frozen water in the berries is directly converted into vapor without passing through the liquid phase. This process helps retain the natural flavors, colors, and nutrients of the blueberries while removing the moisture content.

The freeze-drying process results in blueberries that are lightweight, crunchy, and have a longer shelf life compared to fresh or even frozen blueberries. The texture of freeze dried blueberries is crisp and brittle, and they easily crumble or dissolve in the mouth. When rehydrated, freeze-dried blueberries regain much of their original flavor, aroma, and shape, making them a versatile ingredient for various culinary applications.

Dried blueberries are another form of preserved blueberries. Unlike freeze-dried blueberries, which undergo a freeze-drying process, dried blueberries are made by dehydrating fresh blueberries to remove their moisture content. This dehydration process helps prolong the shelf life of blueberries while retaining some of their flavor and nutritional properties.

To make dried blueberries, fresh blueberries are typically washed and sorted before being placed in a dehydrator or an oven set at a low temperature. The low heat gently removes the moisture from the berries over a period of several hours. This process allows the blueberries to retain their shape, albeit in a shriveled form, and intensifies their sweetness.

Does it matter if I use dried, fresh, or freeze dried blueberries for this recipe?

Nope! It just depends on the level of work you want to put into it. The quickest recipe to make will use freeze dried blueberries in the blueberry buttercream. For dried blueberries, you will need to add water and pulverize them. This will produce a bit of a jam. For fresh blueberries, see what I mentioned above.

Ingredients Needed

Fast and Easy Blueberry Buttercream Recipe: The Best Icing
Ingredients for blueberry buttercream

Powdered Sugar: powdered sugar helps thicken your frosting. It is also known as icing sugar
Butter: Every buttercream needs butter, hence the name. If you like a more buttery buttercream, see my Russian Buttercream Recipe.
Vanilla: Vanilla extract adds a delicious splash of flavor. It won't taste like a vanilla buttercream, but, just help boost the blueberry flavor.
Dried Blueberries: Hence the blueberry part of our blueberry buttercream! If you do not have dried blueberries but have freeze dried blueberries, you can use those instead.
Milk: You will only use milk (or cream) if your icing is too thick and you want to loosen your icing a bit. You can also use heavy cream. 


How to make Blueberry Buttercream?

Beat the butter: You can use either a handheld electric mixer or a stand mixer. I use a stand, so, I place the softened unsalted butter into the bowl of an electric mixer.  Place your softened unsalted butter in the bowl of a stand mixer (or a regular bowl if you are using a hand mixer). Attach the paddle attachment not a whisk attachment) and beat on medium for 3-5 minutes. I like the butter to get fluffy before I add anything else.
Thicken the icing: This is where you will add the  powdered sugar (also known as icing sugar). Make sure that you start this on low speed to ensure that the powdered sugar does not fly out of the large bowl. Once it is starting to incorporate, up it to medium speed. Mix until it becomes smooth and the icing is starting to form. 
Add the blueberries: In my recipe I use dried blueberries, these will have been needed to be pulsed in a food processor. If you do not wish to use dried blueberries, you can use freeze dried blueberries, or blueberry jam. Add it to the bowl now. Once it mixes for a minute or so, add the vanilla extract. If you want a lemon flavor to your blueberry buttercream, you could add it now by adding a lemon zest, lemon extract, or lemon juice. 
Pipe your blueberry buttercream frosting: Place the blueberry buttercream into a piping bag. Pipe onto cake, cupcakes, into cookies, your choice! Make sure that the piping nozzle does not get blocked with blueberry. If it does, a knife or a toothpick will be handy to dislodge it.

creamed butter in a bowl
beat the butter for 3-5 minutes
powdered sugar in a bowl next to creamed butter
add the powdered sugar and beat until the blueberry frosting begins to come together
Fast and Easy Blueberry Buttercream Recipe: The Best Icing
Pour the vanilla and add the blueberries into the buttercream and beat until smooth.
Fast and Easy Blueberry Buttercream Recipe: The Best Icing
Blueberry frosting atop vanilla cupcakes

Why should you make this fluffy and easy blueberry buttercream?

This blueberry frosting is so quick and easy to make! As you can see, it is only 4 (or 5 depending on your choice) ingredients. It can be used for so many vehicles, cakes, cupcakes, donuts (I have a blueberry glazed donuts that should you wish to do icing instead, you definitely could), and cookies. The icing itself is all natural and does not involve any processed colors or dyes. It adds such a pop of beautiful color on any dessert table.

How much icing does this recipe make?

It will make enough to ice 12 cupcakes!

Can I store or freeze this blueberry buttercream?

how to store this easy blueberry buttercream frosting:

Transfer the frosting: If you have leftover blueberry buttercream frosting, transfer it to an airtight container. Ensure that the container is clean and dry.
Cover the surface: To prevent the frosting from forming a crust or drying out, place a layer of plastic wrap directly on the surface of the frosting. This helps create a seal and maintain its freshness.
Seal the container: Close the airtight container securely to prevent air from entering. This will help preserve the flavor and texture of the frosting.
Refrigerate: Place the container of blueberry buttercream frosting in the refrigerator. The cool temperature will help prolong its shelf life and maintain its quality.
Proper storage duration: Blueberry buttercream frosting can typically be stored in the refrigerator for up to 3-4 days. However, always check for any signs of spoilage or off flavors before using it.
Before using: When you're ready to use the frosting again, remove it from the refrigerator and let it come to room temperature. Allow it to soften slightly before rewhipping or spreading it on your desired baked goods.

Remember that the storage duration may vary depending on the specific recipe and ingredients used. It's essential to trust your senses and discard the frosting if you notice any unusual odor, discoloration, or signs of spoilage. Always prioritize food safety and enjoy the blueberry buttercream frosting within a reasonable timeframe.

Recipe Variations

If you want instead of using the types of blueberries I listed above, you can use frozen wild blueberries (but thaw them first and then pulse them in a good processor). You could also use a blueberry puree, or a blueberry sauce. Fresh berries are an option as well but again, you would need to pulse them. If you would like to make blueberry lemon frosting, you can use fresh lemon juice as well. 

I love to pair this icing with vanilla cake, vanilla cupcakes, or anything with lemon!

LEAVE A RATING AND REVIEW!

Did you love the recipe? If you did, let me know! And let others know too by leaving a comment and star rating. Reviews are incredibly useful in helping other people find my site and make my recipes. Thank you so much!

Laura 

Other Recipes

Best Gluten Free Chocolate Chip Cookies

May 23, 2022

Best Gluten Free Chocolate Chip Cookies on a table

If you are gluten free and have not been since birth, chances are you have been searching for the best gluten free chocolate chip cookies. Look no further. This recipe is quick, easy, and will satisfy all of your cravings!

Growing up, my family would often make homemade sweets and treats however we were big into the Pillsbury Cookie dough game. When I went gluten free, I began trying to make gluten free chocolate chip cookies that tasted just as good. Finding a recipe (over ten years) for a soft chewy chocolate chip cookie was impossible. Most chocolate chip cookies were hard, dry, and crumbled.

For a soft chewy cookie, you'll have to read below for troubleshooting gluten free recipes, but, I promise that if you follow the recipe, you will get the soft chewy that you are looking for.

After years of testing and trying, these cookies are great. So much so, that I make gluten free chocolate chip cookies and sell them at my local farmer's market to people who aren't even gluten free! The cook time on these cookies is short, and the ingredients are simple. Let's make these cookies.

FAQ

Is it easy to make these gluten free chocolate chip cookies?

Yes! The prep time is less than 5 minutes and then the cook time is less than 15. While there is a chill time of 1 hour, it is so easy when your prep time is so low. It is the perfect dessert for the end of the day, or, if you want to make them in the morning and bake them later in the day. Low prep time, and low stress.

What tools do you need for the best gluten free chocolate chip cookies?

  1. wire rack
  2. paddle attachment
  3. stand mixer (or a handheld mixer)
  4. cookie scoop
  5. baking sheet x 2-4
  6. parchment paper or baking mat

Can I make any substitutes to this recipe? Can I make it vegan or dairy free?

As always, not all gluten free flour is made equal. My preference for cookie dough is King Arthur Gluten Free Measure for Measure All Purpose flour blend. It has xanthan gum but is a dairy free flour blend. I think it is the best gluten free flour for cookie dough because it tastes the closest to regular cookies.

If you do use another gluten free flour blend then make sure it has xanthan gum in it (if you do use another gluten free flour blend then note it may not yield the same results as what is depicted here.)

If you wish to make this recipe dairy free (be sure not to use the Cup4Cup blend as this gluten free flour contains milk powder). You will have to substitute the room temperature butter with a dairy free butter. I myself have not but some good butter substitute options are earth balance. If not, you can use a vegan butter and try that! In addition, for the little bit of milk, you can substitute water or a dairy free milk. Lastly, use dark chocolate chips instead of semi sweet chocolate or milk chocolate.

Vegan?

See the paragraph above. However for the egg substitute, I am a bit unsure. You can try using "Just Egg" which is a vegan egg substitute.

I don't have vanilla extract, can I substitute anything?

Almond extract is a nice flavor that pairs well with chocolate chip cookies!

What types of chocolate chips are best?

When making chocolate chip cookies, you generally think "there are chocolate chips" in those cookies. While this is usually the case, it isn't always, but we will get to that.

My preference of chocolate chips is milk chocolate however semi sweet is just as good or if you need to avoid dairy for a dietary reason (or preference) you can use dark chocolate chips.

Some people use chocolate discs and or chocolate chunks! The world is your chocolate. Make your choice!

I only have granulated sugar, can I just use this?

The brown sugar in the recipe gives it a really nice flavor. So, I would advise using both, not just granulated sugar. If you are in a pinch, then you can, but, it isn't my favorite.

What is the best gluten free flour to use for gluten free chocolate chip cookies?

King Arthur Gluten Free Measure for Measure All Purpose flour is my suggestion however if it is not available where you are I suggest going with a one for one mix. Whatever you do, make sure that your mix has xanthan gum in it. Xanthan gum helps bind the baked good together.

In my statement above, not all gluten free flours are made equal but some options for 1:1 flour blends are:
1. King Arthur
2. Bob's Red Mill
3. Cup4Cup
4. Pillsbury

If you look up on Google what the best flour is, it says "brown rice flour", and I think this is quite misleading. You will want a mix.

How do I make gluten free chocolate chip cookies moist?

The best gluten free chocolate chip cookies are moist cookies. While you are making your cookie dough, you are going to want to make sure that the cookie dough is moist. The way to do this is by using just enough butter and milk. Gluten free flour can be dry compared to regular flour when baking so it is a balancing act of finding how to get the right amount of moisture into your bakes. Butter needs to be at room temperature to really incorporate properly into your cookie dough, and milk will help give it that extra little bump.

My gluten free chocolate chip cookies are crumbly. How do I fix this?

This all comes down to the flour mixture you are using. If you are not using one with xanthan gum, it will yield a more crumbly cookie and it will not taste good!

What do I need for the best gluten free chocolate chip cookies?

  1. ¼ cup white sugar
  2. ¼ cup light brown sugar
  3. 6 oz chocolate chips, I used milk chocolate - semi sweet is good as well
  4. 1 tablespoon milk
  5. 1 teaspoon baking soda
  6. 8 tablespoon unsalted butter, room temperature
  7. 2 teaspoon vanilla extract
  8. 1.5 cup gluten free flour, I used King Arthur Gluten Free All Purpose Flour Measure for Measure - with xanthan gum
  9. 1 large egg

How do I make the best gluten free chocolate chip cookies?

Ingredients for chocolate chip cookies
cream together the butter and sugars
add the remaining ingredients and make the cookie dough
place the dough on the baking sheets, chill, and then bake
bake for 11-12 minutes until golden brown
cool and enjoy
https://garnishedwithjoy.com//www.youtube.com/watch?v=O1IRo6CL3-c
  1. In the bowl of a stand mixer, place the paddle attachment and begin to beat the room temperature unsalted butter. It will help when you then add the light brown sugar and the white sugar to the bowl. Mix them together for around 5 minutes on a medium high.
  2. Scrape the sides of your bowl and make sure everything is incorporated. Add the egg and beat together for around 3 more minutes. The mix may look a bit curdled however it is totally fine. Add the vanilla extract and the milk and beat for 30 more seconds.
  3. Add the gluten free flour and baking soda. Toss in the chocolate chips and mix until the cookie dough comes together. Place parchment paper (or a baking mat) onto your baking sheets. Make sure they are a few inches apart (if you do not place them a few inches apart, then you may end up with one massive cookie when you bake them).
  4. Take your prepared baking sheets and use a cookie scoop to scoop the gluten free cookie dough balls and place them onto the baking sheets. Roll the cookie dough balls if you feel they are a bit off with their shape. Place the baking sheets in the fridge or the freezer for 1 hour.
  5. Preheat the oven to 350 f and when it reaches the appropriate temperature bake the cookies for 11-12 minutes. They will be a nice golden brown on the top. If you are worried that they are not quite done, lift the cookies and if the bottoms are golden brown then they are likely done. It may be that your oven rack is just too low.
  6. You can allow them to cool completely on the baking sheet or transfer them to a wire rack to cool. You can store these cookies in an airtight container on the counter for 5-7 days or in the freezer for 3 months. If you freeze them, then you can bust out the best gluten free chocolate chip cookies whenever you have a craving over the next 90 days!

Looking for other gluten free recipes or popular posts?

If you are looking to improve your gluten free baking, then you can practice by making these gluten free recipes!

Tiramisu Sandwich Cookies
Candy Cane Cookies Recipe
Linzer Cookies
Chocolate Tahini Cookies
Soft Amaretti Cookies
Chocolate Crinkle Cookies
Double Chocolate Chip Cookies
Peppermint Mocha Cookies
Mexican Hot Chocolate Cookies

Heath Bar Cookies

Be sure to never miss a new recipe video and follow me on Youtube here
Follow me on Facebook here

Gluten Free Pop Tarts

May 16, 2022

Gluten Free Pop Tarts: Video Tutorial

The perfect nostalgic food for any 90s kid, this gluten free pop tarts recipe tastes just as good as the original! Watch the video tutorial to see how to make this recipe gluten free without compromising on flavor, texture, and style. The prep time is quick making it the perfect treat.

We never had pop tarts in my house growing up. They were considered a junk food and it was not considered a proper breakfast. Pop tarts, for me, were reserved when I had sleepovers at friends houses whose parents did allow the delicious pastry treat to be served as breakfast! Strawberry pop tarts have always been my favorite (as I am a sucker for strawberry jam). So, let's live for our younger selves and make the best gluten free breakfast (or snack) and make this gluten free pop tarts recipe. The cook time is 20 minutes but the prep is a bit longer. It is a recipe that parts can be made in advance!

FAQ

What tools do you need for this recipe?

  1. Food processor
  2. rolling pin (for roll out the dough)
  3. parchment lined baking sheet
  4. parchment paper
  5. Fork - use a fork to crimp the pastry dough
  6. small bowl x 2 (one for filling, one for the glaze)
  7. cooling rack

What is the most popular flavor of pop tarts?

According to HuffPost (who appears to have conducted a survey), the strawberry pop tarts are the universal favorite. The runner up is Brown Cinnamon Sugar. The thing that is great is that once you know how to make gluten free pop tarts, you can use whatever filling you wish! The world is your gluten free pop tarts (who needs oysters right now).

Can I place these in the toaster?

While traditional pop tarts are toaster pastries, these are best in the oven. If you do not put the glaze on them and keep them in the fridge over night, you are welcome to try to put them in the toaster the next day (I myself have not done this).

Should I freeze my gluten free pop tarts?

I personally would not. It is like freezing a fruit hand pie, but, it is your choice!

Does Kellogs make a gluten free pop tart?

No, they do not make a gluten free pop tart. However, we now have you sorted that you can make gluten free pop tarts at home!

Can I make any substitutions or changes to this recipe?

Gluten free baking can be hard enough when you are trying to adapt a recipe. When you add in other dietary restrictions it can be even more difficult. I personally do not have any other dietary restrictions (except for bananas) therefore I offer only suggestions a lot of the time that I myself have not tried and tested. The gluten free flour that I like best for making gluten free pop tarts is Cup4Cup. This flour has dairy in it- so be advised.

I do not know how this would work dairy free. Dairy free pop tarts would be achievable if you can make a dairy free pastry dough. My pastry dough has butter in it, but, if you could use something like vegetable shortening (such as Crisco) that may be an option for you.

To make this recipe vegan, you would have to use a vegan butter or supplement in the pastry dough, as well as skip the egg wash that goes on top. In addition, some sugar is not considered vegan. You would need to check your powdered sugar to make sure there is no bone char listed in the ingredients.

The gluten free flour that I like best for making gluten free pop tarts is Cup4Cup. As stated above, Cup4Cup does have dairy in it. If you need to be dairy free, then it is best you avoid this gluten free flour blend. If you do not need to be dairy free, then this is the flour blend I suggest. Not all gluten free flour blends are created equal and when you use different flours, you can end up with less than desirable results. If you are not able to use Cup4Cup then I advise using King Arthur Gluten Free Measure for Measure flour blend. Make sure your mix has xanthan gum in it.

What toppings can I use on my gluten free pop tarts?

As stated above, once you know how to make a gluten free pop tart, the possibilities are many! If you are not a fan of glaze, you could always use granulated sugar on top after you apply your egg wash (the egg wash will help it stick). The granulated sugar will give the gluten free pop tarts a nice sweet bite when you taste it.

You can also do different types of glazes on top. If you want to maintain the strawberry jam filling but do not want a strawberry jam glaze, then you could make a vanilla glaze by subbing out the jam and using pure vanilla extract.

Sprinkles are entirely optional. I think they just make the gluten free pop tarts look more festive and fun. I typically advise that you let the gluten free pop tarts cool completely prior to placing the glaze on top. If you do not let them cool completely, if can cause the glaze to run off a bit too much.

I only have granulated sugar, can I use this instead of powdered sugar for a glaze?

The answer is no. The glaze requires powdered sugar because of how fine the sugar is. It allows the glaze to be smooth. Granulated sugar makes it grainy. You would not want a grainy glaze on top of your gluten free pastry!

How do I store my gluten free pop tarts?

I like to store mine in an airtight container in the fridge for 3 days. Similar to a hand pie. I do not feel the need to wrap them each individually in plastic wrap.

What ingredients do you need to make gluten free pop tarts?

One Pie crust recipe:

- 1 ½ cups Gluten Free Flour Blend (I like Cup4Cup- make sure whatever mix you use has xanthan gum in it)
- 8 tablespoons Unsalted Butter (cold- not room temperature)
- 5 tablespoons ice water (or milk)
-1 egg

Filling & Glaze:

  1. ½ cup Strawberry Jam
  2. 1 Egg (for the egg wash)
  3. 1 tablespoon Cornstarch 
  4. 1 cup Powdered Sugar
  5. 1 teaspoon Milk (add more if you need it- for glaze)
  6. 1 tablespoon Strawberry Jam (for glaze)

How do I make this recipe?

Ingredients for the crust
Ingredients for the filling
Cube the butter and place it in the food processor
Pulse the flour with the butter until it is pea sized. Add the milk as the food processor is running. The dough will come together when it forms a ball in the food processor.
To make the filling, mix the jam and the cornstarch together in a bowl. All you need is a spoon.
Slice the pie dough into strips, and place some of the filling inside. Fold the dough over and pinch the sides together. Then use a fork to crimp the edge.
Once they are all made, place in the fridge for 30 minutes and proceed to bake.
While they are baking, make the glaze for the gluten free pop tarts
Once they are out of the oven and slightly cool, drizzle the glaze on top and top with sprinkles (should you wish!)
https://garnishedwithjoy.com//www.youtube.com/watch?v=HarMiLaORnI

1. In a food processor, place the butter and gluten free flour blend. Make sure the butter is not room temperature. Pulse until the butter is the size of peas. While running the food processor, add one tablespoon of ice cold water (or milk) at a time. The dough is ready when it begins to form a ball. Once the pie dough has come together in the food processor, place the dough between the parchment paper. The parchment paper will help you roll it out smoother.

  1. Roll it out and slice it so that you have a rectangle. Once you have a rectangle, cut into three strips. Do the same with the leftover scraps. You will get 6 gluten free pop tarts total from the pie dough. Traditionally, pop tarts (and therefore gluten free pop tarts) are 3 inches by 5 inches. They are less than an inch thick.

2. In a bowl, mix together the strawberry jam and corn starch. The mixture will look a bit gooey at first but it will smooth out as you mix it together. On the lower half of each of the strips, place a teaspoon of the strawberry jam mixture. 

4. Fold over the top part of each strip. If it breaks at the top seam, that is fine, you will be pinching the dough together. Pinch the edges together on all four sides and then use a fork to press the dough together to make sure it really sticks. Next, use your fork to pierce holes into the top of the gluten free pop tarts. Place the pop tarts on a baking sheet.

5. Preheat oven to 350°F and place the pop tarts on the baking sheet into the fridge while the oven comes to the correct temperature.When ready to place in the oven, take the egg and whisk together in a bowl. Brush the egg wash on top of the pop tarts. The cook time is 20 minutes.

6. Remove the baking sheet from the oven and allow them to cool on a cooling rack. They will be a nice golden brown color. Meanwhile set aside the gluten free pop tarts and in a small bowl, mix together the icing sugar, jam, and milk. Once it is a nice thick consistency, dip the pop tarts into it. Cover with sprinkles and serve! 

Notes: They will keep for a few days in the fridge.
The prep time for this recipe is not long but you will often have to set aside elements of the recipe as you work. The time adds up when you have to place the gluten free pastry dough in the fridge etc.

Looking for other gluten free recipes?

Pumpkin Pies
Mincemeat Pies
Orange Tart
Pear and Frangipane Tart
Rhubarb Tart
Tomato Tart

If you make this recipe, please be sure to leave a comment and rating!

Çilbir: Turkish poached eggs

May 9, 2022

çibir: Turkish poached eggs on a blue and white china plate

Turkish poached eggs (also known as çilbir) is a delicious meal. Made with a spicy sauce, fresh herbs, it is such an easy recipe. Make this breakfast (or lunch or dinner) today!

In North America, we tend to associate eggs recipes with breakfast and we forget about the rest of the day. Which is shameful because eggs make the perfect meal at any time of the day. For this Turkish poached eggs recipe (also known as çilbir), you will have to poach the eggs but I will walk you through it. I promise I will gently walk you through this process. Let's dive in and make this fresh and delicious recipe that is not just reserved for breakfast.

FAQ

How do you poach the eggs?

To poach eggs, you will need the following:

  1. a pot
  2. 1 tablespoon distilled white vinegar
  3. ramekin (or a small bowl)
  4. fine mesh sieve
  • You do not require a slotted spoon

Poaching eggs is really simple. Let's walk through this.

  1. Fill your pot up with water and bring it to a boil. Once the water is boiled, add the tablespoon of vinegar.
  2. Crack your egg over a fine mesh sieve. Eggs have water in them and by doing this, you eliminate the water which gives the poached eggs a much nicer finish. Let it sit in the sieve for 1-2 minutes. Then transfer to a ramekin.
  3. Take a spoon and stir the pot of water until a whirlpool forms. Stop stirring (the water will still be moving), gently slide the egg into the middle of the whirlpool into the simmering water. The cook time for the egg is 3 minutes. 3 minutes gets you the perfect poached eggs. If you go under the 3 minutes it will be undercooked and if you go over the 3 minutes, the yolk will be hard and not what you want.
  4. Gently lift the egg out of the simmering water and gently place on your food or on a paper towel while you cook the rest of your meal.

Can I make any substitutions for this Turkish poached eggs recipe?

This recipe has dairy in it due to the yogurt mixture. If you are dairy free, you can try to use a dairy free yogurt. However, make sure that the yogurt you do use is thick and not thin.

If you cannot find Greek yogurt for your yogurt mixture, you can use labneh which is a similar yogurt but also similar(ish) to sour cream.

Traditionally, they use aleppo pepper but I know aleppo pepper can be hard to find in all grocery stores. If you cannot find aleppo pepper then you can use crushed red pepper flakes.

What is the difference between Turkish and Greek yogurt?

There is not much of a difference. They are strained slightly differently but they are thicker yogurt than the North American variety. If you google "the origin of yogurt", the dish is thought to have originated in Mesopotamia but the yogurt that we now know is Turkish, as is the word yogurt itself. However, as there are long-standing rivalries regarding food and traditions between differing countries in the Mediterranean, there are conflicting narratives.

What do you need to make this Turkish poached eggs recipe?

  1. 1 cup plain Greek yogurt (made with whole milk, at room temperature)
  2. 1 Clove Garlic (you can use 2-3 if you'd like, finely minced)
  3. 2 Large Eggs
  4. 3 tablespoons Extra Virgin Olive Oil (or unsalted butter)
  5. 1 tablespoon Vinegar
  6. 2 teaspoons Aleppo Pepper (or Crushed Red Pepper Flakes)
  7. Fresh Dill (for garnish)
  8. Chopped Mint (for garnish)
  9. 1 teaspoon lemon juice (optional)
  10. Toasted Bread (optional)
  11. Sea Salt (to taste)

How do you make Turkish poached eggs?

Ingredients for çibir: Turkish poached eggs
After you have made the eggs and yogurt mix (see the video) make your topping
top the eggs with the sauce and fresh herbs
serve immediately
https://garnishedwithjoy.com//www.youtube.com/watch?v=eRwjLf3igGI
  1. First and foremost, make sure that the yogurt is room temperature. So, if you plan to make this, take your yogurt out of the fridge at least an hour before you make the yogurt mixture.
  2. To make the yogurt mixture, take the room temperature Greek yogurt and stir with the minced garlic and salt. Take the dish and set aside. Once it it set aside, make the poached eggs.
  3. To poach the eggs:
    1. Fill your pot up with water and bring it to a boil. Once the water is boiled, add the tablespoon of vinegar.
    2. Crack your egg over a fine mesh sieve. Eggs have water in them and by doing this, you eliminate the water which gives the poached eggs a much nicer finish. Let it sit in the sieve for 1-2 minutes. Then transfer to a ramekin.
    3. Take a spoon and stir the pot of water until a whirlpool forms. Stop stirring (the water will still be moving), slide the egg into the middle of the whirlpool into the simmering water. The cook time for the egg is 3 minutes.
    4. Gently lift the egg out of the simmering water and gently place on your food or on a paper towel while you cook the rest of your meal.
  4. While the eggs are cooking, make your sauce to cover the eggs. In a medium saucepan, melt your butter or heat the extra virgin olive oil on a medium heat and place the pepper flakes or aleppo pepper into the pot. Make sure it does not get too hot, you do not want to burn the spice.
  5. Once the eggs are poached, place the poached eggs on the yogurt and cover with spiced sauce. Top with the chopped dill and mint. Serve immediately. Voila! Your Turkish poached eggs recipe is complete.

*The prep time for this meal is little but as stated above, the yogurt needs to be room temperature, so take that into consideration.

*If you are serving with toasted bread then add it on the plate as you place the poached egg on the yogurt. It looks so nice on the side!

Looking for similar recipes?

Shakshuka
Eggs and Polenta
Summer Quiche
Fried Egg with Rice

Peanut Butter Blondies Recipe

May 2, 2022

Combining two of my favorite things, peanut butter and chocolate, this peanut butter blondies recipe only requires one bowl, is ready in a jiffy, and is super delicious. Follow the video tutorial for a step-by-step guide as to how to make this recipe!

I love blondies and I love peanut butter. Together, they are the perfect combination, especially when you add chocolate chips. Blondies are a fun alternative to cookies and or brownies. They are an easy snack as they are handheld. They can be cut up into little bars so that they make a perfect treat for little ones, and they are easy to pack and take with you. This recipe has little prep time, everything can be mixed in one bowl, and is absolutely delicious. Let's dive in to this recipe.

FAQ

How do I know when my blondies are done?

Blondies should be a beautiful golden brown on the top. In addition, you stick a toothpick into the center to see if it comes out clean. If it does, then, your blondies are done! This blondie recipe is not a super long cook time, so, just be sure to check them at the appropriate time!

What tools do you need for this peanut butter blondie recipe?

  1. Mixing bowl
  2. Whisk
  3. Spatula
  4. Measuring Cups
  5. Parchment paper (optional)
  6. 8x8 inch pan (or a 9x13)

Why is my blondie recipe so cakey?

It could be that you added more liquid that you should have to the recipe. It is also possible that you did not fully incorporate your dry ingredients (you may have under mixed them). Over baking is also a possibility. If you want your blondies to bake accurately, depending on the size of your pan (read further below on the page) make sure to begin to check them at the appropriate times. Despite your oven saying it is a certain temperature, it could be that the actual temperature in your oven is not correct and you may not get the right bake on your blondies if you do not check them at the right times.

Can I make any substitutions to this recipe?

I have only ever made the recipe this way. Remember, not all gluten free all purpose flour is created equal. The all purpose flour I use in this recipe is King Arthur and if you use a different one, you may not get the same results. Typically, 1:1 flour mixes are okay in recipes like this, however, I always state which flour I use and like best!

I use chocolate chunks in this recipe however you are more than welcome to use chocolate chips instead. Chocolate chips can be easier to come by depending on your local grocery store.

Can I use just one type of sugar instead of two?

I like the mix of sugar in this recipe because brown sugar typically gives a more caramelized flavor to the blondie recipe. However, if you only have one or the other, it will suffice! I will say, if you are only going to use one, I would personally use brown sugar.

Can I make this dairy free?

The only dairy in this recipe is butter. I have made this recipe only using regular butter however you can try using a dairy free alternative.

If I cannot have peanut (and vis a vis peanut butter) is there an alternative I can put in its place.

I think most nut butters would suffice here. However, make sure it is not an organic butter. The oil makes too runny and will make this blondie recipe too soft. The taste / flavor will be a bit different, but, almond butter would also be delicious!

How do I store these? Can I freeze blondies?

Yes. They will freeze for up to 3 months.

Are blondies meant to be gooey in the middle?

Yes. Blondie recipes should be a bit gooey in the center but not to the point where they are underbaked. To see if your blondies are finished baking, stick a toothpick into the center of the blondies. If it comes out clean then you are good to go. If there is a bunch of batter still stuck to the toothpick, then pop it back into the oven until it is fully baked. You want your blondies to be baked!

What do I need for this Peanut Butter Blondies Recipe?

  1. 1 stick of melted butter, 8 tablespoons unsalted butter
  2. ¾ cup creamy peanut butter, do not use organic
  3. 1 cup light brown sugar
  4. ½ cup White Granulated Sugar
  5. 1 cup Chocolate Chunks
  6. 2 cups Gluten Free Flour, I used King Arthur Gluten Free Measure for Measure Flour
  7. 2 large Eggs
  8. 1 teaspoon Baking Powder
  9. 1 teaspoon Vanilla Extract
  10. Flakey Salt, optional

How do I make them?

https://garnishedwithjoy.com//www.youtube.com/watch?v=KvdsVFEQF-k
  1. Preheat oven to 350 f. Then take your baking tin and spray with a non-stick spray (or grease it with butter). You can then line the pan with parchment paper. The parchment paper makes it easier to lift out of the pan later but it is not necessary, this is an optional step.
  2. Put the butter and the peanut butter into a microwavable safe bowl and microwave until you have melted butter. Set aside until ready to use.
  3. In a mixing bowl, add the eggs and whisk the eggs with the brown sugar and the white granulated sugar until it is nice and thick. Add the vanilla extract and whisk a bit more. Add the melted butter and the peanut butter to the mixture and continue to mix together. Then, add the dry ingredients (baking powder, flour), and chocolate chunks. Use a spatula to fold the mixture together. The blondie batter will come together and be the color of peanut butter.
  4. Transfer the blondie batter to your baking pan. Sprinkle the salt on top, and place in the oven. When baking in an 8x8 pan, bake for 35 minutes. If you are using a 9x13 baking pan then bake for 45-40 mins. If it does not seem done, place back in the oven for 5-10 more mins.
  5. To check for doneness, remove the baking pan from the oven, insert a toothpick into the middle. If the toothpick comes out clean, then it means it is baked. Allow it to cool completely in the baking pan and then lift it out once it has cooled completely. If the blondies feel too soft, it likely means that they are underbaked. You want a gooey center but they should not be so soft that they are falling apart. You can always cut a little piece from the blondies, taste it, and see if it truly is done. If not, you could place it bake in the oven for 10 minutes and check again.

*It is imperative to allow the blondies to cool completely otherwise they will fall apart when you cut them.

*make sure your butter is melted when adding it to the mixing bowl! You do not want clumps.

Looking for similar recipes?

Raspberry Blondies
Black Lake Brownies
Double Chocolate Chip Cookies
Easy Gluten Free Chocolate Crinkle Cookies
Chocolate Heath Bar Cookies
Raspberry Lemon Cheesecake Bars

Never miss a new recipe video and follow me on Youtube here
Follow me on Facebook here

Gluten Free Pastry Dough Recipe: Gluten-free Crust

April 25, 2022

Gluten Free Pastry Dough Recipe

Ever wonder how to make your favorite pie or pastry gluten free? This gluten free pastry dough recipe is quick, easy, and so delicious. You and your guests will be questioning if it is actually gluten free.

Gluten Free Pastry Dough Recipe: Gluten-free Crust

I went many years without having pie, quiche, tarts, you name it. If it had a pastry dough component, then, it was out. However, thanks to the many flour blends that now exist in the gluten free market, I have been able to test which ones are best for a traditional pastry dough recipe. Things I love about this recipe? There are few dry ingredients, the prep time is only a couple of minute, and the cook time is short as well. There is no cream cheese, no eggs, just three simple ingredients and voila, a delicious flakey gluten free pie crust or the base for a tart, or even pop tarts! This is such an easy gluten free recipe. Let's dive in

What do I need for this recipe?

  1. Food Processor
  2. Parchment Paper / or a pie mat
  3. Plastic wrap * or an eco friendly alternative
  4. pie pan or pie plate (or a tart pan)
  5. rolling pin

What happens if I do not have a food processor?

I find that this recipe comes together best in a food processor but you can try to make it by hand.
In order for this to be achieved, you need to make sure that neither the butter or the water are at room temperature.
Take a small bowl and place the gluten free flour blend into it along with the butter. Use a pastry cutter (or your hands) to get the butter to be the size of peas. If you feel that the butter is becoming too warm, place it back in the fridge for 30 minutes.
Add one tablespoon of the ice cold water or milk at a time and use your hands to bring it together. Once the dough comes together and stays together, it is done. You can try to roll out the dough immediately (go to the instructions section on how to make this), and or place it in the fridge after being wrapped in plastic wrap (or an eco friendly alternative) for an hour.

Which flour blends are best for making gluten free pastry dough?

Not all gluten free flours are created equal. I always advise this because it is true! Certain gluten free flour mixtures are better for certain things. For example, my favorite two flour blends are the King Arthur Gluten Free Measure for Measure flour and Cup4Cup flour. Both have xanthan gum in them which helps with binding and I find them best suited for specific things.
After experimenting with several mixes,  the best gluten-free flour blend to use to make a gluten free pie crust or gluten free pastry dough is Cup4Cup. This will yield the best results every time for a good gluten-free pie crust recipe for sweet pies and savory pies. It is also my go-to pie dough for things like pasties, gluten free pop tarts, and more. The crust, if made correctly, is a flaky crust, with a good flaky texture and is a thousand times better than any gluten free pie dough you pick up at the grocery store. 

A note on Cup4Cup flour: This will be an issue if you are dairy free as there is milk powder in the mixture, however, King Arthur's is okay, just not as good in my opinion.

If you want to make the BEST gluten free pastry dough then please use Cup4Cup if you are able and avoid Bob's red mill or King Arthur. I have tried this recipe with other flours and while they come out well, they just are not AS delicious as the Cup4Cup.

If you wish to buy a mix, then I will say, Bob's red mill mix for pie crust is really nice, I just find that their 1:1 flour will not yield the results that you want.

Why does gluten free pastry go hard or crack?

If you have worked with regular flour or pie crust recipes before then this will be a bit of a change for you most likely. Gluten free pastry does not have the elasticity that traditional pastry will have. Typically if your dough is too hard or is cracking when you roll it out, it means that there is not enough moisture in the dough. This recipe calls for 4-5 tablespoons or ice water (or milk) and you should add them one at a time. You want to find the right balance in your dough. Not too dry but not too wet.

What do you need for this gluten free pastry dough recipe?

This recipe makes one single crust or enough for a tart. Double the recipe if you want double crust pie.

Cold butter, unsalted butter or salted butter is fine (frozen is good as well)
Cup4Cup gluten free flour blend
Egg
Granulated sugar, optional (if you want to place some on top of a fruit pie)

    How do you make it?

    ingredients for Gluten Free Pastry Dough Recipe: Gluten-free Crust
    Ingredients for gluten free pastry dough recipe
    ingredients for Gluten Free Pastry Dough Recipe: Gluten-free Crust
    In the bowl of your food processor, place the gluten free flour, chopped butter, and egg. Pulse. If it is too dry, add 1 teaspoon of water at a time
    Gluten Free Pastry Dough Recipe: Gluten-free Crust
    Use immediately or wrap in plastic wrap and place in the fridge
    Gluten Free Pastry Dough Recipe: Gluten-free Crust
    The possibilities are endless for what you can make with this gluten free pastry dough recipe!
    1. In the bowl of you processor, place the dry ingredients. Cut the butter and place into the food processor. Pulse the butter and gluten free flour together until the butter is pea sized. Make sure that your butter is cold. If you feel that the butter is too warm, place back into the fridge for 30 minutes before completing step 2.
    2. Add one tablespoon of ice cold water (or super cold milk) into the food processor while it is running. The dough will start to come together and form a ball. That is how you know that the dough is done. You want it to be easy to roll and in order for it to be so, it needs to have enough moisture. Once it has formed the ball, take the dough out of the food processor.
    3. Now, this may be controversial but I roll the dough out immediately. I place it between two pieces of parchment paper and roll it out. I then lay the dough into a pie plate or tart pan and will place it into the fridge or freezer for an hour. About 45 minutes in, set your oven to 425°F.
    4. Depending on the recipe you are making, you may want to parbake the dough. To to this, take the crust from the freezer, and lay a piece of parchment paper or wax paper on top of it. You will need pie weights which can be beans, or beads, and you will then bake the dough for 20 minutes. When you remove it from the oven, it will be a nice golden color. This helps to start cooking the dough without burning it.
    5. Bake the crust then according to whatever recipe you are using.

    *If you do not wish to make your recipe immediately, you can place the dough in the refrigerator overnight. That is no problem. You can even store it in the fridge up to 3 days. I personally would still suggest rolling the dough out before placing it in the refrigerator overnight but that is your call!

    What can you use this recipe for?

    I traditionally use this recipe to make a gluten free pie crust recipe. If you want to make a pastry recipe then that is definitely fine as well. It is meant for a gluten free pie crust recipe or a pastry recipe! If you like to make pot pies (specifically chicken pot pie or a vegetable pot pie - you can get my recipe here) then this is a perfect recipe.

    I also love using it for the following: Pear and Frangipane Tart Tomato Tart Orange Tart Rhubarb Tart Peach Tart

    It is good to always have easy gluten free recipes on hand and once you nail down how to make a good gluten free pastry dough, you have half of the battle won!

    LEAVE A RATING AND REVIEW!

    Did you find this helpful? If you did, let me know! And let others know too by leaving a comment and star rating. Reviews are incredibly useful in helping other people find my site and make my recipes. Thank you so much!

    Laura 

    Looking for something similar?


    Make sure you never miss a new recipe video and follow me here on Youtube

    Maple Doughnuts

    April 18, 2022

    maple donuts on a metal tray

    Maple doughnuts (or maple donuts, we accept all spellings here!) are a quick and easy recipe. Follow the video tutorial for step by step instructions as to how to make this recipe!

    My family and maple syrup are synonymous with one another. My family would tap the trees, collect the sap, and boil the maple syrup (twice, most places only do once and man are they missing out!). It has made me a bit of a pure maple syrup snob but I appreciate quality maple syrup more than anything else. So, for this recipe, please do not just use maple flavor but actually use maple syrup. Let's dive in and make this maple donut recipe!

    FAQ

    Can I make the dough the night before?

    Yes. If you would like, you can make the dough and place in the fridge overnight. You would just then place the dough in the piping bag, and bake in the donut pans. See the "how do I make this recipe" section or the recipe card to see how to fully make the recipe!

    Can I use an air fryer?

    Not for this recipe. These donuts are not fried. This is a donut recipe for baked donuts. I love baked donuts (all of the donut recipes on my site are for baked donuts) simply because they are so easy to make, and there is no oil cleanup.

    What do you need for these maple doughnuts?

    1. Wire rack (also known as a cooling rack)
    2. pastry bag (also known as a piping bag)
    3. donut pans
    4. One bowl (a large bowl is best)

    Can I make maple donuts in a stand mixer?

    You can make them in a stand mixer however I find using a stand mixer to be unnecessary. If you do choose to use a stand mixer, be sure to use a whisk attachment (not the paddle or dough hook attachments). Just do not over-mix your donut dough.

    How do I store maple donuts?

    Maple Donuts will keep on the counter for a few days in an airtight container. You should not be wrapping them in plastic wrap or anything like that. You can extend their shelf life by storing them in an airtight container in the fridge for about a week. They are a great dessert cuisine but they are also perfect for breakfast, or simply as a snack. So, these maple donuts can cover you for a week or so!

    What do I need for this maple doughnuts recipe?

    1. 2 cups gluten free all purpose flour, I used King Arthur Measure for Measure for (be sure whatever mix you use that it has xanthan gum in it)
    2. 1 teaspoon baking powder
    3. 1 teaspoon baking soda
    4. ¼ cup maple syrup
    5. 1.5 teaspoon vanilla extract
    6. ½ cup granulated sugar
    7. ½ light brown sugar
    8. 1 egg, use large eggs
    9. 3 tablespoon unsalted butter, melted butter
    10. ½ cup milk, the % doesn't really matter but I use 2% (if you want a richer taste then use whole milk)- if you do not have milk you can use heavy cream
    11. 1 teaspoon salt, you can use Kosher salt

    Maple Glaze Ingredients

    1. 1 cup powdered sugar, also known as icing sugar and confectioners sugar
    2. 1 tablespoon pure maple syrup
    3. 2 teaspoon corn syrup

    How do I make these homemade donuts?

    ingredients for maple doughnuts
    Maple donut ingredients
    Whisk the dry ingredients and then add the sugars
    Whisk and add the milk, butter, and vanilla. Continue to mix
    Mix until your batter looks like this
    Add the maple syrup. Continue mixing the batter and make sure that there are no flour pockets in the batter
    Spray your donut pans with a non-stick spray
    https://garnishedwithjoy.com//www.youtube.com/watch?v=r2VVvusUPHQ
    Fill a pastry bag (piping bag) with the donut batter
    Pipe the batter into the donut pans
    Bake for 12 minutes at 350°F and allow them to cool completely while you make the glaze
    Once cool, dip in the glaze. Allow the glaze to set and then enjoy!
    1. Preheat the oven to 350°F. In a large bowl, whisk your dry ingredients. Add the baking powder, baking soda, sugar, one teaspoon salt, and flour and whisk. When finished whisking dry ingredients, add the vanilla extract, egg, and mix.
    2. In a microwaveable safe bowl (or a glass measuring cup) heat the milk and unsalted butter until the butter is melted. Pour the melted butter mixture into the dry ingredients and whisk. Your donut dough should be starting to come together now. Add the maple syrup and whisk for the last time. Make sure all of the flour is incorporated (you do not want pockets of flour in your donut batter!)
    3. Take the donut pans and spray them all with a nonstick spray. Place your donut batter into a pastry bag, and pipe into the pans. Place the donut pans into the oven and bake for 12 minutes. You will know that the donuts are down when they are golden brown on the top and spring back when you touch them. If they are not golden brown and not springing back, leave in the oven for 2 additional minutes.
    4. Allow the donuts to cool for a few minutes in the donut pans and then transfer them to a cooling rack and allow them to cool completely and come to room temperature.
    5. While they are cooling, make your rich maple glaze! To make your maple icing (or rich maple glaze, it is really a glaze and less of a maple icing here but you get my point), take a bowl and add the confectioners sugar, and pure maple syrup. Once you start to mix them together, it will get a bit lumpy and then begin to smooth out. Once it is smoothed out, add the corn syrup. If you find that the glaze is still a bit too thick, add the tiniest bit of milk or water to the mixture.
    6. Dip the homemade donuts into the maple glaze (make sure they are not warm doughnuts). Now, the maple glaze may run a bit, so, you can either place them on paper towels, on a wire rack with paper towels underneath, a plate, or baking sheet (if you do use a baking sheet, you still may want to line it with paper towel). Whatever you need to do to minimize the mess. Let the maple donut glaze set for a little bit and then dig in!

    Looking for more donut recipes or gluten free recipes in general?

    Baked Apple Cider Donuts
    Gluten Free Donut Recipe
    Blueberry Glazed Donuts
    Breakfast Cakes
    Pumpkin Pasties

    Never miss a new recipe video and follow me on Youtube here
    Follow me on Facebook here

    Gluten Free Oatmeal Cookies Recipe

    April 11, 2022

    Gluten Free Oatmeal Cookies Recipe on a beige cloth

    Been craving oatmeal cookies since going gluten free? Well this gluten free oatmeal cookies recipe has you covered! Perfect for those on a gluten free diet (celiac or an intolerance), this recipe is quick, easy, and delicious. Make this great recipe today!

    I love gluten free cookies because they are really so easy to make once you know what gluten free flours you should be using. I always like to suggest a gluten free flour blend as it makes any cookie recipe that much simpler. For this recipe (and generally any cookie recipe that you will find on this site) I will specify in that cookie recipe which gluten free flour blend I used to bring them to life!

    FAQ

    Why do I need to use certified gluten free oats?

    Not all oats are gluten free! A lot of oats are processed with wheat and or gluten containing grains and are therefore not deemed gluten free. Oats are naturally gluten free but you need to find a company that offers the certified gluten free oats to make these gluten free oatmeal cookies! I like Bob's Redmill. If you purchase these oats and are looking for something else to make with them, you can make oatmeal gluten free as well and have an awesome breakfast. You can also pulse your oats in a food processor and make your very own oat flour!

    What is xanthan gum? Why do I need it in my gluten free flour blend?

    Xanthan gum is a popular food additive that is added to flour blends as a thickening agent. As gluten is the typical thickening agent in all purpose regular flour, for gluten free flour, you need something that will help thicken it and that is why we use it! It is gluten free, dairy free, and vegan

    Can I adapt these to gluten free oatmeal raisin cookies?

    Yes! You can 100% make these into gluten free oatmeal raisin cookies. All you need to do is follow the exact same steps for the recipe, but, after you add in the oats, you would add in raisins. I would suggest that you add ¾ cup of raisins to your recipe and voila, gluten free oatmeal raisin cookies.

    If you would like, instead of raisins you could add chocolate chips (I would avoid chopped walnuts as it may make your cookie dough even dryer).

    Can I make these gluten free oatmeal cookies recipe dairy free?

    I personally have not tried but you definitely could. The two options for substituting butter that I would suggest would be Myokos vegan butter and Earth Balance vegan butter. That would give you a dairy free version of this recipe as there is no other dairy in the recipe! Remember if you are making these cookies dairy free, and you want to add chocolate chips, then be sure to use dairy free chocolate chips.

    What storage options are there for these cookies?

    If you want to keep the cookies out, then I suggest you put them in an airtight container. They should keep for 3-5 days. You can also freeze cookies by placing them in a ziploc (or something similar) freezer type bag and marking the date on the bag. They should be good for 3 months.

    What do you need for this gluten free oatmeal cookies recipe?

    1. 1 ½ cups gluten free flour blend, I use King Arthur Gluten Free Measure for Measure flour blend, make sure whichever flour blend you use that it has xanthan gum in it
    2. 1 teaspoon baking soda
    3. 2 ½ cups oats, use certified gluten free oats- I used Bob's Redmill
    4. ½ cup white granulated sugar
    5. 1 cup dark brown sugar, you can use light brown sugar if that is all you have
    6. 1 teaspoon vanilla extract
    7. 2 eggs
    8. ½ teaspoon cloves
    9. 1 tablespoon ground cinnamon
    10. 8 tablespoons unsalted butter, room temperature (if you forget to put your unsalted butter out to come to room temperature, melt in the microwave for 7 seconds, then flip, and for another 7 seconds. it should be good to go)

    *optional

    You can add either raisins or chocolate chips to this recipe if you would like to make this cookie dough a gluten free oatmeal raisin cookies cookie dough or gluten free oatmeal cookies with chocolate chips!

    Tools: wire rack, cookie dough scooper, baking sheet (cookie sheets), parchment paper (or baking mat)

    How do you make this cookie dough?

    1. Heat oven to 350°F and line baking sheets with parchment paper or a baking mat. Meanwhile, in the bowl of a stand mixer or using a hand mixer with a large bowl, cream together the butter and granulated sugar and brown sugar. Scrape down the sides of your bowl and make sure everything is incorporated. Add the eggs, followed by the vanilla extract, and continue to mix.
    2. Add the gluten free flour blend, cinnamon, clove, baking soda, and mix. Once it has come together, add the oats to the mixture. Now, if you were adding raisins or chocolate chips, this is when you would do it.
    3. Take your parchment lined baking sheet and scoop dough into dough balls and place on the baking sheets. They will spread a little in the oven but not a huge amount. If you are using a larger baking sheet, then you can do 9-12 dough balls on that baking sheet.
    4. If you would like to freeze the dough you can for 15 minutes but it is not necessary for this recipe. Take the two baking sheets and place onto the oven rack and bake for 11-12 minutes. When they are done, they will be lightly golden brown color and will have melted down a bit but will still be a bit puffy. Allow the cookies to cool completely on a wire rack the counter and then serve!
    Ingredients
    Cream together your butter and sugars
    add the eggs and vanilla and mix
    add the dried ingredients followed by the oats
    scoop the dough into balls and place on baking sheets and bake
    allow to cool completely and enjoy!
    https://garnishedwithjoy.com//www.youtube.com/watch?v=6obDaeWcTvw

    Looking for other cookie recipes?

    Remember, all of my recipes are gluten free recipes!

    Gluten Free Biscotti
    Soft Amaretti Cookies
    Candy Cane Cookies Recipe
    Gluten Free Linzer Cookies
    Double Chocolate Chip Cookies

    Never miss a new recipe video and follow me on Youtube here

    Orange Macarons

    April 4, 2022

    Macarons are the perfect French treat. Hailed as a difficult (but decadent dessert cuisine) macarons are actually quite easy to make once you nail down the technique. Watch the video for step by step instructions as to how to make these orange macarons!

    I am not sure I recall the first time I was introduced to macarons but I remember when I had my first orange macarons. We visited a shop in Georgetown near Washington DC while shopping for my wedding dress.

    The orange macaron had a bright orange shell (not sure if it had orange extract in it - realistically, you do not need orange extract if your recipe is done properly), but it was filled with orange buttercream frosting. I was determined after visiting that shop to establish a foolproof macaron recipe and I am happy to say that I have with this!

    Macaron recipes generally share similar components, i.e. a powdered sugar mixture, a macaron filling, almond flour, granulated sugar, cream of tartar, and voila, perfect macarons will be born. Baking macarons is intimidating at first but I promise if you follow the seps, you will become so much more comfortable with it. Once you nail down this recipe, you can play with macaron flavors and have plenty of successful macarons! Let's dive in.

    FAQ

    What tools do I need for these orange macarons?

    You will need (in addition to your ingredients):

    1. rubber spatula
    2. baking sheets
    3. medium bowl or a large bowl
    4. piping bag (if you do not have a pastry bag then a Ziploc bag can act as a piping bag)
    5. stand mixer (if you do not have a stand mixer then a hand mixer)
    6. whisk attachment

    Troubleshooting Making Macarons

    1. You can use room temperature egg whites but it is not necessary. If you find your macaron shells are not yielding the results you want, then give it a try.
    2. You need to use fresh egg whites, do not use carton egg whites. They will not yield the results you want. They will crack very easily and not be the beautiful macaron shells that you are used to.
    3. How do I get rid of air bubbles in my macaron shells? Can you release air bubbles?
      You get rid of air bubbles by hitting the baking pan against a flat surface and by making sure that the macaron batter is smooth.
    4. It looks like a macaron shell has beaked at an angle. Why is this?
      This is likely that the heat of your oven is uneven. Sometimes to solve this problem, I put a baking tray on the top rack of the oven.
    5. Are there macaron tips for piping bags?
      No. You just need an open ended piping bag- it will form a circle as you pipe
    6. My filling is oozing out, why is this?
      You need to let macarons cool before you fill macarons. If you do not, the filled macarons will soon become empty macarons. Properly assembled macarons will be done when the shells are cool and you do not overuse the filling.
    7. My egg whites are not stiff peaks. How can I make stiff peaks form?
      See above, make sure you are using the correct type of egg whites. Make sure that no yolk or fat has gotten mixed in to the egg whites. If you follow the instructions, it should work out just fine!
    8. Help, I only have almond meal and not almond flour. What do I do?
      You're in luck! Almond flour and almond meal are exactly the same thing! The name is fairly interchangeable.
    9. My macaron batter seems not smooth, can it be fixed?
      Sometimes it just requires a bit more mixing. However, it can also be indicative that your almond flour and powdered sugar were not made fine enough before being folded into the egg whites.

    How can I store my orange macarons?

    You can freeze macarons so long as they are in an airtight container. I suggest an airtight container and not a ziploc bag because an airtight container will protect them. You can freeze them for up to three months. If you want, they can be kept on the counter for a few days and or in the fridge for up to a week.

    Can you flavor macaron shells?

    Yes. In many recipes you can definitely flavor macaron shells. All you do is add the spice you like to the egg whites. Some flavors I really love are chai, ground up pistachios, cinnamon, etc. You can really play around with it once you get a handle on how to make French macarons.

    Can you color French macarons shells?

    Yes, however, you need to be careful as to what type of food coloring that you use. The gel food coloring is what you want and not the liquid food coloring. Liquid food coloring can cause issues with your egg whites and after all the trouble you go to to get them looking so beautiful, you do not want anything to get in the way of that.

    Another option is to use powder food coloring if you want those vibrant flavors. Again, I still do not feel that they will give you the same "wow" factor as the orange food coloring (the orange gel food coloring) but you can play around with it and see exactly what it is you like!

    Can I add a topping to these orange macarons?

    If you want to add a topping to your orange macaron shells you can. You just need to be careful as to what it is because you do not want your orange macaron shells to break in the process. The orange macaron will get its flavor from its filling, but, what pairs beautifully with an orange macaron is chocolate. Macaron flavors often will combine some of our favorites and orange and chocolate is a classic.

    If you want, you can make a chocolate ganache (you can add this to the center of the macaron filling along with the curd) or you can place a dollop on top before serving to someone. Chocolate ganache can be a bit heavy though so you can also do a chocolate drizzle. In order to do this, you can take dark chocolate and melt it. You will want chopped chocolate in order to speed up the melting process. Melt the dark chocolate either on a pot on the stove and or in the microwave in 30 second increments. If doing so in the microwave, stir every 30 seconds until it comes together. Drizzle is on top of the shells. If you want to infuse even more orange flavor with the chocolate, you can add some orange marmalade to the mix!

    How do you dye macarons without food coloring?

    The simple way to do this without food coloring is with ground up natural food coloring sources (such as beetroot powder if you wanted something in the pinkish tones). You will not get the same vibrant colors that you would if you use synthetic gels.

    What ingredients do I need for my orange macarons?

    1. 2 large egg whites (you need to make sure that no yoke gets into the whites- it will not allow the egg whites to properly rise)
    2. 1 cup powdered sugar (also known as confectioners sugar)
    3. ½ cup + 3 tablespoon almond flour
    4. 5 tablespoon granulated sugar
    5. 1 teaspoon Cream of Tartar
    6. Orange Curd, this is for your filling
    7. gel food coloring (this is optional)
    8. Baking mats and or parchment paper
    ingredients for orange macarons
    beat your egg whites
    add the almond flour and powdered sugar
    pipe the shells once the batter has come together
    let them cool completely and fill with curd or other filling
    see storage tips above

    How do I make orange macarons?

    1. Place your egg whites in the bowl of a stand mixer. Add your whisk attachment. Start them on a low speed and make your way up to a medium speed. At first the egg whites will foam, and then the egg whites whip up and begin to really come together. Add your cream of tartar. Start the machine on medium. Once the egg whites begin to look frothy, change it up to high speed. Once you see stiff peaks form in the meringue, add your granulated sugar one tablespoon at a time. To see if your meringue truly does have stiff peaks, we do the meringue test. Take your bowl, flip it upside down. If the meringue stays in its place, it is ready. If you are adding orange gel food coloring you would add it now before you stop whipping the egg whites.
    2. While your egg whites are beating, mix together your almond flour and powdered sugar. If you want to make sure they are super fine, pulse the together in your food processor and use a sieve to sift them.
    3. Once your egg whites are ready add one third of your dry mixture to the whites. You are going to want to gently fold them in the shape of a “J”. This means to cut down the middles of the bowl with your spatula, and curve up as you would a J. Continue to do this until all of the dry mixture is incorporated. You want your mixture to be smooth and to slide off of the spatula. Once it is like that, transfer the macaron batter it to a piping bag.
    4. In order to get perfect circles, you may want to use a baking mat with circles printed on it (these are easily found on amazon). Pipe your filling onto the baking mat or parchment paper (place these on your baking sheet before you bake them).
    5. You are now going to bang your baking tray against the counter. 5 x per side. This will allow the meringue to flatten and get rid of any potential air bubbles. Once you have done this, you need to let the macarons rest. Letting the macarons rest is a fundamental step. By letting the macarons sit, you allow the shell to harden just slightly and this helps with the bake in the oven.
    6. Set your oven to 310°F, when ready, place macarons in the oven on the middle rack, and bake for 11-13 minutes. You will want to see little “feet” grow on them. This is the little extra bit that bubbles up when they bake under the top part of the shell. Once you haver removed your shells from the oven, allow them to cool completely.
    7. Once the macaron shells have cooled completely, place a bit of the orange curd on one macaron shell, and then place the top on it. Gently press together and you now have successful macarons!

    What if I do not have curd and still want an orange creamsicle filling?

    For this macaron recipe, I love the curd filling. However, if you do not want to make orange curd, then you have a few options!

    1. For your orange macarons make an orange buttercream frosting! For this, you will need room temperature butter, powdered sugar, and here is where we can make a choice. you can add blood orange juice and make a blood orange buttercream filling. If you do use blood orange juice, it will likely give you a beautiful color. You can use regular orange juice to get the orange macarons flavor that you are craving. (Blood oranges are in season for a short period of time every year so if you do give this a go, take advantage!)
    2. If you want just a hint of orange flavor, try adding orange zest to the buttercream frosting.
    3. Don't want orange flavor at all? But want citrus flavor? Then add lemon juice to your buttercream frosting!
    4. If you want something kind of fun and whacky, you can add orange marmalade to the filling instead! You can also add orange marmalade to your buttercream!

    How do I make orange buttercream?

    1. ½ cup unsalted butter, softened to room temperature
    2. 1 cup powdered sugar
    3. 2-3 tablespoons juice, orange juice, blood orange juice, lemon juice
    4. 1 teaspoon vanilla
    5. orange zest * optional
    1. While your macarons are cooling on the baking sheet, make the buttercream. Take the room temperature unsalted butter and beat in the bowl of a stand mixer. If you do not have a stand mixer, you can use a hand mixer (or you can make it by hand but you will need either a medium bowl or a large bowl). Turn the speed to zero and add your powdered sugar. Start the machine back up slowly and make your way up to a medium speed. Beat them together for 5 minutes.
    2. Add your juice and continue to mix together. If you find that the mixture is not thick enough and is too "watery" for your liking, add more powdered sugar. If you find the opposite and that your flavor is not exactly where you want it to be yet, you can add more orange marmalade, orange zest, more blood orange juice, etc. Do not add too much of any one thing at a single time because once it is done, you cannot go back. Making macarons can seem overwhelming at first but they come together quite easily, and if you are making a buttercream to go with them (such as a blood orange buttercream filling) you won't be disappointed with your finished macarons. If you do go with a buttercream filling, it will put the orange creamsicle flavor over the top (if you happen to be a fan of orange creamsicle, then this may be the best option for you!).

    Looking for other orange recipes?

    Orange Curd
    Gluten Free Cranberry Orange Scones
    Gluten Free Cranberry Orange Muffins
    Orange Olive Oil Cakes
    Orange Bundt Cake

    Never miss a new recipe video and follow me on Youtube here

    Sweet Potato Black Bean Tacos

    March 28, 2022

    Sweet Potato Black Bean Tacos filling in tortillas

    This taco recipe does not need to be reserved just for taco Tuesday. These sweet potato black bean tacos are the perfect addition to your repertoire of vegetarian recipes! Follow the video for step by step instructions as to how to make this fun new recipe!

    As I am married to someone who does not eat meat, we have many vegetarian recipes on rotation in our household. Back when I was in University in Montreal, there was a taco restaurant across the street from my main building named Burritoville. This recipe is based off of what they had but adapted. As I have a food blog, I love to pay homage to recipes that I have loved and this was definitely one of them. You would not necessarily think to add apples, sweet potatoes, black beans and cheese together but alas, it gives you a delicious recipe! Perfect for a Meatless Monday not just a Taco Tuesday, this recipe is just what you ordered. Let's dive in and make this taco recipe.

    FAQ

    Can I make alterations to this recipe? Can these be vegan sweet potato black bean tacos or dairy free?

    Yes! Yes they can! The base is entirely vegan to begin with. The only dairy (and therefore non-vegan element in the dish) is cheese. I use cheddar cheese in this recipe but you can definitely use a plant based cheese and or a dairy free cheese. This vegetarian taco recipes is super easy to adapt!

    The recipe is gluten free (I exclusively use corn tortillas), if you aren't a fan of corn tortillas, you can definitely use whatever floats your boat. I personally love the flavor of the corn, so, that is what we use.

    Cheeses: I use cheddar cheese but this recipe would pair beautifully with different types of cheese. you could add goat cheese if you wanted to. Goat cheese adds a really nice tang flavor that you would not get from a traditional cows milk cheese. You could use cotija cheese which is delicious! I love to add crumbled cotija tacos. If you want the tang from a cheese but you do not want to use goat cheese, then you could also use feta cheese. There are plenty of options!

    Can I add additional flavors to this recipe?

    (Once you have made it, you can definitely play around with this recipe. You could use roasted sweet potatoes instead of adding them to the pot. If you like a bit of citrus, you could add a hint of lime juice to the pot. In addition, you could add garlic powder if you are a fan of garlic (I love garlic powder). If you want a bit more heat, you can add cayenne pepper and smoked paprika. Cayenne pepper and smoked paprika are favorites in our household. We love the recipe as is but it could definitely be a fun addition to the recipe! Once you know how a recipe works, you can make many delicious recipes using the base of it and adding to it what you love.

    I think beans are great and that hearty black beans add so much to this dish. However, if you do not like black beans, you could also try pinto beans instead. It would yield a different flavor, but, hey, go for it.

    Are there optional toppings I could use?

    Of course! If you like cilantro, then definitely toss some fresh cilantro on top of your tacos. I know that some people think fresh cilantro tastes like soap (I do not) so I think it would be a great addition. You could add sliced avocado. Avocado slices are a great addition to any taco. I also will just use guacamole. My husband loves to use hot sauce. You can use different types of hot sauce (if you like sriracha then go for it) or if you like the traditional Frank's Hot Sauce then do it! I know some people like sour cream but I prefer Greek yogurt. Lastly, a salsa could definitely go nicely. Traditional roja salsa or a salsa verde. My desired toppings are generally just guacamole but you do you, babe!

    Can I store leftover filling?

    Yes! The filling will keep in the fridge for around 7 days and or you can freeze the filling for 3-6 months. If you do freeze it, allow it to thaw in the fridge over night!

    What do you need for this sweet potato black bean tacos recipe?

    1. 1 yellow onion
    2. 3 sweet potatoes
    3. 4 apples, I use honeycrisp apples
    4. 1 can black beans
    5. ½ cup liquid aminos
    6. 2-3 tablespoon apple cider vinegar, you can also use rice vinegar
    7. 1 tablespoon cinnamon
    8. ½ tablespoon cumin, taste as your food is cooking, you can add more
    9. 1 tablespoon oregano
    10. 1 teaspoon chili powder, chili powder is optional if you do not want a bit of heat
    11. kosher salt + freshly ground black pepper, to your taste
    12. extra virgin olive oil, to sauté the onion
    13. tortillas

    How do you make sweet potato black bean tacos?

    Ingredients for sweet potato and black bean tacos
    Sauté onions
    add the remainder of the ingredients and cook down
    Bake the tacos with the filling for 10 minutes
    Have your sides and or toppings ready
    eat immediately
    https://garnishedwithjoy.com//www.youtube.com/watch?v=XJQBXOFNaKg

    Despite the instructions looking a bit long, this is an easy recipe! It uses one point for all of your filling to come together.

    1. Take a medium sized bowl and place your peeled and chopped sweet potatoes and apples into it. Meanwhile, on medium heat, place a heavy set pot (or a large skillet with a lid) on the burner. Add 2 tablespoon of olive oil and add the onion to the pot. You want to sauté the onion until it is golden brown.
    2. Add the chopped sweet potato, apples, black beans, liquids, oregano, salt, pepper, cinnamon, cumin and chili powder into the pot. Stir to make sure everything gets coated, cover the pot, and allow the bean mixture to come together. You are going to keep the heat to a medium heat, do not raise it to medium high heat because it will burn the bottom of the mixture. We want this sweet potato mixture to come together nicely, we want no burnt bits! The thing with this recipe is that you won't need a potato masher, as it cooks down, the food will become mushier and it is just easy to work with. We will achieve this by stirring occasionally. This should cook for an hour.
    3. When you are getting close to your hour mark coming up, preheat oven to 400°F. Now, you are going to want to work with warm tortillas. Warm tortillas can be folded over and this is what we want for this recipe. Because the sweet potato and black bean mixture is soft, we will bake the tortillas with the mixture inside. Place the tortillas in the microwave for 30 seconds or so to warm them up. Take a baking sheet and place the corn tortillas onto the baking sheet. Now, if you are using cheddar cheese (or a cheese that melts), place the cheese on top of the tortillas. Then take the filling (which will be nice and mushy and everything will have come together in your pot) and put it on the tortilla. Fold the warmed tortillas over. Brush them with olive oil, this will allow the tortillas to crisp up a bit in the oven (this step is optional). Place the baking sheet into the oven and bake for 10 minutes. When done, remove the baking sheet from the oven. If you did not place cheese into the tortillas, then add cheese now!

    Looking for other vegetarian recipes?

    Vegetarian Tortellini Soup with Spinach
    The Cobblers Wife Pasta
    Spinach Soup
    Tomato Tart
    Butternut Squash Bisque
    Fried Egg with Rice
    "Meat" Balls
    Vegetarian Bourguignon

    Never miss a new recipe video by following me on Youtube here

    Dulce de Leche Cheesecake

    March 21, 2022

    This recipe for dulce de leche cheesecake is absolutely delicious. It is a baked cheesecake and uses the traditional burnt basque cheesecake method. It is quick, delicious, and an easy cheesecake! Who doesn't love a homemade cheesecake?

    This is a great recipe for those who do not want to have to make prepared crust but love cheesecake. Perks of baking the cheesecake this way? You do not need a pie crust or a crust of any kind (which means you won't end up with a soggy crust). I know some people love a graham cracker crust (I do too), but, it simply does not work with burnt basque cheesecakes. You also do not need to worry about a hot water bath! Which is so great because dealing with a hot water bath can be such a pain for those who are not experienced with it. There is always the question of, do you place the springform pan directly into the hot water bath or do you place springform pan above a hot water bath. Let's dive in!

    Is dulce de leche the same as caramel?

    The main difference is that dulce de leche is made from sweetened condensed milk (or milk and sugar) whereas caramel is made from caramel and water. Condensed milk is made from cows milk but has had the water removed from it, and has sugar added.

    If you cannot find dulce de leche at your grocery store, you could substitute a sweetened condensed milk or caramel if you wanted. However, it is generally readily available.

    So what is Dulce de Leche?

    Dulce de leche is a cooked down sweetened condensed milk that is really popular in South America. One of my friends, Belen, is from Argentina and incorporates dulce de leche into many of her recipes. You can see them here.

    Recipe notes:

    If you do not have some of the ingredients, you may be wondering if you could substitute any. If you do not have dulce de leche, then you may use sweetened condensed milk. Sadly, there are not many replacements for the heavy cream, or the cream cheese. The heavy cream helps build up the dulce de leche cheesecake batter, and the cream cheese is of course integral to the dessert.

    I like to bake with King Arthur's Measure for Measure Gluten free flour. However, any 1:1 gluten free flour will do for this dulce de leche cheesecake.

    Cheesecake Tips:

    The type of baking pan that you will use for this recipe is a springform pan. It is not a large baking pan, but rather, an 8-9 inch cake pan or tin. This is the only type of baking pan that you will use for a burnt basque cheesecake! That is because when it is done baking, you will unlock the springform pan and life the circular mold up, and just slice your cake! Which is super easy. If you do not have a springform pan, they are available in most cookery stores and are definitely available online!

    What if I want to make this recipe into mini cheesecakes? You absolutely can! Please read my recipe here for instructions on how to do just that.

    Can I use aluminum foil instead of parchment paper?

    No, you should 100% not sure aluminum foil. Aluminum foil, while nonstick, is not the best solution when you are using a decent amount of heat. As this dulce de leche cheesecake is a baked cheesecake, you do not want to surround it with aluminum foil. Stick with the parchment paper.

    Now if you are thinking "can I use plastic wrap" to store this recipe, then yes. you can. If you wish to wrap the entirety of the cake or individual slices in plastic wrap that is doable. See below for my suggestions for how soon after the cake should be eaten. If you do not use plastic wrap but an eco-friendly alternative, I would suggest that you use an airtight container instead.

    This recipe only really requires one large bowl. It is the bowl of a stand mixer. You will make the cheesecake filling all in this one bowl!

    What to serve with this dulce de leche cheesecake?

    If you are wondering what to serve this dulce de leche cheesecake with, then Dulce de leche topping is super delicious! You could also go with a whipped cream! If you do not have dulce de leche, I would not substitute sweetened condensed milk as a topping.

    Because this is a burnt basque cheesecake recipe (or a San Sebastian cheesecake recipe), as stated above there is no crust. Which for the following reasons is great!

    1. You do not need to wait for the cooled crust to add the cheesecake mixture.
    2. There is no butter in this recipe. Usually, melted butter (salted butter or unsalted butter) is used in combination with graham crackers ( or you take the butter and combine cookie crumbs) forms the crust. It eliminates these steps so you can get to working on the cheesecake mixture.
    3. Burnt Basque Cheesecakes are known for being a creamy cheesecake. It is due to the way in which it is baked in addition to the heavy cream, but, who doesn't love a creamy cheesecake.

    What do you need for this dulche de leche cheesecake batter?

    You will need the following:

    1. 3 8 oz packages of cream cheese, softened cream cheese; you can use full fat cream cheese or a low fat cream cheese
    2. 1 cup cream, I use heavy cream
    3. 1 cup sugar
    4. 4 eggs
    5. ¼ cup dulce de leche
    6. 1 ½ teaspoon vanilla extract, I like to use an authentic vanilla extract however if all you can find is the clear synthetic vanilla extract, then that is fine
    7. ¼ cup gluten free flour, I used King Arthur Measure for Measure Gluten Free Flour

    *prepared pan - use a springform pan

    *stand mixer (or a mixer with a beater); please do not use a food processor

    How do you make it?

    Preheat your oven temperature to 400°F.

    1. Add the cream cheese to the large bowl of a stand mixer (it may be tempting to use a food processor but I would not suggest it). You are going to beat cream cheese until it is smooth. You want the filling to be a smooth cheesecake batter without lumps! Add the sugar and continue to beat cream cheese filling on a medium speed. Scrape down the sides of the bowl and make sure that everything is smooth and fully incorporated. The cheesecake filling should be coming together at this point.
    2. Add eggs one at time now until they are all smooth in the batter. Next, add the vanilla extract and the heavy cream and beat for another minute. You are going to want to lower the speed from a medium speed to low (you do not want the heavy cream to go flying). Now add dulce de leche. Remove from the stand mixer (again, I really suggest a stand mixer and not a food processor or a hand mixer as you want the beater option), and fold in the gluten free flour.
    3. Spray the springform pan with a nonstick spray and line it with parchment paper. If you do not have a nonstick spray, that is fine, you can grease the springform pan with butter and then line it with the parchment paper. Pour the smooth cheesecake batter into the prepared springform pan, open the oven door, and then place the springform pan into the oven. Bake cheesecake for 50 minutes. The dulce de leche cheesecake will still be a bit jiggly when you remove the springform pan from the oven, and that is totally normal. The top will be a beautiful golden brown color. The golden brown is unique to a burnt basque cheesecake and adds a caramelized flavor to the dulce de leche cheesecake.
    4. Let the dulce de leche cheesecake sit on the counter in its springform pan (do not, I repeat, do not try to remove the circular mold of the springform pan) and cool completely for one hour before placing in the fridge and allowing it to cool for at least 2 hours. When you go to slice your cheesecake, lift the circular mold of the springform pan off, peel the parchment paper down from the sides before slicing! Feel free to use more dulce de leche topping to go right on top of your perfect cheesecake slices! I would suggest heating it up to make it a bit smoother to drizzle on the top. I like to let my cheesecake sit in the fridge overnight, that way, you make sure it is cool completely! If you wish to store it in an airtight container that is fine but make sure that said airtight container is in the fridge. The dulce de leche cheesecake is best eaten within 3-4 days!
    Ingredients for dulce de leche cheesecake
    Beat the ingredients together
    fold in the gluten free flour
    pour the dough into a prepared springform pan
    bake for 50 minutes, until just set in the middle
    allow to cool on the counter for 1 hour before transferring to the fridge for a minimum of 2 hours
    serve once the cake is cooled!

    Looking for other cheesecake recipes?

    Lemon Burnt Basque Cheesecake
    Blueberry Burnt Basque Cheesecake
    Burnt Basque Cheesecake
    Heath Bar Cheesecake
    Lemon Cheesecake Bars
    Raspberry Cheesecake Bars

    Be sure to never miss a recipe video and subscribe to my Youtube channel here

    Quick and Easy Oven Baked Rockfish Fillets Recipe

    March 14, 2022

    baked rockfish with chives on top on a white plate with a silver serving utensil next to it

    This recipe for baked rockfish fillets is quick, delicious, and an easy recipe. With a cook time of under 30 minutes, you will be wondering why you haven't been making this recipe forever.

    Quick and Easy Oven Baked Rockfish Fillets Recipe

    In our house, as we don’t eat meat, we love fish. Fish is a staple as it is our main source of protein. This is one of my favorite fish recipes. I have even brought this to a dinner party. It was served as one of the main dishes and everyone thought it was absolutely delicious. As a recipe developer, I love to try new fish recipes, but, sometimes, you need to just go back to your staples. I love recipes with little to no prep time, and the prep time for this baked rockfish is less than 10 minutes and its cooking time is around 23 minutes. Making it an ideal dish to make and the perfect 30 minute meal for home cooks everywhere. Let’s dive in and make this baked rockfish aka the perfect main course.

    ⭐️ Tips, Tricks, and Alterations:

    If you are looking for substitutes for this recipe, let’s take a look. If you do not have butter then you can substitute olive oil. Make sure that it is extra virgin olive oil. You could also do a combination of butter and olive oil if you wanted! Be sure to not over-do it though if you do use olive oil, as you do not want the sauce to be too thinned out.

    Rockfish is a mild fish that will flake easily when you bake it. If you find that you cannot find rockfish fillets where you live then you can also substitute rock cod, black cod, pacific snapper, red snapper, or halibut. Halibut would be my last choice for this, and really if you can buy rockfish fillets, then do so! In my opinion, it really is the best fish.

    This baked rockfish recipe does not have lemon in it. If you are obsessed with lemon and want that extra flavor, then add the lemon zest of one lemon. You could also line the fish with lemon slices if you wish. However, I would avoid lemon juice.

    Fish recipes can be intimidating if you don’t cook them often, however, it becomes easy the more often you practice! This is a tasty first recipe to try your cooking skills on, so, the best tip I can give you is to purchase a thermometer so that you can check the internal temperature of the fish fillets if you are worried that they may not be cooked fully inside. The temperature you are looking for is 145°F.

    Rockfish fillets tend to be more expensive and therefore you may be worried about how to cook them. This recipe is foolproof and will yield delicious results! So long as you follow the instructions, and bake them accordingly, the fillets will be a 10/10 and you will be adding this to your regular list of recipes!

    ❤️ Why you will love this baked rockfish:

    This is a great option if you are looking for a meaty white fish and are looking for a decadent meal. All of the ingredients can be found at your local grocery store. It is my favorite way to bake rockfish.

    ⍰ What to serve with rockfish filets:

    You can serve it with rice, potatoes, and or salad. If you do decide to serve it with rice, I would save a bit of the sauce as a leftover, and pour it over the rice before placing the rockfish on top. The rice will feel a bit less bland and or dry that way. We love to serve it with these roast potatoes! They are delicious and one of our favorite recipes! Plus if you make the potatoes, you can bake them at the same time as the fish. A win win.

    📃 Ingredients for baked rockfish:

    1. rockfish fillets, I just used one one fillet and it fed my husband and myself, I also use fresh fish
    2. 4 tablespoons butter
    3. 1 tablespoon mustard powder
    4. 2 teaspoon dried thyme
    5. 1 teaspoon curry powder
    6. ½ cup heavy cream
    7. 1 shallot, if you cannot find shallots then use red onion
    8. salt and pepper to taste
    9. 2 cloves minced garlic
    10. Fresh herbs, chives and parsley (optional)
    11. Capers (optional)

    📖 How to make these baked rockfish filets:

    Preheat oven to 425°F and line a sheet pan or a baking sheet with parchment paper (if you absolutely do not have parchment paper then you could use aluminum foil- please note that it will stick more-so to aluminum foil). If you are dealing with a whole fish, slice it into filets, and then pat it down with paper towel to absorb the extra moisture. Place filets on the sheet or in a casserole dish if that is all you have. Meanwhile make the sauce.
    In a sauce pan or pot, place the butter and melt. Add the shallot and fry for 3-5 minutes on medium heat. Once the shallots look nice and golden brown, add the spices, garlic, and continue to stir. Add the capers if you want them, followed by the cream. You are going to continue to stir the sauce until it thickens. Cream will naturally thicken a sauce. It should take around 5 minutes on a medium heat.
    Take your rockfish fillets and pat dry with paper towels. Place the rockfish fillets onto the baking sheet lined with parchment paper. Season with salt and pepper. If you wish, you can use kosher salt and pepper, it makes no real difference in this dish. Pour the sauce over the fish and make sure the sauce is spread evenly over the fish. You want the entire fish to be infused with the flavors of the sauce. Place the baking sheet pan into the preheated oven. This baked rockfish recipe has a cook time of 23 minutes (you do not need to rotate the baked rockfish half way through the bake). When you remove the rockfish from the oven, the internal temperature should be at a minimum 145°F. Therefore, I always check the thickest part of the fish fillets to make sure it is in fact cooked all the way through .
    Remove the baked rockfish from the oven and cover with fresh herbs. You will see when you cut into the fish fillets with your fork that the fish flakes easily. It is absolutely delicious! The color on the top will be a beautiful golden brown, and your rockfish fillets are ready. I like to serve it on a large plate and place it in the middle of a table. It just feels fancier that way.

    ingredients for Quick and Easy Oven Baked Rockfish Fillets Recipe
    ingredients for cafe de Paris baked rockfish
    Quick and Easy Oven Baked Rockfish Fillets Recipe
    Once you have made the sauce, evenly spread the sauce on top of the rockfish filet
    Quick and Easy Oven Baked Rockfish Fillets Recipe
    bake for 23 minutes and top with fresh herbs
    Quick and Easy Oven Baked Rockfish Fillets Recipe
    serve immediately
    https://garnishedwithjoy.com//www.youtube.com/watch?v=C_SJmFwYSQc

    🌟 LEAVE A RATING AND REVIEW! 🌟

    ⭐️⭐️⭐️⭐️⭐️
    Did you love this recipe? If you did, let me know! And let others know too by leaving a comment and star rating. Reviews are incredibly useful in helping other people find my site and make my recipes.
    Thank you so much!
    Laura 

    🔎 Looking for other fish dinners?

    If you want to connect follow me here
    Make sure you never miss a new recipe video and follow me on Youtube here

    « Previous Page
    Next Page »

    Primary Sidebar

    Custard Apple Tart: A French NormandeTarte Recipe

    Let's Get Cooking!

    • 100% gluten-free sweet & indulgent recipes that I've tested in my own kitchen that I hope you'll try and love!
    • Step-by-step instructions (including some videos) on how to perfect your gluten-free cooking and baking game.
    • All of my favorite cooking, baking, and photography equipment that I deem essential in the kitchen!

    More about Garnished With Joy →

    As Featured In

    Footer

    ↑ back to top

    About

    Recipes

    Contact

    Privacy Policy

    Disclaimer

    Terms & Conditions

    © 2025 Garnished With Joy