• Skip to primary navigation
  • Skip to main content
  • Skip to primary sidebar
  • Recipe Index
  • About
  • Contact

Garnished With Joy logo

menu icon
go to homepage
  • Recipe Index
  • About
  • Contact
search icon
Homepage link
  • Recipe Index
  • About
  • Contact
×
Sift

Blog

Candy Cane Cookies Recipe

November 23, 2020

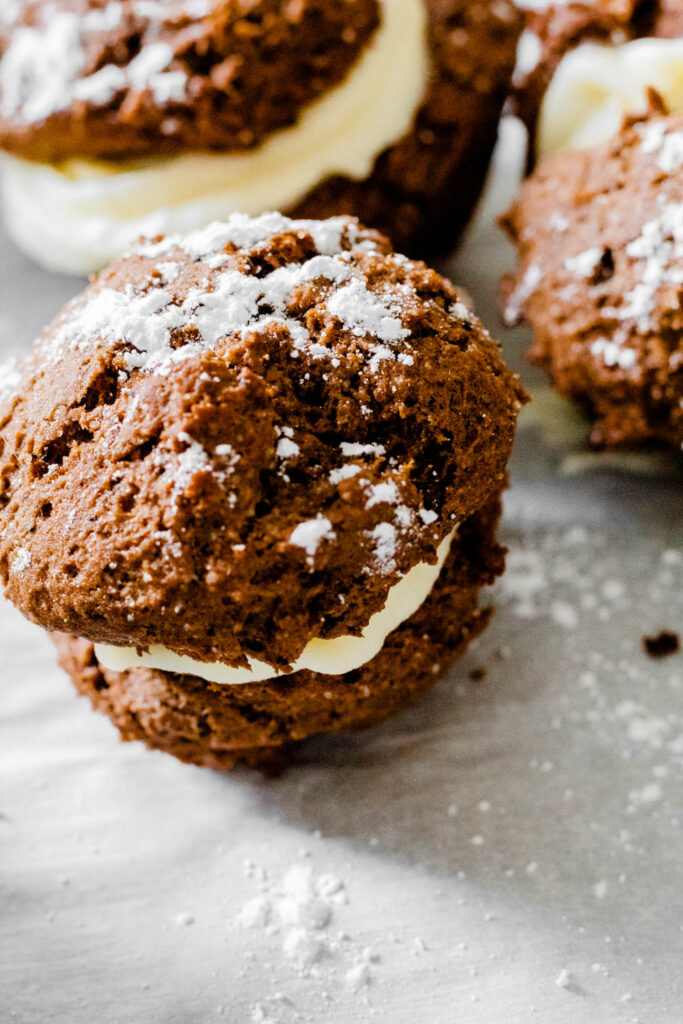
Candy Cane Cookies Recipe: A Perfect Holiday Cookie

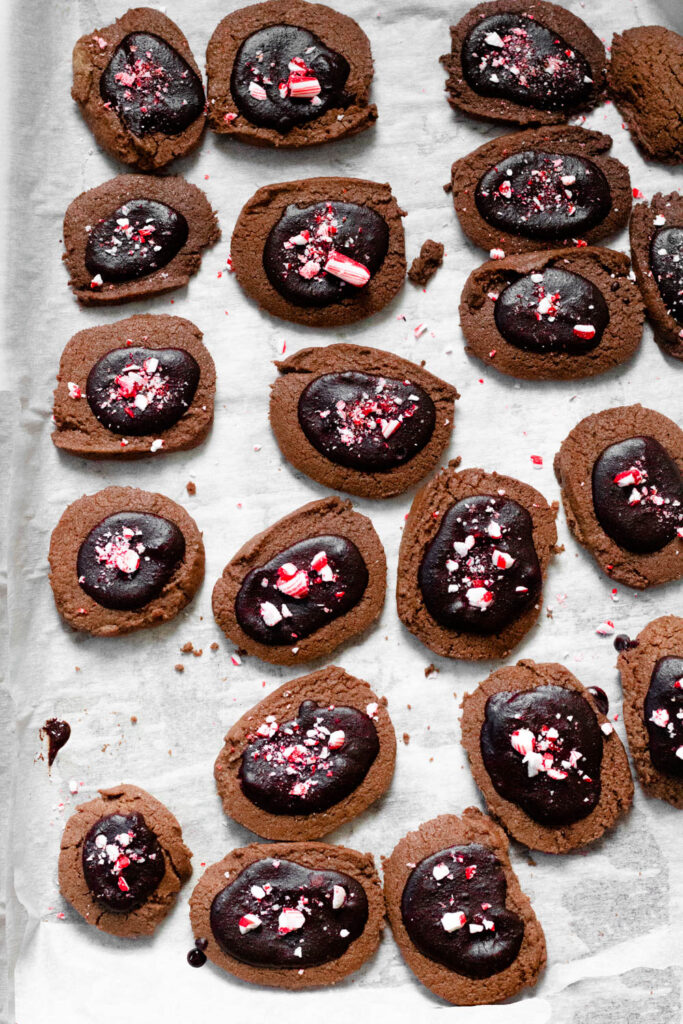
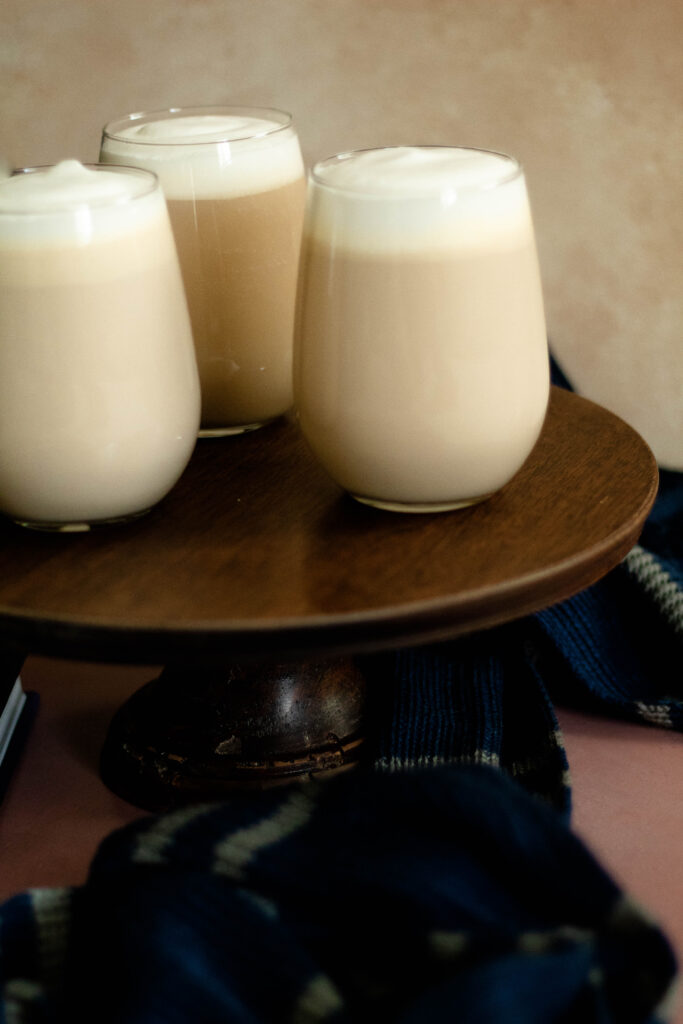
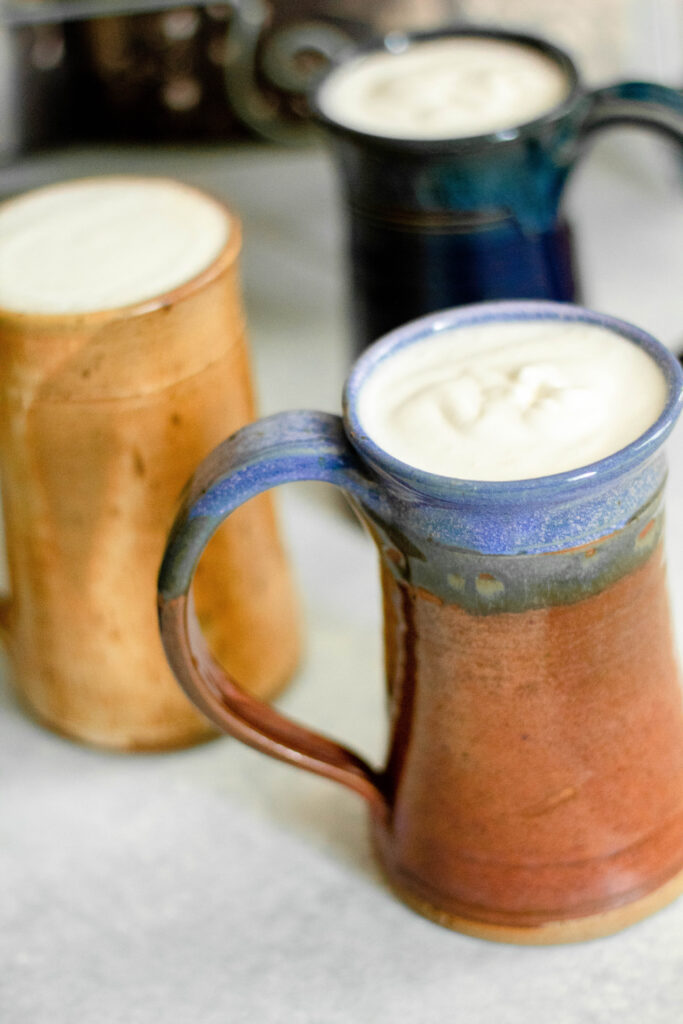
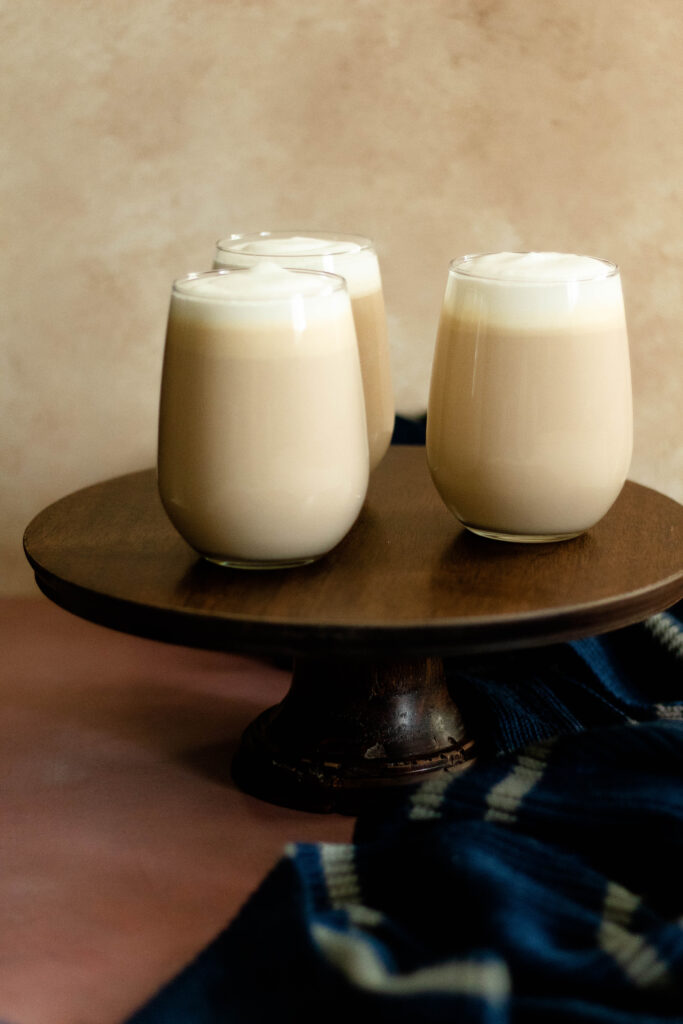
I am not a big candy person. I love baked goods, pies, cakes, patisserie, you name it. Candy however, has never been my thing. On Halloween, I was the kid that would trade chips for candy. The one major exception to this rule is candy canes. A coffee chain in Canada is Second Cup and every winter they have the best Candy Cane Latte. These cookies fill me with nostalgia for that drink, but better than that, they satisfy my craving!

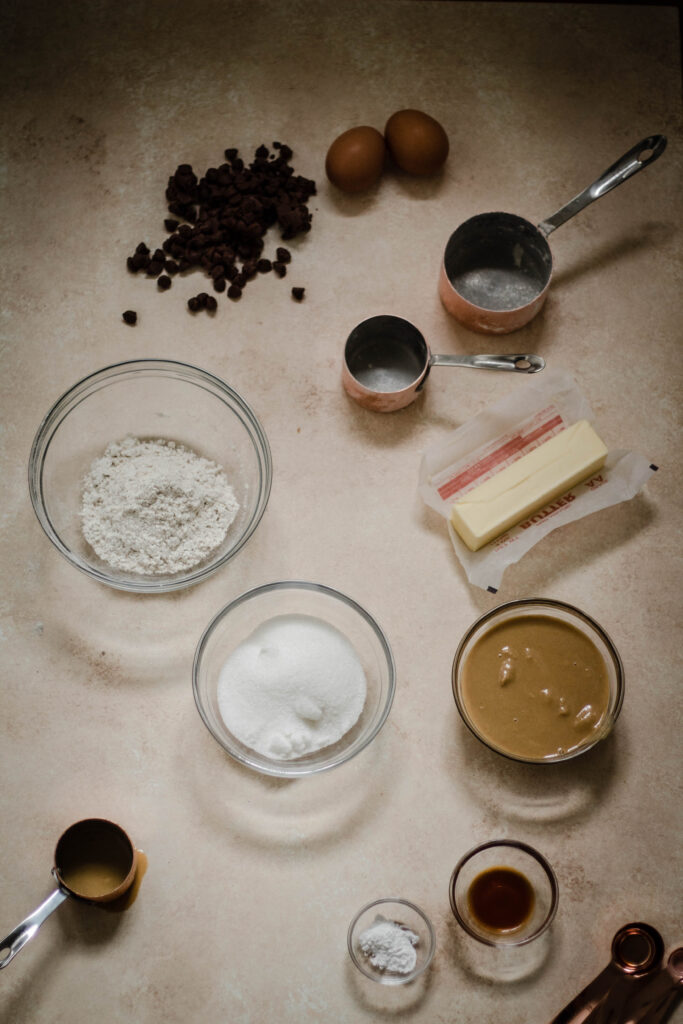
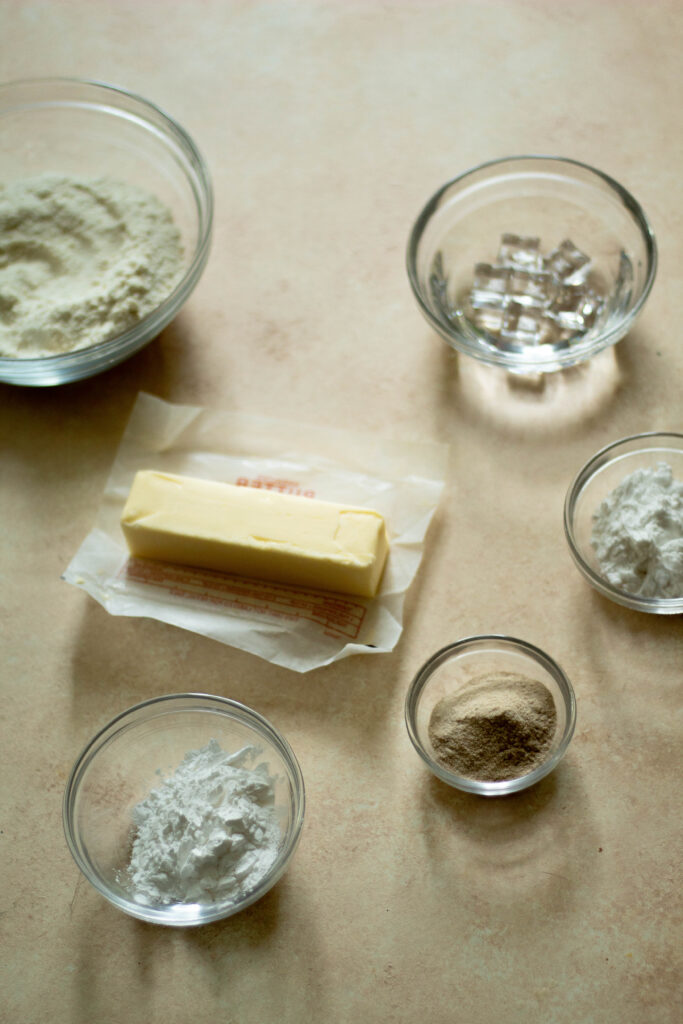
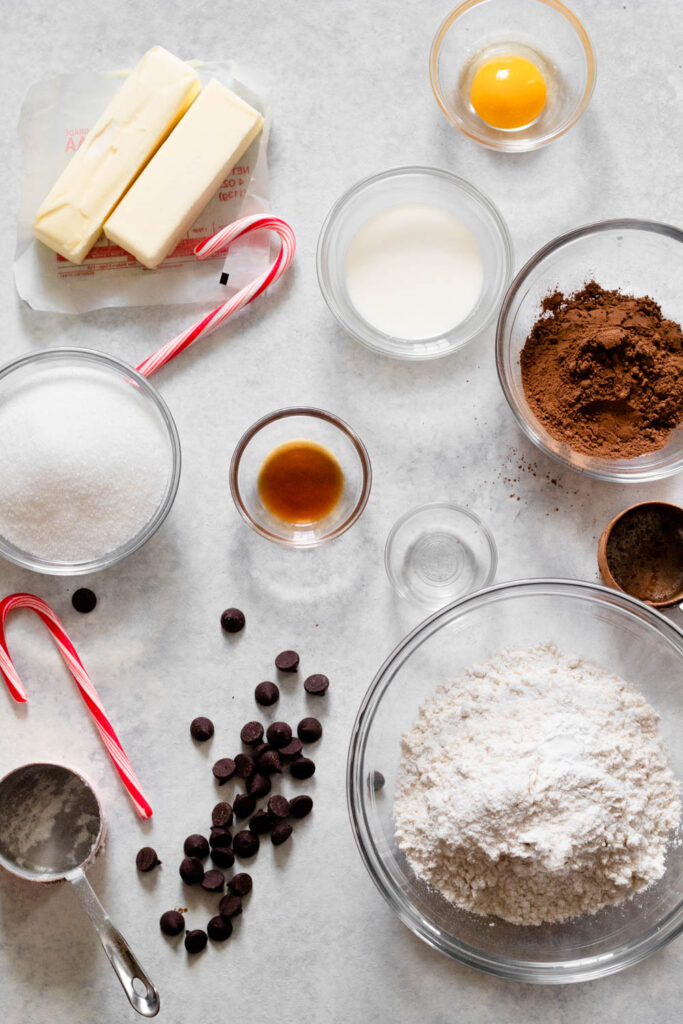
What do you need for this candy cane cookies recipe?

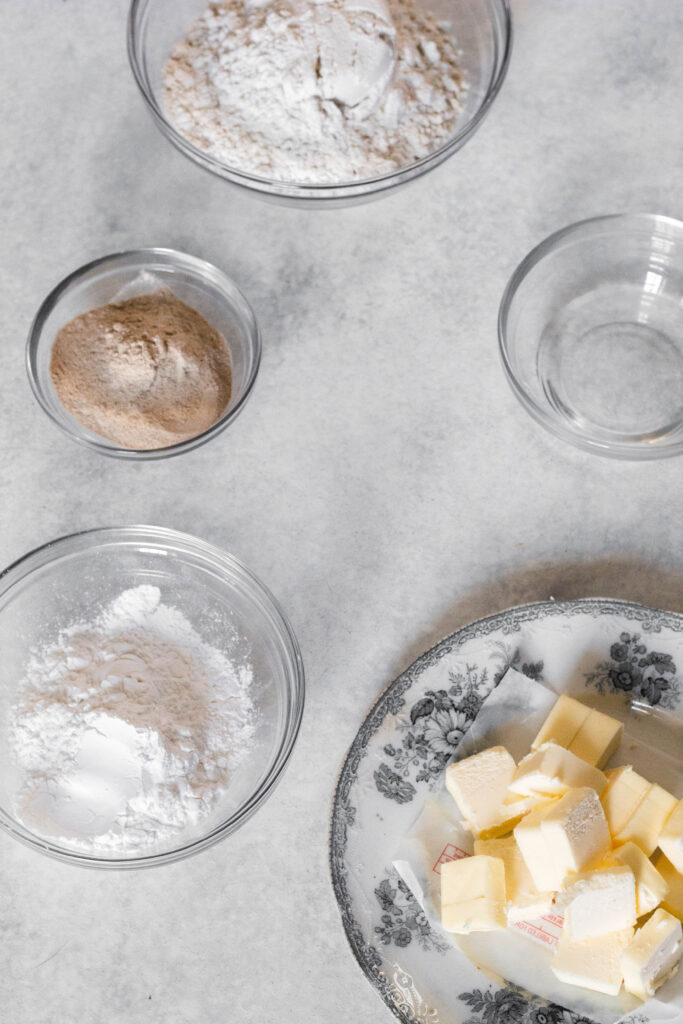
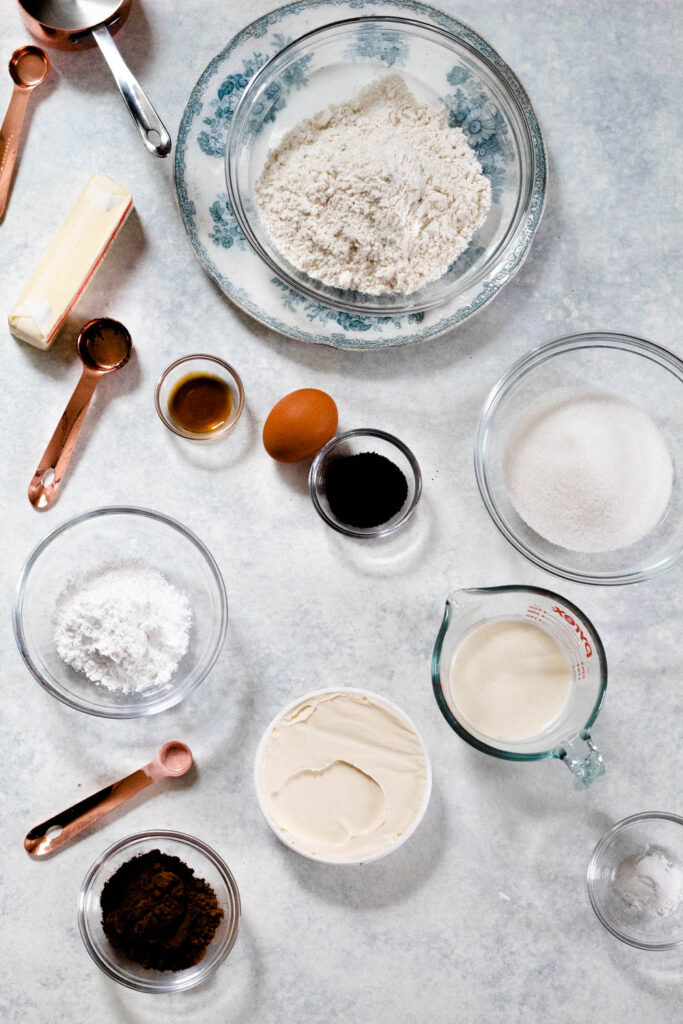
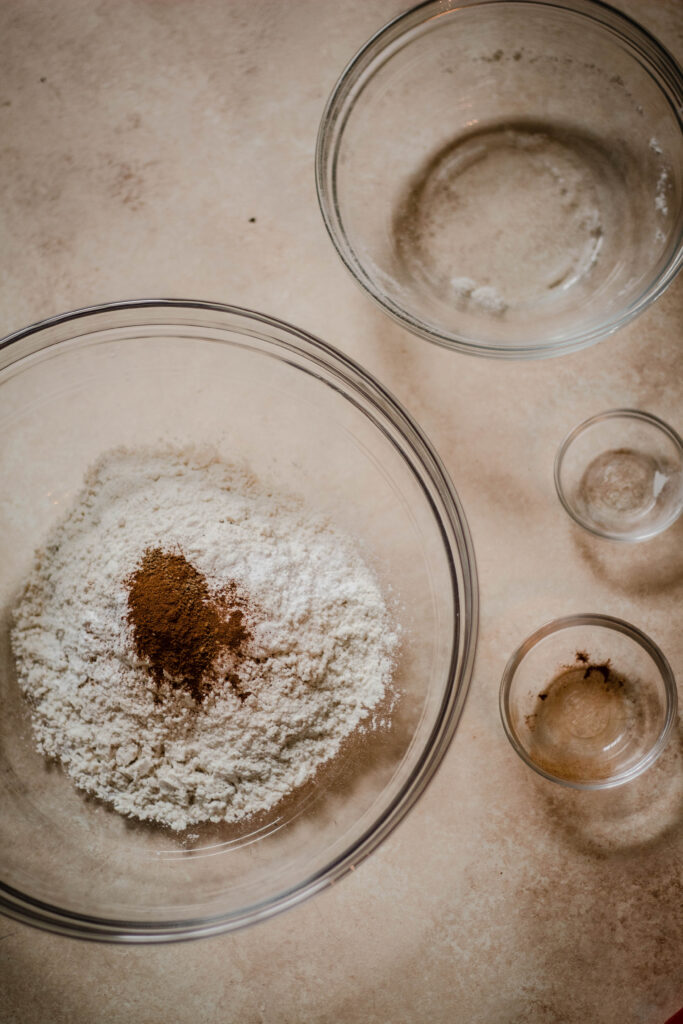
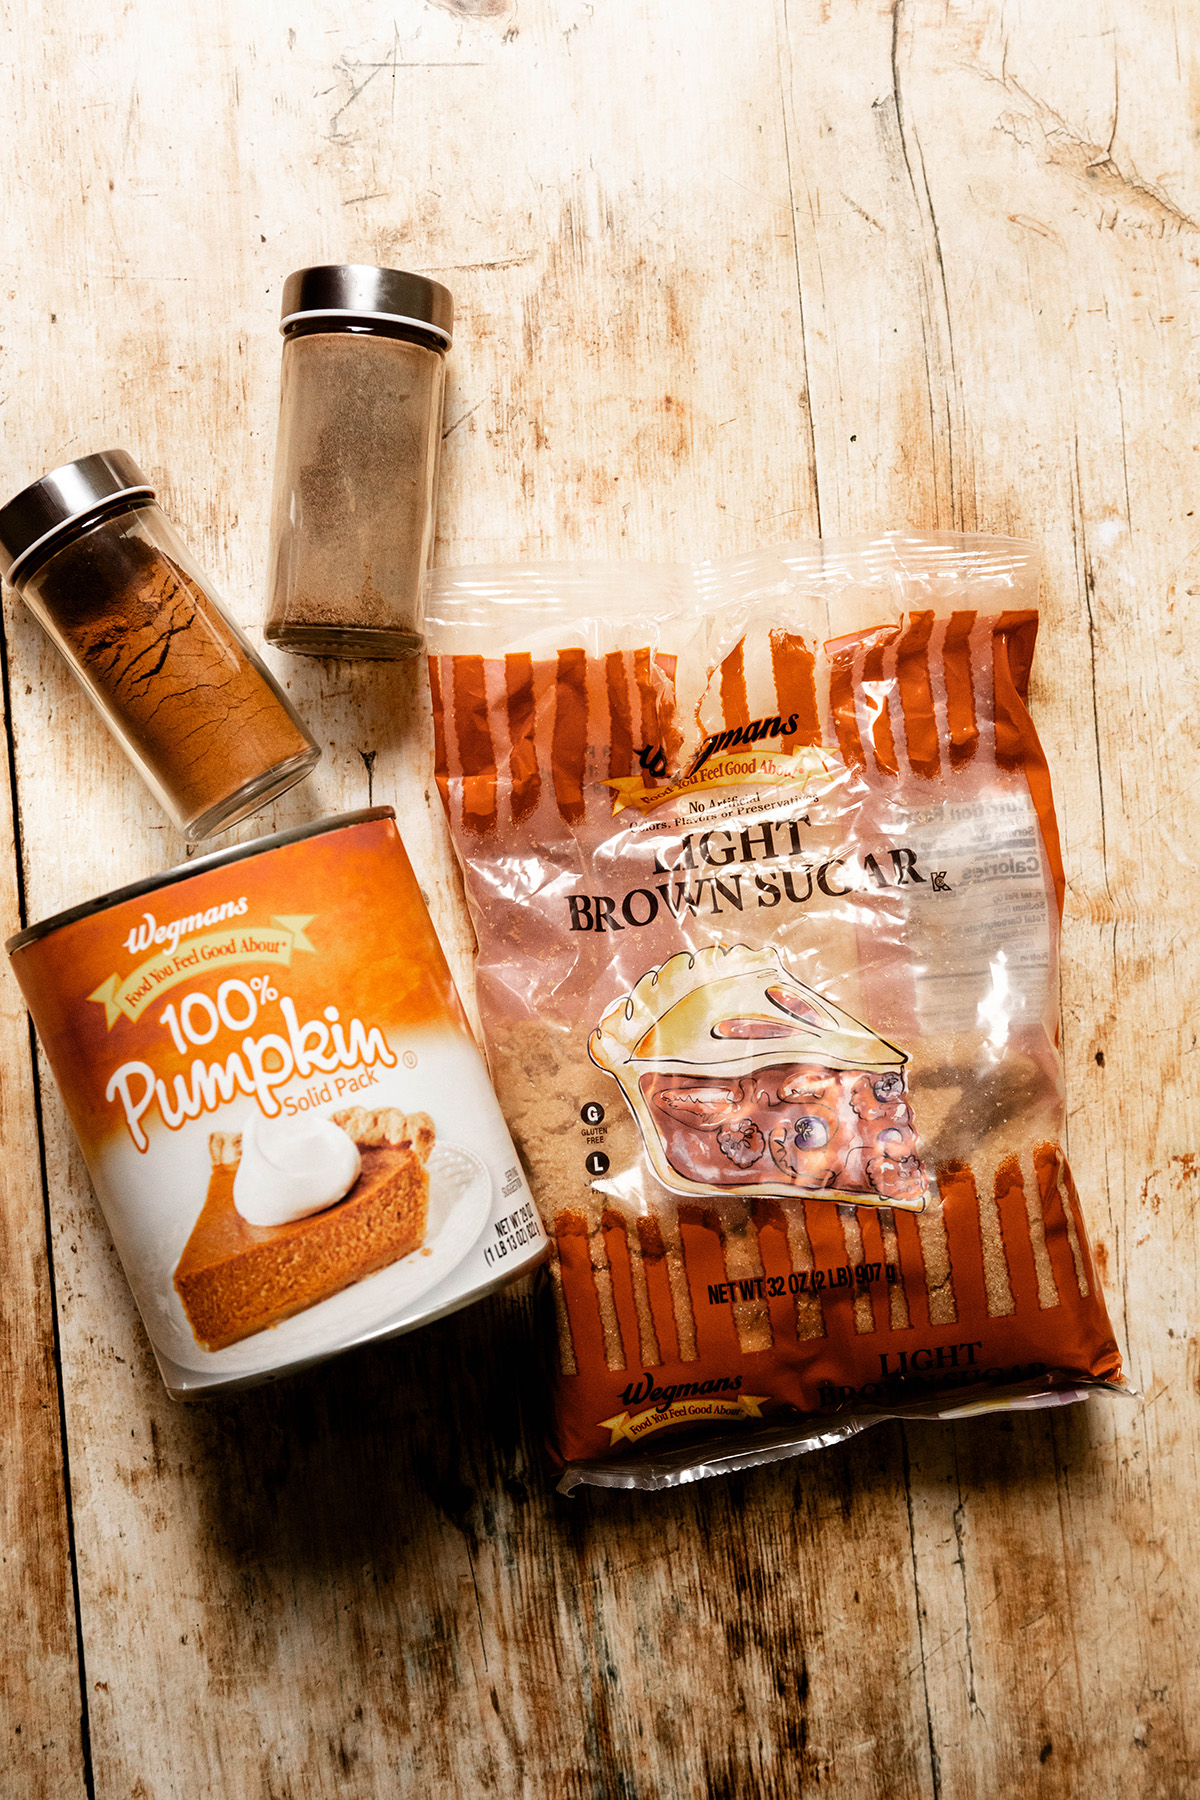
  1. 1 ¼ cup gluten free flour (regular flour if you are not gluten free)
  2. ⅓ cup good quality cocoa powder
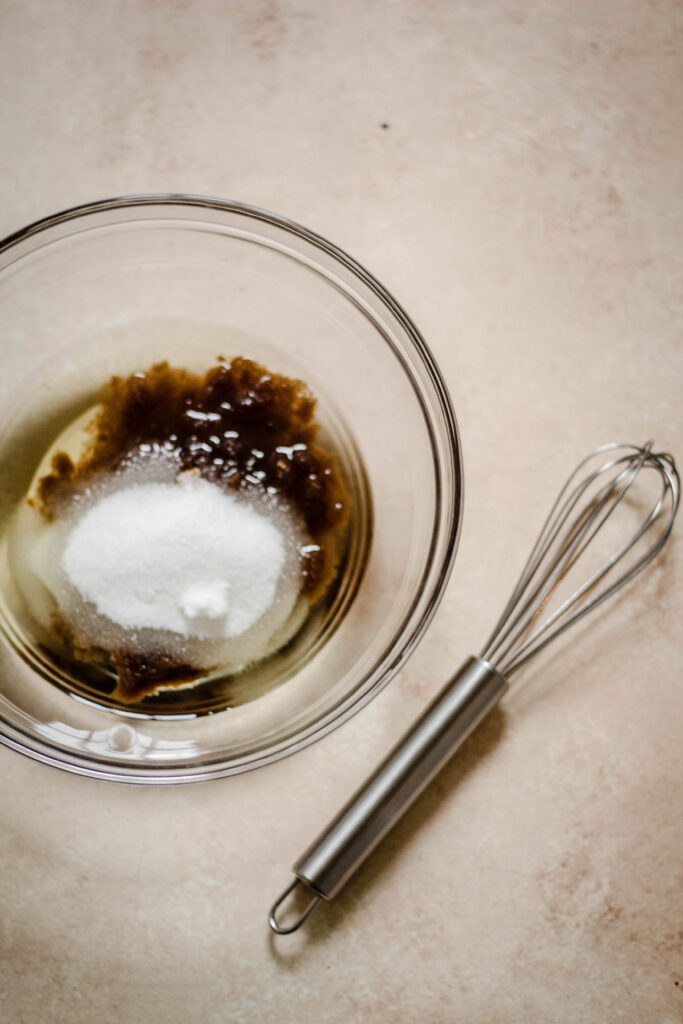
  3. 1 egg yolk (from large egg)
  4. ½ teaspoon salt
  5. 1 tablespoon vanilla
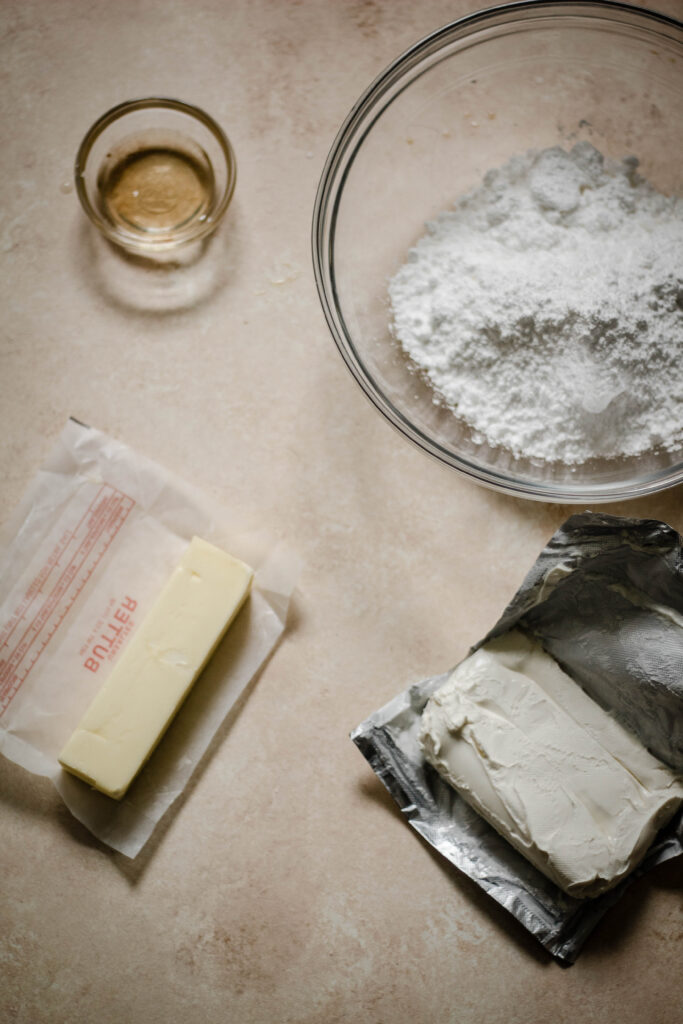
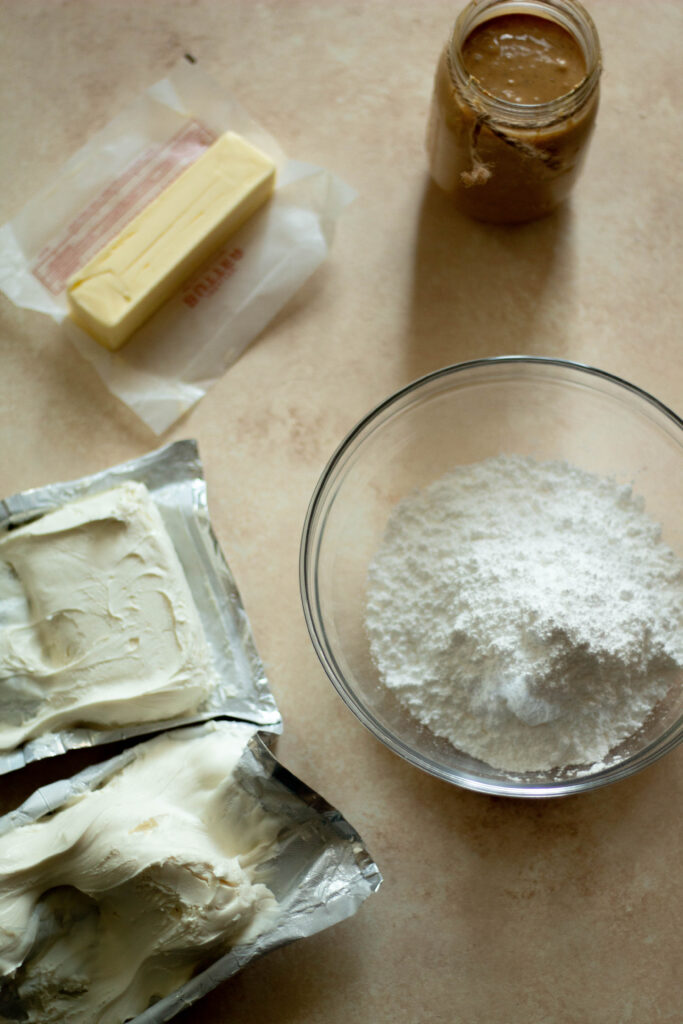
  6. 14 tablespoon unsalted butter (room temperature)
  7. 1 cup white sugar
  8. ¼ teaspoon baking powder
  9. 1 cup sugar
  10. ¾ teaspoon peppermint extract

For the icing:

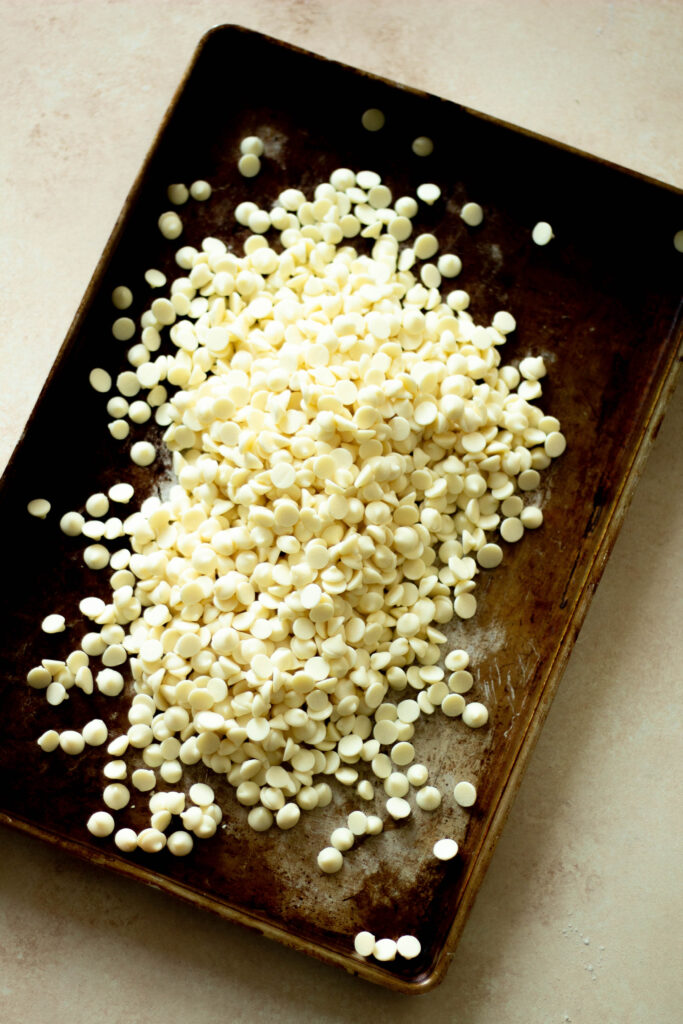
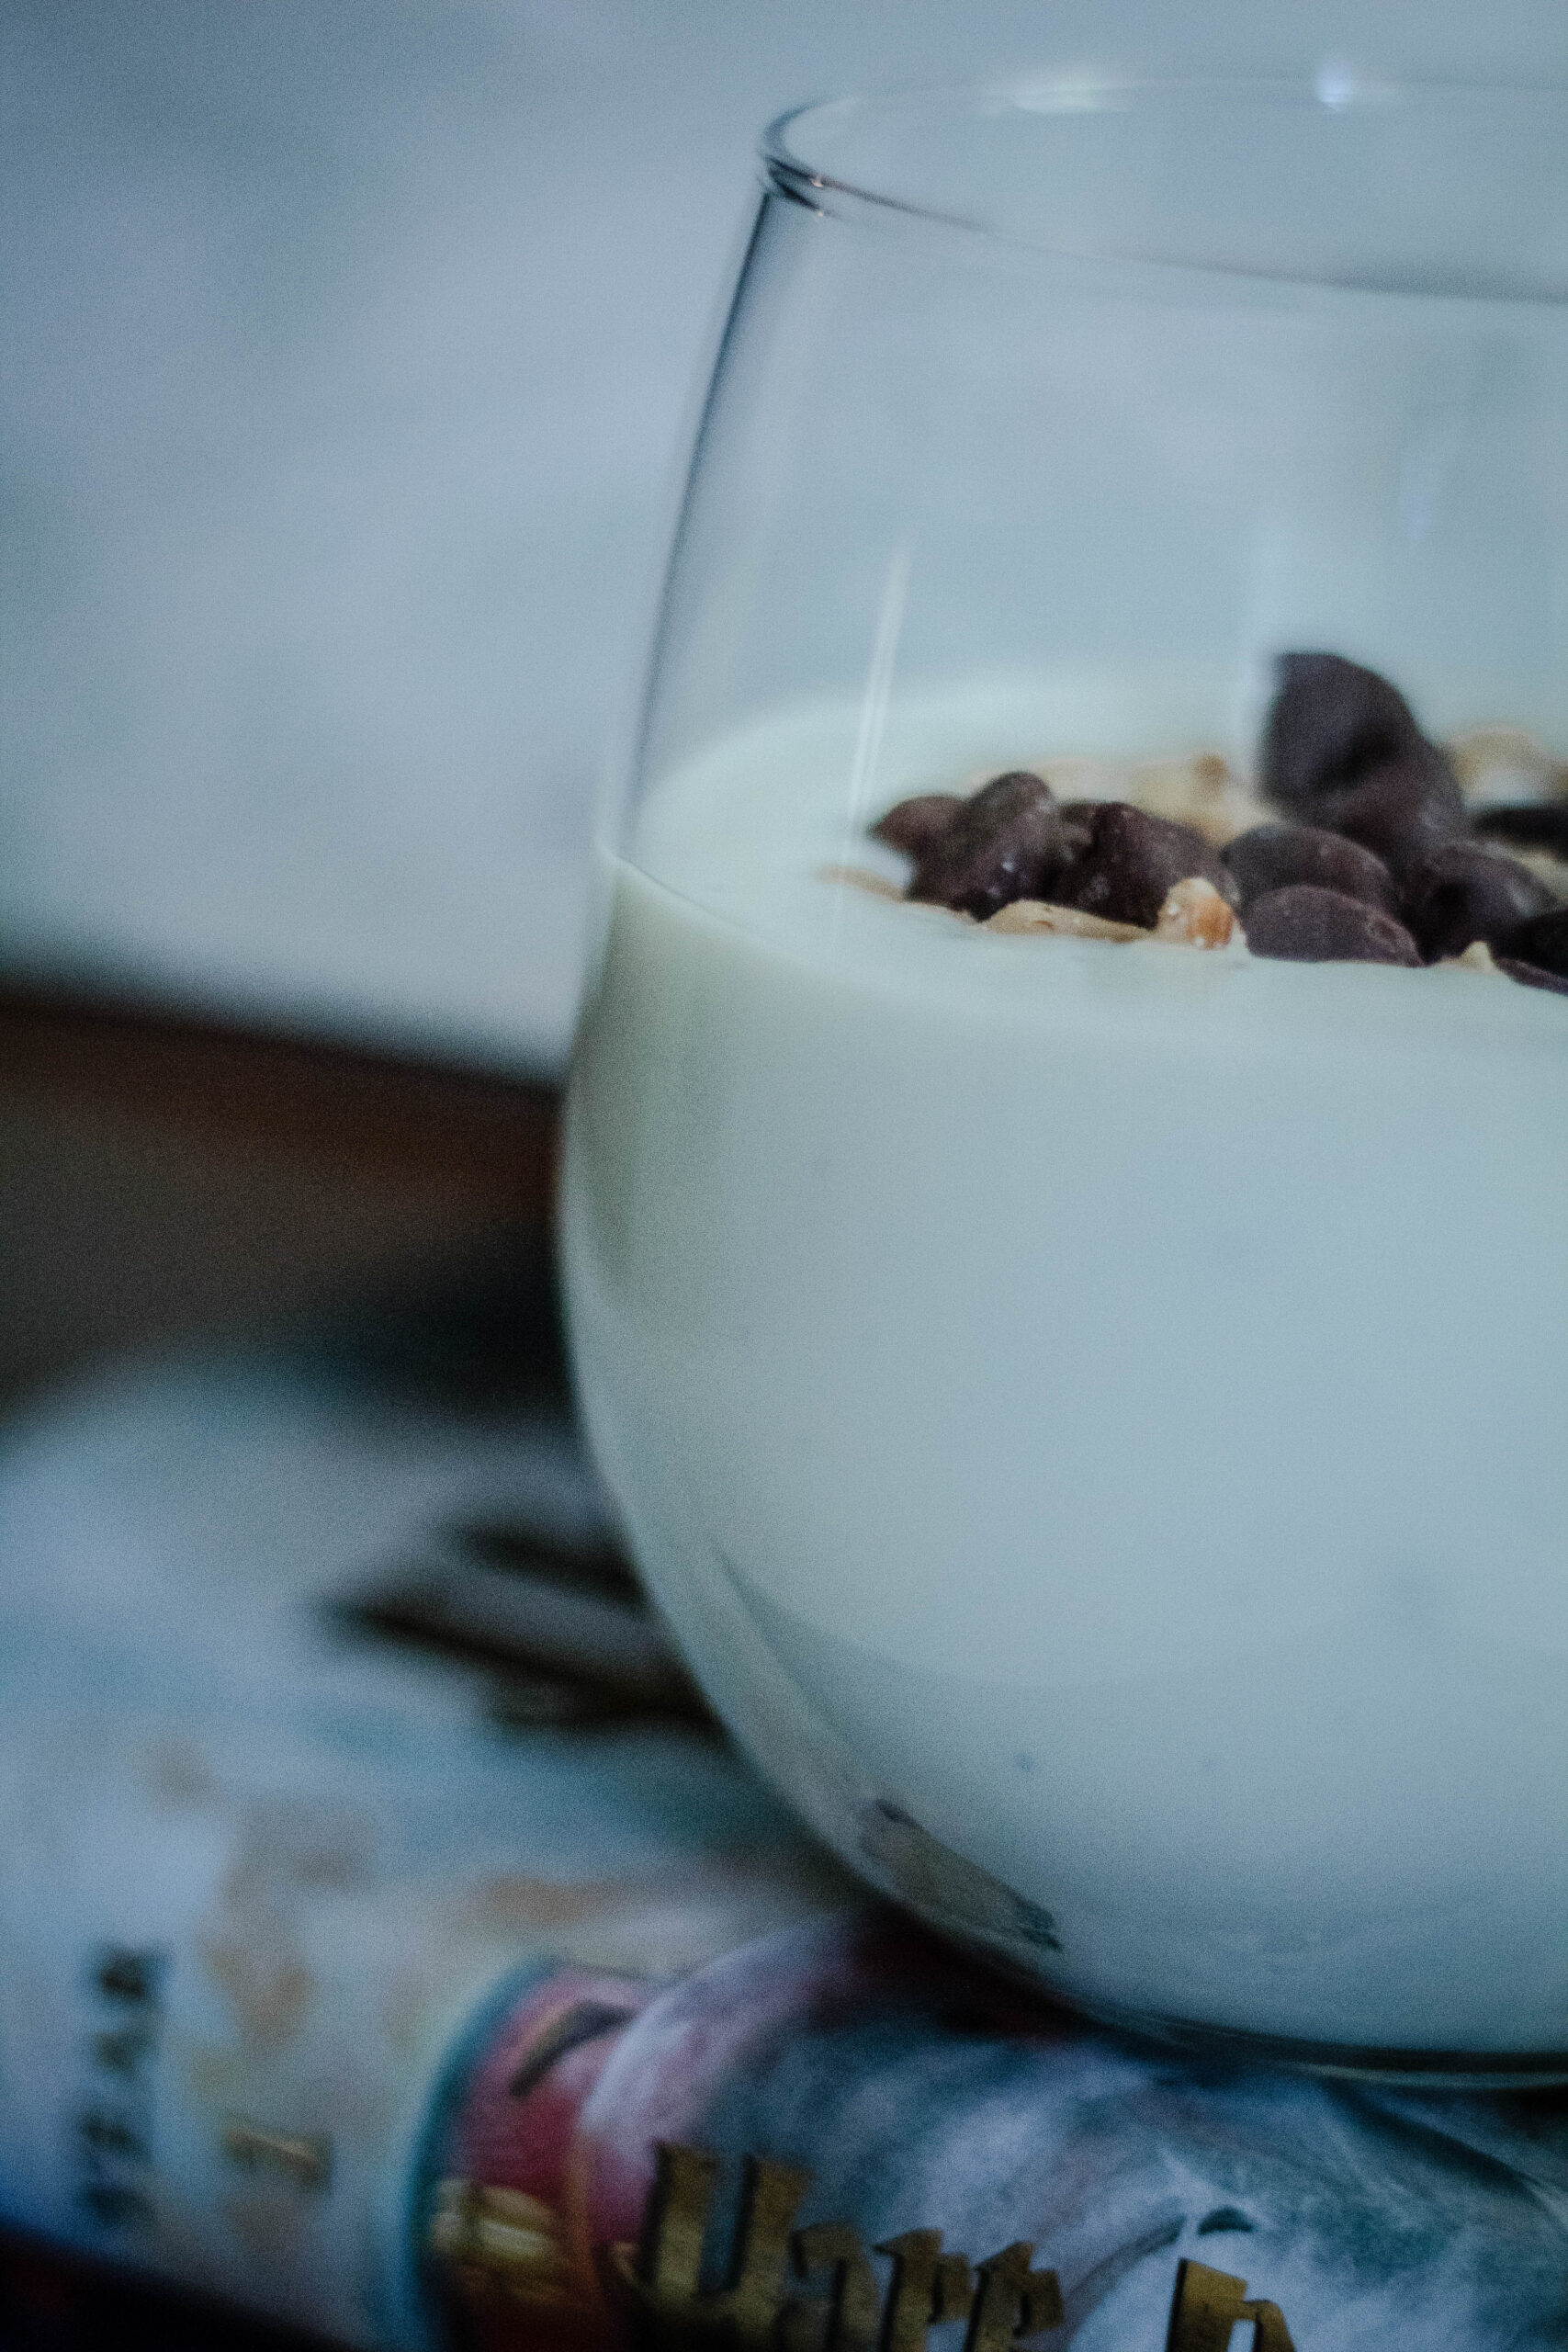
  1. ½ cup milk chocolate & ½ cup dark chocolate chips
  2. 2-3 tablespoon heavy cream
  3. 2 tablespoon unsalted butter

Topping:

Crushed Candy Cane

How do you make them?

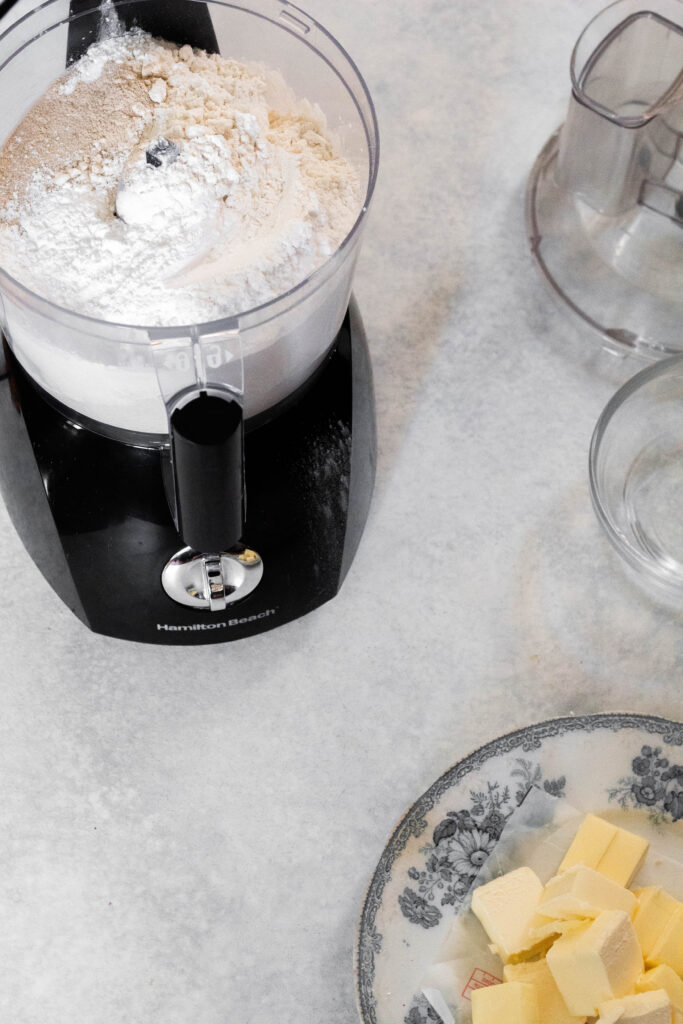
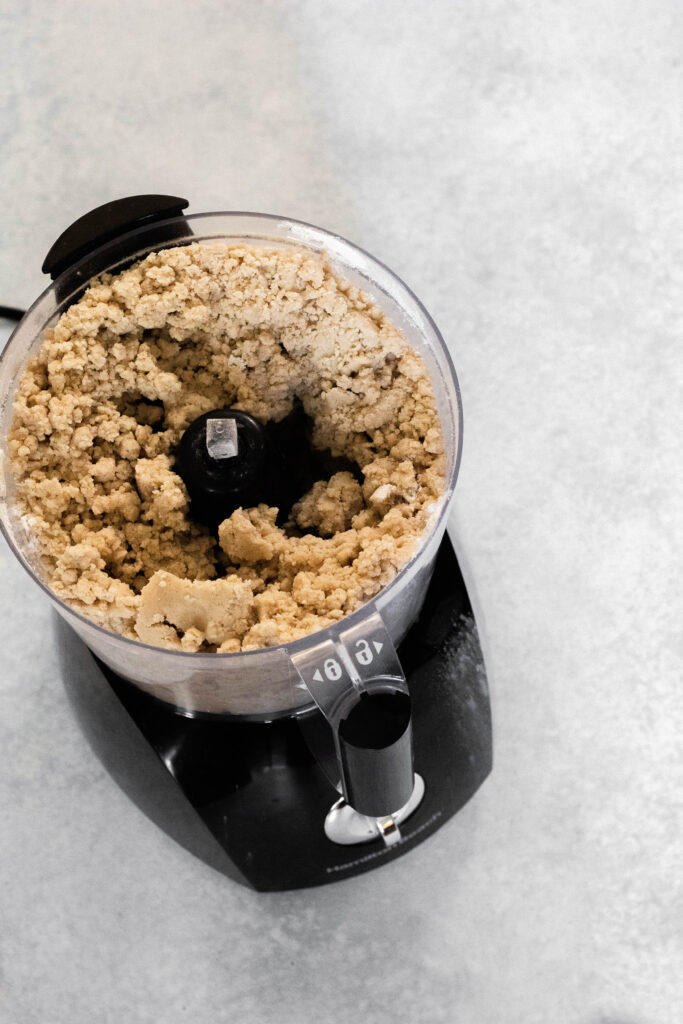
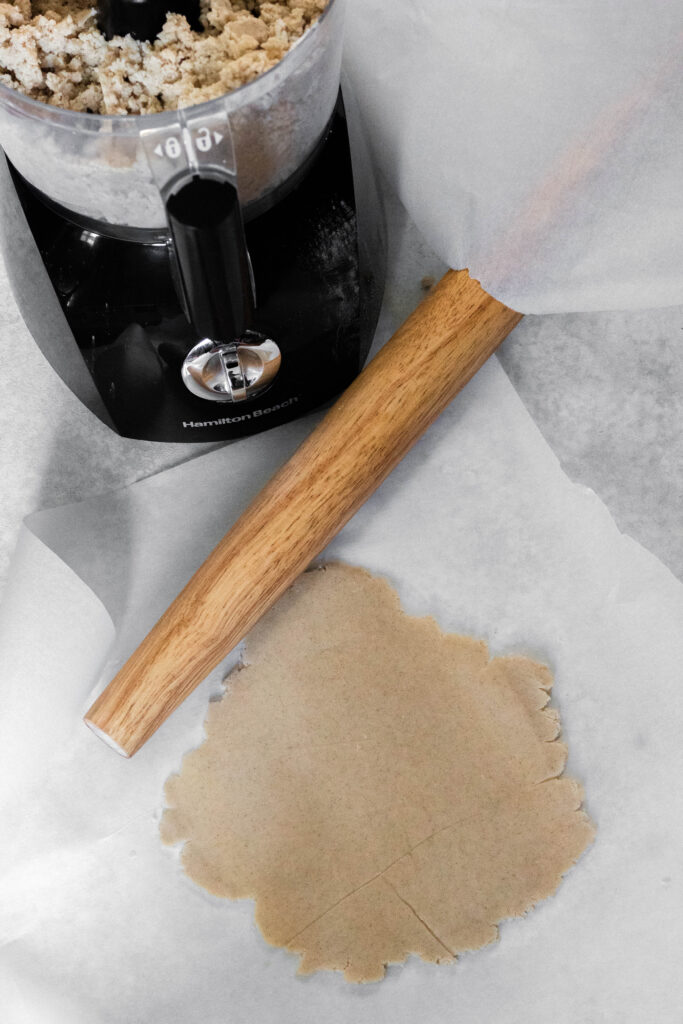
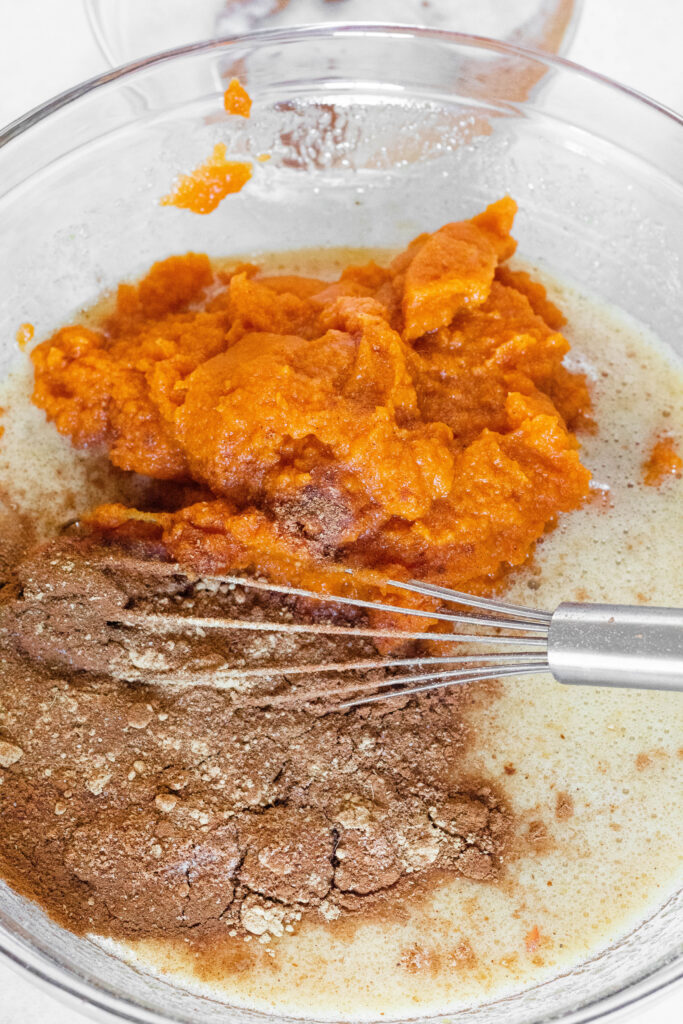
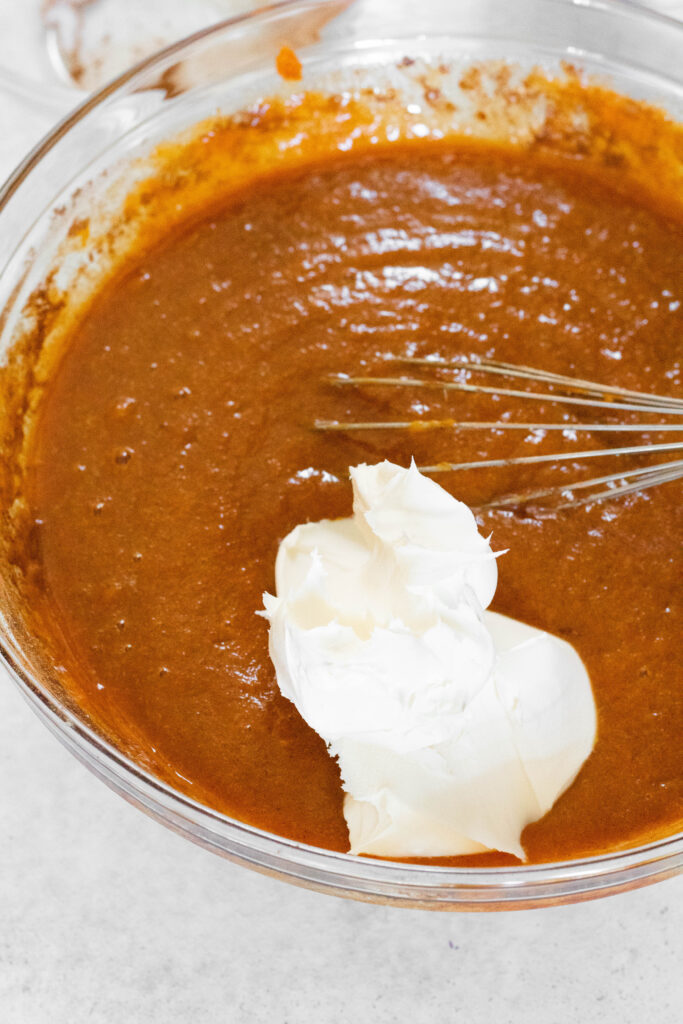
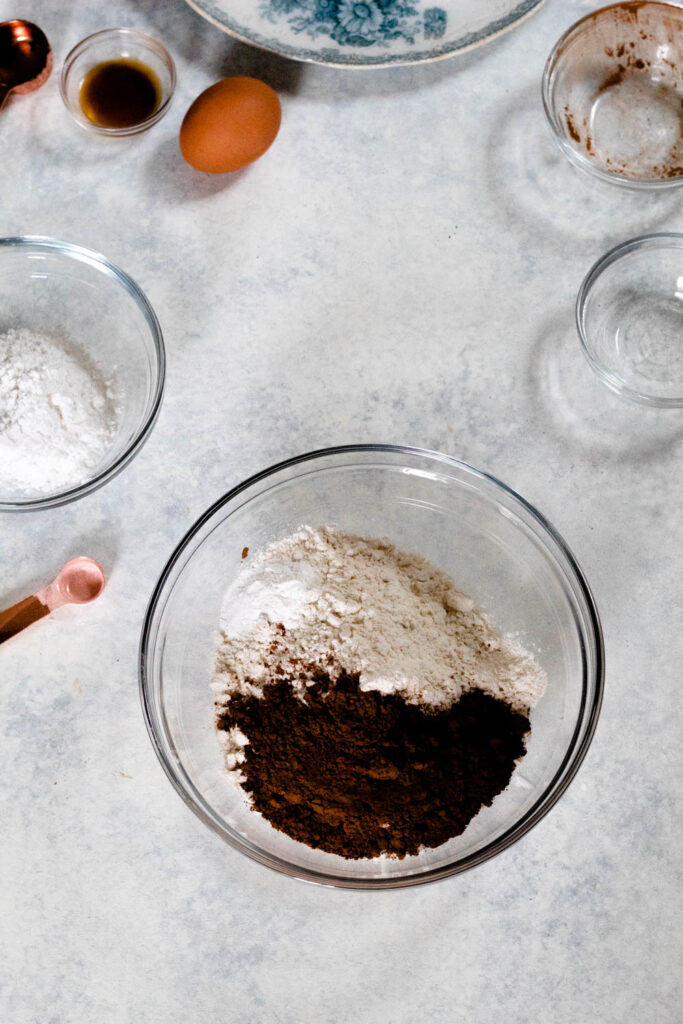
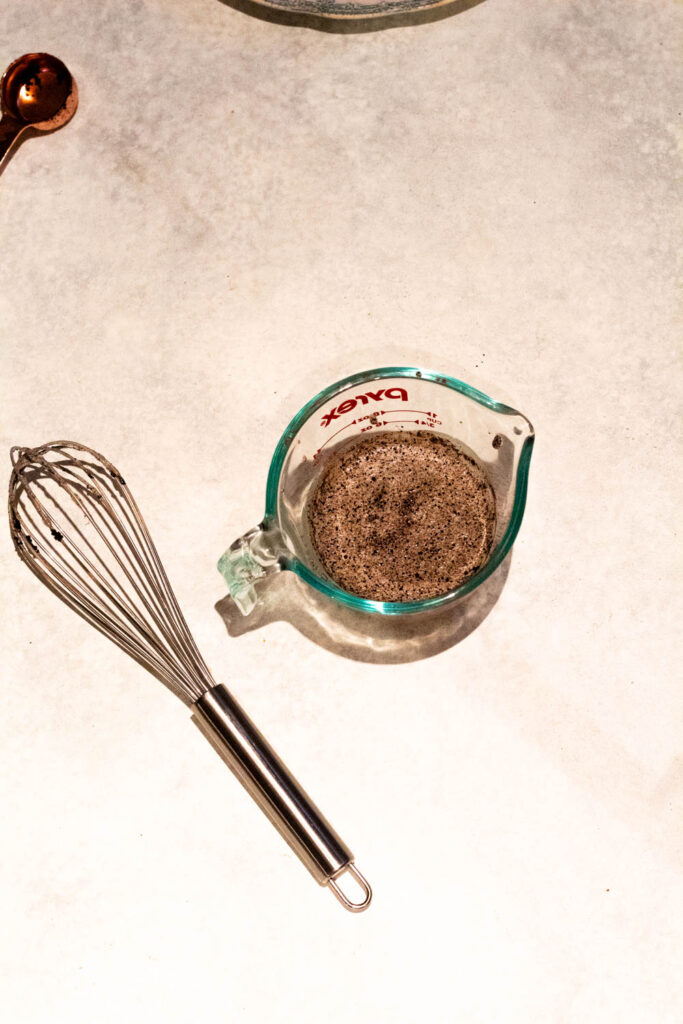
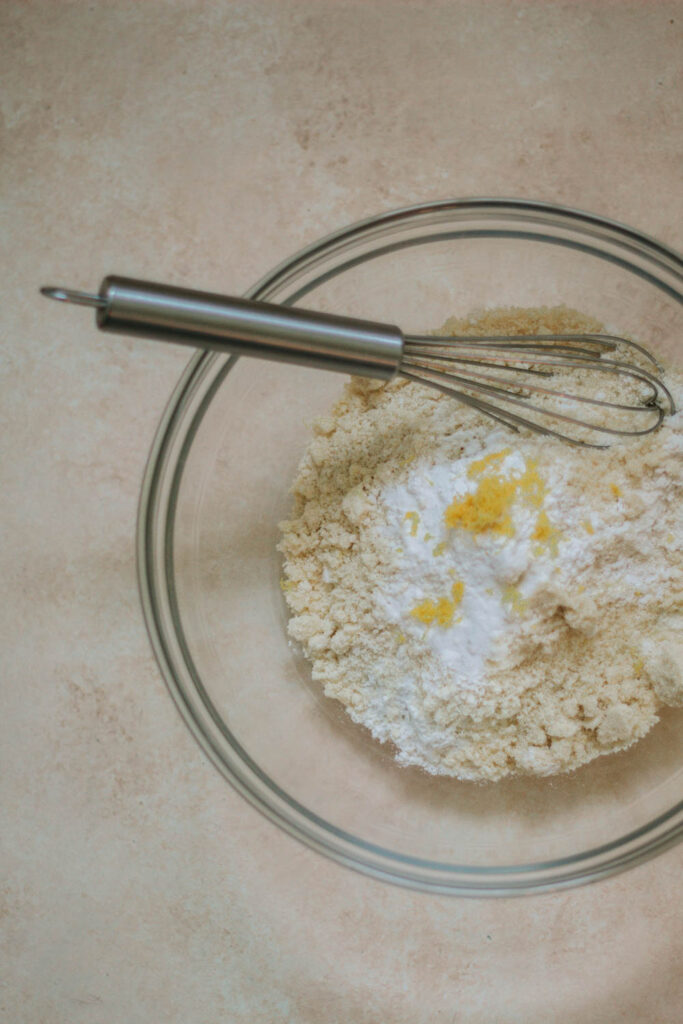
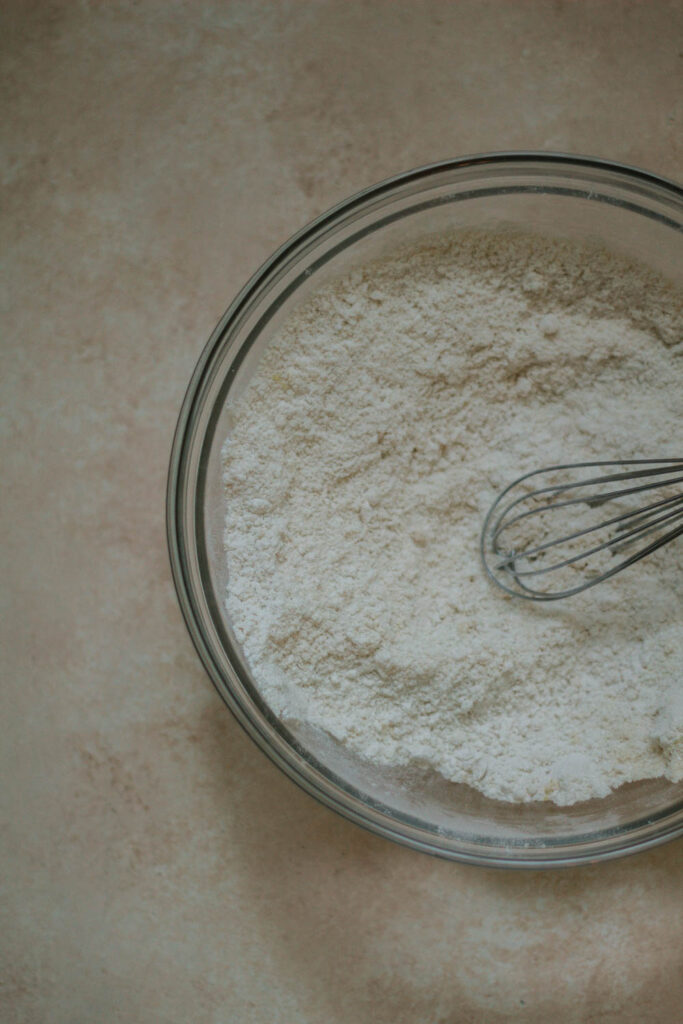
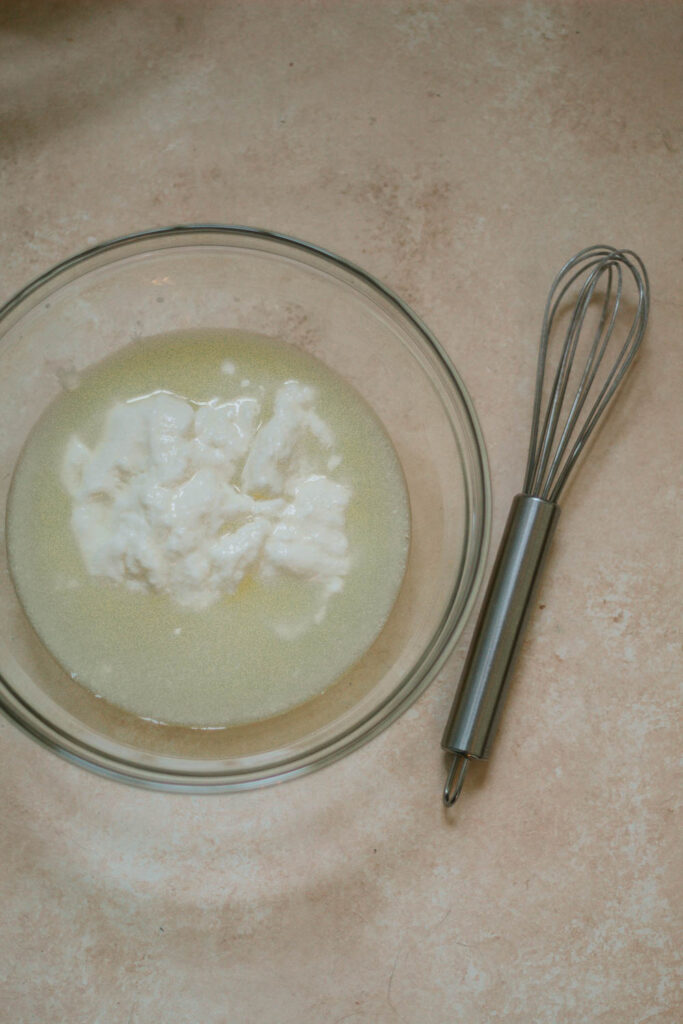
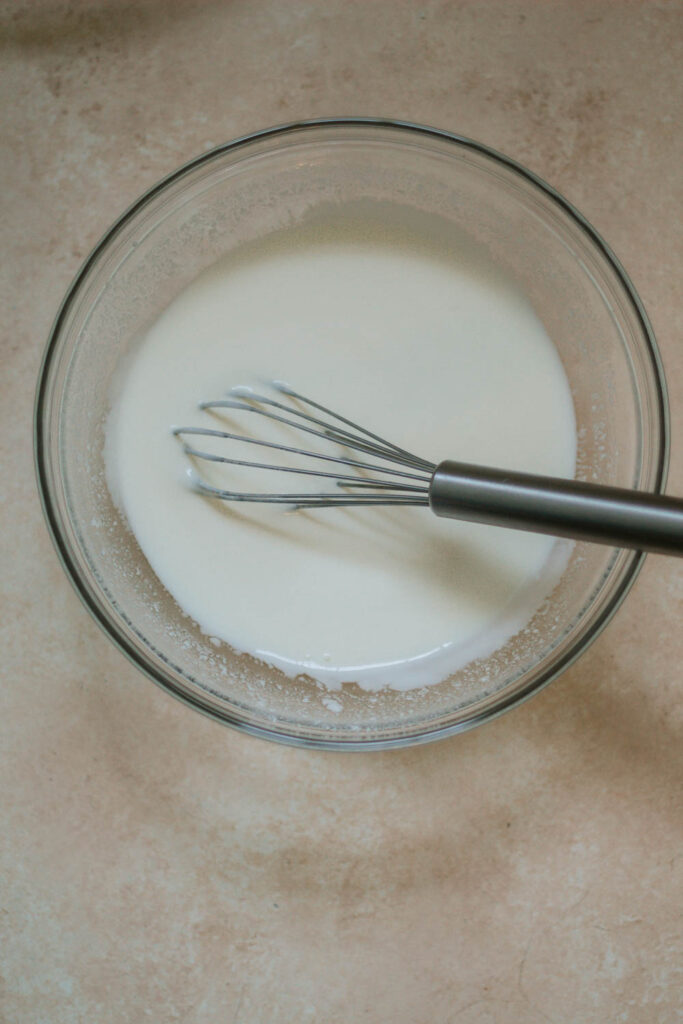
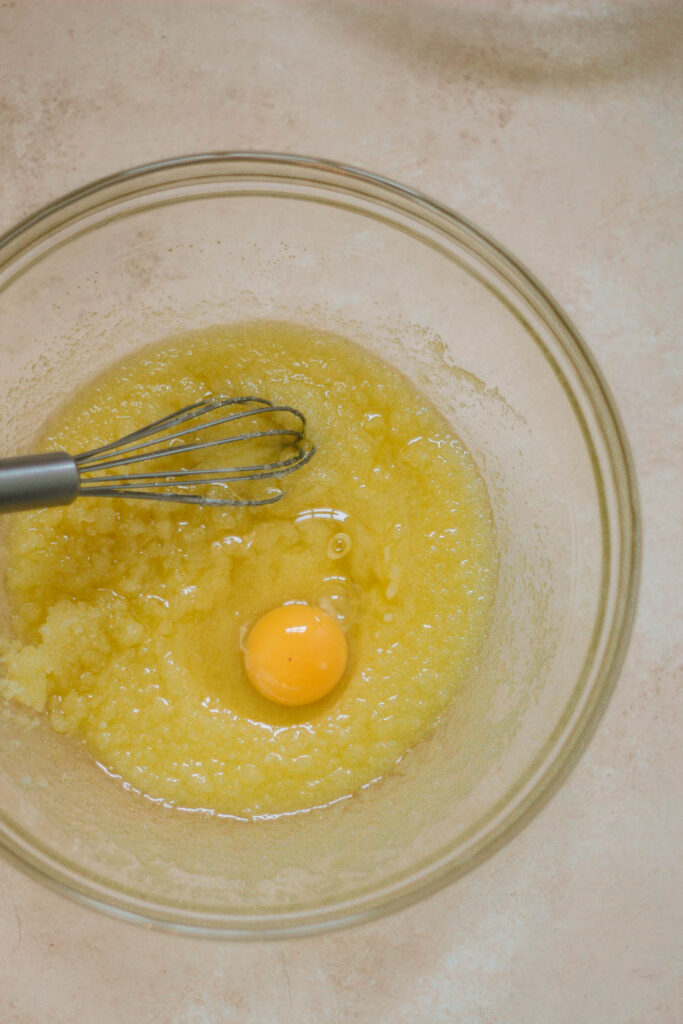
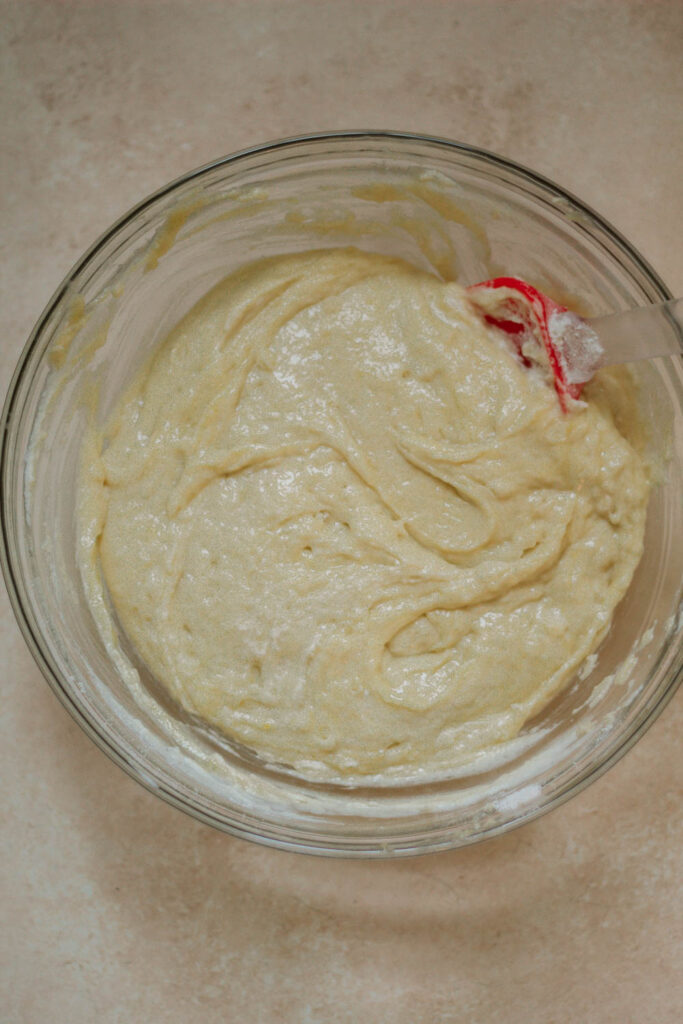
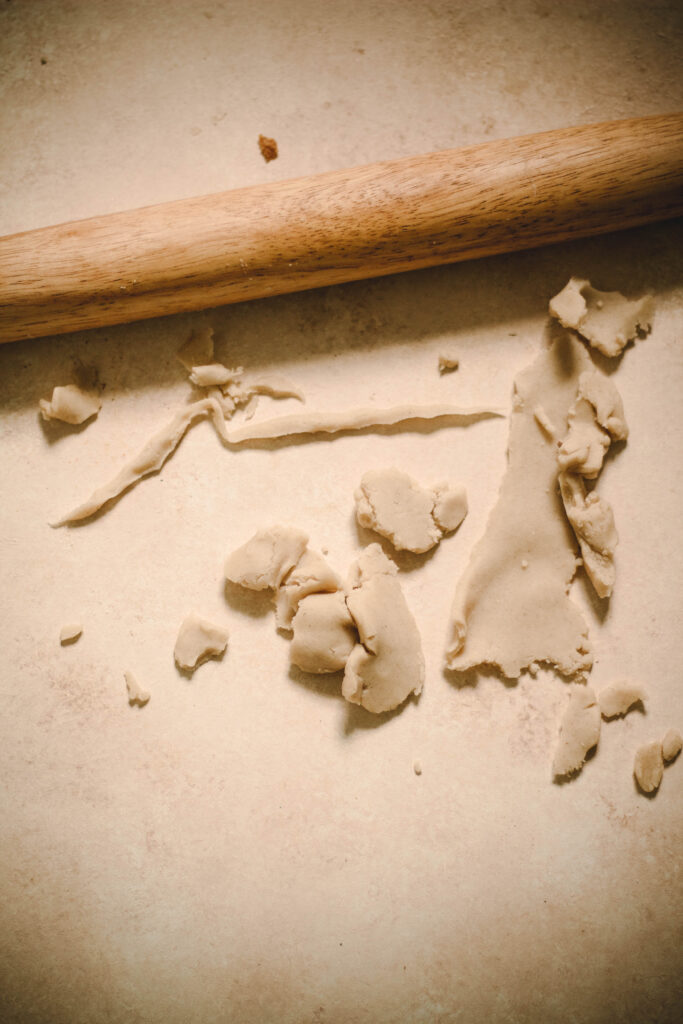
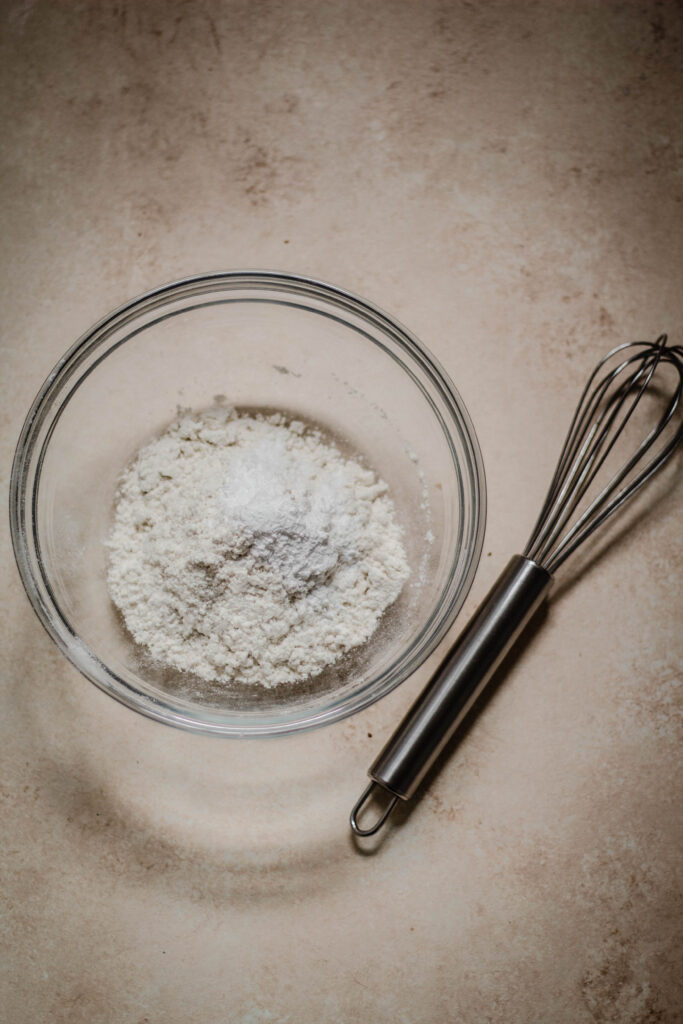
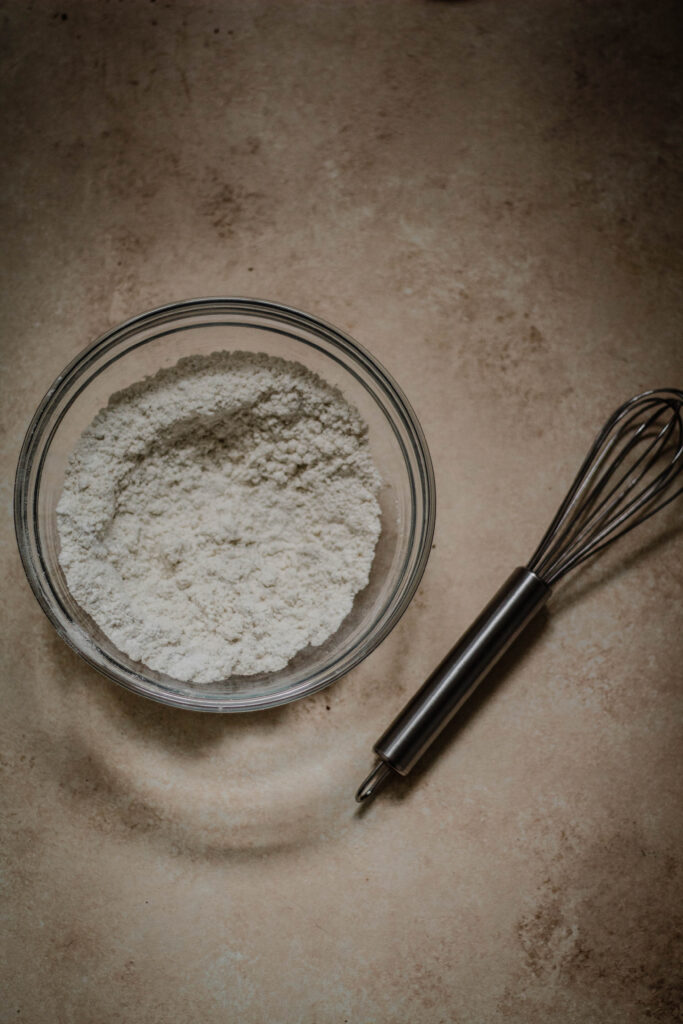
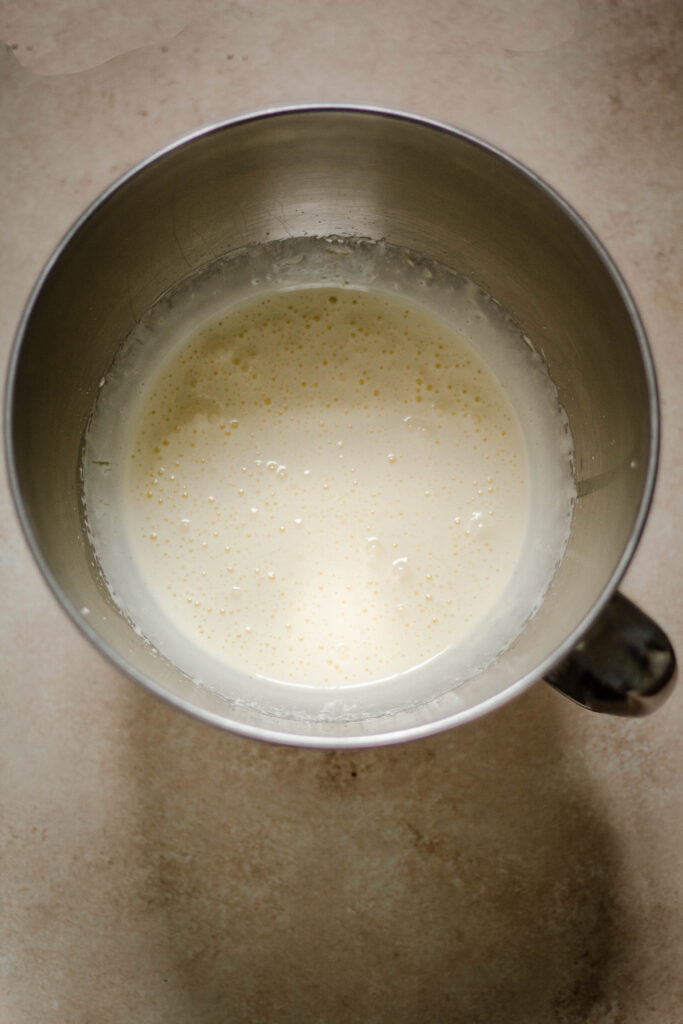
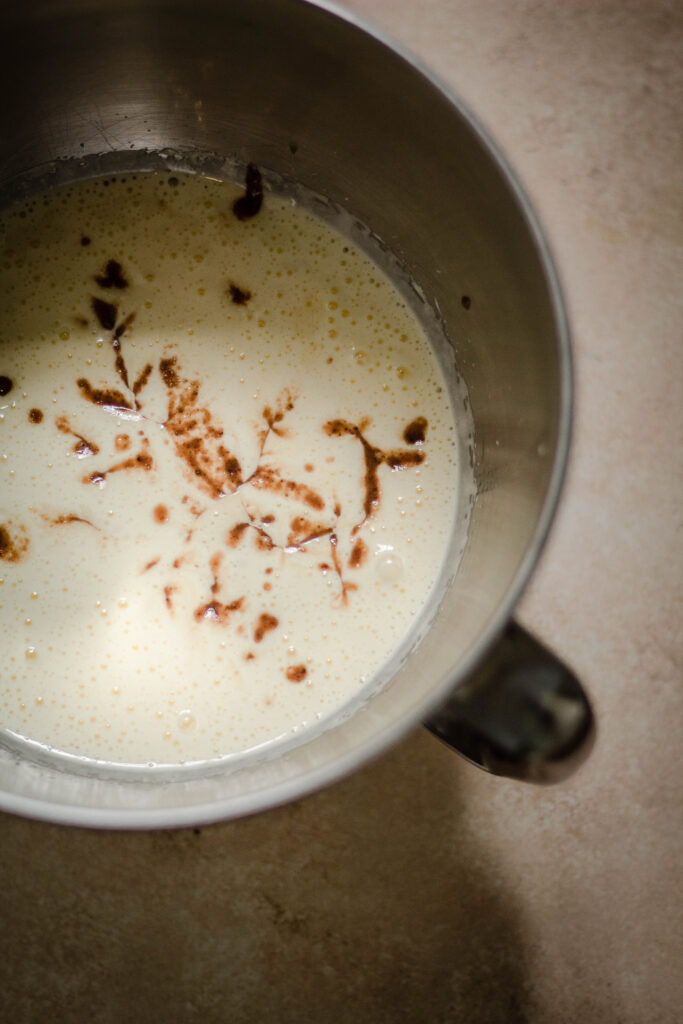
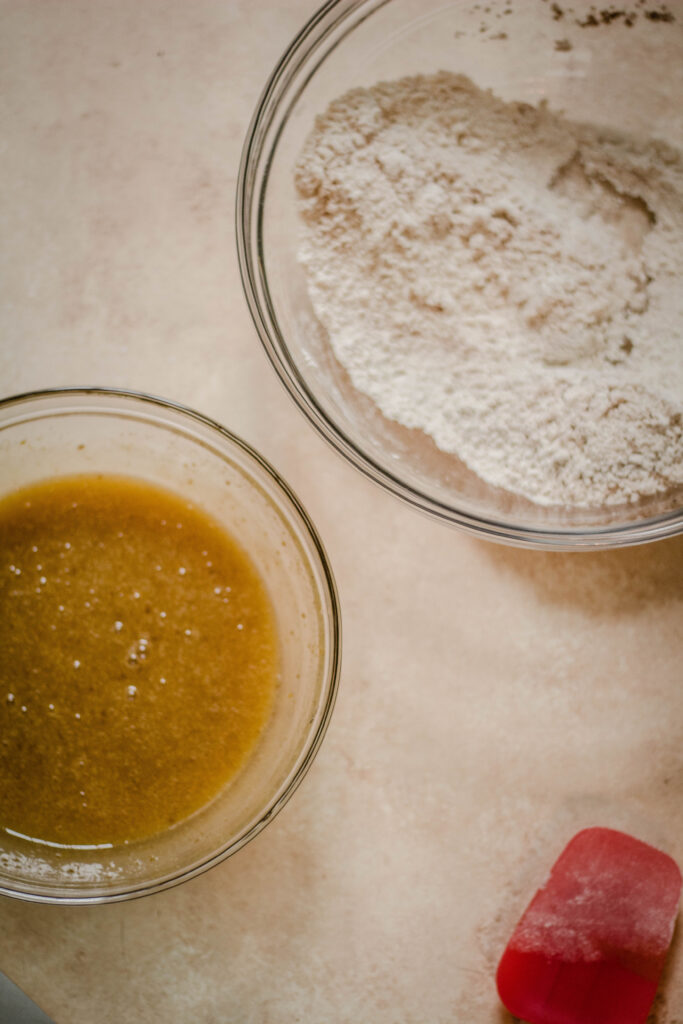
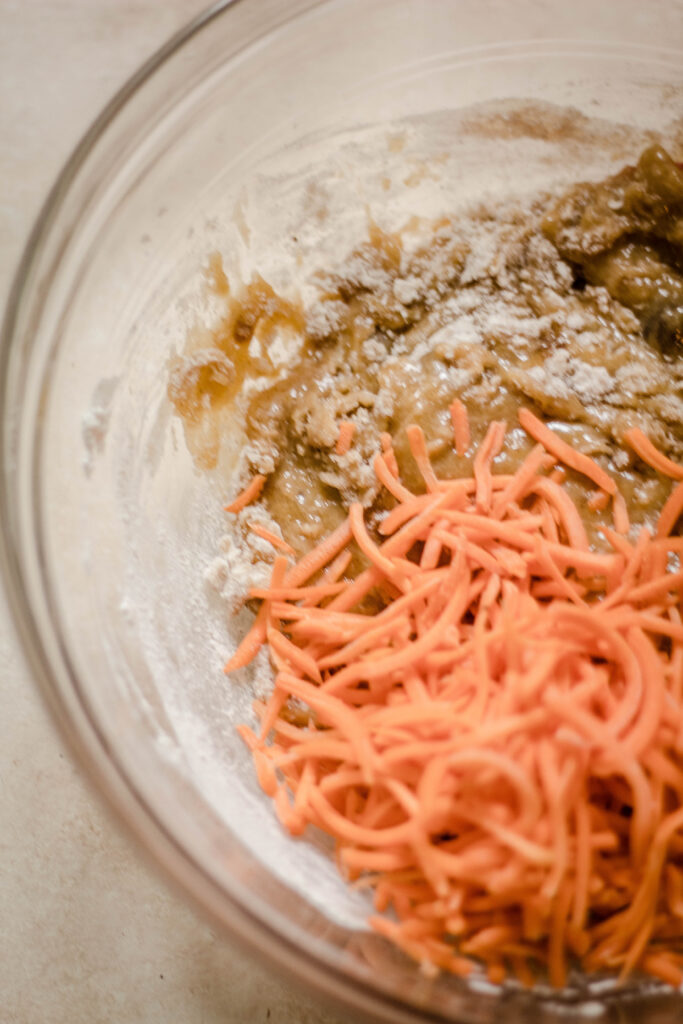
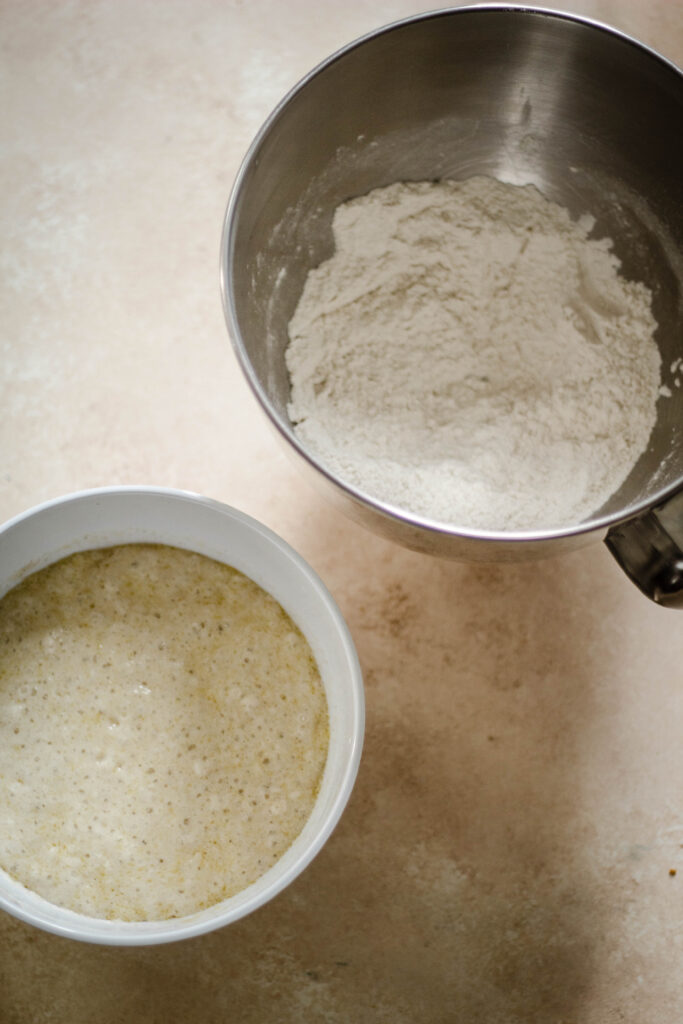
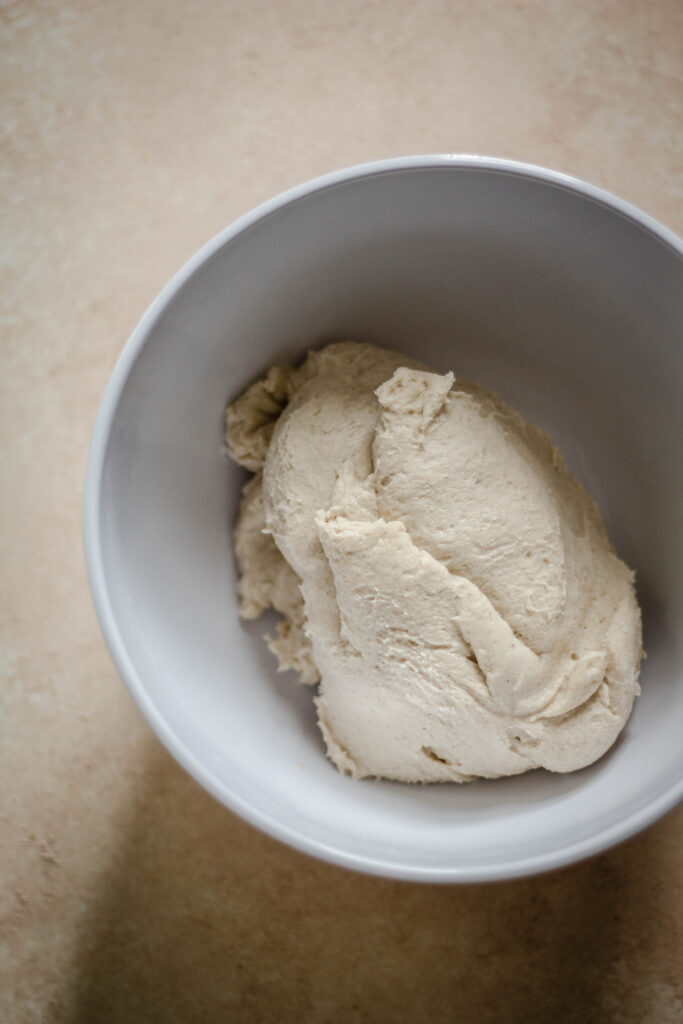
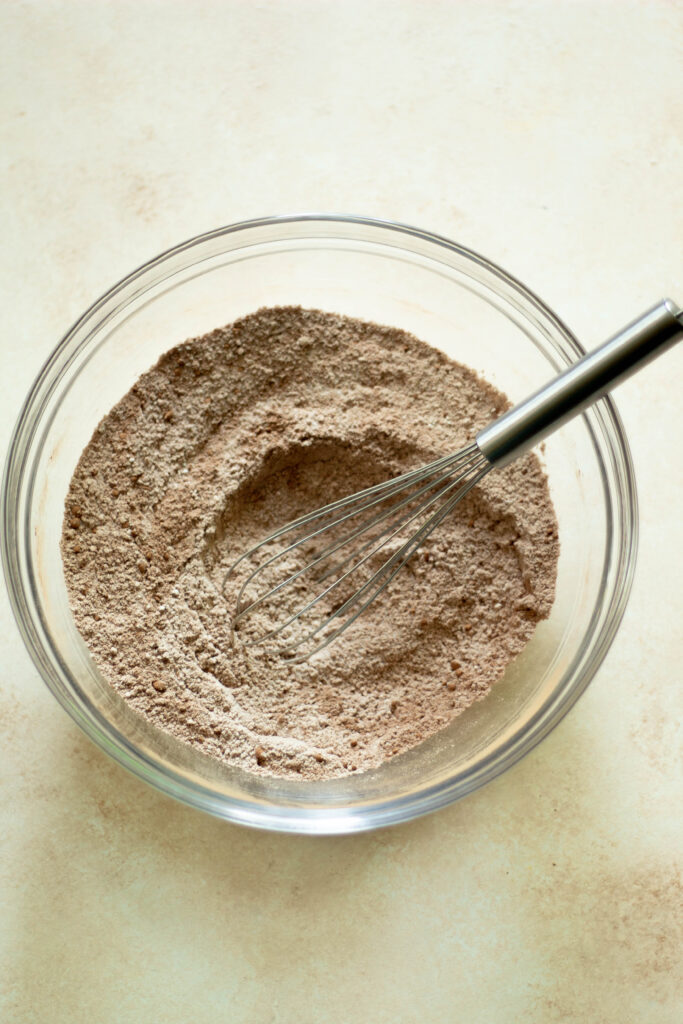
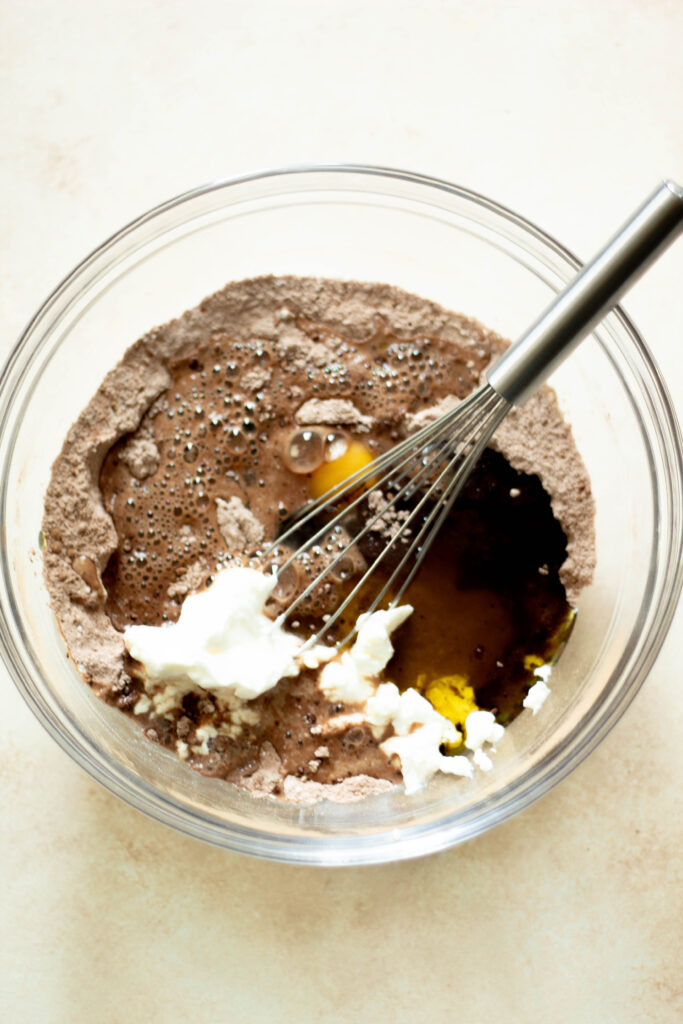
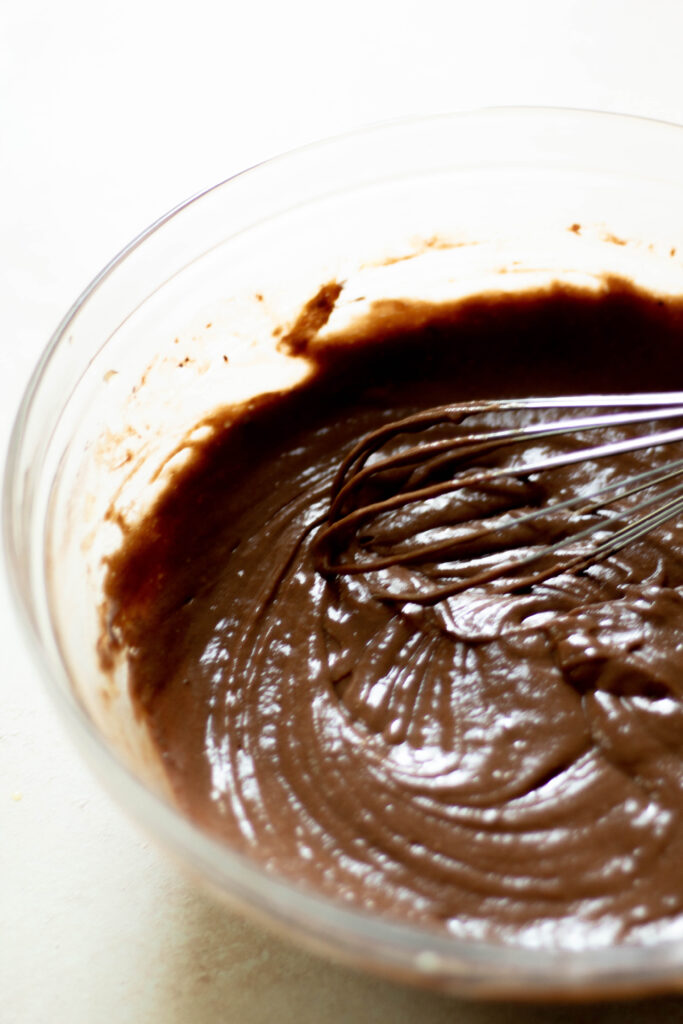
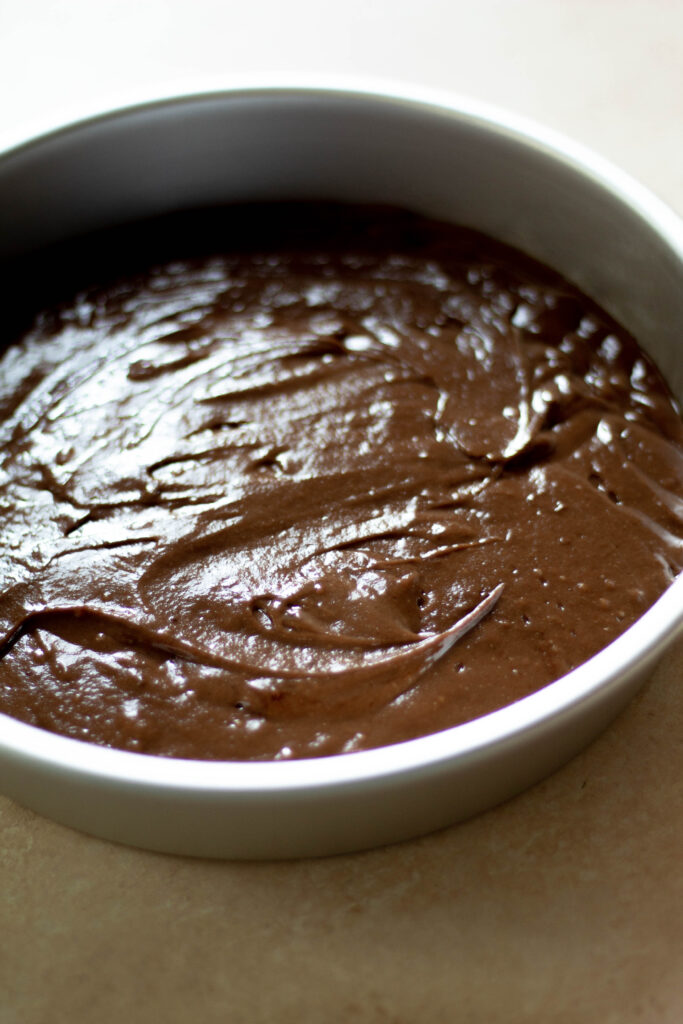
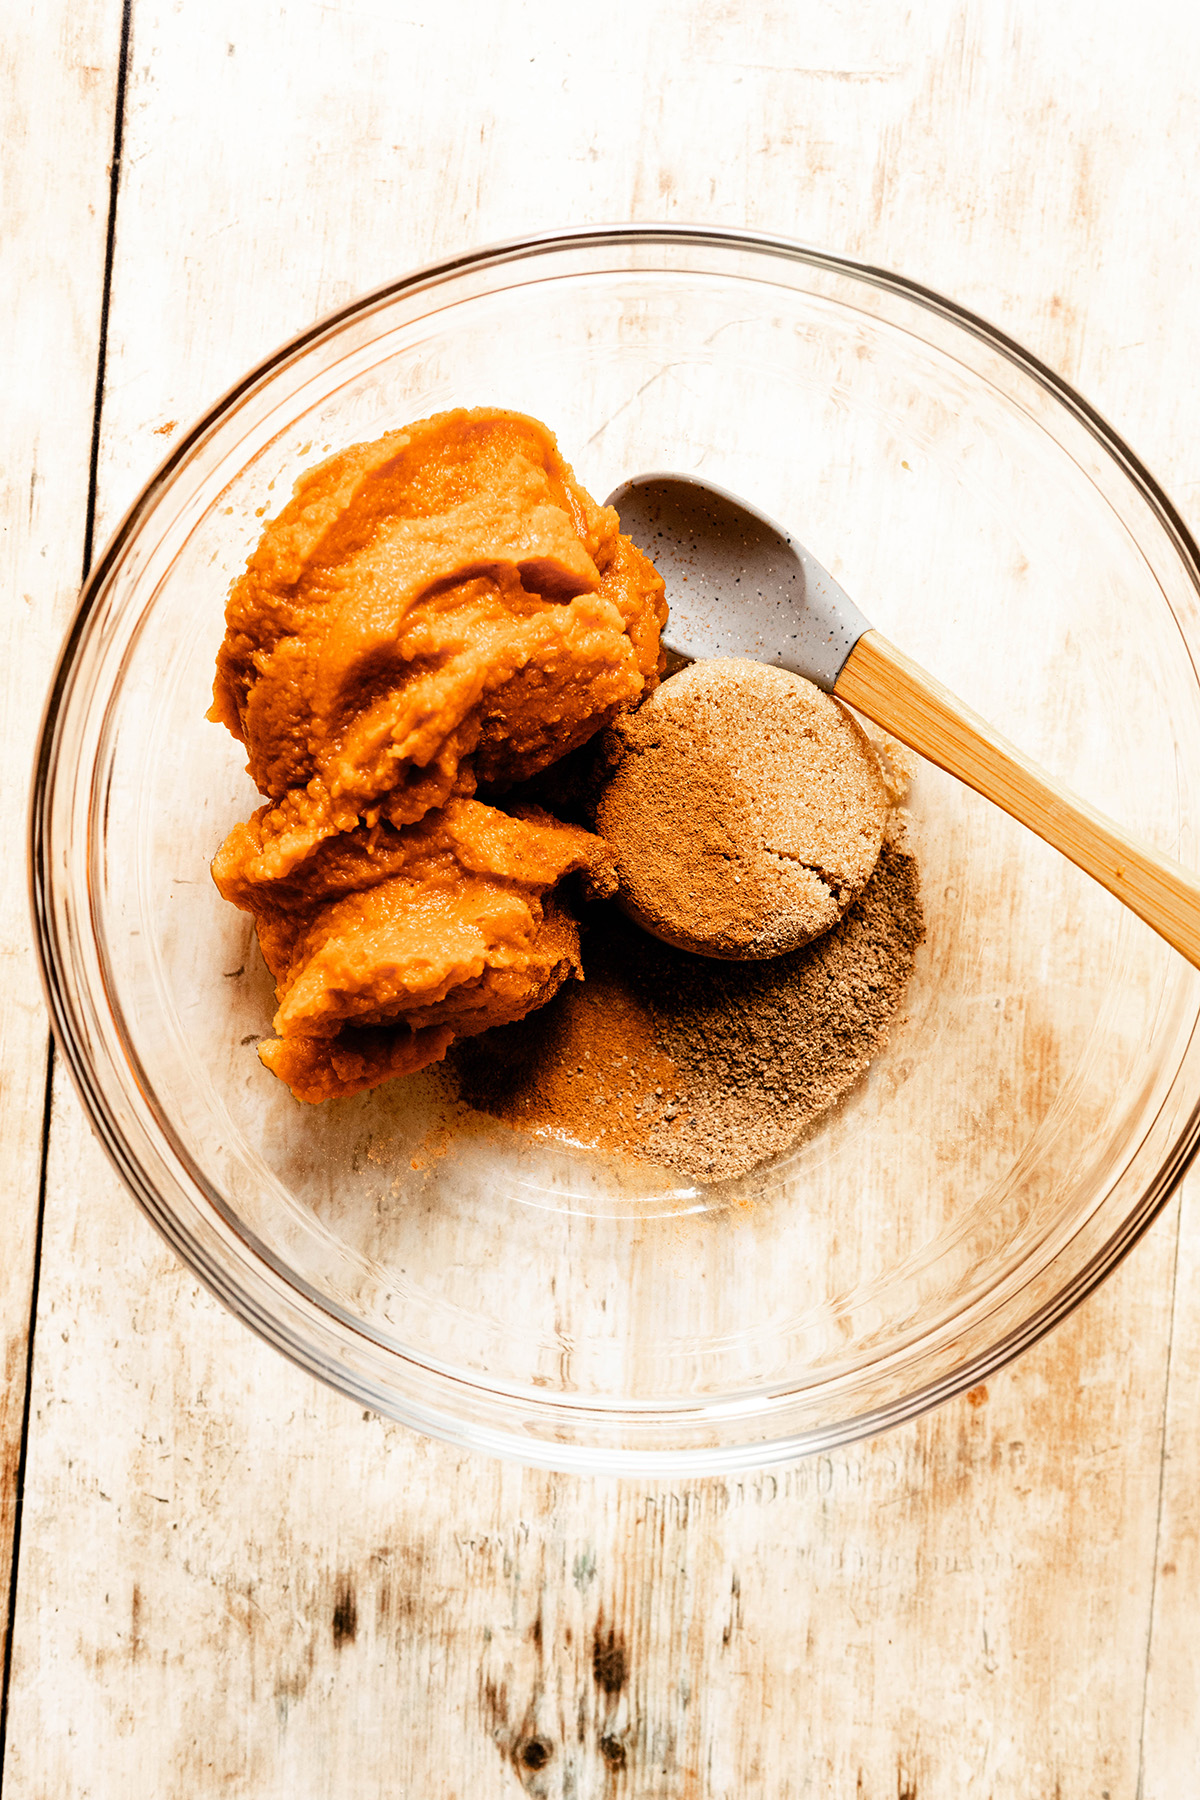
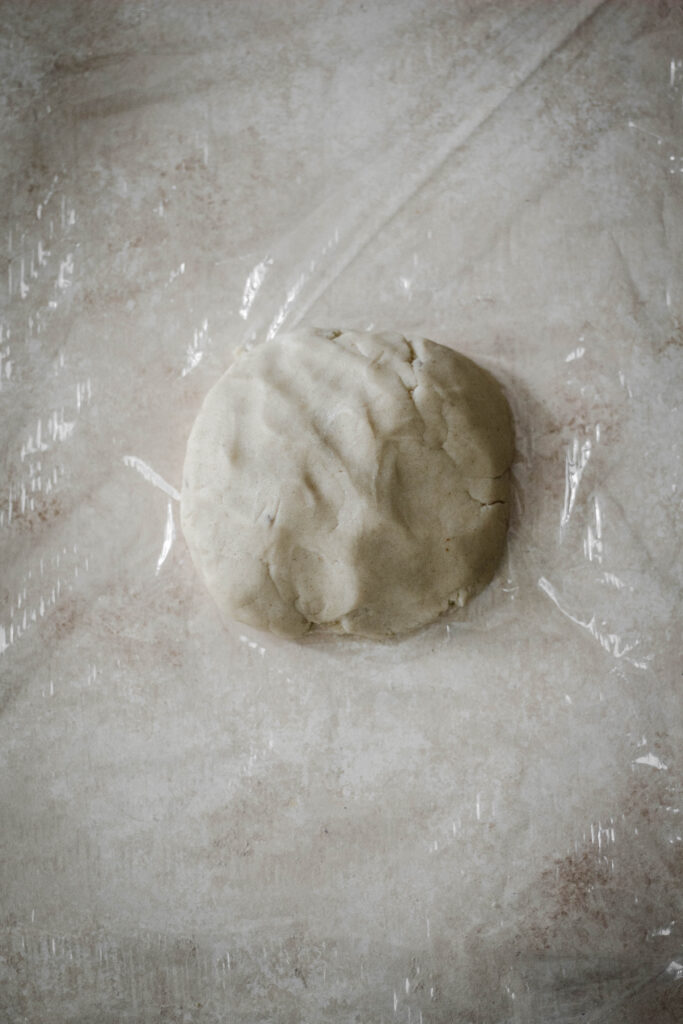
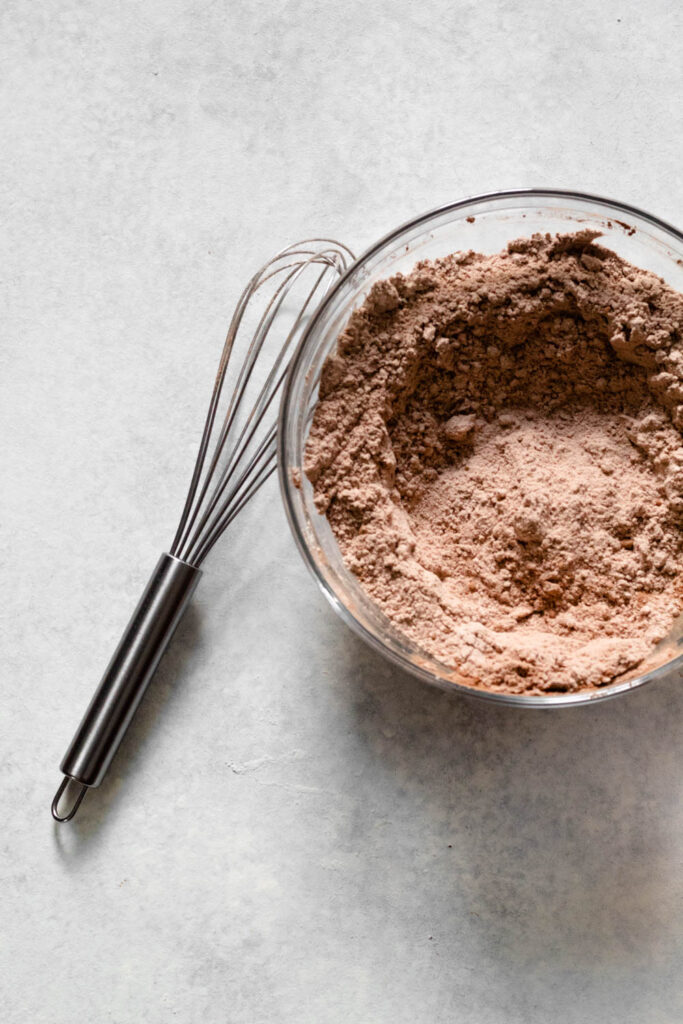
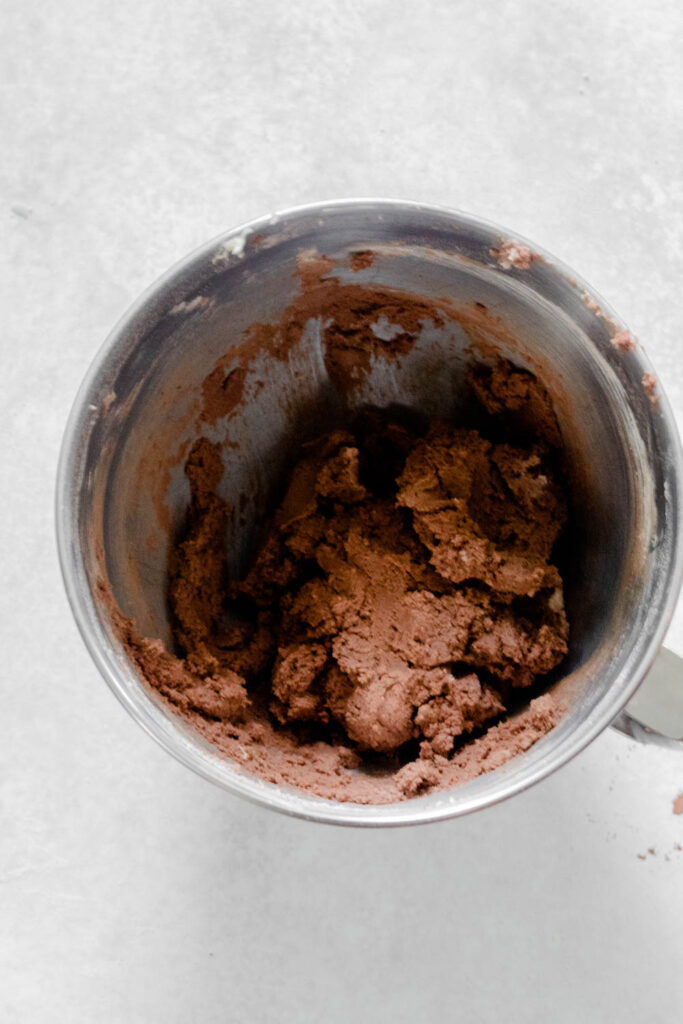
  1. You are going to whisk your flour, cocoa powder, salt, and baking powder in a medium bowl. While doing this, beat together your butter and sugar in the bowl of your stand mixer. Once it is light and fluffy (around 5 minutes) add the egg yolk, vanilla, and peppermint extract. Beat for 30 more seconds.
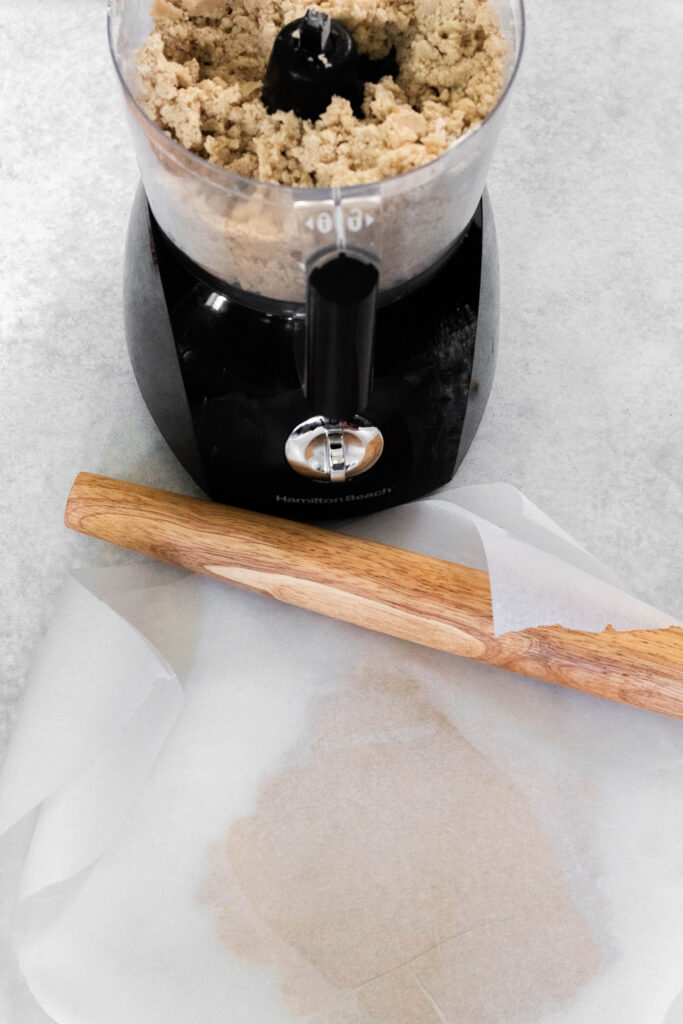
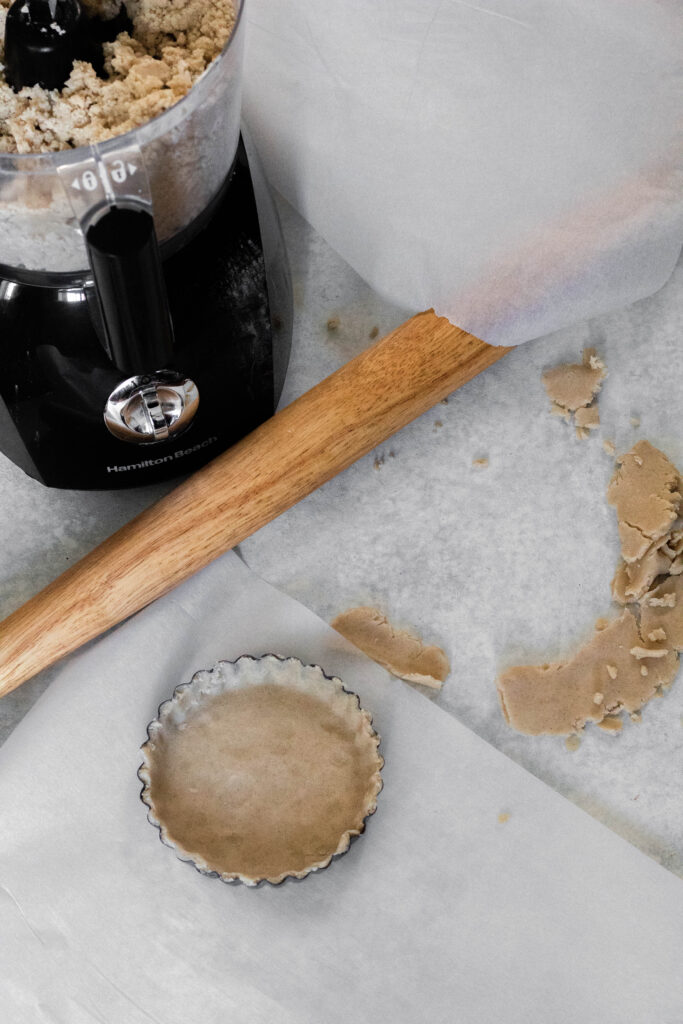
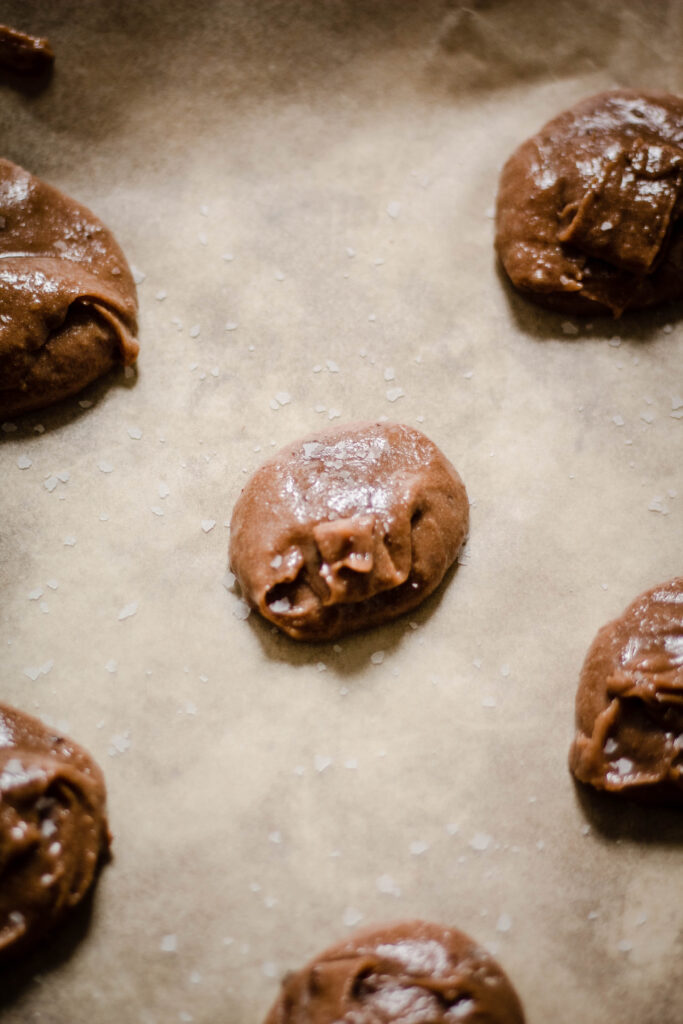
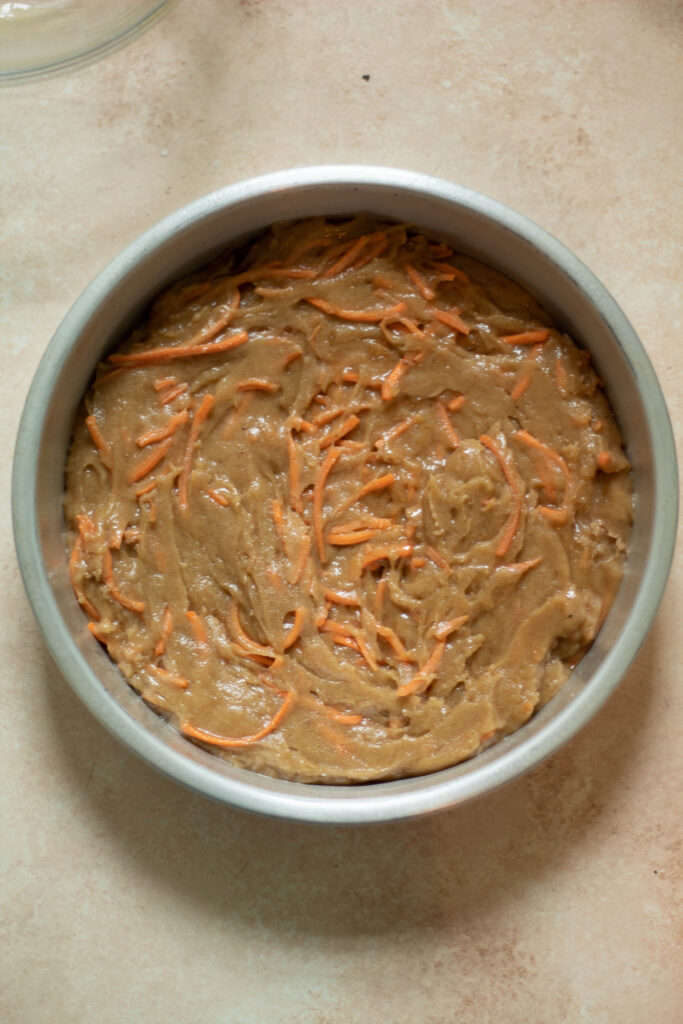
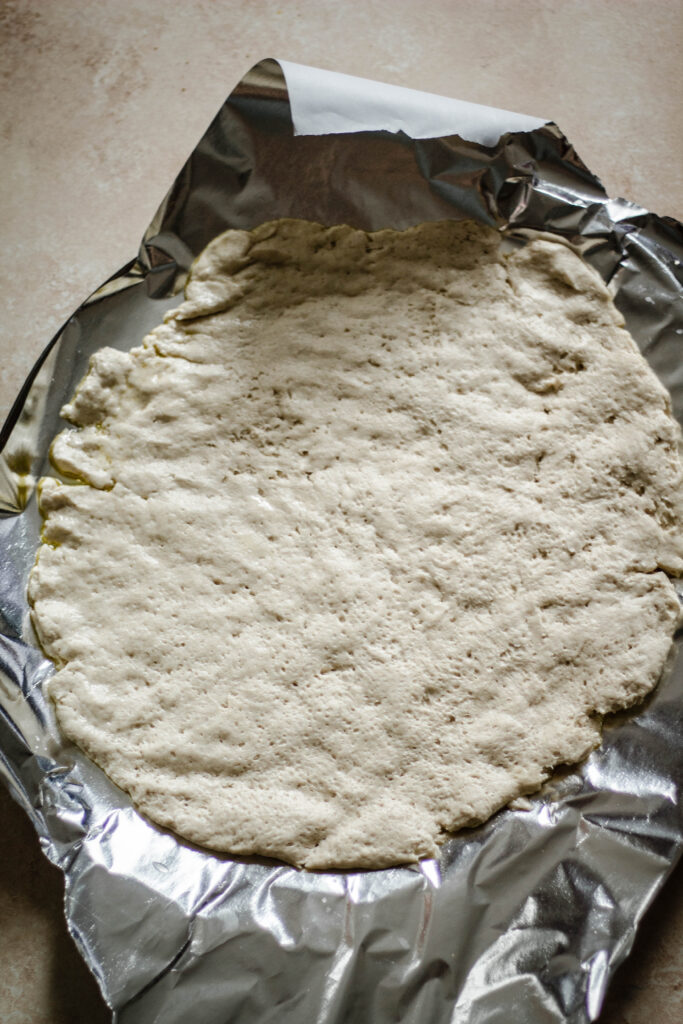
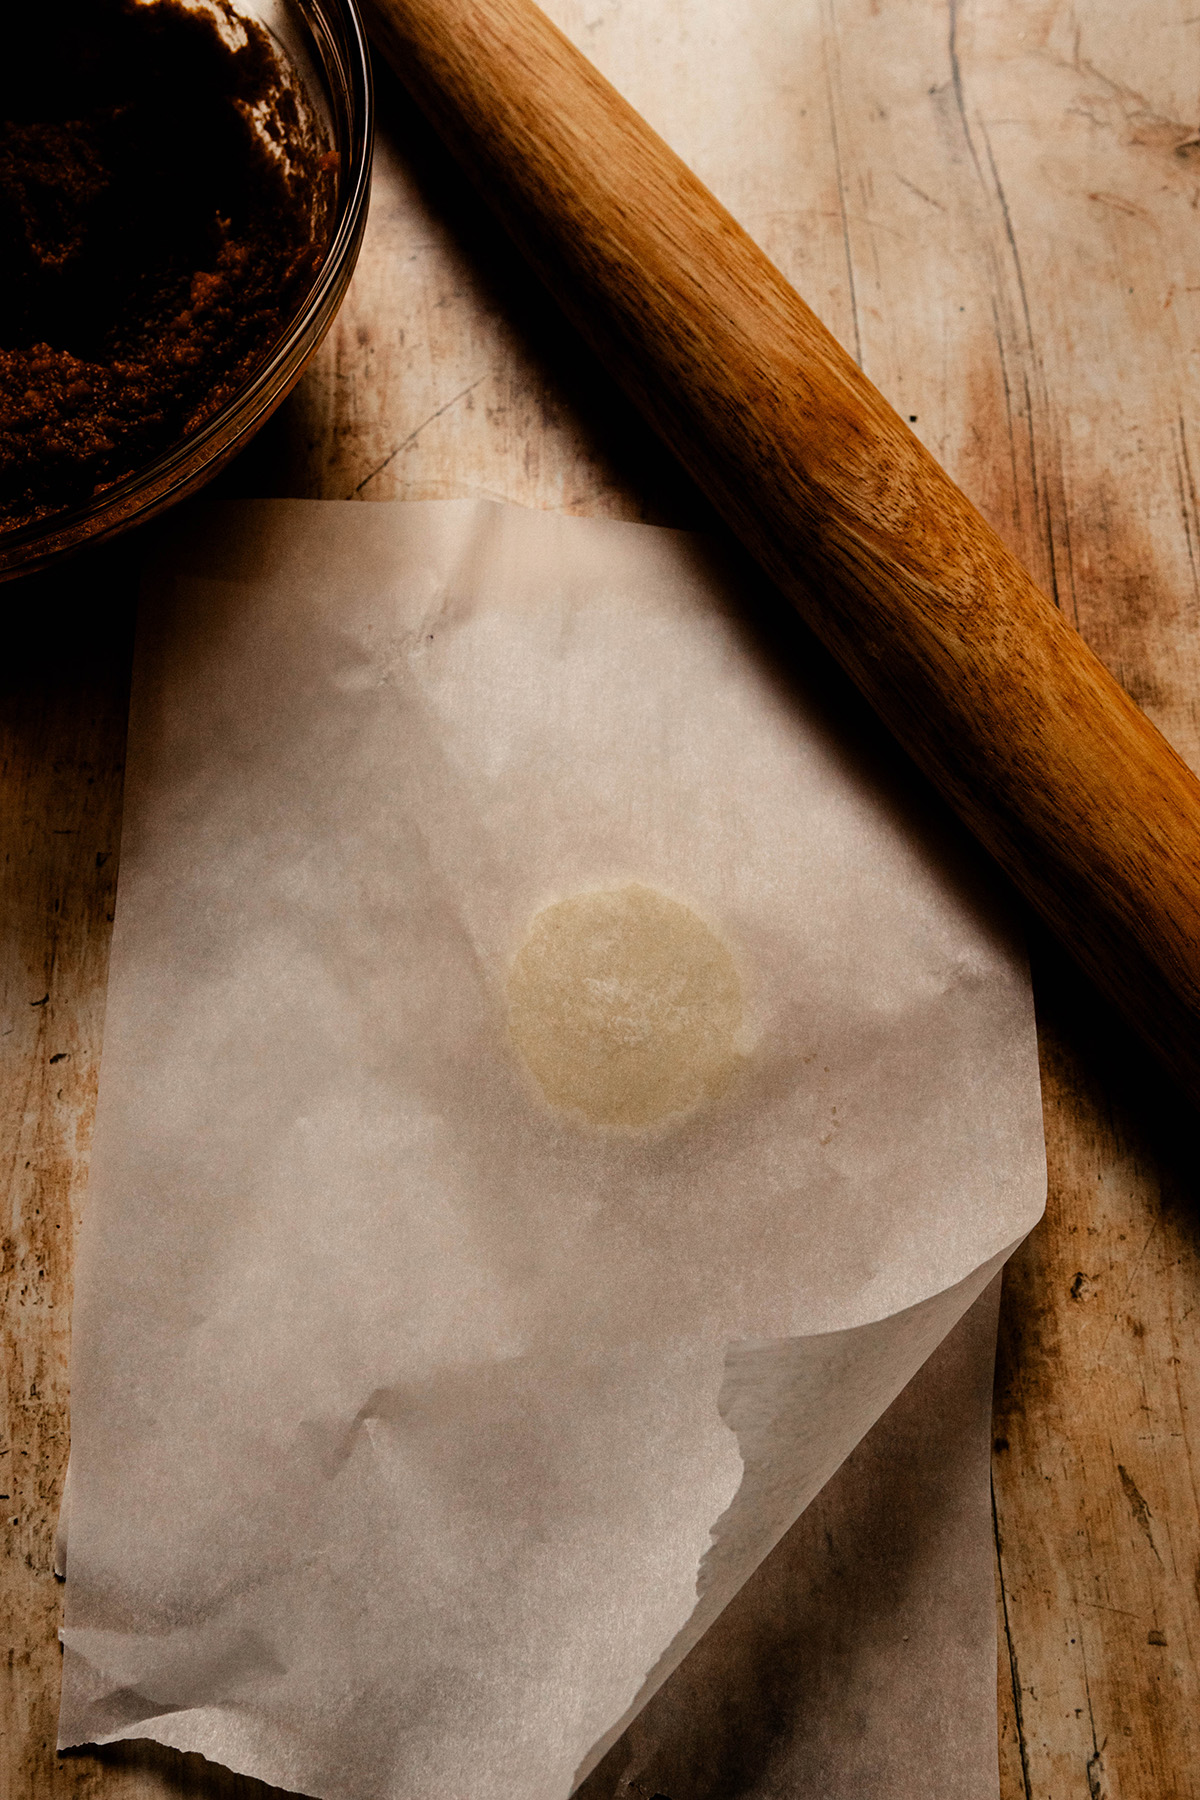
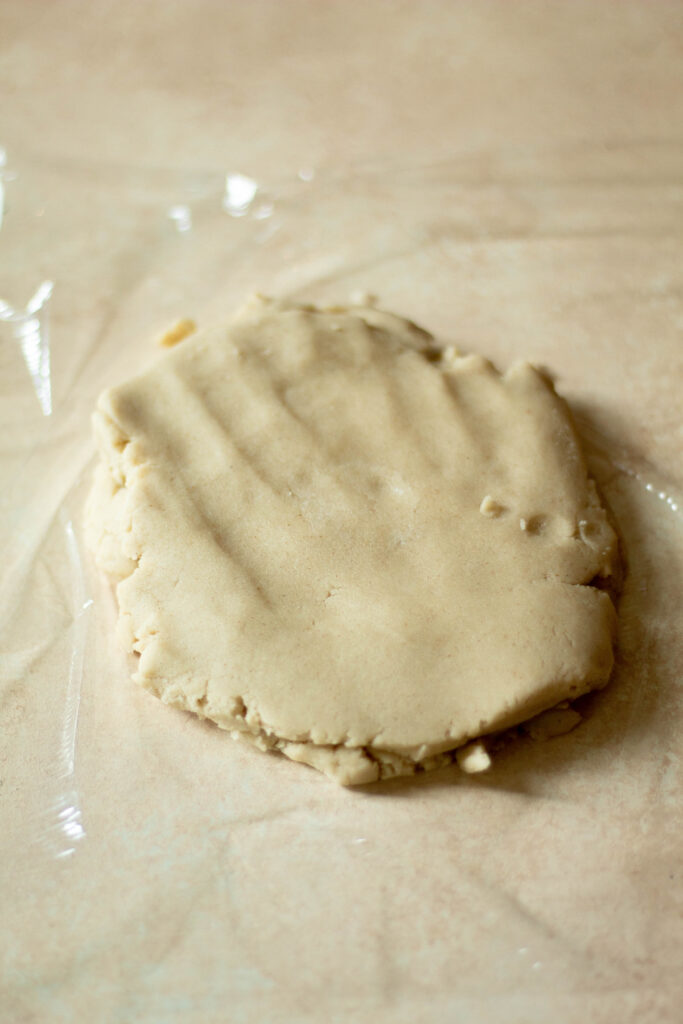
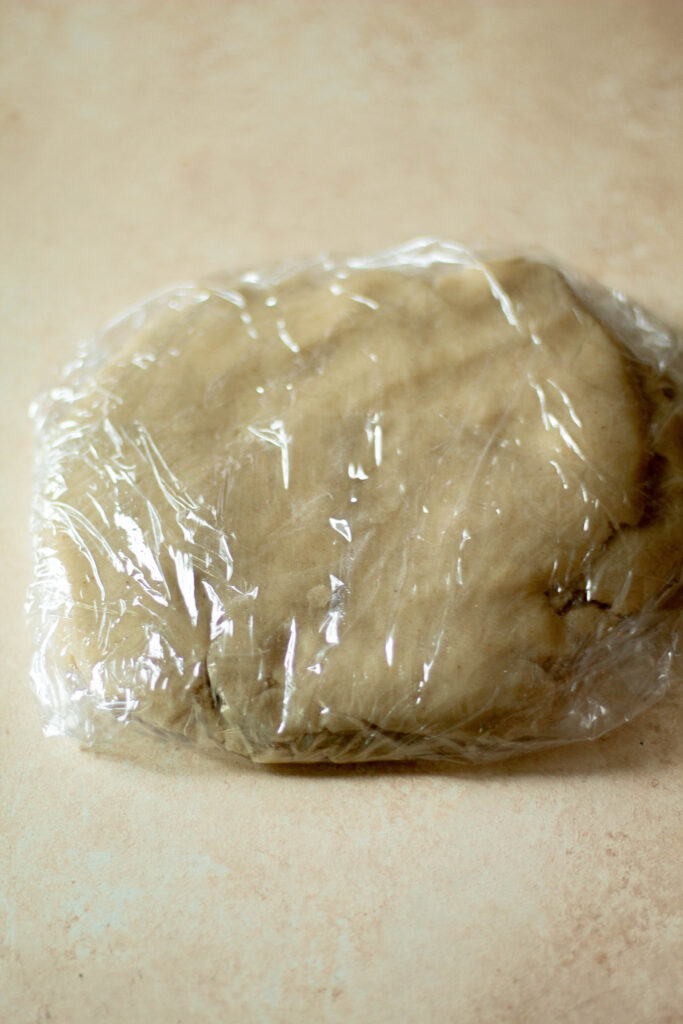
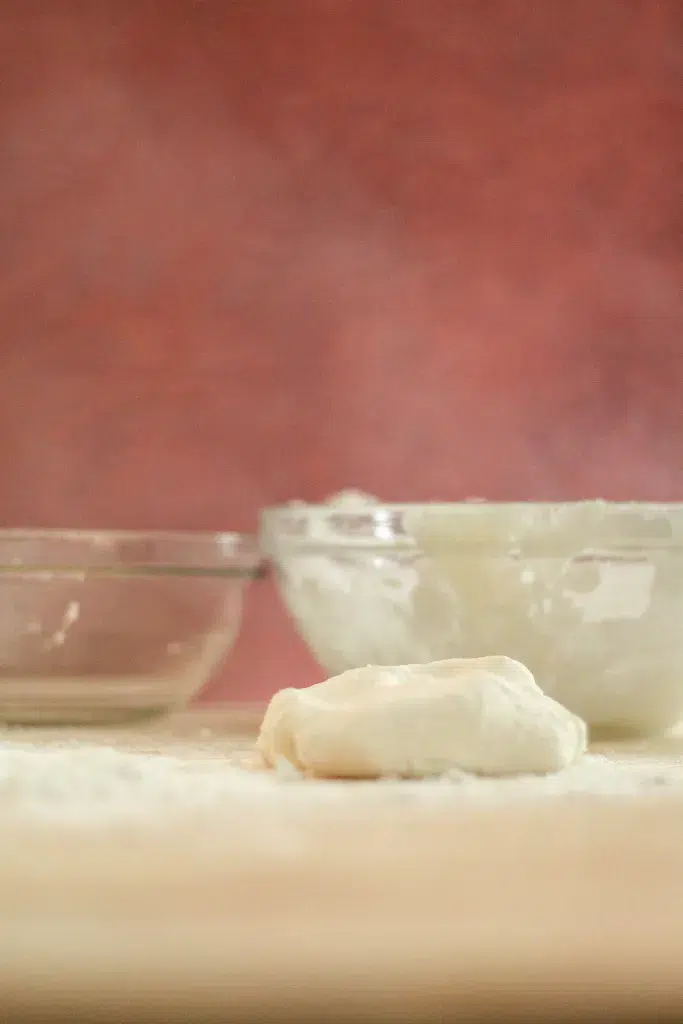
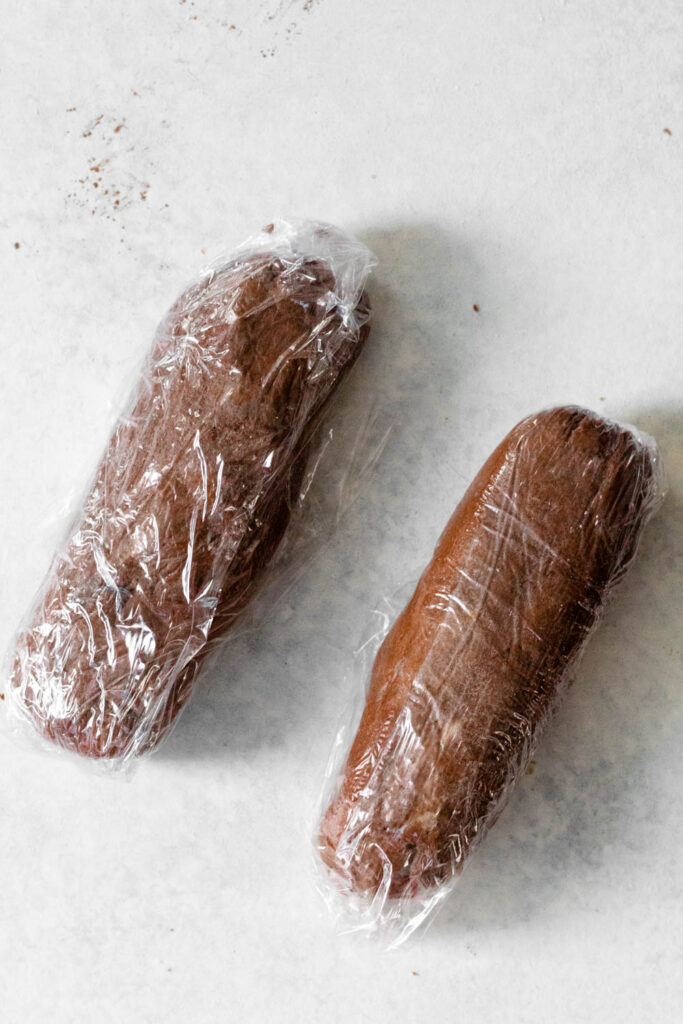
  2. Pat the dough into the separate rectangles and cover with plastic wrap. Place in the fridge for 30 minutes. If you take them out and they are not cold, put back in. * The dough can stay in the fridge wrapped for a few days if you want to make ahead.
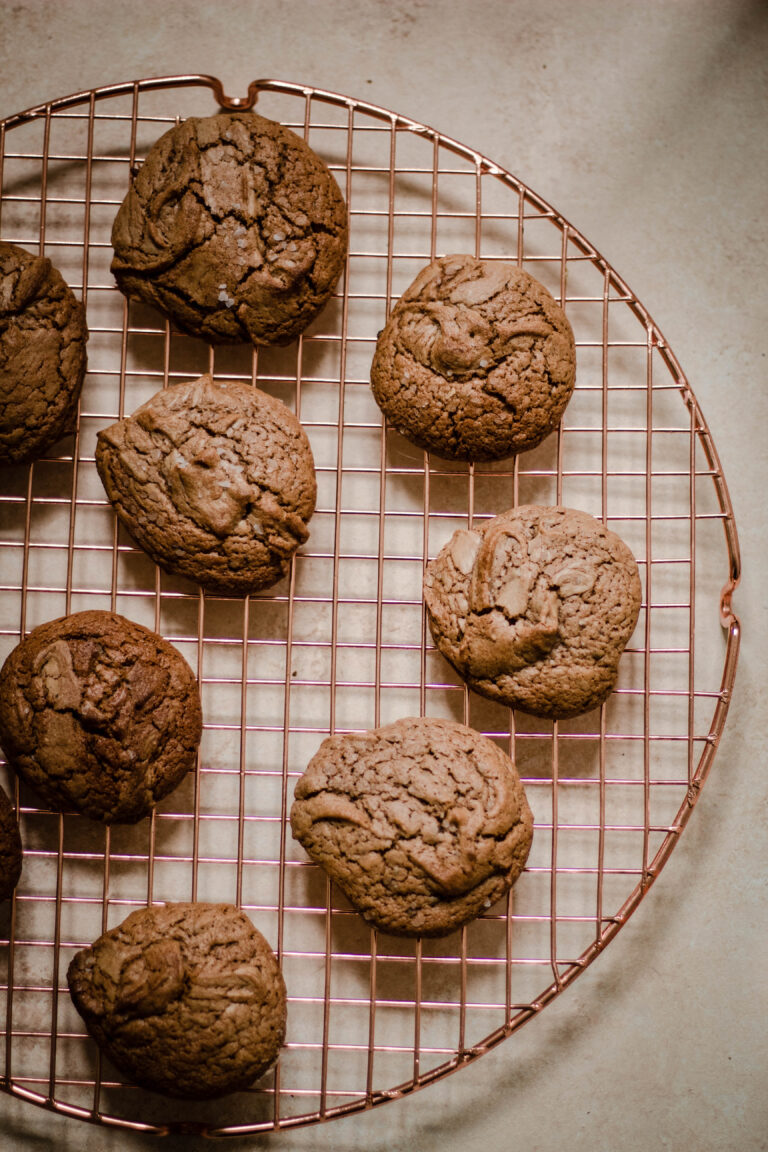
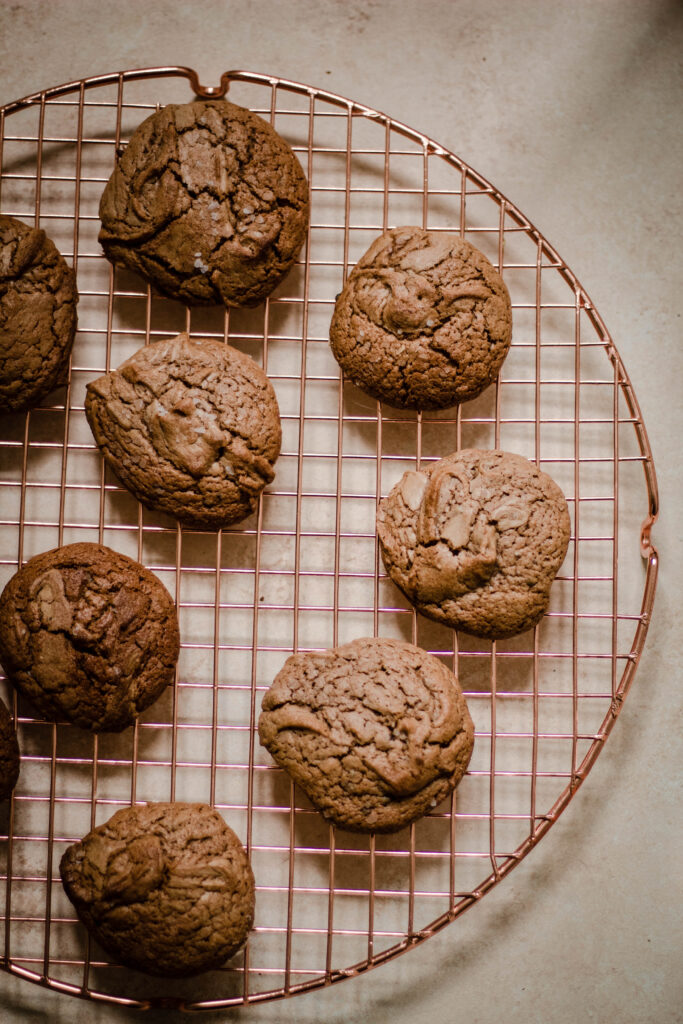
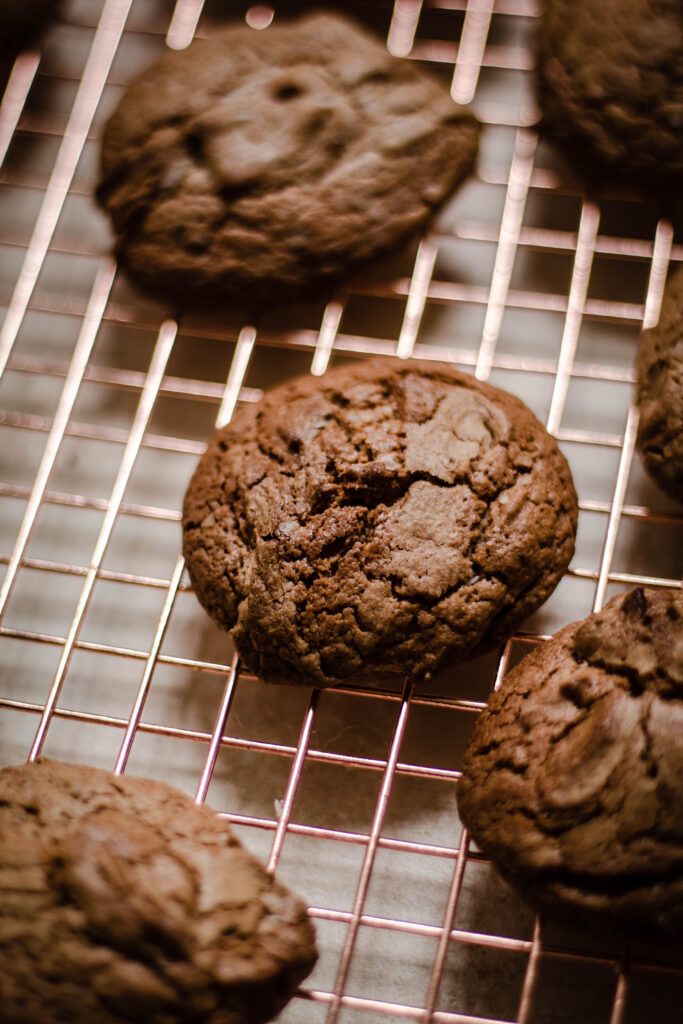
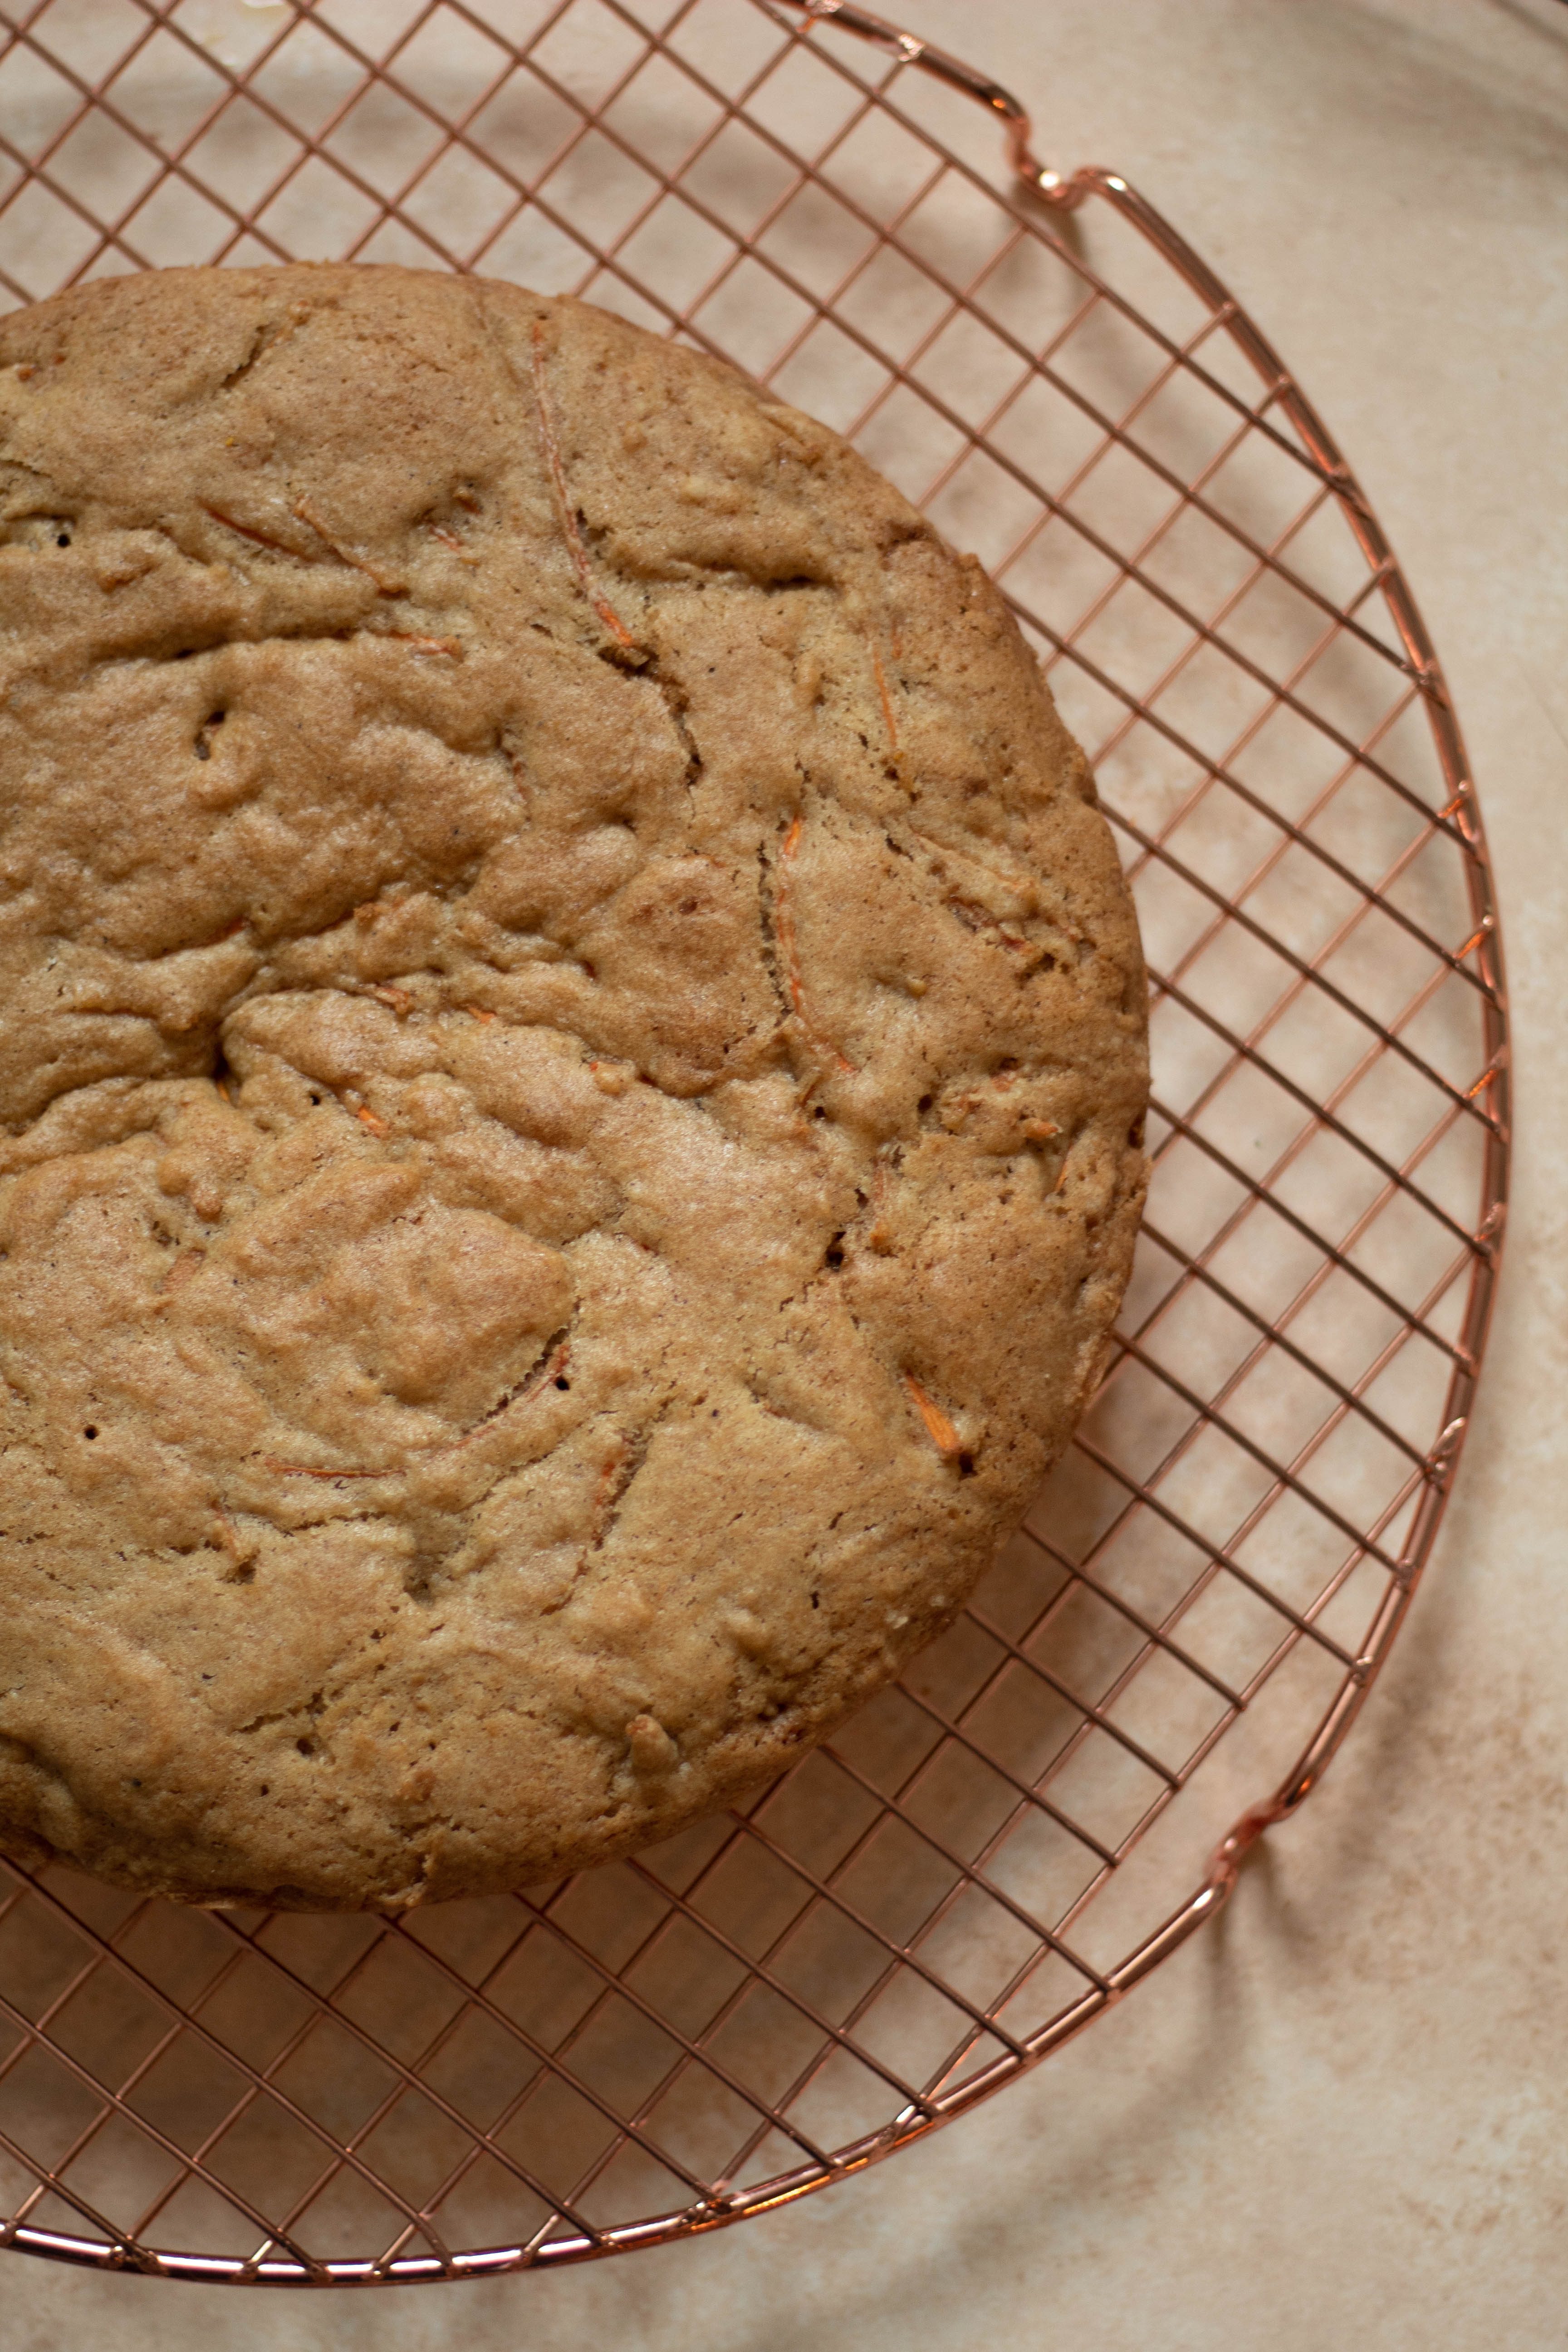
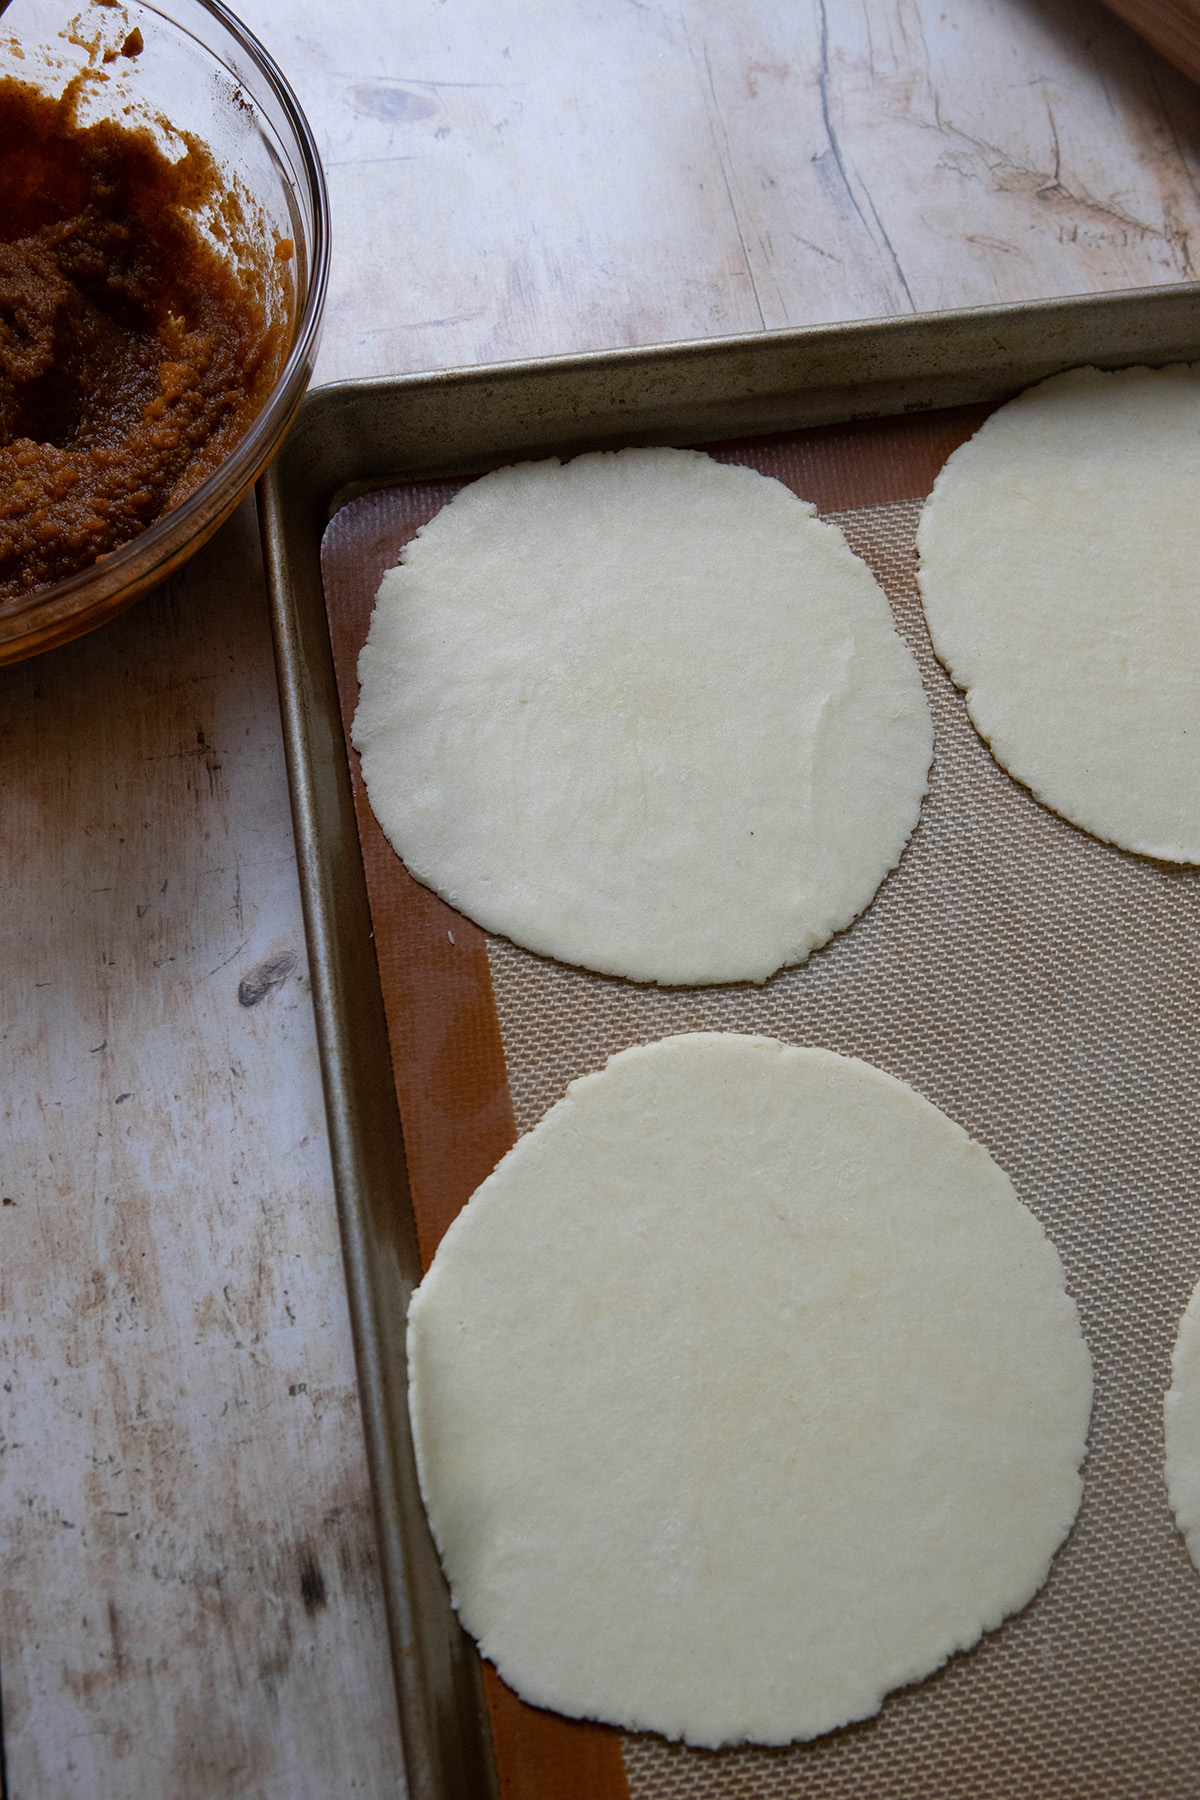
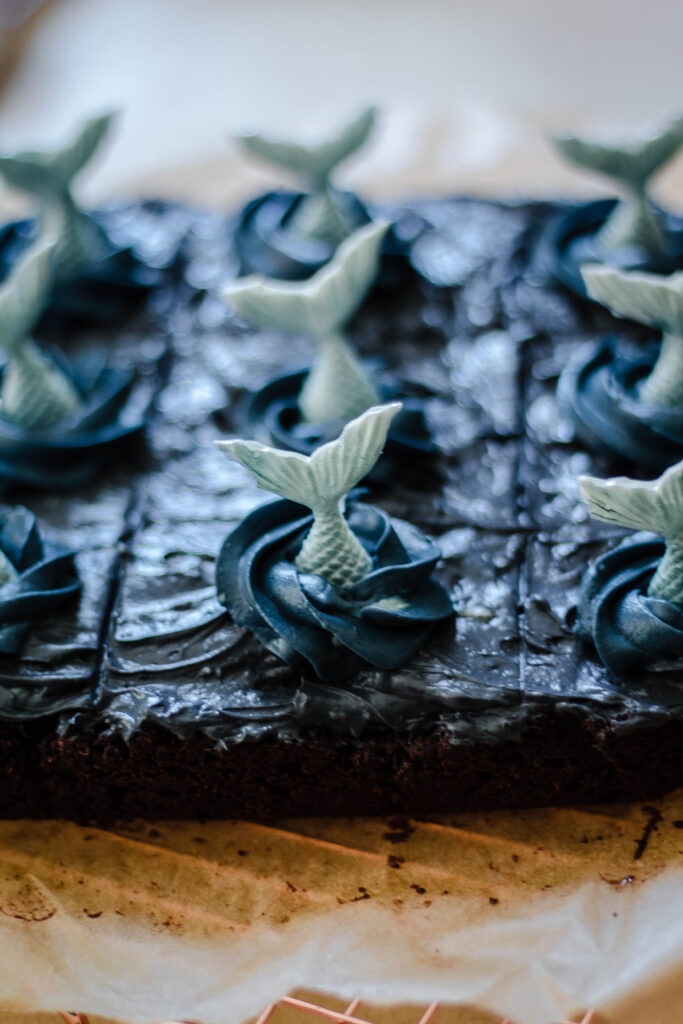
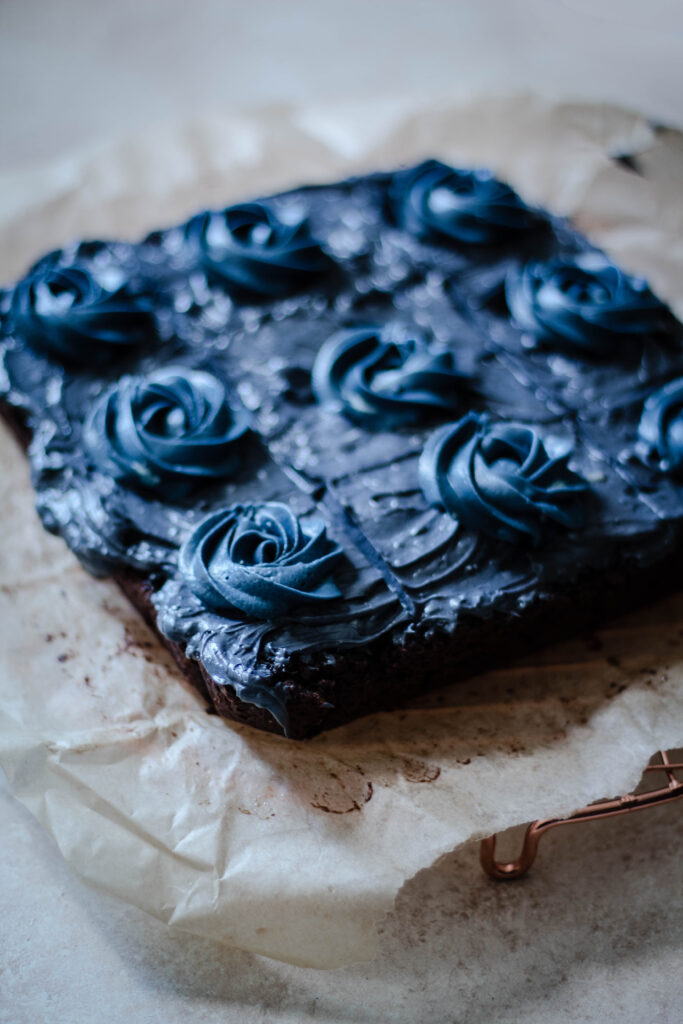
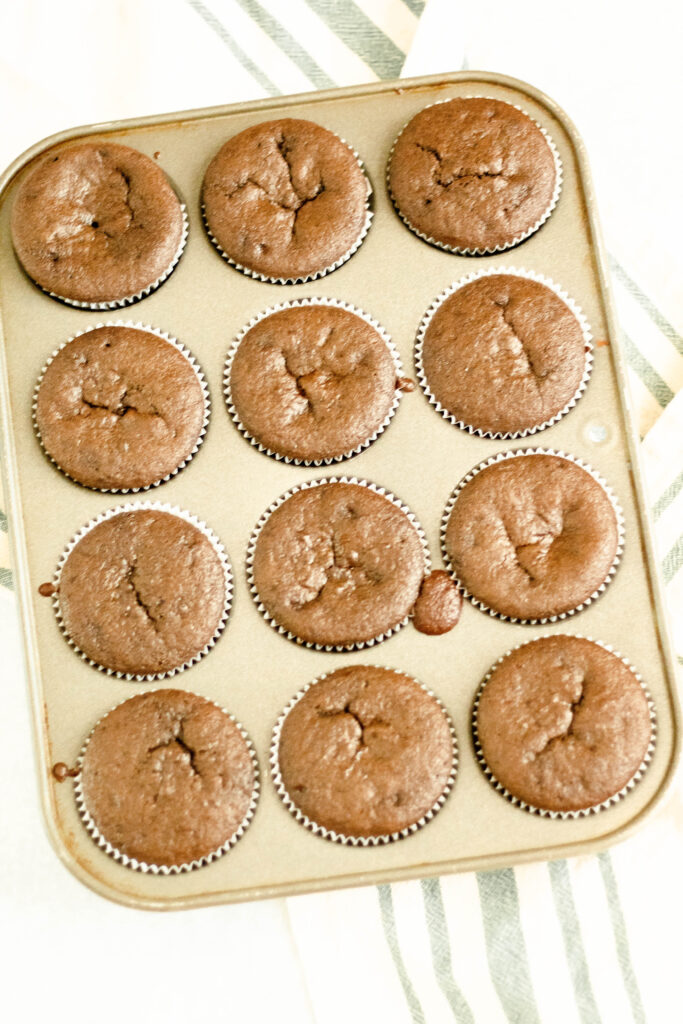
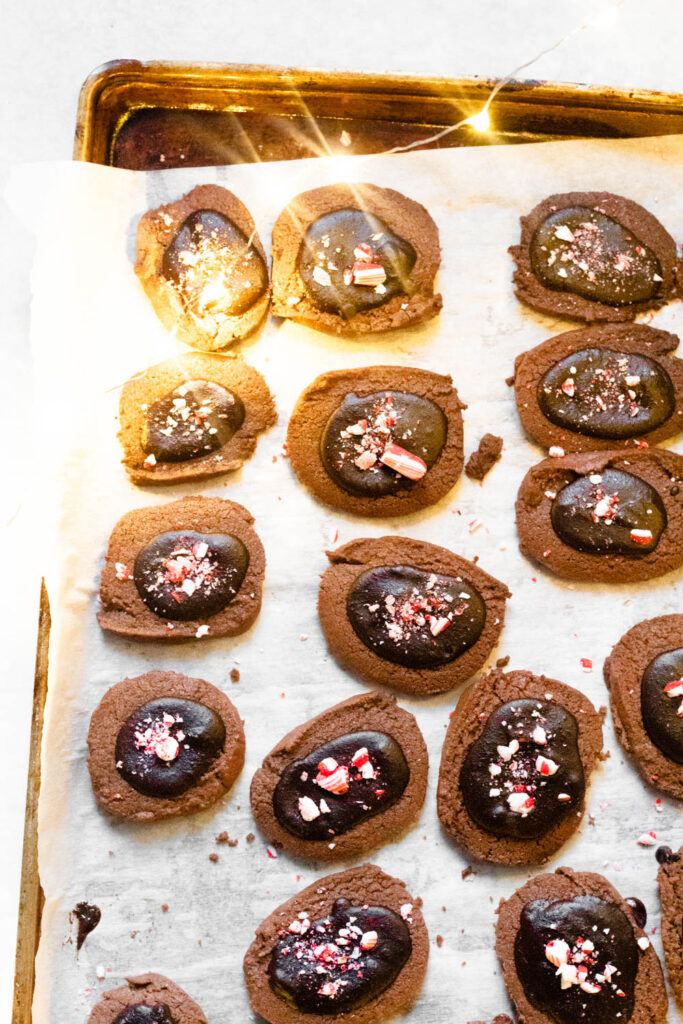
  3. Set your oven to 350°F. Line baking trays with parchment paper. Slice your cookies and line the trays with them. Place into the oven and bake for 20 minutes. They should have a bit of a darker color along the edge.
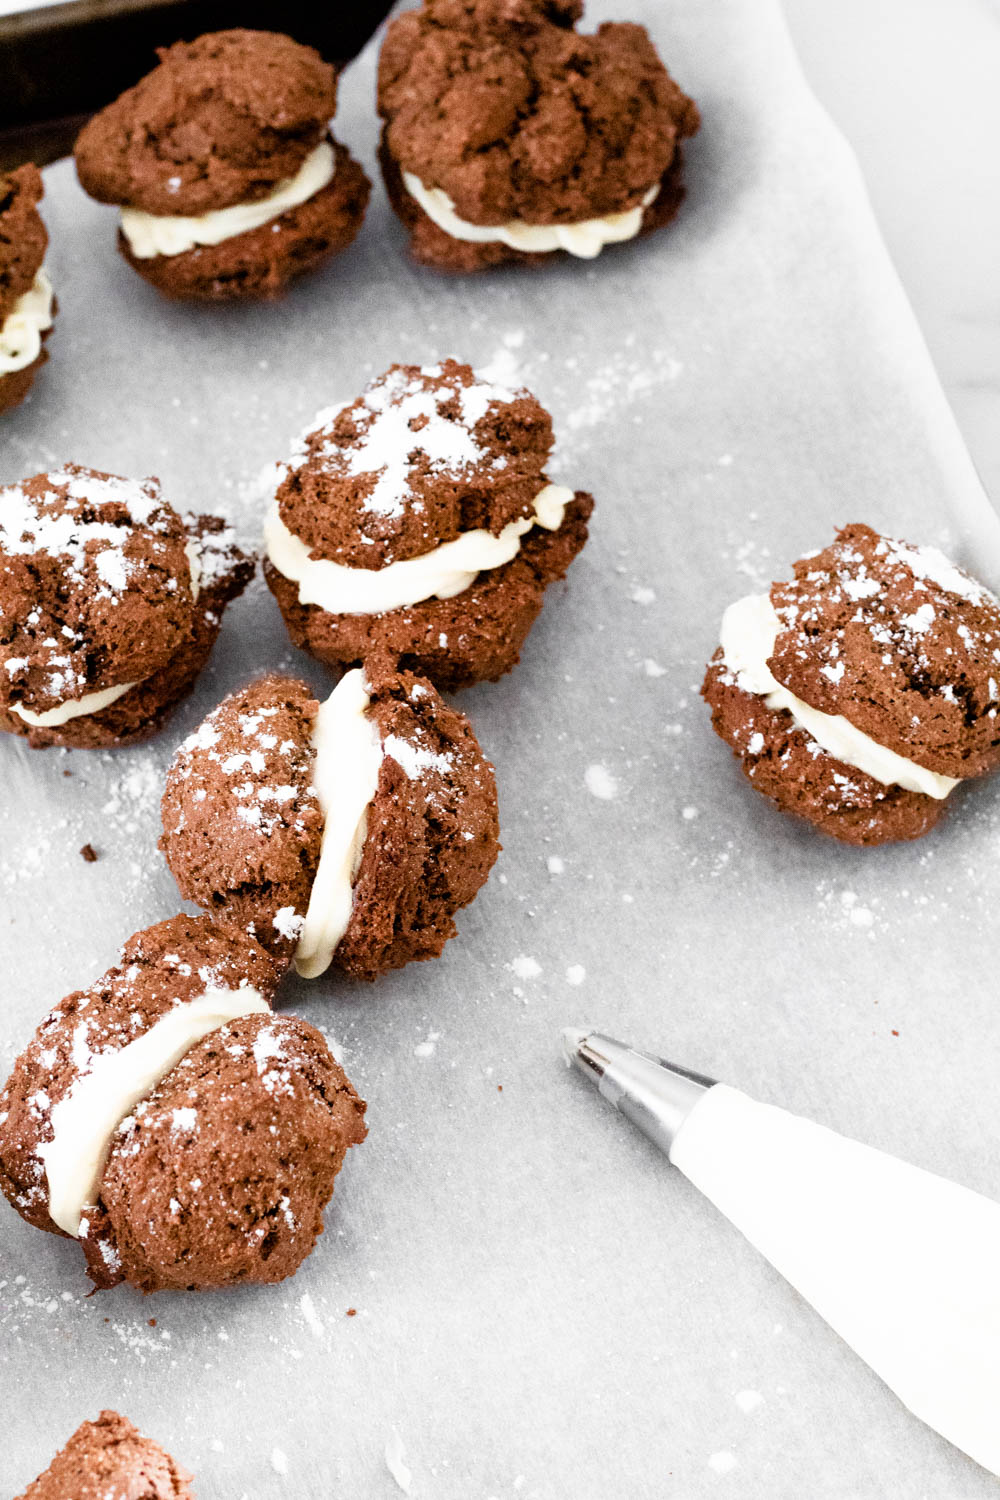
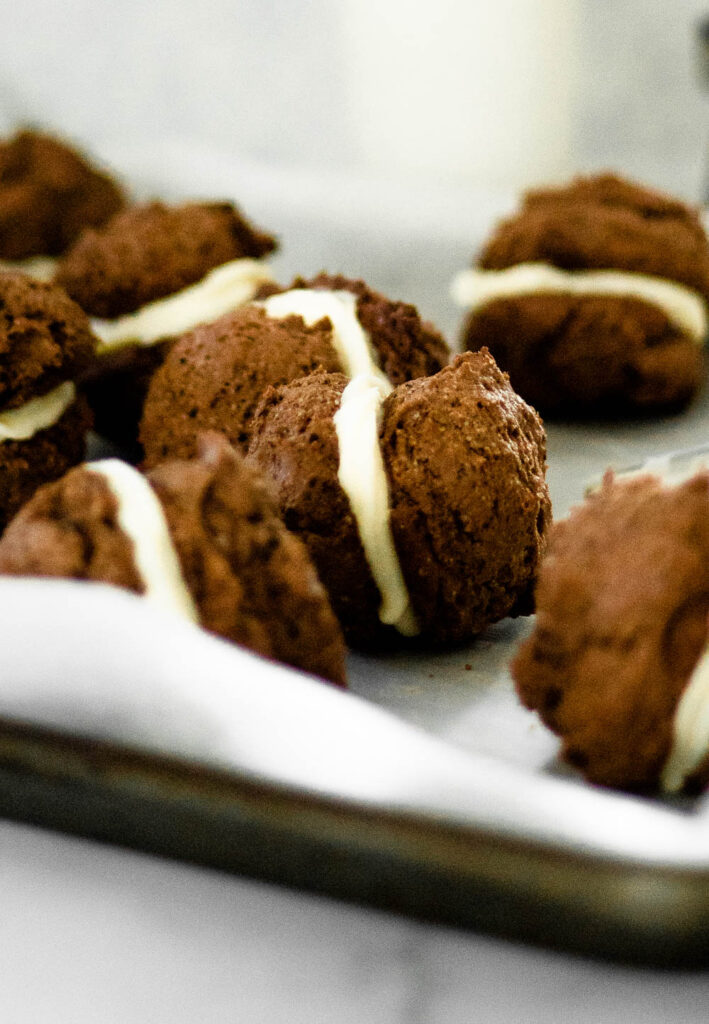
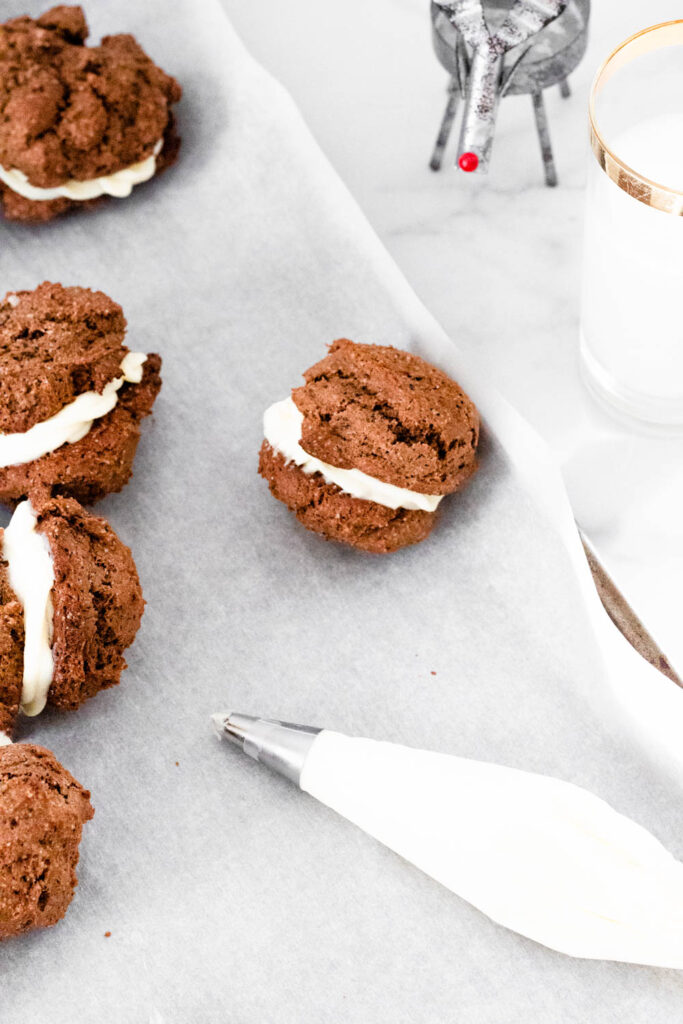
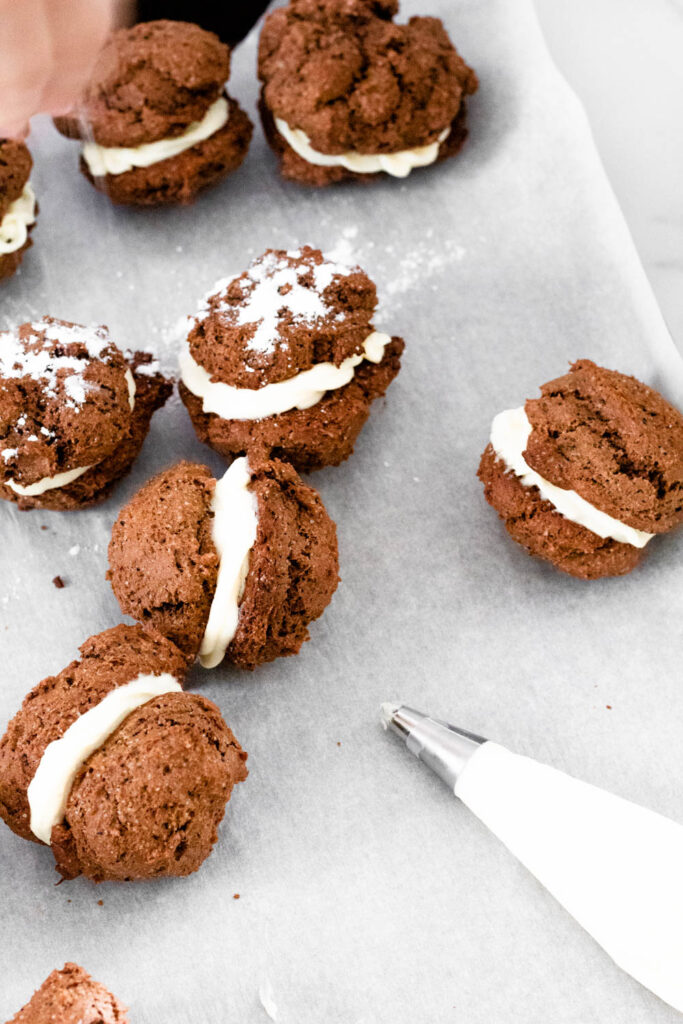
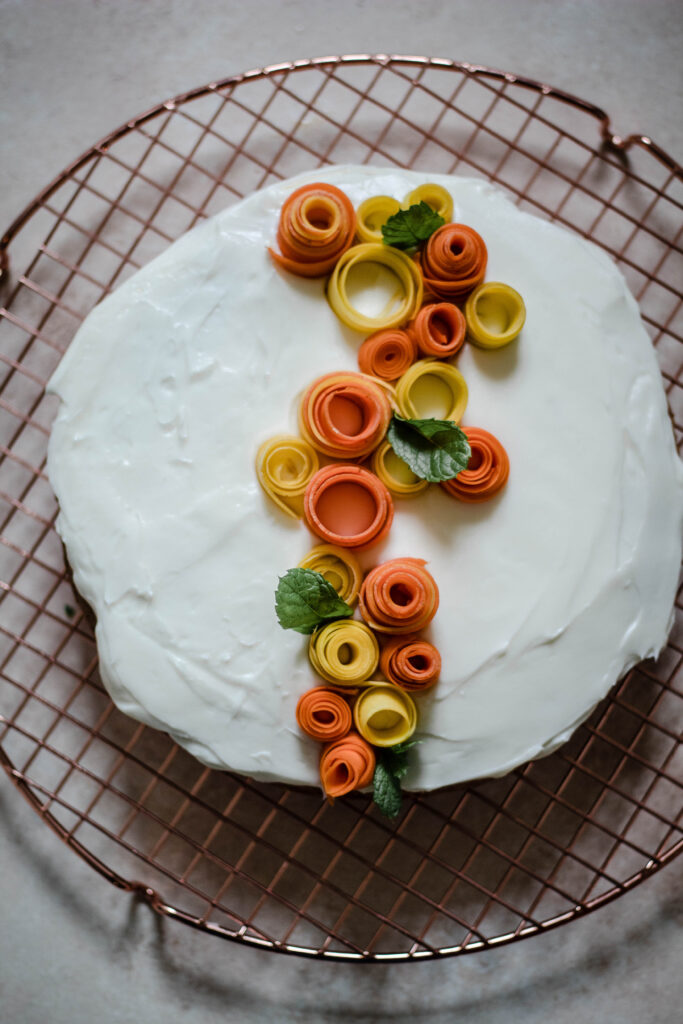
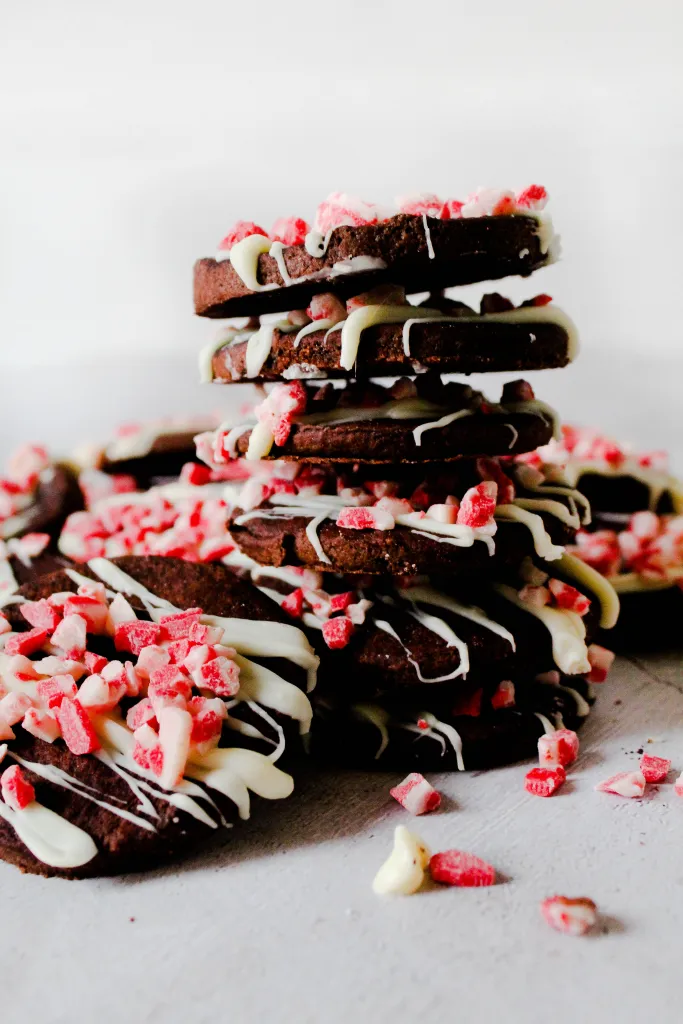
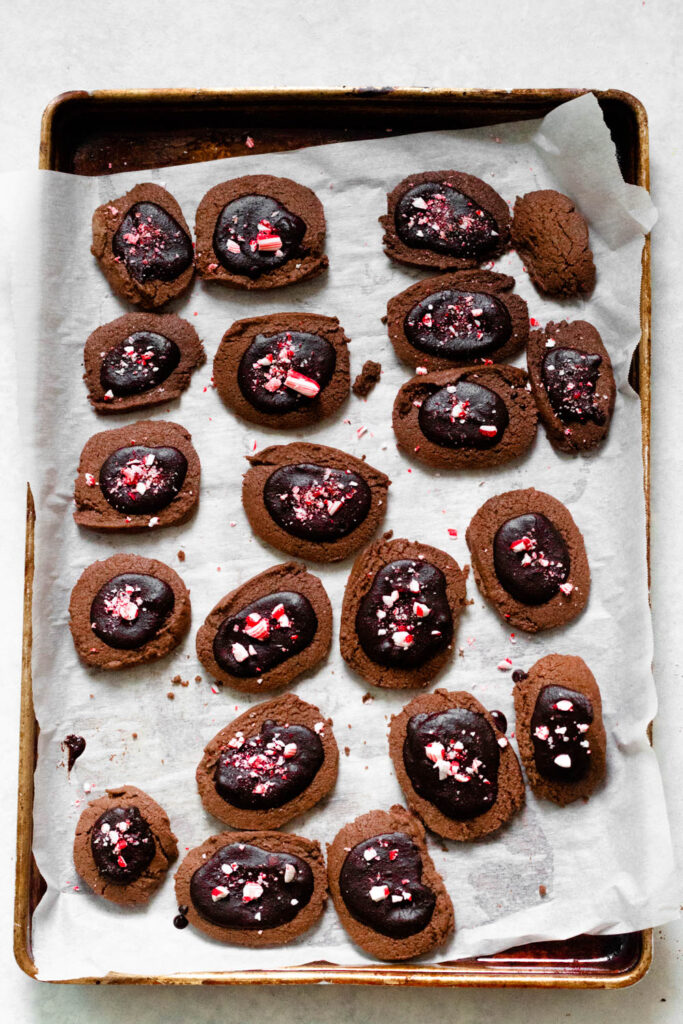
  4. Remove from the oven, allow to cool for 10 minutes. Make the icing during this time. Melt the chocolate with the heavy cream and butter in a pot. Remove from the stove and allow to cool for 5 minutes. Drizzle cookies with icing and cover with candy cane!
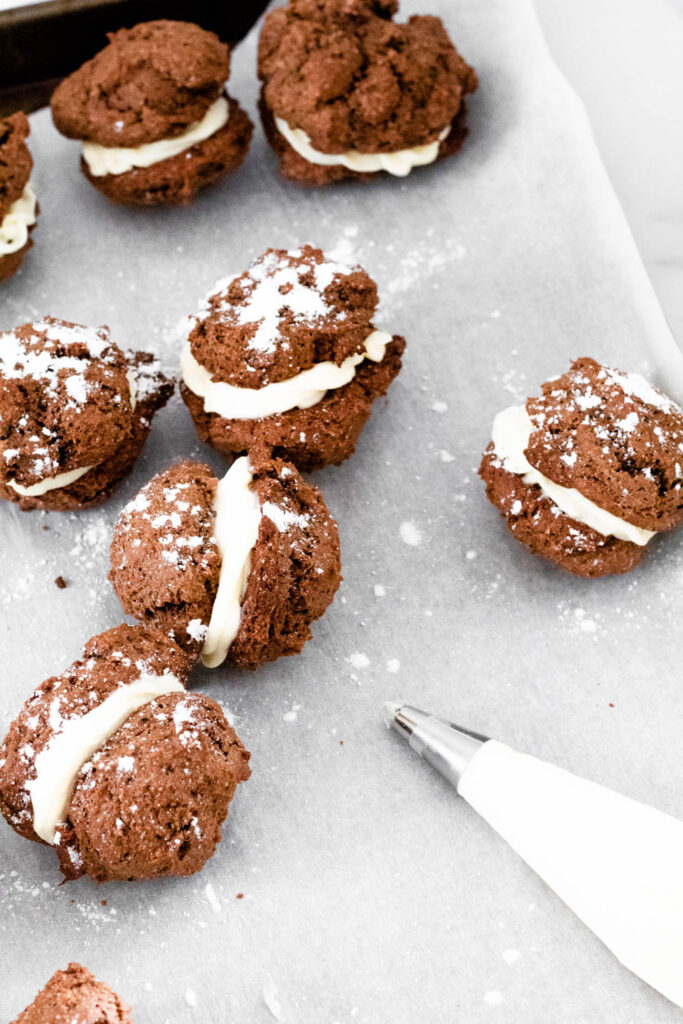
  5. You can eat these immediately, serve them, or store them in an airtight container in the freezer for weeks! The world is your cookie oyster.
Ingredients for your candy cane cookies recipe
Whisk together the dry ingredients
Beat your butter and sugar together. Add your dry ingredients and milk ⅓ at a time. Rotate them into the batch.
Make two rectangular logs with the dough. Wrap in plastic wrap and or an eco-friendly alternative. Place in the fridge for 30 minutes - 1 hours.
Once the dough has chilled, slice, place on baking sheets, and bake.
After the cookies have cooled, melt your chocolate and make your frosting. Cover the cookies with it and crushed candy cane.
You can eat immediately!

Why should you make this recipe?

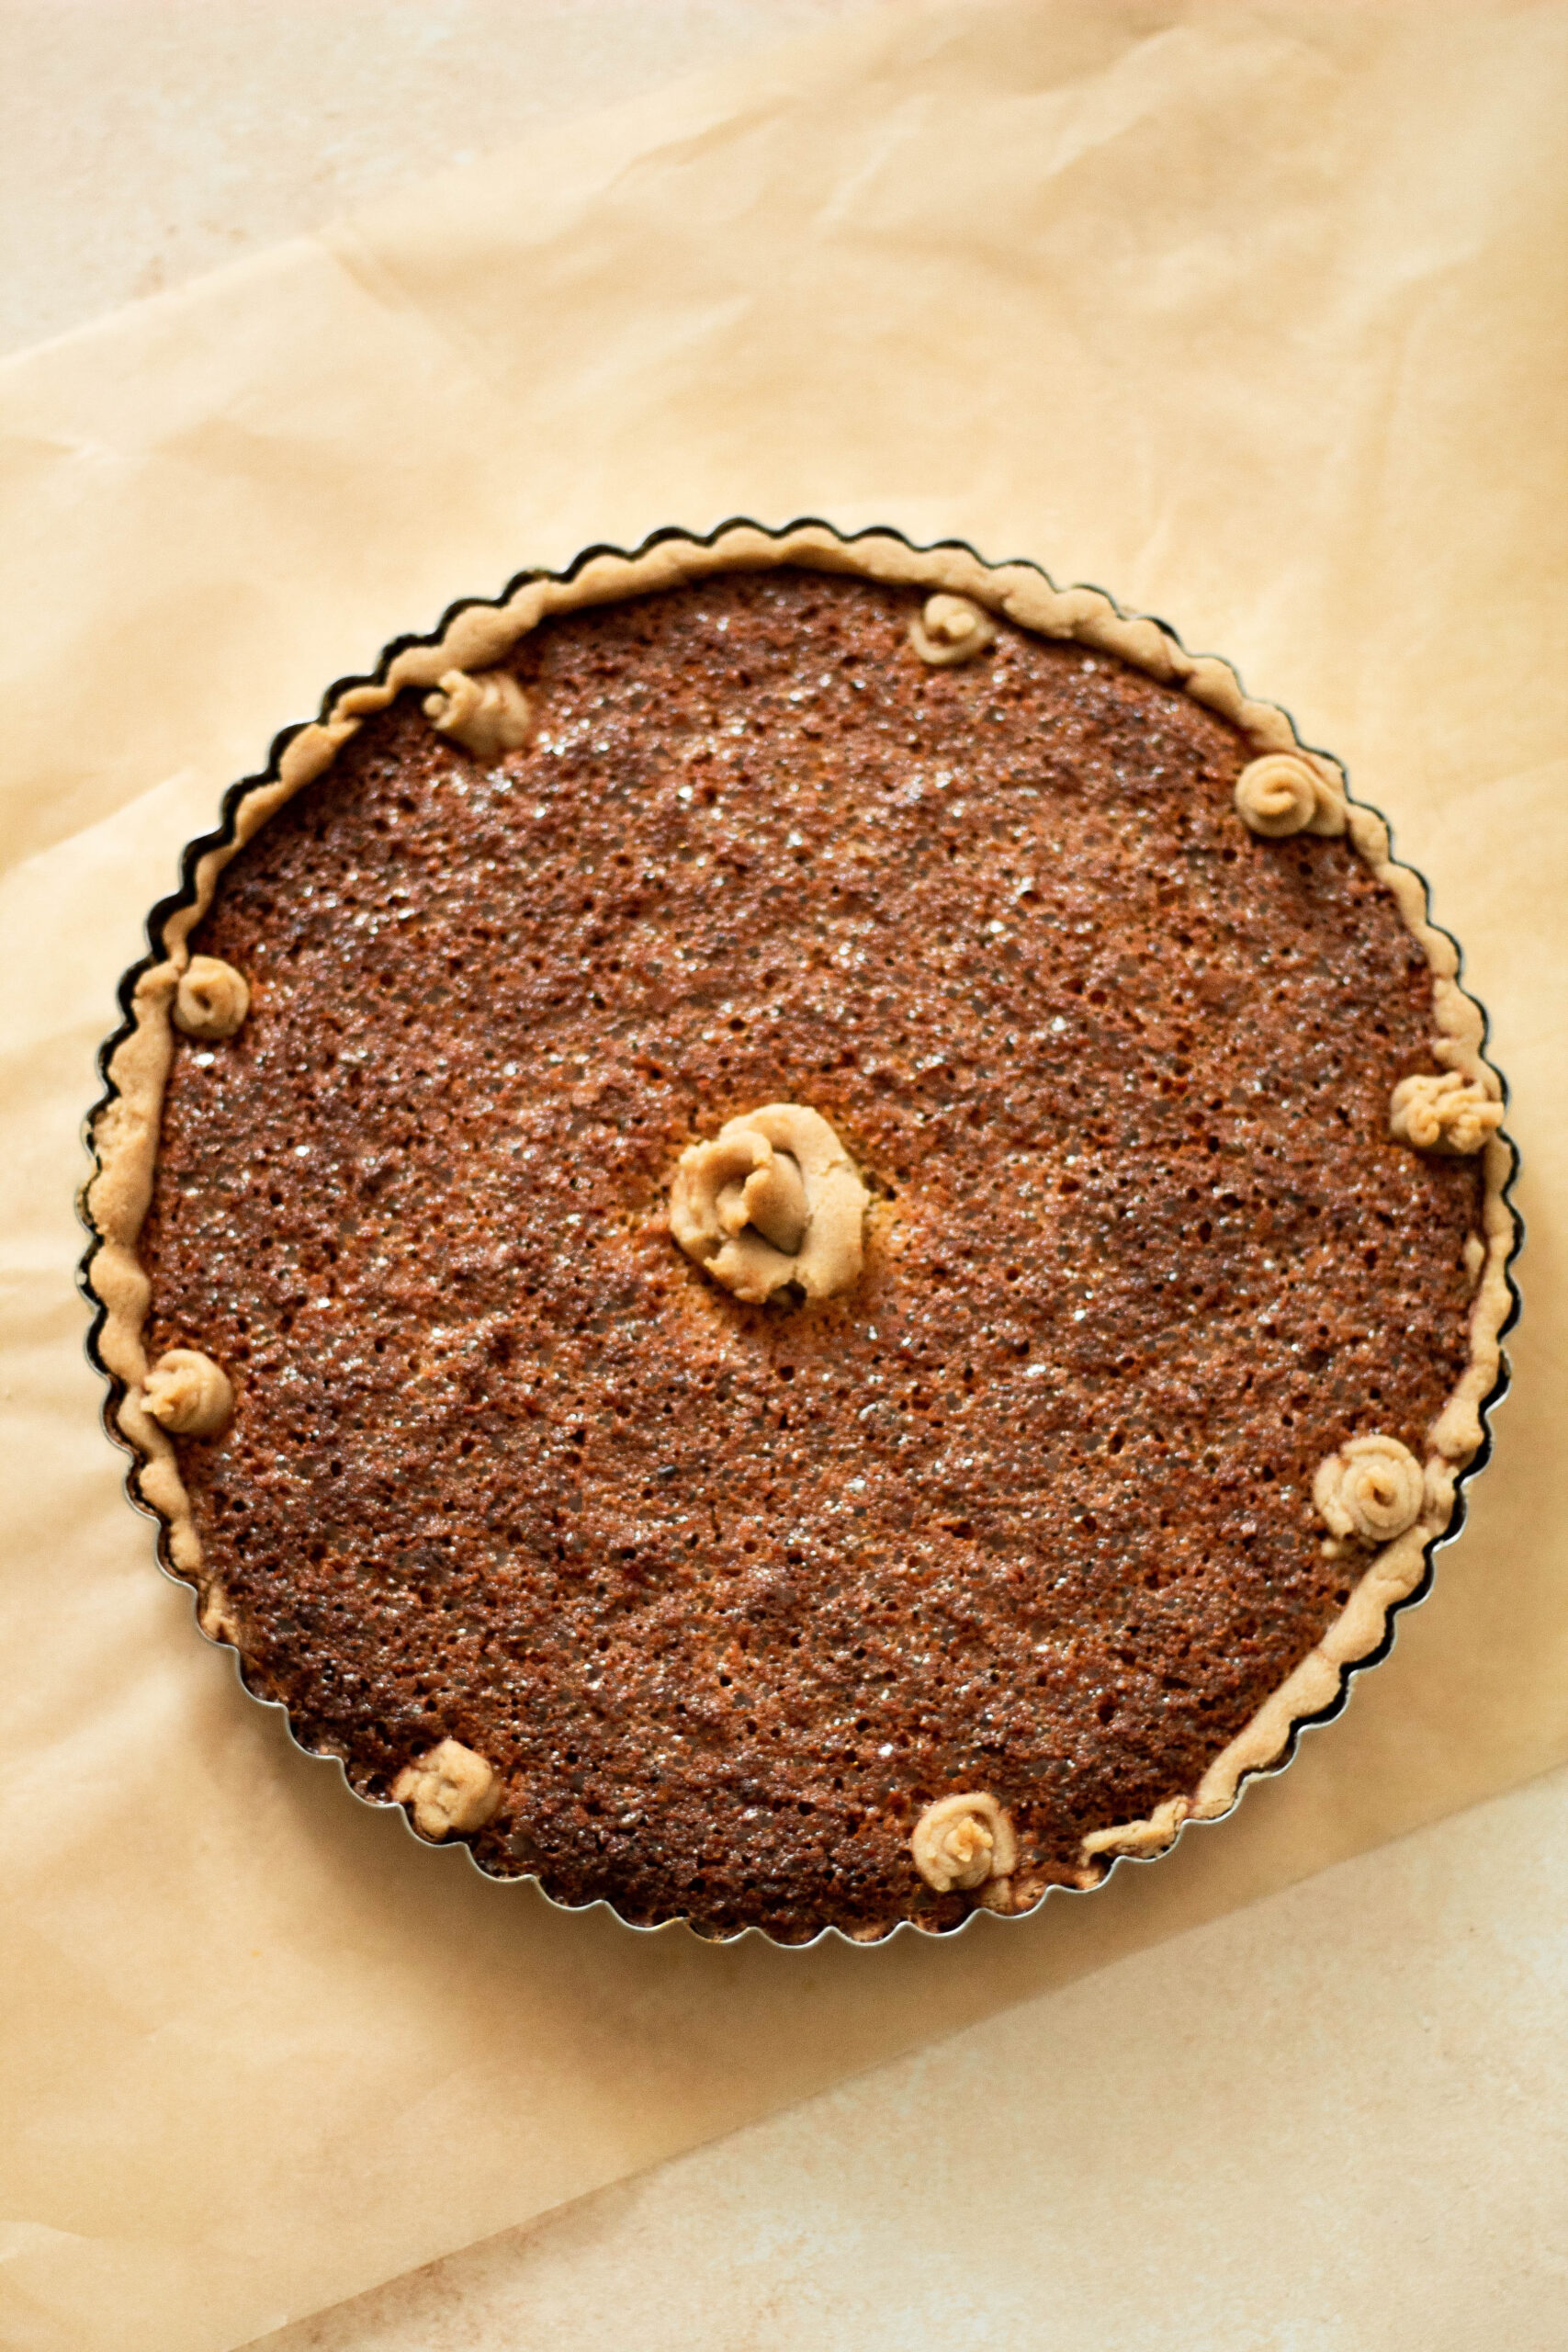
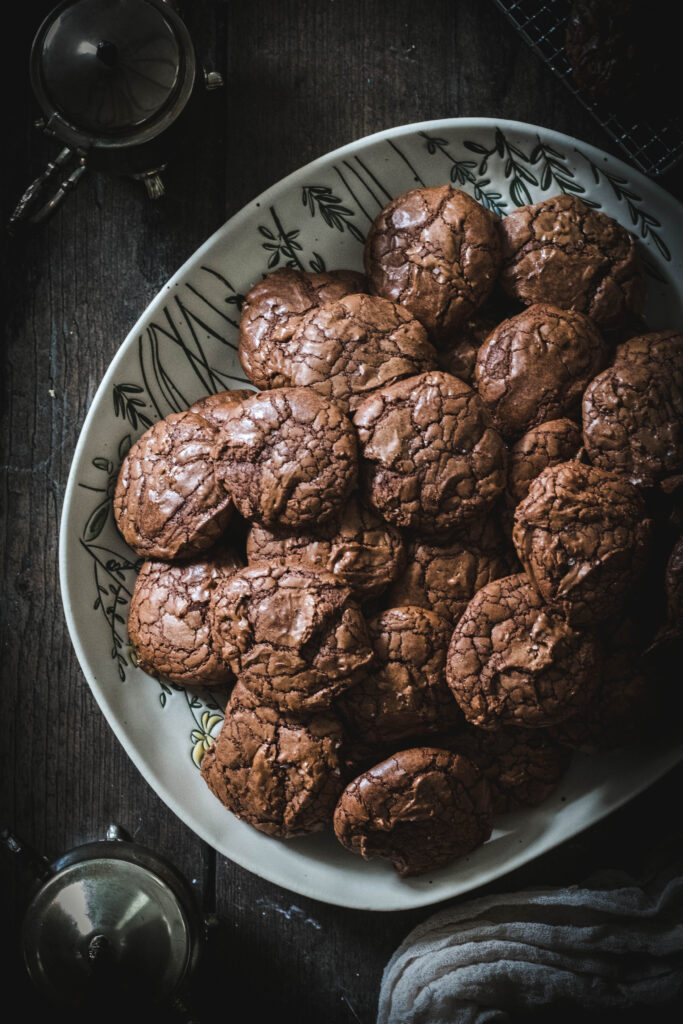
It is an easy recipe to put together and it is great because it is a 1:1 recipe. Easy to make gluten free for those who cannot eat gluten and just as easy for those who do! They are chewy, chocolatey, and delicious either way!

Looking for something similar?

Linzer Cookies click here
Sugar Cookies click here
Chocolate Crinkle Cookies click here
Tiramisu Sandwich Cookies click here
Peppermint Mocha Cookies click here

Pumpkin Pies

November 20, 2020

Gluten Free Pumpkin Pie

How to make Pumpkin Pie

How to make pumpkin pie was a google search I did for the first time a few years ago. I did not grow up with pumpkin pie as a staple in my household. To be honest, the extent of my relationship with pumpkins was that I would carve them on Halloween and then we would part ways for the rest of the year. When I started my relationship with Josh, an American, it became clear that room would need to be made in our lives for pumpkin pie. I definitely feel that I was in the minority in that I felt it very strange that a savory item, pumpkin, became a sweet pie. Obviously now, I see the err in my ways and I present to you this delicious guide on how to make pumpkin pie! This recipe is a play off of Erin McDowell's pumpkin pie recipe! I hope you love it.

What will you need for this recipe?

This recipe is broken into two parts for what you will need. You will need the ingredients for your crust and then the ingredients for your filling.

*If you want to make 1 pie crust use these measurements. If you would like to make mini pies by half a dozen, simply double.

For Crust:

  1. 8 tablespoons (½ cup) cold butter (cubed)
  2. 2 ½ tablespoon psyllium husk
  3. 4 tablespoon tapioca starch
  4. 1 cup gluten free flour
  5. 3-5 tablespoon ice water

This filling is for one 9inch pie. If you are making mini pies, you will need to double the recipe (which I did). I made 14 mini pies, and then a crustless pie!

For the Filling:

  1. 3 large eggs
  2. ½ cup packed light brown sugar
  3. ½ cup granulated sugar
  4. 1 teaspoon vanilla extract
  5. 2 cups canned pumpkin puree
  6. 2 teaspoons grounder cinnamon
  7. 1 teaspoon ground ginger
  8. 2 teaspoon pumpkin spice
  9. ¼ teaspoon freshly grated nutmeg
  10. ½ teaspoon sea salt
  11. 8 oz (1 cup) mascarpone cheese

How to make pumpkin pie?

Let us begin our how to guide!

  1. You are going to make your crust! To make the crust: cube your butter and make sure the butter is cold. In your food processor, put your flour, tapioca flour, psyllium husk and pulse a few times. After add your butter and pulse until the butter looks like pea sized. Begin to pulse again and add one tablespoon of water at a time. Your dough will come together. Wrap with an eco-friendly sealer and place in the fridge for 30 minutes - an hour. In the photos I rolled mine out right away, but it really is better if you wait after chilling it.
  2. Take the dough and place between two pieces of parchment paper and roll out. Form to your pie or tart pan.
  3. Set the oven to 375°F. Use a fork to put some holes in the bottom of your crust. Place in the oven for 10 minutes. Remove from oven while you make your filling.
  4. Take your sugar and put in a bowl. Add the eggs and begin to whisk. Once they have been fully incorporated, add your pumpkin and spices. Once your mix is starting to look good, add the mascarpone cheese and continue to whisk!
  5. Once your filling is all combined, add the mixture to your pie (or pies). Place in the oven and bake for 45 minutes.
  6. Once they are finished baking, they may still be a bit jiggly in the middle, and that is fine! They are to be placed in the fridge for 2 hours following their bake. When you are ready to serve, add some whipped cream, baked meringue, or, ice cream! Enjoy 🙂
Take your ingredients for your tart and getting ready!
Place the dry ingredients in the food processor and pulse a few times.
Place the cubed butter into the food processor and pulse.
Add water to your food processor as you continue to pulse, one tablespoon at a time.
Once your dough has come together, you should chill it for 30-minutes to an hour (covered with plastic wrap or an eco-friendly alternative).
Take two pieces of parchment paper, place dough in-between them and roll it out.
Place the crust into your tart or pie pan. Take your pan and place in the oven for 10 minutes.
Get out your filling ingredients.
Add the eggs to your sugars and whisk.
Place the pumpkin and spices into the bowl and whisk together.
Add the mascarpone to your mixture.
Whisk until the cheese is broken down as much as you can.
Place the filling into your crust and bake for 45 minutes.
When ready to serve, add your choice of topping and enjoy!

Why should you follow this recipe on how to make pumpkin pie?

I hope you feel that is a comprehensive how to guide on the world of pumpkin pie! I did my best to include as much detail as possible as I know tackling something from scratch (or something you are simply unfamiliar with) can be daunting. I hope you give it a go and that you love it!

Looking for something similar?

Peach Tart click here
Pear and Frangipane Tart click here
Treacle Tart click here
Rhubarb Tart click here

Creamy Mashed Potatoes

November 18, 2020

Creamy Mashed Potatoes

Recipe for Creamy Mashed Potatoes

Radio stations are beginning to play Christmas songs. There is a crispness in the air that makes you want to pause and take a deep breath. The signs of Fall are here and the holidays are beginning to assert themselves. It is always such a magical time of the year. However, 2020 has been a strange year. I saw an ornament the other day that was adorned with the hand of the Grinch stealing the last of the goodies, and it read "2020 Stink, Stank, Stunk".

One of my favorite things, no matter the year, is potatoes. Let's dive in!

What do you need?

  1. Potatoes
  2. Salt
  3. Garlic Cloves
  4. Butter
  5. Whole Milk
  6. Freshly Ground Black Pepper
  7. Nutmeg

How do you make this recipe for creamy mashed potatoes?

Mashed potatoes are so easy to make. It is delightful that they yield such an amazing taste and flavor for the effort they require.

  1. Chop up the potatoes and peel your garlic. You will place then in a pot and cover them with water. Be sure to salt your water. You are going to boil the potatoes and garlic until they are pierced with a fork and very soft.
  2. While your potatoes are boiling, take the milk and place the butter in the milk and melt. If you do not wish to use a microwave, you can do this in a pot on the stove. The microwave will of course be faster.
  3. Once the potatoes have finished boiling, drain them and place the potatoes back into the pot (or a bowl, your call). Add the warmed milk and butter to the potatoes and begin to mash. Be sure that the milk and butter are warm. It is not good for the potatoes if the milk is cold.
  4. Add salt, pepper, and the nutmeg. You can now serve right away! If you'd like, top with a heap more butter, parsley and go to town!
Ingredients for this recipe for creamy mashed potatoes
Chop your potatoes and peel your garlic. Place in a pot and then cover with salted water.
Place butter in the milk
Melt the butter in the milk. You want to make sure the milk is warm.
Strain the potatoes and garlic.
Pour the butter and milk over the potatoes and garlic.
Mash the potatoes and flavor with salt, pepper, and nutmeg. Top with more butter and parsley should you wish.
Serve up your potatoes.
Enjoy!

Why should you make this recipe for creamy mashed potatoes?

These are super simple to make and packed full of delicious flavor!

Looking for something similar?

Herb Potato Recipe click here
Roasted Potato Recipe click here

Tiramisu Sandwich Cookies

November 16, 2020

Recipe for Sandwich Cookies

I do not remember the first time I had Tiramisu but I do remember that it was love. One of the things I feared when I gave up gluten was that I would never again have Tiramisu. What a tragic life that would be! I have been contemplative of what cookies I plan to make for the holiday season. Some cookies are staples, however, I throw in new ones every year to spice it up! That is why this year Tiramisu cookies made the list. This recipe for sandwich cookies is relatively simple, and tasted like you are eating a delicious slice of Tiramisu. You will not regret making them. Let's get started.

What do you need for this recipe for sandwich cookies?

Not pictured above is cream cheese (for which you will need half a block or cup of it).

It is going to seem like quite a few ingredients, however, it really is not. This is for the cookies and the icing that will hold them together.

  1. 1 ½ cups all purpose flour (gluten free or regular, this is a 1:1 recipe!)
  2. ¼ cup cocoa powder - try to use a good quality cocoa powder (meaning the cocoa percentage is higher. If you cannot find one, any will do!)
  3. ½ teaspoon Baking Powder
  4. ¼ teaspoon Baking Soda
  5. ⅓ cup whole milk
  6. 1 tablespoon instant coffee or instant espresso powder
  7. 1 teaspoon vanilla extract
  8. 6 tablespoons unsalted butter
  9. ¾ cup white sugar
  10. 1 large egg
  11. 6 oz mascarpone cheese (room temperature)
  12. 4 oz cream cheese (room temperature)
  13. ⅓ cup powdered sugar

How do you make them?

They are easy to make!

  1. Heat your oven to 350°F and line your baking trays with parchment paper.
  2. Whisk the flour, cocoa powder, baking soda and powder in a bowl.
  3. Combine the milk and espresso powder along with the vanilla in a cup and stir until dissolved.
  4. In your stand mixer, beat the butter and granulated sugar in a large bowl with the speed at medium/high. Once it is creamy, add the egg. Beat for one minute more. Add the dry ingredients in one batch, followed by the wet ingredients. Repeat this until fully incorporated.
  5. Use a cookie scooper to evenly distribute the dough onto your cookie pans. Make sure that they are at least two inches apart. Dampen your fingers to help shape them (or don't if you prefer a more rustic cookie). Bake for 15 minutes. Check the cookies and make sure they spring bake when touched (that is the marker they are done). Let them remain on the tray for 5 minutes to cool, then transfer to a wire rack.
  6. While your cookies are cooling, make your icing. Beat the mascarpone cheese along with the icing, confectioners sugar. You should add a bit of vanilla here, a teaspoon should do it. If you would like more, you can go up to a tbsp.
  7. Fill the icing in a piping bag. Once the cookies are completely cool, you can pip the filling onto one of the cookies and then top with the other cookie. Should you wish, you can top the cookies with powdered sugar. Eat up!
Add your powdered ingredients and whisk them together.
Whisk together your instant coffee and milk.

Use a cookie scoop (the smaller ones) to scoop out the cookie dough and place on the parchment paper.
After making your cookies, make the icing. Once the cookies have cooled, fill them.
Top with powdered sugar (optional)

Why should you make this recipe for sandwich cookies?

They are easy, fun, delicious, and the perfect homage to tiramisu!

Looking for something similar?

Chocolate Crinkle Cookies click here
Double Chocolate Chip Cookies click here
Peppermint Mocha Cookies click here
Heath Bar Cookies click here

Gluten Free Thanksgiving Recipes

November 9, 2020

Chilean Sea Bass Recipe on a Thanksgiving table

Gluten Free Thanksgiving Recipes

Having guests for Thanksgiving that are gluten free can be really tricky, especially when you yourself, are not gluten free. Even when I visit my family, they often forget how stringent I have to be. It can be daunting to prepare a meal for other people, especially when food allergies are involved (or sensitivities). Luckily, I have compiled a list of tried and true recipes that will please any Thanksgiving guest, gluten free or not! Let's get started.

What types of Gluten Free Thanksgiving Recipes are there?

Side Dishes:

Brussels Sprouts

This recipe for Brussels Sprouts it the perfect combination of flavors. Topped with breadcrumbs, lemon juice, hot sauce, and lemon, it is the perfect side.

Herbed Potatoes

Herb Potatoes are a Polish take on the classic mashed potatoes. This recipe will soon be a new family favorite. Make them today!

Gluten Free Herb Potatoes on a platter

Potato Dumplings

This Gluten Free Dumplings Recipe is based on an old Polish recipe. Kluskies, a potato dumpling, are a delicious addition to any meal.

Butternut Squash Bisque

A quick and easy soup that you will want all year round. This Butternut Squash Bisque is few ingredients, short in time, and full of flavor.

A green bowl filled with butternut squash bisque topped with cilantro, pine nuts, pumpkin seeds, and feta.

Roasted Butternut Squash Salad

This Roasted Butternut Squash Salad is a quick and easy side dish. Easily made vegan, it can accommodate multiple guests!

Carrot Gravy

This gluten free gravy recipe is a quick, simple, and delicious recipe. Perfect for any holiday or family gathering. Make it today!

Gluten Free Gravy Recipe in a pumpkin tin

Main Dish:

Chilean Sea Bass

This Chilean Sea Bass Recipe is 5 ingredients! Quick, easy, and packed full of flavor. A perfect centerpiece for any gathering. Make it today!

Chilean Sea Bass ingredients

Desserts:

Burnt Basque Cheesecake

Burnt Basque Cheesecake is a delicious, easy, and flavorful cake. A mix between cheesecake and flan, this recipe is not to be missed!

Gluten Free Burnt Basque Cheesecake on parchment paper

Raspberry Lemon Cheesecake Bars

Raspberry Lemon Cheesecake Bars are a quick, easy, and delicious treat. Sweet and tangy, as well as tart, they are the perfect dessert!

Gluten Free Raspberry Lemon Cheesecake Bars ingredients

Chilean Sea Bass

November 5, 2020

Chilean Sea Bass Recipe

Chilean Sea Bass ingredients

This is a winner, guys. I wish I could take credit for this recipe because it is that delicious, but I cannot. It was introduced to me from my mother-in-law who had it introduced to her via her sister, who had a similar recipe in a restaurant. It is no surprise that they would make this and sell it in a restaurant because it is THAT GOOD. Chilean Sea Bass is an expensive fish. We typically only have it 2 or 3x per year (all holidays). As we do not eat meat (me sometimes, Josh never), this is our main course. It is so worth it, though. It is meaty, tender, and have I mentioned delicious?

What do you need for this Chilean sea bass recipe?

This recipe is few ingredients! Let me also preface this by telling you that I hate mayonnaise. The consistency, the color, the smell. I find it mostly revolting. Except on this fish. I was stunned when I was told that mayo was on this, and honestly, I have only forgiven mayo for being what it is because of this recipe.

  1. Chilean Sea Bass
  2. Pistachios - we get the ones in their shells. Do not get them spiced with anything weird. Roasted with salt is fine, everything else is not.
  3. Mayo
  4. Salt and pepper for spicing

How do you make it?

It is so simple! Bless this recipe. I promise that you will be singings its praises as soon as you try it.

  1. If you purchase a frozen chilean sea bass then make sure to take it out of the freezer and place in the fridge overnight.
  2. Set your oven to 425°F
  3. Place a piece of parchment paper on a baking tray.
  4. Wipe down the fish. Make sure that they are dry.
  5. Once your fish are on the tray, sprinkle with salt and pepper.
  6. Take your pistachios and use a mortar and pestle to grind them up!
  7. Cover the fish in mayo. You do not want to drench it. Just make sure that there is enough to coat it so that the pistachios will stick to the fish.
  8. Coat the fish with the pistachios.
  9. Bake the fish for 22-25 minutes.
  10. Serve immediately!

Why should you make this Chilean Sea Bass Recipe?

As you can see above, it is so simple in its ingredients! It is quick, ready in less than 30 minutes, and packed with so much flavor. It pairs well with just about anything and you (or your guests) will be gushing about this recipe for years to come.

Looking for something similar?

Linguine Con Vongole recipe click here
Gluten Free Beer Steamed Mussels click here
Cajun Catfish click here

Raspberry Lemon Cheesecake Bars

November 3, 2020

Gluten Free Raspberry Lemon Cheesecake Bars ingredients

Raspberry Lemon Cheesecake
This quick and easy recipe for Raspberry Lemon Cheesecake Bars is a crowd pleaser! With a total prep time of under 15 minutes, these are not to be missed!

It is no secret on this blog that in my household we are fans of cheesecake. We have been on a cheesecake kick as of late. Recently, I made my Burnt Basque Cheesecake, and fell in love. However, I wanted to make something that would be quick, simple, and look festive for the upcoming holiday season. We are in November, folks, aka, I am in Winter Holiday mode. Michael Bublé has defrosted, and the Christmas music has begun in my household. So, what do you need for this recipe?

What do you need for these raspberry lemon cheesecake bars?

1. 1 cup gluten free graham crackers (or use regular graham crackers for non-gluten free)
2. 2 packages of cream cheese – I used low fat
3. 8 tablespoon (½ cup) unsalted butter – melted
4. ¾ cup white sugar
5. ¼ cup lemon juice (freshly squeezed is best but not necessary)
6. 3 eggs 
7. Raspberries! Either 2 smaller containers (one you will make into a puree) the other you will use in your cheesecake. Or, one larger container that you will divide in half.
8. 1 tablespoon vanilla

How do you make them?

As I like my recipes to be, this is another easy one!

  1. Preheat your oven to 350°F
  2. Take a small pot and your raspberries (either 1 small container, or half of a larger container) and place them in the pot. You are going to place it on high heat. The goal here is to make it warm enough that your raspberries will pop. You want to create a thick consistency (almost like jam). This should take between 10-20 minutes. Once you have that perfect consistency, take a sieve, and pour the mixture in it. You want to get all of the juice and none of the seeds. This is going to go into your batter and amp up the tartness of the overall dessert. Set aside and allow to cool.
  3. Take your butter and melt it either in a pot on the stove, and or in the microwave.
  4. Place your gluten free graham crackers (or regular, this is a 1:1 recipe) in a food processor. As you run the food processor, drizzle in your butter. It will come together and be easier to use.
  5. Line your 8x8 baking tray with parchment paper.
  6. Place the graham crackers inside and push down to form a crust.
  7. Place the crust in the freezer while you work on the filling.
  8. Take your cream cheese and place in your mixing bowl. Use your paddle attachment.
  9. Once the cream cheese as been beaten and is fluffy, add your sugar. You will cream these together for about 5 minutes. Scrape down the sides of your bowl to make sure that no cream cheese remains on the side. You want everything to be incorporated.
  10. Add your eggs one at a time. Make sure that they are mixed in well before added the next one.
  11. You can now add the lemon juice, and vanilla. Beat for 30 more seconds.
  12. Pour the batter on top of your crust.
  13. Take your raspberry jam and place it in dollops on the cheesecake batter. You should swirl it around. You will not see it once it has baked, but, it is going to amplify the raspberry flavor in your bars.
  14. Cover your cheesecake with as many raspberries as you like.
  15. Place in the oven and bake for 50 minutes. After 50 minutes, turn your oven off, open the door, and allow the cheesecake to sit in there for 30 more minutes.
  16. Once it has sat for 30 minutes, place in the fridge (or freezer) for at least 4 hours.
  17. Serve once they have had time to properly chill!

Why should you make these raspberry lemon cheesecake bars?

While there are a lot of steps listed, it is actually a very simple recipe to make! They are a fun, easy, and delicious dessert. I love the tang of the lemon and the tart of the raspberries, along with the sweetness. It pairs together so nicely and brings you the perfect dessert. Also, how pretty is the pop of red? I mean, come on!

Looking for something similar?

No Bake Heath Bar Cheesecake click here
Lemon Cheesecake Bars click here
Burnt Basque Cheesecake click here

Classic Basque Cheesecake

October 28, 2020

Gluten Free Burnt Basque Cheesecake on parchment paper

Welcome to a delightful culinary journey into the world of Basque cuisine! Today, we're diving into the mouthwatering realm of the Classic Basque Cheesecake, a dessert that has taken the culinary world by storm. If you're wondering what exactly is Basque cheesecake, its origins, and how to make this delectable treat, you've come to the right place. Get ready to discover the rich history and irresistible flavors of this iconic dessert.

I love a classic Basque cheesecake aka a burnt Basque Cheesecake. I have a lemon, dulce de leche, and blueberry version of it on this site. Let's dive into the history of this cake and what exactly it is and makes it different.

FAQ

What is Basque cheesecake?

Basque cheesecake is a delightful twist on the traditional cheesecake, known for its beautifully caramelized top and creamy, custard-like interior. Originating from the Basque region of Spain, particularly the city of San Sebastián, this dessert has gained immense popularity for its unique flavors and texture.

Basque cheesecake origin:

Legend has it that the creation of Basque cheesecake was a fortunate accident. A local chef in San Sebastián accidentally overcooked a traditional cheesecake, resulting in a delightful surprise. The burnt exterior and velvety interior became the foundation of what we now know as the Classic Basque Cheesecake. Since then, this iconic dessert has become a staple in Basque cuisine and has gained recognition worldwide.

Pros to a Classic Basque Cheesecake vs regular Cheeecake

This is a great make-ahead dessert: Burnt Basque Cheesecake tastes even better when chilled, making it an ideal make-ahead dessert. You can prepare it a day in advance, allowing the flavors to meld and intensify, and simply serve it straight from the fridge.

No Crust Required: Burnt Basque Cheesecake is typically made without a crust, saving you time and effort. The focus is on the luscious interior and the caramelized top, which provide ample flavor and satisfaction on their own.

Gluten-Free Option: Traditional Burnt Basque Cheesecake recipes typically use a small amount of flour to stabilize the texture. However, it can easily be adapted to be gluten-free by using a gluten-free flour substitute or omitting the flour altogether. This makes it accessible to individuals with dietary restrictions or preferences.

Foolproof Baking: One of the joys of making Burnt Basque Cheesecake is its forgiving nature. It is designed to have a burnt and cracked exterior, so you don't need to worry about achieving a perfectly smooth surface or preventing cracks. Embrace its imperfections and enjoy the unique visual appeal.

  1. Unique Appearance: Unlike traditional cheesecakes with a smooth, uniform surface, Burnt Basque Cheesecake is intentionally baked until the top turns beautifully caramelized and burnt. Its rustic, cracked appearance adds to its charm and character.
  2. Creamy and Custard-like Texture: The interior of Burnt Basque Cheesecake is incredibly creamy and indulgent, often described as having a custard-like consistency. It is dense, yet delightfully light at the same time.

Versatile Flavor Profile: While the classic version of Burnt Basque Cheesecake has a rich, vanilla-infused taste, there are endless opportunities for flavor variations. You can experiment with different extracts, citrus zests, chocolate, or even incorporate other ingredients like matcha or fruit puree for a personalized twist.

San Sebastián cheesecake recipe aka Classic Basque Cheesecake

To make the Classic Basque Cheesecake, you will need:
1. 24 oz Cream Cheese (room temperature) this is 3 normal size packets of cream cheese
2. 1 ¼ cup Heavy Whipping Cream
3. 1 cup Sugar
4. 1 ½ teaspoon Vanilla
5. 4 Eggs
6. ¼ Gluten Free Flour, I use King Arthur Gluten Free 1:1 flour, regular flour is fine too if you do not need this to be gluten free.

What Equipment do you need?

  1. Mixmaster (or hand mixer)
  2. 8 inch spring form pan
  3. Cooking Spray
  4. Parchment Paper
  5. Spatula

How do you make it?

I love how easy this recipe is to make!

  1. Set your oven to 400°F
  2. Take your room temperature cream cheese and place in the bowl of your mixmaster or a bowl that you can use with a hand-mixer.
  3. Beat the cream cheese on medium for a few minutes, it will become very light and fluffy.
  4. Once you have done this, add your sugar. Continue to beat for 4-5 minutes on a medium high.
  5. Scrape down the side of your bowl to make sure everything has been incorporated on the sides of the bowl.
  6. Add your eggs now (one at a time) until each is fully mixed in.
  7. Once the eggs are all in, add the vanilla.
  8. Now is the time to add your cream. Mix for one minute.
  9. You are going to mix in the flour by hand. Add the flour to the bowl and use a spatula to blend it all together.
  10. Spray your springform pan with a cooking spray (I use Pam), and take 2 pieces of parchment paper. You want the entirety of the bottom and sides to be covered. If it is crunchy in places, that is okay! It will give more character to your cake.
  11. Pour your batter into the pan and place in the oven for 1 hour.
  12. Remove at the 1 hour mark; your cake should be jiggly in the middle and have a nice browned color on top. If it has cracks, all the better!
  13. Allow the cake to cool in the pan on the counter for 1 hour.
  14. After your one hour, transfer the cake to the fridge for a second hour to chill.
  15. After sitting in the fridge for an hour, you are free to slice up your cake, serve, and dive in!
Ingredients for Classic Basque Cheesecake
Whip the softened cream cheese, and mix with the cream. Add the vanilla, and sugar.
Fold in the flour
Grease and line your springform pan. Fill with the classic Basque cheesecake mixture
Bake and allow to cook on the counter until it is room temperature
place in the fridge for at least one hour
when ready to serve, remove from fridge, pull down the parchment paper
slice and serve

Mini Basque Cheesecakes

For those who love individual portions and a charming presentation, Mini Basque Cheesecakes are an excellent option. By following the same recipe, you can adapt the dessert into smaller sizes, creating adorable treats that offer the same creamy indulgence. Mini Basque Cheesecakes are perfect for dinner parties, gatherings, or simply when you want to savor a bite-sized delight.

Notes for Classic Basque Cheesecake + Thoughts

So why not try your hand at making this burnt Basque Cheesecake? It's incredibly easy to prepare, and you don't need to worry about a crust or the risk of cracking. The result is a delectable dessert with a unique flavor profile and a stunning appearance. Give it a try and experience the magic of Basque cuisine in your own kitchen.

Looking for more cheesecake recipes? Check out our Cheesecake Bars recipe or indulge in the deliciousness of Heath Bar No Bake Cheesecake. There's no shortage of sweet treats to explore and satisfy your dessert cravings.

Browse More Cheesecake Recipes

  • Lemon Burnt Basque Cheesecake Recipe with one piece tilted sideways on parchment paper
    Lemon Burnt Basque Cheesecake Recipe
  • Dulce de Leche Cheesecake
  • Blueberry Burnt Basque Cheesecake Recipe
    Blueberry Burnt Basque Cheesecake
  • Gluten Free Raspberry Lemon Cheesecake Bars ingredients
    Raspberry Lemon Cheesecake Bars


LEAVE A RATING AND REVIEW!

Did you love the recipe? If you did, let me know! And let others know too by leaving a comment and star rating. Reviews are incredibly useful in helping other people find my site and make my recipes. Thank you so much!

Laura 

Kluskies

October 26, 2020

Gluten Free Dumplings Recipe

I do not come from a large family. My immediate family is 4 and our family gatherings around the holidays usually averaged around 12 people (and a dog). Despite this, there was always enough food for 30. It never mattered to me how much was made or what was potentially new that year, I would always strategically sit myself in front of these dumplings. Kluskies, a Polish potato dumpling (according to my grandmother) are a delicious, easy, and savory treat. They are very rich and honestly, they are one of my three favorite foods in the world.

What do you need for this Gluten Free Dumplings Recipe?

Like a lot of my recipes, the quantities will often depend on how much you plan on making. There is also an option here that you can make them with gluten, or without, and you can use a "premade" version (to save time), or, you can make the dumplings yourself.

  • If you wish to make them yourself, you will use a recipe akin to making gnocchi.
  • 1 ½ pounds of potato
  • 1 ½ cups of gluten free (or regular) flour

If you do not wish to make them yourself, simply purchase some premade gnocchi. My favorite for gluten free can be found here.

  1. Dumplings (however many you make or buy)
  2. ½ cup - 1 cup of butter (salted)
  3. 1 cup Breadcrumbs (if using gluten free, I like the Schar gluten free breadcrumbs). If you wish to make them yourself, toast the bread a bit and then blitz it in your food processor.
  4. Salt to taste

How do you make them?

If you are making your own dumplings:

  1. Boil your potatoes until they are nice and soft.
  2. Flour your surface and drain the potatoes once they are cooked through.
  3. Mix together your potatoes and flour. It will come together as if it is a dough. Roll it out into logs.
  4. Slice it up so that the dumplings are around the size of gnocchi.
  5. Place a pot of water on the stove, add salt.
  6. Bring to boil, add your dumplings. Once they float, they are finished. Set them aside.

If you are using premade:

  1. Boil your dumplings according to the instructions.
  2. While they are boiling, add your butter to a pan.
  3. Allow the butter to melt and then add your breadcrumbs into the pan.
  4. Once your dumplings are floating, transfer them into your pan.
  5. Make sure to coat all of the dumplings with the butter and breadcrumbs. Salt to season and taste along the way.
  6. Serve when they are a nice golden brown.

Why should you make this gluten free dumplings recipe?

They are incredibly rich and delicious. The perfect starch and carb for a holiday meal!

Looking for something similar?

For other potato recipes, see the following:

For Roast Potatoes recipe click here
For Herb Potatoes recipe click here

Carrot Gravy

October 23, 2020

Gluten Free Gravy Recipe in a pumpkin tin

Gluten Free Gravy Recipe

Gluten free gravy can be an issue for people that eat gluten free around the holidays. As you sit and gather around the table with your family (likely virtually this year), you watch everyone else adorn their plate with stuffing and gravy. This carrot gravy has been a family favorite of ours and a grandma classic recipe for my lifetime. Once I had to give up gluten, she made sure that I had a gluten free version. This recipe will work as a 1:1, so, if you do not need to be GF then you can also enjoy!

What do you need for this gluten free gravy recipe?

Not a lot!

  1. Carrots - I am able to buy sliced carrots in the US, but, if you cannot, you just need to buy regular carrots. You can decide to use as much as you want. I use about 2-3 cups.
  2. Water - again, this will depend on how much gravy you want to make. I usually add 3-5 cups of water, depending.
  3. Sugar- to taste
  4. 4-5 tablespoon gluten free flour (or regular flour)
  5. 4 tablespoon butter
  6. Chicken Base or Vegetable Base ( I use Better than Bouillon)

How do you make it?

  1. Fill a pot with the water and your carrots. You are going to boil this until you can pierce the carrots and they are soft.
  2. In another pot, melt your butter. Once the butter is melted, add your flour. You are going to whisk this together so that you form a roux. This will be your thickening agent in your gravy.
  3. Add your roux to the water. Make sure that it all dissolves in the water and begin stirring. Your gravy should begin to thicken (leave your pot on high or medium high heat). If you find that it is not thickening to the level that you would like, make another roux and add it in. Just repeat the process.
  4. This is when you will add your chicken or vegetable base. I like to add one tablespoon at a time, and then taste it. Tasting along the way is the best way to see if it is the flavor that you like.
  5. I like to add a tiny bit of sugar once I have hit the level of flavor that I want. It tames the saltiness a bit and just levels everything out nicely.
  6. You can serve this immediately, or, place in a bowl and cover the top with plastic wrap to prevent it from growing a skin.
  7. To serve later, just warm up in the microwave!

Why should you make this gluten free gravy recipe?

It is a really delicious recipe and it will be such a treat for those at your table who have become accustom to never having gravy again. A good vegetarian option as well, it will accommodate many of your guests 🙂

Looking for something similar?

This gravy pairs well with any sort of meat dish, fish, and of course goes great with potatoes.

For Cajun Catfish recipe click here
For Herb Potatoes recipe click here

Easy Polish Potatoes: Best Potato Recipe with Dill

October 21, 2020

If you are looking for the perfect side dish or holiday recipe, look no further! This recipe for Polish Potatoes is quick, easy, and beyond delicious. Ready in under 30 minutes, it is the perfect accompaniment to any meal. Make them today.

Easy Polish Potatoes: Best Potato Recipe with Dill

My grandmother was my gateway into Polish food. While she was born in Canada, both her parents were born in Poland and then immigrated. Potatoes are a staple in Polish cuisine. Kluski (kluski śląskie) are one of my absolute favorite foods which are Polish potato dumplings, there are polish potato pancakes, and potato filled pierogi (sometimes known as pierogi ruskie). Dill and potatoes are a staple in Polish dishes and in many polish homes. This potato recipe is for herbed potatoes and is a potato mixer of fresh herbs, butter, potatoes, and salt. It is the perfect side dish to any meal. You'll have these potatoes as one of your favorite Polish recipes in no time. This is a family recipe that I am happy to share with you. 

[feast_advanced_jump_to]

Why you'll love these polish potatoes:

They do not take a long time to cook! They are a great way to use the leftover herbs and potatoes in your fridge / house. You do not need exact measurements for the amount of herbs or potatoes that you use. You can add more of one if you prefer one herb or another. It is the perfect side dish for a holiday like Christmas or Christmas eve or just a regular old Tuesday. This is one of my favorite ways to eat potatoes and it is a different way than your traditional creamy mashed potatoes. 

Easy Polish Potatoes: Best Potato Recipe with Dill

What equipment do you need:

Large bowl
Large Pot
Slotted Spoon or colander 

What type of potatoes should I use?

There are so many kinds of potatoes! Baby potatoes, russet potatoes, butter potatoes, Yukon golds. The list goes on and on. You can use any type of potatoes that you would like for this recipe however, I use red potatoes and butter potatoes more often than not. However, you can use whatever type of potatoes you want for this potato dish. 

What herbs go with potatoes?

The nice thing is, is that so many do! It depends really on what you are wanting to make that goes with the potatoes, however, in this recipe we use dill, parsley, and green onion. The beauty of that combination is that they pair amazingly with any protein. It will help enhance the flavor of whatever you eat it with. Plus, the freshness from those three herbs is basically unbeatable.

Boil or bake? Do you boil potatoes before baking them?

If you are wanting a traditionally crispy roasted herb potato then yes, I would say you boil before you bake them. However in this recipe, it is more of a mash. These are creamy potatoes, and depending on how you want them, you can leave a bit of chunk in them for some extra bite!

Polish potatoes in an air fryer?

If you wanted to again have those crispy potatoes, you could definitely make them in an air fryer, but, you wouldn't want to do that for a mashed potato. Especially when they come together super quickly and can be made in 1 pot.

Troubleshooting: Should you soak potatoes for mashed potatoes?

No! You should just wash them lightly.

Soaking them will literally wash off starch, and wash off enzymes that break down pectin (a natural glue that holds them together). Soaking the potatoes for too long, or cutting them too small before boiling will remove all the enzymes, leaving too much glue that can't be broken down. You can read more about that here. Starchy potatoes are the best potatoes.

Tips, tricks, and alterations:

If you want to make sure that your potatoes have zero lumps in them, you can toss them in a food processor to make them incredibly smooth. I prefer these potatoes have chunks in them, but, both are absolutely delicious.

If you want to add richness to the recipe, you can add a bit of sour cream to the potatoes (however, I do not feel that they need it due to the butter). 

What do you need for your herb potatoes?

Easy Polish Potatoes: Best Potato Recipe with Dill ingredients

Another reason these potatoes are so great is that it is not heavy on ingredients.

  1. Dill
  2. Parsley
  3. Green Onion
  4. Red Skin Potatoes (or a different type of potato if you do not like red skin potatoes)
  5. Butter (for a richer potato, use something like Kerrygold Irish butter)
  6. Salt (to your taste)

How do you make Polish potatoes?

Take the potatoes and cut them up into pieces. Do not make them too small. If they are too small, when you boil them, they will turn into mush. The consistency of these potatoes when they are finished is that they will be a chunky mash. Place the raw potatoes into a large pot with salted water.
Cover the potatoes with water and place on the stove on a high heat. You are going to boil the potatoes until all of the potatoes are soft enough to pierce with a fork and are cooked all the way through.
While the potatoes are boiling, chop your herbs and place into a bowl. I used half a bunch of dill, a full pack of green onions, and same with parsley. This is really up to you, though.
Once the potatoes are fully boiled, grab a strainer and drain the water from the pot.
You are going to want to add everything into a bowl while the potatoes are warm. It will allow the butter to melt and incorporate more seamlessly, as well as get the smoother consistency of the potatoes while some chunkier pieces remain. I like a chunky potato mixture but if you want smooth, see my note on a food processor in the post. 
Mix everything together in a bowl. While you are stirring everything together, begin to season with salt. Add enough salt until you have seasoned them to your preference.
When everything is fully mixed it, place them into a bowl or a serving platter. Top with a bit more butter and eat up!

Just as a side note- I am sure you can use some sort of vegan butter as a supplement here for real butter. I myself have not tried this, but, I am sure it would turn out well! For frame of reference, I used 2 sticks of butter for an entire bag of red potatoes.

chopped potatoes on a cutting board
Depending on the size of potatoes, half or quarter them and place them in a pot
potatoes with water in a pot
Cover the potatoes with water and boil until they are soft enough to mash
potatoes and herbs in a glass bowl
Chop the herbs, melt the butter, and place them in a bowl
Easy Polish Potatoes: Best Potato Recipe with Dill
Thoroughly mix and add salt to your taste
Easy Polish Potatoes: Best Potato Recipe with Dill
Serve your potatoes immediately!

Why should you make these Polish potatoes?

These potatoes are a staple in my family. The legacy my grandmother left behind is so visible in our food and in our family gatherings. Since being married, they have also become a staple in our family. We have them every Canadian and American Thanksgiving, as well as Christmas. I am sure they will become a staple for your family, too.

How do I store these Polish potatoes?

This easy recipe yields leftovers! Leftover mashed potatoes are so good the next day and can be stored in the fridge in an airtight container in the fridge for 3-5 days.  

If you would like a few different ways to use your leftovers, some great options are to make the potatoes into small pancakes and fry them in a frying pan until they are golden brown and crispy. If you would like to make homemade pierogies then you can use them as Polish pierogi filling. If you want to make a cheese pierogi recipe, simply add some cheese to the leftover potatoes and use it at a filling for the pierogies. 

LEAVE A RATING AND REVIEW!

Did you love this recipe? If you did, let me know! And let others know too by leaving a comment and star rating. Reviews are incredibly useful in helping other people find my site and make my recipes. Thank you so much!
Laura 

Looking for other recipes?

  • Gluten-Free Sourdough Bread
  • Gluten-Free Sourdough Starter
  • Miso Butter Onions: Yotam Ottolenghi's Flavor Onions!
  • image
    Gluten Free Potato Recipes: Easy Gluten-Free Food


Lemon Loaf

September 28, 2020

Gluten Free Lemon Loaf Cake

Lemon Loaf Cake

I love lemons. I love them. I love that they are naturally sour but can be used to make the sweetest most delicious things, such as lemon curd, lemon meringue pie, and this lemon loaf cake! This recipe is a play on a recipe from Molly Yeh's second cookbook, Yogurt. The thing I love about this recipe is that it utilizes yogurt. Gluten free baking is so finicky, and honestly one of the best things I learned is that if you can add yogurt to a recipe, do it. It will undoubtedly make the recipe fluffier, and just super moist (I know many people hate this word, but it is the truth). So, I give you the recipe for this lemon loaf cake.

What will you need for this lemon loaf cake?

This is a cake not too high in ingredients but you will need a few. To make your cake, you will need the following:

  1. 1 ½ cups of gluten free flour (or regular flour, this is a 1:1 recipe)
  2. ½ cup almond flour
  3. 1 teaspoon baking powder
  4. ¾ teaspoon baking soda
  5. 1 tablespoon lemon zest
  6. ¼ cup lemon juice
  7. ¾ cup extra virgin olive oil
  8. ¾ cup Greek yogurt
  9. 1 ¼ cup sugar
  10. 2 large eggs

For your glaze:

  1. 1 cup powdered sugar
  2. 2-3 tablespoon lemon juice
  3. ¼ teaspoon vanilla extract

How do you make your lemon loaf cake?

  1. Preheat your oven to 350°F
  2. Grease a loaf pan and place parchment paper inside of it. This will allow your loaf to rise properly and then be removed once it has baked.
  3. In a medium sized bowl, whisk together your flour, almond meal, baking powder, baking soda, and lemon zest .
  4. In a separate bowl, whisk together the yogurt and lemon juice until it is very smooth.
  5. In a large bowl whisk together the oil and sugar until combined. Once properly mixed together, add your eggs one at a time and mix them together.
  6. Add the dry mixture and the yogurt mixture in alternating batches (3 in total).
  7. Pour the batter into the loaf tin and place in the oven.
  8. Begin to check for doneness at 55 minutes. You will know it is done once a toothpick is inserted in the middle of the loaf and it comes out clean.
  9. Let the loaf cool in the tin for 10 minutes. Afterwards, use the parchment paper to lift it from the tin and place on a wire rack for it to cool completely.
  10. Meanwhile, you can make your glaze. Mix together your powdered sugar and your lemon juice. Add your vanilla and continue to mix. If you find it too thick, you can add water, milk, and or more lemon juice.
  11. Once your loaf is cool, you can cover your loaf in the glaze and serve it up!

Why should you make this lemon loaf cake?

The lemon loaf cake is so sweet, spongey, and everyone I have served it to absolutely loves it. If you like lemon, and if you love lemon, this is the recipe to make. I promise it will not dissappoint. Enjoy!
-L

Looking for something similar?

Carrot Cake recipe here
Harry Potter cake recipe here
Salvadorian Breakfast Cakes recipe here
Orange Bundt Cake recipe here
Heath Bar Cheesecake recipe here

Soft Shell Crab Sandwich

September 21, 2020

Gluten Free Soft Shell Crab Sandwich

Soft Shell Crab Sandwich

So much has happened in life, guys! First and foremost, we moved to Maryland. If you are thinking "moving during a pandemic, what is that like?" I can tell you that the answer is pretty crazy. It was really stressful to have people visit our home. We would clean like crazy and then get everything sorted before and after anyone entered. We had been wanting to move to Maryland for a long time, and honestly, our dream house kind of just happened. It is a magical 200 year old dream house, so, I call this soft shell crab sandwich our welcome to Maryland sandwich.

What is life like here?

Much slower paced than in Richmond. We have more land and therefore there is more distance between us and our neighbors. We moved while everything was still in bloom (in the middle of July) and everything was just so beautiful.

I love soft shell crab. There is a sushi restaurant in Charlottesville, Virginia named Ten that makes really delicious gluten free soft shell crab rolls. In my mind, crabs are basically the state dish of Maryland so it only made sense to make a gluten free soft shell crab sandwich once we were all settled in.

What will you need for your soft shell crab sandwich?

Not a lot, partially why I love this recipe!

  1. Soft Shell crabs (this recipe is ideally for 4)
  2. Buns! I used Schar gluten free hamburger buns and they worked nicely.
  3. Coleslaw or cabbage that you will put as much tartar sauce on as you like
  4. 1 slice heirloom tomato per sandwich
  5. 3 cups rice flour
  6. 2 cups water
  7. Canola oil for frying
  8. Hot sauce (optional)

How do you make them?

Again, so easy!

  1. In a bowl mix together your slaw with tartar sauce. It is kind of up to you how much you want to use. I did just enough that when I stirred everything together, all the pieces were lightly coated.
  2. Set aside your bowl with the slaw.
  3. Heat up your oil in a dutch oven.
  4. In one bowl, have 1 cup of the rice flour. In another, mix the 2 remaining cups of rice flour and water together to make your batter. If you are going to add hot sauce, now is the time to do it (in the batter).
  5. Dip your crab into the flour, and then into the batter. Let a bit drip off, and then place in the oil once the oil is 375°F. You can fry two at a time. Fry for about 3 minutes per side, or, until they are nice and golden brown.
  6. Slice up your tomato while they are frying.
  7. On the base of your bun, add the slaw, then once the crab is done, place it on top of the slaw. Then your tomato slice, and your bun on top! Tada!
  8. Serve

Why should you make this soft shell crab sandwich?

For one, it is really easy, delicious, and gives those of us who have to eat gluten free an option to have tempura. it is a fun sandwich to have even if you have not moved to Maryland.

Looking for something similar?

Other fish based recipes:

Cajun Catfish click here
Linguine and Clams click here
Beer Steamed Mussels click here

Roasted Potatoes

September 14, 2020

Roasted Potatoes Recipe on a plate

Roasted Potatoes Recipe

Welcome to my favorite roasted potatoes recipe of all time. One morning while we were decided what to have for breakfast, I decided to become experimental with the spices I put on my potatoes. I rummaged through my cabinet and found what I wanted to try. Za'atar and harissa. Occasionally, harissa can be found in a paste but I had the actual spice. So, here is my Za'atar / Harissa roasted potatoes recipe.

What will you need for this roasted potatoes recipe?

What I love about this recipe is that you can determine how much of each thing you use!

  1. Potatoes
  2. Harissa (the spice)
  3. Za'atar
  4. Hot Sauce (I use Franks- it is gluten free)
  5. Parmesan cheese

See, so simple in its ingredients but so delicious in its flavor.

How do you make them?

I have made these potatoes for countless people and they all agree that they are delicious. I had a friend with a mouthful go "Ohhh yeahhh" when he took his first bite. I showed another friend how to make them and she was surprised how easy they are.

  1. Set your oven to 400°F
  2. Slice your potatoes pretty thin, the thicker they are, the longer they will have to be in the oven.
  3. Drizzle olive oil on the potatoes. It is going to help your potatoes crisp up and have the spices stick to them.
  4. It does not matter which order you do these in but decide how much harissa and how much za'tar on the potatoes. Sprinkle it on the potatoes.
  5. Rustle the potatoes around on the tray to make sure that each of the potato slices has spice and olive oil on it.
  6. Place the potatoes in the oven and bake for 30 minutes.
  7. Once you remove them from the oven, decide how much hot sauce and parmesan you want and place on top.
  8. Serve immediately!
Roasted Potatoes Recipe on a tray

Why should you make this roasted potato recipe?

As you can see, these potatoes are just the prettiest. The flavor profiles that you get are so packed with umami that you will just want to continue shoving them into your mouth. Be sure to make lots, they go quickly!

Looking for something similar?

These are a great side dish that would go well with the following dishes

Shakshuka recipe click here
Quiche click here
Lentils & Eggplant click here

Cajun Catfish

September 7, 2020

Cajun Catfish Recipe on a plate

Recipe for Cajun Catfish

Initially when I made my migration from the Canadian depths of winter to Virginia, I wanted to learn more about Southern cuisine. I am by no means an expert and really only touched the surface of my learning but a few solid recipes I taught myself were shrimp and grits, and this cajun catfish. What I love about this recipe is that it is so simple, easy, the fish is flakey, delicious, and gets such a nice crisp because you broil it!

What do you need?

Another reason I love this recipe is because it is so simple in its ingredients. Once you have your spice mix made, it is only three ingredients. First, let us look at what we need for our spice mix:

  1. 2 ½ tablespoons sweet paprika.
  2. 2 tablespoons salt.
  3. 2 tablespoons garlic powder.
  4. 1 tablespoon black pepper.
  5. 1 tablespoon onion powder.
  6. 1 tablespoon cayenne pepper.
  7. 3 tablespoon dried leaf oregano.

Now for your other ingredients:

  1. Catfish filets
  2. Olive Oil to drizzle
  3. Enough spice to rub on both sides of your fish

How do you make it?

Again, so easy!

  1. Mix your spices together in a container. The best thing is that it will keep so you can use it again! Shake them all up and make sure it is really mixed well.
  2. Pat down your catfish filets with paper towel to make sure that the filets aren't too wet. You want them to be dry.
  3. Drizzle them with olive oil and make sure they are coated, but, aren't drenched.
  4. Pat your spices on and make sure they are covered on both sides.
  5. Now, set your broiler to high.
  6. Place your filets on some aluminum foil and place into the oven. Bake for 7 minutes.
  7. Remove from the oven, flip over. Bake for another 7 minutes.
  8. Take out of the oven and serve it up!

Why should you make this cajun catfish recipe?

It has such a nice flavor! If you wanted to try changing it up a bit, you could always use smoked paprika instead. It is a crowd pleaser if ever I knew one, and honestly, just so delicious. It is the perfect stepping stone for learning southern cuisine.

Looking for something similar?

Beer Steamed Mussels click here
Linguine and clams click here

Peach Frangipane Tart

September 3, 2020

Gluten Free Peach Frangipane Tart on a plate

Peach Frangipane Tart Recipe

So excitingly, I have been visiting our local farmers market (where I will be selling baked goods!). Each Saturday, I put on my mask, bring my reusable bags, and see what is available. I love peaches and whenever peach season comes along, I get giddy. The last fruit tarts I have made have been frangipane tarts and I wanted to continue that tradition. I give you my peach frangipane tart recipe.

What do you need?

You will need different ingredients for your pie crust, frangipane, and the peaches.

For your crust:

  1. 8 tablespoons (½ cup) cold butter (cubed)
  2. 2 ½ tablespoon psyllium husk
  3. 4 tablespoon tapioca starch
  4. 1 cup gluten free flour
  5. 3-5 tablespoon ice water

For the filling:

1. ½ cup (1 stick) unsalted butter, room temperature
2. ½ cup sugar
3. 1 egg
4. 1 cup almond flour (almond meal is the same- works just as fine)
5. 1 teaspoon almond extract

For your peaches:

Cover the sliced peaches with sugar and cinnamon. You can decide how much.

How do you make your frangipane tart?

For your peaches:
1. Slice up your peaches
2. Cover them with sugar and cinnamon.
3. Let them sit in a bowl for a while so you can allow a lot of the liquids to drain so when they top the tart, it won't seep to the bottom and give you a soggy bottom!

For your crust:
1. Place all of the dry ingredients in your food processor.
2. Pulse a few times.
3. Add the butter and pulse until it is the size of peas.
4. Slowly drizzle in the water one tablespoon at a time as you pulse so that the crust will come together.
5. Cover your dough with eco-friendly wrap and place in the fridge for 1.5 hours

Putting it all together:

  1. Set your oven to 350 °F
  2. Take your dough from the fridge and roll it out between two pieces of parchment paper
  3. Fill the tart with the dough. If some if hanging over the side, use a rolling pin to roll over the side of the tart. It will trim the edges for you! It is a handy trick that you will thank me for later.
  4. Place your tart back in the fridge while you make your frangipane.
  5. Add the butter and sugar in your mixing bowl or stand mixer. Cream them together.
  6. Add your egg and mix until fully incorporated.
  7. Place the almond flour and almond extract in the bowl and combine.
  8. Remove your tart from the fridge and fill it with the frangipane and smooth it out.
  9. Take your peaches and place them on the tart in the design you want. Make sure they aren't too wet. Remember, no soggy bottom.
  10. Place your tart in the oven. Depending on the temperature of your oven, bake for 50 - 60 minutes. You can begin to check on it at 50 minutes.
  11. Remove from the oven when done and let it sit in the pan for a bit to make sure that it doesn't crack when you remove it.
  12. Serve it up!
Gluten Free Peach Frangipane Tart in a tart

Why should you make this peach frangipane tart?

There are few things that taste better than a peach that is in season. Top it off with cinnamon sugar, and add the sweetness from the frangipane, oh man. You are in Great British Bake Off Heaven! It is a perfect dessert, and honest, not too hard to put together. Your guests will all love it. That is, if you have any left to share with them!

Looking for something similar?

Pear and Frangipane Tart recipe here
Rhubarb tart recipe here
Treacle Tart recipe here

Gluten Free Tomato Sauce

August 31, 2020

Gluten Free Tomato Sauce

When the topic of favorite cuisine in the world comes up it is always a hard game for me. I love Mexican and Indian food so much, however, Italian food wins it for me every single time. Pretty sure in a past life I was some Italian who just ate themselves to death who know just dreams of pasta on a daily basis. When I first heard of Marcella Hazan's famous cookbook, the recipe that everyone spoke of was her tomato sauce. I love her sauce, dearly, however I have adapted it some. Here is my recipe for gluten free tomato sauce:

What will you need for your gluten free tomato sauce?

This is SUCH a simple recipe that you are going to be so happy. Here is what you will need:

  1. 1 24 oz can of San Marzano tomatoes (I like them whole)
  2. 8 tablespoons butter
  3. ½ cup of cream- I used light cream but you can use either light or heavy cream
  4. 1 vidalia onion

That is it! As the sauce cooks, if you find it to be too acidic, you can add a tiny bit of sugar to break up that acidity and make it sweeter.

How do you make it?

The sauce is so simple to make, honestly, it is the easiest sauce I have ever made.

  1. Slice your onion in half and make it nice and pretty.
  2. In a large pot, place your tomatoes. I suggest using a wooden spoon. It helps with breaking up the tomatoes. I like a bit of chunkiness in my sauce so I don't blend the tomatoes or anything like that. I just use my wooden spoon.
  3. Add the butter, onion and cream.
  4. You are going to let the sauce boil and really come together.
  5. Once the oil has begun to separate from the top of the sauce, that is how you know it is ready. You should stir the sauce a few times but not too too often.
  6. Pour it over your favorite pasta, I used gnocchi here, or use it on pizza!

Why should you make this gluten free tomato sauce?

This sauce is so easy! That is why you should make this sauce. Not only that but it is packed full of flavor. The onion gives it such a distinct flavor and I love the little bits of chunk of the tomato. San Marzano tomatoes are sweet and have such a full texture and taste. I had always read that Italian chefs swore that San Marzano tomatoes were the only ones the would use and now I know why. I can say I am a convert. I hope you make it and love it!

Looking for something similar?

This sauce would go great on my pizza crust! You can find that recipe here
Tomato Pie recipe here

Tahini Chocolate Chip Cookies

August 27, 2020

Tahini Chocolate Chip Cookies

Now that A Very Potter Summer is over I was struggling for ideas of things to make and bake for this site. We had just moved and everything was in boxes and I decided to look through my pantry and see what was in there. What I came across was an unopened jar of tahini along with chocolate chips. The tahini chocolate chip cookies were born.

What do you need for your tahini chocolate chip cookies?

As you can see from the picture above, there aren't too many ingredients! Another reason why I love this recipe, in addition to how ooey and gooey and delicious they actually are. This is a 1:1 recipe.

  1. ½ cup of tahini
  2. 6 tablespoons of butter
  3. ½ cup of gluten free flour (or regular flour)
  4. 1 teaspoon vanilla
  5. ¾ baking powder
  6. ½ cup chocolate chips
  7. 2 eggs
  8. ½ cup sugar

How do you make them?

They are very easy to make! Another perk to these cookies.

  1. Preheat your oven to 350°F
  2. In a bowl take your flour and your baking powder and whisk them together.
  3. In the bowl of your stand mixer and or another bowl with a hand mixer, mix together your 2 eggs and sugar. You should let them mix for about 5 minutes, it should look like and fluffy like in the picture below.
  4. While that is mixing, on your stove, place your chocolate and tahini in a pot. Melt them together. Once it becomes almost a thick syrup, it is ready.
  5. Allow the chocolate and tahini mixture to cool.
  6. Add vanilla to your egg and sugar mixture.
  7. Add the flour mix and your chocolate tahini syrup and continue to mix until the dough comes together.
  8. It is not a super thick batter, it is more like a loose brownie mixture. Use a ice cream scoop to place your batter on the tray.
  9. Line your baking sheets with parchment paper and place cookies onto the trays.
  10. Bake for 10 - 11 minutes. When done, allow to cool on the pan for 5-10 minutes and then transfer to a wire rack. Then eat up with a glass of cold milk or however you like 🙂

Why should you make these tahini chocolate chip cookies?

These cookies are really easy to make, the yield a good amount and they are super chewy! They are definitely not the prettiest cookie but honestly, their taste completely makes up for it. I hope you give them a try. If you do, let me know in the comments what you think!

Looking for something similar?

Heath Bar Cookie here
Mexican Chocolate cookie here
Egg free sugar cookies here
Linzer Cookies here
Peppermint Mocha Cookies here
Chocolate Crinkle Cookies here
Double Chocolate Cookies here

Carrot Cake

August 24, 2020

Gluten Free Carrot Cake Recipe on a cake stand

Gluten Free Carrot Cake Recipe

Growing up as a kid, often for some reason when I think of the cakes that were often had in my household two stick out: 1) Maple Walnut Cake, and 2) Carrot Cake. I never loved carrot cake until I started experimenting with how to make it. This gluten free carrot cake recipe is a 1:1 recipe which means anyone can make it, and it will be delicious either way!

What will you need?

This recipe makes 1 8inch layer cake.

For your cake:

  1. 1 cup shredded carrots
  2. ⅔ cup white sugar
  3. ¾ teaspoon baking powder
  4. ¾ teaspoon baking soda
  5. 1 tablespoon cinnamon
  6. 1 ¾ cup gluten free flour (or regular if you are not gluten free)
  7. ¾ cup oil - I used canola
  8. 1 tablespoon vanilla
  9. 1.5 tablespoon ras el hanout
  10. 2 eggs
  11. ½ cup brown sugar

For the icing:

  1. 8 oz low fat cream cheese
  2. ½ cup butter (8 tbsp)
  3. 3 cup icing sugar
  4. 1 tablespoon butterscotch syrup

Topping:

Shredded carrots rolled up

I also used mint leaves for decoration

How do you make this gluten free carrot cake recipe?

For your cake:

  1. Preheat your oven to 350°F
  2. Take your powdered ingredients and mix together
  3. In a separate bowl whisk together your oil and sugars
  4. Once they are fully incorporated add the eggs one at a time. Whisk together.
  5. Add your liquid mixture to your dry mixture and fold together.
  6. Add your carrots once it is ¾ incorporated.
  7. Grease an 8 inch tin and put the mixture in it.
  8. Flatten it so that your cake will bake level
  9. Bake for 30 minutes and then test for doneness. Insert a toothpick into the middle of the cake and if it comes out clean, it is done.
  10. Place on a cooling rack and allow it to fully cool.

Make your icing:

  1. Make sure your butter is room temperature, and place in your mixer.
  2. Add your cream cheese and combine.
  3. Once it is combined, add your powdered sugar slowly so that it doesn't blow up in your face out of the bowl.
  4. Add the butterscotch syrup
  5. make sure your icing has no lumps. If you need to, scrape down the sides of the bowl.

Gluten Free Carrot Cake Recipe ingredients

Putting it all together

  1. Place your icing on your cake once it has fully cooled.
  2. If you want to decorate your cake with the shredded carrots, shred them. Roll them up and decorate your cake.
  3. Serve!

Why should you make this gluten free carrot cake recipe?

I was told by a friend of mine (who is not gluten free) that it is the best carrot cake she has ever eaten. If that isn't an endorsement, then I don't know what is!

Enjoy!

Looking for something similar?

For some savory recipes with carrot in them see the following:
Vegetarian bourguignon
Vegetable Casserole


For a chocolate cake click here

Pizza Crust

August 20, 2020

Gluten Free Pizza Crust Recipe

Before being diagnosed as someone that could not eat gluten, I loved pizza like every other sane person on the planet. Finding a gluten free pizza crust recipe was just about impossible when I first went off of gluten. It took many years but I have now figured out how to do it. It may not be the prettiest pizza crust ever but it is super delicious, easy, and it tastes great.

What will you need?

  1. 1 ½ cups gluten free flour (make sure it has xanthan gum in it)
  2. 1 teaspoon baking powder
  3. ¾ teaspoon salt
  4. 1 ½ teaspoons instant yeast
  5. 1 tablespoon sugar
  6. ¼ cup (50g) olive oil, divided
  7. 1 cup (227g) warm water
  8. 1.5 tablespoon psyllium husk powder

You can do whatever you want for toppings, for this pizza, I used pesto, mozzarella, parmesan, pepper, and arugula.

How to make this gluten free pizza crust recipe:

To make your crust you will need to do the following:

  1. Whisk together all of your dry ingredients except the sugar and the yeast
  2. Mix together in a separate bowl the warm water, yeast, sugar, 2 tablespoons of olive oil and ¼ cup of the dry mixture.
  3. It is okay if it is a bit lumpy but allow it to sit for 30 minutes. It will bubble up as you see in the photo above.
  4. After the 30 minutes, add your wet mixture to your dry mixture and beat in the bowl of your stand mixer. It should look like the 3rd picture, that is when you know it is ready.
  5. Cover your bowl and allow it to sit for another 30 minutes.
  6. Preheat the oven to 425°F
  7. Take a baking sheet or a round pizza pan and cover it with a non stick paper.
  8. Drizzle 2 tablespoon of olive oil on it and begin to spread out your crust. Dip your fingers in some oil, it will help you work out the dough.
  9. Once you have pressed it into the shape you want, you will let it sit on the counter covered for 15 minutes.
  10. Bake the crust for 10-15 minutes until it looks opaque. Remove from the oven and allow it to cool.
  11. Cover your crust with your toppings and place back in the oven for 10-15 minutes.
  12. Remove from your oven, slice it up and serve!

Why should you make this gluten free pizza crust recipe?

As you can see, it is not overly complicated and it looks like an actual pizza. Another secret? It takes like an actual pizza. It is super good! I am so excited for you to give it a try. When you do, let me know in the comments how it works out for you!

Looking for something similar?

For my savory galette recipe click here

Toffee Cupcake

August 17, 2020

Gluten Free Cupcakes Recipe: Chocolate Toffee Cupcakes

Heath bar is one of my husbands favorite things. If you put it on something, chances are, he will eat it. One of my favorite things are cupcakes. It then became so clear and simple. What is a treat that we could both enjoy? Heath or toffee cupcakes! This gluten free cupcake recipe is quick, easy, and delicious.

What will you need for this recipe?

  1. 1 cup gluten free flour
  2. ½ cup salted butter (1 stick, 8 Tbsp)
  3. ½ cup water
  4. ¼ cup buttermilk
  5. ⅓ cup cocoa powder
  6. 1 cup sugar
  7. 1 egg
  8. 1 teaspoon baking soda
  9. ¼ teaspoon salt
  10. 1 teaspoon pure vanilla extract

For the icing:

  1. 8 oz cream cheese
  2. ¾ cup butter (softened)
  3. ⅓ cup cocoa powder
  4. 1.5 cups powdered sugar
  5. 2-3 tablespoon milk or cream

Topping:

Heath Bar Bits!

cupcake batter
chocolate cupcake on a brass tray

How do you make this gluten free cupcakes recipe?

To make your cupcakes:

  1. In a bowl, mix together your flour, sugar, salt, and baking soda.
  2. In a pot on the stove, melt your butter, add the water, and cocoa powder. Bring to a boil.
  3. Once it has boiled, add it to your bowl with your dry ingredients. Whisk together until there are no lumps.
  4. Add your egg, buttermilk, and vanilla. Whisk again.
  5. Set your oven to 350°F and line your muffin tin your liners.
  6. I like to use an ice cream scooper for cupcakes, so, fill your liners ¾ of the way up.
  7. Place in the oven between 18-20 minutes. When you remove them from the oven, you should be able to stick a toothpick in the middle and for it to come out clean.
  8. Let the cupcakes cool in the tin for about 15 minutes. Once they have cooled a bit, transfer to a wire wrack.
  9. While they are cooling, you can go ahead and make your icing!

ICING

  1. Take your softened butter and cream cheese and beat with the paddle attachment in your mixer. Let it beat for a few minutes so it gets nice and fluffy.
  2. Add your powdered sugar and let it carry on for a few minutes as it forms into icing.
  3. It is going to seem a bit stiff, so, now you will add your milk or cream.
  4. Take a bit of the icing out of the bowl, as you will mix this with the four house colors.
  5. Once you have your reserved amount out of the bowl (you won’t need much) add your cocoa powder to the icing. If you feel it is too stiff, then, add 1 more tablespoon of cream.

Putting it all together

You can use both heath bits and actual heath bars. I liked to use bot.

  1. use a piping bag and pipe your icing onto your cupcakes
  2. decorate your cupcakes on the edge with the heath bits and the bar in the middle!
  3. Voila and enjoy!

Why should you make this gluten free cupcakes recipe?

It is a simple and delicious recipe. You will not be disappointed if you make them. If you do, leave me a note in the comments!

Looking for something similar?

Sorting Hat Cupcakes recipe here
Chocolate Cake recipe here

Tomato Tart

August 11, 2020

Quick and Easy Recipe for Tomato Tart

A Summer Classic: Recipe for Tomato Tart

I am going to share a secret with you. I love all things tomato when they are cooked. The secret is I hate raw tomatoes. I have never loved the taste of a fresh tomato off of the vine, which I know many people love.

My grandmother used to grow tomatoes and she was always successful with them. This was always a surprise as she lived 1.5 hours north of Montréal. The summers were nice but they were never too warm. Her secret she told me was eggshells. She would keep eggshells and put them into the soil.

What will you need for this recipe for tomato tart?

  1. 1 Pie Tart (I used a gluten free pie tart)
  2. 1 Pint Cherry Tomatoes
  3. ½ tablespoon Fresh Tarragon
  4. 1 tablespoon Dijon Mustard (For the Tomatoes)
  5. ½ tablespoon Dijon Mustard (For the base of the tart)
  6. ½ tablespoon Herb de Provence (Scattered in the layers)
  7. Mozzarella (To your Taste)

How do you make it?

  1. The tart I used is Wholly Gluten Free- you should let the tart shell sit on the counter for 10 minutes to defrost.
  2. Set your oven to 400°F
  3. Slice your tomatoes in half. Let them sit out for 10-20 minutes to lose some of their juices. You do not want a soggy bottom tart!
  4. Take the dijon for the base of your tart and use a spatula to spread it evenly. Then place some tarragon in there, too.
  5. Once your tomatoes are drained, in a bowl mix them with the dijon and some of the herbs.
  6. Place the first layer of herbs in the tart. Once the first layer is in, use some of the herbs and mozzarella to your taste. Then add your second layer. Cover again with some of the herbs and mozzarella. Bake the pie for 30 minutes. Let the tart sit for 5 minutes and serve.

Why should you make this recipe for tomato tart?

It's amazing how those who have touched our lives have their influence in places you could never imagine, like tomatoes. Another secret when it comes to this recipe, I cheat a bit and I use a pre-bought pie tart. You can of course make your own, which is just more time consuming. I have been trying to find ways of making delicious recipes that cut down on time so I can continue to go about my day without having to be in the kitchen for hours on end.

I was watching an old television series called Brothers & Sisters. One of my main characters goes to France to look at vineyards. It made me recall a recipe from a French author that I enjoy, Mimi Thorisson, who once posted a recipe for a tomato tart. Her post motivated me to create this. It is colorful, and with each bite you get an explosion of flavor (it may be the tomatoes bursting as you bite into them).

I imagine as I eat this that I am sitting at a vineyard in southern France looking out at beautiful fields with a glass of wine in one hand and a fork with tomato tart in the other.

I hope it transports you, too.
-L

Looking for something similar?

For other tart recipes:
Treacle Tart recipe click here
Pear and Frangipane Tart click here
Rhubarb Tart click here
The first tart I saw that made me want to make a tomato tart click here

Vegetable Tater Tot Casserole

August 10, 2020

This vegetable tater tot casserole is the epitome of comfort food. Styled as a “chicken pot pie” it has all the flavor without the meat.

Casseroles are pretty much standard comfort food, and a midwest staple I have been informed by my friend Amanda over at Midwest Nice. Casseroles tend to have meat in them (from what I have seen), so, as I live with a pescetarian, I decided to make this comfort food classic safe for vegetarians. I now introduce you to the vegetable tater tot casserole.

What do you need for a vegetable tater tot casserole?

You will need the following for your cassrole:

  1. 4 celery stalks (chopped up finely)
  2. 1 small onion chopped finely (a yellow sweet onion is best)
  3. 1.5 cup mushrooms - cremini are fine (sliced up)
  4. 5 tablespoon gluten free flour (or regular flour, this is a 1:1 recipe)
  5. 3 tablespoon butter
  6. 2 tablespoon olive oil
  7. 4 large carrots chopped up or a bag of shredded carrots
  8. 1 tablespoon vegetable bouillon (this is my fave brand)
  9. 2.5 cups milk (I used 2% for a richer and heavier casserole, you can use whole milk- or for a less rich you can use 1 %)
  10. 3 or 4 thyme sprigs
  11. Enough tater tots to cover the top of the vessel you are using to bake your casserole in. You can use a cast iron pan (as I have here) or a baking dish. Your choice!

How do you make your vegetable tater tot casserole?

To begin:

  1. Set your oven to 400°F
  2. Chop up all of your vegetables and put them into a bowl. In the meantime, melt your butter and oil together in a pot.
  3. Once the butter has melted, add your vegetables to the put, stir to make sure that they have all been covered with the butter. As soon as they have, cover the pot with a lid.
  4. Check every few minutes to stir but you are going to sweat your veggies for about 10-15 minutes. You want to make sure that they are really soft.
  5. You will then add your flour, make sure to coat all of your vegetables.
  6. Add half of your milk, and stir your vegetables. It will begin to thicken. Once thick, add the rest of your milk.
  7. Once you have stirred your mixture and it appears to be thickening, add your vegetable bouillon. You also now want to add the thyme, and any salt or pepper you wish to add.
  8. Allow this mixture to sit on medium for about 10 minutes.
  9. Transfer to the dish in which you will cook it in, and cover with tater tots.
  10. Place your vegetable tater tot casserole in the oven and bake for 30 minutes.
  11. When done, remove from oven and allow to stand for 5-10 minutes prior to serving.

Why should you make this?

Whether it is cold or warm outside, if you are craving comfort food, this is it. The creaminess of the filling along with the crisp top of the tots makes this vegetable tater tot casserole an instant classic. The best part? If you are having dinner guests, it is super easy and can accommodate gluten free, vegetarian, and pescetarian diets. As Michael Scott would say, a win win win.

Cheesecake Bars

August 6, 2020

Gluten Free Recipe for Cheesecake Bars on parchment paper

This recipe for cheesecake bars is quick, easy, and beyond delicious. It is a joy for all who eat them.

We moved! It was a quick but tumultuous process. We have left Virginia and moved to Maryland to a beautiful house that is 200 years old. It is smaller than what we had so we have had to move furniture around and make it work but we love it. On one of our first visits to our new house, my mother-in-law packed us some cheesecake bars. I ended up making a similar recipe to what she made. This recipe for cheesecake bars is a 1:1 recipe, the one I have made is gluten free but it is very simple to make it regular should you choose.

What do you need for this recipe for cheesecake bars?

One of the many things I love about this recipe is that it is so simple and super delicious!

1. 1 cup gluten free graham crackers (or use regular graham crackers for non-gluten free)
2. 2 packages of cream cheese - I used low fat
3. 8 tablespoon (½ cup) unsalted butter - melted
4. ¾ cup white sugar
5. ¼ cup lemon juice (freshly squeezed is best but not necessary)
6. 3 eggs 

How to make them:

https://garnishedwithjoy.com//www.youtube.com/watch?v=_1wnYjo1HHs

1. Preheat your oven to 325°F and line a 8x8 oven dish with baking paper. You are going to want to let the edges of the paper hang over the sides so it can be lifted when it has finished baking. 

2. Melt your butter either in the microwave or a pot on the stove. In a food processor, add your gluten free graham crackers (or regular) and add your butter. Mix together in the food processor until it becomes a bit sticky. This is going to be your crust! Take the crust and press it into your baking pan. 

3. In your stand mixer or in a bowl with a hand mixer, beat together the cream cheese and sugar until it is smooth. 

4. Add the eggs one at a time to the sugar and cream cheese mixture. 

5. Once all of the eggs have been added, add your lemon juice and beat for 1 minute. 

6. Pour your mixture into the crust. You are going to bake this for 50 minutes. At the 50 minute mark, you will turn the oven off but leave the door to the oven cracked open. Leave it in the oven for 30 minutes. 

7. Remove from the oven. It may still be a bit jiggly in the middle, and that is okay. Set aside until it is cool enough to transfer to the fridge. 

8. Chill for at least 4 hours in the fridge. Once you are ready to serve, use the baking paper to help you lift it out of the pan. Cut the squares and serve! 

Gluten Free Recipe for Cheesecake Bars on parchment paper

Why should you make THIS recipe for cheesecake bars?

As you can see, there are very few ingredients. It is so simple and so delicious. I made this for our friends who had just had a baby and the immediate response to trying it was "OH YEAH". That was from a gluten eater as well! I hope you make them and love them! Let me know in the comments if you give them a go.

Looking for something similar?

Click here for my recipe for heath bar cheesecake!
Click here for my friend Amanda's rhubarb cheesecake squares recipe. If you need to make it gluten free, just sub out the graham crackers to make a crust like this one or use gluten free flour!

Honey and Thyme Ice Cream

August 3, 2020

No churn honey and thyme ice cream

No churn ice cream is the quick and easy way to make your favorite summertime dessert.

No churn ice cream is everywhere I look on instagram these days. My friends Amanda and Anita have both made really delicious recipes, (all of their recipes look beautiful and delicious) that they inspired me to jump in on this trend. I love baking with herbs. Some of my favorite things that I have made (that will one day grace this blog) are rosemary and thyme shortbread cookies and my chocolate and rosemary cupcakes. When I was thinking about what flavor of ice cream I might want to make I wanted a sweet but savory flavor, and that is how the no churn honey and thyme ice cream recipe was born.

What will you need?

  1. 2 cups of heavy cream (very cold)
  2. lots and lots of thyme
  3. 3 tablespoon honey (I used regular honey but you can use a different flavor if you wish)
  4. 1 teaspoon vanilla
  5. 8 oz cream cheese (one block)
  6. 1 can condensed milk

How do you make no churn ice cream?

It is pretty easy to make which is why it is so lovely.

  1. Take your cream cheese and condensed milk and place into your mixer. You are going to want to use your whisk attachment.
  2. Mix together for a few minutes until it is smooth and there are no lumps from the cream cheese. If you need to scrape down the sides a couple of times to make sure everything is incorporated then do it!
  3. Add your vanilla
  4. Pour in your heavy cream and mix it on high until it has the texture of a really good whipped cream.
  5. Put the honey and thyme leaves in the mix and mix it about 30 seconds more.
  6. Place it in the container you plan to freeze it in and cover it.
  7. Put in the freezer and leave it there until it is completely frozen.

Why should you make this no churn ice cream?

This ice cream has such a beautiful flavor. It is non-traditional and unique. It is sure to wow you and whomever you serve it to. It is refreshing from the thyme and is sweet from the condensed milk and the honey. If you wanted to bring it up even one notch more, I would serve it with fresh oranges. Orange, honey, and thyme is a killer taste combination.

If you are looking for a similar recipe

I have a fun coconut ice cream recipe that is also no churn, quick, easy, and delicious. You can get that here.

I hope you give it a go, and that you love it!

Harry Potter Cake

July 31, 2020

“Anyway - Harry,” said the giant, turning his back on the Dursleys, “a very happy birthday to yeh. Got summat fer yeh here - I mighta sat on it at some point, but it'll taste all right.”
- Harry Potter and the Philosopher's Stone Harry Potter cake from Hagrid

Here we are! The last post of our Very Potter Summer. It has been a really fun challenge to go through the series and pick out (what I feel) were the most important and special recipes. I wanted to end with this cake for a couple of reasons.

  1. It is Harry's birthday today!
  2. It is the first real food that is introduced to us in the book and the movie

This Harry Potter cake from Hagrid is super fun to make because it is a messy cake! No perfect lines here. It is sort of a mess and fun. The flavor is a caramelized white chocolate cream cheese icing with a chocolate cake. It is delicious, easy, and worth making.

What will you need?

Note that for the cake ingredients- it is for 1 8-9inch layer cake. Double the recipe for two layers. This is a 1:1 recipe. Can be made gluten free or regular!

For the cake:

  1. 1 cup of sugar
  2. ¾ cup + 2 tablespoon all purpose flour
  3. ¾ teaspoon baking powder
  4. 1 large egg
  5. ¼ cup + 2 tablespoon cocoa powder
  6. 1 tablespoon pure vanilla extract
  7. ½ teaspoon sea salt
  8. ½ cup sour cream (or greek yogurt)
  9. ½ cup hot water
  10. ¾ teaspoon baking soda
  11. ¼ cup sunflower oil

For icing:

  1. 8 tablespoon butter (½ cup)
  2. 16 oz cream cheese (2 packages)
  3. ½ cup caramelized white chocolate (instructions will follow)
  4. 3 cups powdered sugar (if you want it a bit stiffer- add ½ - 1 cup more)

For caramelized white chocolate:

  1. White chocolate - 4 oz

How do you make your Harry Potter Cake from Hagrid?

To make cake:

  1. Set oven to 350°F
  2. Take all of your dry ingredients and mix them together in a bowl. I like to use a whisk.
  3. Add the rest of your ingredients.
  4. Whisk together until there are no lumps.
  5. Spray a 8 or 9 inch pan so that it is non-stick and pour your batter into the pan.
  6. Try to smooth is out so that it will bake evenly.
  7. Bake for 25-30 minutes.
  8. Check for doneness by inserting a toothpick into the middle. If the toothpick comes out clean, then you know it is ready.

To make the caramelized white chocolate:

  1. Once your cake it baked and cooling on a raised sheet, lower the temperature of your oven to 300°F.
  2. Lay white chocolate on the pan for 10 minutes. Remove from the oven and swirl around with a spatula.
  3. Put back in the oven for another 10 minutes. Repeat this process until the chocolate begins to have that caramelized color.
  4. If you find it is starting to look lumpy, then transfer to your mixmaster bowl, and mix it. It will become smooth but the bowl will be very hot, so, be careful not to touch the bowl right after.
  5. Place in a bowl or jar until ready to use.

To make your icing:

  1. Beat the butter in your mix master
  2. Add the cream cheese
  3. Add in your powdered sugar
  4. Place the ½ cup of the caramelized white chocolate into the bowl
  5. If you desire (to make it more realistic) now is the time to remove some of the icing to mix green food coloring with in a bowl. In the bowl of your mixmaster add the pink.

Putting it all together:

  1. Take your layer of cake and put icing on it.
  2. Place your second layer on top
  3. Smother the bad boy with icing
  4. Take a piping bag and write out the happee birthdae harry on the cake
  5. Serve and eat!

Why should you make this Harry Potter cake from Hagrid?

It is the moment that Harry finds out he is a wizard! It is very exciting. It is a fun and easy cake. It is also super delicious!

If you are looking for more Harry Potter Recipes:

I have you covered!
For Butterbeer click here
For Pumpkin Pasties click here
For Mince Meat Pies click here
For "Coconut Ice" cream click here
For Chocolate Frogs click here
For Felix Felicis aka Liquid Luck click here
For Polyjuice Potion click here
For Treacle Tart click here
For Hagrid's Rock Cakes click here
For Black Lake Brownies click here
For Pumpkin Juice click here
For Philosopher's Stones click here
For Sorting Hat Cupcakes click here

Thank you all for joining me on this fun journey. If there is another fandom or series that you would like to see the food come to life, let me know in the comments.

Always,
Laura

"Coconut Ice" Cream

July 23, 2020

No Churn Coconut Ice Cream Recipe

“There were shelves upon shelves of the most succulent-looking sweets imaginable. Creamy chunks of nougat, shimmering pink squares of coconut ice..."
-Harry Potter and the Prisoner of Azkaban Aka this coconut ice cream recipe inspiration.

One of the many sweets that is mentioned in the Harry Potter series is pink coconut ice. When I sat back and thought about it I was wondering how / what I would make with this. "Ice, what to do with ice". Scrolling through instagram, the rage right now (due to summer) is the no-churn ice cream fad. So, it came to me. I'll drop the pink, make it a bit more refined and make a no-churn coconut ice cream recipe for my coconut ice.

What do you need for this coconut ice cream recipe?

Not much! Which is partially why this is SO great!

  1. 1 can of condensed milk
  2. 2 cups of heavy cream (very cold)
  3. 1 teaspoon vanilla (paste if you want speckles or extract is fine)
  4. 8 oz of cream cheese (room temperature - 8 oz is 1 block)
  5. 2.5 cups of sweetened coconut

It is that simple. So few ingredients.

How do you make it?

Again, so simple that it is not wonder everyone is making no churn ice cream. Honestly, people should never make other desserts ever again this is so easy.

  1. Take your condensed milk and the cream cheese and toss them into your mixer. You are going to want to use your whisk.
  2. Mix until it is super smooth.
  3. Add the vanilla.
  4. If you need to, scoop down the sides and make sure everything is incorporated.
  5. Add the cold cream and beat on high for 2-3 minutes. You want to get a lot of air into the mixture and make it look as if it is whipped cream.
  6. Once it is a beautiful light and fluffy texture, fold in the coconut.
  7. Put it into your container that you plan to freeze the ice cream in and pour it in.
  8. Cover with shredded coconut.
  9. Cover with plastic wrap and place in the freezer until it hardens.

Why should you make THIS coconut ice cream recipe?

Well as you see above, it is so simple in terms of ingredients but SO yummy in its flavor. It is so easy to make. I can say that I have never owned an ice cream machine. I see on the shows on the food network when they have those competitions and people make their own ice cream and they put it into the machine and hope that it gets cold enough that it will be ready when the time is up. You do not need one of those machines to make ice cream is what I have learned. It will take a while to firm up and freeze (depending on your freezer and the humidity of the day) but it is so easy. So, while this is not pink or coconut ice it does still have ice in the title as it is a coconut ice cream recipe. A recipe I hope you make.

Looking for other Harry Potter Recipes? I've got you covered.

Butterbeer click here
Black Lake Brownies click here
Pumpkin Juice click here
Treacle Tart click here
Polyjuice Potion click here

Always,
L

Pumpkin Pasties: A Harry Potter Inspired Recipe

July 20, 2020

Pumpkin Pasties: A Harry Potter Inspired Recipe

Pumpkin pasties are delicious hand pies inspired by the Harry Potter books and films. Long are the days of only being able to eat Harry Potter food at the Wizarding World of Harry Potter! This recipe has a quick cook time, is super simple, and the prep time is deliciously easy!

Pumpkin Pasties: A Harry Potter Inspired Recipe
“What she did have were Bertie Bott’s Every Flavor Beans, Drooble’s Best Blowing Gum, Chocolate Frogs, Pumpkin Pasties, Cauldron Cakes, Licorice Wands, and a number of other strange things Harry had never seen in his life.”
– Harry Potter and the Philosopher’s Stone

Pumpkin Pasties- so ubiquitous in the Harry Potter Universe that in Harry Potter book (Harry Potter and the Deathly Hallows), it is the food mentioned most frequently. We are initially introduced to pumpkin pasties in Harry Potter and the Philosopher’s Stone when the Trolley Witch stops by all of the compartments to offer sweets to the students on the Hogwarts Express. In the films, we see Cho Chang order a pumpkin pasty as well! As pumpkin pasties are part of this offering. Now Harry Potter fans everywhere can enjoy pumpkin pasties from their home without having to venture to Hogwarts. 

What are pumpkin pasties?

Harry potter pumpkin pasties are not too different from regular pasties. Pasties are little hand pies (some are larger than others, but for this, they are not too big), that are golden brown. They are said to have originated in Southern Cornwall. They are a baked pastry that traditionally has a meat filling but can also have vegetarian filling ingredients.

If you have ever been to the Wizarding World of Harry Potter at Universal Studios, you can buy pumpkin pasties from Honeydukes. However, you can now make pumpkin pasties from the comfort of your own home.

The sweet ones are not a traditional pumpkin pie filling but are still deliciously sweet, and the savory pumpkin pasties are a perfect blending of flavors.

Can I make any substitutions or changes in this pumpkin pasties recipe?

If you cannot find pumpkin puree at the store: you can always buy a whole pumpkin and bake it and make your own puree from scratch. Of course, this is much more work, and it is easier to just buy the can!

Even though these are pumpkin pasties: there is no pumpkin pie spice in this recipe. If you are obsessed with pumpkin pie spice then you can add 1 teaspoon to your recipe.

Pumpkin Pasties: A Harry Potter Inspired Recipe

This recipe of course has dairy in it: and I have not made it without. However for a pie crust, if you find a pie crust that does not contain butter and instead uses crisco or a vegetable base, you may be able to use that.

I only have granulated sugar: Can I use this instead? The brown sugar gives a more caramel flavor with the pumpkin pasties filling. However, if all you have is granulated sugar then you can use it. The sweet filling will be good either way!

Why should you make pumpkin pasties?

​It is a simple recipe that is packed full of flavor. The first time you take a bit, you will be hooked.

If you are a fan of the Harry Potter series (or want to throw a themed party) these pumpkin hand pies are the perfect treat. They are delicious little hand pies with a flaky pie crust (I use my gluten free pastry dough to make them but you can use your own pie dough). These sweet pumpkin pasties are a sweet treat compared to the savory Cornish pasty.  It will become one of your favorite pumpkin recipes. 

Tips and Tricks for this recipe:

​Be sure not to overfill the pasties by putting in too much filling. Too much filling will force the pasties open in the oven. It is not a big deal if it is slightly open, but, it is best to try to keep them as closed as possible!
For best results, always follow the recipe card!

What tools do you need for this pumpkin pasties recipe?

  1. Pastry Brush
  2. Food Processor
  3. Large Bowl (for the filling)
  4. Baking sheets

What Ingredients will you need?

ingredients for Pumpkin Pasties: A Harry Potter Inspired Recipe

Pie Dough: The casing for these sweet pumpkin pasties is pie dough (as they are a hand pie). I use my gluten free pastry dough recipe to make them (which is incredibly easy) but you can use whatever pie dough you like. 
Pumpkin Puree: This is the essence of our pumpkin pasty. I use canned pureed pumpkin.
Brown Sugar: This is the only sweetener in this recipe
Spices: Cinnamon and Ras el-Hanout give such warming spices and make these pasties sing.

How do you make your pumpkin pasties?

Set Oven to 350°F
Make your pie dough: place the gluten free all purpose flour, egg, water, and unsalted butter. Pulse until the butter is the size of peas.. The pie crust will come together when it forms a ball in the food processor.
Take two pieces of parchment paper: and place the pie dough between them. Roll it out using a rolling pin. Another method is using a tortilla press. Set the circular pieces of dough aside on the lined baking sheet while you prep your filling.
Meanwhile make the filling: in a large bowl and mix together the pumpkin puree, ras el hanout, cinnamon, and brown sugar. Mix together.
Putting them together: Place 2 tablespoons of the pumpkin filling onto each of the dough circles. Close the pumpkin pasties and crimp the edges. You can use a fork to crimp the edges or press the edges with your hands.
Brush with egg wash: Using a pastry brush, brush the pasties with an egg wash and then top with sugar. Place into the oven. Baking time is for 30 minutes.
When they are a golden brown color: and finished baking, remove them from the oven and place on a wire rack to cool down. Once they have cooled a bit, dig in.

filling for pumpkin pasties
place filling ingredients in a bowl and mix together
parchment paper and rolling pin
after making your pie dough, roll it out
pie dough circles on a baking sheet for pumpkin pasties
lay the dough out on your baking sheet
one pasty open with filling while others are folded over pumpkin pasties
fill the pasties
half moon pumpkin pasties
fold the pasties over to be half moons
Pumpkin Pasties: A Harry Potter Inspired Recipe
crimp the edges
pumpkin pasties on a baking sheet with egg wash
brush with an egg wash
Pumpkin Pasties: A Harry Potter Inspired Recipe
cover in sugar and bake until golden brown
Pumpkin Pasties: A Harry Potter Inspired Recipe
once done, allow them to sit to cool and then dig in

When you are done with this recipe, spice up your pumpkin season by making by pumpkin juice recipe!

How do you store pumpkin pasties?

Store these in an airtight container for 3-5 days 

what is the history of pumpkin pasties?

Pumpkin pasties, a popular treat in the wizarding world of Harry Potter, are fictional creations invented by author J.K. Rowling for her book series. They are not part of historical or real-world culinary traditions. In the Harry Potter series, pumpkin pasties are described as hand-held pastries filled with a sweet pumpkin filling. They are a common snack enjoyed by the characters while traveling on the Hogwarts Express train.

While pumpkin pasties are not a real historical food item, they have gained popularity among Harry Potter fans, and some creative bakers have attempted to recreate them based on the descriptions in the books. These recreations typically involve making a sweet pastry dough and filling it with a spiced pumpkin filling similar to that used in pumpkin pies.

So, while pumpkin pasties may not have a genuine historical background, they do hold a special place in the hearts of Harry Potter enthusiasts who enjoy bringing a touch of magic to their culinary endeavors.

LEAVE A RATING AND REVIEW!

Did you love this recipe? If you did, let me know! And let others know too by leaving a comment and star rating. Reviews are incredibly useful in helping other people find my site and make my recipes. Thank you so much!
Laura 

Looking for more Harry Potter Inspired Food? Or throwing a Harry Potter Party? Here are more Harry Potter Recipes

Here are some fun Harry Potter Themed Recipes!


  • Gluten Free Halloween Recipes: Gluten-free Fun Treats!
    Gluten-Free Halloween Recipes
  • Harry Potter Cake
  • No Churn Coconut Ice Cream Recipe
    "Coconut Ice" Cream
  • Pumpkin Pasties: A Harry Potter Inspired Recipe
    Pumpkin Pasties: A Harry Potter Inspired Recipe


Never miss a new recipe video and follow me on Youtube here

Mincemeat Pies

July 16, 2020

Gluten Free Mincemeat Pies recipe Harry Potter inspired stacked

"Mrs. Weasley had sent him a scarlet sweater with the Gryffindor lion knitted on the front, also a dozen home-baked mince pies, some Christmas cake, and a box of nut brittle" aka Mincemeat pies recipe inspo.
- Harry Potter and the Prisoner of Azkaban

It has come to my attention that mince pies or mincemeat pies are traditionally a very British dessert to serve around the Christmas holidays. I had never had it and then spoke to my mom about it, who apparently loves them. This mincemeat pies recipe is inspired by Molly Weasley who in the books and films makes pies! Therefore it has made it into the repertoire of Harry Potter foods for a Very Potter Summer. These are easy to make, delicious, and will make you a convert - serving them every Christmastime.

What will you need for this mincemeat pies recipe?

It isn't too many things (thankfully) which is always good!

  1. 1 cup brown rice flour
  2. 4-5 tablespoon ice water (or really cold water)
  3. 2 tablespoon potato starch
  4. 8 tablespoon butter
  5. 1.5 tablespoon psyllium husk
  6. 2 tablespoon tapioca flour (starch)
  7. 1 teaspoon salt
  8. Mincemeat - I bought mine from here
  9. 1 egg (optional)
  10. cinnamon and sugar (optional)

You will also need:

  1. A muffin tin
  2. circular cookie cutters or biscuit cutters

How do you put them together?

First you are going to make your dough:

  1. Place your flours, husk, and salt into a food processor. Pulse for a few seconds to mix together.
  2. Dice your butter into chunks or cubes and add those to the mix.
  3. Pulse around 10 times for 1 second each. You want the butter to be the size of peas.
  4. Add your water now as you pulse a few more times. Add a tablespoon at a time. Once it comes together as a dough, remove it from the food processor and cover in plastic wrap or an eco-friendly alternative. Place in the fridge for at least 1 hour.
  5. Once you remove dough from the fridge, allow it to sit for a minute so it can warm up and you can more easily roll it out.
  6. Set your oven to 400°F or 200°C
  7. Sprinkle some brown rice flour on top so the rolling pin does not stick.
  8. Once it is rolled out to the thickness you like, use your cookie cutter. Take the dough and place the circle in the muffin tin.
  9. Once you have done this for the whole tin, place the filling inside.
  10. Roll out the remainder of the dough and cut your tops for the pies. You can use a star shape cutter if you wish, or a circle, whatever you like.
  11. Now, this is where the optional egg comes into play. I think it is best to use it but you don't have to. I egg-wash the edges of the tops so it will help them stick to the bottom.
  12. Once the tops are all on, sprinkle with cinnamon sugar and place in the oven.
  13. Bake for 20-25 minutes. Remove from oven and allow them to cool in the tins. Then remove and enjoy.

Why should you make this minemeat pies recipe?

It is a nice gluten free option for those who are so inclined in your life. If you are not gluten free then you can simply use a regular pie dough and follow the same instructions. They are surprisingly delicious. I tried the filling prior to baking the pies and thought I would not like it but honestly, I was so surprised. It has been decided that they will be a holiday staple in our household.

Looking for more Harry Potter Recipes? I've got you covered.

Butterbeer click here
Polyjuice Potion click here
Hagrid's Rock Cakes click here
Black Lake Brownies click here
Pumpkin Juice click here

Always,
L


Chocolate Frogs

July 13, 2020

Harry Potter Chocolate Frogs on a pink surface

Chocolate Frogs: "They're not really frogs, are they?"
- Harry Potter and the Philosopher's Stone

Chocolate frogs are one of the things sold by the Trolly Witch who we see for the first time during Harry Potter and the Philosopher's Stone. Harry is horrified at the prospect of eating a real frog when Ron reassures him that it is "just a spell" and that they usually only have one good jump in them. Harry's rotten luck yields him no frog as the frog crawls up the window and jumps out of the train, leaving him chocolate-less.

Ron indicates that the cards are what you really want and to Harry's excitement, he receives a Dumbledore card. Then to Harry's surprise, the card is soon empty. "You can't expect him to stick around all day" says Ron as he continues to shove his face full of food. While the cards are fun, chocolate frogs are delicious. I have made mine with a bit of a twist, but it is a good one.

What will you need for your chocolate frogs?

First and foremost, you will need a mold for the frogs. I got mine from here.

Next:

  1. 1.5 cups of chocolate- I used milk chocolate it is your call.
  2. Chunky peanut butter! Enough to fill the centers of your molds.

** Initially, I thought I would need butter for my melted chocolate, and I didn't. So while it is pictured below, you don't need it.

How do you make your chocolate frogs?

  1. First, you need to have your mold ready.
  2. Melt your chocolate in the microwave in 30 second increments. Stir after each round until it is completely smooth.
  3. Cover the insides of the mold with chocolate and then turn upside. You want it to be a thin layer.
  4. Take your peanut butter and begin to fill the centers of the molds with peanut butter.
  5. Cover the tops with chocolate and then place in the freezer.
  6. Freeze for a couple of hours.
  7. When they are frozen completely, remove from the freezer and turn the mold over, the frogs should come out pretty easily.
  8. Take a bite and dig in or wait till they warm up a bit. Either way it is your call. They are delicious in every which way.

Why should you make these?

They are super fun and they are a good entryway into the Potterverse of food. The chocolate frogs you buy from Universal studios come with the cards, which I will say are very fun to get and read (and I will boast here that I got the leader of my house on my first box, oh Rowena, you witty minx). The chocolate frogs are expensive and they are just solid chocolate. This is fun in that you can make your own and do your own fillings- caramel and or tahini would be other great options. Whenever you make these, drop me a line, tell me how much you love them and how they are delicious.

Looking for other Harry Potter Recipes? I've got you covered.

Black Lake Brownies click here
Butterbeer click here
Treacle Tart click here
Polyjuice Potion click here
Pumpkin Juice click here

Liquid Luck

July 9, 2020

Liquid Luck Potion: Otherwise known as Felix Felicis in a bottle

 “Yes. That. Well, that one, ladies and gentlemen, is a most curious little potion called Felix Felicis. I take it,” he turned, smiling, to look at Hermione, who had let out an audible gasp, “that you know what Felix Felicis does, Miss Granger?”
“It’s liquid luck,” said Hermione excitedly. “It makes you lucky!”
The whole class seemed to sit up a little straighter. [...] Now, I must give you warning that Felix Felicis is a banned substance in organized competitions… sporting events, for instance, examinations, or elections. So the winner is to use it on an ordinary day only… and watch how that ordinary day becomes extraordinary!”

- Harry Potter and the Half Blood Prince

Liquid luck! First introduced to readers of the Potter series and the Harry Potter films in Professor Slughorn's class. Harry has plans of becoming an auror for the Ministry of Magic (M.O.M) and to do so it is required to be skilled at potions. The Potions Master and teacher for the first five books is Professor Snape, however, in the 6th book, Professor Slughorn returns to Hogwarts and resumes his old post as Potions Master. On their first day, Ron and Harry are told by Professor McGonnogal that they can in fact take potions even with their lower grades as Slughorn does not mind.

They march their way to the potions dungeon where Slughorn has four potions on the table. Students take in their appearance and smells and we are then introduced to liquid luck. Slughorn tells the students that whomever can brew the best living death potion will be the lucky recipient of the liquid luck. In the film it is relatively clear in color and that is what I base my version off of.

What will you need for your liquid luck?

Harry is lucky enough (ha, get it?) to discover an old potions book in the cabinet and his has markings inside. It previously was the property of the "Half Blood Prince". This "prince" seems to know what he is doing as his instructions for the living death potion earn Harry the potion. While Slughorn says it takes 6 months to brew liquid luck, ours only takes minutes.

  1. 1 cup water
  2. 8 lemons (it will end up being around 1 cup of lemon juice)
  3. 1 cup of caster sugar
  4. 3 cups water to then mix in
  5. 1 potion container!

How do you make liquid luck?

Making your liquid luck is so easy! This is a recipe for deliciously sweet yet tart lemonade that will no doubt make you feel lucky to drink it.

  1. You are going to juice your lemons and collect it in a bowl. Make sure to strain it so no seeds or anything else you don't want in the drink get through.
  2. Put a pot on the stove. Place the 1 cup of water and sugar in the pot. Stir on high heat until it completely dissolves and it becomes clear.
  3. Place the lemon juice and the simple syrup you just made into the pitcher you plan to use.
  4. Add 3 cups of water.
  5. Stir
  6. ** I use 3 cups of water- if you want yours to be less tart then you can add more water.
  7. Place in the fridge
  8. Pour into your little potion holder and voila! Liquid luck complete.

Why should you make this?

This recipe is super tasty and as you can see from above it is incredibly easy. It also was what allowed Harry to retrieve an incredibly important memory from Slughorn and save his friends when Death Eaters stormed Hogwarts at the end of the book.

If you are looking for more Harry Potter drinks:

Butterbeer recipe here
Pumpkin Juice recipe here

  • If you are interested in mint lemonade, I have your back on that one too. You can find that recipe here.

Always,
L

Hagrid's Rock Cakes

July 6, 2020

Hagrid Rock Caked aka chocolate rice krispie treats with peanut butter on parchment paper

Chocolate Rice Krispie treats with Peanut Butter
"The rock cakes almost broke their teeth, but Harry and Ron pretended to be enjoying them as they told Hagrid all about their first lessons. Fang rested his head on Harry's Knee and drooled all over his robes."
- Harry Potter and the Philosopher's Stone

While reading the books to find the foods that I was going to make, very early in the first book I came across the rock cakes Hagrid provided to Harry and Ron. I thought the description was pretty funny (see above) and decided then and there to add it to the list. "What would one put in a rock cake?" I thought. Then it came to me, as if it were a vision: Chocolate Rice Krispie treats with Peanut Butter.

What do you need for Chocolate Rice Krispie treats with Peanut Butter aka Rock Cakes?

One of the best things about this recipe? It is not a ton of ingredients!

  1. 6 cups rice krispies (check the kind of use- I get the Wegmans brand which are labelled as gluten free).
  2. 16 oz mini marshmallows
  3. 1 cup chocolate chips (I use milk chocolate, but, you can do semi-sweet, dark, or a mix!)
  4. 1 teaspoon vanilla
  5. 5 tablespoon crunchy peanut butter
  6. 6 tablespoon unsalted butter
  7. Graham crackers (optional)
  8. Grey Food Coloring (optional- to make them look like rocks)

This recipe is a 1:1 as I try to do with most of my recipes, so, if you want to add the graham crackers for that extra crunch, do regular if gluten free isn't your thing and if you are like me and not on the gluten train, then the gluten free ones will suffice!

How do you make your rock cakes?

I love this so much because it is a 1 pot recipe. So simple.

  1. Melt your butter in a pot on medium heat.
  2. Once your butter is fully melted add your marshmallows to the pot and allow them to melt. Stir them with the butter. They will be shiny and smooth when they are ready.
  3. Add the peanut butter and vanilla once the marshmallows are fully melted. If you want to make them look like rocks, now is the time to add your food coloring.
  4. Remove from the heat and add your rice krispies and the chocolate chips, along with the optional graham crackers.
  5. Stir it all up until they are fully melted together.
  6. Allow it to sit in the pot for a few mins and them remove small bits at a time and form them with your hands so they are the shape of rocks.

Why should you make these?

Like Harry and Ron, you don't want to insult Hagrid, aka Rubeus Hagrid Keeper of keys and grounds at Hogwarts School of Witchcraft and Wizardry. These pack such a delicious punch and they are so simple to make. As always, I hope you love them and make them. When you do, leave a rating in the comments and tell me how much you liked em!

Looking for other Harry Potter Recipes? I've got you covered.

Butterbeer click here
Polyjuice Potion click here
Black Lake Brownies click here
Pumpkin Juice click here
Treacle Tart click here

Always,
L

Copycat Butterbeer Universal Studios Recipe

July 2, 2020

three clear glasses with harry potter butterbeer inside on a wooden cakestand.

If you have been to Universal Studios Harry Potter World, then chances are you have tried butterbeer (Frozen or Hot). This copycat recipe is quick, naturally gluten free, and absolutely delicious. You won't be able to tell the difference! Make it today!

This is a big one guys, the recipe for butterbeer. This is the big kahuna, if you will. Readers and movie watchers first get a glimpse at butterbeer in Harry Potter and the Prisoner of Azkaban (which is my favorite of the series). It is supposed to be warming and comforting and just have the sweetest flavor. I have figured out how to make this recipe taste just like Universal Studios but the best part is, you can make it from your very own home! Let's dive in.

Why a copycat butterbeer universal studios recipe?

I have been lucky enough to visit Universal Studios! I went in March of 2019 and as it turns out, March is a great time to visit because they have frozen and warm butterbeer on the menu. My friend I was with preferred the frozen whereas I preferred the hot! This recipe is essentially a copycat universal studios butterbeer recipe. It is as close as you are going to get, and it is so so easy! The recipe is so delicious and I knew I wanted to try to recreate it as soon as I got home!

Cream Soda?

The base of this recipe is cream soda. Sorry if you do not like cream soda, but, I promise, it doesn't actually taste like cream soda. The best one to use is one that is darker in color (not a light cream soda) and it will be boiled down. This will enrich the flavor and act as the base sweetener of your butterbeer drink!

Warm Butterbeer Recipe vs Frozen Butterbeer Recipe

I love this butterbeer both ways! However, my preference is a warm butterbeer. If you wish to make this warm, then follow the instructions below and drink is right away. You can reheat it by warming it up in the microwave and or in a pot on the stove.

For frozen butterbeer, I would suggest you take the butterbeer you make and toss it in the fridge. You can either blend it with ice and make it frozen that way, or, you can freeze the butterbeer and blend it in a blender until it is sort of a smoothie like consistency. Whichever way you make it, it is absolutely delicious!

Is there beer in butterbeer?

No! There is not actually beer in butterbeer. It is slightly hinted at in the Harry Potter books that there may be alcohol in butterbeer but to make it as available as possible, Universal Studios never added beer or alcohol to the beverage!

What will you need for this copycat butterbeer Universal Studios recipe?

So, after referencing my palate and memory when I visited universal, and doing a ton of research, I have come up with a recipe for butterbeer that I think is as close to Universal's version as one can possibly get.

You will need the following things:

  1. 2 tablespoon Butterscotch sauce (now, you can purchase a sauce, or make your own. I made my own and the recipe will follow).
  2. 3 cups of cream soda (you need to get the nectar colored one, not the clear)
  3. 2 cups of milk (I used 2%)
  4. ¼ cup brown sugar
  5. 2 tablespoon butter
  6. Whipping cream (for the top!)

Recipe for butterscotch sauce:

  1. 4 tablespoon (½ stick) unsalted butter
  2. ½ cup dark brown sugar
  3. ½ cup heavy cream
  4. 1 teaspoon vanilla extract
three clear glasses with harry potter butterbeer inside on a wooden cakestand.
two flagons of harry potter butterbeer cheersing

How do you make your recipe for copycat Butterbeer Universal Studios recipe?

If you are making your butterscotch from scratch you will want to do the following:

  1. Melt your butter, brown sugar, and heavy cream in a pot on medium heat. You want to make sure everything is mixed together well. It will look like a caramel soup in the beginning but the longer it stays on the stove, it will thicken into a beautiful sauce.
  2. After about 5 minutes, it should be ready. Remove from heat, add your vanilla, and set it aside. Easy peasy.

To make your butterbeer:

  1. Now, let me preface this by saying that I do not like carbonated drinks (well, my body doesn't) so what I did was boil the cream soda until the carbonation was gone.
  2. In a separate pot, take 3 cups of the cream soda, mix it with the two cups of milk, add the ¼ cup brown sugar, 2 tablespoons of butter, and your 2 tablespoon of butterscotch and mix together. You do not necessarily want this to boil, so, keep it on a medium heat and get it to the point where it is steaming.
  3. While this is happening (should you choose to drink it warm) begin to make your whipped cream topping. It is really how much you want to make / use so, I did not put an exact measurement.
  4. If you are serving it warm, remove it from the stove, put your cream on top, and drink up!
  5. If you want to try it cold, transfer your mixture to a pitcher and place in the fridge for at least a few hours.
  6. When you decide to serve it, you can serve it over ice, or, not, that is your call. But you should make some whipped cream to put on top nonetheless.
  7. Drink up and experience the bliss that is butterbeer!
three clear glasses with harry potter butterbeer inside on a wooden cakestand.

Looking for other Harry Potter Recipes?

Sorting Hat Cupcakes
Black Lake Brownies
Chocolate Frogs
Felix Felicis
Harry Potter Birthday Cake
Pumpkin Pasties
Mincemeat Pies
"Coconut Ice" Cream
Hagrid's Rock Cakes
Treacle Tart
Polyjuice Potion
Philosopher's Stones
Pumpkin Juice

Want to never miss a video recipe? Subscribe to my Youtube channel here

Treacle Tart

June 29, 2020

A recipe for treacle tart: treacle tart

When you read the Harry Potter series, you see the word "treacle" appear frequently. It is Harry's favorite dessert. He loves it so much that he day dreams of treacle tart. I had never heard of such a thing. "What is treacle?" "Where does one even get treacle". Well, after doing my diligent research I present to you Harry Potter's favorite dessert, a recipe for treacle tart.

What is Treacle?

It is a golden syrup that is a weird in-between of maple syrup and molasses. It has a very distinct taste and flavor, one that I really cannot describe. My local grocery stores do not sell treacle so I ordered it from here. You will need it for the recipe. Subbing in the others (I have read) is strictly frowned upon.

What will you need for treacle tart? (Besides treacle)

To make this recipe for treacle tart it is a two prong process. You will first need to make your crust and then put the tart together. What you will need:

Tart Crust:

  1. 8 tablespoon butter (cold and diced)
  2. 1 cup brown rice flour
  3. 1 ½ tablespoon physilium husk
  4. 2 tablespoon potato starch
  5. 4-5 tablespoon ice water
  6. 2 tablespoon tapioca starch

Tart Filling:

  1. 2.5 cups fresh breadcrumbs (gluten free or regular)
  2. 2 eggs
  3. ⅔ cup treacle
  4. Juice and zest of 1 lemon

How to make it

First you are going to make your crust.

  1. Get out your food processor.
  2. Add the flour, starches, and a pinch of salt. Pulse a few times.
  3. Place the diced butter in the food processor and pulse until the butter pieces are the size of peas.
  4. While pulsing, add your water, one tablespoon at a time.
  5. Your dough should come together now. Remove it from the food processor, and flatten it into a disc. Place in plastic wrap or an eco-friendly alternative. Leave in the fridge for 1-2 hours (2 hours being better).

Once you have removed your dough from the fridge

  1. Roll out your dough. If you find it is sticking to the rolling pin, use some brown rice flour to cover the dough and your rolling pin.
  2. Place the dough into your tart pan. If you have any hanging over the edge, roll your rolling pin along the top of the pan and it will force the excess dough to fall off.
  3. Using a fork, poke some holes into the base of the dough.
  4. Take your breadcrumbs, syrup, eggs, and lemon zest and juice and mix together in a bowl.
  5. Once mixed, add to your crust and place back in the fridge for 10-15 minutes.
  6. Set your oven to °350F
  7. Place tart in the oven, put a pan underneath it, incase any syrup sneaks its way out.
  8. Bake for 45 minutes or until golden brown on top.
  9. Remove from oven. You can serve when it comes right out of the oven, however, I found it better cold. Serve it with whipped cream.

Why you should make this recipe for Treacle Tart

To get the full experience of Harry Potter foods, you really should make this at least once. To be entirely honest, it is a strange flavor but it kind of grows on you once you keep eating it. It was not my favorite of the Harry Potter foods, but alas, I am happy I tried it as I love a tart.

If you would like other tart recipes:

Other tart recipes I have on my site:

Pear and Frangipane Tart can be found here
Rhubarb Tart can be found here
Straberry Galette can be found here (a bit different from a tart but still delicious)

Always,
L

Harry potter themed snacks: Black Lake Brownies

June 25, 2020

Harry Potter gluten free brownie recipes on parchment paper

Still waiting on your train ticket to board the Hogwarts Express? Want to learn how to make an awesome Harry Potter themed snack? Look no further. This recipe is a fun play on the second task from the Goblet Fire, Black Lake Brownies. Harry Potter fans will delight in this post honoring all the fun ways you can celebrate the best food from Harry Potter!

Harry Potter gluten free brownie recipes on parchment paper

If you have read my other Harry Potter posts then you know that I love Harry Potter food and Harry Potter themed snacks. I was inspired to create Harry Potter recipes after reading the books, watching the movies, and visiting the Wizarding World of Harry Potter at Universal Studios. While at the Wizarding World of Harry Potter, I was able to actually taste a lot of the Harry Potter treats that had been mentioned in the series, and it got me working and thinking, "how can I make easy Harry Potter snacks and Harry Potter food" easily accessible to those unable to visit Universal studios? Alas, my Harry Potter Themed snacks were born!

Some of my recipes were directly from the books such as treacle tart (treacle tart is said to be Harry's favorite dessert), Liquid Luck, pumpkin juice, rock cakes, pumpkin pasties, chocolate frogs, butterbeer, you name it. However, some are more Harry Potter inspired. For our Harry Potter inspired food, I have created sorting hat cupcakes (which you can see the recipe for here) or this recipe, Black Lake Brownies! These are such a fun treat, and really delicious. You won't need to force feed your kids a love potion to ensure that your kids will love this recipe!

FAQ

What are is a good Harry Potter snack or the best Harry Potter food?

I think the universal food that is sought out the most from the Harry Potter series is butterbeer. It is many peoples favorite Harry Potter snack, but, I think my favorite harry potter treat is pumpkin juice. However, it entirely depends on my mod or the day!

If you do wish to make butterbeer (you can find my recipe for it here), you can expand and make a whole slew of new and fun butterbeer based recipes. There is butterbeer ice cream, butterbeer cupcakes, butterbeer pots de creme, butterbeer popcorn, butterbeer fudge, butterbeer birthday cake (although, you may want to just go ahead and make Hagrid's birthday cake for harry which is a delicious chocolate cake - found here).

If you want to really stay on theme and have a Harry Potter themed party or a Harry Potter movie night, and make things from the books then I suggest some of the following:

Sorting Hat cupcakes, everyone can get sorted into their own house which is super fun (especially if you are looking for party ideas).

Polyjuice Potion is another really fun recipe as it is such a book moment in the Harry Potter books.

Chocolate Frogs, you can also have fun little wizard cards to go with them if you are a crafty person!

I have not made them but acid pops could be really fun to make at home. Acid pops are sold at Honeydukes (which as told to us in the Harry Potter books is a sweets shop). Cauldron cakes would also be super fun for a harry potter movie night or party!

What do you need for this recipe?

Most gluten free brownie recipes end up being really good. This recipe is as if a blondie and a brownie got together made a dessert baby and put a tail on top. So, this is what you will need:

  1. 2 cups flour (gluten free or regular. This is a 1:1 recipe)
  2. 1 teaspoon salt
  3. 2 cups brown sugar (I used dark but you can use light)
  4. ¾ teaspoon baking powder
  5. 1.25 cups olive oil
  6. 3 large eggs
  7. 1 teaspoon vanilla

For the frosting:

  1. 8 oz cream cheese
  2. ½ cup butter (8 tablespoons)
  3. 2 cups powdered sugar

For the tails:

  1. 1 bag white chocolate melts

Special Equipment:

  1. One tail silicone mold (I bought mine here)
  2. A small paint brush
  3. Grey or Blue / Green food coloring
  4. Black Food Coloring
  5. Deep Blue Food Coloring

Gluten Free Brownie Recipe: Harry Potter Ed.- How do you make em?

First you are going to make your brownies:

  1. Mix together your dry ingredients in a bowl (whisk them together)
  2. Add your olive oil and vanilla and mix together with a wooden spoon.
  3. Add one egg and a time and make sure they are fully incorporated.

Baking it

  1. Take an 8x8 baking pan and grease it. Add parchment paper so you can remove them after it has baked.
  2. Set your oven to 350° and set aside until the oven is ready.
  3. Once it has hit 350F, place in the oven on the middle rack and bake for 30-35 minutes.
  4. Once it has done baking, remove from oven and place a toothpick in the middle. If it comes out clean, it is done.
  5. Leave on the counter to cool

How to make your tails and icing

For your tails:

  1. Add your melts into a bowl and microwave for 30 seconds at a time. If you do not feel comfortable using a microwave, place in a double boiler until they are melted.
  2. Stir the melts until smooth
  3. fill the silicon mold with the chocolate and place in the fridge until they are hard.
  4. Once they are hard- remove from the fridge and allow them to sit for a few minutes. This will allow the chocolate to loosen a bit and you will be less likely to break any of the tails when you remove them from the mold.
  5. Once they are removed from the mold, take your paint brush and food coloring and paint them.
  6. Once they are painted, place them back in the fridge until ready to use.

Making your icing:

  1. Add your cream cheese and butter together in your mixer and mix until they are smooth. Add your powdered sugar ½ cup at a time until it is fully incorporated.
  2. Separate the icing into 2 parts; you will use black food coloring for the icing that will go directly on top and the other part will be blue for the swirl aka "splash" that the tail will go into.

Putting them all together

  1. Once your brownies have cooled, take the black icing and make swirls on top so that it almost looks like waves of water.
  2. Mark where you are going to cut and then put swirls on each of those squares.
  3. Remove your tails from the fridge and put one into each swirl.
  4. Cut the squares and then you are good to go!
Harry Potter gluten free brownie recipes on parchment paper

Your Harry Potter Party is ready to roll with your Harry Potter themed snacks!

Harry Potter fans rejoice! We have you covered for some of the all time best Harry Potter recipes to celebrate. A bunch of these treats are available at the magical world of Harry Potter however, you don't need to be at the magical world of Harry Potter to enjoy them. The best part is, these recipes are honestly super easy to make. I wanted to make easy Harry Potter recipes for all to enjoy and I hope you will find that when you make them!

Looking for other Harry Potter Recipe Ideas aka the best Harry Potter treats?

Harry Potter Birthday Cake (Hagrid's Cake)
Pumpkin Pasties
Sorting Hat Cupcakes
Coconut "ice cream"
Polyjuice Potion
Philsopher's Stones
Pumpkin Juice
Liquid Luck
Rock Cakes
Copycat Butterbeer Universal Studios Recipe
Treacle Tart

Polyjuice Potion

June 22, 2020

Polyjuice potion in a clear glass.

When I started my research for a polyjuice potion recipe all I could find were green colored drinks. None of this makes any sense, because we true fans know, that polyjuice potion is not really a liquid form. It is a greyish goo with chunks of lacewing flies, leeches, flux-weed, and knotgrass. In addition to powdered horn of Bicorn, shredded skin of Bloomslang, and pieces of the person you want to change into (hopefully not toenails- Ron). I want to stay true to the books, so, while I am giving you something in a glass, it is not a drink. It is a mousse, mixed with fun bits of edible cookie dough, toffee, and chocolate chips.

What do you need for your Polyjuice Potion Recipe?

For your polyjuice potion you will not need toenails or bloomslang, but you will need the following:

  1. Edible Cookie Dough (recipe will follow)
  2. Chocolate Chips
  3. Toffee Bits
  4. 1 cup milk (I used 2% but you can use whole should you choose)
  5. 16 oz yogurt
  6. 1.5 tablespoon vanilla (I used bean paste)
  7. 1 cup + 2 tablespoon sugar
  8. 2 packets of gelatin (I used knox)
  9. 1 cup heavy cream

Recipe for edible cookie dough:

  1. One stick butter- at room temperature
  2. ½ cup (¼ cup brown sugar + ¼ cup white)
  3. 1 ¼ cup flour
  4. 2-3 tablespoon milk or cream
  5. toffee bits
  6. chocolate chips
  7. 1 teaspoon vanilla
  8. 1 teaspoon almond

How do you make it?

First, you are going to make your edible cookie dough. What I love about this recipe is that it is egg free (so no worries about salmonella) and it is not too sweet because you will be adding it to something sweet.

  1. Beat your butter in your mixer with the paddle attachment.
  2. Add your sugars, and cream them together. Allow them to beat together for about 3-5 minutes because it will become light and fluffy.
  3. Once it is all nice and fluffy, you are going to add your flour. It is going to be really clumpy and appear to not be turning into a dough. This is when you add your milk or cream.
  4. Once your milk and or cream have been added, it should be coming together, add your vanilla and almond extracts, along with the chocolate chips and toffee bits.
  5. Voila! Edible cookie dough- set this aside while you make your mousse aka polyjuice potion!

How to make your mousse:

  1. In a pot, take your one cup of milk, 2 packets of gelatin, and vanilla, and whisk together.
  2. Place it on the stove on medium heat, you do not want this to boil. I repeat- do not boil. You simply want this to simmer.
  3. Whisk this while it continues to simmer- once you get a good simmer- remove your pot from the heat and allow it to cool.
  4. Take your 16 oz of yogurt or sour cream and mix it together with the sugar. You want it to come together so not the sugar is not visible and it appears smooth.
  5. Meanwhile, place your cream in your mixer and beat your whipping cream to stiff peaks.
  6. Once your cream is at stiff peaks, add it ⅓ at a time to your bowl with your yogurt. It is at this point that you may want to add the grey food coloring to match the color from the movies. Once all of your cream has been added to the bowl, move the entire mixture back into the bowl for your stand mixer.
  7. You are going to put your mixer on slow and slowly add your mixture with the gelatin in it. As it pours in it will add the gelatin to your mixture.
  8. Decide what glasses you want to serve your polyjuice potion in, and add your cookie dough along with extra chocolate chips, and toffee.
  9. Pour your "potion" recipe over this in the glasses and place in the fridge for a minimum of 3 hours. Chilling it will allow your polyjuice potion recipe to set!

Why should you make this
Polyjuice Potion Recipe?

It is a really big moment in the series when Harry, Ron, and Hermione make and take the potion. Much to the dismay of Hermione, her turning into a cat was not part of the plan, but none the less, the results they wanted were obtained! The recipe alone is delicious. You get the tangyness of the yogurt and sweetness from the cream, cookie dough, and toffee, plus, you get the fun nostalgia. You also can take pride in the fact that you didn't make a green drink like Pinterest wanted you to do and did something much more akin to the story.

I hope you enjoy it!
Always,
L


Harry Potter Pumpkin Juice

June 18, 2020

Harry Potter Pumpkin Juice in clear classes

This fun and easy recipe for pumpkin juice does not have to be reserved just for Hogwarts. You can enjoy this family friendly Harry Potter themed recipe all year round! With a super quick cook time, it is the ideal themed drink to make.

For my 29th birthday, I was lucky enough to visit the Wizarding World of Harry Potter in Orlando, Florida at Universal Studios. I had never been to Universal Studios before (my family were strict Disney visitors), and honestly I had very little interest in visiting Universal Studios until the opening of the Wizarding World of Harry Potter. As someone who adores Harry Potter, I could not wait to get there and explore the parks. It is such a fun way for a family to have a vacation (I totally see the appeal now that I am pregnant of going with kids), and if you are a foodie like me, you can eat your way around the parks and enjoy all of the tastes of Harry Potter!

The Wizarding World of Harry Potter is actually two parks within Universal Studios. One park is Hogesmede and has Hogwarts looming in the distance, while the other is Diagon alley. We chose to start our day in Diagon Alley, and it was so fun! As my birthday is in March, it is an interesting time to visit the parks in terms of what food is available and their temperature. Butterbeer at this time of year can be purchased warm or frozen. I thought this would be my favorite drink from the Wizarding World of Harry Potter however, pumpkin juice was the hero of the day.

This recipe is a copycat recipe of the Harry Potter pumpkin juice that is served at Universal Studios. It is honestly delicious all year round (not just for Halloween time) and is incredibly refreshing. It is a sweet drink (so bare that in mind) but I bet whoever you serve it to will absolutely love it.

FAQ

What do I need for this recipe?

  1. Measuring cups
  2. Glass (pitcher / glass to serve the drinks); bottles are another option if you are doing a Harry Potter themed party and want to try to replicate the bottle they have at the Wizarding World of Harry Potter.

How should I serve this drink?

Unlike butterbeer which can be served and taste delicious both warm and cold, I suggest that for the best flavor and taste that this copycat Harry Potter pumpkin juice be served cold. It could potentially be interesting to serve it warm but it honestly it so good cold that I just think it is served best, plus, as it is traditionally served this way at Universal, I just stuck with it. It can be fun to stay on theme!

What does Harry Potter pumpkin juice taste like?

It tastes like Fall (if Fall had a taste). So, naturally, it tastes delicious.

Typically when we think of pumpkin, we think of food (savory generally or pumpkin pie for a sweeter food or dessert). This is more in the realms of a sweet pumpkin pie. Although there are not many spices in the recipe, it does taste (due to the natural pumpkin) as if there were pumpkin pie spice mixed into the recipe. The pumpkin flavor is very present but it also does have a beautiful apple juice flavor added in. Even when you purchase a bottle of pumpkin juice from Universal Studios, it does not seem as if there is any artificial flavors. Just the luscious and alluring tastes of Fall.

Can I make any substitutions for this recipe?

The pumpkin puree is a must if you really want to hone in on the pumpkin flavor.

For your simple syrup, be sure to use white sugar, not brown sugar. It will not yield the results you want.

In regards to apple juice concentrate, apple juice, apricot nectar questions, see the sections where I discuss the ingredients for the recipe!

If you want to add just a bit more pumpkin flavor to your Harry Potter pumpkin juice, then go ahead and add a teaspoon of pumpkin pie spice, but, I don't think you'll need it!

What do you need for this recipe?

As Universal sells pumpkin juice (you can even order the cutest bottles from their website- although they are expensive), it allows you to take a look at their ingredients. I did research as to what ingredients are used in the Universal recipe in order to make it taste as close to the original pumpkin juice as possible. While this is a copycat recipe, I value authenticity in a recreation! Let's make our Harry Potter pumpkin juice

  1. 1 cup of pumpkin puree
  2. ¾ cup simple syrup (ingredients to follow)
  3. 24 oz apricot juice (get one that is mixed with apple- if you cannot find apricot juice, then apricot nectar is fine, or apple juice)
  4. Water- if you feel it is too sweet and you want to water it down a bit.

Simple Syrup:

  1. Water, 1 Cup
  2. Sugar, 1 Cup
  3. 1 teaspoon Vanilla Extract
  4. 1 tablespoon Cinnamon

*this recipe could easily be doubled, just multiple everything by 2. Example, 1 cup pumpkin puree becomes 2 cups pumpkin puree.

How do you make Harry Potter pumpkin juice?

The overall cook time for this recipe is short (another reason why I love it).

To get started, you are going to want to make your simple syrup:

  1. Place your water in a small pot, along with the sugar, vanilla, and cinnamon.
  2. Allow the mixture to simmer and stir until the sugar dissolves. It is going to smell like Fall and taste amazing.
  3. While that is finishing up (it really shouldn’t take more than 5-10 minutes on a medium high), in a pitcher take your pumpkin puree and apricot juice.
  4. Once your syrup is ready, combine all ingredients in the pitcher and begin to mix! There should be no chunks of pumpkin (the puree should be smooth to begin with). It will become smooth the more you stir.
  5. Place in the fridge and allow to chill.
  6. Once it is cold enough, add some ice cubes, and serve!

Looking for other Harry Potter Food Ideas or Copycat Recipes?

If you are ever going to through a Halloween party or a Harry Potter themed part for your family and friends, I've got you covered.

Harry Potter Cake
Pumpkin Pasties
Copycat Butterbeer Universal Studios Recipe
Liquid Luck
Chocolate Frogs
Black Lake Brownies
Hagrid's Rock Cakes

Be sure to never miss a new blog post and be sure to subscribe to my website in this browser!
Want to never miss a new recipe video? Follow me on Youtube here
Never miss a new post and follow me on Facebook here

Harry Potter and the Philosopher's Stone

June 15, 2020

philosopher's stones in a hand

One of my favorite series of films and books is Harry Potter. I have been pretty vocal about this. It became a goal of mine after having my friend ask me to make some sorting hat cupcakes to dive into the world of Harry Potter recipes. I figured I would start at the beginning with the easiest one. Book one, titled (in differing countries) either: "The Philosopher's Stone"(this is what I grew up with) or "The Sorcerer's Stone" (in America) is a perfect place to begin. So, my Harry Potter recipes begin with the philosopher's stone.

What will you need to make your Philosopher's Stone?

It is so simple, and that is why it is so great!

  1. Food Coloring
  2. Rock Candy
  3. Gold glitter

Tools:
Paint brush

How do you make your Harry Potter Recipe?

Here is where it gets even easier:

  1. Take your paint brush, dip it into the food coloring of your choice and begin to cover the rock candy.
  2. Spray the gold dust onto a plate. Dip your paint brush into it and begin to then cover the stone again so it has a bit of shine to it.
  3. Let it dry!

Why should you make these?

So, here are my thoughts. This is a super fun activity for kids be it for any random day or for a party. Harry Potter themed parties are basically my dream whenever Josh and I have children. It can be a fun candy to give out at Halloween, or, it could be a fun stocking stuffer during the holidays. I mean, why wouldn't you make this? It is so simple that you could basically do it in your sleep. If you need more information on the Philosopher's Stone remember to check in the restricted section.

Sorting Hat Cupcakes

June 11, 2020

Sorting hat cupcakes sitting on a brass tray

If you are a fan of Harry Potter, then the question of "which house you belong to" has definitely been asked. Play a fun game of cupcake roulette and be sorted into your Hogwarts house! Take a bite and find out if you are a Gryffindor, Ravenclaw, Hufflepuff, or Slytherin!

I was a reader as a child and was enthralled with the magical world of Harry Potter. I think as kids, most like to envision themselves as a member of Gryffindor as that is the Hogwarts house of our protagonist, Harry. Gryffindor House prides themselves on being courageous, brave, and kids like to see themselves that way. However, as I aged I knew I was a Ravenclaw at heart and it was fun to see which "house" my friends belong to as well. As a Ravenclaw who married a Slytherin, I have come to learn that we can all co-exist. Enter in, sorting hat cupcakes.

The sorting ceremony is an integral part of the first book, and it is easy to bring to life with the creation of these sorting hat cupcakes! Let's dive in and make these sorting hats and sorting hat cupcakes.

FAQ

How do you make sorting hat cupcake toppers?

I have a recipe and explanation as to how to make them from fondant. If you want, you can also make them from modeling chocolate. You can find out more about that here. It may seem like a bit of work, but it is easy to make and super fun! Once you make your sorting hats, set aside while you make the cupcakes. Do not make these too far in advance though, you do not want them to dry out.

What flour is the best for gluten free cupcakes?

Most 1:1 gluten free flour mixes that contain xanthan gum will yield decent cupcakes. However, I love King Arthur Measure for Measure gluten free for my cupcakes as it makes them so easy to make and I do not need to worry about how they will turn out. They always turn out well. It is always a blessing when you are gluten free and you find a product that works and means you do not have to worry about the quality of your food!

What is the best way to make and pipe your buttercream frosting?

I suggest making one big batch of buttercream frosting. Then dividing the frosting into 5 sections. 4 of those sections will be for the colors (red for Gryffindor, blue for Ravenclaw, yellow for Hufflepuff, and green for Slytherin), and then the fifth will be for the frosting that tops each of the sorting hat cupcakes and helps the sorting hats stay in place on the top of each cupcake.

Once you have made your cupcakes (see instructions below as to how to how to make them), allow them to cool completely. Once the cupcakes are cool, remove part of the center of each of the cupcakes. I like to use a piping tip (a large one). They sell cupcake center removers however I have never purchased one.

Mix your food coloring in each of your bowls and take your piping bag and make sure it is fitted with a piping tip. Pipe the buttercream frosting into the center of the cupcake. This will be the big reveal when your guests take a bite of their sorting hat cupcakes and find our which house they have been sorted into!

Pipe frosting on top of the cupcakes and then place the sorting hat on top of each cupcake.

What tools do you need for this recipe?

  1. Piping Bag
  2. Piping Bag Tip
  3. Cupcake liner
  4. Food coloring; red, green, blue, and yellow
  5. large bowl

What do you need to make sorting hat cupcakes?

To see how to make the hats, click here

For the cupcakes (this recipe makes 12), you are going to need:

  1. 1 cup gluten free all purpose flour, I use King Arthur Measure for Measure (with xanthan gum)
  2. ½ cup salted butter (1 stick, 8 Tbsp)
  3. ½ cup water
  4. ¼ cup buttermilk
  5. 1 cup sugar
  6. 1 egg
  7. ⅓ cup cocoa powder
  8. 1 teaspoon baking soda
  9. ¼ teaspoon salt
  10. 1 teaspoon pure vanilla extract

For your buttercream frosting:

  1. ¾ cup unsalted butter (butter softened, room temperature)
  2. 8 oz cream cheese
  3. ⅓ cup cocoa powder
  4. 1 teaspoon Vanilla Extract
  5. 2-3 tablespoon Milk or cream
  6. 1.5 cups Powdered Sugar

How do you make these sorting hat cupcakes?

  1. Preheat your oven to 350°F. Meanwhile, Mix together in a bowl the gluten free flour, sugar, salt, and baking soda.
  2. In a pot on the stove, melt your butter, add the water, and cocoa powder. Bring to a boil.
  3. Once it has boiled, add it to your bowl with your dry ingredients. Whisk together until there are no lumps.
  4. Add your egg, buttermilk, and add the vanilla extract. Whisk again. Line your muffin tin your liners.
  5. I like to use an ice cream scooper for cupcakes, so, fill your liners ¾ of the way up.
  6. Place in the oven between 18-20 minutes. To make sure the cupcakes are fully done baking, insert a toothpick into the middle. If it comes out clean, it means that they are finished baking.
  7. Let the cupcakes cool in the tin for about 15 minutes. Once they have cooled a bit, transfer to a wire wrack.
  8. While they are cooling, you can go ahead and make your frosting.

How do I make the buttercream frosting?

  1. Take your softened butter and cream cheese and beat with the paddle attachment in your mixer. Let it beat for a few minutes so it gets nice and fluffy.
  2. Add your powdered sugar and let it carry on for a few minutes as it forms into buttercream frosting. You want to make sure that the mixer is on a low or medium low when you add the sugar, as you do not want your sugar to go flying everywhere. Flying sugar is no good!
  3. After creaming together the butter and sugar, it is going to seem a bit stiff. Now, add your milk or cream.
  4. Divide the frosting into 5 bowls. 4 bowls will be mixed with colors (red, green, blue, and yellow) and the fifth will be the brown frosting that goes on top of the sorting hat cupcakes.
  5. Place the reserved amount for the tops of the cupcakes back into the mixing bowl. Add your cocoa powder and mix. If the frosting seems too stiff, add a bit more milk or cream.

How do I put my sorting hat cupcakes together?

  1. You are going to make a divot in each of the cupcakes. This is where the color for each house will go.
  2. Separate the frosting you took out and place it into 4 bowls, and mix your red, yellow, green, and blue,
  3. Fill the cupcakes with the colors.
  4. Once you have filled your cupcakes, take piping bag fitted with the appropriate tip and swirl the chocolate buttercream frosting and cover the tops so that no one can see what is inside! You want them to be surprised.
  5. Place your hats on top of each cupcake, and voila! You have successfully made sorting hat cupcakes!

How do you make your
Sorting Hat Cupcakes?

To make your hats, see instructions here.

To make your cupcakes:

  1. Mix together in a bowl your flour, sugar, salt, and baking soda.
  2. In a pot on the stove, melt your butter, add the water, and cocoa powder. Bring to a boil.
  3. Once it has boiled, add it to your bowl with your dry ingredients. Whisk together until there are no lumps.
  4. Add your egg, buttermilk, and vanilla. Whisk again.
  5. Set your oven to 350°F and line your muffin tin your liners.
  6. I like to use an ice cream scooper for cupcakes, so, fill your liners ¾ of the way up.
  7. Place in the oven between 18-20 minutes. When you remove them from the oven, you should be able to stick a toothpick in the middle and for it to come out clean.
  8. Let the cupcakes cool in the tin for about 15 minutes. Once they have cooled a bit, transfer to a wire wrack.
  9. While they are cooling, you can go ahead and make your icing.

PS. If you are wondering what book has those illustrations, you can buy it here.

Looking for other Harry Potter Food Ideas or Recipes?

Harry Potter Pumpkin Juice
Harry Potter Cake
Pumpkin Pasties
Copycat Butterbeer Universal Studios Recipe
Liquid Luck
Chocolate Frogs
Black Lake Brownies
Hagrid’s Rock Cakes

Peppermint Mocha Cookies

June 8, 2020

Now, before you tell me, I know. It is June and it is not Christmas. I know all of this. However, and just hear me out, times have been crazy right now. Crazy with a pandemic, crazy what it took to get officers arrested for the murder of George Flloyd, and crazy that we live in a world where this is all still an issue.

I think, at least for me, in times of unrest, I search for comfort. When I think of comfort, I think of the holidays. When I think of the holidays, I think of my grandma. When I think of her, naturally, I think of cookies. These mint cookies with chocolate chips were not a recipe of hers, she hated mint. The man I married, however, loves mint everything. Therefore, when we want some comfort, we go for cookies, and today, I am telling you how to make these easy and delicious mint cookies with chocolate chips.

What do you need for mint cookies with chocolate chips (besides mint and chocolate chips)?

So, for your cookie dough, you will wan the following:

  1. 1 cup sugar
  2. ¾ cup butter (softened to room temperature)
  3. 1 ½ cups gluten free all purpose flour (or regular flour- 1:1 recipe)
  4. 1 egg
  5. ¼ teaspoon salt
  6. 1 teaspoon baking powder
  7. ¾ cup cocoa powder
  8. 1 teaspoon vanilla extract
  9. ¼ teaspoon peppermint extract (* or peppermint essential oil if it has been approved by the FDA for consumption)

For your topping:

  1. Peppermint crunch baking chips (as much as you want)
  2. 1 bag white chocolate melts
  3. 1 teaspoon crisco (or a vegetable oil)

How do you make these cookies?

Luckily, they are super simple! Isn't that always the best?

  1. In a stand mixer, you are going to want to cream your butter and sugar together.
  2. Once your mixture is nice and creamy (around 2-3 minute) add your egg and vanilla and mix together on high. If it looks like you need to scrape down the sides of the bowl, be sure to do it.
  3. Add your cocoa powder, flour, salt, and baking powder. Beat together on a medium speed.
  4. Divide the mixture into 2.
  5. Roll out each portion on some cocoa powder / dust your rolling pin with cocoa powder.
  6. Use your cookie cutter and make your cookies. Place them on a cookie sheet and place in the fridge for one hour.
  7. Set oven to °350F and once it hits the right temp, bake your cookies for 10-12 minutes.
  8. Cool on a baking sheet for 5-10 minutes.

Part II

  1. Melt your white chocolate melts (along with your crisco) in a bowl in the microwave in 30 second increments. Stir after each time in the microwave until smooth.
  2. Drizzle your chocolate over your cookies and then sprinkle the peppermint crunch over the chocolate on the cookies.

Why should you make mint cookies with chocolate chips?

They are the perfect Christmas cookie as well as just a comfort cookie. They will make your taste buts sing and make you burst out a carol or whatever song fits your fancy.

In the mood for more cookies?

Double Chocolate Chip Cookies can be found here
Mexican Hot Chocolate Cookies can be found here
Linzer Cookies can be found here
Heath Bar Cookies can be found here
Egg free Sugar Cookies can be found here
Chocolate Crinkle Cookies can be found here

Homemade Fondant Recipe

June 1, 2020

Marshmallow Homemade Fondant - have you heard of it?

I have never been a fan of fondant. I am always the person that if something has fondant on it, I pick it off, and eat what is inside. Plus, the majority of fondant has wheat in it so that it can sit on the shelf for an extended period of time. What I have for you is a tastier, homemade fondant!

What do you need for homemade fondant?

Gosh, it is so easy. It is 3 ingredients!

  1. 5 oz of mini marshmallows
  2. 2-3 tablespoon of water
  3. 3 cups powdered sugar

How do you make it?

Homemade fondant is super easy to make, another reason I love it. To begin:

  1. Place your marshmallows in a microwavable safe bowl.
  2. Cover them in water.
  3. You are going to microwave the marshmallows in 30 second increments for 3 minutes. After each 30 seconds you will stir them. By the 3 minute mark, there should be no lumps!
  4. Sift your powdered sugar into the bowl 1 cup at a time. This way you can make sure it is not lumpy.
  5. Once all of the powdered sugar has been sifted, begin to mix with your hands. I advise using a grease on your hands so that you can avoid the mostly unavoidable stickiness.
  6. Once it is coming together, put it out on your counter and mix until it is a taffy like consistency. If it is too stiff, add a bit more water. If it is too soft, add some powdered sugar.
  7. You add your food coloring to it and begin to work it in until it is the desired color you want.
  8. You can then shape it into whatever you like!

What can you do with homemade fondant?

Well, other than be it being a super fun activity for you and kids, you can use it for a multitude of things. You can use it to cover cake (should you choose to go that route, and create something like this or you can make like decorations like I did.

Sorting hats, anyone?

So what can you do with it?

Whatever your heart desires.

Enjoy!

Double Chocolate Chip Cookies

May 28, 2020

Double chocolate chip cookies: Happy Thursday, everybody! We are on (I have lost count) of what day of lockdown now. Things that I have been into lately: 1) I have been watching Selling Sunset on Netflix and it makes me want to be a realtor (mostly so I can go inside all of these amazing houses and constructions). 2) I did a reiki session with my friend Martha via zoom that helped me feel so calm afterwards. 3) These double chocolate chip cookies that are basically like brownies but in cookie form.

These cookies are so easy

I have a deep love for cookies. While I love cake, it can be time consuming and messy. Cookies are really so simple and that is probably what I love about them the most. Josh is a big cookie fan, so, we generally have cookies in the house. I like to switch it up and not do the same cookies back to back. One of the reasons I love these cookies is that they are a simple recipe, not a lot of effort and time required.

What do you need for these double chocolate chip cookies?

This recipe was inspired by a recipe from the Bonjon Gourmet (who also specializes in gluten free baking). I have adapted the recipe and made it a 1:1 recipe so that if you are gluten free you can have delicious cookies, and if you aren't, you can use regular flour and not worry about it. They will be just as delicious.

What are the ingredients that you are going to need:

  1. 12 oz chocolate - A note about this. I like to use milk chocolate, I am a milk chocolate girl. However, for a darker cookie, you can also use semi-sweet chocolate or dark chocolate. You can also do a mix of chocolates. It is your choice. The world is your chocolate choice!
  2. ½ cup of flour - gluten free for those who need it, and regular for those who do not.
  3. 1 teaspoon vanilla- I used vanilla bean paste but you can also use vanilla extract in its place.
  4. 2 eggs
  5. 6 tablespoon unsalted butter (cold- you will be melting it)
  6. ¾ teaspoon baking powder
  7. 2 tablespoon tapioca flour
  8. ½ cup sugar (you can also use raw cane sugar if you wish)

How do you make double chocolate chip cookies?

These cookies are super simple to make! This and the taste and gooeyness of the cookies are the reasons that I love them. So, let's begin:

  1. The first thing you are going to do is melt 8 oz (1 cup) of the chocolate with the butter in a small pot. I would suggest you do this on a medium / medium high heat. Stir to make sure that it does not burn and cake to the bottom.
  2. Once your chocolate is melted and is beautiful, smooth, and has the prettiest shine, remove from the heat.
  3. While it cools a bit, beat your eggs and sugar together for 5 minutes. It will be beautifully light and fluffy and almost a golden color. Once it is that perfect color and is combined, add your vanilla and beat for another minute.

4. You are now going to add your chocolate to your egg mixture. Allow it to combine for a few minutes.
5. While it is mixing, combine your flour, tapioca flour, and baking powder in one bowl and mix it together (with a fork or a whisk).
6. Add your flour mixture to your to your bowl and allow the batter to really come together.

Now, your batter should not be super runny. It should be like a brownie batter. If it is not, allow it to cool a bit, it is just that the chocolate was added when it was still a bit too warm.

7. You are now going to take the 4 oz (½ cup) of remaining chocolate chips and use a spatula to fold them into your cookie batter.

8. Set your oven to 350°F
9. Use an ice cream scoop to scoop out your batter onto cookie sheets.
10. Sprinkle them with kosher salt, and put in the oven.
11. Bake for 10-12 minutes and then remove from the oven. Allow them to sit on the pan for about 10 minutes. Then you can dig in!

https://garnishedwithjoy.com//www.youtube.com/watch?v=cx-tkWHR3Xw

Why should you make these cookies?

These cookies are so beautiful and so simple. They are a chocolate lovers dream and will likely convert someone into being a chocolate lover if for some strange reason they don't love chocolate already. These cookies are best served the day of however they will stay for several days if they are on your counter in a sealed container.

From start to finish, these cookies take less than 30 minutes to make. It is a perfect activity to do with kids, your spouse, or your mama over facetime. You won't be disappointed with the results, I promise.

If you are in the mood for cookies:

Here are a few links to other cookie recipes I have on my site.

1. For Mexican Hot Chocolate cookies, click here
2. For Heath Bar cookies, click here
3. For Egg Free Sugar cookies, click here
4. For Chocolate Crinkle Cookies, click here
5. For Linzer cookies, click here

Just a reminder

In just a few short weeks, we will be beginning our Very Potter Summer! I cannot wait to get into it with you guys and share some of the recipes I have been coming up with. I have had such a fun time experimenting and playing around with ingredidents, as well as digging back into the story that I can't even tell you. Right now, I am in the middle of Harry Potter and the Goblet of Fire and man, I forgot so much of what happens in the book. Definitely, the movie did not do it justice.

Let me know in the comments if you give this recipe a go and how you liked it. Also, let me know what Harry Potter Recipes you are most looking forward to.
- L


« Previous Page
Next Page »

Primary Sidebar

Custard Apple Tart: A French NormandeTarte Recipe

Let's Get Cooking!

  • 100% gluten-free sweet & indulgent recipes that I've tested in my own kitchen that I hope you'll try and love!
  • Step-by-step instructions (including some videos) on how to perfect your gluten-free cooking and baking game.
  • All of my favorite cooking, baking, and photography equipment that I deem essential in the kitchen!

More about Garnished With Joy →

As Featured In

Footer

↑ back to top

About

Recipes

Contact

Privacy Policy

Disclaimer

Terms & Conditions

© 2025 Garnished With Joy