

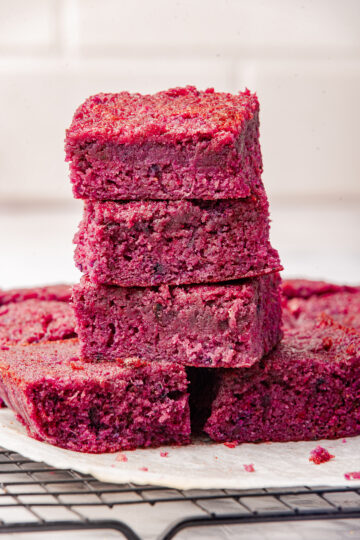
Learn how to make your favorite Cornish staple at home and gluten-free—introducing the gluten-free pasty. This savory hand pie is delicious, hearty, and the perfect meal to eat with your hands.
Prior to visiting Cornwall several years ago I had researched where I could find gluten free Cornish pasties. I ended up finding several that were so delicious that I have worked at perfecting the recipe since coming home.
What is the history of Cornish Pasties?
The history of Cornish pasties dates back to the 17th century when they were commonly eaten by Cornish miners and workers as a portable and hearty meal. The thick crimped edge was designed as a handle so that the miners could hold the pasty with dirty hands and discard the crimped edge afterward, minimizing waste.
What equipment do you need?
I make my pie crust in a food processor so for this recipe I would suggest that.
In addition you will need:
Baking Tray (or baking sheet)
Rolling pin (or a taco press)
parchment paper (or wax paper)
Large bowl
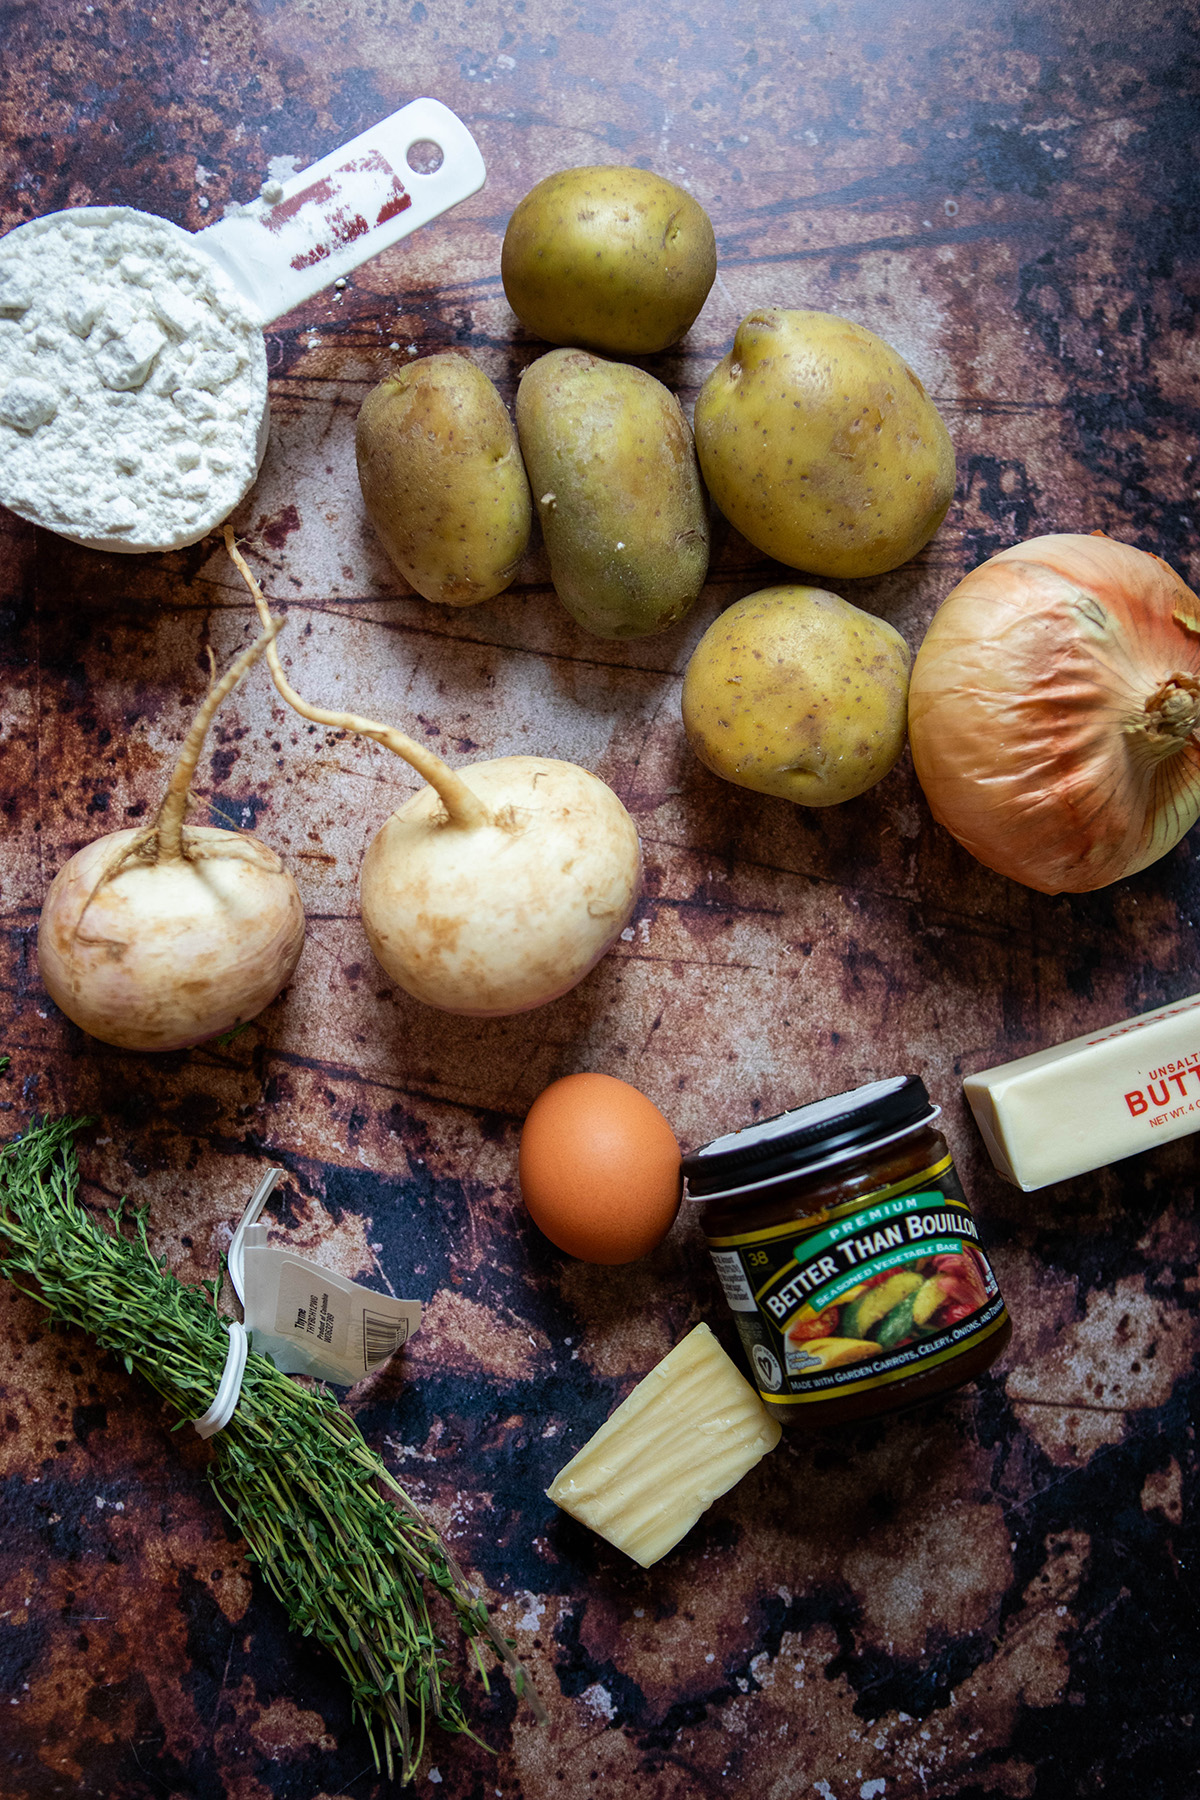
Ingredients for gluten free pasties
Rutabega, root vegetables are integral to a pasty.
Potato
Onion
Cheddar Cheese
Fresh Thyme
Vegetable Boullion
Gluten free flour (make sure to use one with xanthan gum)
Butter
Egg
Water
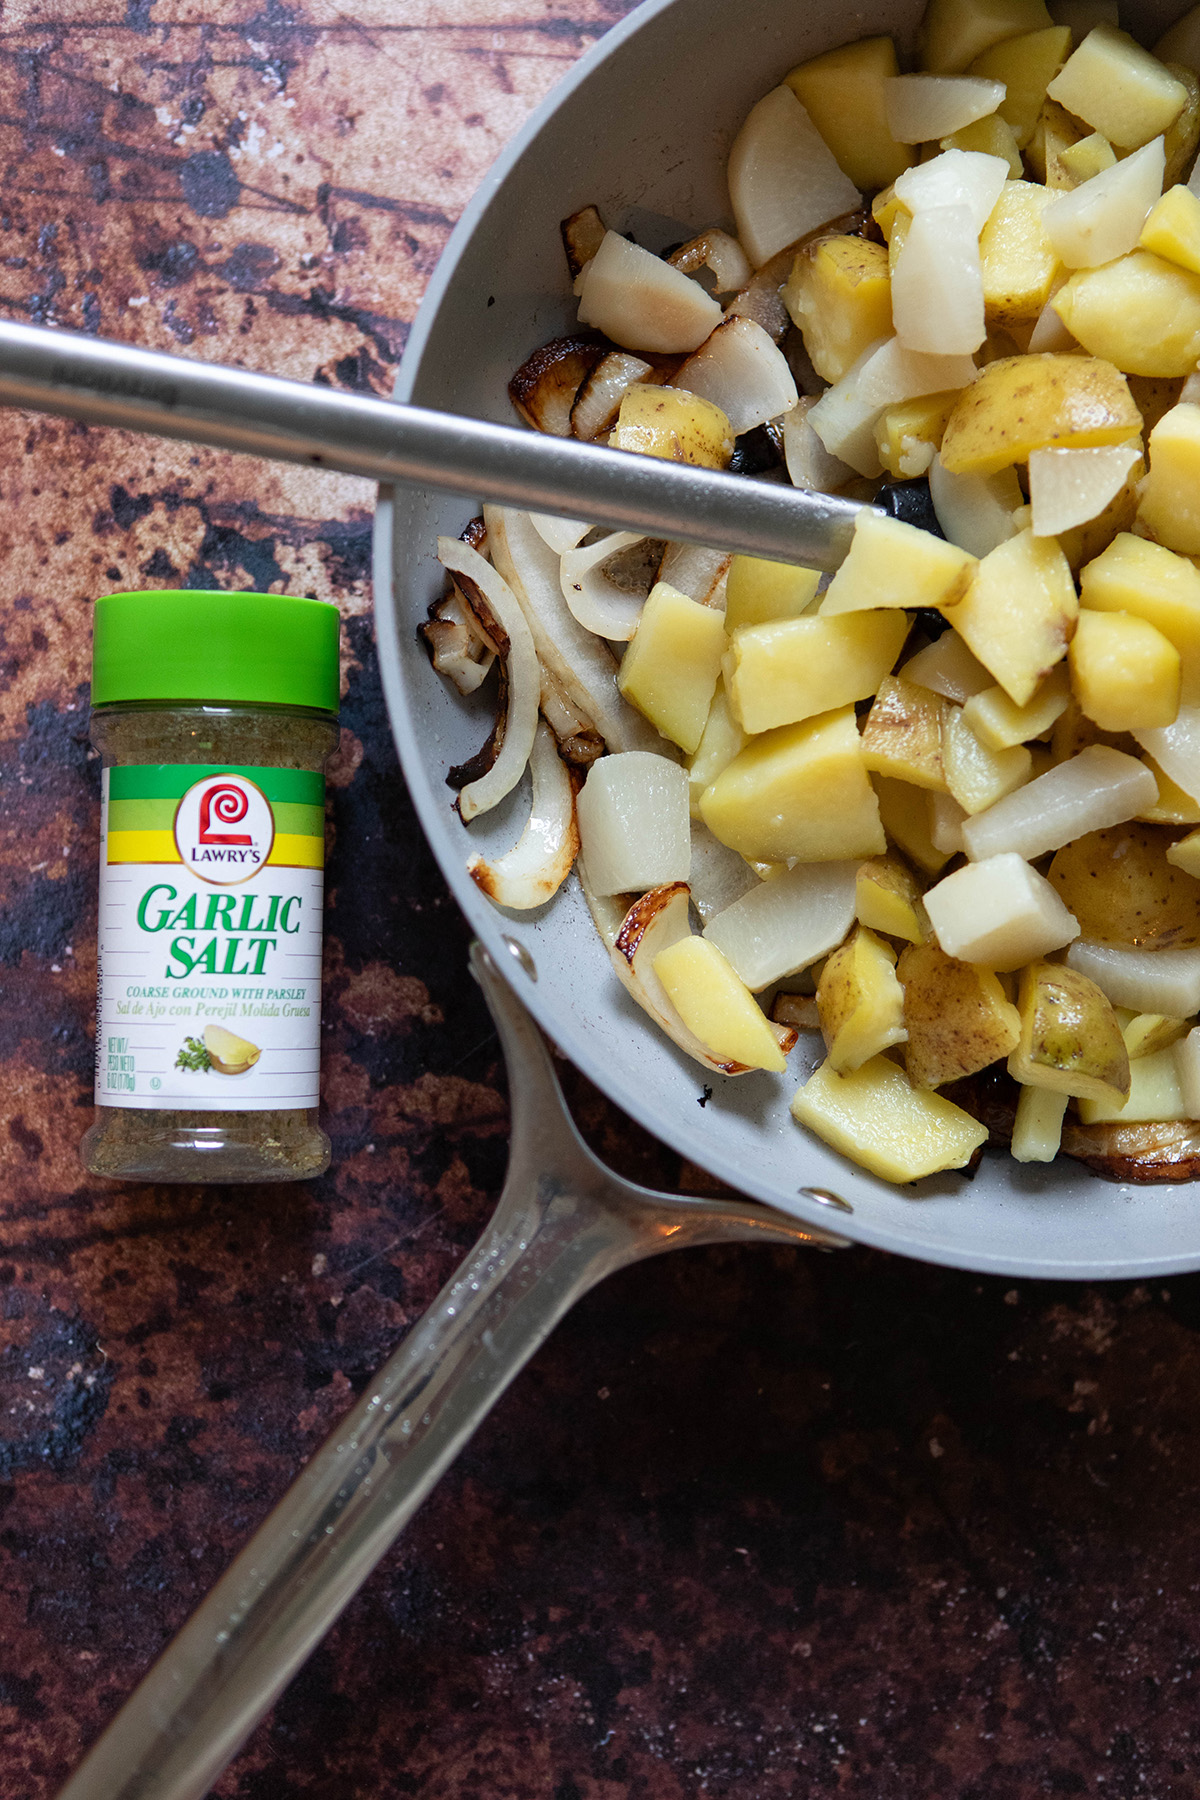
Garlic Salt
Black Pepper
Oil
*A note on gluten free flour: when making your gluten free pasty, remember that not all gluten free flours are made equal. I always use Cup4Cup gluten free flour for pie crusts.
How to make a gluten free Cornish pasty
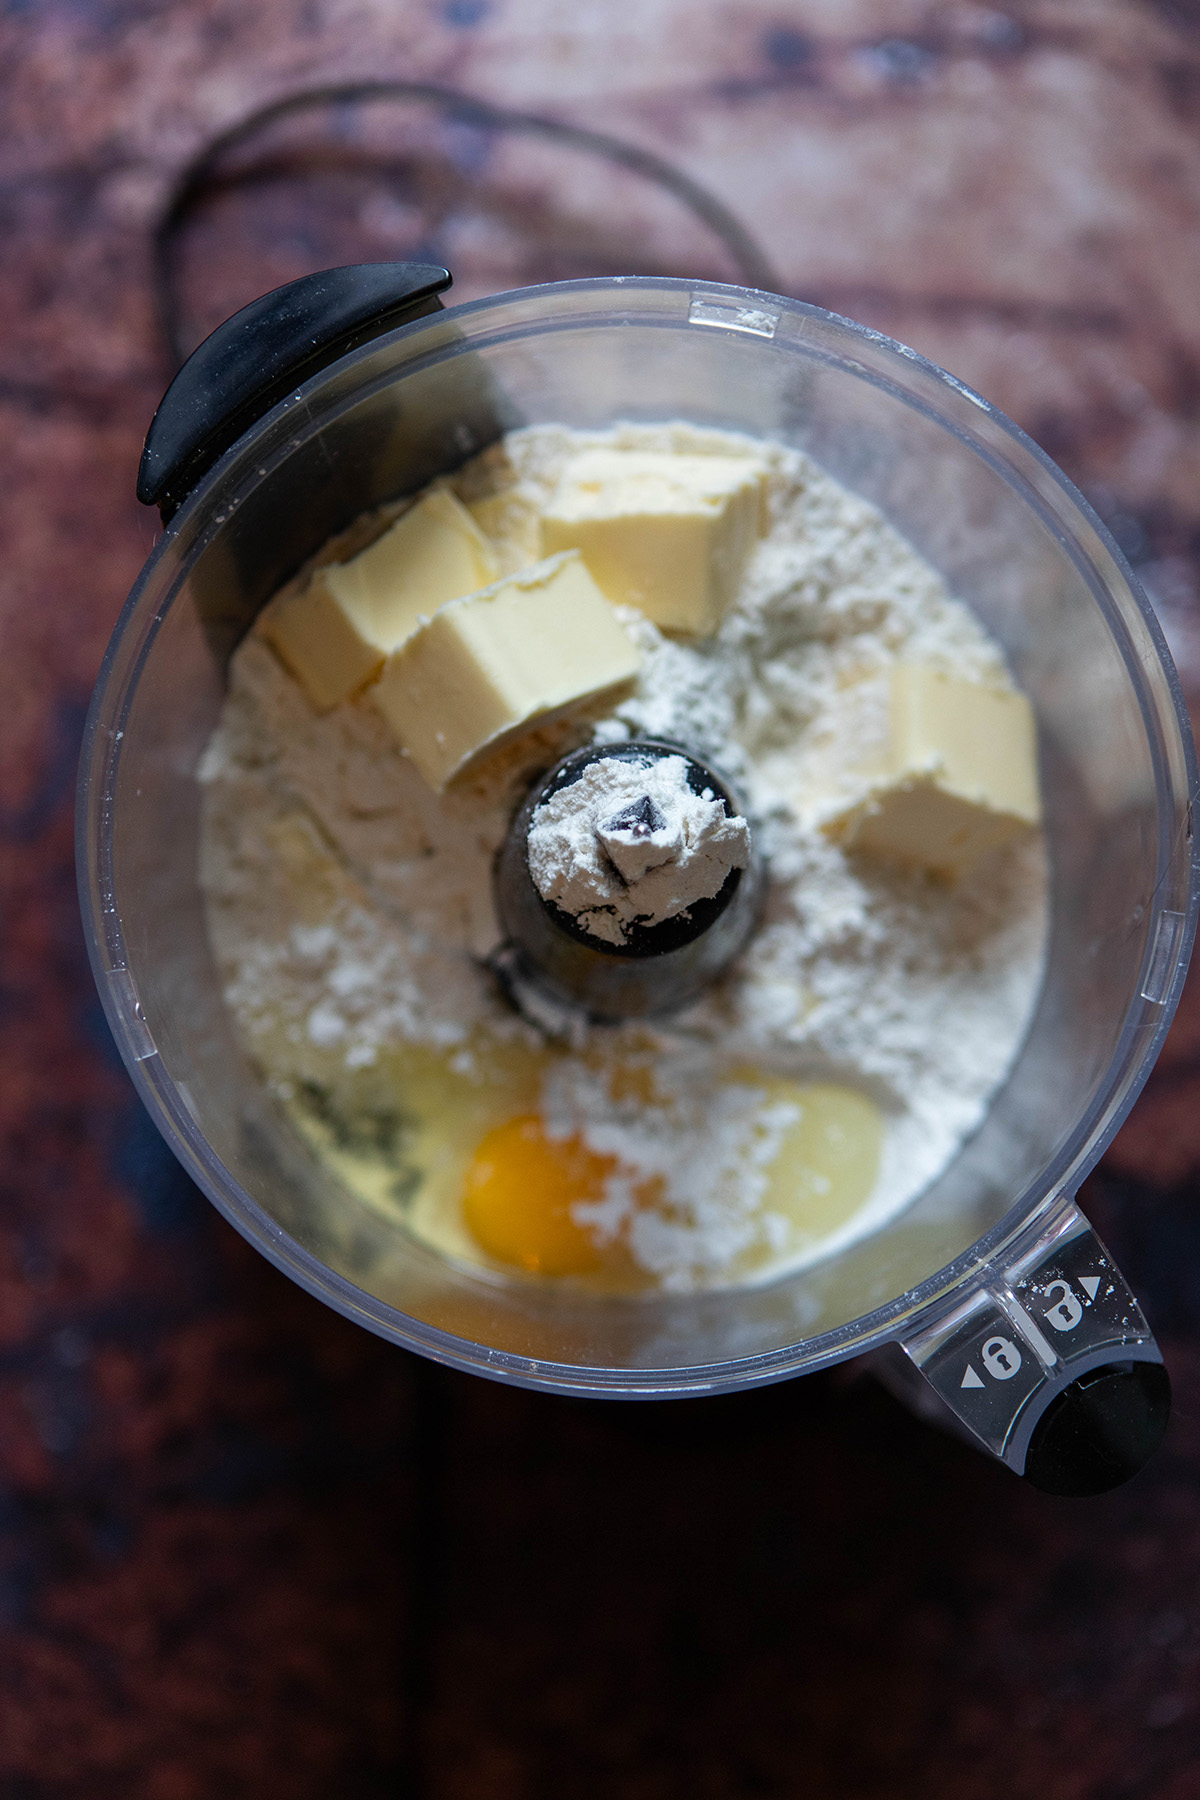
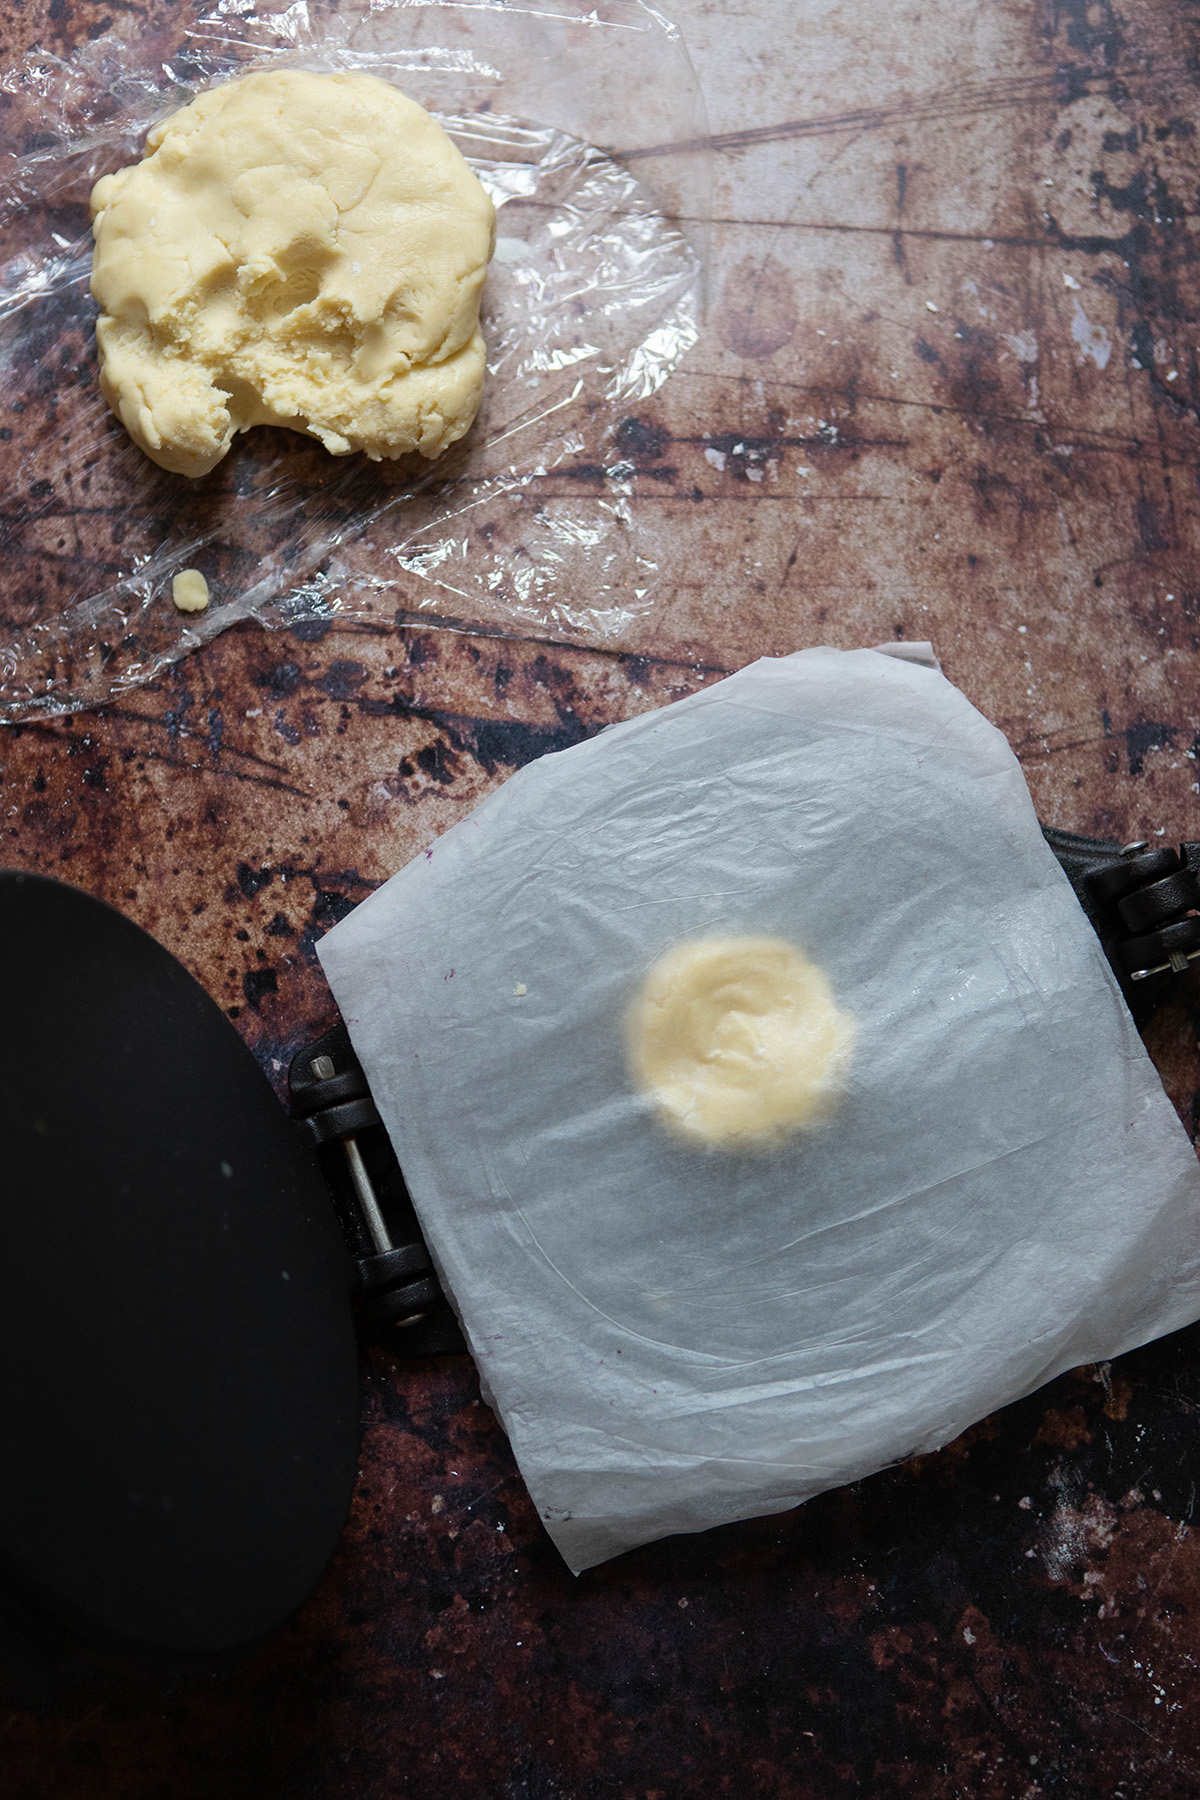
First you are going to make your dough: Add the flour, cold butter that is cubed, egg, and 1-2 teaspoon of cold water into your food processor. Blend until it comes together to form a dough. Place in the fridge after you have covered with plastic wrap to preserve it.
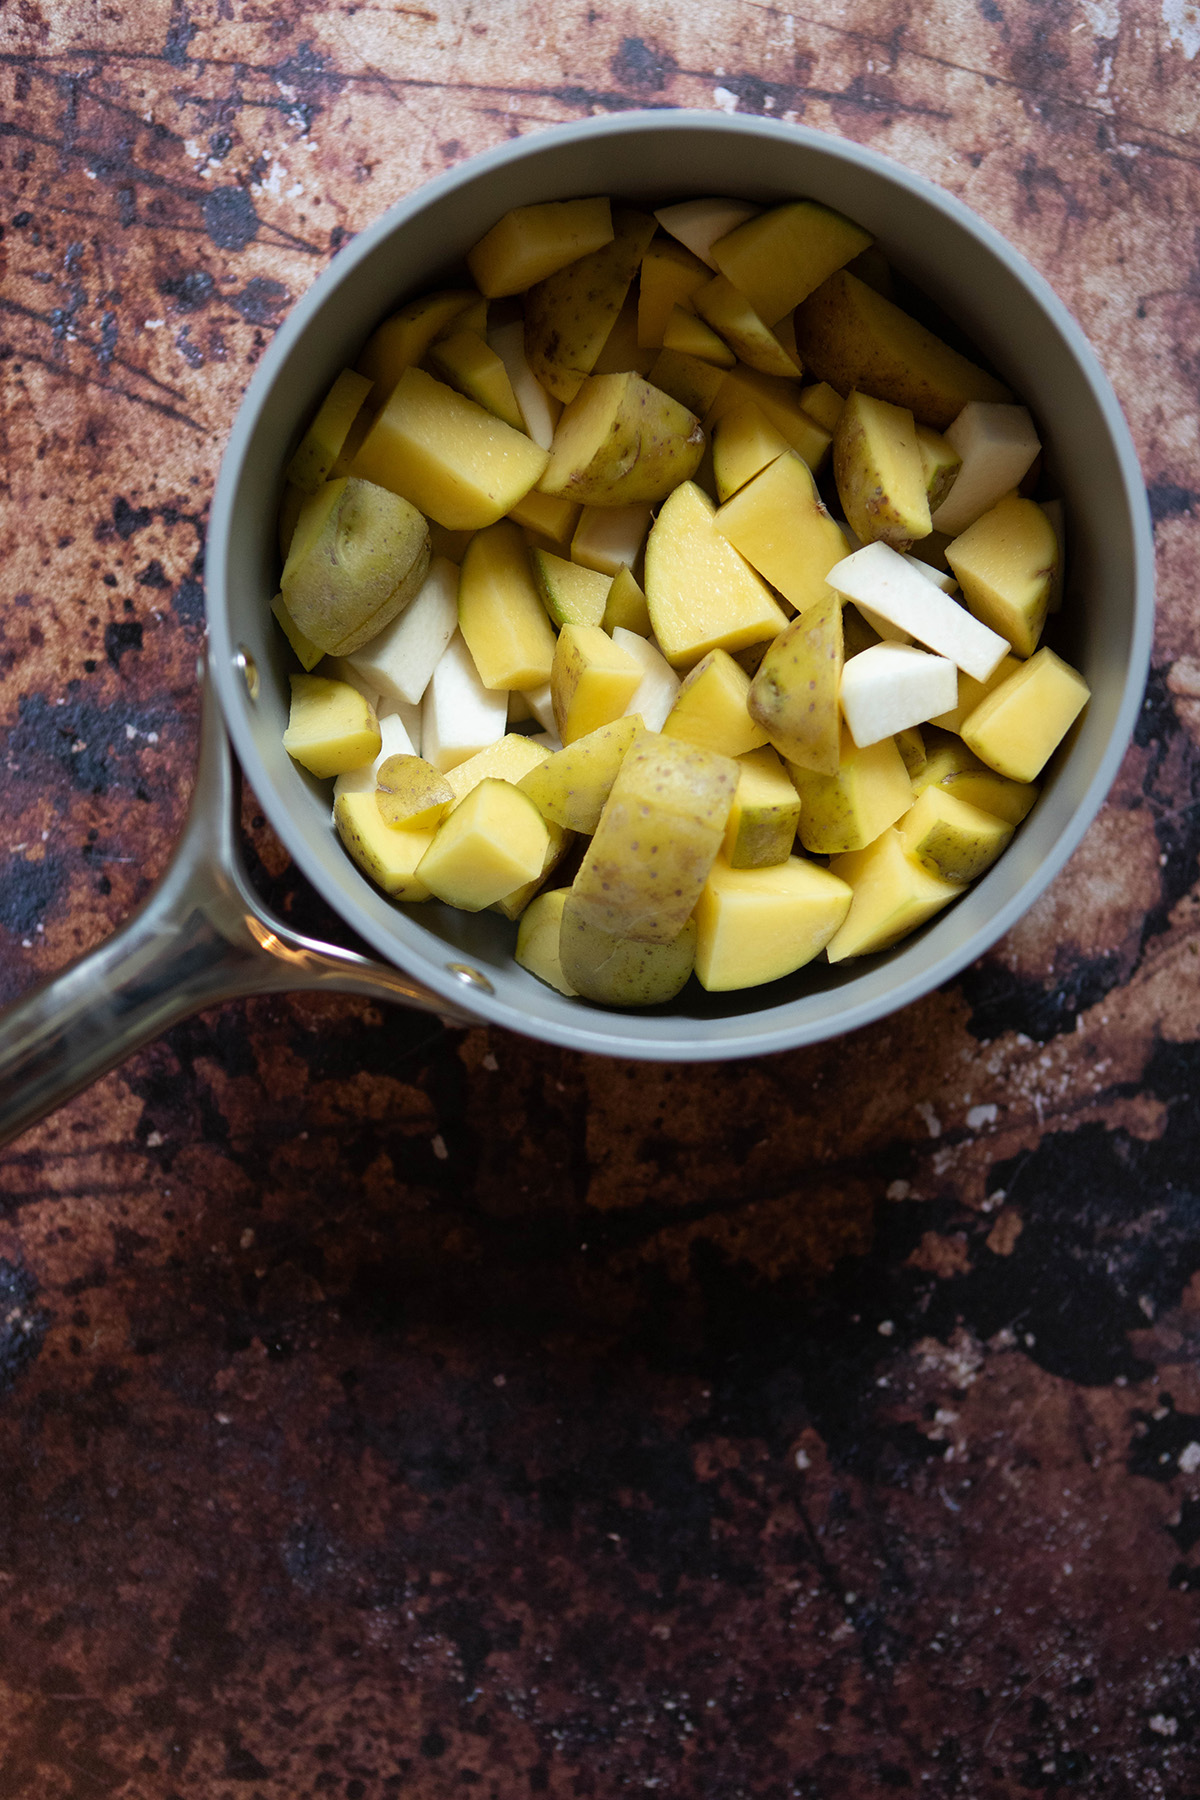
To make your filling: Peel the rutabagas and then cut it up into small pieces. Rutabaga takes some time to soften while it is boiled, so, the smaller the pieces, the easier it will be. Proceed to then cut up the potatoes. Place them both in a pot and fill it with water. Salt your water, it will help add flavor to the food. Boil until the components are all soft.
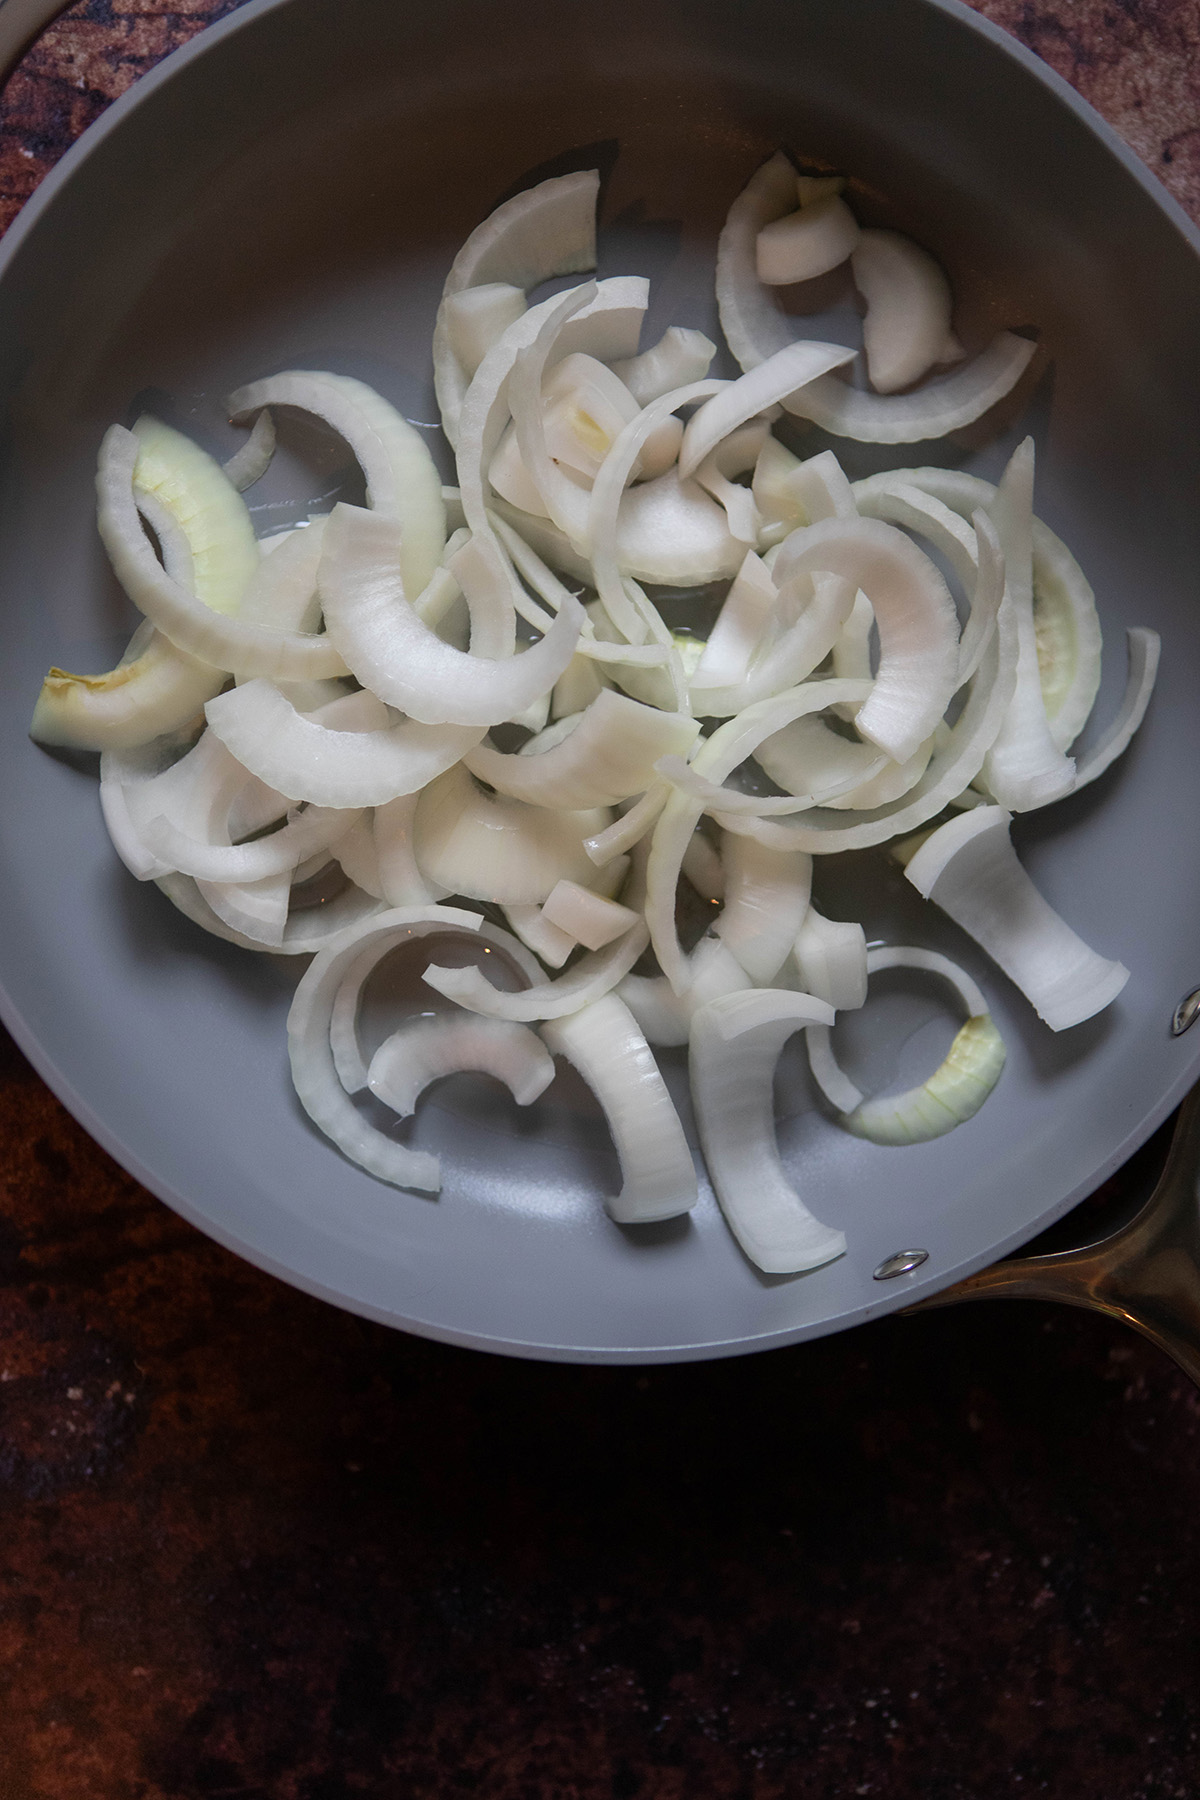
In the meantime, slice your onions: You can keep them longer (as if making caramelized onions) or dice them to ensure that each pasty will have plenty of onion. On medium heat, heat around 2-3 tablespoons of canola oil in a pan, and place the onions in. Allow them to turn golden brown. Once this has happened, add the boiled potatoes and rutabaga and allow it to start to come together to form a sort of mash. Begin to season with garlic salt, pepper, and 1 tablespoon of vegetable bouillon. Stir to make sure it is incorporated.
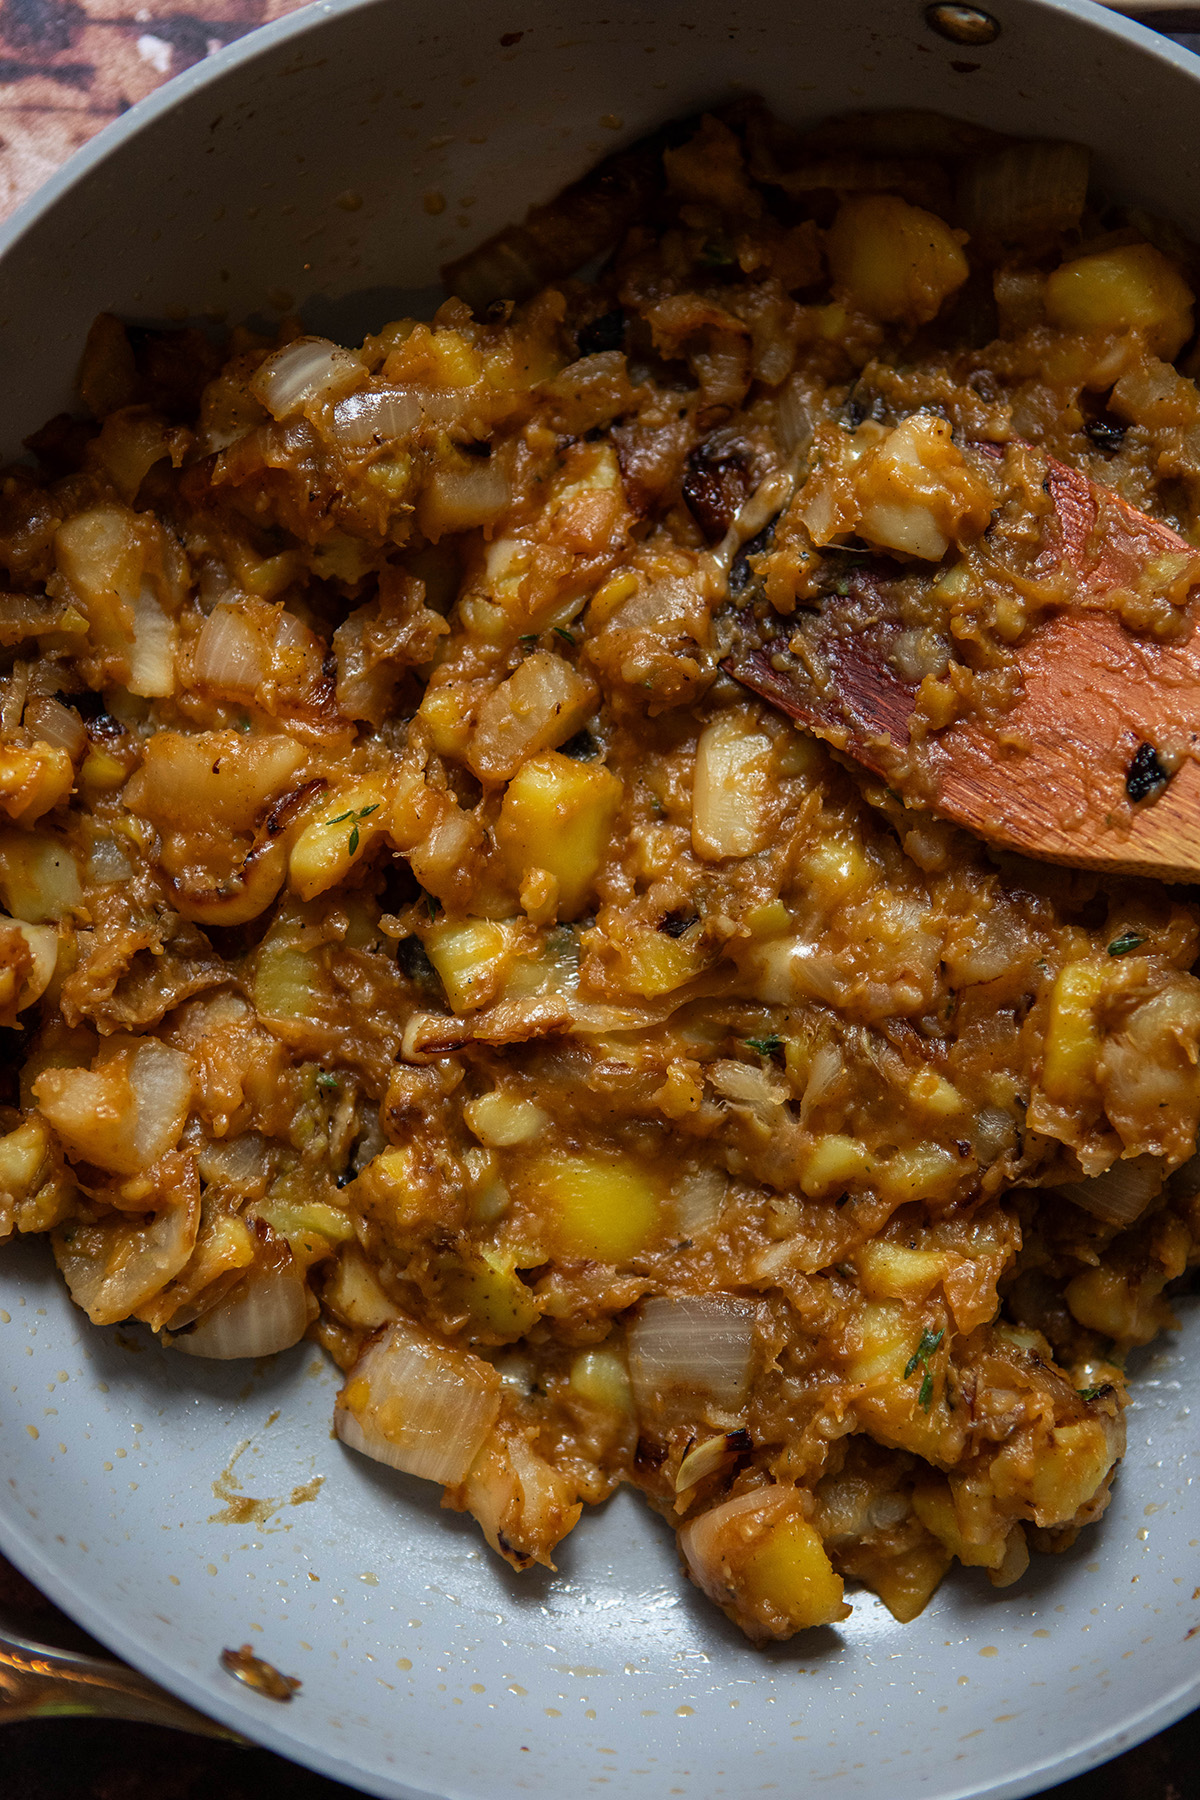
Add the thyme: add the 2 tablespoons of fresh time, and continue to stir. Once you feel the flavor is balanced, add the ¼ cup of cheddar cheese. Once the filling has come together, set it aside so it can cool until the point where it is lukewarm. You can transfer it to a large mixing bowl or keep it in the pan that you cooked it in.
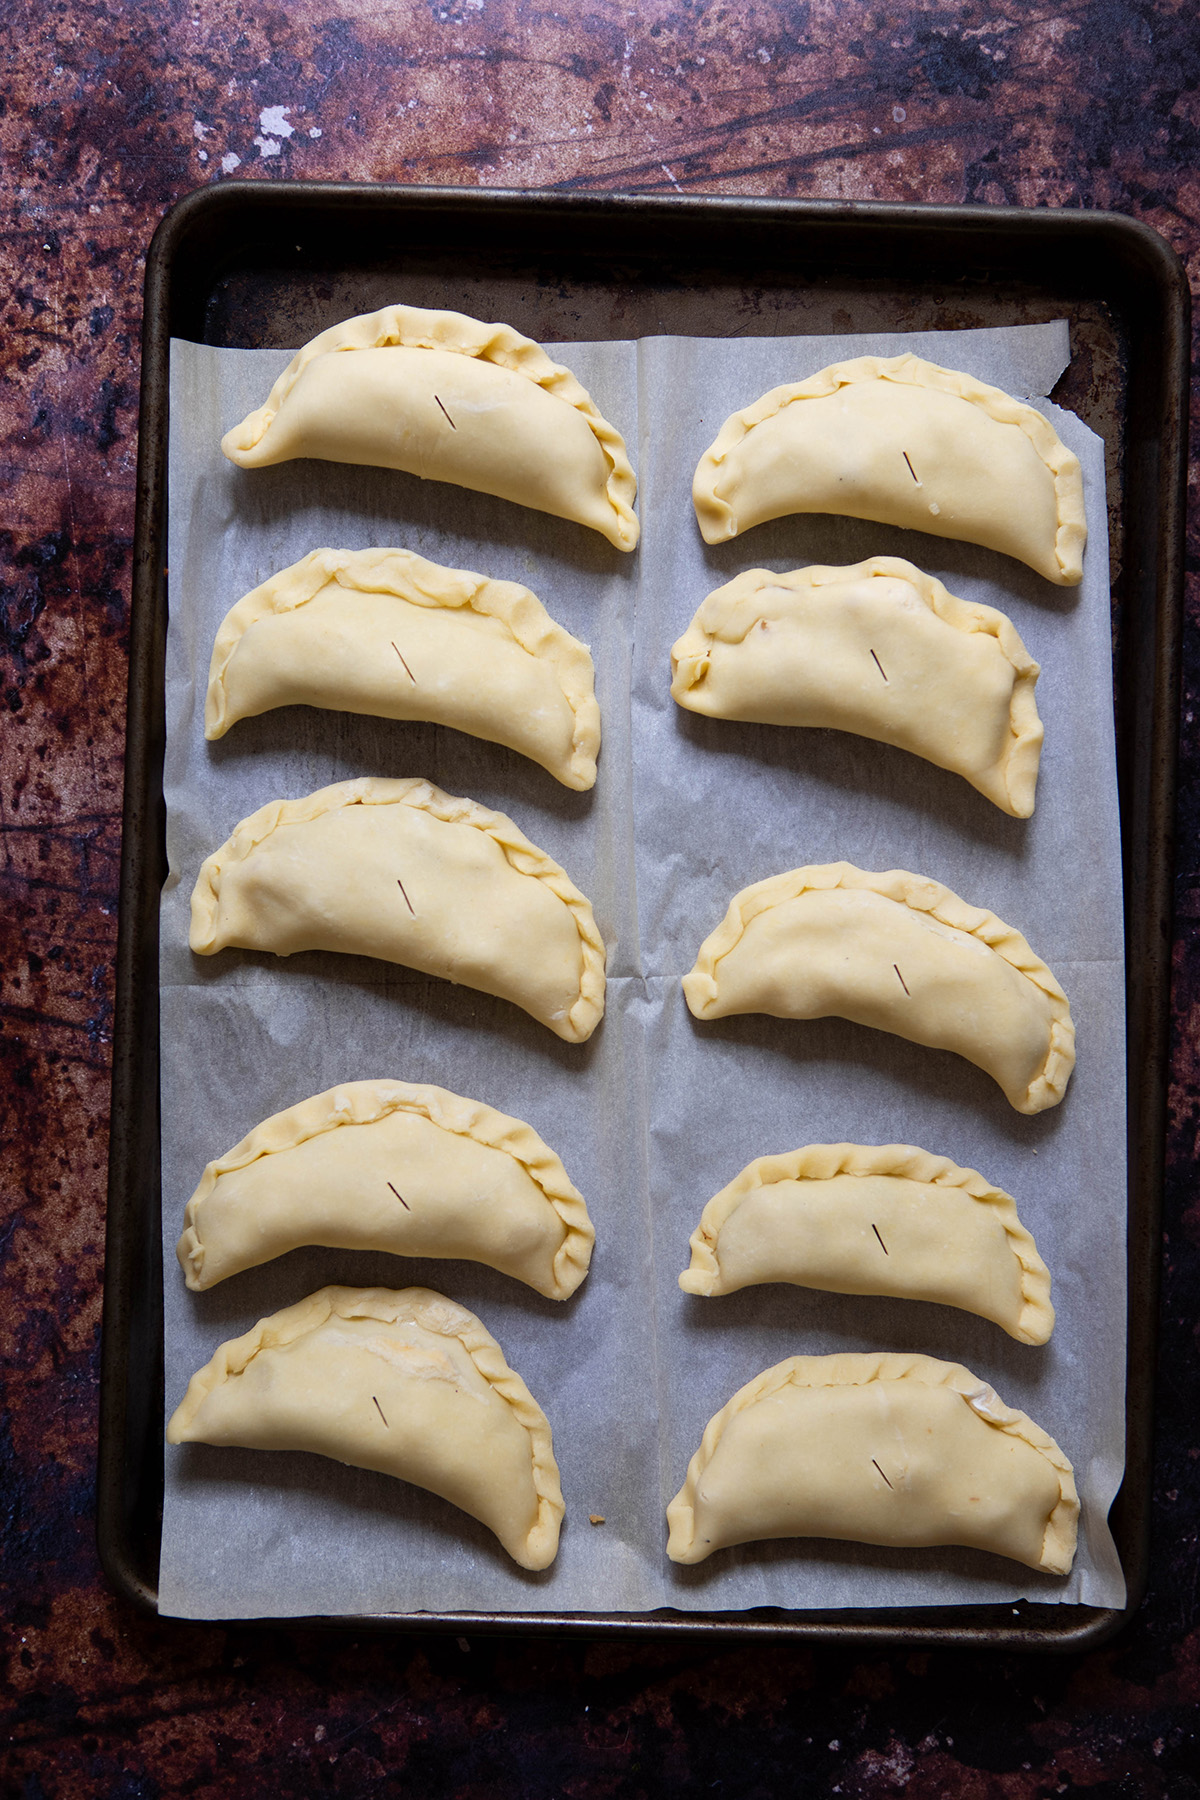
Putting them together: Heat your oven to 350°F. This recipe can make 8-9 small pasties or if you wish to make large pasties, it will likely make 3 or 4.
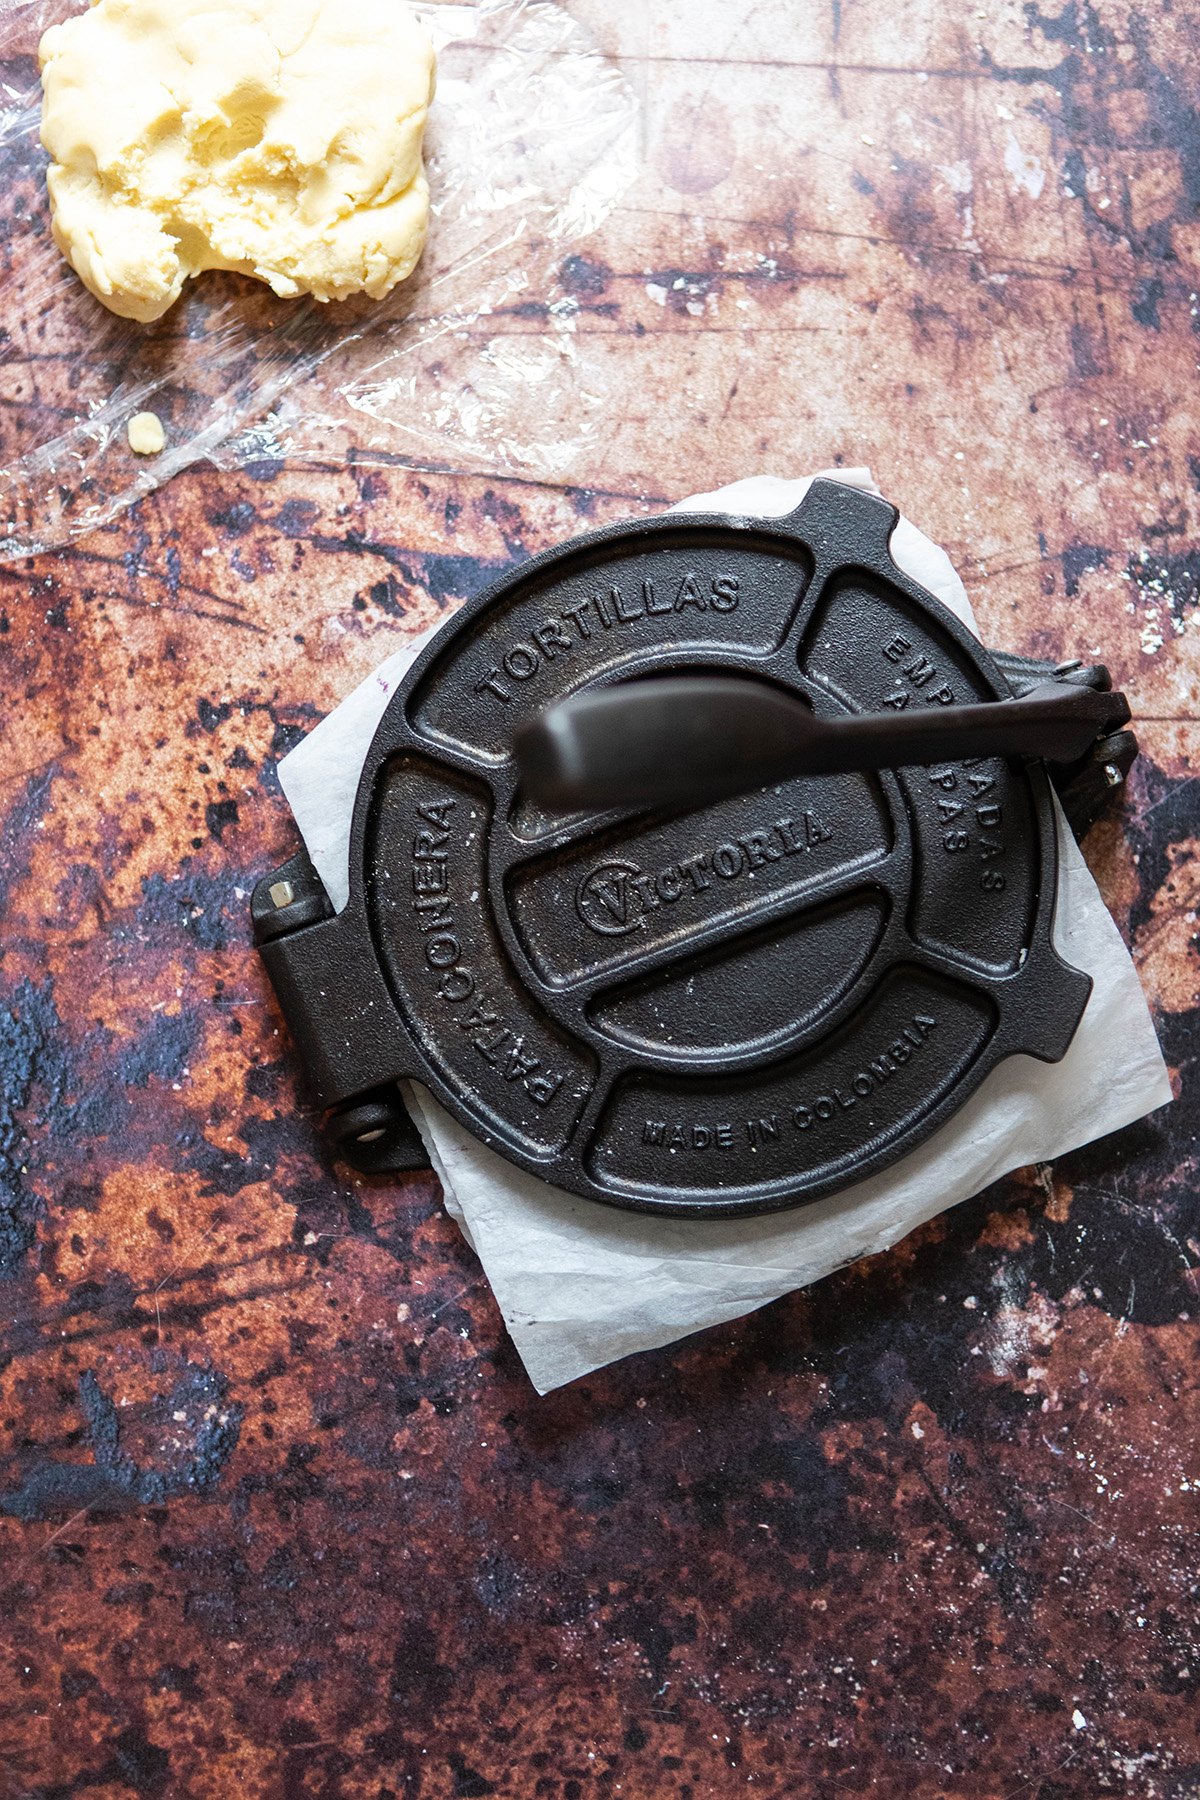
To make your pie crust for your gluten free pasties, you can do this one of two ways.
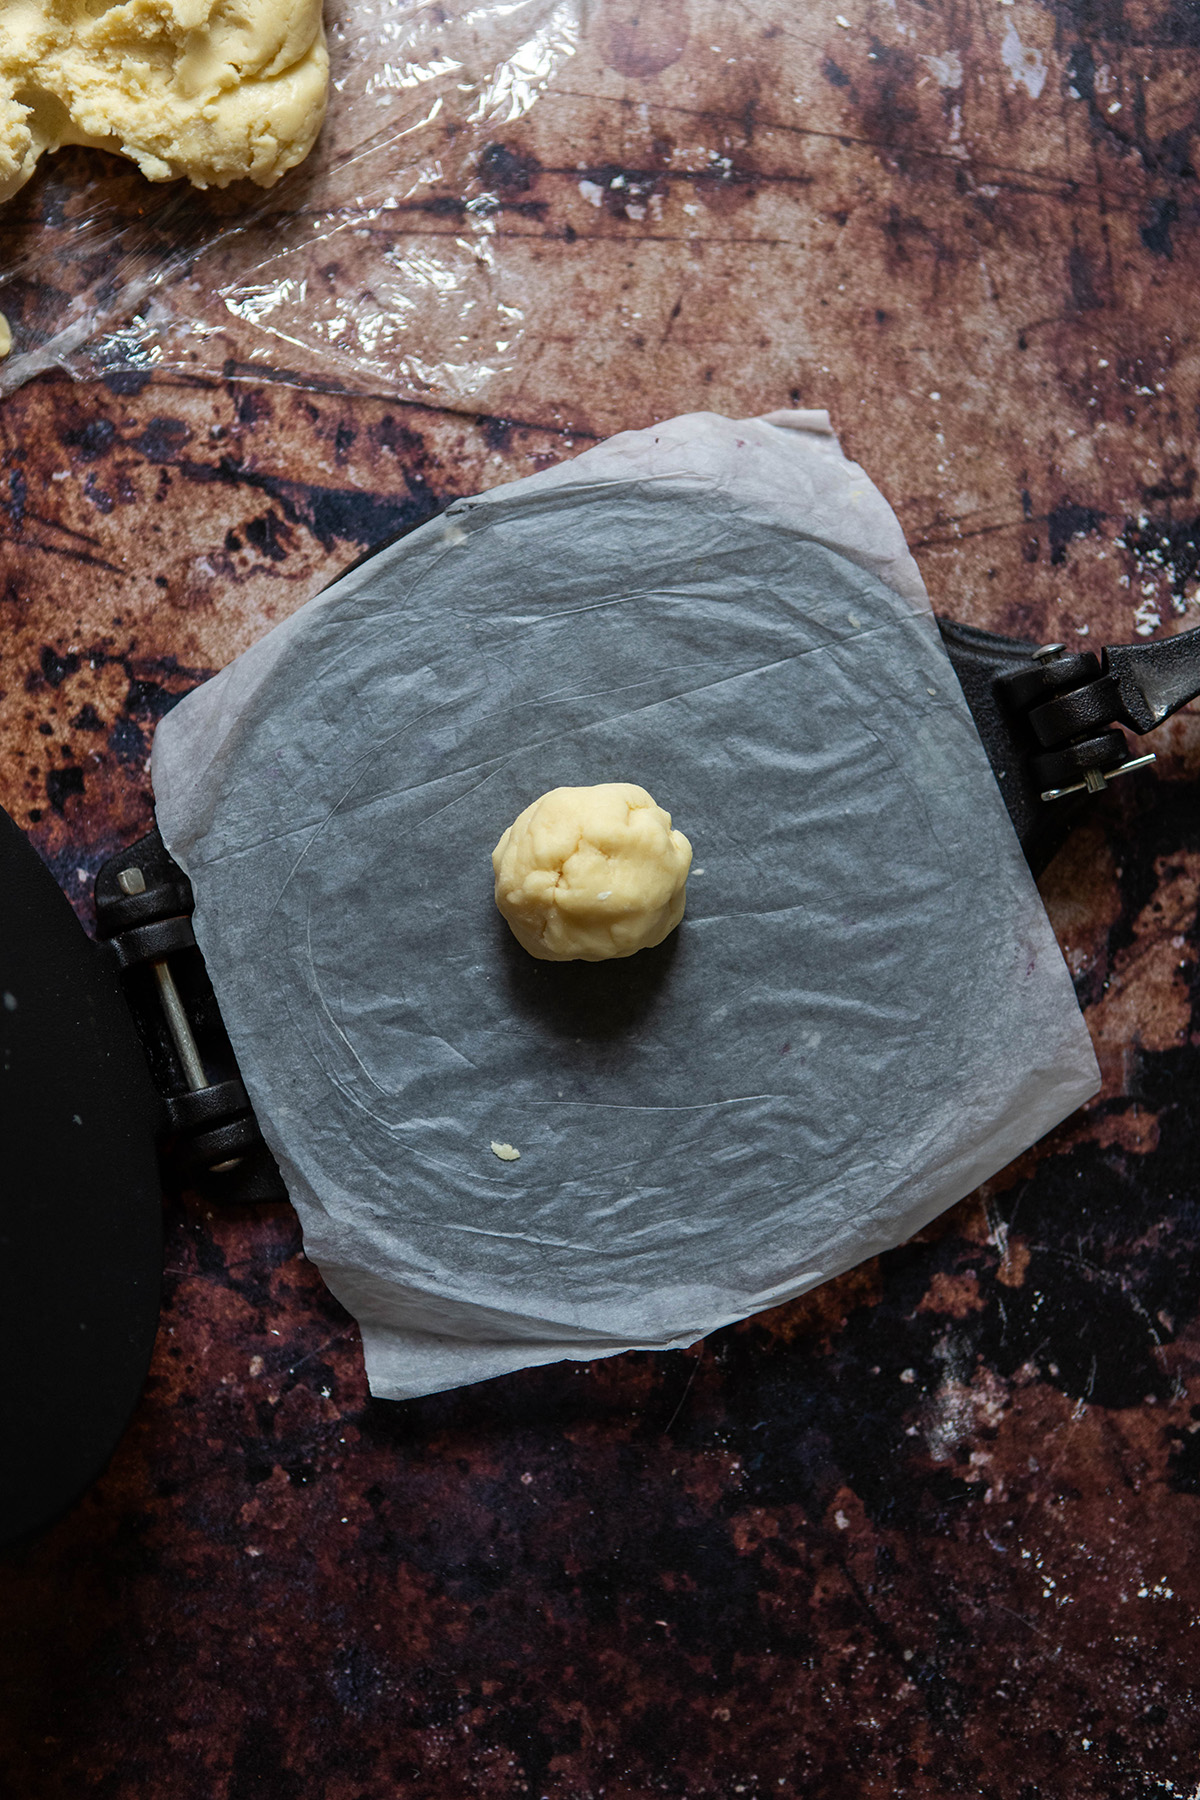
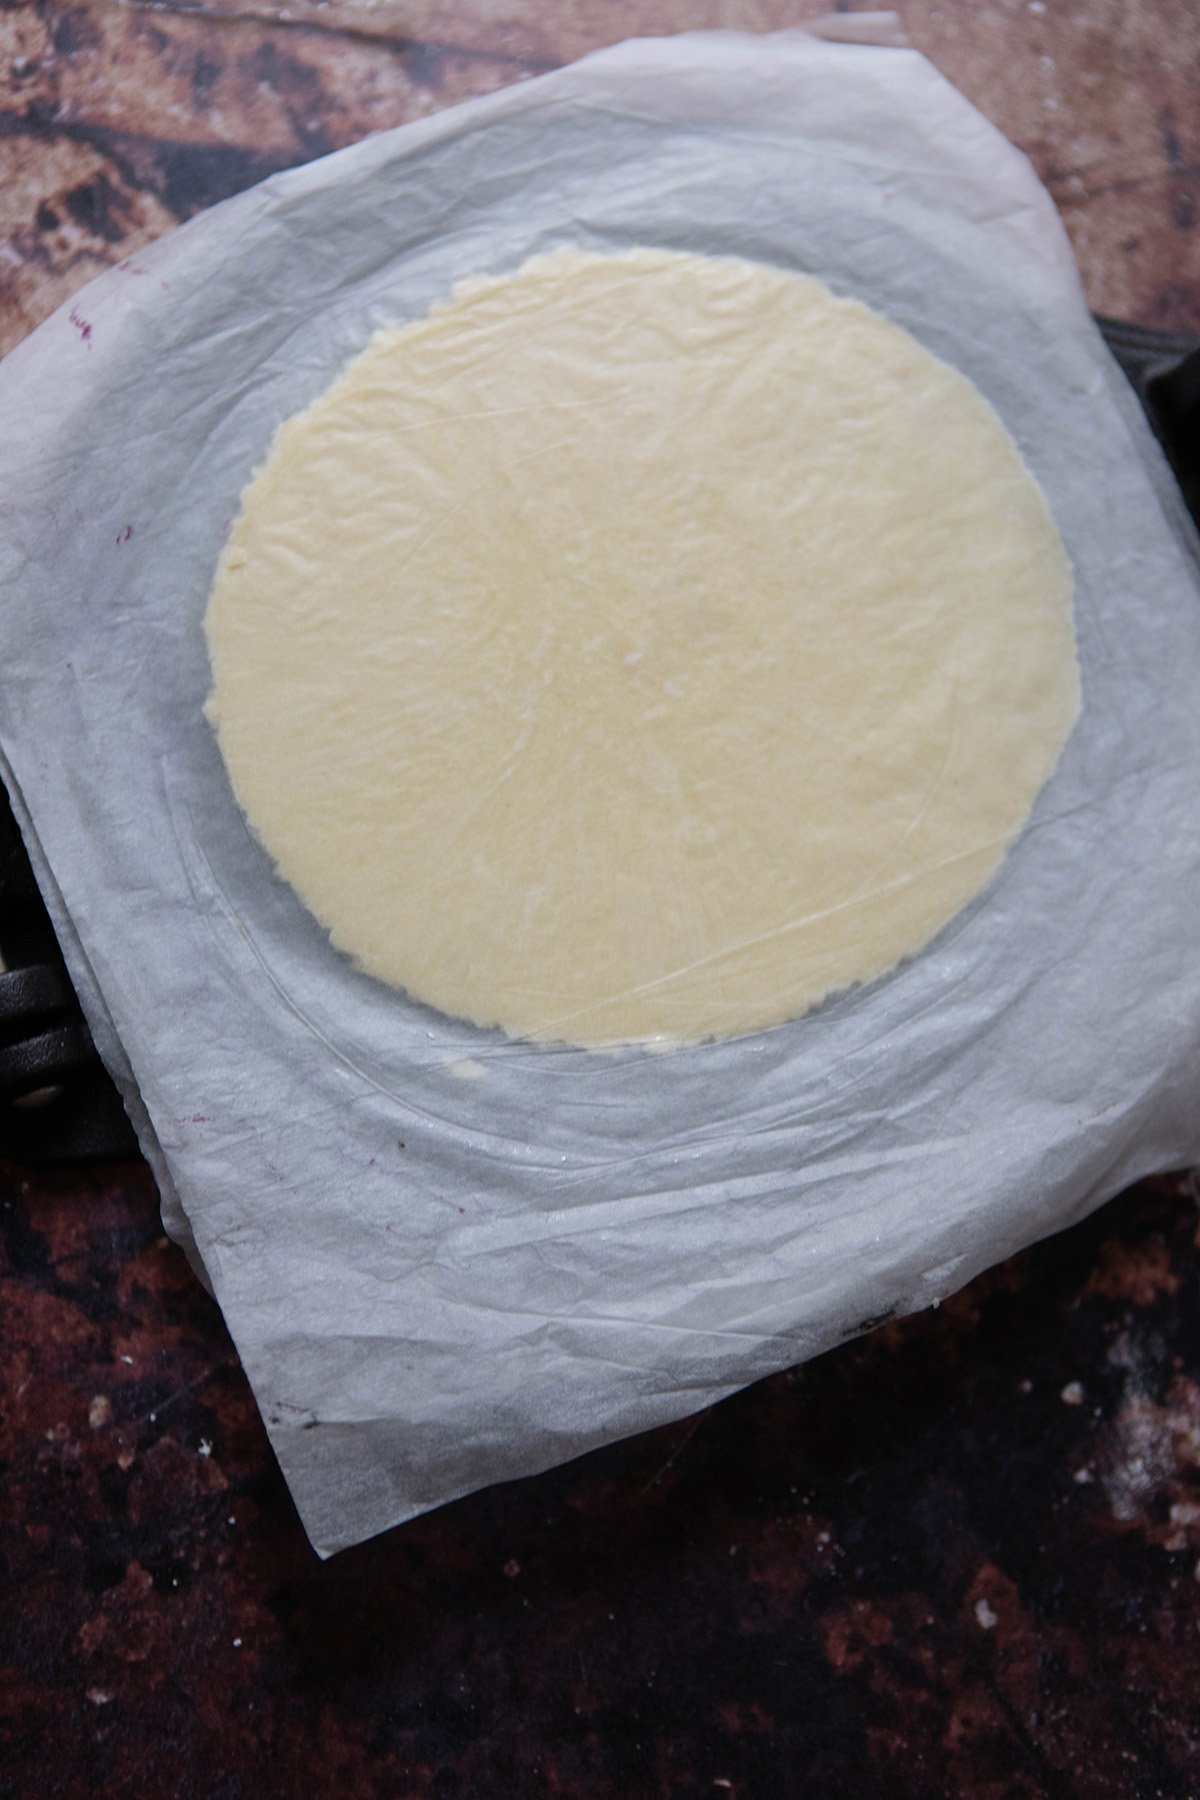
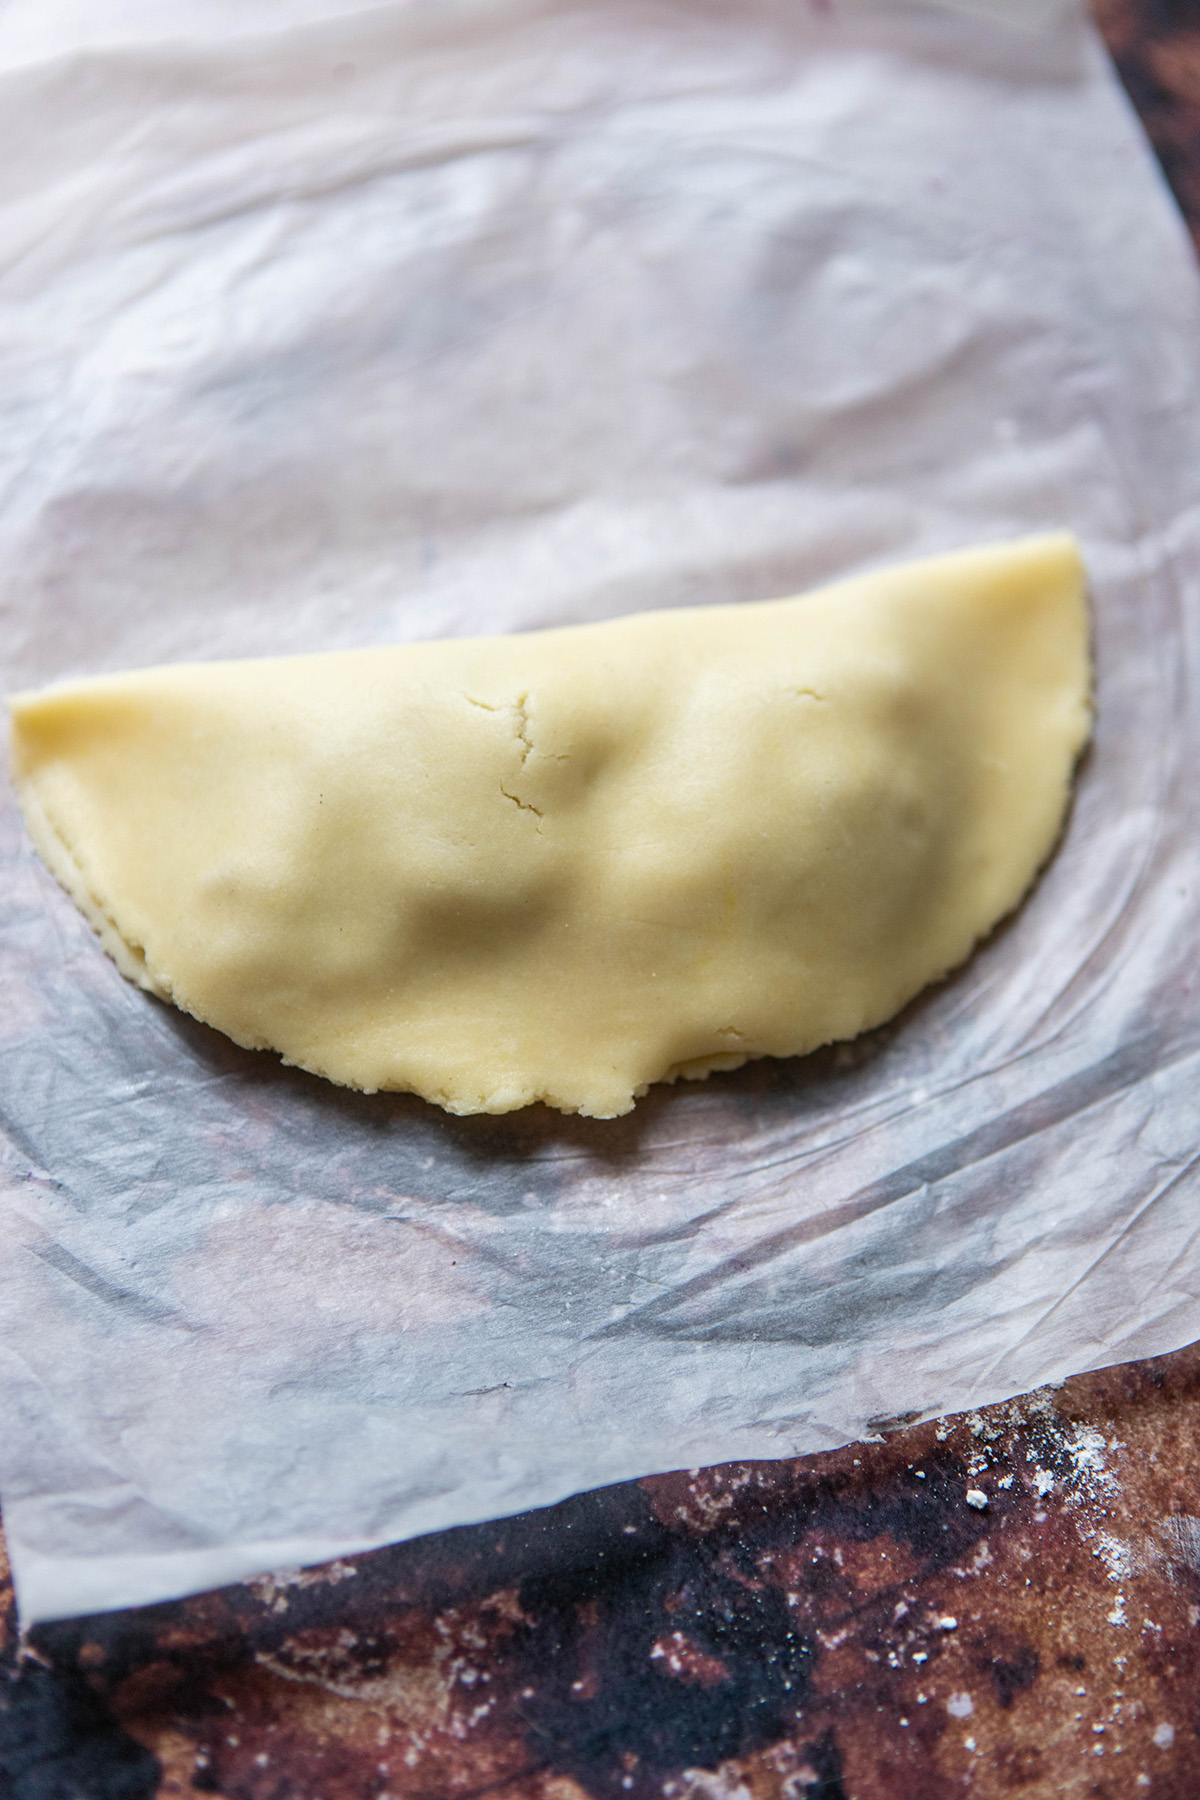
Take two piece of parchment paper, then take a ball of dough and place it between them. Use your rolling pin to roll it out until it is the size of a corn tortilla.
On a taco press, take two pieces of parchment paper, and place a ball of pie dough between them. Press down, and do this until it is the size of a corn tortilla.
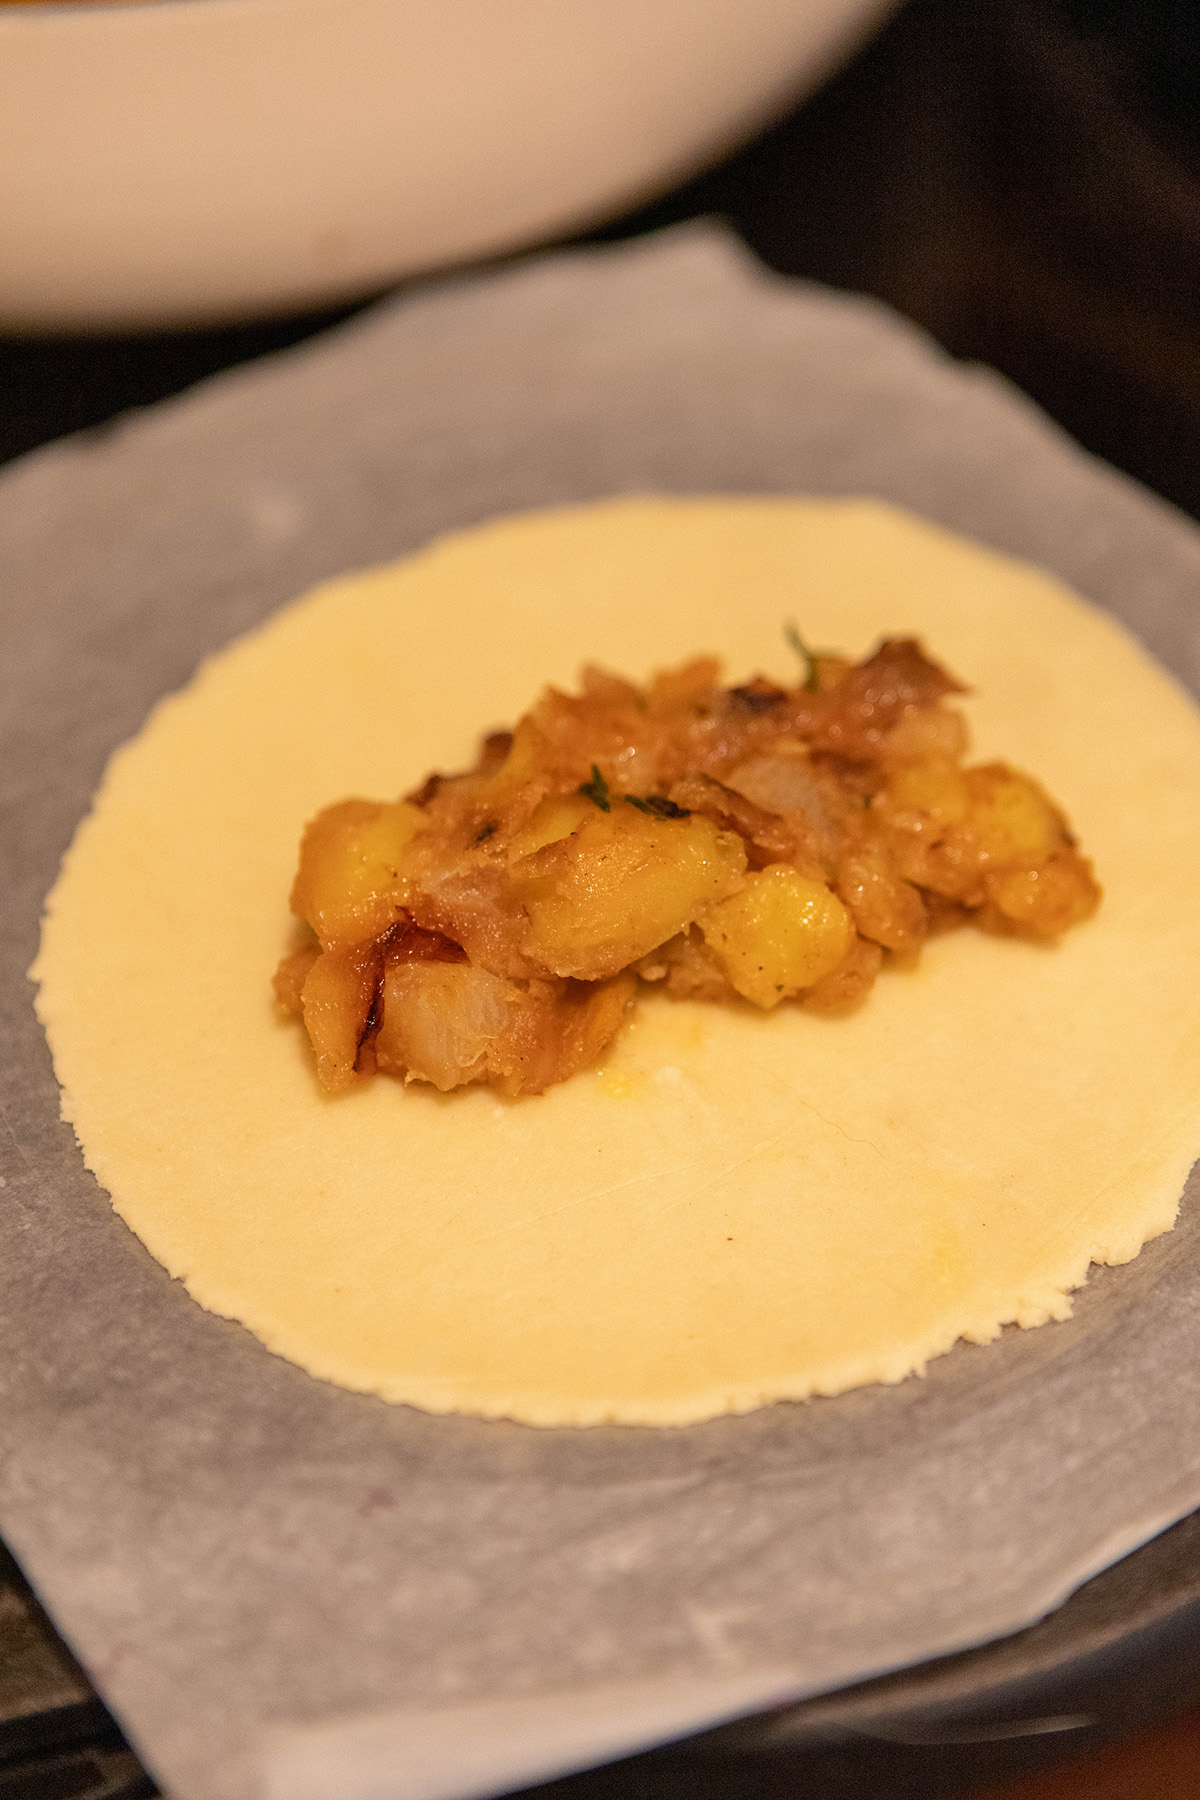
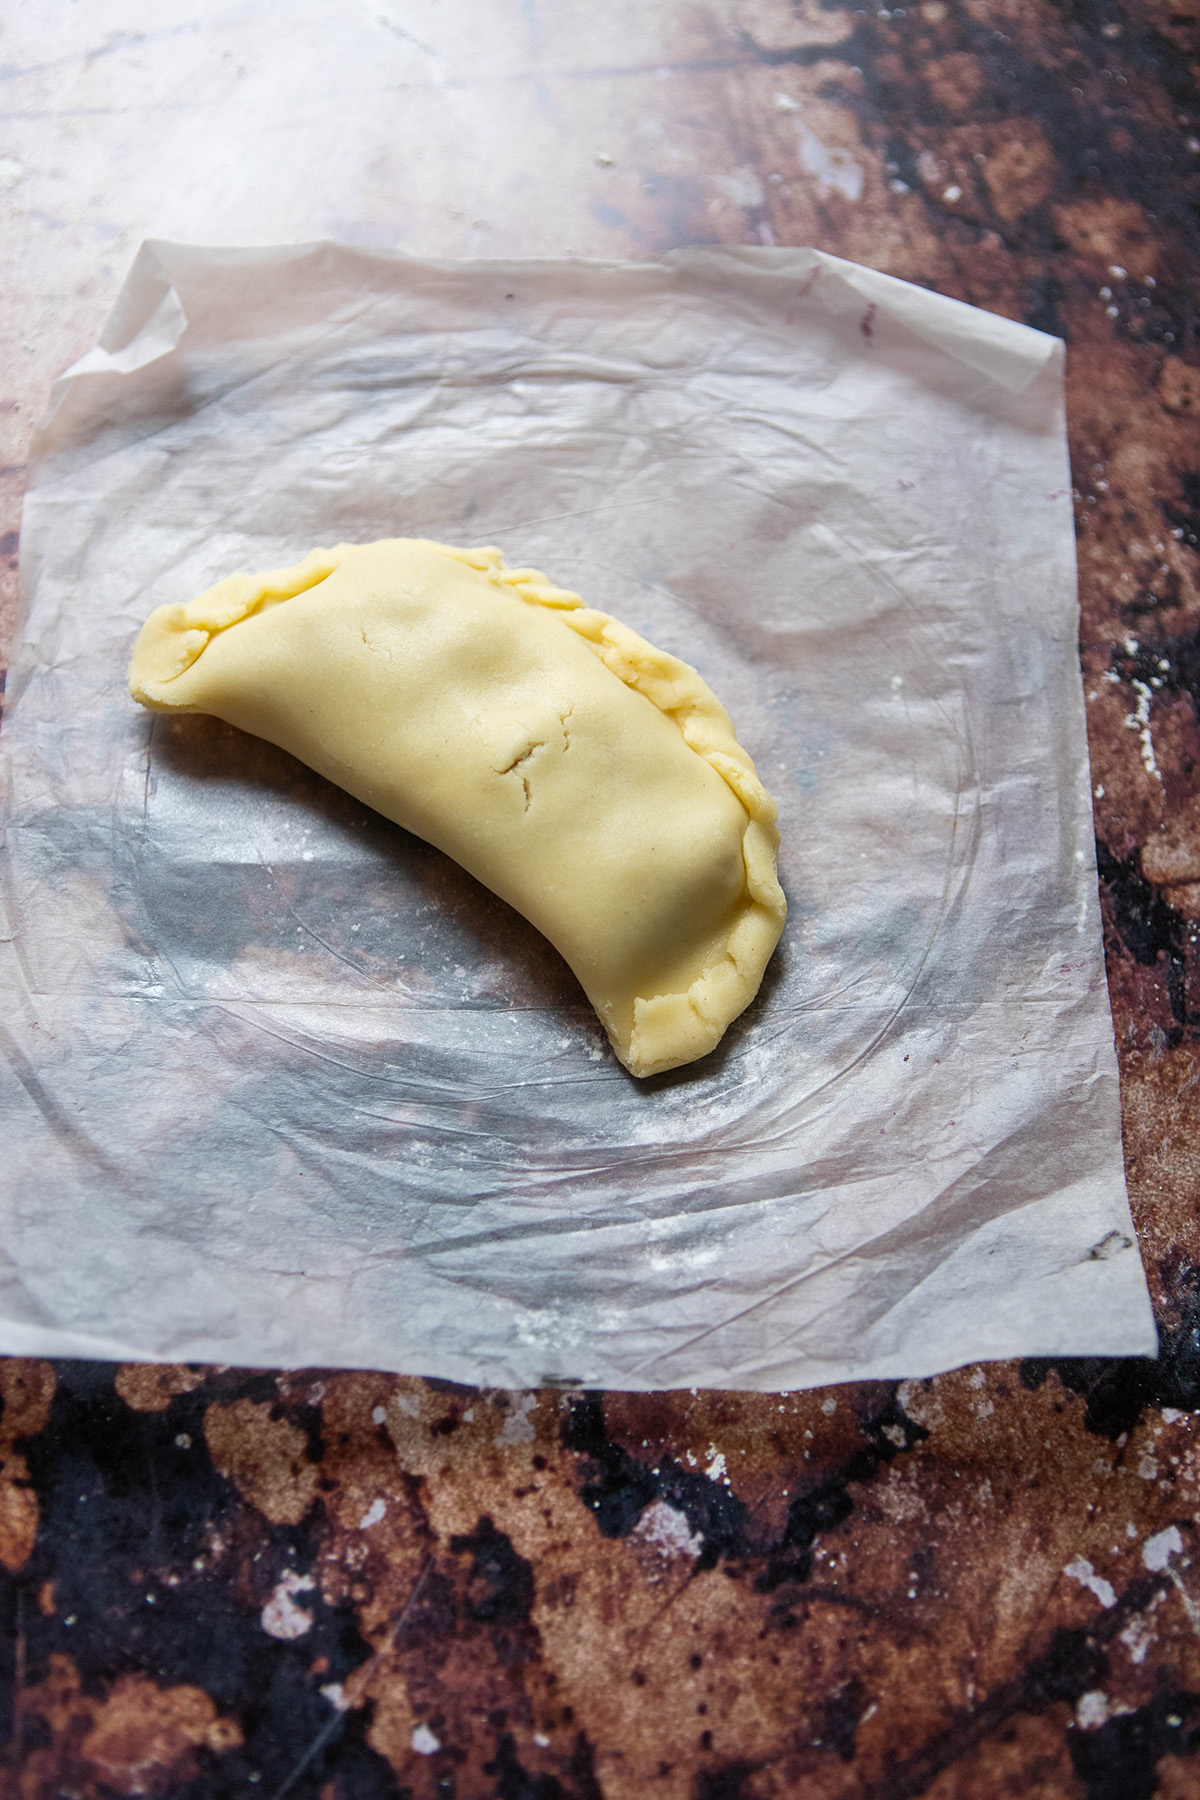
Once it is the size you want: scoop in the filling. Place it in the center of the dough in a line going across. Fold the dough over, and crimp the dough along the edges. Do this until all of the filling and dough is gone.
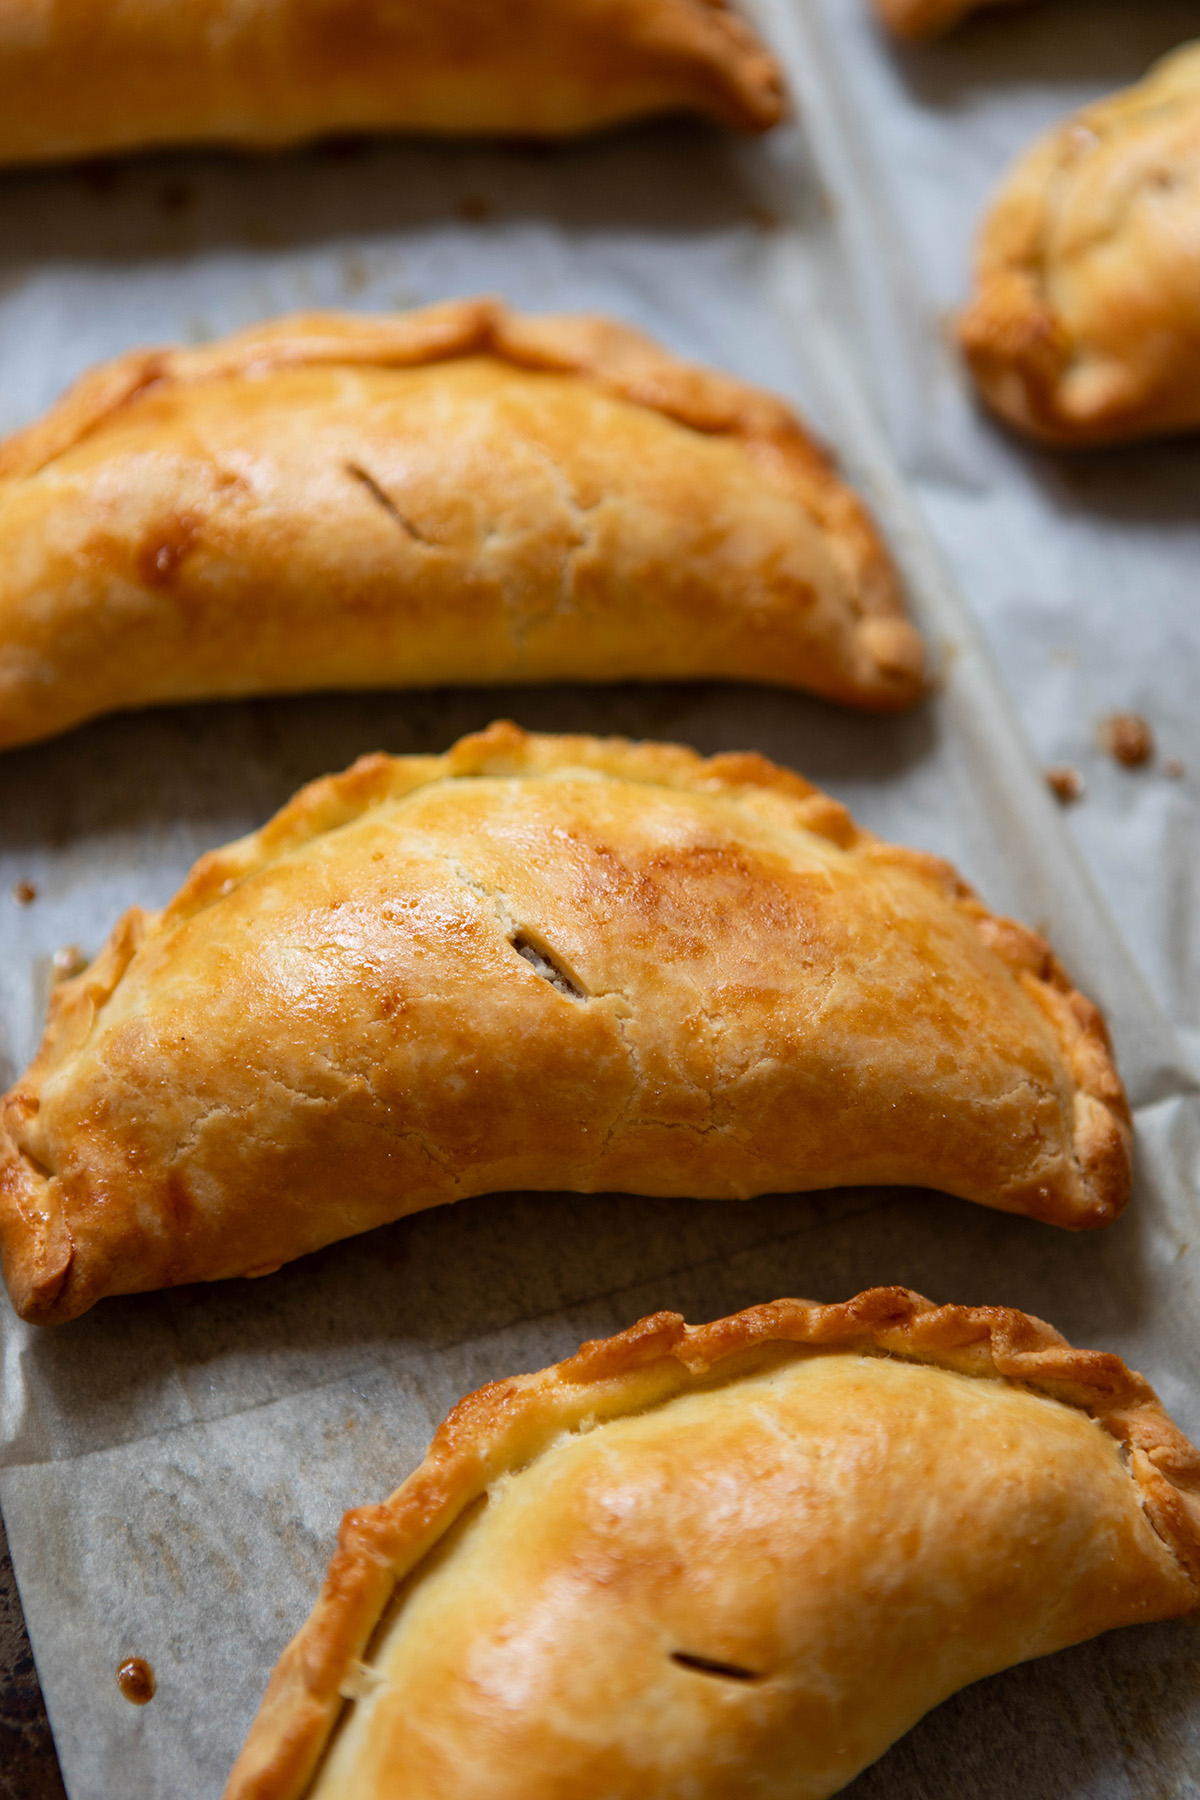
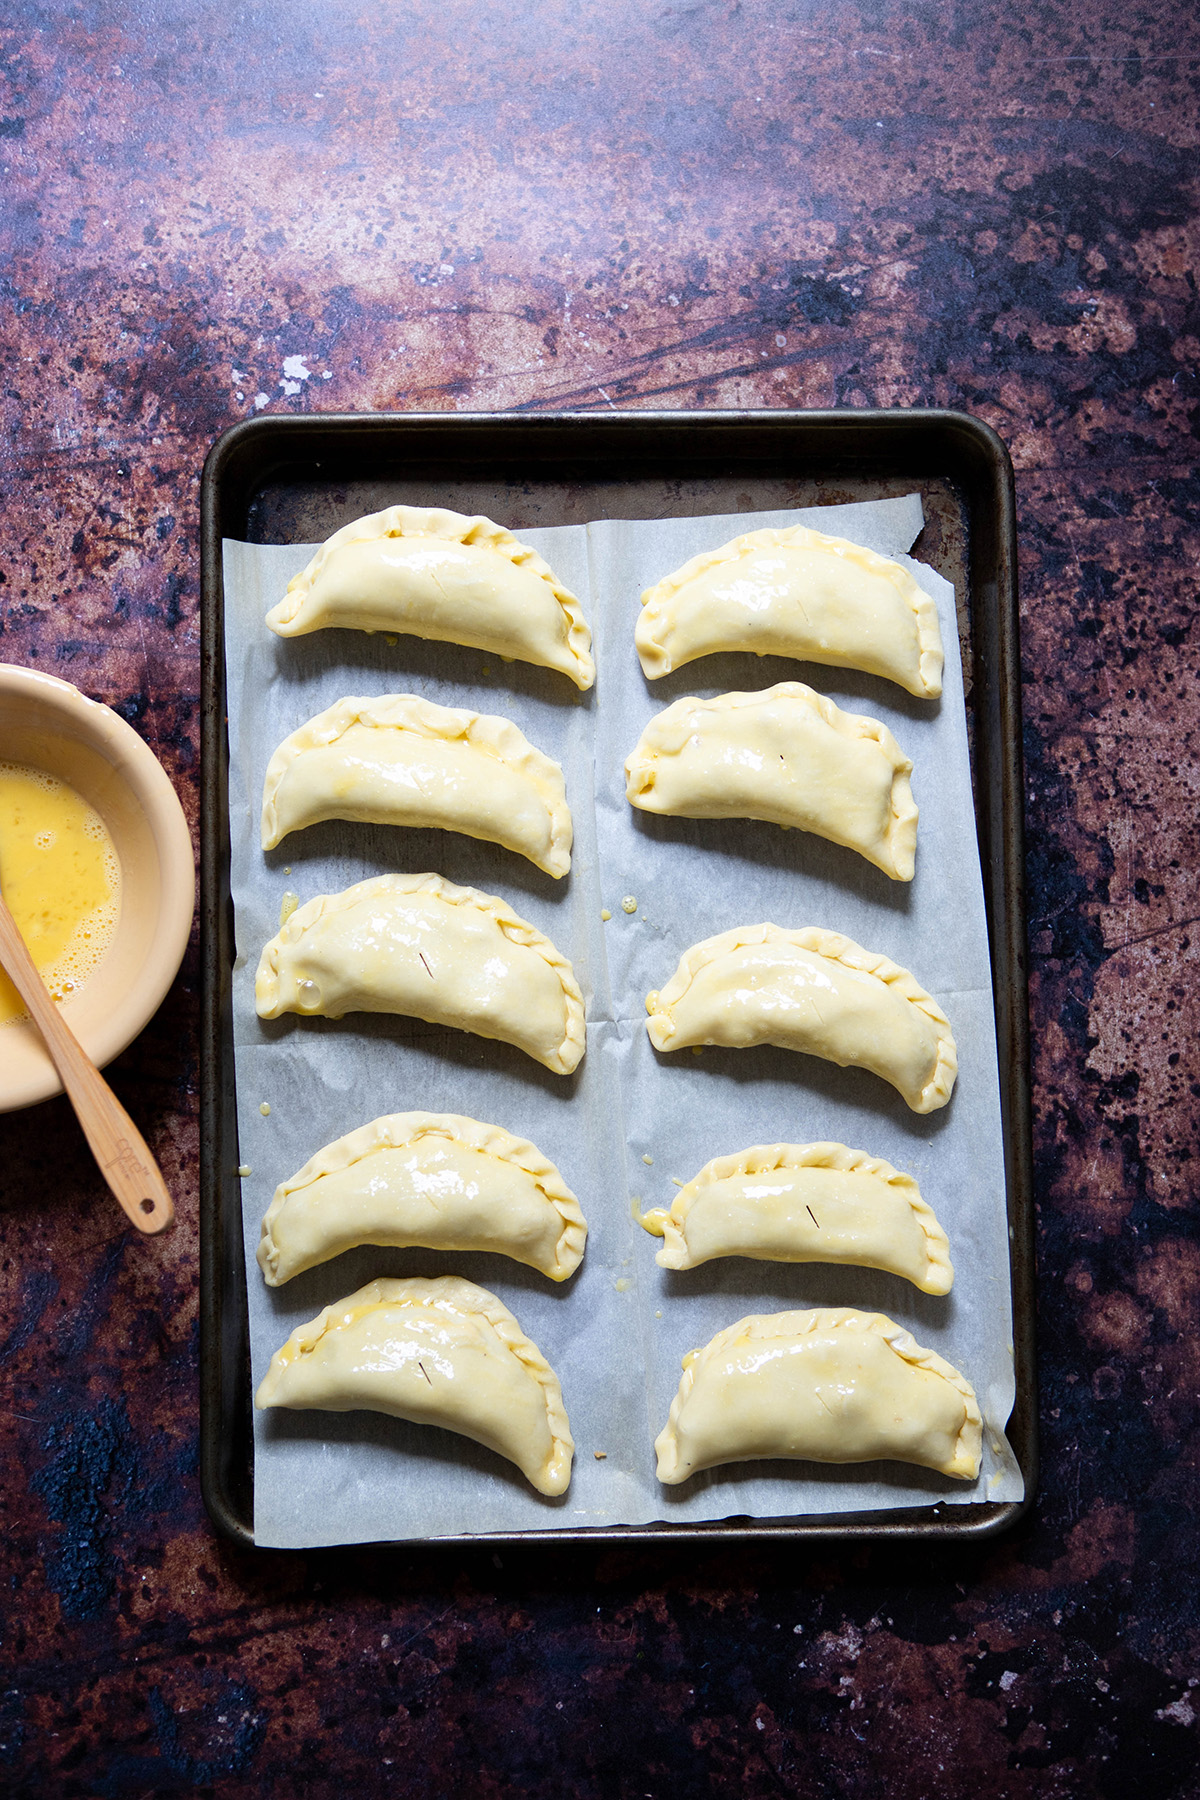
Once your pasties are assembled: on baking sheets lined with parchment paper, place the pasties onto them. Slit holes onto the top of each gluten free pasty to ensure that air can properly escape while baking. Now, take a beaten egg and brush the egg mixture onto the top of each pasty. Place in the oven and bake for 30 minutes or until golden brown. When removed from the oven, allow them to sit for a few minutes. You do not want to burn your tongue when you bite into them.

*Making gluten free pastry can be daunting at first but it is simple once you get the hang of it!
*A note on gluten free pie dough: I prefer working with gluten free pie dough before it is chilled. I find it is easier to roll out and less likely to crack. I make my dough typically after I make my filling, however, it is entirely your choice and you do what you prefer.
*If you do not have gluten free pie dough nor wish to make it but do have a gluten free puff pastry, you could use that (even though traditional pasties use regular pie crust. For a flaky crust, it is hard to beat making your own pie crust).
What to do with extra filling?
If you have extra filling, you can freeze it or keep it in the fridge for a few days. If you freeze it it will last for three months. You can also freeze pasties and heat them up and bake them at a later time. The time to freeze them would before the baking step and egg wash.
So why make this gluten free pasty recipe?
This is such a delicious recipe and it becomes so easy to make after the first time you have made it. The half-moon shape is so nice and you have delicious food at the tips of your fingers! The pastry dough is deliciously flakey, and who doesn't want to have their very own Cornish pasty recipe? It is an easy recipe and is a winner whenever you are having non-meat eating friends over for dinner. With each bite you should get equal pieces potato, rutabaga, and onion (along with some flavor from cheddar). Hard to beat that!
LEAVE A RATING AND REVIEW!
Did you find this helpful? If you did, let me know! And let others know too by leaving a comment and star rating. Reviews are incredibly useful in helping other people find my site and make my recipes. Thank you so much!
Laura
Looking for something similar?
Print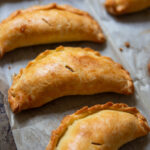
Gluten Free Pasty Recipe: Traditional Cornish Pasties
- Total Time: 1 hour 30 minutes
- Yield: 6 People
Ingredients
- 5 Butter Potatoes
- 1 Onion (Use sweet onions)
- 2 Rutabaga (Small ones)
- 1 tablespoon Vegetable Bouillion
- 8 tablespoon Butter (for crust)
- 1 ½ cup Flour (for crust- I use Cup4Cup for my gluten free crusts)
- 2 Eggs (1 for crust, one for egg wash)
- ¼ cup Cheddar Cheese
- 1 tablespoon Fresh Thyme
- Garlic Salt (to your taste)
- Pepper (to your taste)
- Salt (to your taste)
Instructions
- First you are going to make your dough: Add the flour, cold butter that is cubed, egg, and 1-2 teaspoon of cold water into your food processor. Blend until it comes together to form a dough. Place in the fridge after you have covered with plastic wrap to preserve it.
- To make your filling: Peel the rutabagas and then cut it up into small pieces. Rutabaga takes some time to soften while it is boiled, so, the smaller the pieces, the easier it will be. Proceed to then cut up the potatoes. Place them both in a pot and fill it with water. Salt your water, it will help add flavor to the food. Boil until the components are all soft.
- In the meantime, slice your onions: You can keep them longer (as if making caramelized onions) or dice them to ensure that each pasty will have plenty of onion. On medium heat, heat around 2-3 tablespoons of canola oil in a pan, and place the onions in. Allow them to turn golden brown. Once this has happened, add the boiled potatoes and rutabaga and allow it to start to come together to form a sort of mash. Begin to season with garlic salt, pepper, and 1 tablespoon of vegetable bouillon. Stir to make sure it is incorporated.
- Add the thyme: add the 2 tablespoons of fresh time, and continue to stir. Once you feel the flavor is balanced, add the ¼ cup of cheddar cheese. Once the filling has come together, set it aside so it can cool until the point where it is lukewarm. You can transfer it to a large mixing bowl or keep it in the pan that you cooked it in.
- Putting them together: Heat your oven to 350°F. This recipe can make 8-9 small pasties or if you wish to make large pasties, it will likely make 3 or 4.
- To make your pie crust for your gluten free pasties, you can do this one of two ways. Using a tortilla press is my preferred way as I find it to be faster. If you have one, take two pieces of parchment paper and place a dough ball inbetween them and place on the press. Push down. Once you have a flat disc, set aside. If you wish to do this by hand, use a rolling pin and place a dough ball between two pieces of parchment paper. Roll until you have a disc.
- Once it is the size you want: scoop in the filling. Place it in the center of the dough in a line going across. Fold the dough over, and crimp the dough along the edges. Do this until all of the filling and dough is gone.
- Once your pasties are assembled: on baking sheets lined with parchment paper, place the pasties onto them. Slit holes onto the top of each gluten free pasty to ensure that air can properly escape while baking. Now, take a beaten egg and brush the egg mixture onto the top of each pasty. Place in the oven and bake for 30 minutes or until golden brown. When removed from the oven, allow them to sit for a few minutes. You do not want to burn your tongue when you bite into them.
- Prep Time: 10 minutes
- Cook Time: 1 hour 15 minutes
- Category: brunch, Dinner, lunch
- Cuisine: Cornish, English
Nutrition
- Calories: 344
- Sugar: 7
- Sodium: 189
- Fat: 19
- Saturated Fat: 11
- Carbohydrates: 37
- Fiber: 4
- Protein: 8
- Cholesterol: 99
Dianna Wilson Sirkovsky says
These pasties are delicious! As good as the originals!
Laura Sirkovsky-Kauffman says
Thanks so much! Glad you love them!
Dianna Wilson Sirkovsky says
Delicious and good for many different fillings!
Martha says
Thank you for making this recipe -- I am able to enjoy a childhood favorite again!!
Laura Sirkovsky-Kauffman says
I'm so glad! Enjoy!
Angela says
A fantastic dough! Can’t believe it’s gluten free. It is flaky, delicious and most importantly in this recipe, it is sturdy enough to hold all the yummy filling ingredients without splitting or cracking open. These can definitely eaten as a hand pie–no utensils needed.
Alessandra says
Yum yum!! I’ve been looking for a GF pastry dough, and these look amazing!
Laura Sirkovsky-Kauffman says
They are a favorite in my household!